

Page 1
T.sonic™ 320
User’s Manual
Page 2

Table of Contents
Introduction︱......................................................................................... 5
Package Contents︱............................................................................... 5
Features︱............................................................................................... 5
System Requirements︱ ........................................................................ 6
Safety Precautions︱ ............................................................................. 6
General Use........................................................................................................................6
Backing Up Data ................................................................................................................6
Caution: Risk of Deafness.................................................................................................7
Reminders ..........................................................................................................................7
Player Controls︱ ................................................................................... 8
Music Playback Screen︱ ...................................................................... 9
Basic Operation︱ ................................................................................ 10
Charging the Battery .......................................................................................................10
Power ON..........................................................................................................................10
Power OFF........................................................................................................................10
Play a Song.......................................................................................................................11
Pause a Song ...................................................................................................................11
Next Track.........................................................................................................................11
Previous Track.................................................................................................................11
Fast Forward ....................................................................................................................11
Rewind..............................................................................................................................11
Increase Volume ..............................................................................................................11
Decrease Volume.............................................................................................................11
Main Menu ........................................................................................................................11
Voice Recording...............................................................................................................11
A-B Repeat........................................................................................................................11
Hold...................................................................................................................................12
Reset.................................................................................................................................12
MUSIC Mode︱...................................................................................... 13
Playing MP3, WMA, or WMA-DRM10 Music...................................................................13
File Navigator...................................................................................................................13
Deleting Music Files ........................................................................................................13
RADIO Mode︱...................................................................................... 14
Listening to the Radio .....................................................................................................14
Selecting a Radio Station................................................................................................14
Adjusting the Volume......................................................................................................14
Saving a Radio Station....................................................................................................14
2
Page 3

Recalling a Saved Station...............................................................................................15
Recording the Radio........................................................................................................15
RECORD Mode︱.................................................................................. 16
Making Voice Recordings with the Built-In Microphone..............................................16
Playing Voice or FM Recordings....................................................................................16
File Navigator...................................................................................................................16
Deleting Recorded Files.................................................................................................. 17
Settings︱.............................................................................................. 18
The Settings Menu...........................................................................................................18
Equalizer (EQ) ..................................................................................................................18
User EQ Customization...............................................................................................................18
Repeat Mode.....................................................................................................................19
Play Speed........................................................................................................................19
Record Settings ...............................................................................................................20
Record Quality ............................................................................................................................20
VAD (Voice Activity Detection)....................................................................................................21
Contrast............................................................................................................................21
Screen Saver....................................................................................................................21
Lyrics Sync.......................................................................................................................22
Sleep Timer.......................................................................................................................22
Date / Time Settings.........................................................................................................23
Set Date / Time ...........................................................................................................................23
Time Zone ...................................................................................................................................23
Daylight Saving Time (DST)........................................................................................................24
FM Reset...........................................................................................................................24
Language..........................................................................................................................24
Music Transfer Protocol (MTP).......................................................................................25
Player Info.........................................................................................................................25
Driver Installation︱ ............................................................................. 26
Connecting to a Computer︱............................................................... 27
Transferring Files to the T.sonic ....................................................................................27
Disconnecting from a Computer ....................................................................................28
T.sonic™ Utility Software︱ ................................................................ 30
Installing the T.sonic Utility Program.............................................................................30
PC-Lock ............................................................................................................................32
Partition ............................................................................................................................34
Log In / Log Out...............................................................................................................35
Changing your Password................................................................................................36
Forgotten Passwords ......................................................................................................37
3
Page 4

Troubleshooting︱ ............................................................................... 38
Specifications︱ ................................................................................... 40
Ordering Information︱........................................................................ 40
Transcend Limited Warranty︱ ........................................................... 41
4
Page 5
Introduction︱
Thank you for purchasing Transcend’s T.sonic™ 320, a next-generation MP3 Player that combines all the
advantages of lightweight portable music with the benefits of a USB flash drive, and includes many extra
features such as an FM radio, advanced digital voice recording, karaoke-style lyrics display, A-B repeat
functions and variable track playback speeds. Your T.sonic 320 is equipped with a Hi-speed USB 2.0 interface
to transfer data and music files to and from your computer quickly and easily. The A-B repeat and variable
track playback speed features allows you to continuously replay specific sections of an audio file at slower or
faster speeds – ideal for learning foreign languages and reviewing an important part of a song or recording. In
addition, you can make personal memos and record meetings or class lectures using the advanced digital
voice recorder with the built-in microphone. The stylish T.sonic 320 from Transcend will change the way you
think about digital music forever.
Package Contents︱
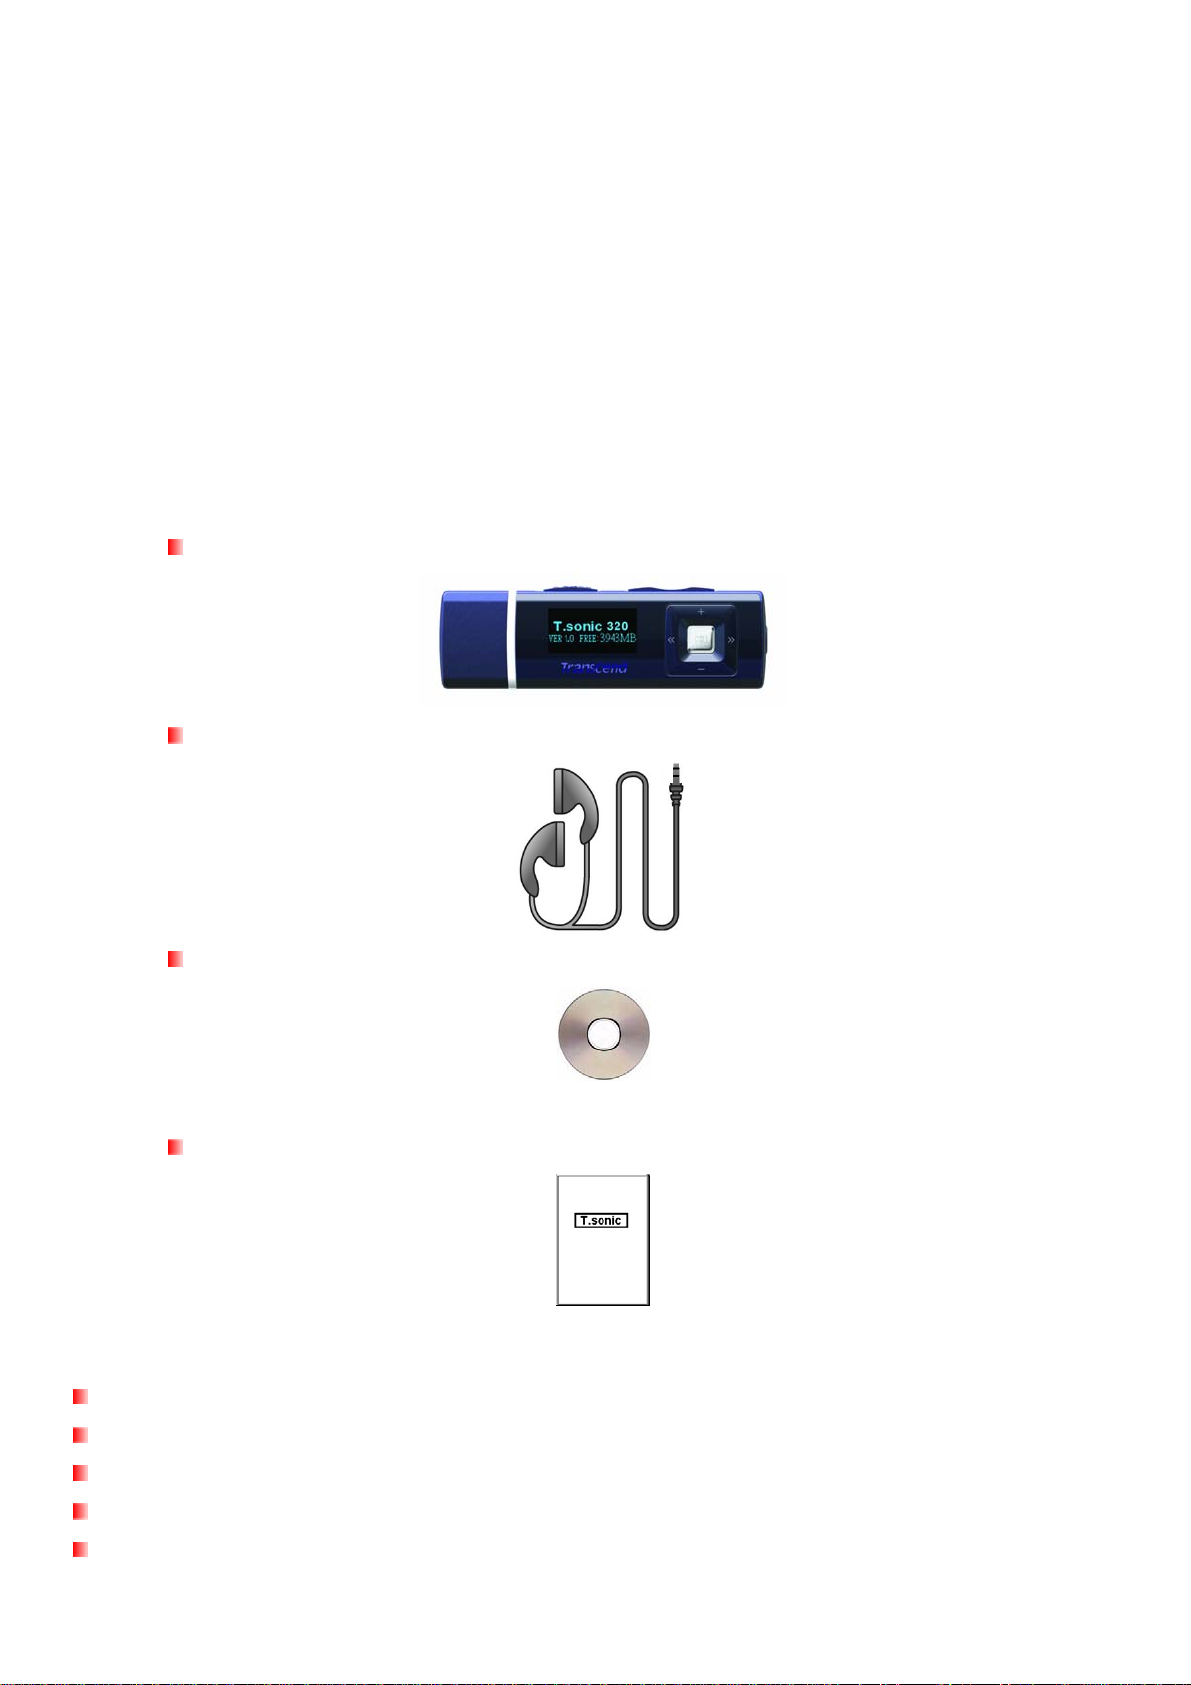
The T.sonic 320 package includes the following items:
T.sonic™ 320
Earphones
Software CD
Quick Start Guide
Features︱
MP3 Player – supports MP3, WMA, WMA-DRM10 (subscription music) and WAV music formats
Recordable FM Radio with 20 station presets
Advanced Digital Voice Recorder
Karaoke-style lyrics display
Vivid dual-color OLED screen displays clear text at any angle and in any light
5
Page 6

VAD (Voice Activity Detection) for high quality gapless audio recordings
A-B repeat function allows you to continuously replay a designated section of a track
Variable track playback speeds
Supports 13 languages including menus, song/album title, artist name and lyrics
USB flash drive capabilities for data transfer and storage
Included software can be used to lock your computer and password-protect your files
7 Equalizer effects, including a customizable USER EQ setting
Internal rechargeable Li-ion battery provides over 15 hours of continuous music playback*
Built-in USB 2.0 connector for easy computer connectivity and fast file transfers
Real Time Clock displays local and world times
* Max. playback time achieved with screen saver set to “Blank” and “Lyrics Sync” disabled.
System Requirements︱
A desktop or notebook computer with a working USB port
One of following operating systems:
®
• Windows
• Windows
• Windows
• Windows Vista
• Mac
™
• Linux
Me
®
2000
®
XP
™
OS 10.0, or later
™
Kernel 2.4, or later
Safety Precautions︱
These usage and safety guidelines are IMPORTANT! Please follow them carefully.
General Use
• Unpack the contents of the T.sonic package carefully.
• Do not allow your T.sonic to get wet or come in contact with water or any other liquids.
• Do not use a damp/wet cloth to wipe the exterior case.
• Do not use or store your T.sonic in any of the following environments:
o Direct sunlight
o Next to an air conditioner, electric heater or other heat sources
o In a closed car that is in direct sunlight
Backing Up Data
Transcend does NOT take any responsibility for data loss or damag e during op eration. If you decide to
store data on your T.sonic, we strongly advise that you regularly backup the data to a computer or other
storage medium.
To ensure Hi-Speed USB 2.0 data transfer rates when connecting to a computer, please ensure the computer
has the necessary USB drivers. If you are unsure how to check this, please consult your computer or
motherboard’s User’s Manual for USB driver information.
6
Page 7

Caution: Risk of Deafness
• Repeated or regular use of headphones or earphones at volume levels above 80 decibels can give a
false impression that the audio level is not high enough. Users may try to progressively increase the
volume control, therefore risking a dangerous noise level for their ears.
• To protect your health and your hearing, keep the volume of your MP3 player below 80 decibels and do
not use for an extended period of time. Stop use if symptoms like headaches, nausea, or hearing
disorders occur.
• Your MP3 player is limited to a volume level of 100 decibels.
• Both the MP3 player and its accompanying earphones are compliant with the French regulation
concerning musical Walkmans (24th July 1998 Order).
• Before using any other earphones, confirm that their technical specifications are compatible with the
original set.
Reminders
• Make sure the switch is not enabled before turning on the player.
®
• Never use the “Quick Format” or “Full Format” functions in Windows
• Follow the procedures in the “Disconnecting from a Computer” section to properly remove your
T.sonic 320 from a computer.
to format your T.sonic 320.
• Transcend occasionally releases firmware updates for certain products. We suggest you visit
http://www.transcendusa.com and download the latest firmware version for your device.
7
Page 8
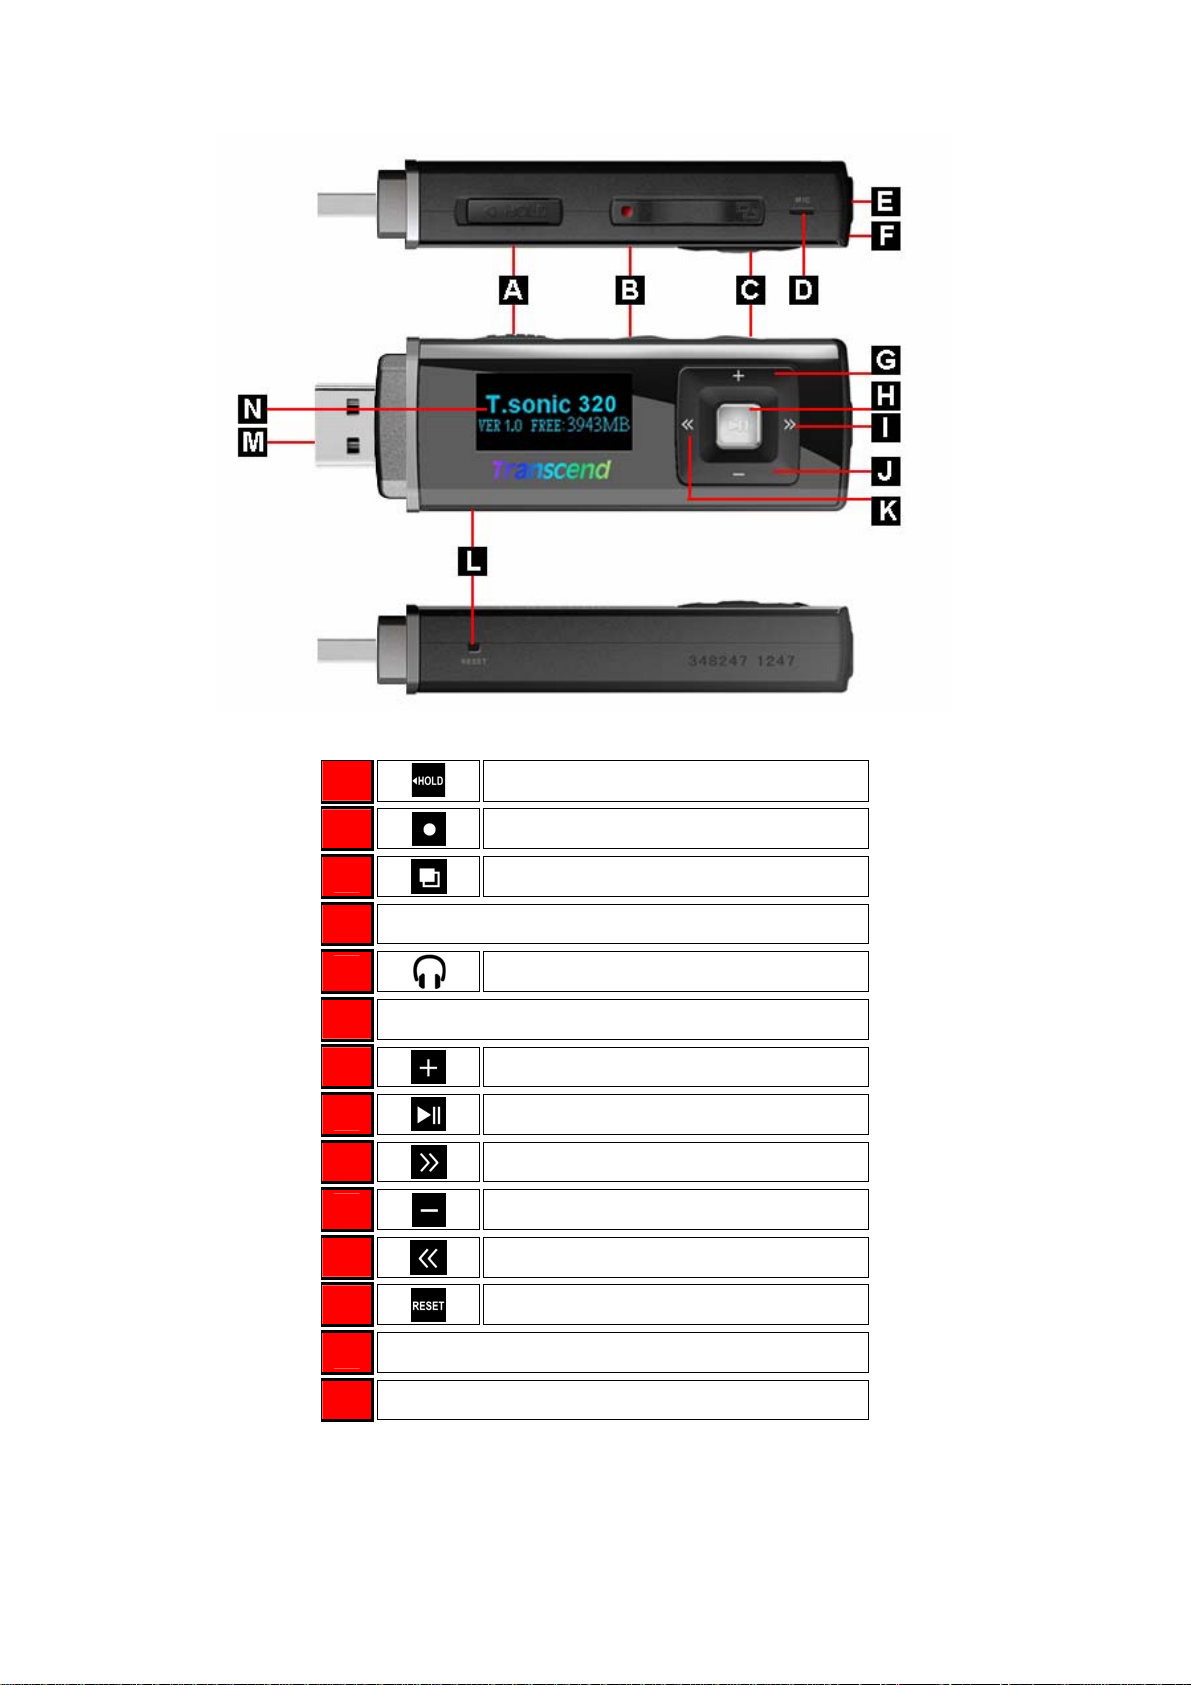
Player Controls︱
Figure 1. T.sonic 320
A Hold Switch
B
C
D
Microphone
E
F
Lanyard Attachment Loop
G
H
I
J
K
L
A-B Repeat / REC
Menu Button
Headphone Jack
Volume Up
Play / Pause / Power
Next / Fast-Forward
Volume Down
Previous / Rewind
Reset Button
M
Hi-Speed USB 2.0 Connector
N
Dual-Color OLED Display
8
Page 9
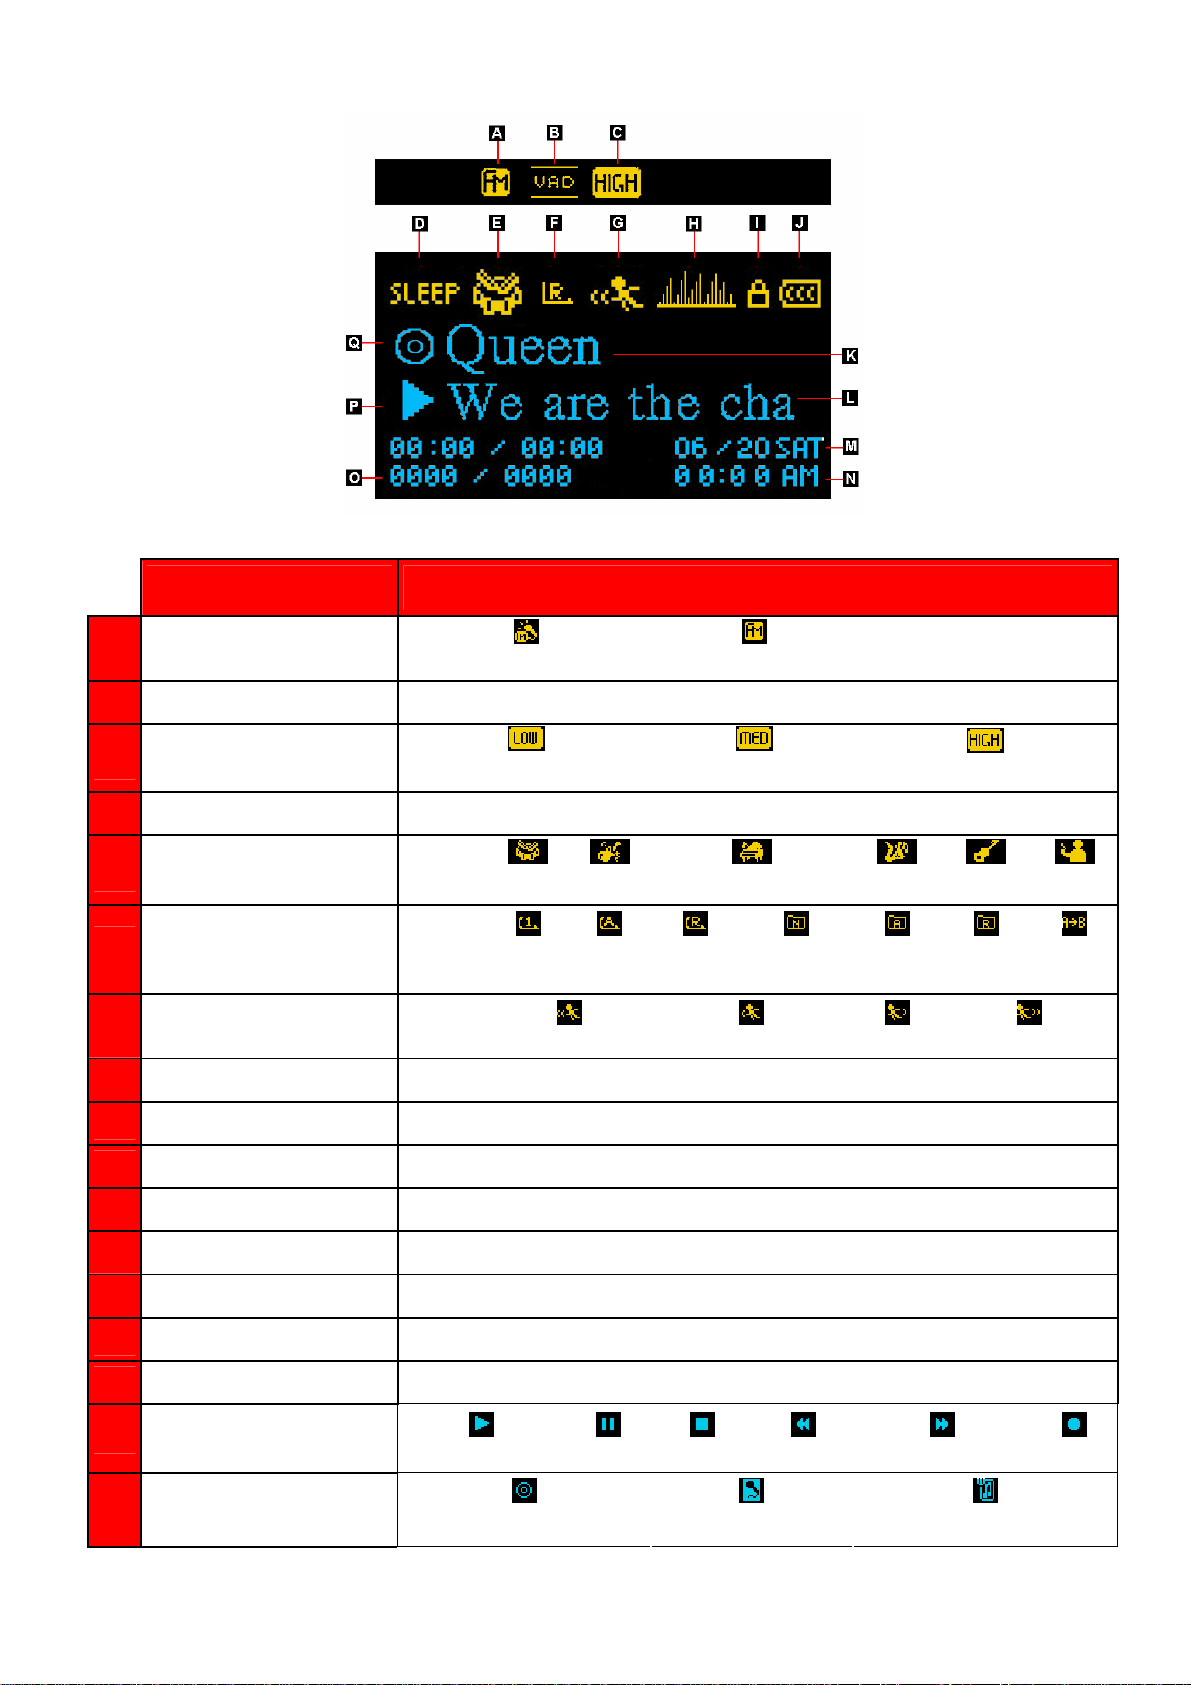
Music Playback Screen︱
Figure 2. OLED Display
ICON INDICATION
A Record Source
Built-in Microphone
FM Radio
B VAD Indicates Voice Activity Detection is enabled
C Record Quality
Low Quality Medium Quality High Quality
D
Sleep Indicates the Sleep Timer is enabled
E EQ Mode
(Blank)
Normal Pop Rock Classical Jazz Bass
(Blank)
F Repeat Mode
Normal
G Play Speed
H
Graphic EQ
I
Lock Indicates the Hold switch is enabled (controls are locked)
J
Battery
K
Album / Artist / Lyrics Displays album title, artist name, or lyrics
(Blank)
1.00x 1.33x
Displays real-time graphic equalizer visualization during playback.
Indicates the battery power level
Repeat
One
Repeat
All
Shuffle
Normal in
1.14x
Repeat in
Folder
USER
Folder
Shuffle in
Folder
A-B
Repeat
0.80x 0.67x
L
Song Title / Lyrics Displays song title, file name, or lyrics
M
Date Displays today’s date and day of the week
N
Time Displays the current time
O
Track Info Indicates current track number and playtime statistics
P Play Status
Play Pause Stop Rewind Fast-Forward Record
Q Text Display Mode
Album Title Artist Name Song Lyrics
9
Page 10
Basic Operation︱
The T.sonic 320 needs to be charged for at least 12 hours before first use.
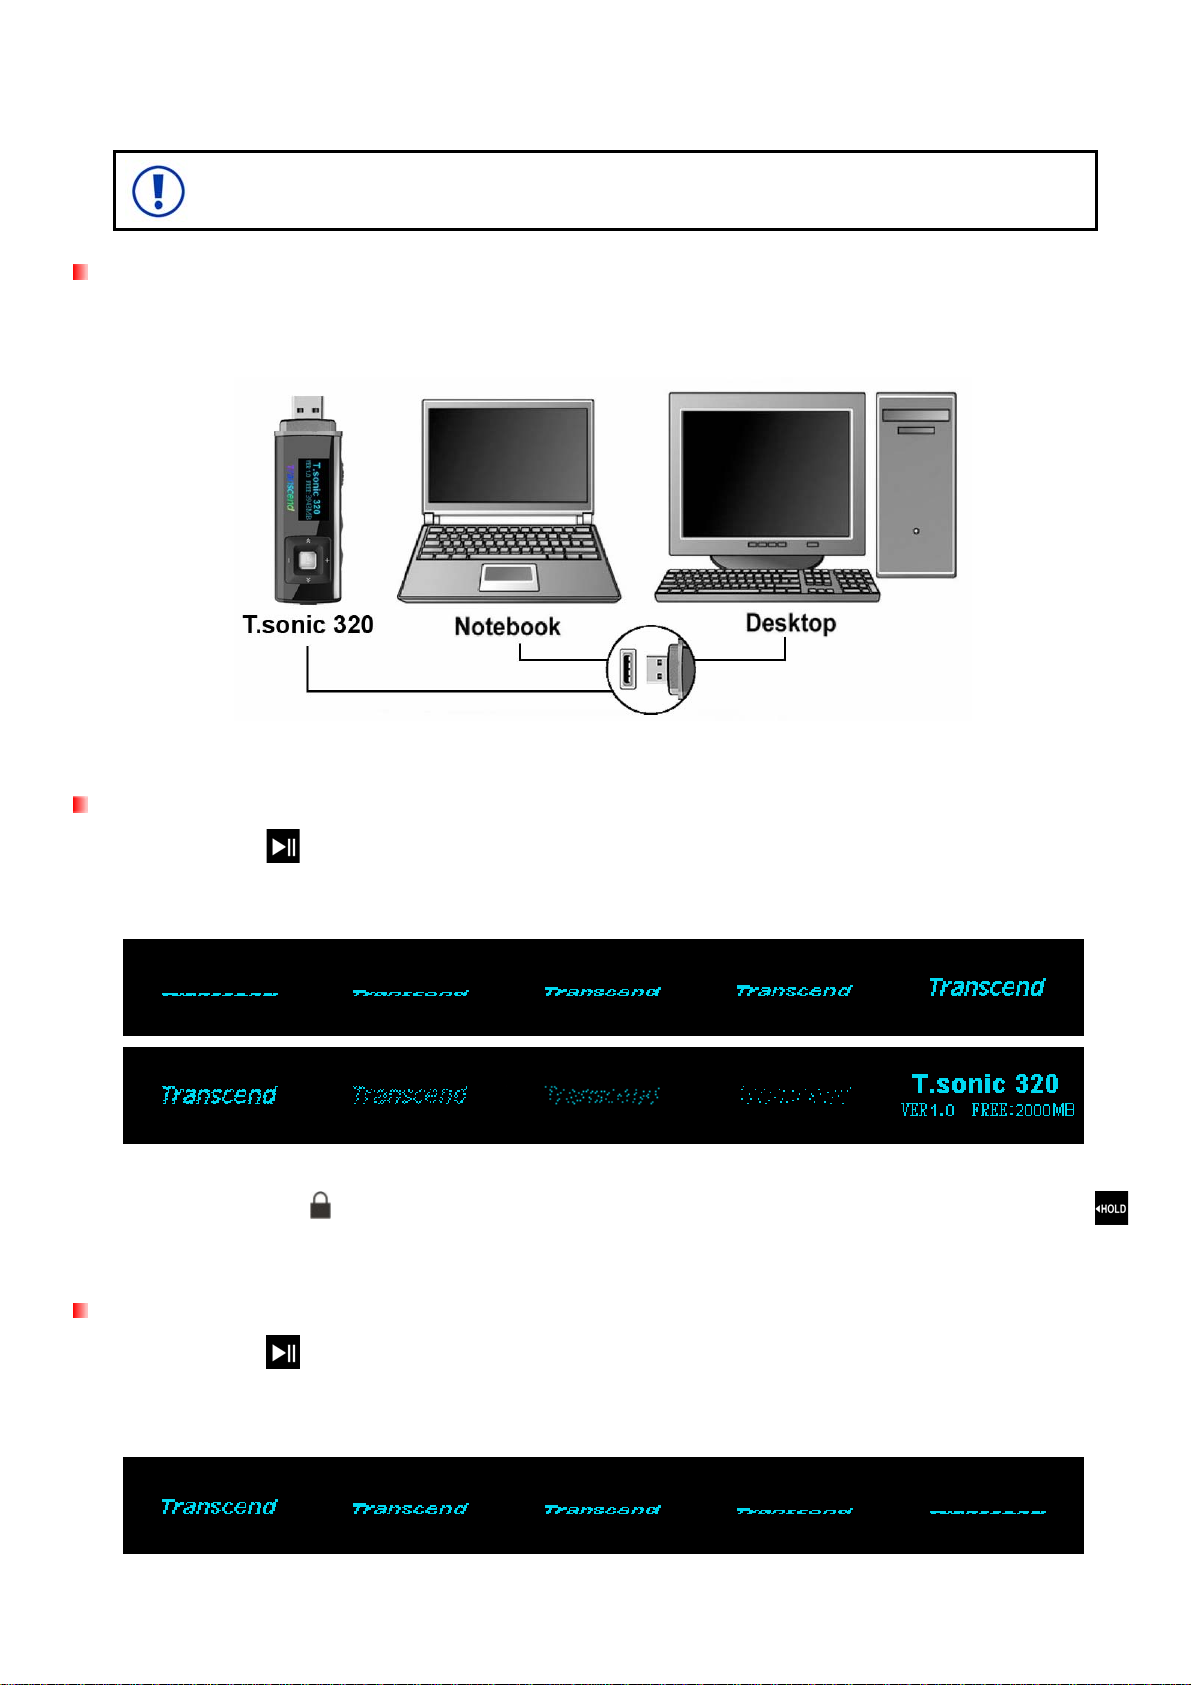
Charging the Battery
Remove the T.sonic 320’s cap and plug its USB connector directly into an available USB port on your desktop
or notebook computer. The T.sonic 320’s internal Li-ion battery will begin charging.
Figure 3. Connecting to a Computer
Power ON
Press and hold the button to turn on the player. An animated Transcend logo will appear on the screen.
After the startup screen disappears, the Main Menu will appear. You can now start using the T.sonic 320. The
Main Menu will appear.
• It takes a few seconds for the T.sonic to power up.
• If the Lock icon
switch is enabled. You must switch off the Hold mode before you can power on the player.
appears on the display while powering on the T.sonic, this means that the
Power OFF
Press and hold the button to turn off the T.sonic 320.
• It takes a few seconds to completely power down.
• The power OFF animation will be displayed:
10
Page 11

Pla y a Song
Press to play the currently selected MP3, WMA, or WAV track.
Pause a Song
Press to pause and un-pause a track during playback.
Next Track
Press to skip to the next available song.
Previous Track
Press
to go back to the previous song.
Fast Forward
Press and hold the button to fast-forward.
Rewind
Press and hold the
button to rewind.
Increase Volume
Press once or press and hold the
button until you reach the desired volume level.
Decrease Volume
Press once or press and hold the
button until you reach the desired volume level.
Main Menu
Press in any mode to bring up the Main Menu. The Main Menu gives you access to the MUSIC, RADIO,
RECORD modes and the SETTINGS menu.
Voice Recording
The T.sonic 320 records using is its built-in microphone located near the
1. Press and hold the
T.sonic 320’s built-in microphone and begin recording.
2. Press and hold
3. Recorded audio files can be found in the Record mode.
button for 2 seconds in any mode (except the FM Radio mode) to activate the
for 2 seconds again to finish the recording.
button.
A-B Repeat
1. While listening to a song or recording in the Music or Record modes, press the button once to
11
Page 12

mark the beginning of the portion you wish to repeat.
2. Press the
3. The marked section of the track will playback the marked A-B section in a continuous loop.
4. Press the
button again to mark the end of the section you wish to repeat.
button once more to stop the A-B repeat function.
Hold
When the switch enabled, all of the T.sonic 320’s buttons will be disabled, and cannot accidentally be
pressed while in your pocket.
Reset
If the T.sonic is not functioning properly, you can reboot by pressing
for 3 to 5 seconds.
12
Page 13
MUSIC Mode︱
Before buying DRM (Digital Rights Management) protected music online, please
be advised that the T.sonic 320 only supports WMA-DRM10 file protection.
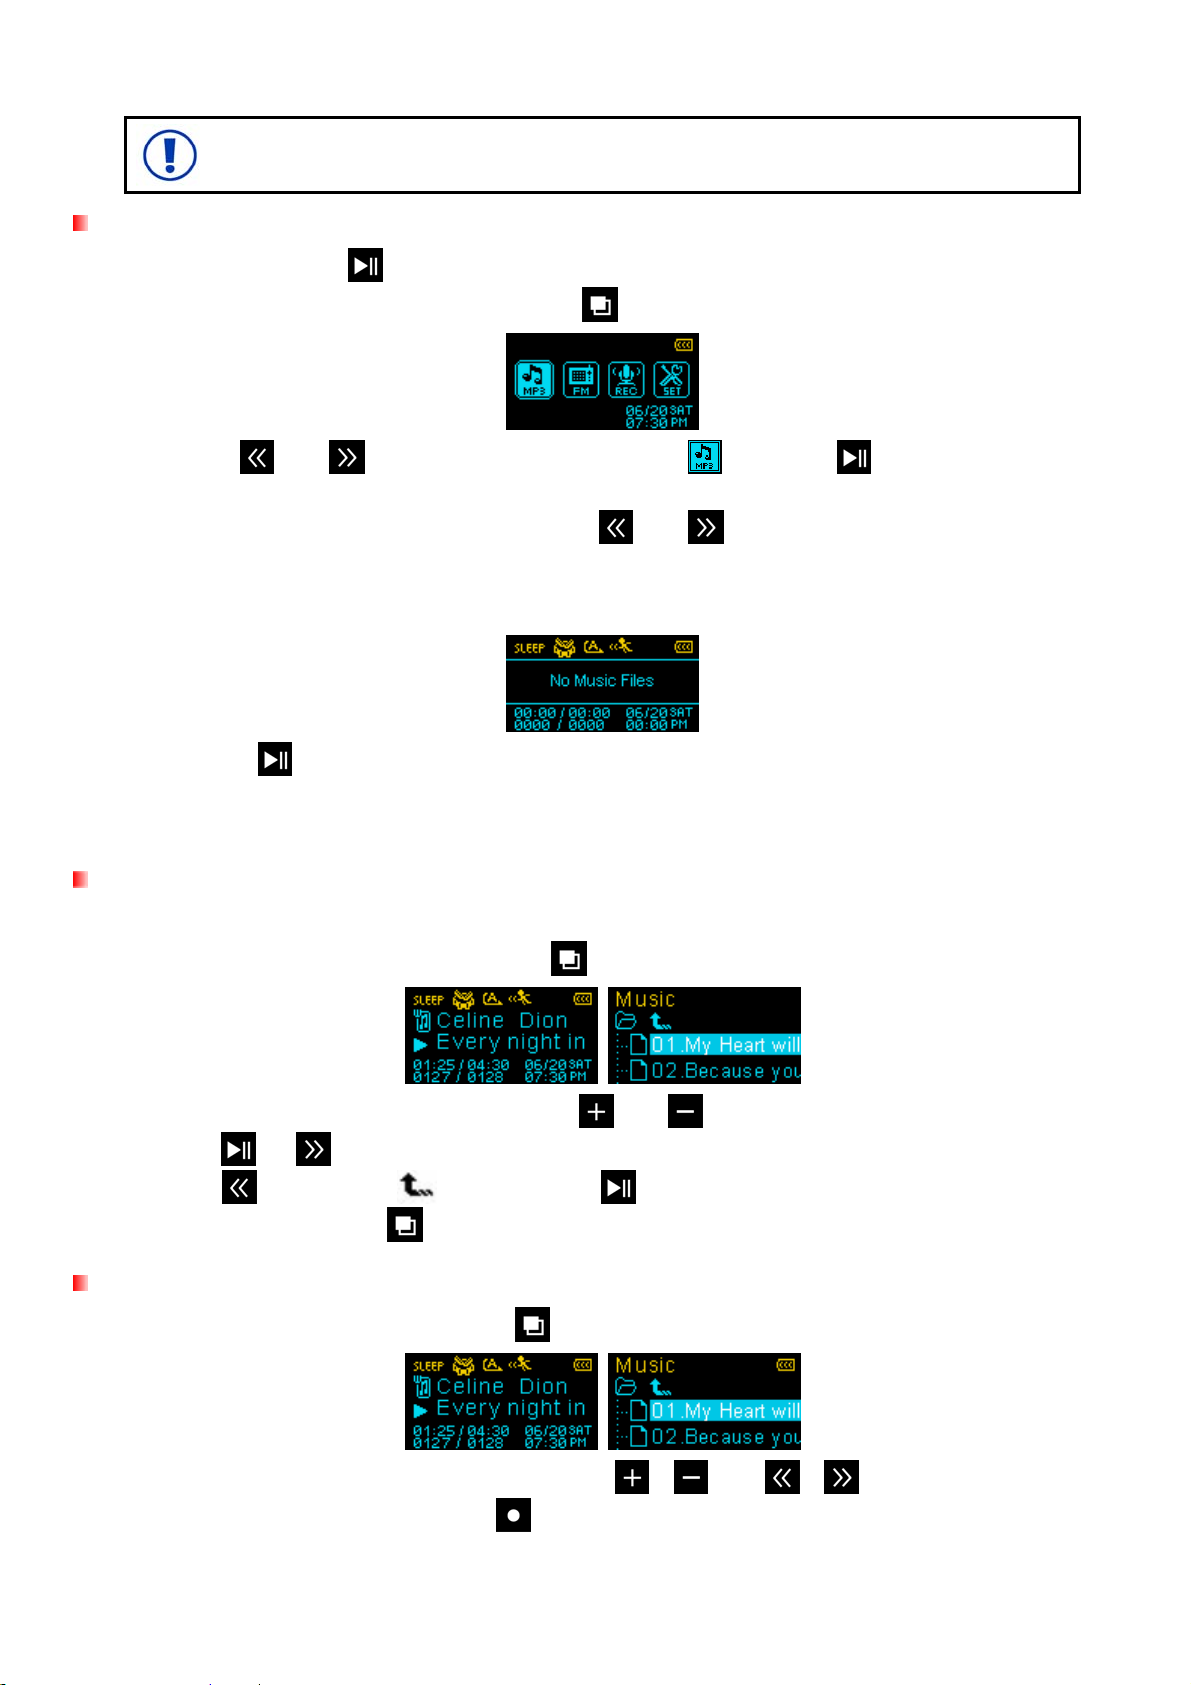
Playing MP3, WMA, or WMA-DRM10 Music
1. Press and hold the
¾ If the T.sonic is already on, press the
2. Use the
automatically find available music files.
3. Select the song you want to listen to with the
¾ If T.sonic cannot find any MP3, WMA, or DRM10 files, a “No Music Files” message will appear.
¾ WAV files can only be played in the Record mode.
4. Press the button to play the music file.
¾ T.sonic 320 supports Mpeg I Layer 3 and WMA files compressed at between 32Kbps –
and buttons to select the “MP3” icon and press to confirm. The player will
320Kbps.
button to power ON the T.sonic. The Main Menu will appear.
button to enter the Main Menu.
and buttons or use the File Navigator.
File Navigator
The File Navigator is a fast and convenient way of moving between tracks, files and folders.
1. In the MUSIC mode, press and hold the
button to enter the File Navigator.
2. A list of files or folders will appear. Use the and buttons to move up and down the list.
3. Press
4. Press
5. To exit, press and hold
or to play the highlighted song or to enter the selected folder.
select the
or
icon and press to move up one folder level.
.
Deleting Music Files
1. In the MUSIC mode, press and hold
to enter the File Navigator.
2. Navigate to the file you want to delete with the /
3. With the file highlighted, press the
button. A “Delete? yes / no” message will appear.
and
/
buttons.
13
Page 14

4. Use the
button to highlight “yes” and press
RADIO Mode︱
Listening to the Radio
to permanently delete the file.
1. Plug in the earphones .
2. Press the
3. Use the
button to go to the Main Menu.
and buttons to select the “FM” icon
(Earphones must be plugged-in to listen to the Radio)
and press
.
4. The current FM radio frequency will be displayed.
¾ The first time you use the Radio, the T.sonic will automatically scan all frequencies and save
the 20 strongest stations as channel presets (CH). To rescan, select “FM Reset” in the
SETTINGS menu.
Selecting a Radio Station
To manually select a radio station, press or (the FM frequency will increase or decrease in
0.1MHz increments) until you reach the desired station. Alternatively, you can press and hold either
to auto-scan for the next available station.
or
Adjusting the Volume
Press once or press and hold the
or
buttons until you reach a comfortable volume level.
Saving a Radio Station
The T.sonic lets you save (preset) your 20 favorite radio stations (CH 01 to CH 20).
To save a station:
1. Use
2. Press (don’t hold) the
3. Use the
or to select the radio station (FM frequency) that you want to save.
button to display the preset channel selector
and buttons to select the channel number (CH 01 to CH 20) to save the station to.
14
Page 15

4. Press (don’t hold) again to save the current station to that channel number.
Recalling a Saved Station
1. In the RADIO mode press (don’t hold) to display your saved stations (
2. Use the
3. Press
and buttons to select the channel you want to listen to.
to listen to the selected channel.
Recording the Radio
1. Select a radio station that you want to record.
2. Press and hold the
3. An automatically generated file name for your recording will appear.
button for 2 seconds to begin recording the station.
¾ FM Recordings are named in this format: “MonthDayF###.WAV”
Ex: “ 0101F012.WAV “ would be the twelfth FM recording made on January 1st
CH
01 to CH 20).
4. Press
5. Press and hold
¾ FM recordings are saved in the /FMIN.DIR/ folder
¾ FM recordings can be accessed by using the File Navigator in RECORD mode
¾ To adjust the recording sample rate, please see the “Record Settings” section of this manual.
to pause the recording, and press again to resume.
again to finish the recording. The player will return to the RADIO mode.
15
Page 16

RECORD Mode︱
The T.sonic 320 can record from 2 different sources: the FM Radio or the built-in microphone. The
RECORD mode is for creating voice recordings and playing back both FM and voice recordings. To record
from the FM Radio, please see the previous section on “Recording the Radio.”
Making Voice Recordings with the Built-In Microphone
1. Press and hold the
320’s built-in microphone and begin voice recording.
2. An automatically generated file name for your recording will appear.
button for 2 seconds in any mode (except FM Radio) to activate the T.sonic
¾ Voice Recordings are named in this format: “MonthDayM###.WAV”
Ex: “ 0113M012.WAV “ would be the twelfth Voice recording made on January 13
3. Press
4. Press and hold
¾ Voice recordings are saved in the /MICIN.DIR/ folder
¾ Voice recordings can be accessed by using the File Navigator in RECORD mode
¾ To adjust the recording sample rate, please see the “Record Settings” section of this manual.
¾ For best results, try to position the T .sonic 320’ s m icrophone as close as possible to the source
to pause the recording, and press again to resume.
again to finish the voice recording. The player will return to the RECORD mode.
of the sound or voice you are recording.
Playing Voice or FM Recordings
1. Press to bring up the Main Menu.
2. Use the
or buttons to select the “Record” icon
and press
.
3. All voice and FM radio recordings can be found in the RECORD mode. Use the
or the File Navigator to find your desired recording and press
¾ If the T.sonic cannot find any voice or FM recordings, a “No Recordings” message will appear.
to listen to it.
File Navigator
The File Navigator is a fast and convenient way of moving between tracks, files and folders.
1. In the RECORD mode, press and hold the
button to enter the File Navigator.
and buttons
16
Page 17

2. The “MICIN.DIR” or “FMIN.DIR” folder will appear, and a list of available recordings will be shown.
Use the
and buttons to move up and down the list.
3. Press
4. To switch between the MICIN.DIR and FMIN.DIR folders, press
press
¾ Voice recordings can be found in the /MICIN.DIR/ folder
¾ FM recordings can be found in the /FMIN.DIR/ folder
5. Select a folder using the
6. To exit, press
to play the selected recording.
to go up to the “Root” directory.
and buttons, and press or
or
while in the “Root” directory.
Deleting Recorded Files
1. In the RECORD mode, press and hold
to enter the File Navigator.
2. Navigate to the file you want to delete with the /
3. With the file highlighted, press the
button. A “Delete? yes / no” message will appear.
and
or select the icon and
to open it.
/
buttons.
4. Use the
button to highlight “yes” and press
to permanently delete the file.
17
Page 18

Settings︱
The Settings Menu
1. Press the
2. Use the
button to enter the Main Menu.
or buttons to select the “Settings” icon
and press
.
Equalizer (EQ)
There are seven equalizer modes to choose from:
Normal, Pop, Rock, Classical, Jazz, Bass, and User EQ
1. In the SETTINGS menu, use the
and buttons to select “EQ” and press
.
2. Use the and buttons to select an equalizer mode. If music is playing, you will instantly hear
the difference between each mode through the earphones.
3. Press
to confirm the new EQ setting.
User EQ Customization
The User EQ allows you to customize the 5-band equalizer to your personal preference.
1. In the SETTINGS menu, use
and to select “EQ”
and press
.
2. In the EQ menu, use and to select “User EQ” and press
.
3. Use the
The “ALL” setting move all 5 bands up or down together.
and buttons to switch between 5 bands: 80Hz, 250Hz, 1KHz, 4KHz, and 12KHz.
18
Page 19

4. Press or to increase or decrease levels in 1.0dB steps (Adjustment range: -7dB to +8dB)
5. Press to save the new User EQ settings and return to the SETTINGS menu.
Repeat Mode
There are seven Repeat modes to choose from:
Normal (plays all music files available one time, in consecutive order)
Repeat One (continuously repeats the current song),
Repeat All (continuously repeats playback of all music files available, in consecutive order)
Shuffle (continuously repeats playback of all music files available, in random order)
Normal in Folder (plays all music files in a folder one time, in consecutive order)
Repeat in Folder (continuously repeats playback of all music files in a folder, in consecutive order)
Shuffle in Folder (continuously repeats playback of all music files in a folder, in random order)
1. In the SETTINGS menu, use
and to select the “Repeat” icon
and press
.
2. Use the and buttons to select the desired repeat mode and press
to confirm.
Play Speed
The speed at which an audio file is played can be increased or decreased. Playback speeds can be set to:
0.67 X (very slow), 0.80x (slow), 1.00x (normal), 1.14x (fast) , 1.33x (very fast).
1. In the SETTINGS menu, use
or to select the “Play Speed” icon
and press
2. Use or
to select one of the 5 playback speed settings and press
19
to confirm.
.
Page 20

Record Settings
Record Quality
The quality of an audio recording can be set to Low (8,000Hz), Medium (16,000Hz), or High (32,000Hz).
Higher recording quality settings require more memory space to save the recorded WAV files.
1. In the SETTINGS menu, use
or to select the “Record Settings” icon
and press
.
2. Use
or to select “Record Quality” and press .
3. Use or to switch between “Low”, “Medium”, or “High” and press to confirm.
Maximum Record Time / Quality Table
Sample rate Channels 2GB 4GB 8GB
FM Radio
Recording
Low (8KHz) 2 (stereo) 64 hrs 128 hrs 256 hrs
Med (16KHz) 2 (stereo) 32 hrs 64 hrs 128 hrs
High (32KHz) 2 (stereo) 16 hrs 32 hrs 64 hrs
Sample rate Channels 2GB 4GB 8GB
Voice
Recording
Low (8KHz) 1 (mono) 128 hrs 256 hrs 512 hrs
Med (16KHz) 1 (mono) 64 hrs 128 hrs 256 hrs
High (32KHz) 1 (mono) 32 hrs 64 hrs 128 hrs
¾ Note: The above recording times may not be possible if space is limited or the battery power is low.
¾ For best results, try to position the T .sonic 320’ s Microphone as close as possible to the source
of the sound or voice you are recording.
¾ RADIO recordings are recorded in Stereo. Voice recordings are recorded in Mono.
20
Page 21

VAD (Voice Activity Detection)
VAD allows the T.sonic 320 to make gapless voice recordings. This means during voice recording with the
internal microphone, the player will only record when it detects voices. If the person(s) pauses or stops
speaking, the T.sonic 320 will temporarily stop recording until the person(s) starts speaking again. This allows
for more concise, easier to understand recordings and smaller recording files.
1. In the SETTINGS menu, use
or to select the “Record Settings” icon
and press
.
2. Use
or to select “VAD” icon and press .
3. Use or to switch between “Enable” or “Disable” and press .
Contrast
The contrast of the OLED display can be adjusted for brighter or darker text. Higher contrast levels will drain
the battery faster, while lowering the contrast level will provide better battery life.
1. In the SETTINGS menu, use
and to select the “Contrast” icon and press .
2. Use and to increase or decrease contrast. Press to confirm the new contrast level.
Screen Saver
This function lets you enable/disable the screen saver, choose which screen saver you want to be displayed,
and set the time delay for the screen saver to activate. Available screen savers are:
Blank (Displays an all-black screen to save battery life)
Clock (Displays the current real time)
Song Title (Displays the title of the song currently being played)
1. In the SETTINGS menu, use
and to select the “Screen Saver” icon
21
and press
Page 22

2. Use or to select a Screen Saver delay and press . The screen saver will commence
whenever this amount of time passes with no button activity. Available delay timers are: “Disable”,
“10 Seconds”, “20 Seconds”, and ”60 Seconds”
3. After you select a Screen Saver time delay, a list of available screen savers will appear.
4. Use or to select one of the three Screen Saver types and press .
Lyrics Sync
This feature displays the lyrics of a song (if available) simultaneously during music playback.
Note: For Lyrics Sync to work, an “.LRC” file with the exact same file name as its corresponding .MP3
song must be transferred to the T.sonic in the same folder as the MP3 file.
Ex: If the MP3 file is “GM-Last_Christmas.mp3”, the LRC lyrics file must be named “GM-Last_Christmas.lrc”
1. In the SETTINGS menu, use
and to select the “Lyrics Sync” icon and press
.
2. Use or
album, artist, and song title information will be displayed during music playback.
to switch between “Enable” or “Disable” and press
. If lyrics are disabled, the
Sleep Timer
This function sets a time delay to automatically power OFF the T.sonic 320, regardless of playback status.
1. In the SETTINGS menu, use
and to select “Sleep Timer” and press
.
2. Use
“60 Min” or “Disable”. When the selected time is reached, the T.sonic will automatically power OFF.
or to select a Sleep delay time and press . You can choose from “15 Min”, “30 Min”,
22
Page 23

Date / Time Settings
Set Date / Time
This setting lets you adjust the time and date, choose between 12Hr or 24Hr format, and set the time zone.
1. In the SETTINGS menu, use
or to select the “Date/Time Settings” icon
2. Use or to select the ”Set Date/Time “ icon and press .
3. Use
and to move between 12/24Hr, Year, Month, Day, Hour, Minute, Second, and AM/PM.
¾ “12 Hr” will display AM and PM, “24 Hr” will display 00:00 - 24:00
4. Use the and buttons to adjust the values of each field.
and press
.
5. After setting the date and time, press to continue and set the Time Zone.
Time Zone
The T.sonic can display the local time for different time zones; this is a handy feature for travelers.
1. In the SETTINGS menu, use
or to select the “Date/Time Settings” icon
and press
2. In the “Date/Time Settings” menu, use
.
or to select the “Time Zone” icon
3. The Time Zone setup screen will appear.
and press
.
4. Use and to select the time zone for your country and press .
23
Page 24

Daylight Saving Time (DST)
If your region uses DST, the T.sonic can automatically adjust the clock for Summer and Winter time.
1. In the SETTINGS menu, use
or to select the “Date/Time Settings” icon
and press
2. Use
or to select the “Daylight Saving” icon and press .
3. Use or to switch between “Enable” or “Disable” and press .
¾ Enabling Daylight Saving Time will automatically adjust the T.sonic 320’s clock forward or
backward one hour, depending on the time of year and the time zone you are in.
.
FM Reset
This function resets all saved Radio stations (CH 01 – CH 20). If you use this feature, the next time you enter
the RADIO mode, the T.sonic will automatically re-scan and save the 20 strongest stations.
1. In the SETTINGS menu, use
or to select the “FM Reset” icon
and press
.
2. Use or to select “Yes” to reset your FM stations or “No” to keep them. Press to
confirm.
Language
This option adjusts the T.sonic 320’s display language, which includes menus, song/album titles, artist names,
and lyrics. The player supports 13 different languages.
1. In the SETTINGS menu, use
and to select the “Language” icon and press .
2. Use the and
buttons to select your language and press
24
to confirm.
Page 25

Music Transfer Protocol (MTP)
If you own WMA-DRM10 music files or if you want to use Windows Media Player 10 to synchronize music
between your computer and the T.sonic, the Music Transfer Protocol (MTP) must be enabled. This setting lets
you switch between MTP or USB transfer modes.
™
USB (Use this mode for normal transfer of all other files or if using Mac
MTP (Use this mode for transferring WMA-DRM10 music files with Windows Media Player 10)
1. In the SETTINGS menu, use
or to select the “MTP” icon and press .
or Linux™)
2. Use or to switch between “MTP” or “USB” and press .
¾ Note: In MTP transfer mode, all files will be stored in the “Music” folder.
Player Info
Displays the T.sonic 320’s firmware version and available memory capacity.
1. In the SETTINGS menu, use
or to select the “Player Info” icon
2. Press any button to continue.
and press
.
25
Page 26

Driver Installation︱
Driver Installation for Windows® Me, 2000, XP and Vista
®
No drivers are required. These Windows
Plug your T.sonic 320 into an available USB port and Windows
Disk drive with a newly assigned drive letter will appear in the My Computer window.
Driver Installation for Mac™ OS 10.0, or Later
No drivers are required. Plug your T.sonic™ 320 into an available USB port and your computer will
automatically detect it.
Driver Installation for Linux™ Kernel 2.4, or Later
Operating Systems have built-in drivers to support the T.sonic 320.
®
will install the necessary files. A Removable
Figure 4. Mac Installation
No drivers are required. Plug your T.sonic 320 into a USB port and mount it.
1. Create a directory for the T.sonic.
Example: mkdir /mnt/T.sonic
2. Mount the T.sonic.
Example: mount –a –t msdos /dev/sda1/mnt/T.sonic
Plug the T.sonic directly into a USB port on your computer. Connecting the T.sonic through a
USB hub is strongly discouraged.
Audio files (MP3/WMA/WMA-DRM10/WAV) must be no more than 4 folder levels away from
the “[/Root /] “ directory. The T.sonic 320 is limited to 128 characters for a file name.
NEVER
format your T.sonic 320 in Windows.
26
Page 27

Connecting to a Computer︱
If you are using Windows Media Player 10 and want to play WMA-DRM10 music files, you
must set the T.sonic’s Music Transfer Mode to MTP to transfer and synchronize music files
between the computer and your T.sonic 320.
Transferring Files to the T.sonic
If you want to use your T.sonic 320 to listen to music other than the Radio, you must transfer MP3, WMA, or
WMA-DRM10 music files to the player. When the T.sonic 320 is connected to a computer it is locked into
transferring files. You will not be able to play or record any music at this time. Please disconnect your T.sonic
320 from the computer when you want to use the player.
1. Remove the T.sonic 320’s cap and plug its USB connector directly into an available USB port on
your desktop or notebook computer. While the T.sonic™ is connected to a computer, it can only be
used for transferring files. The T.sonic 320’s rechargeable Li-ion battery will begin charging.
Figure 5. Connecting to a Computer
2. When connected to a computer the T.sonic 320’s screen will display a “READY” message, indicating
that files can be loaded onto the player.
¾ You cannot play or record music when the T.sonic 320 is connected to a computer.
If you are using Windows® a new Removable Disk drive with a newly assigned drive letter representing the
T.sonic 320 will appear in the My Computer window.
Figure 6. The T.sonic 320 shows up as a Removable Disk in the My Computer window
*Note: “(F:)” is an example drive letter – your “My Computer" window may differ
27
Page 28

3. To transfer normal MP3 and WMA music files to the T.sonic, the MTP (see Music Transfer Protocol)
mode in the Settings menu must be set to “USB.” You can transfer music and data files to the T.sonic
by simply dragging them onto the T.sonic 320’s “Removable Disk” drive letter.
4. While files are being transferred to the T.sonic, the screen will display a “WRITE” message. After files
have been successfully transferred, the “READY” message will be displayed again.
5. If you choose to transfer files or folders to the computer, the T.sonic will display a “READ” message
indicating that files are being transferred to the computer. After files have been successfully
transferred, the “READY” message will be displayed again.
NEVER unplug the T.sonic during file transfer. Unplug the T.sonic only when Windows informs
it is safe (see Disconnecting from a Computer) and the “READY” screen disappears.
Disconnecting from a Computer
Always follow the procedures listed below before you disconnect the T.sonic.
Removing the T.sonic 320 in Windows® Me, 2000, XP and Vista
1. Select the Hardware icon
in the system tray.
2. The Safely Remove Hardware pop-up window will appear. Select it to continue.
Figure 7. Safely Remove Hardware
3. A message window will appear stating: “The ‘USB Mass Storage Device’ device can now be safely
removed from the system.”
Figure 8. Safe to Remove Hardware
4. Unplug the T.sonic from your computer.
Removing the T.sonic 320 in Mac™ OS 10.0 or Later
1. Drag the Disk icon that corresponds to your T.sonic 320 into the trashcan.
2. Unplug your T.sonic 320 from the USB port
Removing the T.sonic 320 in Linux™ Kernel 2.4 or Later
28
Page 29

1. Execute unmount /mnt/T.sonic to un-mount the device.
2. Unplug your T.sonic 320 from the USB port.
29
Page 30

T.sonic™ Utility Software︱
The bundled software CD includes some very useful software tools that can help you manage your data
™
increase productivity. Please read the following instructions before using the T.sonic
The T.sonic
Utility has four functions:
PC-Lock (Use the T.sonic 320 to temporarily lock your computer)
Partition (Divide your T.sonic’s memory into Public and Private areas)
Login/out (Log in to the Private area to access your personal files)
Password (Change the password to the Private area on your T.sonic)
¾ The T.sonic Utility is only supported in Windows
®
Me, 2000, XP and Vista
¾ The T.sonic Utility is not supported on Mac™, or Linux™ Operating Systems.
¾ To use the T.sonic Utility, you must log in to the Windows® OS with Administrator rights.
Installing the T.sonic Utility Program
1. Put the software CD into your computer’s CD-ROM drive (with Auto-run enabled).
Utility program.
2. The T.sonic 320 Auto-Run window will appear.
Figure 9. T.sonic Auto-Run window
3. Click on the “T.sonic 320 Utility” button.
4. Choose your setup language and click the “OK” button to continue.
30
Page 31

Figure 10. Choose a language
5. The “InstallShield Wizard” window will appear. Click the “Next” button to continue. The InstallShield
Wizard will guide you through the installation process.
Figure 11. T.sonic Utility InstallShield Wizard
6. When the T.sonic 320 Utility is finished installing, click the “Finish” button to exit the wizard.
Figure 12. Installation complete
31
Page 32

7. The T.sonic Utility program can be found in: “ -> Programs -> T.sonic Utility.”
PC-Lock
With PC-Lock, you can use your T.sonic as a key to temporarily lock your computer while you are away.
1. Start the T.sonic Utility (
2. Click on the “PC-Lock” button
->
Programs -> T.sonic Utility)
in the T.sonic Utility window or Task Bar menu.
Figure 13. T.sonic Utility – PC-Lock
3. The PC-Lock Settings window will appear. Select the “Enable PC-Lock” checkbox.
Figure 14. Enable PC-Lock
4. You can change the text displayed on the screen while the computer is locked in the “Screen Saver
Message
” field.
32
Page 33

Figure 15. PC-Lock Screen Saver text
5. You can adjust the period of time that your computer will be locked for with the “Enable Timer” option.
Set the Unlock Timer in
automatically unlock and be available for use.
Hours and Minutes. When this time elapses, your computer will
Figure 16. PC-Unlock Timer
6. Click the “OK” button to start the PC-Lock.
33
Page 34

Figure 17. Start PC-Lock
¾ When PC-Lock is enabled, your computer will be locked when the T.sonic is unplugged
¾
While your computer is locked, the screen will display the “Screen Saver Message” text.
T o unlock the computer, you must reconnect your T.sonic to your computer. The PC-Lock message text
will disappear and you will be free to use your computer again. The computer will also unlock itself
automatically when the lock timer expires.
Partition
This feature allows you to create a secure password-protected area on the T.sonic for your personal files. You
can adjust the size of Public and Private areas, and add a password to protect the Private area. Data stored in
the Private area will be kept secure and can only be accessed with your password.
WARNING! Creating a Private area or adjusting the partition size will erase
all data on T.sonic!
Please back up your data before using this feature.
1. Connect the T.sonic to your computer.
2. Start the T.sonic Utility (
3. Click on the “Partition” button
->
Programs -> T.sonic Utility)
in the T.sonic Utility window or Task Bar menu.
Figure 18. T.sonic Utility – Partition
4. The Partition window will appear. Move the slider left and right to adjust the size of the Public and
Private areas on your T.sonic.
34
Page 35

Figure 19. Create a Partition
5. To protect the Private area, choose a password and a “Hint” (in case you forget your password)
Figure 20. Password and Hint
6. Click the “Start” button to complete Partition & Security setup. The process may take a few minutes.
7. Click the “Start” button to complete the Partition & Security setup.
Log In / Log Out
This function lets you access the files stored on the Private partition of your T.sonic. If you do not log in, your
protected files will be invisible.
1. Connect the T.sonic to your computer.
2. Start the T.sonic Utility (
->
Programs -> T.sonic Utility)
3. Click on the “Login/Logout” button in the T.sonic Utility window or Task Bar menu.
Figure 21. T.sonic Utility – Login/out
4. The Login/out window will appear. Input your password and click “Login.”
35
Page 36

Figure 22. Enter your password
5. When successfully logged in, the “Public Area” message will change to “Private Area.” The files in
your Private Area will no longer be hidden and can be accessed normally.
6. When you are finished using the Secure Area and no data is being transferred between the T.sonic
and the computer, click the “
Login/Logout” button
again to log out.
Figure 23. T.sonic Utility – Login/out
Changing your Password
1. Start the T.sonic Utility (
2. Click on the “Password” button
->
Programs -> T.sonic Utility)
in the T.sonic Utility window or Task Bar menu.
Figure 24. T.sonic Utility – Password
3. The New Password window will appear. Input your current Password and New Password, then
confirm the new password. Use the “New Hint” field to give yourself a hint in case you forget your
new password.
36
Page 37

Figure 25. Change Password
4. Click on the “OK” button to complete the New Password setup.
Forgotten Passwords
If you forget your password, use the password hint to help you remember your password. If you are still unable
to remember your password, you will have to use the
THIS WILL ERASE ALL DATA ON THE T.SONIC. Although the data in the Private area will be lost, you can
back up all data on the Public area before using the Partition function.
Partition function to reset the Public and Private areas.
37
Page 38

Troubleshooting︱
If a problem occurs with your T.sonic 320, please first check the information listed below before taking your
T.sonic 320 for repair. If you are unable to remedy a problem from the following hints, please consult your
dealer, service center, or local Transcend branch office. We also have FAQ and Support services on our
website at
http://www.transcendusa.com.
Software CD does not auto-run in Windows
Go to the Device Manager in the Control Panel and enable the Auto-Insert function for the CD-ROM drive.
Alternatively, you can manually run the “
Operating system cannot detect the T.sonic 320
Check the following:
1. Is your T.sonic 320 properly connected to the USB port? If not, unplug it and plug it in again.
2. Is your T.sonic 320 connected to the Mac keyboard? If yes, unplug it and plug it into an available USB
port on your Mac Desktop.
3. Is the USB port enabled? If not, refer to the user’s manual of your computer (or motherboard) to
enable it.
Cannot Power ON
Check the following:
1. Is the T.sonic 320 connected to your computer? If yes, unplug it.
2. Is the Hold switch enabled? If yes, switch it to the “OFF” position.
3. Is the battery out of power? If yes, please recharge the battery.
T.sonic.EXE” file on the software CD.
®
Cannot transfer MP3, WMA, WMA-DRM10, or WAV files to the T.sonic 320
Uninstall and re-install the driver. If this doesn’t work, try Resetting the T.sonic.
Buttons aren’t working
Is the Hold switch enabled? If yes, set it to the “OFF” position.
Cannot hear track playback
1. Have you downloaded any music files onto the T.sonic? If no, then you must first do so from your
computer or the Internet. (Only Mpeg I Layer 3 and WMA files compressed at a rate of
32Kbps–320Kbps are supported.)
2. Are the earphones properly connected to the earphones jack? If not, reconnect them.
3. Is the volume loud enough? If not, increase the volume level until the music can be heard.
Track name does NOT display correctly on the screen
1. The default language of the T.sonic is English. Please set the language option first.
2. ID3 tag information has display priority on the screen of the T.sonic. You can modify the ID3 tag by
using Windows Media Player or Winamp.
3. If the ID3 tag is empty, just the file name will be displayed on the screen.
Cannot enter the RECORD Mode
To make sure the recorded file will not be lost, two safety mechanisms are provided.
1. If the remaining battery capacity is less than 10%, you cannot enter the RECORD Mode.
38
Page 39

2. During recording, if the remaining battery capacity goes below 10% the T.sonic will automatically
save the recording.
Track playback sounds intermittent
Plug the earphones into the earphones jack again to make sure they are properly connected.
T.sonic Powers OFF automatically
T.sonic features a SLEEP Mode, which acts as a Power Saving feature. You can preset your T.sonic to Power
OFF automatically after 15, 30, or 60 minutes. Please refer to the “
Sleep Timer” section of this manual.
T.sonic just isn’t working properly
If your T.sonic ever stops working properly, or locks up, try Powering it ON and OFF a few times, if this does not
correct the problem you can reset
the T.sonic by pressing and holding the “Reset” button for 3 to 5 seconds.
Cannot find the file that was just copied to the T.sonic
™
Re-copy the file and refer to the “Disconnecting from a Computer” section to remove the T.sonic after the
copy process is completed.
A File that was just deleted still appears
Re-delete the file and refer to the “Disconnecting from a Computer” section to remove the T.sonic after the
delete process is completed.
T.sonic™ cannot operate after it was formatted in Windows®
Formatting the T.sonic using the “Quick Format” or “Full Format” option in Windows® destroys the default
format of the T.sonic. To retrieve the default format, visit
™
Firmware Update for your T.sonic
.
http://www.transcendusa.com and download a
How do I find out what Windows Media Player version I am using?
1. Open your Windows Media Player program.
2. Click on the “Help” menu and select the “About Windows Media Player” option.
3. The version of your Windows Media Player will be displayed on the computer screen.
Cannot listen to DRM music on my T.sonic 320?
1. The T.sonic 320 only supports WMA-DRM10 protected music files, is this the file type you are using?
2. Did you use the MTP “Music Transfer Protocol” to transfer music to the T.sonic 320?
Lyrics Sync: Why can’t I see the words of the song I am listening to?
For detailed Lyrics Sync instructions, please see the FAQ section on our website at:
http://www.transcendusa.com/Support/FAQ
39
Page 40

Specifications︱
Size (L x W x H): 85.5 mm × 25.5 mm × 13 mm
Weight: 29g (with Li-ion battery)
Music Formats: MP3 WMA and WMA-DRM10 (Subscription music)
Recording Format: ADPCM (WAV)
Estimated Battery Life: 15 hours (fully charged battery)
Compression Rates: 32Kbps to 320Kbps
Data Retention: Up to 10 years
Erase Cycles: ≥ 100,000 times
Signal-to-Noise Ratio: ≥ 90dB
Certificates: CE, FCC, BSMI
Warranty:
Ordering Information︱
Device Description Memory Size Transcend P/N
T.sonic 320 MP3 Music Player 2GB TS2GMP320
T.sonic 320 MP3 Music Player 4GB TS4GMP320
T.sonic 320 MP3 Music Player 8GB TS8GMP320
2-years
40
Page 41

Transcend Limited Warranty︱
“Above and Beyond” is the standard we set ourselves for customer service at Transcend. We
consistently position ourselves to be significantly above the industry norm, which is all part of our
commitment to Customer Satisfaction.
Transcend information, Inc. (Transcend) products are warranted and tested to be free from defects in
All
material and workmanship and to conform to the published specifications. During the warranty period should
your Transcend T.sonic 320 fail under normal use in the recommended environment due to improper
workmanship or materials, Transcend will repair the product or replace it with a comparable one. This warranty
is subject to the conditions and limitations set forth herein.
Duration of Warranty: The Transcend T.sonic 320 is covered by this warranty for a period of two (2) years
from the date of purchase. Proof of purchase including the date of purchase is required for warranty service.
Transcend will inspect the product and decide whether to repair or replace it. Transcend reserves the right to
provide a functional equivalent or refurbished replacement product.
Limitations: This warranty does not apply to product failure caused by accidents, abuse, mishandling,
improper installation, alteration, acts of nature, improper usage, or problems with electrical power. In addition,
opening or tampering with the product casing, or any physical damage, abuse or alteration to the product’s
surface, including all warranty or quality stickers, product serial or electronic numbers will also void the product
warranty. Transcend is not responsible for recovering any data lost due to the failure of a flash memory device.
Transcend’s T.sonic 320 must be used with devices that conform to the recommended industry standards.
Transcend will not be liable for damages resulting from a third party device that causes the Transcend T.sonic
320 to fail. Transcend shall in no event be liable for any consequential, indirect, or incidental damages, lost
profits, lost business investments, lost goodwill, or interference with business relationships as a result of lost
data. Transcend is also not responsible for damage or failure of any third party equipment, even if Transcend
has been advised of the possibility. This limitation does not apply to the extent that it is illegal or unenforceable
under applicable law.
Disclaimer: The foregoing limited warranty is exclusive. There are no other warranties, including any implied
warranty of merchantability or fitness for a particular purpose. This warranty is not affected in any part by
Transcend providing technical support or advice.
Online Registration: To expedite the warranty service, please register your Transcend Product within 30
days of purchase.
Register online at http://www.transcendusa.com/productregister
The specifications mentioned above are subject to change without notice.
Transcend Information, Inc.
www.transcendusa.com
*The Transcend logo is a registered trademark of Transcend Information, Inc.
*All logos and marks are trademarks of their respective companies.
41
 Loading...