

Trango Systems A600 Installation Manual

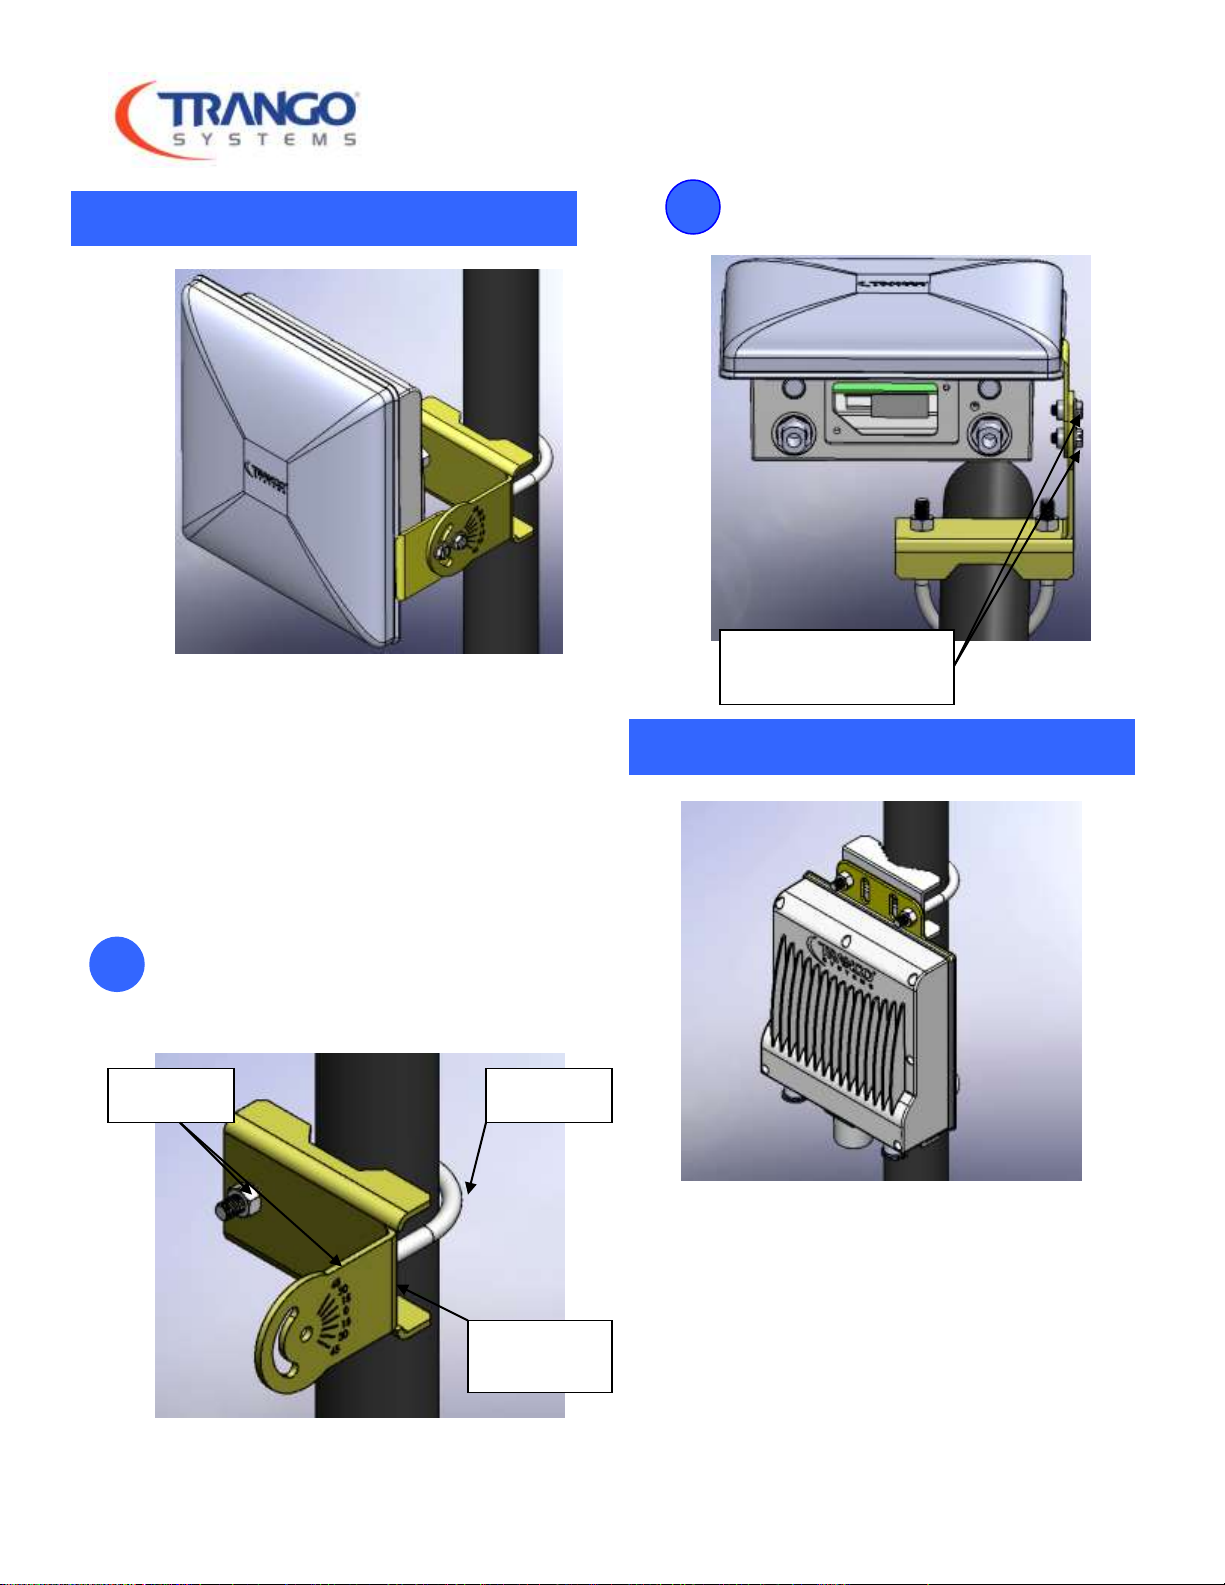
Mounting Bracket
U-Bolt
Hex Nut
Kep Nuts
U-Bolt
Bracket
Altum AC Installation Quick Start Guide
Overview
The Altum AC comes in three different configurations; A600-EXT, A600-19, and A600-25. This guide
will illustrate how to install the Altum AC unit after configuring the unit on the bench.
Installing A600-25
In the A600-25 box you will find the following parts:
(1) U-Bolt with hex nuts
(1) Mounting Bracket
(1) Port Plug
(1) U-Bolt bracket
(1) Port Plate with captive screws
(4) 10-32 kep nuts
(1) POE injector
1. For easiest installation install the mounting
bracket onto the 1.5-2.5 inch diameter pole
using the U-bolt and the U-bolt bracket. Tilt
the bracket to the approximate desired angle
before tightening the hex nuts onto the U-bolt.
2. Install the Altum AC radio unit by sliding the (4)
protruding threads on the back plate through the
mating holes on the mounting bracket. Secure the
unit with the (4) 10-32 kep nuts. Skip to step 3.
LT-9065 Installation Quick Start Guide Revision A 1
¼-20 hex head
Screw
U-Bolt
Mounting
Bracket
Hex Nuts
Installing A600-19
2. Install the A600-19 radio using the ¼-20 hex
head screws. Skip to step 3.
In the A600-19 box you will find the following parts:
(1) U-Bolt with hex nuts
(2) ¼-20 hex head screws
(1) Mounting Bracket
(1) Altum AC 19 dBi unit
(1) Port Plug
(1) Port Plate with (2) captive screws
(1) POE injector
1. Install the Mounting Bracket by feeding
the U-Bolt through the holes and
tightening using the included hex nuts.
Installing A600-EXT
In the A600-EXT box you will find the following parts:
(2) U-Bolt with hex nuts
(2) Mounting Brackets
(1) Port Plug
(1) Port Plate with (2) captive screws
(1) POE injector
(1) Connector Sealing Tape Packet
LT-9065 Installation Quick Start Guide Revision A 2
 Loading...