

Page 1
Programming Guide
IntelliPak™
Commercial Self-Contained
Signature Series, 20-110 Ton
Modular Series, 20-35 Ton
Model Numbers:
SCWG -020, -025, -030, -035
SIWG -020, -025, -030, -035
SCRG -020, -025, -032
SIRG -020, -025, -032
SCWF -020, -022, -025, -029, -032, -035, -038, -042, -046, -052, -058, -065, -072, -080
SIWF -020, -022, -025, -029, -032, -035, -038, -042, -046, -052, -058, -065, -072, -080
SCRF -020, -025, -029, -030, -035, -040, -050, -060
SIRF -020, -025, -029, -030, -035, -040, -050, -060
SAFETY WARNING
Only qualified personnel should install and service the equipment. The installation, starting up, and servicing of heating, ventilating, and airconditioning equipment can be hazardous and requires specific knowledge and training. Improperly installed, adjusted or altered equipment
by an unqualified person could result in death or serious injury. When working on the equipment, observe all precautions in the literature and
on the tags, stickers, and labels that are attached to the equipment.
August 2013
PKG-SVP01D-EN
Page 2
Warnings, Cautions and Notices
Warnings, Cautions and Notices. Note that warnings,
cautions and notices appear at appropriate intervals
throughout this manual. Warnings are provided to alert
installing contractors to potential hazards that could result
in death or personal injury. Cautions are designed to alert
personnel to hazardous situations that could result in
personal injury, while notices indicate a situation that
could result in equipment or property-damage-only
accidents.
Your personal safety and the proper operation of this
machine depend upon the strict observance of these
precautions.
Read this manual thoroughly before operating or servici ng
this unit.
ATT EN TI ON : Warnings, Cautions, and Notices appear at
appropriate sections throughout this literature. Read
these carefully:
WARNING
CAUTIONs
NOTICE:
Indicates a potentially hazardous
situation which, if not avoided, could
result in death or serious injury.
Indicates a potentially hazardous
situation which, if not avoided, could
result in minor or moderate injury. It
could also be used to alert against
unsafe practices.
Indicates a situation that could result in
equipment or property-damage only
accidents.
unit’s human interface panel. Screens that are
configuration-dependent are labeled as such. Follow the
appropriate steps for each screen as it appears and
proceed through each section.
Refer to the table of contents and index for specific topics
contained in this manual and supporting manuals.
Complete the “Start-Up” procedures in the applicable
Installation, Owner, and Diagnostic (IOD) manual before
attempting to operate or service this equipment to
minimize the risk of improper operation.
Note: The procedures discussed in this manual should
only be performed by qualified, experienced HVAC
technicians.
Revision History
PKG-SVP01D-EN
• Updated manual to current template.
PKG-SVP01C-EN
• Added Index.
Trademarks
Echelon, the Echelon logo, 3120, 3150, LON, LonBuilder,
NodeBuilder, LonLink, LonMaker, LonManager, LonPoint,
LonResponse, LonSupport, LonTalk, LONWORKS,
LonUsers and Neuron are registered trademarks of
Echelon Corporation.
Introduction
Note: One copy of the appropriate service literature
(Installation, Owner, and Diagnostic Manual) ships
inside the control panel of each unit.
™
Use this manual for IntelliPak
models SCWF/SIWF, SCRF/SIRF, SCWG/SIWG, and SIWG/
SIRG.
Overview
This manual is divided into multiple sections based on the
unit’s human interface (HI) panel format. Each section
provides step by step instructions for programming the
unit using the HI. In addition, each section provides
specific information about the system operating
parameters and their related HI screens, in the order they
appear when scrolling through the HI.
By carefully following the screen layout in this manual
while referencing the HI panel, the user can monitor
operating status, set specific operating parameters, and
diagnose system problems.
Some screens shown in this manual are dependent on unit
options and/or model configuration. Therefore, some
screens in this manual may not appear on a particular
© 2013 Trane All rights reserved PKG-SVP01D-EN
commercial self-contained
Page 3

Table of Contents
Warnings, Cautions and Notices . . . . . . . . . . 2
Introduction . . . . . . . . . . . . . . . . . . . . . . . . . . . 2
Overview . . . . . . . . . . . . . . . . . . . . . . . . . . . 2
Revision History . . . . . . . . . . . . . . . . . . . . . 2
Trademarks . . . . . . . . . . . . . . . . . . . . . . . . . 2
General Information . . . . . . . . . . . . . . . . . . . . . 4
Commonly Used Acronyms . . . . . . . . . . . 4
Glossary of Terms . . . . . . . . . . . . . . . . . . . 5
IntelliPak
UCM Control System . . . . . . . . . . . . . . . . . 5
Programming the Unit . . . . . . . . . . . . . . . . . 8
Data Manipulation Keys . . . . . . . . . . . . . . . 9
Unit Operation Keys . . . . . . . . . . . . . . . . . 10
Factory Presets . . . . . . . . . . . . . . . . . . . . . 11
Password Protected Screens . . . . . . . . . . 13
Programming Status . . . . . . . . . . . . . . . . . . . . 14
STATUS Menu . . . . . . . . . . . . . . . . . . . . . . . 14
™
Points List . . . . . . . . . . . . . . . . 5
Programming SETUP . . . . . . . . . . . . . . . . . . . 22
SETUP Menu . . . . . . . . . . . . . . . . . . . . . . . . . 22
SETUP Menu Screens . . . . . . . . . . . . . . . 22
Sensor Source Selections Submenu . . . 26
Outside Air Ventilation Setup . . . . . . . . . 27
Ventilation Override Definitions . . . . . . . 28
GBAS Module I/O Assignments . . . . . . . 29
RTM Alarm Output Diagnostic
Assignment Screens . . . . . . . . . . . . . . . . 30
Temperature Input Calibration . . . . . . . . . 30
Device Charatcteristic Setup Definitions 32
Control Algorithm Tuning Parameters . . 35
SETPOINT Menu . . . . . . . . . . . . . . . . . . . . . . . . 36
Programming Configuration . . . . . . . . . . . . . 40
SERVICE MODE Menu . . . . . . . . . . . . . . . . . . 43
DIAGNOSTICS Menu . . . . . . . . . . . . . . . . . . . . 45
Failure Modes . . . . . . . . . . . . . . . . . . . . . . 47
Diagnostics Types . . . . . . . . . . . . . . . . . . 47
Glossary . . . . . . . . . . . . . . . . . . . . . . . . . . . . . . . 48
Index . . . . . . . . . . . . . . . . . . . . . . . . . . . . . . . . . . 50
PKG-SVP01D-EN 3
Page 4

General Information
Commonly Used Acronyms
For convenience, a number of acronyms and
abbreviations are used throughout this manual. These
acronyms are alphabetically listed and defined below.
Ta b le 1. A c ro ny m s
Act = active
AH = Air Handler
Annunc = Annunciator
AS = AirSide
Aux = auxiliary
BAS = building automation systems
®
BCI = BACnet
CCFM = hundreds of cubic-feet-per-minute
CCW = counterclockwise
cfm = cubic-feet-per-minute
Cfg = Configured, configuration
ckt = circuit
Cmd = command
Comp (s) = compressor, compressors
Cond = condenser, condensers
Config = configured, configuration
Ctrl = control
CV = constant volume
Cy = cycle
CVDA = Constant Speed Fan (CV)/Discharge Air Temp Control
CVZT = Constant Speed Fan (CV)/Zone Temperature Control
CW = clockwise
DCV = Demand Control Ventilation
Dflt = default
Diag = diagnostic
Dmpr = damper
DWU = Daytime Warm-up
E/A = exhaust air
ECEM = exhaust control/enthalpy module
Econ = economizer, economizing
Ent = entering
Evap = evaporator
F/A = fresh air
Funct = function
GBAS = generic building automation system (module)
HGBP = Hot Gas Bypass
HGP = Hot Gas Bypass
Hi = high
HI = where all caps Human Interface
HO = History Only (Diagnostic)
HVAC = heating, ventilation and air conditioning
ICS = Integrated Comfort System
IGV = inlet guide vanes
Communication Interface
Table 1. Acronyms (continued)
INFO = Information Only (Diagnostic)
I/O = input/output
Indep = Independent
IOM = installation/operation/ maintenance manual
IPC = interprocessor communications
IPCB = interprocessor communications bridge (module)
IWC = inches water column
LH = left-hand
Lo = low
®
LCI = LonTalk
LCI-I = LonTalk Communication Interface for IntelliPak™ Module
Manif = manifolded
Max = maximum
Min = minimum
Misc = miscellaneous
MCM = Multiple Compressor Module
MDM = Modulating Dehumidification Module
Mod = modulating
MPM = Multi-Purpose Module
MWU = morning warm-up
NSB = night setback panel
Num = number
O/A = outside air
Occ = occupied
OVRD = override
PAR = Partial System Disable, Auto Reset (Diagnostic)
PMR = Partial System Disable, Manual Reset (Diagnostic)
Pos = position
Pot = potentiometer
PPM = parts per million
HEAT = where all caps HEAT (module)
Propor = proportional
psig = pounds-per-square-inch gauge pressure
PWS = part-winding start
R/A = return air
Refrig = refrigerant
RH = right-hand
RHI = Remote Human Interface
rpm = revolutions-per-minute
RT = rooftop unit
RTM = rooftop module
SA = supply air
SAP = supply air pressure
Sat = saturated
SCM = Single Compressor Module
Setpt = SETPOINT
SF = supply fan
Communication Interface
4 PKG-SVP01D-EN
Page 5

General Information
Table 1. Acronyms (continued)
SRC = source
Stg = stage
Stnd = standard
STP = SETPOINT
Sw = switch
SZ = single-zone (unit airflow)
TCI = Tracer communications interface (module)
Press = pressure
Temp = temperature
UCM = Unit Control (Module)
Unocc = unoccupied
VAV = variable air volume
VCM = ventilation control module
VDC = volts DC
Ventil = ventilation
VFD = variable frequency drive
Table 1. Acronyms (continued)
VOM = ventilation override module
VVDA=Variable Speed Fan (VAV)/Discharge Air Temp Control
W/ = with
w.c. = water column
WU = warmup
XL = across-the-line start
Glossary of Terms
For a glossary of terms see “Glossary,” p. 48. Carefully
review these definitions since they are used throughout
this document and the Installation, Operation,
Maintenance Guide (IOM). Knowledge of these terms is
essential in gaining an understanding of how these units
operate.
IntelliPak™ Points List
Table 2. IntelliPak™points list
Unit
Module Analog Inputs Analog Outputs Binary Inputs Binary Outputs
Emergency stop
External auto/stop
RTM ASE damper min pos O/A damper actuato
SCM
MCM
Heat Module
ECEM
VOM N/A N/A VOM mode A, B, C, D, E contacts VOM relay
GBAS
Evap temp sensor
Sat cond temp sensor
Evap temp sensor
Sat cond temp sensor
MWU temp sensor
Modulating heat actuator
Return air temp sensor
Return air humidity sensor
4 inputs from these choices:
Occ zone cool setpt
Occ zone heat setpt
Unocc zone cooling setpt
Unocc zone heat set
Min O/A flow setpt
Sup air cooling setpt
Sup air heating setpt
Sup air static pres setp
Cond fan speed
(Low ambient)
Cond fan speed
(Low ambient- ckt 1 & 2)
Low entering air
N/A Demand limit contacts
Unoccupied/occupied
Alarm
Dirty filter
VAV cha nge over
Supply airflow proof
Low pressure control Compressor
proving
Low pressure control- ckt 1 & 2
Compressor proving- ckt 1 & 2
Heat 1 relay
Heat 2 relay
Heat 3 relay
VAV box drive max
CV unoccupied mode indicator
Alarm
Fan run request
Water pump request
Compressor relay Condenser fan A,
B
Compressor relay
Condenser fan 1A, 1B, 2A, 2B
Dirty filter
Refrigeration fail relay
Heat fail relay
Fan fail relay
TBD relay
UCM Control System
The IntelliPak™self-contained units are controlled by a
microelectronic control system that consists of a network
of modules and are referred to as Unit Control Modules
(UCM).
The unit size, type, heating functions, peripheral devices,
options, exhaust capabilities, etc. determine the number
and type of modules that a particular rooftop unit may
employ.
These modules perform specific unit functions using
proportional/integral control algorithms. They are
mounted in the unit control panel and are factory wired to
their respective internal components.
By processing analog and binary inputs, each module
supplies outputs in the form of modulating voltages (from
PKG-SVP01D-EN 5
Page 6

General Information
other unit modules, sensors, remote panels, and customer
binary contacts) to perform the applicable request; such as
economizing, mechanical cooling, heating, ventilation.
The UCM provides some equipment protection functions
both directly and indirectly, such as duct pressure limits
and compressor lockouts. Following is a description of
each module’s function within the UCM system.
The UCM provides some equipment protection functions
both directly and indirectly, such as duct pressure limits
and compressor lockouts.
Listed below are the various modules that may be
employed in a UCM control system.
Rooftop Module Board (RTM)- Standard on all
units
The RTM is the central processor of the system. It
continuously receives information from the other unit
modules, sensors, the remote control panel, and customer
supplied relays. It then interprets this information and
responds to cooling, heating, and ventilation requests by
directing the other modules in the system to energize the
proper unit components. It also directly initiates supply
and exhaust fan operations, and economizer operation.
Compressor Module (SCM/MCM)
The Compressor module, (Single Circuit & Multiple
Circuit), upon receiving a request for mechanical cooling,
energizes the appropriate compressors and condenser
fans. It monitors the compressor operation through
feedback information it receives from various protection
devices.
Heat Module (Standard on all heating units)
The Heat module directs the unit’s heater to stage up and
down to bring the temperature in the controlled space to
within the applicable heating SETPOINT.
Exhaust/Comparative Enthalpy Module
(ECEM)(Option)
The ECEM is on units with the comparative enthalpy
option. It receives data from the return air humidity sensor,
the return air temperature sensor, and the return air space
pressure transducer and controls dampers to maintain
space pressure and humidity levels.
Generic Building Automation System (GBAS)
Module Option
The GBAS module links the RTM with non-Trane building
control systems to enable communication (input/output
interface) between the systems. It can accept external
setpoints for cooling, heating, demand limiting, and S/A
pressure.
Ventilation Override Module (VOM) Option
The VOM can control the unit’s air handling functions to
perform customerspecified functions, such as space
pressurization, exhaust, purge, unit off, etc.
Interprocessor Communications Board (IPCB)
Option
The IPCB is used to expand communication from the unit’s
UCM network to a remote human interface panel. DIP
switch settings on the IPCB module for this application
should be; switches 1 and 2 “off,” switch 3 “on.”
Trane Communications Interface Module (TCI)
Option
The TCI module allows external setpoints for most of the
unit functions to be communicated to the unit’s UCM
network via a Trane ICS™ system. DIP switch settings on
the TCI module for these applications should be; switches
1, 2, and 3 are “off.”
BACnet Communication Interface Module
(BCI) (Optional - used on units with Trane ICS
or 3rd party Building Automation Systems)
The BACnet Communication Interface module expands
communications from the unit UCM network to a Trane
Tracer Summit, or a 3rd party building automation system
that utilizes BACnet, and allows external SETPOINT and
configuration adjustment and monitoring of status and
diagnostics.
Lontalk Communication Interface Module
(LCI) (Optional - used on units with Trane ICS
or 3rd party Building Automation Systems)
The LonTalk Communication Interface module expands
communications from the unit UCM network to a Trane
Tracer Summit, or a 3rd party building automation system
that utilizes LonTalk, and allows external SETPOINT and
configuration adjustment and monitoring of status and
diagnostics.
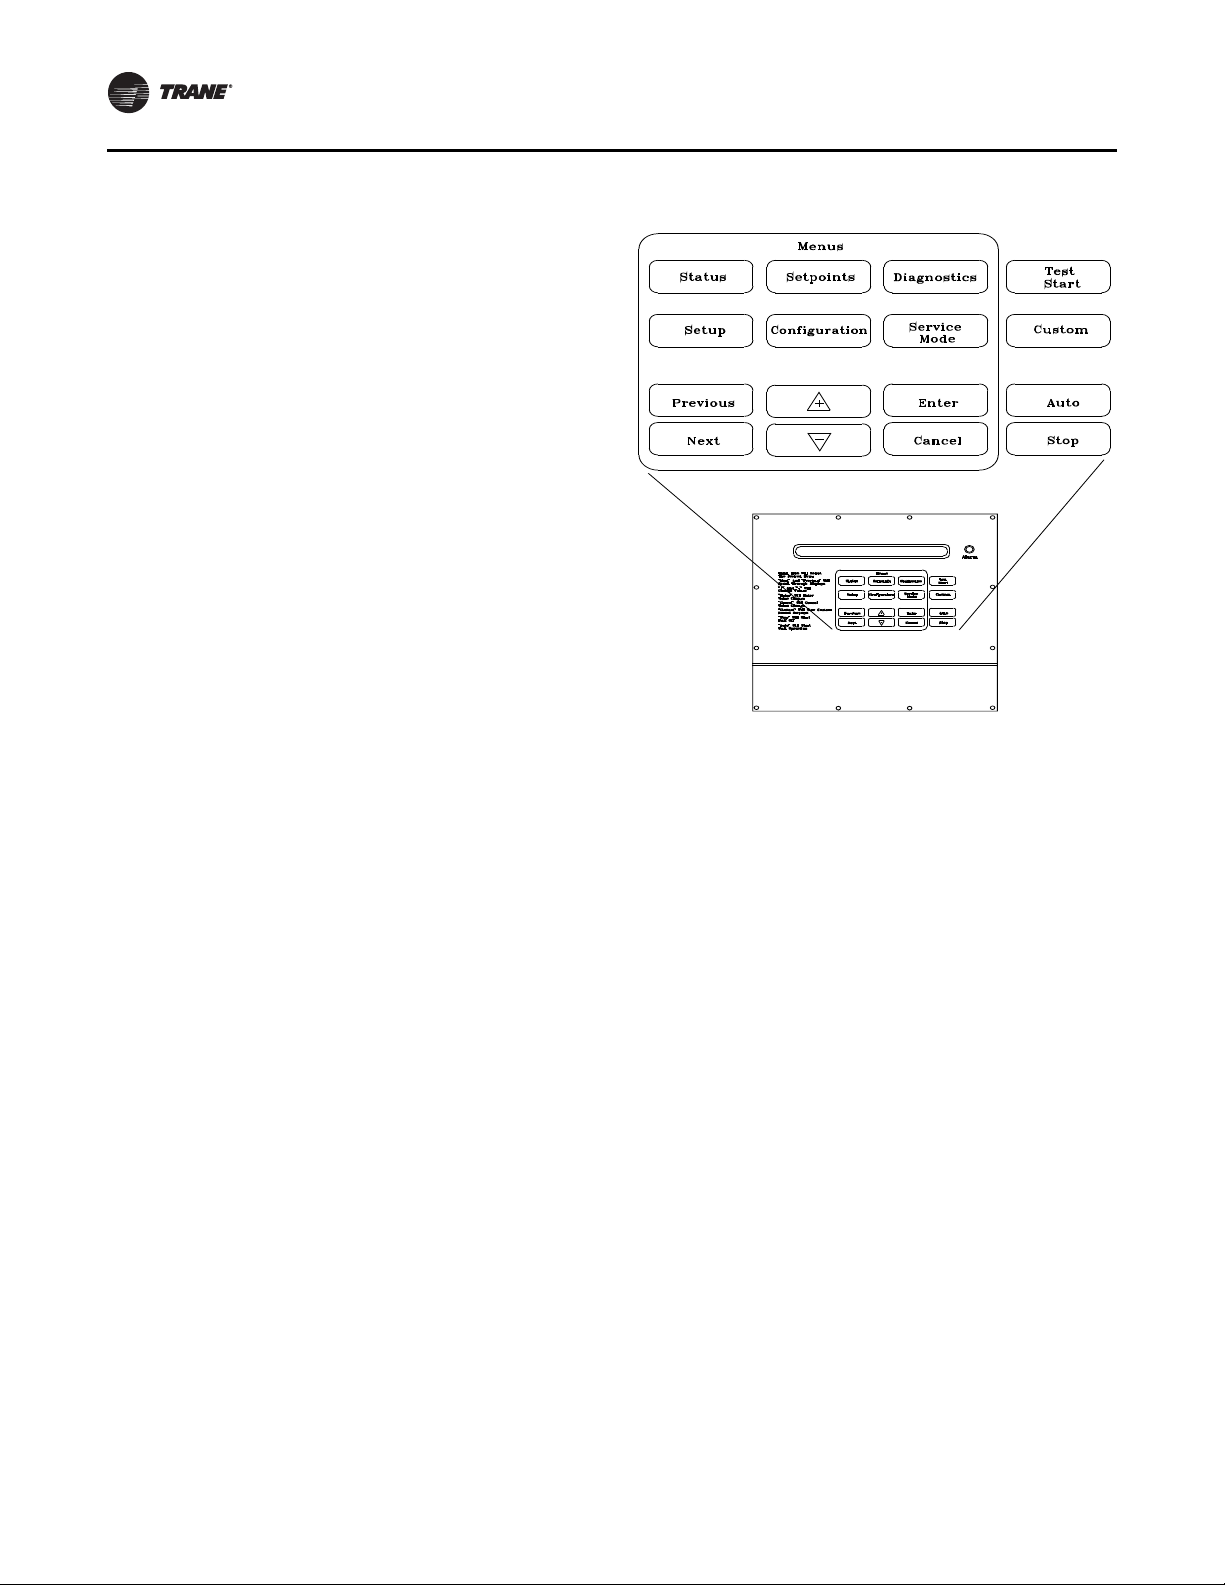
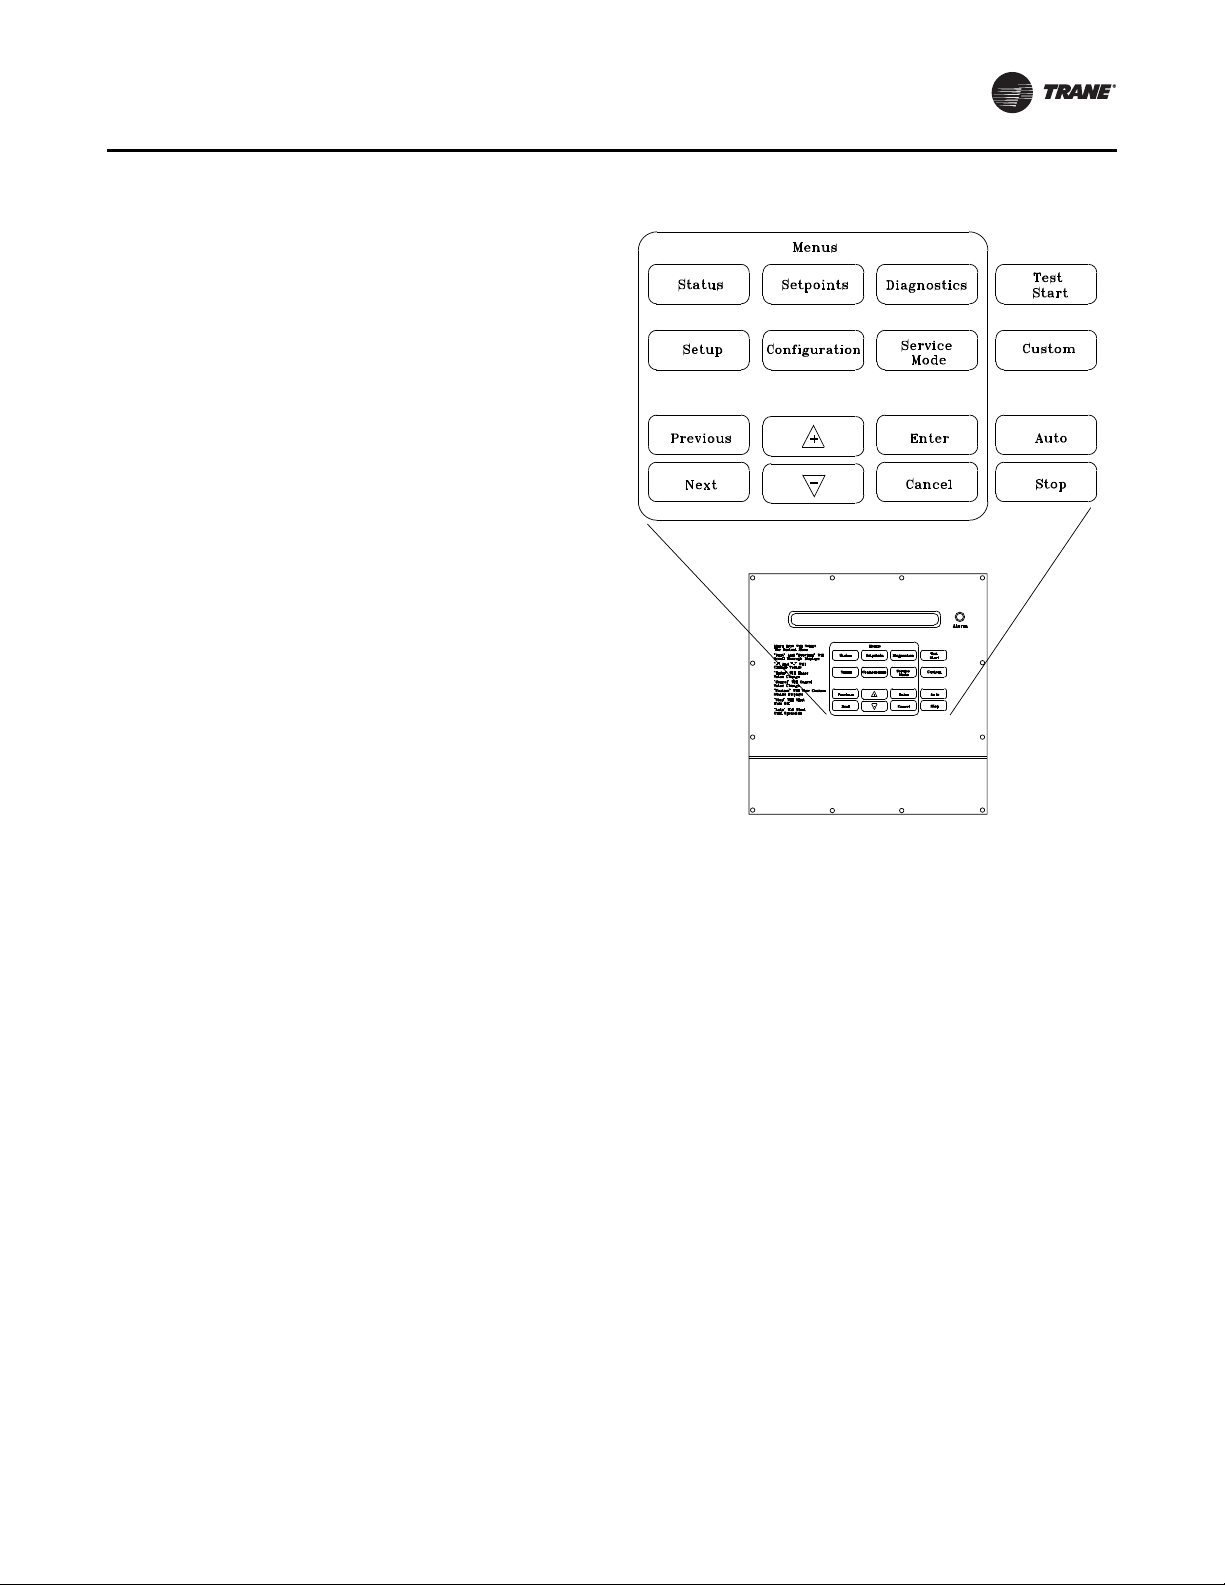
Human Interface Module
The Human Interface (HI) Module illustrated in Figure 1 is
the device which enables the customer, building owner, or
contractor, to communicate to the Rooftop unit the
necessary parameters for unit operation such as cooling
and heating SETPOINTs, demand limiting, ventilation
override modes, etc.
The HI Module is located in the unit’s main control panel.
A small door located in the unit’s control panel door allows
access to the HI Module’s keypad and display window.
There is a 2 line by 40 character LCD screen which provides
status information for the various unit functions as well as
menus used to set or modify the operating parameters.
There is a 16 key keypad adjacent to the LCD screen, which
allows the operator to scroll through the various menus
and make adjustments to the SETPOINTs, etc.
The information displayed in the LCD window will be toplevel status information unless the operator initiates other
displays.
6 PKG-SVP01D-EN
Page 7

General Information
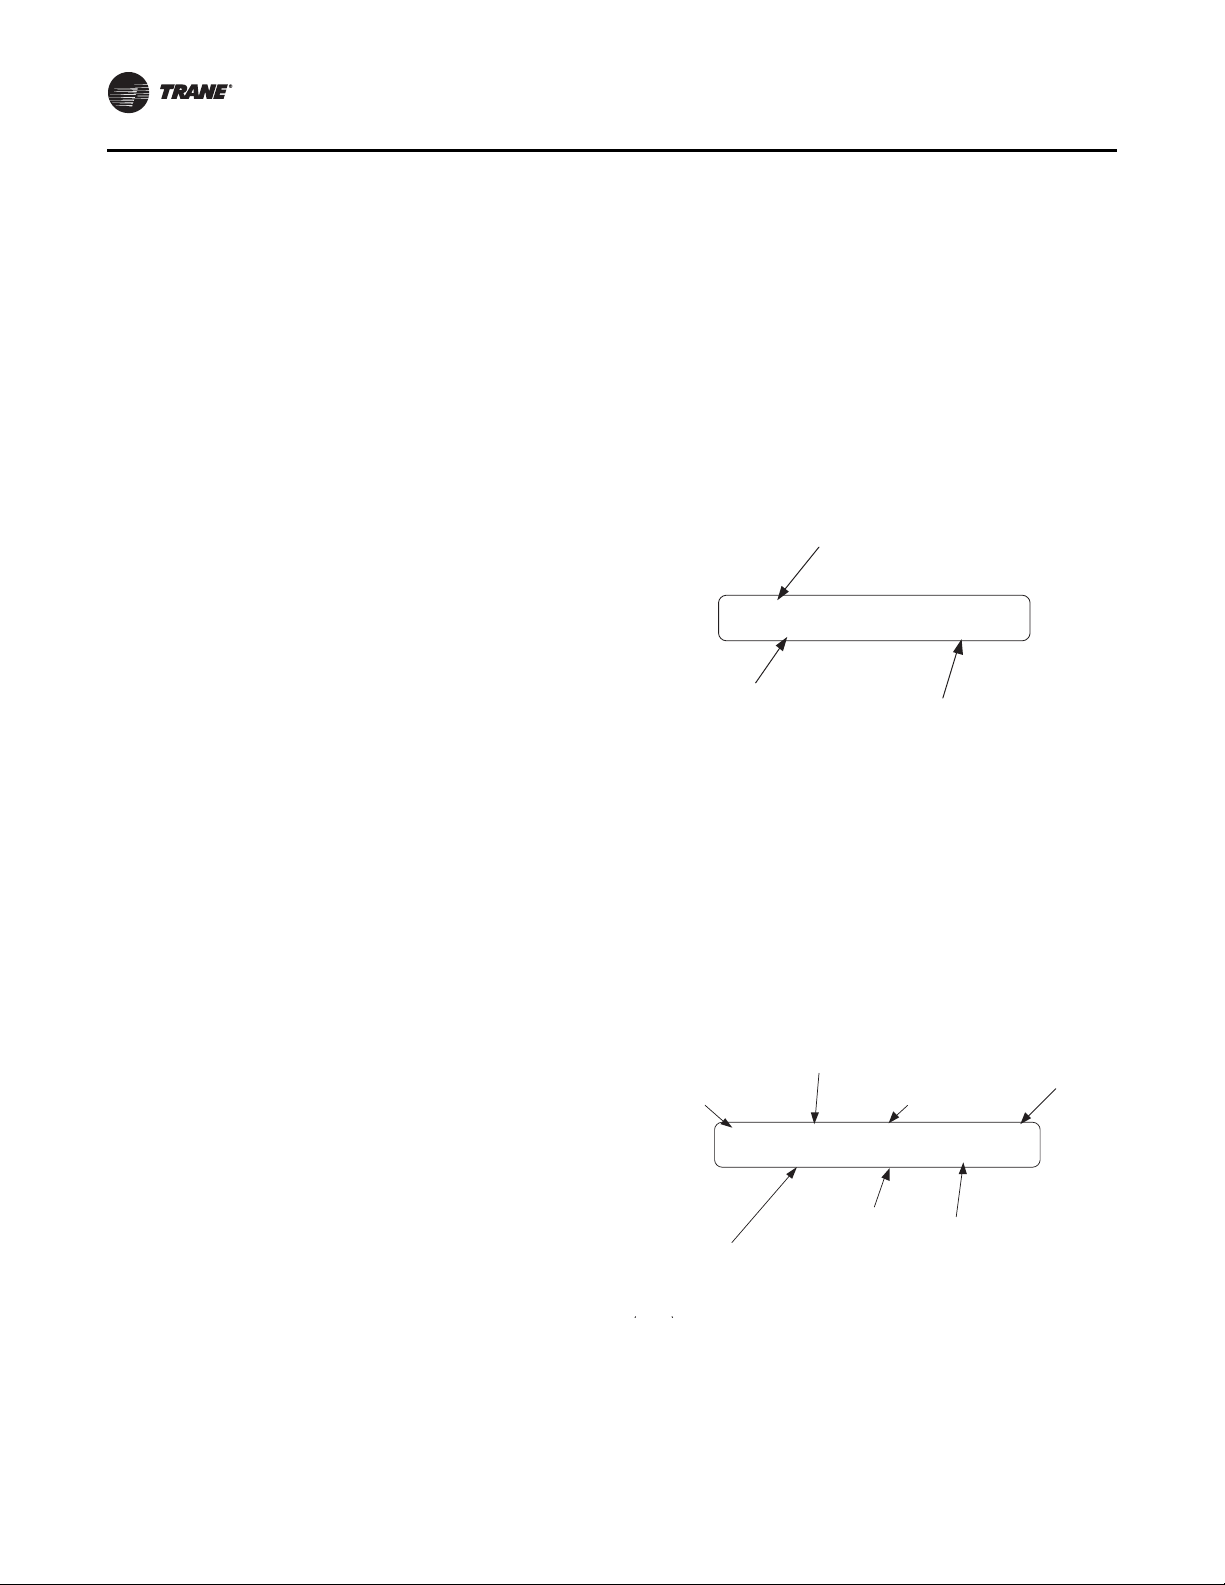
At power-up, the Human Interface LCD will display one of
four initial screens illustrated in the “General Status”
section.
1. Unit Status (Unit Off or Stopped) (The unit is
configured and operational, but is not running). This
screen shows state, mode, and function information
when the unit is off or stopped.
2. Unit Status (Unit On) (The unit is configured and
operational, and is running). This screen shows state,
mode, and function information when the unit is on.
3. VOM Active (a ventilation override command was
received) This screen shows that the unit is in a
Ventilation Override Mode.
4. No Configuration (the unit needs to be configured).
This screen shows that required configuration data is
missing.
The LCD screen has a backlight that makes the information
easier to read. The light will go out if no keys are pressed
for 30 minutes. If it goes out, simply press the STATUS key.
Ventilation Override Module (VOM) Definitions
The ventilation override module can be field-configured
with up to five different override sequences for ventilation
override control purpose. When any one of the module’s
five binary inputs are activated, it will initiate specified
functions such as; space pressurization, exhaust, purge,
purge with duct pressure control, and unit off.
Once the ventilation sequences are configured, they can
be changed unless they are locked using the HI. Once
locked, the ventilation sequences cannot be unlocked.
The compressors and condenser fans disable during the
ventilation operation. If more than one ventilation
sequence activates, the one with the highest priority (VOM
“A”) begins first, with VOM “E” having lowest priority and
beginning last.
A description of the VOM binary inputs follows below.
UNIT OFF sequence “A”
When complete system shut down is required, the
following sequence can be used.
• Supply fan – Off
• Supply fan VFD – Off (0 Hz) (if equipped)
• Inlet guide vanes – closed (if equipped)
• Outside air dampers – Closed
• Heat – all stages – Off, Modulating heat output at 0 vdc
• Occupied/Unoccupied output – Deenergized
• VO relay – Energized
• Exhaust fan (field-installed) - Off
• Exhaust damper (field-installed) - Closed
PRESSURIZE sequence “B”
This override sequence can be used if a positively
pressured space is desired instead of a negatively
pressurized space.
• Supply fan – on
• Supply fan VFD – on (60 Hz) (if equipped)
• Inlet guide vanes/VAV boxes – open (if equipped)
• Outside air dampers – open
• Heat – all stages – off, hydronic heat output at 0 vdc
• Occupied/ unoccupied output - energized
• VO relay - energized
• Exhaust fan (field-installed) - off
• Exhaust damper (field-installed) - closed
EXHAUST sequence “C”
With the building’s exhaust fans running and the unit’s
supply fan off, the conditioned space becomes negatively
pressurized. This is desirable for clearing the area of
smoke when necessary; i.e. from an extinguished fire, to
keep smoke out of areas that were not damaged.
• Supply fan – off
• Supply fan VFD – off (0 Hz) (if equipped)
• Inlet guide vanes – closed (if equipped)
• Outside air dampers – closed
• Heat – all stages – Off, hydronic heat output at 0 vdc
• Occupied/Unoccupied output – deenergized
• VO relay – energized
• Exhaust fan (field-installed) - on
• Exhaust damper (field-installed) - open
PURGE sequence “D”
This sequence could be used for purging the air out of a
building before coming out of unoccupied mode of
operation on VAV units. Also, it can be used to purge
smoke or stale air.
• Supply fan – on
• Supply fan VFD – on (60 Hz) (if equipped)
• Inlet guide vanes/VAV boxes – Open (if equipped)
• Outside air damper – Open
• Heat – all stages – Off, Modulating heat output at 0 vdc
• Occupied/Unoccupied output – Energized
• VO relay – Energized
• Exhaust fan (field-installed) - On
• Exhaust damper (field-installed) - Open
PKG-SVP01D-EN 7
Page 8
General Information
PURGE with duct pressure control “E”
This sequence can be used when supply air control is
required for smoke control.
• Supply fan – on
• Supply fan VFD – on (if equipped)
• Inlet guide vanes – controlled by supply air pressure
control function with supply air pressure high limit
disabled
• Outside air dampers – open
• Heat – all stages – off, hydronic heat output at 0 vdc
• Occupied/unoccupied output – energized
• VO relay – energized
• Exhaust fan (field-installed) - on
• Exhaust damper (field-installed) - open
Note: Each system (cooling, exhaust, supply air, etc.)
within the unit can be redefined in the field for each
of the five sequences, if required. Also the
definitions of any or all of the five sequences may
be locked into the software by using the human
interface panel keypad. Once locked into the
software, the sequences cannot be changed.
Programming the Unit
The UCM must be programmed with “job-specific”setup
information for the unit to operate and function properly.
The data necessary for unit operation will vary depending
on factors such as unit size, type, and options.
This manual provides step by step instructions for
programming setup information using the HI or RHI. It also
includes instructions for checking unit operating status,
accessing and clearing diagnostics, and performing
service tests. Some of the displays in this manual may not
appear on the HI or RHI screen during programming. Only
applicable screens for specific unit options and operating
parameters will display.
Any steps that do not apply to all unit types are marked
accordingly. Ignore any steps that do not apply to your unit
and/or application. Continue this process until all
applicable screens are programmed with the required
information.
Figure 1. Human interface module
Menu Keys
Any references in this section to the HI applies to both the
HI and RHI, with the exception of the SERVICE MODE key.
See Figure 1 for an illustration of the six menu keys. The
menu keys are: STATUS, SETPOINTS, SETUP,
CONFIGURATION, DIAGNOSTICS, and SERVICE MODE.
These keys allow access to various interactive menus so
the user can input and access unit operating data. Pressing
these keys will display the initial menu screen designated
by the key’s name. The following information describes
each key and its function.
STATUS Key
Pressing the STATUS key causes the LCD to display the
operating status screen; i.e. “On”, “Unit Stop”, “External
Stop”, “Emergency Stop”, “Service Mode”. Pressing the
NEXT key allows the operator to scroll through the screens
which provide information such as air and refrigerant
temperatures, humidity levels, fan operation, compressor
operation, heater operation, economizer positioning,
exhaust operation, as well as heating, cooling, and
compressor lockout SETPOINTs. Pressing the STATUS key
while viewing any of the data screens will cause the LCD
to go back to the operating status screen.
SETPOINTS Key
Pressing the SETPOINTS key will cause the LCD screen to
display the first of the SETPOINT screens where the
operator will designate default temperature and pressure
SETPOINTs. While scrolling through the SETPOINT
screens, pressing this key again will cause the LCD to
display the first SETPOINT screen.
8 PKG-SVP01D-EN
Page 9
General Information
DIAGNOSTICS Key
Pressing the DIAGNOSTICS key at any time will allow the
operator to view any unit function failures. The LCD screen
will display one of the diagnostic screens (depending on
which diagnostic, if any, is present). If no key is pressed for
30 minutes while the screen is displaying diagnostic
information, it will revert back to the operating status
display.
CONFIGURATION Key
Pressing the CONFIGURATION key will cause the LCD
screen to display the first of the configuration screens
where the operator will designate unit configuration data
such as unit type, capacity, system control, etc....
This information was programmed at the factory. Pressing
the configuration key at any level in the configuration
menu will display the first configuration screen.
Note: This key should be used if the unit’s configuration
data is lost or new options are added in the field,
and to view current configuration.
SETUP Key
Pressing the SETUP key will cause the LCD screen to
display screens where the operator will designate various
operating parameters such as temperature and pressure
ranges, limits, percentages, SETPOINT source selections,
and sensor input definitions for the control of the rooftop
unit’s various operating modes. Pressing the SETUP key at
any level in the SETUP menu will display the first SETUP
screen.
SERVICE MODE Key
Pressing the SERVICE MODE key causes the LCD to display
the first of the service test mode screens showing various
unit components which may be turned on or off for the
particular test being performed. Once the status of these
components is designated, the LCD will display screens
that allow the operator to designate the TEST START time
delay for each test.
Data Manipulation Keys
The six data manipulation keys illustrated in Figure 2,
(ENTER, CANCEL, + (Plus), - (Minus), PREVIOUS, and
NEXT are used to modify the data within the screens
(change values, move the cursor, confirm choices, etc....)
Figure 2. Human interface keypad
ENTER Key
This key will confirm the new values that were designated
by pressing the + (Plus) or - (Minus) keys at all edit points.
When viewing status and diagnostics screens, it has no
function.
CANCEL Key
After changing data, at an editable screen, but before
confirming it with the ENTER key, pressing the CANCEL
key will return the data to its previous value. This key shall
also function to clear active diagnostics.
+ (Plus) Key
When viewing a SETPOINT screen, this key will increase
the temperature or pressure value of the SETPOINT. When
working with a status menu, it will add the current status
display to the custom menu. When viewing the SETUP or
service test screens, it will increase SETPOINTs or toggle
choices On or Off at each edit point.
- (Minus) Key
This key when viewing the SETPOINT screen will decrease
the temperature or pressure value of the SETPOINT. When
viewing the SETUP or service test screens, it will decrease
SETPOINTs or toggle choices On or Off at each edit point.
When viewing the custom menu, pressing the - (Minus)
key will remove the status screen from the custom menu.
When viewing diagnostics screens it has no function.
PKG-SVP01D-EN 9
Page 10
General Information
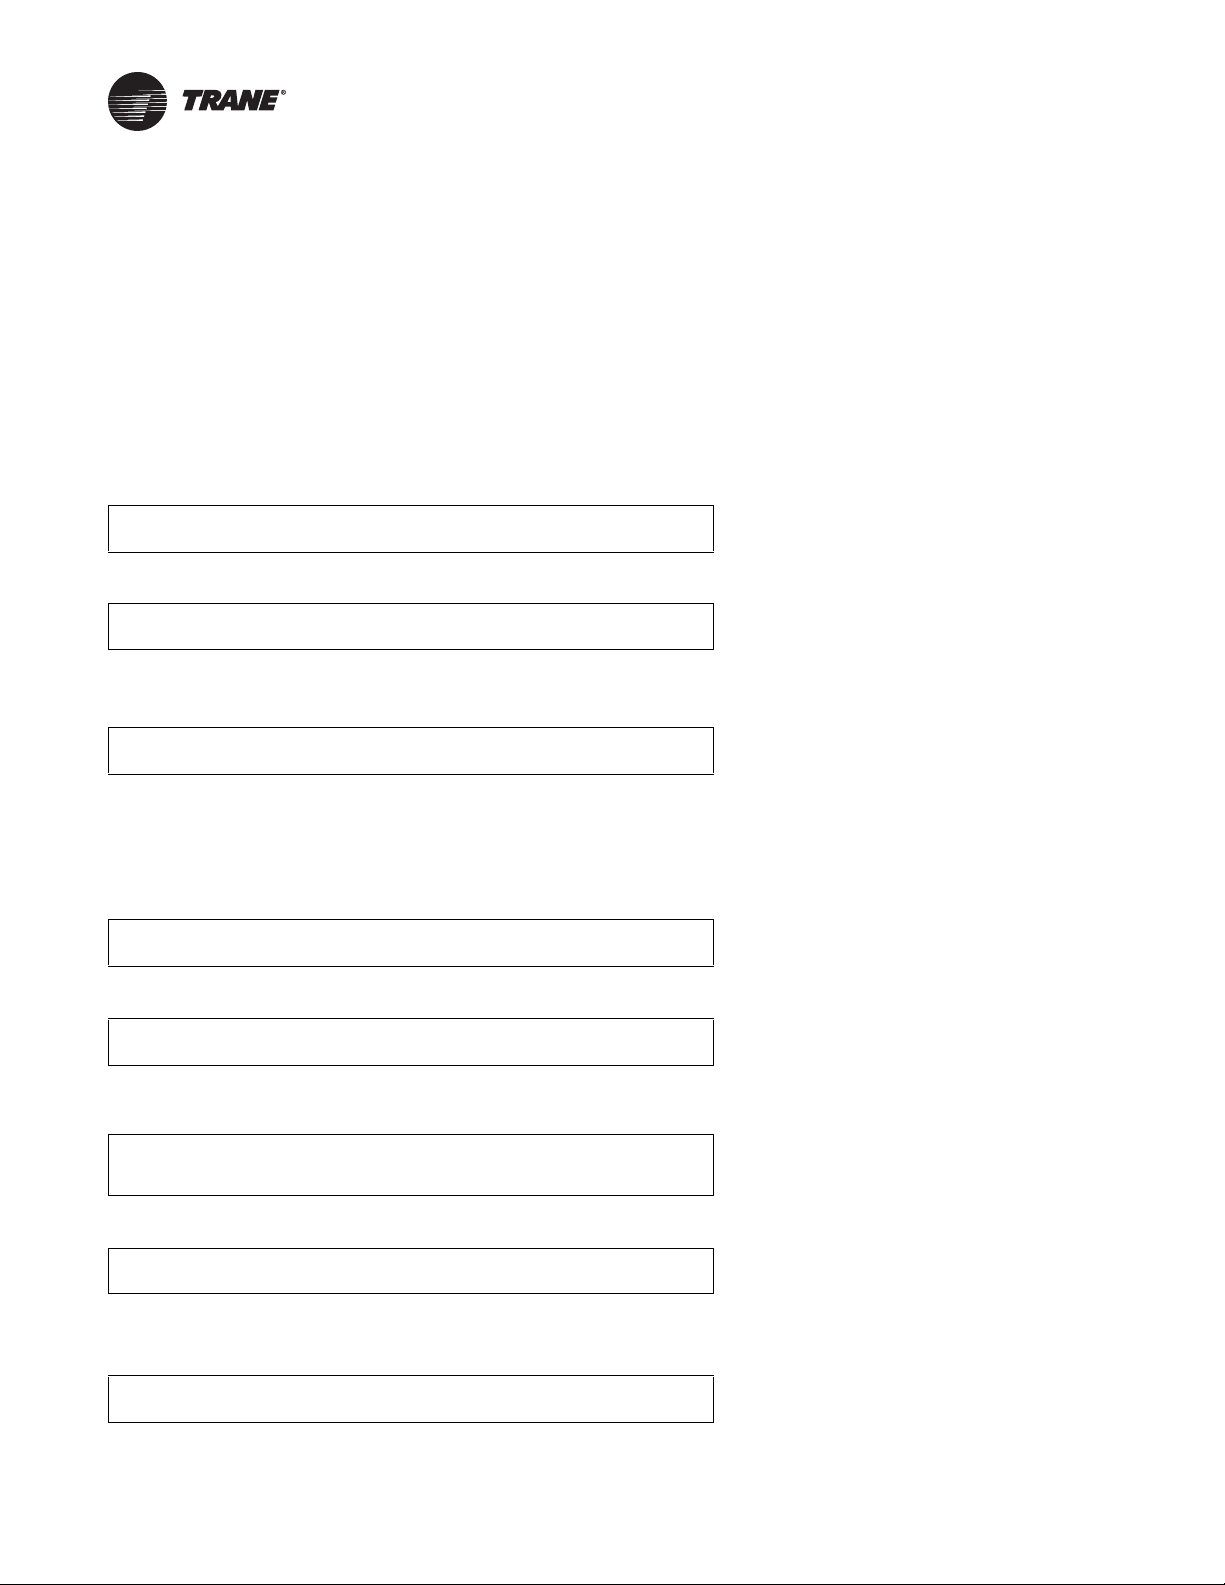
VAV OA Flow
___
CFM Supply Fan
____
___________ _______ ____________
Unit Type
(CV)
(VAV)
Mode of Operation
(Occupied)
(Daytime WU)
(Morning WU)
(Standby)
(Unoccupied)
(Shutdown)
(Initializing)
Function Stage
(Heat)
(Cool)
(O/A Dmpr)
(Blank)
Tr o uble Indicator
(Blank)
(Diagnostics Present)
Fan Mode
(On)
(Off)
Range
0-600
Function in Operation
O/A Flow (CCFM)
Unocc
upied
(Blank if supply fan off or no VCM)
PREVIOUS Key
Pressing the PREVIOUS key causes the LCD to scroll
backwards through the various displays for each menu. At
displays with multiple edit points, it moves the cursor from
one edit point to another.
NEXT Key
Pressing the NEXT key causes the LCD to scroll forward
through the various displays for each menu. At displays
with multiple edit points it moves the cursor from one edit
point to another.
information. The Human Interface will not display screens
or parts of screens for which the unit is not configured.
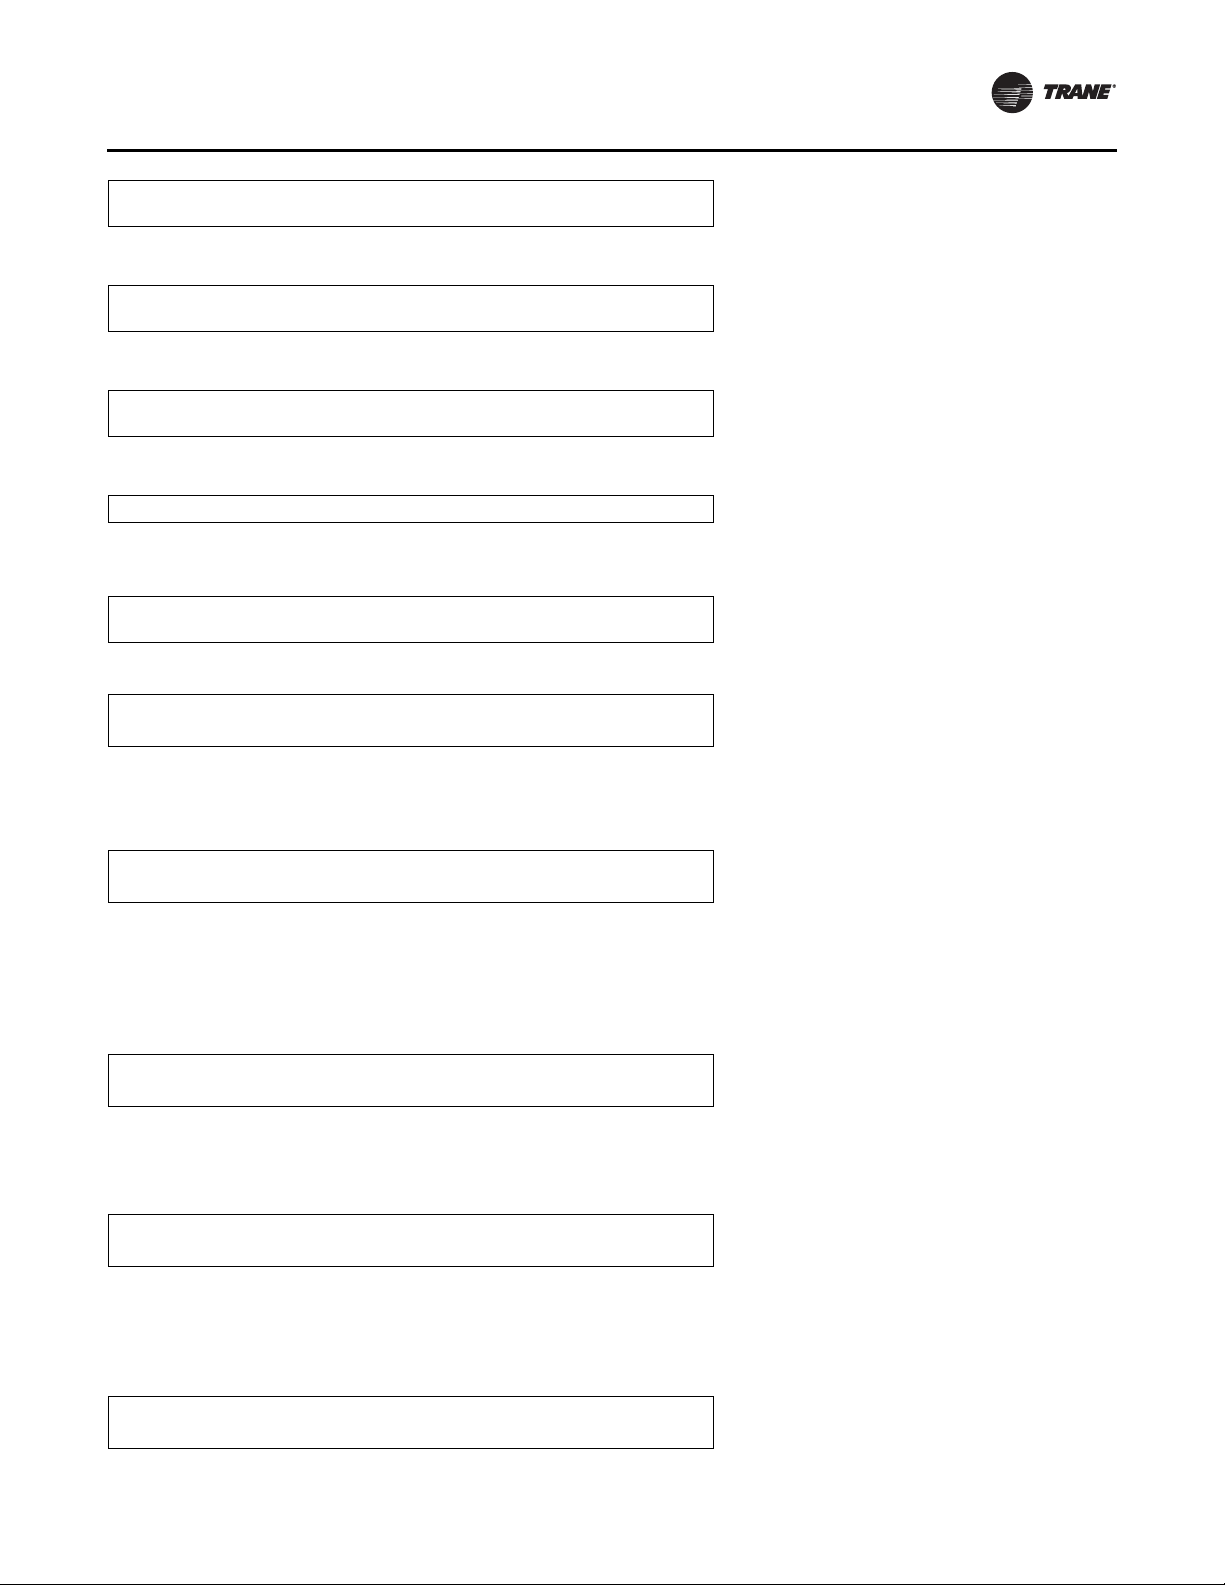
Unit “Off” or “Stopped”
If at power up the unit is not running, the following display
will appear on the Human Interface LCD screen. When this
screen is being displayed, the only functional keys are the
six menu keys (STATUS, SETPOINTS, DIAGNOSTICS,
SETUP, CONFIGURATION, and SERVICE MODE), the AUTO
key, the CUSTOM key, and the STOP key.
To p Level State
(Unit Off)
Unit Operation Keys
AUTO Key
Pressing the AUTO key at any time will cause the display
(Unit Stopped)
(External Stop)
(Emergency Stop)
(Unit Starting)
(Service Mode On)
to go to the top level status display and, if the unit is
shutdown, will cause the unit to begin operation in the
appropriate mode no matter what level in the menu
structure is currently being displayed. If the current display
is an editable display, the AUTO key will confirm the
___________________
____________ _____________
desired edit.
STOP Key
Pressing the STOP key will cause the unit to transition to
the stop state. If the current display is editable, pressing
the STOP key will cancel the desired edit.
TEST START Key (SERVICE)
Pressing this key while viewing any screen in the SERVICE
Mode menu will start the service test. When viewing
status, SETUP, SETPOINT, and diagnostics screens, it has
no function.
CUSTOM Key
The Custom menu is simply a status menu that contains
Unit “On”
If the unit has entered an operating state (running), the
following display will appear on the Human Interface LCD
screen. When this screen is being displayed, the only
functional keys are the six menu keys (STATUS,
SETPOINTS, DIAGNOSTICS, SETUP, CONFIGURATION,
and SERVICE MODE), the AUTO key, the CUSTOM key, and
the STOP key.
Function in Operation
(Blank)
(Shutdown)
(Check Config)
(Invalid Cfg)
Tr o u ble Indicator
(Blank)
(Diagnostics)
screens that the user monitors most frequently. The
Custom menu can only contain five status screens. To
create the Custom menu, press the STATUS key, followed
by the NEXT key (this brings up the initial status screen).
If you want to add this screen to the Custom menu, press
the + (Plus) key, if not, press the Next key again until a
status screen appears that you would like to add to the
Custom menu. Pressing the + (Plus) key while viewing any
of the various status screens will add that screen to the
Custom menu. Once the Custom menu is programed it can
be accessed by pressing the CUSTOM key. To remove a
status screen from the Custom menu, press the CUSTOM
key, then press the NEXT key until the status screen that
you want to remove appears, then press the - (Minus) key.
General Status Display
Anytime the rooftop unit is powered up, or the STATUS,
AUTO, or STOP keys are pressed, the unit mounted Human
Interface will display one of the following four general
status display screens. The operator will then be able to
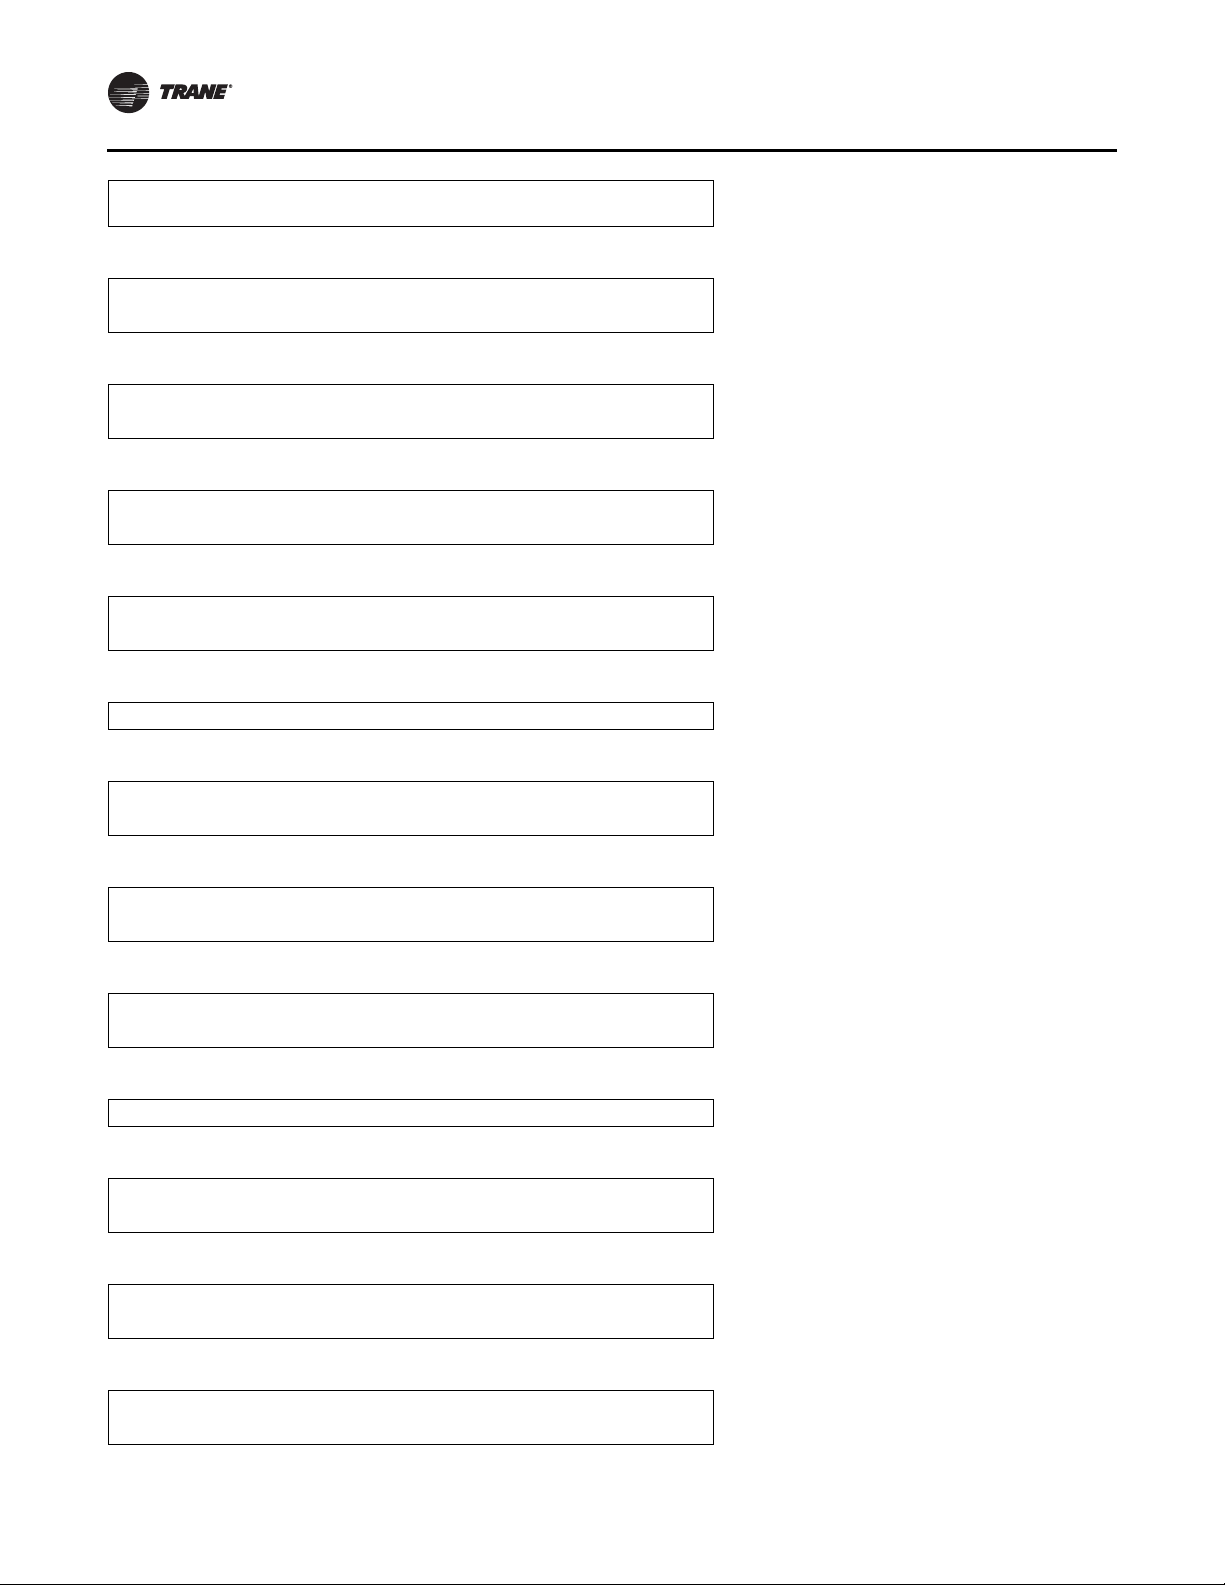
VOM Active
If at power up the unit is running and has entered a
Ventilation Override mode of operation, the following
display will appear on the Human Interface LCD screen.
enter keystrokes which will allow him to navigate through
a set of menus and submenus in order to provide/access
various monitoring, SETUP, and configuration
10 PKG-SVP01D-EN
Page 11

VO Mode in Operation
Ventilation Override Mode
______
No Configuration Present
g
(A,B,C,D,E)
Press Confi
General Information
uration Key
_____________
No Configuration
If at power up the unit has not been programmed with the
necessary configuration data for normal unit operation,
the following display will appear on the Human Interface
LCD screen. When this screen is being displayed, the only
functional key is the CONFIGURATION key.
Note: This screen will only appear when the RTM has
been field replaced. Refer to the Configuration
Menu.
Table 3. Factory presents
Adjustable Function Factory Preset Changed To Reference Page
Default system mode Auto p. 22
Demand limit definition for cooling None p. 23
Demand limit definition for heating None p. 23
Economizer minimum position (w/o IGV or VFD)* 15% p. 37
Economizer minimum position with IGV @ 0%* 15% p. 37
Economizer minimum position with IGV @ 100%* 10% p. 37
Morning warm-up type Full p. 23
Power-up start time delay 0 seconds p. 23
Supply air low limit* 50 °F p. 37
Supply air temperature deadband for cooling* 8 °F p. 36
Supply air temperature deadband for heating* 4 °F p. 36
Supply air temperature O/A reset start temp cooling 90 °F p. 24
Supply air temperature O/A reset end temp cooling 70 °F p. 24
Supply air temperature O/A reset start temp heating 10 °F p. 24
Supply air temperature O/A reset end temp heating 60 °F p. 24
Supply air temperature reset type cooling none p. 24
Supply air temperature reset type heating none p. 24
Supply air temperature zone reset start temp cooling 72 °F p. 24
Supply air temperature zone reset end temp cooling 69 °F p. 24
Supply air temperature zone reset start temp heating 65 °F p. 24
Supply air temperature zone reset end temp heating 68 °F p. 24
Supply air temperature reset max. amount cooling 5 °F p. 24
Supply air temperature reset max. amount heating 10 °F p. 24
Unit Address 1 p. 22
Unit Control Local p. 22
Control Parameters
Trouble Indicator
(Blank)
(Diagnostics)
Factory Presets
The UCM controlled unit has many operating functions
which are preset at the factory, but may be modified to
meet the unique requirements of each job. The following
list identifies each of the unit’s adjustable functions and the
value assigned to it. If these factory presets match the
application’s requirements, simply press the AUTO key at
the Human Interface module to begin unit operation (after
completing the Pre-Start and Start-Up procedures in the
Installation, Operation, and Maintenance manual). If the
application requires different settings, turn to the listed
page beside the function, press the designated function
menu key, then press and hold the NEXT or PREVIOUS key
until its screen appears on the LCD. Once the proper
screen appears, simply follow the programming
instructions given below the applicable screen in this
manual.
Note: Record any changes made to the factory-preset
values in the corresponding space provided.
PKG-SVP01D-EN 11
Page 12

General Information
Table 3. Factory presents (continued)
Adjustable Function Factory Preset Changed To Reference Page
Default Setpoint Setups
Daytime warmup - initiate 67 °F p. 36
Daytime warmup - terminate 71 °F p. 36
Low ambient compressor lockout (std. units) 50 °F p. 38
Supply air temp - cooling 55 °F p. 36
Supply air temp - heating 100 °F p. 36
Unoccupied zone time - cool 85 °F p. 36
Unoccupied zone temp - heat 60 °F p. 37
Unoccupied zone temp - MWU 72 °F p. 37
Function (Enable/Disable) Setups
Compressor lead/lag Disable p. 23
Daytime warmup Disable p. 22
Morning warmup Enable p. 23
Supply air tempering Disable p. 23
Unoccupied economizer Enable p. 25
Unoccupied heating Enable p. 23
Unoccupied mechanical cooling Enable p. 23
Module Defaults
GBAS input/output assignments
GBAS input/output not assigned p. 29
Information format
Text displays
Unit displays
Reference Enthalpy
RTM alarm output assignments
English
English
25 btu/lb. p. 37
any active diagnostic p. 30
p. 22
p. 22
Sensor source selection for:
Daytime warmup RTM zone temp p. 27
Monitor Specified Temp. Input RTM zone temp p. 27
Morning warmup RTM zone temp p. 27
Unoccupied zone control RTM zone temp p. 27
Zone reset RTM aux temp p. 27
Setpoint source selection for:
Cooling supply air temp default p. 38
Heating supply air temp default p. 38
Morning warmup default p. 38
Unoccupied zone cooling default p. 38
Unoccupied zone heating default p. 38
Actuator setup:
Direct/reverse action direct acting p. 32 - p. 35
Max stroke time 150 seconds p. 32 - p. 35
Max voltage 10 VDC p. 32 - p. 35
Min voltage 2 VDC p. 32 - p. 35
Coil frost cutout temperature
30 °F p. 23
Condenser temperature control band:
12 PKG-SVP01D-EN
Page 13

General Information
Table 3. Factory presents (continued)
Adjustable Function Factory Preset Changed To Reference Page
Temporary low limit suppression 10 °F p. 26
Upper limit 120 °F p. 26
Low limit 80 °F p. 26
Condenser temperature:
Efficiency check point 105 °F p. 26
Low ambient control point 90 °F p. 26
Control algorithm tuning parameters N/A p. 35
Max IGV position occupied 100% p. 24
Temperature input offset for:
Heat morning warmup 0 °F p. 31
Return air 0 °F p. 31
RTM zone temperature 0 °F p. 31
RTM aux. temperature 0 °F p. 31
Outdoor air 0 °F p. 31
Ventilation override definitions N/A p. 28
Password Protected Screens
Some of the operating displays on the Human Interface
LCD screens and require a password to change. The
following screens display the various programming
sections that require a password in order to view or to
modify the preset operating parameter s. The password for
each screen is a different series of + (Plus) or - (Minus) key
strokes in a predefined sequence. Shown below are the
password protected screens, and the passwords for
accessing them.
The following screens display the various programming
sections that require a specific PASSWORD to be entered
by a qualified operator in order to modify the operating
parameters. The following screen will appear if the
PASSWORD is not entered within approximately 15
seconds.
Diagnostic Reset is Password Protected
Please Enter Password: ____________
1. Press the + or - keys in this sequence ( - + + ) to access this restricted
screen.
2. Press the ENTER key to confirm the password and Lock the definitions.
3. Press the NEXT key until the following screen is displayed.
Diagnostic Log is Password Protected
Please Enter Password: __________
1. Press the + or - keys in this sequence ( - + + -) to access this restricted
screen.
2. Press the ENTER key to confirm the password and Lock the definitions.
3. Press the NEXT key until the following screen is displayed.
Password Entry Time Limit Exceeded
1. Press the NEXT key until the following screen is displayed.
Configuration is Password Protected
Please Enter Password: __________
1. Press the + or - keys in this sequence ( + - - - ) to access this restricted
screen.
2. Press the ENTER key to confirm the password and enter the menu.
3. Press the NEXT key until the following screen is displayed.
Ventilation Override Mode _______
Enter Password to Lock Definition:
1. Press the + or - keys in this sequence ( + - - + ) to lock each VO Mode.
2. Press the ENTER key to confirm the password and Lock the definitions.
3. Press the NEXT key until the following screen is displayed.
PKG-SVP01D-EN 13
Page 14
Programming Status
STATUS Menu
The STATUS menu is used to view various operating
conditions such as temperatures and humidity levels. It’s
used to view unit component status such as fan,
compressor, heater, and economizer operation, as well as
SETPOINT status.
The screens shown in this section are for example only.
Pressing the + (Plus) key while viewing any of the status
display screens will add that screen to the Custom menu.
When a status screen is displayed for 30 minutes without
a key being pressed, the LCD screen will revert to the
VAV OA FLOW
OCCUPIED
1. Press the NEXT key until the following screen is displayed.
General System Status Submenu
Press ENTER to View Data in this Submenu
1. Pressing the NEXT key will bypass this section.
RTM Supply Fan Relay:
RTM Supply Airflow Proving:
1. Pressing the NEXT key will scroll forward through the screens.
2. Pressing the PREVIOUS key will scroll backwards to view the previously displayed screen.
3. Press the + (Plus) key while viewing any screen to add that screen to the custom menu. Refer to the custom menu for the creation and maintenance
of customized menus.
4. Press the NEXT key until the following screen is displayed. (if applicable)
350.0 CCFM
OA DMPR 0%
SUPPLY FAN ON
DIAGNOSTICS
OFF
FLOW
general operating status display. If this happens, press the
STATUS key again to return to the status menu. The
following are examples of status screens that may be
viewed by pressing the STATUS key.
Note: Many of the screens displayed in this section are
applicable only for the options that are installed in
the unit and may not be visible on your unit.
Press the STATUS key to begin viewing the status screens.
Note: The range for all temperature inputs is –40 to 200 F.
“ERR” will appear if the temperature is out of
range.
Possible Values: Fan = On, Off
Airflow = Flow, No Flow
IGV/VFD Cmd
Active Supply Air Pressure
1. Press the NEXT key until the following screen is displayed.
OR
Active Supply Air Pressure 2.0 IWC
1. Press the NEXT key until the following screen is
displayed.
OR
WSM Water Pump Relay Status:
Active Water Flow Indication
1. Press the NEXT key until the following screen is displayed.
Electric Heat
Stage 1 OFF
1. Press the NEXT key until the following screen is displayed. (if applicable)
ENABLED
Stage 2 OFF Stage 3 OFF
30%
2.0 IWC
OFF
Flow
Note: Two or three stage electric heat is a field-provided option
Hydronic Heat:
Low Air Temp Limit
1. Press the NEXT key until the following screen is displayed.
ENABLED
OK
0%
Used With: All units with IGV/VFD.
Possible Values: Increasing to: 0-100%;
Decreasing 100-0%
Used With: Units without IGV/VFD.
Used With: Water-Cooled units only
Possible Values: Pump Status = Off, On Waterflow
= Flow, No Flow
Used With: Units with Electric Heat
Possible Values: ON, OFF
Used With: Units with hydronic heat only
Possible Values: Hydronic Heat = Enabled,
Disabled; Valve position = 0-100% open; Low temp
air = OK, tripped
14 PKG-SVP01D-EN
Page 15
Programming Status
Active Min OA Flow Setpoint
OA Flow 350.0 CCFM
1. Press the NEXT key until the following screen is displayed. (If applicable)
Active Min OA Flow Setpoint
CO2 Level 1512 PPM
1. Press the NEXT key until the following screen is displayed. (If applicable)
342.0 CCFM
OA Damper Pos 0%
342.0 CCFM
OA Damper Pos 0%
OA Preheat Output Control ON
1. Press the NEXT key until the following screen is displayed. (If applicable)
End of Submenu (NEXT) to Enter SETUP
1. Press the NEXT key to leave the submenu and show following screen.
2. Press PREVIOUS to page back through the submenu.
Compressor Status Submenu
Press ENTER to View Data in This Submenu
1. Pressing the NEXT key will display the following screen.
Compressor Relay K11
OFF
Enabled
1. Pressing the NEXT key will scroll forward through the screens.
Used With: All units VCM module and CO2 reset
enabled
Possible Values: Unit Airflow = 0 to maximum unit
airflow
Used With: All units VCM module or Traq™ damper
option only
Possible Values: Unit Airflow = 0 to maximum unit
airflow
Used With: All units VCM module and preheat
enabled
Possible Values: Unit Airflow = 0 to maximum unit
airflow
Possible Values: K11: ON, OFF, LOCKED, Disabled,
Enabled
Disabled by: Compressor protection, Frost
protection, contactor failure, Tracer Summit®
lockout, low pressure cutout, minimum off time, bad
cond temp sensor, low ambient lockout, demand
limit, ventilation override, low ent cond water temp.
Compressor Relay K12
Enabled
OFF
Used With: Units with manifolded refrigerant circuits
Possible Values: K11: ON, OFF, LOCKED, Disabled,
Enabled
Note: On models SCWF/SIWF and SCRF/SIRF units, K12 is the “B” compressor on units with manifolded refrigerant
circuits and “C” compressor on all units with independent refrigerant circuits. Check unit model number, digit 5
to determine which type circuit the unit has.
1. Pressing the NEXT key will scroll forward through the screens.
Compressor Relay K3
Enabled
Note: On models SCWF/SIWF, 35-80 tons, K3 is the “B” compressor.
1. Pressing the NEXT key will scroll forward through the screens.
Compressor Relay K4
Enabled
1. Pressing the NEXT key will scroll forward through the screens.
Active Outside Air Temperature
Low Ambient Comp Lockout Temp:
1. Pressing the NEXT key will scroll forward through the screens.
OFF
OFF
86.0 F
32 F
Used With: Units with independent refrigerant
circuits.
Possible Values: K3 = ON, OFF, LOCKED, Enabled,
Disabled
Used With: On model SCWF/SCIF, 60-80 tons units
Possible Values: K4 = ON, OFF, LOCKED, Disabled,
Enabled
Disabled by: Compressor protection, Frost
protection, contactor failure, Tracer Summit®
lockout, low pressure cutout, minimum off time, bad
cond temp sensor, low ambient lockout, demand
limit, ventilation override, low ent cond water temp.
Possible Lockout Values: Lockout Temperature =
-20 - 80 F
PKG-SVP01D-EN 15
Page 16
Programming Status
WSM Ent Cond Water Temp Input
Low Water Temp Compressor Lockout
1. Pressing the NEXT key will scroll forward through the screens.
65.2 F
34 F
Compressor Module Ckt 1
Evap Temp 75.0 F Sat Cond Temp 81.0 F
1. Press the NEXT key until the following screen is displayed. (if applicable)
Compressor Module Ckt 2
Evap Temp 72.0 F Sat Cond Temp 97. 0F
1. Press the NEXT key until the following screen is displayed.
Compressor Module Ckt 3
Evap Temp 72.0 F Sat Cond Temp 97 .0 F
1. Press the NEXT key until the following screen is displayed.
Compressor Module Ckt 4
Evap Temp 72.0 F Sat Cond Temp 97 .0 F
1. Press the NEXT key until the following screen is displayed.
End of Submenu (NEXT) to Enter SETUP
1. Press the NEXT key until the following screen is displayed.
Used With: All water-cooled units only.
Possible Lockout Values: Lockout Temperature =
0 - 99 F
Used With: All SCWF/SIWF 35-80 ton units only.
Used With: All SCWF/SIWF 60-80 ton units only.
Economizer Status Submenu
Press ENTER to View Data in This Submenu
1. Press the NEXT key until the following screen is displayed.
Water Economizing: DISABLED
Outside Air Damper Pos: 10%
1. Press the NEXT key until the following screen is displayed.
WSM Mixed Air Temperature: 68 F
WSM Entering Water Temperature: 60 F
1. Pressing the NEXT key will scroll forward through the screens.
Water Econ Bpass Pos: 10%
1. Pressing the NEXT key will scroll forward through the screens.
Air Economizing: DISABLED
Outside Air Damper Pos: 0%
1. Pressing the NEXT key will scroll forward through the screens.
Active Outside Air Enthalpy 12.0 BTU/LB
ECEM Return Air Enthalpy 34.0 BTU/LB
1. Pressing the NEXT key will scroll forward through the screens.
Used With: Units with a waterside or airside
economizer only.
Used With: Units with a waterside economizer only.
Possible Values: Economizer = Disable, enable;
Water econ position - opening to/closing to 0-100%
Used With: Units with a waterside economizer or
condenser only.
Used With: Units with a waterside economizer and
condenser only.
Used With: Units with an airside economizer only.
Possible Values: Economizer = Disable, enable;
Outside air = opening to/closing to 0-100%
Used With: Units with an airside economizer and
comparative enthalpy only.
Possible Values: 10-99 BTU/LB
Active Outside Air Temperature 86.0 F
ECEM Return Air Temperature 78.0 F0
1. Pressing the NEXT key will scroll forward through the screens.
Used With: Units with an airside economizer only.
16 PKG-SVP01D-EN
Page 17

Programming Status
Active Outside Air Humidity 30%
ECEM Return Air Humidity 62%
1. Pressing the NEXT key will scroll forward through the screens.
End of Submenu (NEXT) to Enter SETUP
1. Pressing the NEXT key will scroll forward through the screens.
Controlling Setpoint Status Submenu
Press ENTER to View Data in This Submenu
1. Pressing the NEXT key will scroll forward through the screens.
Active Supply Air Cooling STP From
HI (KEY PAD) SETPOINT MENU Is 55 F
1. Pressing the NEXT key will scroll forward through the screens.
Active Supply Air Heating STP From
HI (KEY PAD) SETPOINT MENU Is 100 F
1. Pressing the NEXT key will scroll forward through the screens.
Active Daytime Warmup Setpoints
Initiate: 67 F is Terminate 71 F
1. Press the NEXT key until the following screen is displayed.
Used With: Units with an airside economizer only.
Possible Values: 0-100%
Used With: All VAV units only.
Possible Values: HI ( K e y pa d ) S e tp o in t Me n u, Z o n e
Sensor Setpoint Input, GBAS 0-5 VDC Module, ICS
(Tracer Summit™)
Used With: All VAV units only.
Possible Values: HI ( K e y pa d ) S e tp o in t Me n u, Z o n e
Sensor Setpoint Input, GBAS 0-5 VDC Module, ICS
(Tracer Summit™)
Used With: Units with hydronic, electric, or external
heat only.
Possible Values: HI (Keypad) Setpoint Menu
Active Occupied Zone Cooling STP From
RTM ZONE TEMP INPUT is 74 F
1. Pressing the NEXT key will scroll forward through the screens.
Active Occupied Zone Cooling STP From
RTM ZONE TEMP INPUT is 100 F
1. Pressing the NEXT key will scroll forward through the screens.
Active Unoccupied Zone Cooling STP From
RTM ZONE TEMP INPUT is 85 F
1. Pressing the NEXT key will scroll forward through the screens.
Active Unoccupied Zone Heating STP From
RTM ZONE TEMP INPUT is 60 F
1. Pressing the NEXT key will bypass this section.
Active Morning Warmup Setpoint From
HI (KEYPAD) SETPOINT MENU is 72 F
1. Pressing the NEXT key will scroll forward through the screens.
Possible Values: HI ( K e y pa d ) S e tp o in t Me n u, Z o n e
Sensor Setpoint Input, NSB Zone Sensor Setpoint
Input, GBAS 0-5 VDC Module, ICS (Tracer Summit™)
Used With:Units with hydronic, electric, or external
heat with daytime warmup enabled only).
Possible Values: HI ( K e y pa d ) S e tp o in t Me n u, Z o n e
Sensor Setpoint Input, NSB Zone Sensor Setpoint
Input, GBAS 0-5 VDC Module, ICS (Tracer Summit™)
Possible Values: HI ( K e y pa d ) S e tp o in t Me n u, Z o n e
Sensor Setpoint Input, NSB Zone Sensor Setpoint
Input, GBAS 0-5 VDC Module, ICS (Tracer Summit™)
Used With:Units with hydronic, electric, or external
heat.
Possible Values: HI ( K e y pa d ) S e tp o in t Me n u, Z o n e
Sensor Setpoint Input, NSB Zone Sensor Setpoint
Input, GBAS 0-5 VDC Module, ICS (Tracer Summit™)
Setpoint Range: 50-90 F
Used With:Units with hydronic, electric, or external
heat only.
Possible Values: HI ( K e y pa d ) S e tp o in t Me n u, Z o n e
Sensor Setpoint Input, NSB Zone Sensor Setpoint
Input, GBAS 0-5 VDC Module, ICS (Tracer Summit™)
Setpoint Range: 50-90 F
PKG-SVP01D-EN 17
Page 18

Programming Status
Active Min OA Flow Setpoint from
REMOTE MIN POS POT INPUT 342.0 CFM
1. Pressing the NEXT key will scroll forward through the screens.
Active Supply Air Pressure STP From
HI (KEYPAD SETPOINT MENU) is 2.0 IWC
1. Pressing the NEXT key will scroll forward through the screens.
Active Supply Air Pressure Setpoints
Hi Limit: 40 IWC Deadband: 0.5 IWC
1. Pressing the NEXT key will scroll forward through the screens.
End of Submenu (NEXT) to Enter SETUP
1. Pressing the NEXT key will scroll forward through the screens.
Controlling Sensor Status Submenu
Press ENTER to View Data in This Submenu
1. Pressing the NEXT key will scroll forward through the screens.
Active Supply Air Heating Temp Sensor Input From
RTM ZONE TEMP INPUT is 50.0 F
1. Pressing the NEXT key will scroll forward through the screens.
Used With: Units with VCM module only
Possible Value s: HI (Keypad) Setpoint Menu, GBAS
0-5 VDC Module
Setpoint Range: 0 to max unit airflow
Used With: Units with IGV or VFD only.
Possible Value s: HI (Keypad) Setpoint Menu, GBAS
Module
Used With: Units with IGV or VFD only.
Possible Values: High Limit = 1.6-4.7 IWC;
Deadband = 0.1-2.0 IWC
Possible Values: RTM Supply Air Temp Input, ICS
(Tracer Summit™)
Active Daytime WU Temp Sensor Input From
RTM ZONE TEMP INPUT is 82.0 F
1. Pressing the NEXT key will scroll forward through the screens.
Active Occupied Zone Temp Sensor Input From
HI (KEYPAD) SETPOINT MENU Is 90.0 F
1. Pressing the NEXT key will scroll forward through the screens.
Active Unocc Zone Temp Sensor Input From
RTM ZONE TEMP INPUT is 75.0 F
1. Pressing the NEXT key will scroll forward through the screens.
Active Morning WU Temp Sensor Input From
RTM ZONE TEMP INPUT is 82.0 F
1. Pressing the NEXT key will scroll forward through the screens.
Used With: Units with Electric, Hydronic or External
Heat installed.
Possible Values: RT M Zone Te m p I n put, N S B Z o n e
Sensor Setpoint Input, RTM Aux Temp Input, ECEM
return Air Temp Input, ICS (Tracer Summit™)
Sensor Range: -40 to 200 F
Used With: Units with Electric, Hydronic or External
Heat with DWU installed.
Possible Values: RT M Zone Te m p I n put, N S B Z o n e
Sensor Setpoint Input, RTM Aux Temp Input, ECEM
return Air Temp Input, ICS (Tracer Summit™)
Sensor Range: -40 to 200 F
Possible Values: RT M Zone Te m p I n put, N S B Z o n e
Sensor Setpoint Input, RTM Aux Temp Input, ECEM
return Air Temp Input, ICS (Tracer Summit™)
Sensor Range: -40 to 200 F
Used With: Units with Electric, Hydronic or External
Heat with MWU installed.
Possible Values: RT M Zone Te m p I n put, N S B Z o n e
Sensor Setpoint Input, RTM Aux Temp Input, ECEM
return Air Temp Input, ICS (Tracer Summit™)
Sensor Range: -40 to 200 F
Active Zone Reset Sensor Input From
RTM ZONE TEMP INPUT is 82.0 F
1. Pressing the NEXT key will scroll forward through the screens.
Possible Values: RT M Zone Te m p I n put, N S B Z o n e
Sensor Setpoint Input, RTM Aux Temp Input, ECEM
return Air Temp Input, ICS (Tracer Summit™)
Sensor Range: -40 to 200 F
18 PKG-SVP01D-EN
Page 19

Programming Status
Active OA Temperature Sensor Input From
RTM OUTSIDE AIR TEMP INPUT is 86.0 F
1. Pressing the NEXT key will scroll forward through the screens.
Active Outside Air Humidity Sensor Input From
OA HUMIDITY SENSOR INPUT Is 30%
1. Pressing the NEXT key will scroll forward through the screens.
Active Supply Air Press Sensor Input From
RTM SA PRESSURE INPUT is 2.1 IWC
1. Pressing the NEXT key will scroll forward through the screens.
Temp Sensor Input Being Monitored
RTM ZONE TEMP INPUT is 82.0 F
1. Pressing the NEXT key will scroll forward through the screens.
End of Submenu (NEXT) to Enter SETUP
1. Press the NEXT key until the following screen is displayed. (if applicable)
Temperature Input Status Submenu
Press ENTER to View Data in This Submenu
1. Pressing the NEXT key will scroll forward through the screens.
Possible Values: RTM Outside Air Temp Input, ICS
(Tracer Summit™)
Used With: Units with an airside economizer.
Possible Values: O/A Humidity Sensor Input, ICS
(Tracer Summit™)
Sensor Range: 0 - 100%
Used With: Units with IGV, VFD or with the SAP
sensor enabled
Possible Values: RTM SA PRessure Input, ICS
(Tracer Summit™)
Possible Values: RT M Zone Te m p I n put, N S B Z o n e
Sensor Setpoint Input, RTM Aux Temp Input, ECEM
return Air Temp Input, ICS (Tracer Summit™)
Sensor Range: -40 to 200 F
Temp Meausured By Sensor Connected To
RTM ZONE TEMP INPUT 82.0 F
1. Press the NEXT key until the following screen is displayed. (if applicable)
Temp Meausured By Sensor Connected To
RTM SUPPLY AIR TEMP INPUT 50.0 F
1. Press the NEXT key until the following screen is displayed. (if applicable)
Temp Measured By Sensor Connected To
NSB Panel Temp Sensor Input 79.5 F
1. Press the NEXT key until the following screen is displayed. (if applicable)
Temp Measured By Sensor Connected To
RTM AUX TEMP INPUT 62.0 F
1. Press the NEXT key until the following screen is displayed.
Temp Measured By Sensor Connected To
RTM OUTSIDE AIR TEMP INPUT 86.0 F
1. Press the NEXT key until the following screen is displayed.
Temp Measured By Sensor Connected To
HEAT MODULE AUX TEMP INPUT 82.0 F
1. Press the NEXT key until the following screen is displayed. (if applicable)
Used With: Units with NSB zone sensor installed.
Used With: Units with hydronic, electric, or
external heat only
Temp Measured By Sensor Connected To
ECEM RETURN AIR TEMP INPUT 78.0 F
1. Press the NEXT key until the following screen is displayed.
Used With: Units with a VCM and OA preheater
enabled.
PKG-SVP01D-EN 19
Page 20

Programming Status
Temp Measured By Sensor Connected To
WSM ENT WATER TEMP INPUT 60.1 F
1. Press the NEXT key until the following screen is displayed.
Temp Measured By Sensor Connected To
WSM MIXED AIR TEMP INPUT 51.7 F
1. Press the NEXT key until the following screen is displayed.(if applicable)
Temp Measured By Sensor Connected To
WSM ENT COND WATER TEMP INPUT 64.9 F
1. Press the NEXT key until the following screen is displayed. (if applicable)
Temp Measured By Sensor Connected To
VCM MODULE AUX TEMP INPUT 50.0 F
1. Press the NEXT key until the following screen is displayed.
Compressor Module Ckt 1
Evap Temp 75.0 Sat Cond Temp 81.0 F
1. Pressing the NEXT key will scroll forward through the screens.
Compressor Module Ckt 2
Evap Temp 72.0 Sat Cond Temp 87.0 F
1. Pressing the NEXT key will scroll forward through the screens.
Used With: On water-cooled units only.
Used With: On water-cooled units only.
Used With: On water-cooled units only.
Used With: Units with a VCM installed and O/A
preheater enabled.
Compressor Module Ckt 3
Evap Temp 72.0 Sat Cond Temp 87.0 F
1. Pressing the NEXT key will scroll forward through the screens.
Compressor Module Ckt 4
Evap Temp 72.0 Sat Cond Temp 87.0 F
End of Submenu (NEXT) to Enter SETUP
1. Press the NEXT key until the following screen is displayed.
Misc Input Status Submenu
Press ENTER to View Data in This Submenu
1. Press the NEXT key until the following screen is displayed. (if applicable)
RTM Supply Airflow Proving Inut: FLOW
1. Press the NEXT key until the following screen is displayed.
RTM Remote Min Position Pot Input 0%
1. Press the NEXT key until the following screen is displayed. (if applicable)
Used With: SCWF/SIWF 42-80 tons or SCRF/SIRF
50-60 tons only.
Used With: SCWF/SIWF 65-80 tons.
Possible Values: Flow, No Flow
Used With: Units when minimum position pot is
assigned to function.
Possible Values: 0-100%
RTM Supply Air Pressure Input 2.1 IWC
1. Press the NEXT key until the following screen is displayed.
Used With: Units with IGV or VFD, or units without
IGV or VFD and supply air pressure is present.
20 PKG-SVP01D-EN
Page 21

Programming Status
Active Outside Air Humidity 30%
1. Press the NEXT key until the following screen is displayed. (if applicable)
Active Outside Air Humidity
ECEM Return Air Humidity
1. Press the NEXT key until the following screen is displayed.
30%
62%
VCM Outside Air Flow Input 350.0 CCFM
1. Press the NEXT key until the following screen is displayed.
VCM CO2 Level Input 1512 PPM
1. Press the NEXT key until the following screen is displayed.
WSM Water Flow Switch Input Flow
1. Press the NEXT key until the following screen is displayed. (if applicable)
End of Submenu (NEXT) to Enter SETUP
1. Press the NEXT key until the following screen is displayed.
Used With: Units with an airside economizer only
Used With: Units with an airside economizer and
comparative enthalpy only.
Possible Values: 0-100%
Used With: Units with VCM.
Possible Values: 0 to max unit airflow
Used With: Units with VCM installed and CO2 reset
enabled.
Possible Values: 0-2000 PPM
Used With: Water-cooled units with a water flow
switch installed.
Possible Values: Flow, No Flow
GBAS 0-5VDC Module Staus Submenu
Press ENTER to View Data in This Submenu
1. Press the NEXT key until the following screen is displayed.
GBAS (0-5VDC) Module Input 1 0.00 VDC
Assignment: Not Assigned
1. Press the NEXT key to display GBAS 0-5 VDC inputs 2, 3, and 4.
2. Press the NEXT key until the following screen is displayed.
GBAS (0-5VDC) Demand Limit Input Status
OPEN
1. Press the NEXT key until the following screen is displayed. (if applicable)
GBAS (0-5VDC) Module Relay Output Status
Output 1 OFF
End of Submenu (NEXT) to Enter SETUP
1. Press the NEXT key to leave the submenu and show following screen.
Used With: Units with GBAS module
Used With: Units with GBAS module.
Possible Values: The inputs 1,2,3 and 4 may be
assigned to: Occ Zone Cooling Setpoint, Occ Zone
Heating Setpoint , Unocc Zone Cooling Setpoint,
Unocc Zone Heating Setpoint, Space Static Pressure
Setpoint, Supply Air Static Pressure Setpoint, Min O/
A Flow Setpoint, Not Assigned
Used With: Units with GBAS module.
Possible Values: Open, Closed
Used With: Units with GBAS module.
Possible Values: Open, Closed
PKG-SVP01D-EN 21
Page 22

Programming SETUP
After the unit is installed, the control module must be
programmed with certain SETUP information in order to
operate and function properly. The data necessary for unit
operation will vary depending on certain factors such as
unit size, type, and installed options.
This section of the manual provides step by step
instructions for programming this information. Also
provided are instructions for checking unit operating
status, accessing and clearing diagnostics, and
performing service tests.
Some of the displays shown in this manual may not
appear on the Human Interface (HI) LCD screen during
programming. Only the applicable screens for the specific
unit options and operating parameters will be displayed.
Ignore the steps that do not apply to your unit and
application, and move on to the next applicable set of
instructions in the manual. Continue this process until all
applicable screens are programmed with the required
information.
SETUP Menu
The SETUP menu is used to input initial operating
information such as control parameters, SETPOINT source
selection, sensor source selections, ventilation override
definitions, functions enable/disable, status, text display
(language), temperature display (C or F), and system
tuning parameters. When a SETUP screen is displayed for
30 minutes without a key being pressed, the LCD screen
will revert to the appropriate power-up display. If this
happens, press the SETUP key again to return to the
SETUP menu.
Note: Many of the screens displayed in this section are
applicable only for the options that are installed in
the unit and may not be visible on your unit.
Press the SETUP key to begin viewing or modifying the
SETUP screens.
If a screen is not visible on the Unit Human Interface
Module, refer to the “Used With” information listed to the
right of each screen in this book.
Follow this procedure when viewing a screen that requires
modification:
1. Press the + or - key until the proper value displays.
2. Press the ENTER key to confirm your choice.
3. Press the NEXT key to advance the cursor.
4. Repeat steps 1 and 2 if there are addtional values on the
same screen that require changing.
SETUP Menu Screens
Press the SETUP key to display the following screens.
Display Text in: ENGLISH LANGUAGE
Display Units Using: ENGLISH NOTATION
1. Press the NEXT key until the following screen is displayed.
Unit Control:
Unit Address:
1. Pressing the NEXT key will bypass this section.
General Unit Functions Setup Submenu
Press ENTER to Review or Adjust
1. Pressing the NEXT key will bypass this section.
Supply Fan VFD Mode: BYPASS
1. Pressing the NEXT key will bypass this section.
If Remote Panel Mode Input Not Present:
System Mode: AUTO
1. Press the NEXT key until the following screen is displayed (if applicable).
Daytime Warmup Function: DISABLED
1. Press the NEXT key until the following screen is displayed.
LOCAL
31
Used With: All Units
Factory Presets: Text and Units: ENGLISH
Language, ENGLISH Notation
Possible Values: Te x t : E N G LI S H , F RE N C H ,
SPANISH; Units: ENGLISH NOTATION, SI
NOTATION
Used With: Units with TCI, LCI or BCI module
Factory Presets: Control = Local, Address = 1
(only shown if TCI installed)
Possible Values: Unit Control = Local, BAS/
NETWORK, Unit address= 0-31 (only shown if
TCI installed)
Used With: Units with VFD and bypass
Factory Presets: Mode = Normal, Address = 1
Possible Values: Mode = Normal, Bypass
Possible Values: System Mode = OFF/AUTO
Factory Preset: Disabled
Possible Values: Daytime Warm up Function:
ENABLED, DISABLED
22 PKG-SVP01D-EN
Page 23

Programming SETUP
Morning Warmup Function: ENABLED
Morning Warmup Type: FULL CAPACITY
1. Press the NEXT key until the following screen is displayed (if applicable).
Supply Air Tempering Function: DISABLED
Warm Up Outside Air Used For Ventilation
1. Press the NEXT key until the following screen is displayed.
Unocc Mech Cooling Function: ENABLED
OR
Unocc Mech Cooling Function: ENABLED
Unocc Heating Function: ENABLED
1. Press the NEXT key until the following screen is displayed (if applicable).
OA Preheater Output Control: ENABLED
Activate If Preheat Temp Below SETPOINT
1. Press the NEXT key until the following screen is displayed
Used With: Units when Electric, or Hydronic
Heat is installed.
Factory Presets: Function = Enabled; MWU
Type = Full Capacity
Possible Values: Function = Enabled,
Disabled; MWU Type = Full Capacity, Cycling
Capcity
Used With: All Units when Hydronic Heat is
installed
Factory Preset: Function = Disabled
Possible Values: Function = Enabled, Disabled
Used With: Cooling-only units
Factory Preset: Cooling and Heating Function
= Enabled
Possible Values: Cooling and Heating Function
= Enabled, Disabled
Used With: All Units with electric, hydronic, or
external heat is installed
Factory Presets: Cooling & Heating =Enabled
Possible Values: Cooling & Heating = Enabled,
Disabled
Used With: Units with VCM installed
Factory Preset: Control = Disabled
Possible Values: Control = Enabled, Disabled
Demand Limit Definition:
Cooling: 100%
1. Press the NEXT key until the following screen is displayed.
Demand Limit Definition:
Cooling: 100% Heating: 100%
1. Press the NEXT key until the following screen is displayed.
Compressor Lead/Lag Function: DISABLED
Vary Staging Order To Distribute Runtime
1. Press the NEXT key until the following screen is displayed.
Reduce Multi-Unit Startup Power Demand
After Power-Up, Delay Unit Start: 0 Sec
1. Press the NEXT key until the following screen is displayed (if applicable).
Coil Frost Cutout Temperature:
Compressors If Evap Temp Is Below:
1. Press the NEXT key until the following screen is displayed.
Shut off
30 F
End of Submenu (NEXT) to Enter SETUP
1. Press the NEXT key to leave the submenu and show following screen.
VAV Control Functions Submenu
Press ENTER to Review or Adjust
1. Press the NEXT key until the following screen is displayed.
Factory Presets: None
Possible Values: Cooling = None, 50 or 100%
Used With: Units Electric or Hydronic heat.
Factory Presets: None
Possible Values: Cooling/Heating: None, 50 or
100%
Factory Preset: Function = Disabled
Possible Values: Function = Enabled, Dis abled
Factory Preset: Start = 0 Seconds
Possible Values: Start = 0-255 Seconds
Factory Preset: 30 F
Possible Values: 25 F to 35 F
PKG-SVP01D-EN 23
Page 24

Programming SETUP
Supply Air Temp Reset Type:
Cooling: ZONE
1. Press the NEXT key until the following screen is displayed.
Supply Air Temp Reset Type:
Cooling: ZONE
1. Press the NEXT key until the following screen is displayed.
Heating: ZONE
Supply Air Temp Zone Reset For Cooling:
Start Temp: 72 F End Temp: 69 F
1. Press the NEXT key until the following screen is displayed.
Supply Air Temp Outside Air Reset For Cooling:
Start Temp: 90 F End Temp: 70 F
1. Press the NEXT key until the following screen is displayed.
Supply Air Temp Zone Reset For Cooling:
Maximum Amount of Reset Applied: 5 F
1. Press the NEXT key until the following screen is displayed.
Supply Air Temp Outside Air Reset For Cooling:
Maximum Amount of Reset Applied: 5 F
1. Press the NEXT key until the following screen is displayed.
Supply Air Temp Outside Air Reset For Heating:
Start Temp: 10 F End Temp: 60 F
1. Press the NEXT key until the following screen is displayed.
Supply Air Temp Zone Reset For Heating:
Start Temp: 65 F End Temp: 68 F
1. Press the NEXT key until the following screen is displayed.
Supply Air Temp OA Reset For Heating:
Maximum Amount of Reset Applied: 10 F
1. Press the NEXT key until the following screen is displayed.
Used With: Units without heat
Factory Presets: None
Possible Values: Cooling = None, Zone, OA
Used With: Units with hydronic heat
Factory Presets : None
Possible Values: Cool/Heat = None, Zone, OA
Used With: Units when Zone Cooling Reset is
selected.
Possible Values: Cooling/Heating = Zone, OA;
Start Temp Zone = 209 OS = 70; End Temp Zone
= 210 OA = 71
Possible Values: Cooling/Heating = Zone, OA;
Start Temp Zone = 209 OS = 70; End Temp Zone
= 210 OA = 71
Used With: All Units when Outside Air cooling
reset is selected.
Possible Values: SAT = Zone, OA; Reset
(Zone) = 72; Reset (OA) = 72
Used With: All Units when Outside Air cooling
reset is selected.
Possible Values: SAT = Zone, OA; Reset
(Zone) = 72; Reset (OA) = 72
Used With: All Units when Outside Air heating
reset is selected.
Factory Presets: Start = 10 F; End = 60 F
Possible Values: Start OA Temp = 73 F; End
OA Temp = 74 F
Used With: Units when Zone Air heating reset
is selected.
Factory Presets: Start = 65 F, End = 68 F
Possible Values: Start OA Temp = 211; End
OA Temp = 212
Used With: All Units when Zone Heating is
selected.
Possible Values: SAT temp = Zone, OA; Zone
Reset = 75; OA Reset = 75
Supply Air Temp Zone Reset For Heating:
Maximum Amount of Reset Applied: 10 F
1. Press the NEXT key until the following screen is displayed.
VAV Box Max Stroke Time: 0 Min
1. Press the NEXT key until the following screen is displayed.
Max Occupied IGV/VFD Command: 100%
1. Press the NEXT key until the following screen is displayed.
Used With: All Units when outside heating is
selected.
Possible Values: SAT temp = Zone, OA; Zone
Reset = 75; OA Reset = 75
Factory Presets: 6 Min
Possible Values: 0 to 10
Used With: Units with IGV/VFD installed
Factory Presets: 100%
Possible Values: 0 to 100%
24 PKG-SVP01D-EN
Page 25

End of Submenu (NEXT) to Enter SETUP
1. Press the NEXT key to leave the submenu and show following screen.
Programming SETUP
Economizer Control Functions Submenu
Press ENTER to Review or Adjust
1. Pressing the NEXT key will bypass this section.
Economizer Priority
Choose Which Economizer Stages Up First
1. Press the + or - key until the proper value is displayed.
Unocc Water Economizer Function: ENABLED
1. Press the NEXT key until the following screen is displayed.
Unocc Air Economizer Function: ENABLED
1. Press the NEXT key until the following screen is displayed.
Disable WS Econ If Difference Between MA
Temp and Ent Water Temp Less Than 4.0 F
1. Press the NEXT key until the following screen is displayed.
End of Submenu (NEXT) to Enter SETUP
1. Press the NEXT key to leave the submenu and show following screen.
2. Press PREVIOUS to page back through the submenu.
Used with: Units with an airside or waterside
conomizer.
Possible Values: Waterside Econ, Airside Econ
Used with: Units with an airside or waterside
conomizer
Possible Values: Waterside Econ, Airside Econ
Used With: Units with a waterside economizer
installed
Factory Presets: Enabled
Possible Values: Enabled, Disabled
Used With: All Units when an airside
economizer is installed
Factory Presets: Enabled
Possible Values: Enabled, Disabled
Used With: Units with a waterside economizer
installed
Water Flow Control Setup Submenu
Used With: All units water-cooled and all units
with waterside economizer installed
Press ENTER to Review or Adjust
1. Press the NEXT key until the following screen is displayed.
Periodic Water Purge Function: Enabled
Interval: 1Hr Duration: 1 Min
1. Press the NEXT key until the following screen is displayed.
Water-Flow Init Time Delay: 1 Min
Time to Establish Water Flow Before Diag
1. Press the NEXT key until the following screen is displayed.
Temp Stabilization Time Delay: 1 Min
Water Flow Time for Valid Temp Readings
1. Press the NEXT key until the following screen is displayed.
Head Pressure Control Inactive Min: 10%
Head Pressure Control Active Min: 30%
1. Pressing the NEXT key will bypass this section.
Used With: All units water-cooled and all units
with waterside economizer installed
Possible Values: Enabled, Disabled; Interval
= 1-999 Hrs; Duration = 1-9 Min
Used With: All units water-cooled and all units
with waterside economizer installed
Possible Values: 0-20 Min
Used With: All units water-cooled and all units
with waterside economizer installed
Possible Values: 0-20 Min
Used With: All units water-cooled units
Possible Values: 0-100%
PKG-SVP01D-EN 25
Page 26

Programming SETUP
Water Economizer Min Position: 10%
1. Press the NEXT key until the following screen is displayed.
Select Water Flow Control Required For
Water Pump System: Variable/Minimize
1. Press the NEXT key until the following screen is displayed.
End of Submenu (NEXT) to Enter SETUP
1. Press the NEXT key until the following screen is displayed
Head Pressure Ctrl Setup Submenu
Press Enter to Review or Adjust
1. Press the NEXT key until the following screen is displayed
Cond Temp Control Point: 90 F
1. Press the NEXT key until the following screen is displayed
Preset Value to Min if Cond Water Below
Head Press Value Preset Temp Limit: 90 F
1. Press the NEXT key until the following screen is displayed
Used With: Units with a waterside economizer
Possible Values: 0-100%
Used With: Water-cooled units with a
waterside economizer installed.
Possible Values: Constant/Maximize;
Variable/Minimize
Used With: All water-cooled units.
Possible Values: 80 - 100 F
Used With: All water-cooled units.
Possible Values: 80 - 100 F
Cond Temp Control Band
Lower Limit: 80 F Upper Limit: 120 F
1. Press the NEXT key until the following screen is displayed.
Cond Temp Control Band
Temporary Low Limit Suppression: 10 F
1. Press the NEXT key until the following screen is displayed.
Cond Temp
Efficiency Check Point: 105 F
1. Press the NEXT key until the following screen is displayed.
Cond Temp
Low Ambient Control Point: 90 F
1. Press the NEXT key until the following screen is displayed.
End of Submenu (NEXT) to Enter SETUP
1. Press the NEXT key to leave the submenu and show following screen.
Sensor Source Selections Submenu
Used With: All air-cooled units
Factory Presets: Upper: 120 F, Lower: 80 F
Possible Values: Lower: 70 F to 90 F, Upper:
110 F to 130 F
Used With: All air-cooled units
Factory Presets: 10 F
Possible Values: 0 to 20 F
Used With: All air-cooled units
Factory Presets: 105 F
Possible Values: 95 to 115 F
Used With: All air-cooled units
Factory Presets: 90 F
Possible Values: 80 F to 100 F
Sensor Source Selections Submenu
Press ENTER to Review or Adjust
1. Pressing the NEXT key will bypass this section.
Used with: All Units.
26 PKG-SVP01D-EN
Page 27

Programming SETUP
For Daytime Warmup Temp Crtl, Use sensor
Connected to: RTM ZONE TEMP INPUT
1. Press the NEXT key until the following screen is displayed.
For Occupied Zone Temp Ctrl, Use Sensor
Connected To: RTM ZONE TEMP INPUT
1. Press the NEXT key until the following screen is displayed.
For Unoccupied Zone Temp Ctrl, Use Sensor
Connected To: RTM ZONE TEMP INPUT
1. Press the NEXT key until the following screen is displayed.
For Morning Warmup Temp Control, Use Sensor
Connected To: RTM ZONE TEMP INPUT
1. Press the NEXT key until the following screen is displayed.
For Zone Reset Function, Use Sensor
Connected To: RTM ZONE TEMP INPUT
1. Press the NEXT key until the following screen is displayed.
Used With: Units with electric, Hydronic or
External Heat installed.
Possible Values: RTM ZONE TEMP INPUT, NSB
PANEL TEMP SENSOR INPUT, RTM AUX TEMP
INPUT, HEAT MODULE AUX TEMP INPUT, ECEM
RETURN AIR TEMP INPUT
Used With: All Units
Factory Preset: RTM ZONE TEMP INPUT
Possible Values: RTM ZONE TEMP INPUT, NSB
PANEL TEMP SENSOR INPUT, RTM AUX TEMP
INPUT, HEAT MODULE AUX TEMP INPUT, ECEM
RETURN AIR TEMP INPUT
Used With: All Units
Factory Preset: RTM ZONE TEMP INPUT
Possible Values: RTM ZONE TEMP INPUT, NSB
PANEL TEMP SENSOR INPUT, RTM AUX TEMP
INPUT, HEAT MODULE AUX TEMP INPUT, ECEM
RETURN AIR TEMP INPUT
Used With: All Units when Electric, Hydronic or
External Heat is installed.
Factory Preset: RTM ZONE TEMP INPUT
Possible Values: RTM ZONE TEMP INPUT, NSB
PANEL TEMP SENSOR INPUT, RTM AUX TEMP
INPUT, HEAT MODULE AUX TEMP INPUT, ECEM
RETURN AIR TEMP INPUT
Used With: All Units
Possible Values: RTM Zo ne Temp, NSB Pan el
Temp Sensor Input, RTM Aux Temp Input, Heat
Module Aux Temp Input, ECEM Return Air Temp
Input
For Outside Air Preheat Ctrl, Use Sensor
Connected To: VCM MODULE AUX TEMP INPUT
1. Press the NEXT key until the following screen is displayed.
Monitor Specific Temp Input, Use Sensor
Connected To: RTM ZONE TEMP INPUT
1. Press the NEXT key until the following screen is displayed.
End of Submenu (NEXT) to Enter SETUP
1. Press the NEXT key to leave the submenu and show following screen.
Outside Air Ventilation Setup
Outside Air Ventilation Setup Submenu
Press ENTER to Review or Adjust
1. Pressing the NEXT key will bypass this section.
Used With: Units only when Traq™ Dampers
are installed
Possible Values: VCM Module Aux Temp Input;
WSM Mixed Air Temp Input
Used With: All Units
Factory Preset: RTM ZONE TEMP INPUT
Possible Values: RTM ZONE TEMP INPUT, NSB
PANEL TEMP SENSOR INPUT, RTM AUX TEMP
INPUT, HEAT MODULE AUX TEMP INPUT, ECEM
RETURN AIR TEMP INPUT, NO SENSOR
SELECTED
Used with: All Units when a VCM or airside
economizer is installed
PKG-SVP01D-EN 27
Page 28

Programming SETUP
OA flow Compensation Function: DISABLED
Use fixed OA Damper Minimum Position
1. Press the NEXT key until the following screen is displayed.
OA Flow CO2 Reset Function: ENABLED
1. Press the NEXT key until the following screen is displayed.
OA Flow CO2 Reset Function: ENABLED
CO2 Start: 800 PPM CO2 Max: 1000 PPM
1. Press the NEXT key until the following screen is displayed.
TRAQ Damper Quantity: 1
TRAQ Damper Size 28 Inches
1. Press the NEXT key until the following screen is displayed.
OA Flow Calibration Data
Gain 1.0 Offset 0.0 CCFM
1. Press the NEXT key until the following screen is displayed.
Used with: All Units when an airside
economizer and IGV or VFD is installed.
Possible Values: ENABLED, DISABLED
Enabled 2nd line= "OA Damper Min Pos
Depends on IGV/VFD Pos.; Disabled 2nd line=
"Use Fixed OA Damper Minimum Position"
Used with: Units with a VCM
Possible Values: ENABLED, DISABLED
Used with: Units with a VCM installed and CO
reset enabled.
Possible Values: ENABLED, DISABLED; CO2
Start = 0-1900 PPM; CO2 Max = 100-2000 PPM
Used with: All Units when an airside
economizer with a Traq™ damper installed.
Possible Values: Quantity = 1-12; Size = 0,
13, 16, 20, 24, or 28
Used with: Units with a VCM installed.
Factory Preset: Gain 1.0, Offset 0 CCFM
Possible Values: Gain= 0.5 to 1.5 (Default
1.0); Offset= -250 to 250 CCFM (Default 0 CFM)
2
End of Submenu (NEXT) to Enter SETUP
1. Press the NEXT key to leave the submenu and show following screen.
Ventilation Override Definitions
Ventilation Override Definitions
Press ENTER to Review or Adjust
1. Press the NEXT key until the following screen is displayed.
Ventilation Override Definition Mode A
Supply Fan ON
1. Press the NEXT key until the following screen is displayed.
Ventilation Override Definition Mode A
Outside Air Dampers OPEN
1. Press the NEXT key until the following screen is displayed.
Ventilation Override Definition Mode A
Heat OFF
1. Press the NEXT key until the following screen is displayed.
Ventilation Override Definition Mode A
VAV Box Relay DEENERGIZED
1. Press the NEXT key until the following screen is displayed.
Used with: All Units when VOM is installed
Used With: All Units when VOM and IGV or VFD
is installed
Factory Presets: Refer to Definitions
Possible Values: On, OFF
Used With: All Units when VOM and an airside
or waterside economizer is installed
Factory Presets: Refer to Definitions
Possible Values: OPEN/CLOSED
Used With: All Units when VOM and electric or
hydronic heat is installed
Factory Presets: Refer to Definitions
Possible Values: Off/In Control
Used With: Units with a VOM
Factory Presets: Refer to Definitions
Possible Values: ENERGIZED/DEENERGIZED
28 PKG-SVP01D-EN
Page 29

Programming SETUP
Ventilation Override Definition Mode A
VCM Preheater State IN CONTROL
1. Press the NEXT key until the following screen is displayed.
Ventilation Override Definition Mode A
VO Relay ENERGIZED
1. Press the NEXT key until the following screen is displayed.
Ventilation Override Definition Mode A
Enter Password to Lock Definition:
1. Press the NEXT key until the following screen is displayed.
Used With: All Units when VOM is installed and
OA preheater function is enabled
Factory Presets: Refer to Definitions
Possible Values: OFF, IN CONTROL
Used With: All Units when VOM is installed
Factory Presets: Refer to Definitions
Possible Values: ENERGIZED/DEENERGIZED
Used With: Units a VOM
Factory Presets: Not Locked
Possible Values: + (Plus), -(Minus)
Note: After locking a MODE (by entering the password), the display for that MODE becomes "Reporting" only and the
definition can not be changed unless the Ventilation Override Module is replaced. If the password was entered,
pressing the NEXT key will scroll through the previous screens to confirm the selected choices for each mode as
follows:
Ventilation Override Mode A Is Locked
Supply Fan
Ventilation Override Mode B
Supply Fan
1. Follow the preceding steps used to program MODE "A" to program MODE B", "C", "D", and "E"
if modifications are needed. After all of the Ventilation Override Definitions have been
programmed, pressing the NEXT key will advance to the following screen.
Used With: All Units when VOM and VO mode
is locked
Factory Presets: Refer to the Definitions
Possible Values: N/A
Used With: All Units
Factory Presets: Refer to the Definitions
Possible Values: ON, OFF
End of Submenu (NEXT) to Enter SETUP
1. Press the NEXT key until the following screen is displayed.
GBAS Module I/O Assignments
GBAS 0 - 5 VDC Module I/O Assignments
Press ENTER to Review or Adjust
1. Press the NEXT key until the following screen is displayed.
GBAS (0 - 5 VDC) Analog Input 1 Assignment
NOT ASSIGNED
1. Press the + or - key until the proper selection is displayed for the number 1 assignment.
2. Press the ENTER key to confirm this choice. Only one input definition can be assigned to each
input and they can not be duplicated.
3. Press the NEXT key to advance to the number 2 input assignment screen and repeat steps 1
& 2. Follow these steps for input assignments 3 and 4.
4. Press the NEXT key until the following screen is displayed.
PKG-SVP01D-EN 29
Used with: All Units when GBAS 0-5 VDC is
installed.
Used with: All Units when GBAS is installed.
Factory Presets: Not Assigned
Possible Values: Not Assigned, Unoccupied
Zone Cooling SETPOINT
Occupied Zone Heating SETPOINT
Unoccupied Zone Heating SETPOINT
Space Static Pressure SETPOINT, SA Static
Pressure SETPOINT, Min OA Flow SETPOINT,
Morning Warmup SETPOINT, Econ Dry Bulb
Enable SETPOINT, Minimum Position SETPOINT,
Occupied Dehumid SETPOINT, Unoccupied
Dehumid SETPOINT, Supply Air Reheat
SETPOINT, Occupied Humidification SETPOINT,
Unoccupied Humidification SETPOINT
Page 30

Programming SETUP
GBAS (0 - 5 VDC) Output 1 Alarm Assignments
Press ENTER to Review or Adjust
1. Pressing the NEXT key will bypass this section.
2. Press the + or - k ey until the proper selection is displayed for the number 1 assignment. + (Plus)
key will assign ALL Diagnostics and - (Minus) key will allow diagnostic selection.
3. Press the ENTER key to confirm this choice. If (Yes) was assigned to the Output assignment,
the output 2 assignment screen will be displayed. Repeat step 1 for each of the remaining
4 Outputs. If (NO) was assigned, only one output assignment can be assigned to each output
assignment and they can not be duplicated. Once the output diagnostics have been defined,
press the NEXT key to advance to the number 2 output assignment screen and repeat steps
1 & 2.
Used With: All Units when GBAS is installed
Factory Presets:
Output 1 = Dirty Filters
Output 2 = Compressor Trip
Compressor Trip - Ckt 1
Compressor Trip - Ckt 2
Low Pressure Control Open
Low Pressure Control Open - Ckt 1
Low Pressure Control Open - Ckt 2
Comp Contactor Fail
Comp Contactor Fail - Ckt 1
Comp Contactor Fail - Ckt 2
Output 3 = Heat Fail
Output 4 = Supply Fan Failure
Output 5 = Any Active Diagnostic
Possible Values: Refer to the list of active
diagnostics that can be assigned to each of the
five (5) output definitions in the "Diagnostics
Menu" section.
Note: Assigning "Yes" to a GBAS output definition means that if the assigned diagnostic is present, the output assigned
to it will be energized.
End of Submenu (NEXT) to Enter SETUP
1. Press the NEXT key to leave the submenu and show following screen.
RTM Alarm Output Diagnostic Assignment Screens
RTM Alarm Output Diagnostic Assignments
Press ENTER to Review or Adjust
1. Pressing the NEXT key will bypass this section.
Assign Diagnostic to Alarm Output?
Any Active Diagnostic (No)
1. Press the ENTER key then the NEXT key to display the possible diagnostics that may be
assigned to the RTM alarm output definition.
2. Press the + (Plus) key to assign "Yes" to the output definition or - (Minus) key to assign "No"
to the output definition.
3. Press the ENTER key to confirm each selection.
Used with: All Units
Used with: All Units
Factory Presets: Any Active Diagnostic
Possible Values: Refer to the list of active
diagnostics that can be assigned to each GBAS
output definition in the “Diagnostic Menu”
section.
Note: Assigning “yes” to an alarm output definition means that if the assigned diagnostic is present, the RTM alarm
output will energize.
End of Submenu (NEXT) to Enter SETUP
1. Press the NEXT key to leave the submenu and show following screen.
Temperature Input Calibration
The following five (5) Offset screens are used only if
calibration of a sensor designated to perform the listed
function is necessary.
Example: If the temperature sensor for Morning Warm Up
(MWU) is checked and a difference between the actual
measured room temperature and the corresponding
measured sensor value is found, by programming the
amount of error into the Temperature Input Offset for
Morning Warm Up (MWU) Heat — The sensor can be
calibrated.
To change offset values on a particular screen:
1. Press the plus or minus key until the correct value
appears in the screen.
2. Press the ENTER key to confirm your choice. If you’ve
made an error, press the CANCEL key to delete your
entry.
To navigate to another screen:
1. Press the NEXT key to advance to the next screen, or
30 PKG-SVP01D-EN
Page 31

Programming SETUP
a. if no further changes are required and you want to
exit back to view the unit operationg status, press
the STATUS key once, or
b. if you want to remain in the temperature input
calibrartion submenu, press the SETUP key once
and it will return you to the beinning of that
particular submenu, or
Calibration and Offset Submenu
Press ENTER to Review or Adjust
1. Pressing the NEXT key will bypass this section or press ENTER key to vbiew the following
screens.
Temperature Calibration Offset For
RTM Zone Temperature Input 0.0 F
1. Press the NEXT key until the following screen is displayed.
Temperature Calibration Offset For
RTM Aux Temperature Input 0.0 F
1. Press the NEXT key until the following screen is displayed.
Temperature Calibration Offset For
RTM Outside Air Temperature Input 0.0 F
1. Press the NEXT key until the following screen is displayed.
c. if you want to exit to another submenu in the SETUP
menu, press the SETUP key twice. Then press the
NEXT key to scroll through the SETUP sebmenu
cho98ices, or
d. if you want to exit to another menu, such as
CONFIGURATION, press that key once, then press
the NEXT key to scoll through tose screens.
Used with: All Units
Used With: All Units
Factory Presets: 0.0 F
Possible Values: Plus or Minus 5.0 F
Used With: All Units
Factory Presets: 0.0 F
Possible Values: Plus or Minus 5.0 F
Used With: All Units
Factory Presets: 0.0 F
Possible Values: Plus or Minus 5.0 F
Temperature Calibration Offset For
Heat Module Aux Temp Input 0.0 F
1. Press the NEXT key until the following screen is displayed.
Temperature Calibration Offset For
ECEM Return Air Temperature Input 0.0 F
1. Press the NEXT key until the following screen is displayed.
Temperature Calibration Offset For
WSM Entering Water Temp Input 0.0 F
1. Press the NEXT key until the following screen is displayed.
Temperature Calibration Offset For
WSM Mixed Air Temp Input 0.0 F
1. Press the NEXT key until the following screen is displayed.
Temperature Calibration Offset For
WSM Ent Cond Water Temp Input 0.0 F
1. Press the NEXT key until the following screen is displayed.
Temperature Calibration Offset For
Ckt 1 Sat Cond Temp Input 0.0 F
1. Press the NEXT key until the following screen is displayed.
Used With: All Units when Electric, or Hydronic
Heat is installed
Factory Presets: 0.0 F
Possible Values: Plus or Minus 5.0 F
Used With: All Units when comparative
enthalpy is installed
Factory Presets: 0.0 F
Possible Values: Plus or Minus 5.0 F
Used With: Water-cooled units and /or units
with waterside economizer is installed
Factory Presets: 0.0 F
Possible Values: 0.0-5.0 F
Used With: Water-cooled units and /or units
with waterside economizer is installed
Factory Presets: 0.0 F
Possible Values: 0.0-5.0 F
Used With: Water-cooled units and /or units
with waterside economizer is installed
Factory Presets: 0.0 F
Possible Values: 0.0-5.0 F
Used With: Water-cooled units and /or units
with waterside economizer is installed
Factory Presets: 0.0 F
Possible Values: 0.0-5.0 F
PKG-SVP01D-EN 31
Page 32
Programming SETUP
Temperature Calibration Offset For
Ckt 2 Sat Cond Temp Input 0.0 F
1. Press the NEXT key until the following screen is displayed.
Temperature Calibration Offset For
Ckt 3 Sat Cond Temp Input 0.0 F
1. Press the NEXT key until the following screen is displayed.
Temperature Calibration Offset For
Ckt 4 Sat Cond Temp Input 0.0 F
1. Press the NEXT key until the following screen is displayed.
End of Submenu (NEXT) to Enter SETUP
1. Press the NEXT key to leave the submenu and show following screen.
Device Charatcteristic Setup Definitions
To change device characteristics values on a particular
screen:
1. Press the plus or minus key until the correct value
appears in the screen.
2. Press the ENTER key to confirm your choice. If you’ve
made an error, press the CANCEL key to delete your
entry.
To navigate to another screen:
1. Press the NEXT key to advance to the next screen or
Device Characteristic Setup Definitions
Press ENTER to review or Adjust
1. Pressing the NEXT key will bypass this section.
Used With: Water-cooled units and /or units
with waterside economizer is installed
Factory Presets: 0.0 F
Possible Values: 0.0-5.0 F
Used With: Water-cooled units and /or units
with waterside economizer is installed
Factory Presets: 0.0 F
Possible Values: 0.0-5.0 F
Used With: Water-cooled units and /or units
with waterside economizer is installed
Factory Presets: 0.0 F
Possible Values: 0.0-5.0 F
a. if no further changes are required and you want to
exit back to view the unit operating status, press the
STATUS key once, or
b. if you want to remain in the Device Characteristics
Setup Dfinitions submenu, press the SETUP key
once and it will return you to the bginning of that
particular submenu, or
c. if you want to exit to another submenu in the SETUP
menu, press the SETUP key twice. Then press the
NEXT key to scroll through the SETUP choices, or
d. if you want to exit to another menu, such as
CONFIGUREATION, press that key once, then press
the NEXT key to scroll through those screens.
Used with: All Units
Actuator Setup OA Damper
Max Stroke Time 30 Sec
1. Press the NEXT key until the following screen is displayed.
Actuator Setup OA Damper
Min Voltage 2.0 VDC
1. Press the NEXT key until the following screen is displayed.
Actuator Setup OA Damper
Max Voltage 10.0 VDC
1. Press the NEXT key until the following screen is displayed.
Actuator Setup OA Damper
Direct/Reverse Act DIRECT ACTING
1. Press the NEXT key until the following screen is displayed.
Used With: All Units when an airside
economizer is installed.
Factory Presets: 150 Seconds
Possible Values: 1 - 255 Seconds
Used With: All Units when an airside
economizer is installed.
Factory Presets: 2.0 VDC
Possible Values: 0.0 to 9.9 Volts DC
Used With: All Units when an airside
economizer is installed.
Factory Presets: 10.0 VDC
Possible Values: 0.1 to 10.0 Volts DC
Used With: All Units when an airside
economizer is installed.
Possible Values: DIRECT ACTING, REVERSE
ACTING
32 PKG-SVP01D-EN
Page 33

Programming SETUP
Actuator Setup Water Economizer
Max Stroke Time 150 Sec
1. Press the NEXT key until the following screen is displayed.
Actuator Setup Water Economizer
Min Voltage 2.0 VDC
1. Press the NEXT key until the following screen is displayed.
Actuator Setup Water Economizer
Max Voltage 10.0 VDC
1. Press the NEXT key until the following screen is displayed.
Actuator Setup Water Economizer
Direct/Reverse Acting Direct Acting
1. Press the NEXT key until the following screen is displayed.
Actuator Setup Water Econ Bypass
Max Stroke Time 150 Sec
1. Press the NEXT key until the following screen is displayed.
Actuator Setup Water Econ Bypass
Min Voltage 2.0 VDC
1. Press the NEXT key until the following screen is displayed.
Used With: All Units when a waterside
economizer is installed.
Factory Presets: 150 Sec
Possible Values: 1-255 Sec
Used With: All Units when a waterside
economizer is installed.
Factory Presets: 2.0 VDC
Possible Values: 0-10 VDC
Used With: All Units when a waterside
economizer is installed.
Factory Presets: 10.0 VDC
Possible Values: 0-10 VDC
Used With: All Units when a waterside
economizer is installed.
Factory Presets: Direct Acting
Possible Values: Direct Acting, Reverse Acting
Used With: All Units when a waterside
economizer is installed.
Factory Presets: 150 Sec
Possible Values: 1-255 Sec
Used With: All Units when a waterside
economizer is installed.
Factory Presets: 2.0 VDC
Possible Values: 0-10 VDC
Actuator Setup Water Econ Bypass
Max Voltage 10.0 VDC
1. Press the NEXT key until the following screen is displayed.
Actuator Setup Water Econ Bypass
Direct/Reverse Acting Direct Acting
1. Press the NEXT key until the following screen is displayed.
Actuator Setup IGV/VFD Cmd
Max Stroke Time 150 Sec
1. Press the NEXT key until the following screen is displayed.
Actuator Setup IGV/VFD Cmd
Min Voltage 2.0 VDC
Note: Min. voltage should be set to 2.0 on units with IGV.
1. Press the NEXT key until the following screen is displayed.
Actuator Setup IGV/VFD Cmd
Max Voltage 10.0 VDC
1. Press the NEXT key until the following screen is displayed.
Actuator Setup IGV/VFD Cmd
Direct/Reverse Act DIRECT ACTING
1. Press the NEXT key until the following screen is displayed.
Used With: All Units when a waterside
economizer is installed.
Factory Presets: 10.0 VDC
Possible Values: 0-10 VDC
Used With: All Units when a waterside
economizer is installed.
Factory Presets: Direct Acting
Possible Values: Direct Acting, Reverse Acting
Used With: All Units when IGV/VFD is installed
Factory Presets: 150 Sec
Possible Values: 1 - 255 Seconds
Used With: All Units when IGV/VFD is installed
Factory Presets: 2.0 VDC
Possible Values: 0 to 10 VDC
Used With: All Units when IGV/VFD is installed
Factory Presets: 10.0 VDC
Possible Values: 0 to 10.0 Volts DC
Used With: All Units when IGV/VFD is installed
Factory Presets: DIRECT ACTING
Possible Values: DIRECT ACTING, REVERSE
ACTING
PKG-SVP01D-EN 33
Page 34

Programming SETUP
Actuator Setup Hydronic
Max Stroke Time 150 Sec
1. Press the NEXT key until the following screen is displayed.
Actuator Setup Hydronic
Min Voltage 2.0 VDC
1. Press the NEXT key until the following screen is displayed.
Actuator Setup Hydronic
Max Voltage 10.0 VDC
1. Press the NEXT key until the following screen is displayed.
Actuator Setup Hydronic
Direct/Reverse Act DIRECT ACTING
1. Press the NEXT key until the following screen is displayed.
Actuator Setup Num 1 Low Ambient
Max Stroke Time 60 Sec
1. Press the NEXT key until the following screen is displayed.
Actuator Setup Num 1 Low Ambient
Min Voltage 2.0 VDC
1. Press the NEXT key until the following screen is displayed.
Used With: All Units when Hydronic Heat is
installed.
Factory Presets: 150 Seconds
Possible Values: 1 - 255 Seconds
Used With: All Units when Hydronic Heat is
installed.
Factory Presets: 2.0 VDC
Possible Values: 0.0 to 9.9 Volts DC
Used With: All Units when Hydronic Heat is
installed.
Factory Presets: 10.0 VDC
Possible Values: 0.1 to 10.0 Volts DC
Used With: All Units when Hydronic Heat is
installed.
Factory Presets: DIRECT ACTING
Possible Values: DIRECT ACTING, REVERSE
ACTING
Used With: Air-cooled units low ambient
damper installed.
Factory Presets: 60 Seconds
Possible Values: 1 - 255 Seconds
Used With: Air-cooled units low ambient
damper installed.
Factory Presets: 2.0 VDC
Possible Values: 0.0 to 9.9 Volts DC
Actuator Setup Num 1 Low Ambient
Max Voltage 10.0 VDC
1. Press the NEXT key until the following screen is displayed.
Actuator Setup Num 1 Low Ambient
Direct/Reverse Act DIRECT ACTING
1. Press the NEXT key until the following screen is displayed.
Actuator Setup Num 2 Low Ambient
Max Stroke Time 60 Sec
1. Press the NEXT key until the following screen is displayed.
Actuator Setup Num 2 Low Ambient
Min Voltage 2.0 VDC
1. Press the NEXT key until the following screen is displayed.
Actuator Setup Num 2 Low Ambient
Max Voltage 10.0 VDC
1. Press the NEXT key until the following screen is displayed.
Actuator Setup Num 2 Low Ambient
Direct/Reverse Act DIRECT ACTING
1. Press the NEXT key until the following screen is displayed.
Used With: Air-cooled units low ambient
damper installed.
Factory Presets: 10.0 VDC
Possible Values: 0.1 to 10.0 Volts DC
Used With: Air-cooled units low ambient
damper installed.
Factory Presets: Direct Acting
Possible Values: Direct Acting, Reverse Acting
Used With: Air-cooled units low ambient
damper installed.
Factory Presets: 60 Seconds
Possible Values: 1 - 255 Seconds
Used With: Air-cooled units low ambient
damper installed.
Factory Presets: 2.0 VDC
Possible Values: 0.0 to 9.9 Volts DC
Used With: Air-cooled units low ambient
damper installed.
Factory Presets: 10.0 VDC
Possible Values: 0.1 to 10.0 Volts DC
Used With: Air-cooled units low ambient
damper installed.
Factory Presets: Direct Acting
Possible Values: Direct Acting, Reverse Acting
34 PKG-SVP01D-EN
Page 35

End of Submenu (NEXT) to Enter SETUP
1. Press the NEXT key to leave the submenu and show following screen.
Control Algorithm Tuning Parameters
(Applicable to all units.)
Control Algorithm Tuning Parameters
Press ENTER to Review or Adjust
Note: Contact the Trane Company before making any adjustment to these settings.
1. Pressing the NEXT key will bypass this section.
End of Submenu (NEXT) to Enter SETUP
1. Press the NEXT key to leave the submenu and show following screen.
Programming SETUP
PKG-SVP01D-EN 35
Page 36

SETPOINT Menu
The SETPOINT menu is used to designate default zone
temperature SETPOINTs, supply air and space pressure
SETPOINTs, and low ambient compressor lockout
SETPOINTs.
These SETPOINTs will be active (in use) for the “SETPOINT
Source Selection” designated as “DEFAULT” for these
inputs.
When a SETPOINT screen is displayed for 30 minutes
without a key being pressed, the LCD screen will revert to
the general operating status display. If this happens, press
the SETPOINT key again to return to the SETPOINT menu.
Note: Many of the screens displayed in this section are
applicable only for the options that are installed in
the unit and may not be visible on your unit.
Press the SETPOINT key to begin viewing or modifying the
unit SETPOINTs.
To change the sepoint values on a particular screen:
1. Press the plus or minus key until the correct value
appears in the screen.
Default Supply Air Temp SETPOINT
Cooling: 55 F
2. Press the ENTER key to confirm your choice. If you’ve
made an error, press the CANCEL key to delete your
entry.
To navigate to another screen:
1. Press the NEXT key to advance to the next screen, or
a. if no further changes are required and you want to
exit back to view the unit operating status, press the
STATUS key once, or
b. if you want to remain in the Setpoint submenu,
press the SETPOINT key once and it will return you
to the beginning of that particular submenu, or
c. if you want to exit to another submenu in the in the
SEPOINT menu, press the SETPOINT key twice.
Then press the NEXT key to scroll through the
SETPOINT submenu choices, or
d. if you want to exit to another menu, such as
CONFIGURATION, press that key once, then press
the NEXT key toscroll through those screens.
Used With: All Units
Factory Presets: 55 F
Possible Values: 40 F to 90 F
Default Supply Air Temp SETPOINTS
Cooling: 67 F Heating: 71 F
1. Press the NEXT key until the following screen is displayed.
Supply Air Temperature Deadband
Cooling: 8.0 F
Supply Air Temperature Deadband
Cooling: 8.0 F Heating: 4.0 F
1. Press the NEXT key until the following screen is displayed.
Default Daytime Warmup SETPOINTS
Cooling: 67 F Terminate: 71 F
1. Press the NEXT key until the following screen is displayed.
Note: A minimum of 2° F is maintained between heating and cooling setpoints.
When Economizer Cooling, Reduce Zone
Temperature Cooling Setpoint By: 1.5 F
1. Press the NEXT key until the following screen is displayed.
Used With: All Units
Factory Presets: Heating: 100 F
Possible Values: Cool: 40 F to 90 F, Heat: 40
F to 180 F
Used With: All Units
Factory Presets: 8.0 F
Possible Values: Cooling: 4 - 20 F
Used With: All Units with hydronic heat
Factory Presets: Cooling: 8 F, heat: 4 F
Possible Values: Cooling:4 F to 20 F,
Heat: 2 F to 10 F
Used With: All units with Hydronic, Electric, or
External Heat installed.
Factory Presets: Heat = 71 F, Cool = 74 F
Possible Values:Heat = 50-90 F,
Cool = 52-92 F
Used With: All units with Hydronic Heat
installed.
Factory Presets: 1.5 F
Possible Values: 0.0-0.3 F
Default Unoccupied Zone Temp Setpoint(s)
Cool 85 F
1. Press the NEXT key until the following screen is displayed.
36 PKG-SVP01D-EN
Used With: Cooling only units
Factory Presets: 85 F
Possible Values: Heat: 50 F to 90F
Page 37

SETPOINT Menu
Default Unoccupied Zone Temp Setpoint(s)
Cool: 85 F Heat: 60 F Morn Warmup: 72 F
1. Press the NEXT key until the following screen is displayed.
Used With: All Units when Electric, Hydronic or
External Heat is installed.
Factory Presets: Cool: 85 F, Heat: 60 F,
Morning Warmup: 72 F
Possible Values: Cool: 52 F to 90F, Heat: 50 F
to 88F, Morning Warmup: 50 F to 90 F.
Note: Minimum difference of 2 degrees F maintained between Heating & Cooling SETPOINTS. Morning warmup cannot
be lower than Heating SETPOINTS.
Reference Enthalpy: Enable Air econ
When OA Enthalpy is below: 25 BTU/LB
1. Press the NEXT key until the following screen is displayed.
Supply Air Low Limit - Modulate Economizer
Toward Min Pos if SA Temp below: 50 F
1. Press the NEXT key until the following screen is displayed.
Default Design Min OA Damper Pos: 15%
1. Press the NEXT key until the following screen is displayed.
Default OA Damper Min Position: 15%
With IGV/VFD Command At Minimum (0%)
1. Press the NEXT key until the following screen is displayed.
Used With: Units when an airside economizer is
installed.
Factory Presets: 25 BTU/LB
Possible Values: 19 to 28 BTU/LB
Used With: All Units when an airside
economizer is installed
Factory Presets: 50 F
Possible Values: 40 to 65 F
Used With: All units with an airside economizer
installed.
Factory Presets: 15%
Possible Values: 0-100%
Used With: All units with an airside economizer,
OA Damper and IGV/VFD or without an airside
economizer, with IGV or VFD and a VCM.
Factory Presets: 15%
Possible Values: 0-100%
Default OA Damper Min Position: 10%
With IGV/VFD Command At Maximum (100%)
1. Press the NEXT key until the following screen is displayed.
Default Minimum OA Flow Setpoint: 40 CCFM
Min OA Flow Deadband: 10.0 CCFM
1. Press the NEXT key until the following screen is displayed.
Preheat Output ON If Preheat Temp Below
Preheat Activation Temperature 35 F
1. Press the NEXT key until the following screen is displayed.
Default Supply Air Pressure: 1.5 IWC
High Limit: 4.0 IWC Deadband: 0.5 IWC
1. Press the NEXT key until the following screen is displayed.
Used With: All units with an airside economizer,
OA Damper and IGV/VFD or without an airside
economizer, with IGV or VFD and a VCM.
Factory Presets: 10%
Possible Values: 0-100%
Used With: Units with a VCM.
Possible Values: Setpoing = 0-max unit
airflow; Deadband = 5.0-20 CCFM
Used With: Units with a VCM.and preheat
enabled.
Factory Presets: 35 F
Possible Values: 35-75 F
Used With: All Units when IGV/VFD is installed.
Also, on units with SAT cotnrol without air
voume control and supply air pressure sensor
installed.
Factory Presets: SETPOINT: 1.5 IWC
High Limit: 4.0 IWC; Deadband: 0.5 IWC
Possible Values: SETPOINT Setpoint = 0.5-
4.3 IWC
High Limit 1.2 - 4.7 IWC;
Deadband 0.1 - 2.0 IWC
Note: The high limit sepoint cannot be adjusted below the parameters of the following equation: The high limit =
Deadband - 0.1
PKG-SVP01D-EN 37
Page 38

SETPOINT Menu
Low Ambient Comp Lockout Temp: 50 F
Comp(s) OFF if OA Temp Below This Value
1. Press the NEXT key until the following screen is displayed.
Setpoint Source Selections Submenu
Press ENTER to Review or Adjust
1. Press the NEXT key until the following screen is displayed.
For Supply Air Temp Cooling Control, Use
Setpoint From: HI (KEYPAD) SETPOINT MENU
1. Press the NEXT key until the following screen is displayed.
For Supply Air Temp Heating Control, Use
SETPOINT From: HI (KEYPAD) SETPOINT MENU
1. Press the NEXT key until the following screen is displayed.
For Occ Zone Temp Cooling Control, Use
SETPOINT From: HI (KEYPAD) SETPOINT MENU
1. Press the NEXT key until the following screen is displayed.
Used With: All Units
Factory Presets: 50 F
Possible Values: -20 F to 80 F
Used With: All Units
Used With: All Units
Factory Presets: HI (Keypad) Setpoint Menu
Possible Values: HI (KEYPAD) SETPOINT
MENU, ZONE SENSOR SETPOINT MENU, NSB
PANEL SETPOINT INPUT, GBAS 0-5 VDC
MODULE
Used With: All Units when hydronic or electric
heat is installed.
Factory Presets: HI (Keypad) Setpoint Menu
Possible Values: HI (KEYPAD) SETPOINT
MENU, GBAS 0-5VDC Module
Used With: All Units
Factory Presets: HI (KEYPAD) SETPOINT
MENU
Possible Values: HI (KEYPAD) SETPOINT
MENU, ZONE SENSOR SETPOINT INPUT, NSB
PANEL SETPOINT INPUT, GBAS 0-5 VDC
MODULE
For Occ Zone Temp Heating Control, Use
SETPOINT From: HI (KEYPAD) SETPOINT MENU
1. Press the NEXT key until the following screen is displayed.
For Unocc Zone Temp Cooling Control, Use
Setpoint From: HI (KEYPAD) SETPOINT MENU
1. Press the NEXT key until the following screen is displayed.
For Unocc Zone Temp Heating Control, Use
Setpoint From: HI (KEYPAD) SETPOINT MENU
1. Press the NEXT key until the following screen is displayed.
For Morning Warmup Temp Control, Use
Setpoint From: HI (KEYPAD) SETPOINT MENU
1. Press the NEXT key until the following screen is displayed.
Used With: All Units with hydronic or electric
heat.
Factory Presets: HI (KEYPAD) SETPOINT
MENU
Possible Values: HI (KEYPAD) SETPOINT
MENU, ZONE SENSOR SETPOINT INPUT, NSB
PANEL SETPOINT INPUT, GBAS 0-5 VDC
MODULE
Used With: All Units
Factory Presets: HI (KEYPAD) SETPOINT
MENU
Possible Values: HI (KEYPAD) SETPOINT
MENU, ZONE SENSOR SETPOINT INPUT, NSB
PANEL SETPOINT INPUT, GBAS 0-5 VDC
MODULE
Used With: All Units when External, Electric or
Hydronic Heat is installed
Factory Presets: HI (KEYPAD) SETPOINT
MENU
Possible Values: HI (KEYPAD) SETPOINT
MENU, ZONE SENSOR SETPOINT INPUT, NSB
PANEL SETPOINT INPUT, GBAS 0-5 VDC
MODULE, GBAS 0-10VDC Module
Used With: All Units when Electric, External or
Hydronic Heat is installed
Factory Presets: HI (KEYPAD) SETPOINT
MENU
Possible Values: HI (KEYPAD) SETPOINT
MENU, NSB PANEL SETPOINT INPUT
GBAS 0-5VDC Module
38 PKG-SVP01D-EN
Page 39

SETPOINT Menu
For Default OA Damper Min Position, Use
Setpoint From: HI (KEYPAD) SETPOINT MENU
1. Press the NEXT key until the following screen is displayed.
For Min Outside Air Flow Rate Ctrl, Use
Setpoint From: HI (KEYPAD) SETPOINT MENU
1. Press the NEXT key until the following screen is displayed.
For Supply Air Pressure Control, Use
Setpoint From: HI(KEYPAD) SETPOINT Menu
1. Press the NEXT key until the following screen is displayed (if applicable)
End Of Submenu (NEXT) To ENTER SETUP
1. Press the NEXT key to leave the submenu and show following screen.
Used With: All Units when an airside or
waterside economizer or VCM is installed.
Factory Presets: HI (KEYPAD) SETPOINT
MENU
Possible Values: HI (KEYPAD) SETPOINT
MENU, REMOTE MIN POS POT INPUT
Used With: Un it s wi th a V C M o r GB AS in s ta ll ed .
Factory Presets: HI (KEYPAD) SETPOINT
MENU
Possible Values: HI (KEYPAD) SETPOINT
MENU, GBAS 0-5VDC Module
Used With: AUnits with a IGV or VFD and GBAS
installed.
Factory Presets: HI (KEYPAD) SETPOINT
Menu
Possible Values: HI (KEYPAD) SETPOINT
MENU, GBAS 0-5VDC Module
Used With: All units.
PKG-SVP01D-EN 39
Page 40

Programming Configuration
The electronically controlled unit has many operating
functions whose settings are preset at the factory. The
following configuration programming steps are provided
for those cases where the Human Interface module has
been replaced after the unit has been in operation and
must be reconfigured.
Refer to the Model number stamped on the unit nameplate
located on the control panel door while scrolling through
the configuration screens. Certain digits of this alpha/
numeric model number provide information that must be
entered at the Human Interface (HI) in order for the UCM
network to operate properly.
Note: Many of the screens displayed in this section are
applicable only for the options that are installed in
the unit and may not be visible on your unit.
Press the CONFIGURATION key to begin viewing or
modifying the configuration screens.
Note: Pay close attention to the notes throughout this
section of the document. The notes describe
additional essential messages and other
intermediate screen information.
Press the CONFIGURATION key to begin viewing or
modifying the unit setpoints.
To change the sepoint values on a particular screen:
1. Press the plus or minus key until the correct value
appears in the screen.
2. Press the ENTER key to confirm your choice. If you’ve
made an error, press the CANCEL key to delete your
entry.
To navigate to another screen:
1. Press the NEXT key to advance to the next screen, or
a. if no further changes are required and you want to
exit back to view the unit operating status, press the
STATUS key once, or
b. if you want to remain in the Setpoint submenu,
press the CONFIGURATION key once and it will
return you to the beginning of that particular
submenu, or
c. if you want to exit to another submenu in the in the
CONFIGURATION menu, press the
CONFIGURATION key twice. Then press the NEXT
key to scroll through the CONFIGURATION
submenu choices, or
d. if you want to exit to another menu, such as
SETPOINT, press that key once, then press the
NEXT key toscroll through those screens.
Configuration - Model Num Digit 1
Unit Type: Commercial Self-Contained
1. Press the NEXT key until the following screen is displayed.
Configuration - Model Num Digit 3
Condenser Medium: WATER COOLED CONDENSER
1. Press the NEXT key until the following screen is displayed.
Configuration - Model Num Digit 4
Development Type: SIGNATURE SERIES
1. Press the NEXT key until the following screen is displayed.
Configuration - Model Num Digit 5
Refrig Ckt Config INDEPENDENT
Used With: All Units
Possible Values: Commercial Self-Contained
Used With: All Units.
Possible Values: Water-cooled Condenser; Air-
colled condenser; None-No Condenser
Used With: All Units.
Possible Values: Signature Series, Modular Series
Used With: All Units
Possible Values: Independent, Manifold
Note: Manifolded piping is only available on Signature Series units, 30 tons and larger
Configuration - Model Num Digit 27
Water Economizer INSTALLED
1. Press the NEXT key until the following screen is displayed.
Configuration - Model Num Digit 29
Water Piping: INTERMEDIATE PIPING
1. Press the NEXT key until the following screen is displayed.
Possible Values: Installed, Not Installed
Used With: Units on all water-cooled units or units
with waterside economizer.
Possible Values: Intermediate Piping; Basic Piping;
Non-No Piping
40 PKG-SVP01D-EN
Page 41
Programming Configuration
Configuration - Model Num Digit 29
Water Flow Switch INSTALLED
1. Press the NEXT key until the following screen is displayed.
Configuration - Model Num Digit 20
Used With: Units on all water-cooled units or units
with waterside economizer and water flow switch.
Possible Values: Installed, Not Installed
Possible Values: Hydronic, Electric None, External
Heating Type: HYDRONIC
1. Press the NEXT key until the following screen is displayed.
Configuration - Model Num Digit 6, 7
Unit Capacity 72
1. Press the NEXT key until the following screen is displayed.
Used With: All Units
Possible Values: 20-80
Note: The possible value for unit capacity is dependent oupon the unit size (tons).
Configuration - Model Num Digit 23
Power Exhaust NONE
1. Press the NEXT key until the following screen is displayed.
Used With: All Units
Possible Values: None, 100% with Statitrac, 50%/
100% without Statitrac
Note: This option is currently not available on commercial self-contained units, but this screen still displays..
Configuration - Model Num Digit 28
Air Economizer INSTALLED
1. Press the NEXT key until the following screen is displayed.
Configuration - Model Num Digit 9
Air Temp/Vol Ctrl SA CTRL WITH IGV/VFD
1. Press the NEXT key until the following screen is displayed.
Used With: All Units
Possible Values: Installed, Not Installed
Used With: All Units
Possible Values: SA Control with IGV/VFD, Zone
Control, No IGV/VFD or SA Control, No IGV/VFD
Configuration - Model Num Digit 9
Supply Fan VFD Bypass INSTALLED
1. Press the NEXT key until the following screen is displayed.
Configuration - Model Num Digit 28
Comparative Enthalpy INSTALLED
1. Press the NEXT key until the following screen is displayed.
Configuration - Model Num Digit 33
GBAS 0-5 VDC Module INSTALLED
1. Press the NEXT key until the following screen is displayed.
Configuration - Model Num Digit 33
Ventilation Override (VOM) INSTALLED
1. Press the NEXT key until the following screen is displayed.
Configuration - Model Num Digit 28
Ventilation Ctrl TRAQ DAMPERS
1. Press the NEXT key until the following screen is displayed.
Configuration - Model Num Digit 33
TCI4 Communications Module INSTALLED
1. Press the NEXT key until the following screen is displayed.
Used With: Units with SA Control and IGV/VFD
Possible Values: Installed, Not Installed
Used With: All IntelliPak™ II Units
Possible Values: Installed, Not Installed
Used With: All Units
Possible Values: Installed, Not Installed
Used With: All Units
Possible Values: Installed, Not Installed
Used With: All Units
Possible Values: Traq™ Dampers, Standard
Dampers
Used With: All Units
Possible Values: nstalled, Not Installed
PKG-SVP01D-EN 41
Page 42

Programming Configuration
Configuration - Model Num Digit 33
Remote Human Interface INSTALLED
1. Press the NEXT key until the following screen is displayed.
Unit Model Number
1. Pressing the NEXT key will scroll forward through the screens.
Software Revision Number Report:
RTM 9.13
1. Pressing the NEXT key will scroll forward through the screens.
Software Revision Number Report:
Multiple Compressor Module (SCM) 1.00
1. Pressing the NEXT key will scroll forward through the screens.
Software Revision Number Report:
Multiple Compressor Module (MCM) 4.09
1. Pressing the NEXT key will scroll forward through the screens.
Software Revision Number:
GBAS 0-5 VDC Module 1.00
1. Pressing the NEXT key will scroll forward through the screens.
Software Revision Number Report:
Ventilation Override (VOM) 1.00
1. Pressing the NEXT key will scroll forward through the screens.
Used With: All Units
Possible Values: installed, Not Installed
Used With: All units unless RTM has been changed.
Possible Values: Model Number
Used With: Units with GBAS
Used With: Units with VOM module installed
Software Revision Number Report:
Exhaust/Comp Enthalpy Module 8.04
1. Pressing the NEXT key will scroll forward through the screens.
Software Revision Number Report:
Heat Module 1.00
1. Pressing the NEXT key will scroll forward through the screens.
Software Revision Number Report:
Unit Human Interface 14.07
1. Pressing the NEXT key will scroll forward through the screens.
Software Revision Number Report:
Remote Human Interface (RHI) 11.04
1. Pressing the NEXT key will scroll forward through the screens.
Software Revision Number Report:
Ventilation Control Module (VCM) 1.12
1. Pressing the NEXT key will scroll forward through the screens.
Software Revision Number Report:
BAS Communications: xxxxxxx 13.00
1. Pressing the NEXT key will scroll forward through the screens.
Used With: Units with Comparative Enthalpy,
Used With: Units with hydronic or electric heat
Used With: Units with Remote Human Interface
Module installed.
Used With: Screen shown only if VCM Module
installed
Used With:Units with TCI, LCI or BCI.
xxxxxxx =
Comm3/4 (when TCI installed)
LonTalk (when LCI installed)
BACnet (when BCI installed)
42 PKG-SVP01D-EN
Page 43

SERVICE MODE Menu
The SERVICE MODE menu is used to input operating
parameters for unit operation during a service test.
Depending on the particular test being conducted, the user
will cycle through all unit outputs (compressors, fans,
dampers, heaters, etc.) and selectively turn them On or Off
for the test. After designating the operating status for each
unit component, the operator will designate the “TEST
START” delay time.
When a service mode screen is displayed for 30 minutes
without a key being pressed, the LCD screen will revert to
the general operating status display. If this happens, press
the SERVICE MODE key again to return to the service
menu.
Note: Many of the screens displayed in this section are
applicable only for the options that are installed in
the unit and may not be visible on your unit.
To operate the system in the test mode, press the SERVICE
MODE key to enter into the service mode menu and scroll
through all of the system outputs and selectively turn
them “On” or “Off”.
To change the service mode values on a particular screen:
Supply Air Controls
Supply Fan OFF
1. Press the NEXT key until the following screen is displayed.
1. Press the plus or minus key until the correct value
appears in the screen.
2. Press the ENTER key to confirm your choice. If you’ve
made an error, press the CANCEL key to delete your
entry.
To navigate to another screen:
1. Press the NEXT key to advance to the next screen, or
a. if no further changes are required and you want to
exit back to view the unit operating status, press the
STATUS key once, or
b. if you want to remain in the Setpoint submenu,
press the SERVICE MODE key once and it will return
you to the beginning of that particular submenu, or
c. if you want to exit to another submenu in the in the
SERVICE MODE menu, press the CONFIGURATION
key twice. Then press the NEXT key to scroll
through the CONFIGURATION submenu choices, or
d. if you want to exit to another menu, such as
SETPOINT, press that key once, then press the
NEXT key toscroll through those screens.
Used With: All Units without IGV/VFD.
Possible Values: ON, OFF, AUTO
Supply Air Controls
Supply Fan OFF IGV/VFD Cmd 35%
1. Press the NEXT key until the following screen is displayed.
Water Pump Relay OFF
1. Press the NEXT key until the following screen is displayed.
VAV Box Relay
RTM Alarm Output
1. Press the NEXT key until the following screen is displayed.
Water Econ Control Valve Command
Water Econ Bypass Valve Command
1. Press the NEXT key until the following screen is displayed
Condenser Fan Outputs
1A OFF 1B OFF
1. Press the NEXT key to advance the cursor.
2. Press the NEXT key until the following screen is displayed
Condenser Fan Outputs
1A OFF 1B OFF 2A OFF 2B OFF
1. Press the NEXT key to advance the cursor.
2. Press the NEXT key until the following screen is displayed
0%
0%
Possible Values: ON, OFF, AUTO
IGV/VFD Cond: 0 - 100%
Used With: Water -cooled units or units with
water-cooled condenser.
Possible Values: OFF, ON
Possible Values: RTM VAV Box -0 = Unocc, Drive
Max, Auto-1 = Unocc, Alarm Output = Off, On
Used With: Water -cooled units or units with
water-cooled condenser.
Possible Values: 0-100%
Factory Presets: Off
Used With: Air-cooled units, 20-35 Tons.
Possible Values: ON, OFF, AUTO
Factory Presets: Off
Used With: Air-cooled units, 40-60 Tons.
Possible Values: ON, OFF, AUTO
PKG-SVP01D-EN 43
Page 44
SERVICE MODE Menu
Condenser Fan Speed
Ckt 1 0 %
1. Press the NEXT key until the following screen is displayed
Condenser Fan Speed
Ckt1 0% Ckt2 0%
1. Press the NEXT key to advance the cursor.
2. Press the NEXT key until the following screen is displayed
Compressor Relays:
K11 OFF K3 OFf K12 OFF K4 OFF
1. Press the NEXT key to advance the cursor.
2. Press the NEXT key until the following screen is displayed
Hydronic Heat
Actuator 0 %
1. Press the NEXT key until the following screen is displayed.
Heat Stages
Stage OFF
1. Press the NEXT key until the following screen is displayed.
Note: Only single stage electric heat is available factory installed.
Used With: Air-cooled units.
Factory Presets: 0%
Possible Values: AUTO, 0-100%
Used With: Air-cooled units.
Factory Presets: 0%
Possible Values: AUTO, 0-100%
Factory Presets: Off
Possible Values: On, Off
Used With: Units when Hydronic heat is installed.
Factory Presets: 0%
Possible Values: 0 - 100%, AUTO
Used With: All Units when electric Heat is installed
Factory Presets: OFF
Possible Values: OFF, ON
OA Damper Pos 0%
1. Press the NEXT key until the following screen is displayed.
Supply Fan Bypass Relay NORMAL
1. Press the NEXT key until the following screen is displayed.
Ventilation Override Module Output Relay
OFF
1. Press the NEXT key until the following screen is displayed.
OA Preheater State OFF
1.Press the NEXT key to advance the cursor to the next field within this screen.
2. Press the NEXT key until the following screen is displayed.
GBAS 0-5 VDC Module Relay Outputs
#1 OFF #2 OFF #3 OFF #4 OFF #5 OFF
1. Press the NEXT key until the following screen is displayed.
Status/Annunc Test Sys On (Blinking)
Heat: OFF Cool: OFF Service: OFF
1. Press the NEXT key to advance the cursor to the next field within this screen.
2. Press the NEXT key until the following screen is displayed.
Used With: All units with an airside economizer.
Factory Presets: OA Damper = 0%
Possible Values: OA Damper: 0 to 100%
Used With: Units with VFD and bypass.
Possible Values: Normal, Bypass
Used With: All Units when VOM is installed
Factory Presets: OFF
Possible Values: ON, OFF
Used With: All Units when VCM is installed
Factory Presets: OFF
Possible Values: ON, OFF
Used With: All Units when GBAS is installed
Factory Presets: OFF
Possible Values: 1, 2, 3, 4, 5 = ON, OFF
Used With: All Units
Factory Presets: OFF
Possible Values: HEAT = ON, OFF, COOL = ON,
OFF, SERVICE = ON, OFF
Start Test In 5 Seconds
Press TEST START To Begin, STOP To Halt
1. Press the NEXT key to advance the cursor to the next field within this screen.
2. Press the NEXT key until the following screen is displayed.
44 PKG-SVP01D-EN
Page 45

DIAGNOSTICS Menu
The DIAGNOSTICS menu is used to view diagnostics that
have resulted from system failures within the unit. There
are two lists where diagnostics reside; the Active list, and
the Diagnostic Event Log.
The Active list is used for viewing all active diagnostics
and for clearing manually resetable diagnostics. These
lists of diagnostics are displayed after pressing the
DIAGNOSTICS key if active diagnostics are present.
Active manual diagnostics can be cleared in batch form at
the unit mounted Human Interface. When an Active
diagnostic is manually or automatically cleared, it is
removed from this buffer. Automatically resetting
diagnostics can not be reset by the Human Interface,
The word “MORE” is displayed on all screens if more than
one diagnostic exist, except for the last diagnostic. Upon
reaching the last diagnostic, the word “MORE”
disappears. Pressing the NEXT key at this point causes the
display to advance to the first diagnostic in the Diagnostic
Event Log.
The Diagnostic Event Log screens are displayed after
scrolling through the Active list or after pressing the
DIAGNOSTICS key when no active diagnostics are
present. It’s used to view the past 20 diagnostics.
Diagnostics in this log are stacked in inverse chronological
order, with the first diagnostic screen being the most
recently reported diagnostic.
because the condition that caused the diagnostic has to be
corrected for the diagnostic to clear.
One of the following screens will be the first screen displayed when the DIAGNOSTIC" key is pressed
Diagnostic Menu ---- Info
No Active Diagnostics (NEXT) History Log
OR
Press CANCEL to Clear All Active Manual
Diagnostics, or Press NEXT to View
1. Pressing the "CANCEL" key to clear the diagnostics will prompt the following screen.
Diagnostic Reset Is Password Protected
Please Enter Password: _____________
1. Press the + (plus) or - (minus) keys to enter the password
2. Press the ENTER key to confirm this choice. When the correct password is entered, the
following screen will be displayed.
Resetting Active Manual Diagnostics
Sending Reset Request
and then the following screen will be displayed
Resetting Active Manual Diagnostics
Updating Unit Data, Please wait
and then the following screen will be displayed
Active Diagnostic -- Info
Please Wait, Unit Is In Reset Mode
OR
1. Pressing the "NEXT" key to view the diagnostics will prompt the following screen if a "MANUAL RESET" failure has occurred.
Used With: All Units
Factory Presets: N/A
Possible Values: + (plus) and - (Minus)
PKG-SVP01D-EN 45
Page 46

DIAGNOSTICS Menu
Active Diagnostic -- Manual Reset
___________________ More
Possible Values:
Low Pressure Control Open - Ckt 1, Ckt 2, Ckt 3, Ckt 4 Manual Reset SA Static Pressure Limit
Compressor Contactor Fail - Ckt 1, Ckt 2, Ckt 3, Ckt 4 Low Air Temperature Limit Trip
Compressor Trip - Ckt 1, Ckt 2, Ckt 3, Ckt 4 Emergency Stop
Used With: All units
Factory Presets: N/A
Note: The word “MORE” will appear on the screen if more than one failure has occurred.
OR
Active Diagnostic -- Auto Reset
___________________ More
Possible Values:
RTM Zone Heat Aux Temp
Supply Air Temp Unocc Zone Cool Setpoint
RTM Aux. Temp Unocc Zone Heat Setpoint
OA Temp Supply Air Pres Setpt
Mode Input Space Pressure Pres Setpt
Occ Zone Cool Setpoint Space Pressure
Occ Zone Heat Setpoint Return Air Temp
Supply Air Pres RA Humidity
OA Humidity
SCM Communication Evap Temp - CKT 1, 2, 3, 4
MCM Communication Heat Module Commun.
ECEM Communication Cond Temp - CKT 1, 2, 3, 4
TCI Communication
Tracer® Communication NSB Panel Communication
Unit HI Communcation VOM Communication
Sup Air Temp Cool Setpt Sup Air Temp Heat Setpt
NSB Panel Zone Temp CO
VCM Aux Temp Velocity Press
VCM Communication WSM Communication
Ent Cond Water Temp Ent Water Temp
WSM Mixe Air Temp Water Flow
Auto Reset SA Static Pres
Limit
GBAS Module
Communication
Sensor
2
OR
1. Pressing the "NEXT" key to view the diagnostics will prompt the following screen if a "information only" failure has occurred.
Active Diagnostic -- Info
___________________ More
Possible Values:
Heat Fail
Dirty Filter
Ventilation Override Mode A, B, C, D, or E
RTM Data Storage Error
Note: Activation of any VOM mode can be viewed within the “Active Diagnostic” screen.
46 PKG-SVP01D-EN
Page 47

Log 1 ___________________
___________________
Possible Values:
Log number 1-20 Manual
Viewed or Not Viewed Auto
Active or History Info
Or any diagnostic listed under the previous screens associated with the diagnostic type
including VOM activated mode
1. Press the CANCEL key to clear the diagnostics and prompt the following screen.
DIAGNOSTICS Menu
Diagnostic Log is Password Protected
Please Enter Password: ___________________
1. Press the + (Plus) or - (Minus)keys to enter the password.
2. Press the ENTER key to confirm. After entering the correct password, the following screen will display.
Active Diagnostics ___________________
Please Wait, Updating Diagnostic Log
If the DIAGNOSTIC LOG is empty when the CANCEL key is pressed, the following screen will display.
Active Diagnostics Info
Diagnostic Buffer Is Already Empty!
Press the AUTO or STOP key to return to the top level status screen.
Failure Modes
that ships with the Signature Series units and SCXG-
Possible Values: + (Plus), - (Minus)
Possible Values: Manual, Auto, or Info
Possible Values: Manual, Auto, or Info
SVX01*-EN that ships with the Modular Series units.
When any condition results in the rooftop unit’s inability to
perform a normal function, it is said to have entered a
failure mode. There are two types of failure modes.
1. An “Analog input out of range” failure mode.
This failure mode occurs when a sensing device such
as a zone temperature sensor or a humidity sensor
begins to transmit information that is outside its
allowable range.
2. A “Fault recognition by input logic” failure mode.
This failure mode occurs when the UCM receives
information that does not “make sense” or does not
conform to its predefined logic.
Diagnostics Types
There are three types of diagnostics:
1. Informational - Does not affect machine operation.
2. Automatic Reset - Affects machine operation but
returns to normal when diagnostic condition no longer
exists.
3. Manual Reset - Affects machine operation and must be
reset at the HI or by cycling power to unit for normal
operation to resume.
To troubleshoot diagnostics, reference the Installation,
Operation, and Maintenance Manual SCXF-SVX01*-EN
PKG-SVP01D-EN 47
Page 48

Glossary
A
Active SETPOINT
The SETPOINT which is currently being used for control
by the SETPOINT source selection.
B
BACnet
An open, device networking communications protocol for
controls. This protocol utilizes BACnet and ANSI/ASHRAE
Standard 135-2004 protocol which provides building
owners the capability to connect various types of building
control systems or subsystems together.
®
C
Compressor Lockout
All affected compressors stop and remain off until the
condition resets or is manually reset.
Compressor Protection Switch
A pressure switch installed on the suction line that
prevents compressor operation below the switch’s
SETPOINT. The purpose is to prevent no-flow scroll
compressor operation.
A heat source external to the self-contained unit that is
field installed (i.e. duct heat or VAV reheat boxes).
External Stop
A binary input on the RTM that allows unit shutdown,
with automatic reset, when connected to a field-supplied
switch.
H
Hydronic Heat
Optional steam or hot water heat coil.
Independent Refrigerant Circuit
All model SCWG/SIWG, SCRG/SIRG and SCWF/SIWF
units have independent refrigerant circuits.
I
Interprocessor Communications Board (IPCB)
Option
The IPCB is used to expand communication from the
unit’s UCM network to a remote human interface panel.
DIP switch settings on the IPCB module for this
application should be; switches 1 and 2 “off,” switch3
“on.”
Control Band
The range of temperatures or pressures which would
normally be maintained by the various control functions.
Control Point
The value of a SETPOINT that an algorithm is using at any
given time.
D
Deadband
As applied to SA temp control, this refers to a range of
temperatures equally spaced above and below the SA
temp control point in which the control algorithm is
satisfied.
Dry Bulb
An outdoor temperature above which economizing will be
disabled (unless comparative enthalpy is the economizer
control type being used.)
E
Economizer Zone Temp SETPOINT Suppression
a parameter used for setting the Zone Temp SETPOINT at
a lower value than the mechanical cooling zone temp
SETPOINT.
External Heat
L
Low Ambient Compressor Lockout
A function which prevents compressor operation at low
outdoor ambient temperatures.
Low Entering Water Temperature
When the entering water temperature sensor reads a
water temperature below the minimum water
temperature input into the controller. The factory preset
temperature is 54° F.
Low Entering Water Temperature Compressor
Lockout
On units with head pressure control disabled and an
entering water temperature below 54° F, compressor
operation disables. economizer operation is still
functional.
M
Manifold Refrigerant
Circuit Only model SCRF/SIRF units, 30-60 tons, have
manifolded refrigerant circuits.
N
Night SetBack (NSB)
48 PKG-SVP01D-EN
Page 49

Glossary
Applies to the control of the rooftop unit during
unoccupied periods. Also refers to the NSB panel, a
communicating wall sensor with night setback capability.
O
OA Reset
Outdoor Air Reset - Supply Air Temerature Reset based
on Outdoor Air Temerpature.
Occupied Zone Low Temerature Limit Setpoint
The temperature that initiates daytime warmup.
P
Purge
A function which causes zone air to purge and be
replaced by outside air.
R
Reference Enthalpy
An outdoor enthalpy value above which economizing will
be disabled.
Remote Human Interface
A human interface module designed to be mounted
remotely from the unit. There are some functional
differences between a unit mounted and a remote
mounted human interface module.
Turning on heat when the supply air temperature drops
below a preset value usually due to cold outside air being
brought in to provide building ventilation.
Supply Air Temperature Control Point
The revised value of supply air temperature SETPOINT
after supply air temp reset has been applied.
Supply Air Temperature Reset
A function that shifts the SA Temp SETPOINT an amount
based on the value of another parameter—typically Zone
Temp or Outdoor Air Temp. The purpose of this function
is to lower unit capacity to better meet load
requirements.
W
Water Purge
When the waterside economizer valve opens to flush out
the economizer tubes to prevent failure due to stagnant
water and sedimentation.
Reset Amount Maximum
The maximum amount of reset allowed.
Reset End Temperature
The temperature at which the maximum reset amount
will occur.
Reset Start Temperature
The temperature at which reset will begin.
S
Space Pressure
The pressure in the building as measured by the Space
Pressure Transducer, referenced to outside (atmospheric)
pressure.
Supply Air Pressure High Limit
A pressure limit to prevent unit casing and/or ductwork
over pressurization.
Supply Air Pressure
The pressure in inches water column (IWC) of the supply
duct plenum or outlet as measured by the Supply Air
Pressure Transducer, referenced to local outside
(atmospheric) pressure.
Supply Air Tempering
PKG-SVP01D-EN 49
Page 50

Index
Symbols
- (Minus) Key 9
Symbols
+ (Plus) Key 9
A
Acronyms 4
Active Diagnostic
Active Setpoint
Actuator Setup
AUTO Key
45
48
12
10
B
BACnet 4, 6, 48
BCI
4, 6
C
CANCEL Key 9
central processor of the system
See Rooftop Module
Coil Frost Cutout
Comparative Enthalpy Module
Compressor Lockout
Compressor Module
Compressor Protection Switch
Condenser
Condenser Temperature Control
Band
12
CONFIGURATION
Configuration
Configuration Key
CONFIGURATION Menu
Configuration Menu
Control Algorithm Tuning
Parameters
Control Band
Control Parameters
Control Point
Custom Key
Custom Menu
12
12
8, 10
13, 35
48
48
10
10, 14
6
6
48
6
48
9
9, 11
40
40
11
D
Data Manipulation Keys 9
Daytime Warmup
Deadband
Default Setpoint
designate
Device Characteristic Setup
Definitions
Diagnostic
Diagnostic Event Log
DIAGNOSTICS Key
Diagnostics Key
Diagnostics Menu
48
36
9, 45
See Figure 2
12
12
32
45
9
9, 45
45
E
ECEM 4, 6, 16
Economizer Zone Temp Setpoint
Suppression
Emergency Override modes
ENTER Key
See Figure 2
Exhausst Sequence
Exhaust/Comparative Enthalpy
Module
External Heat
External Stop
48
10
9
7
6
48
48
F
Factory Presets 11
Failure Modes
Figure 1
Figure 2
Function (Enable/Disable)
Setups 12
47
8
9
G
GBAS 4, 6, 12
GBAS Input/Output
General Status Display
Generic Building Automation
System 4, 6
Glossary
48
12
10
H
Heat Module 6
Human Interface
Human Interface Keypad
See Figure 2
Human Interface Module
See Figure 1
Hydronic Heat
22, 40
9
8
48
I
Independent Refrigeration
Circuit
48
Information Format
Interprocessor Communications
Board (IPCB) Option
Interprocessor Communications
Bridge Module
IPCB
48
12
6, 48
6
L
LCI, LCI-I 6
Low Ambient Compressor
Lockout
Low Entering Water
Temperature
Low Entering Water Temperature
Compressor Lockout
48
48
48
M
Manifold Refrigerant 48
4, 6
MCM
Menu Keys
Module Defaults
8
12
N
NEXT Key 8, 10
Night SetBack (NSB)
No Configuration
48
11
O
OA Reset 49
Occupied Zone Low Temerature
Limit Setpoint
Outside Air Ventilation Setup
49
27
P
Password Protected Screens 13
Press
35
Pressurize Sequence
Previous Key
Programming the Unit
Purge
49
Purge Sequence
10
7
8
7
R
Reference Enthalpy 12, 49
Remote Human Interface
Reset Amount Maximum
Reset End Temperature
Reset Start Temperature
RHI
4, 8
Rooftop Module
RTM
6, 11, 12, 13
RTM Alarm Output Assignments
RTM Alarm Output Diagnostic
6
49
49
49
49
30
S
SCM 4, 6
Sensor Source Selection
SERVICE MODE Key
See Figure 2
SERVICE MODE Menu
SERVICE Mode Menu
SETPOINT Menu
SETPOINT Source Selection
Setpoint Source Selection
Setpoints
Setpoints Key
SETUP Key
Space Pressure
special ventilation requirements
stage heat up and down
Statitrac
36
See figure 2
See Ventilation Override
Module
See Heat Module
49
9
36
8
9
49
6
12, 22
43
10
36, 38
48
6
12
50 PKG-SVP01D-EN
Page 51

STATUS key 14
Status Key
STATUS Menu
STOP Key
Supply Air Pressure
Supply Air Temperature Control
Point
Supply Air Temperature Reset
Supply Air Tempering
8
14
10
4, 49
49
49
49
T
TCI 5, 46
Temperature Input Calibration
Temperature Input Offset
TEST START
TEST START Key
Trane Communications Interface
Module (TCI) Option
9, 43
10
6
30
13, 30
U
UCM 5, 6
UCM Control System
UNIT OFF
Unit On
Unit Operation Keys
Unit Status
Unit Status (Unit On)
7
7
7
5
10
7
V
Ventilation Override 5, 6
Ventilation Override Definition
22
VOM
6
VOM Active
7, 10
13,
W
Water Purge 49
Index
PKG-SVP01D-EN 51
Page 52

Trane optimizes the performance of homes and buildings around the world. A business of Ingersoll Rand, the leader in
creating and sustaining safe, comfortable and energy efficient environments, Trane offers a broad portfolio of advanced
controls and HVAC systems, comprehensive building services, and parts. For more information, visit www.Trane.com.
Trane has a policy of continuous product and product data improvement and reserves the right to change design and specifications without notice.
© 2013 Trane All rights reserved
PKG-SVP01D-EN 20 Aug 2013
Supersedes PKG-SVP01C-EN (Jan 2010)
We are committed to using environmentally
conscious print practices that reduce waste.
 Loading...