

Page 1
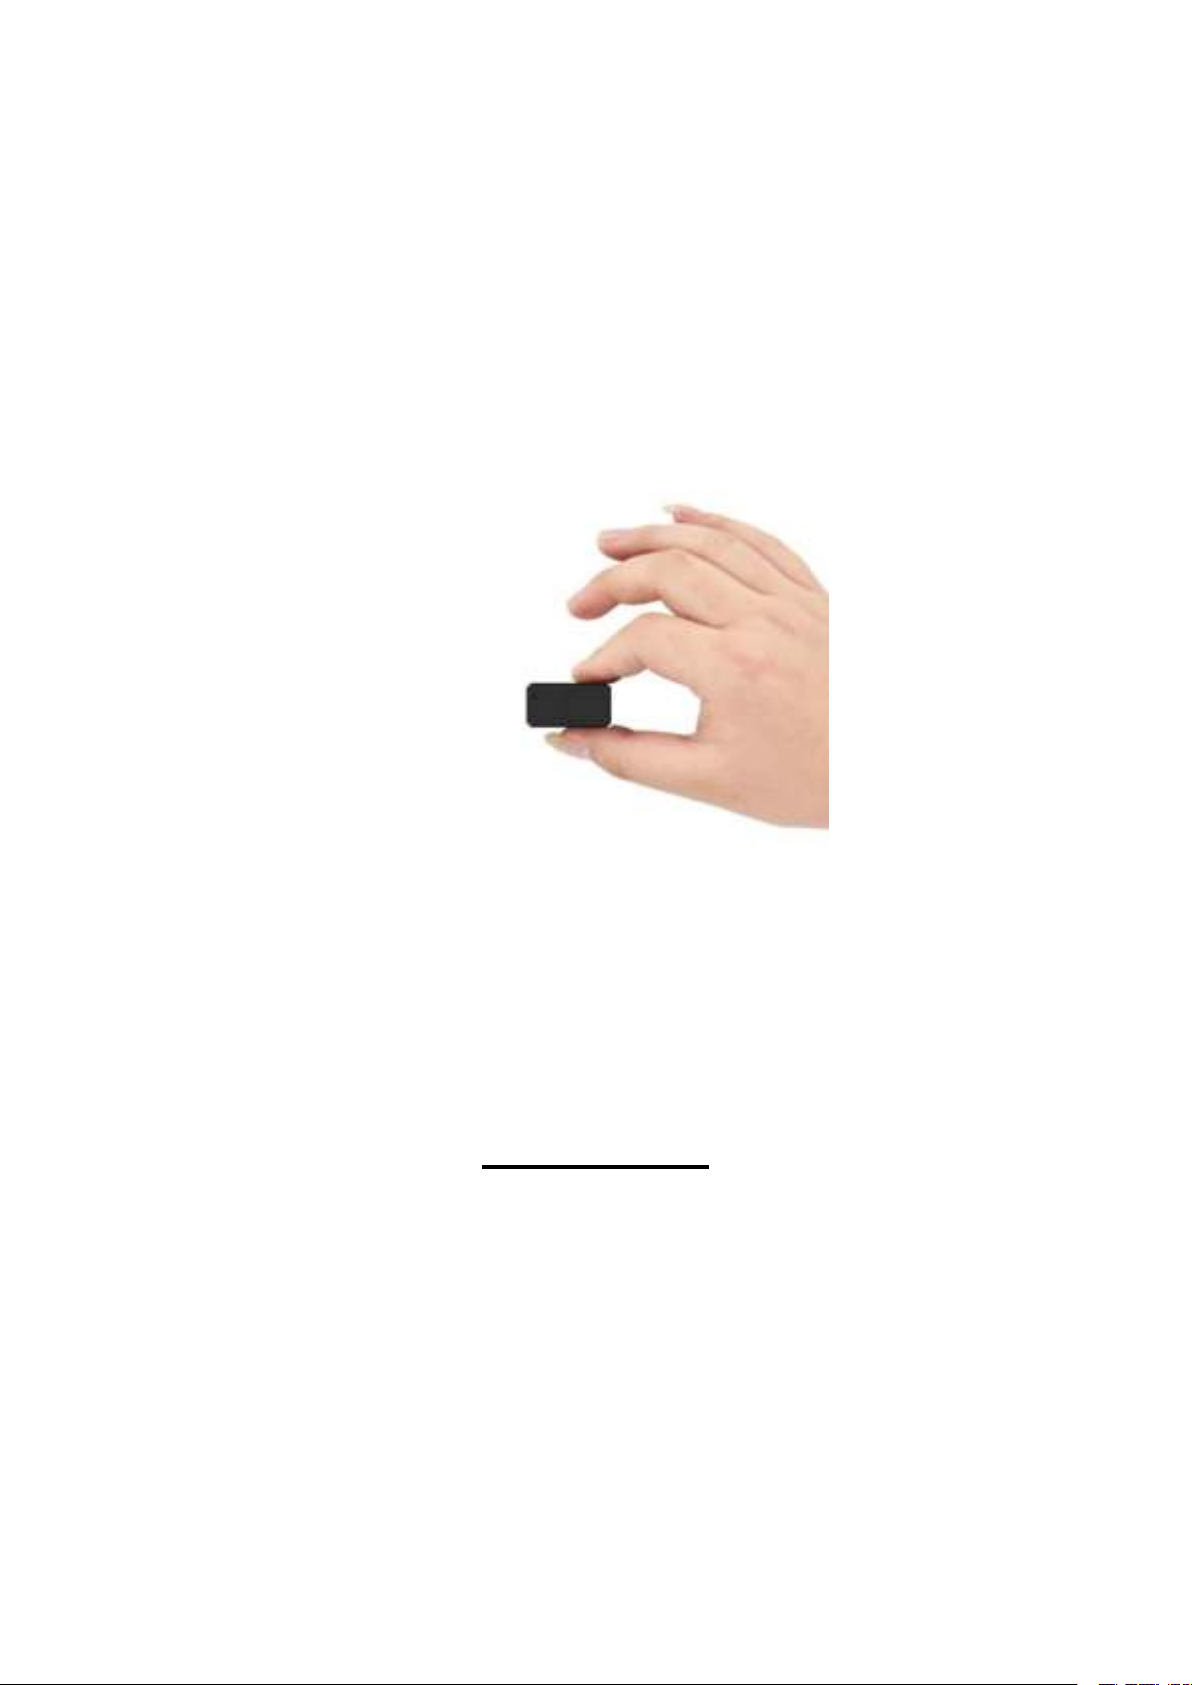
TK-STAR MINI GPS
TRACKER
USER MANUAL
PREFACE
Thank you for purchasing the GPS tracker. This manual shows how to operate the
device smoothly and correctly. Make sure to read this manual carefully before using
this product. Please note that specification and information are subject to changes
without prior notice in this manual. Any change will be integrated in the latest release.
The manufacturer assumes not to be responsible for any errors or omissions in this
document.
Page 2
1. SUMMARY
Content
Specs.
Dim.
47mm x 24mm x 18mm(1.85”*0.94”*0.71”)
Weight
25g
Network
GSM/GPRS
Band
850/900/1800/1900Mhz
GPS sensitivity
-159dBm
GPS accuracy
5m
Time To First Fix
Cold status 45s
Warm status 35s
Hot status 1s
Wall charger
DC 5V--1.0A
Battery
Chargeable changeable 3.7V 600mAh Li-ion battery
Stand by
200hours
Storage Temp.
-40°C to +85°C
Operation Temp.
-20°C to +55°C
Humidity
5%--95% non-condensing
Working Based on existing GSM/GPRS network and GPS satellites, this product can
locate and monitor any remote targets by SMS or internet. The most advanced
technology of GPS and GSM dual positioning.
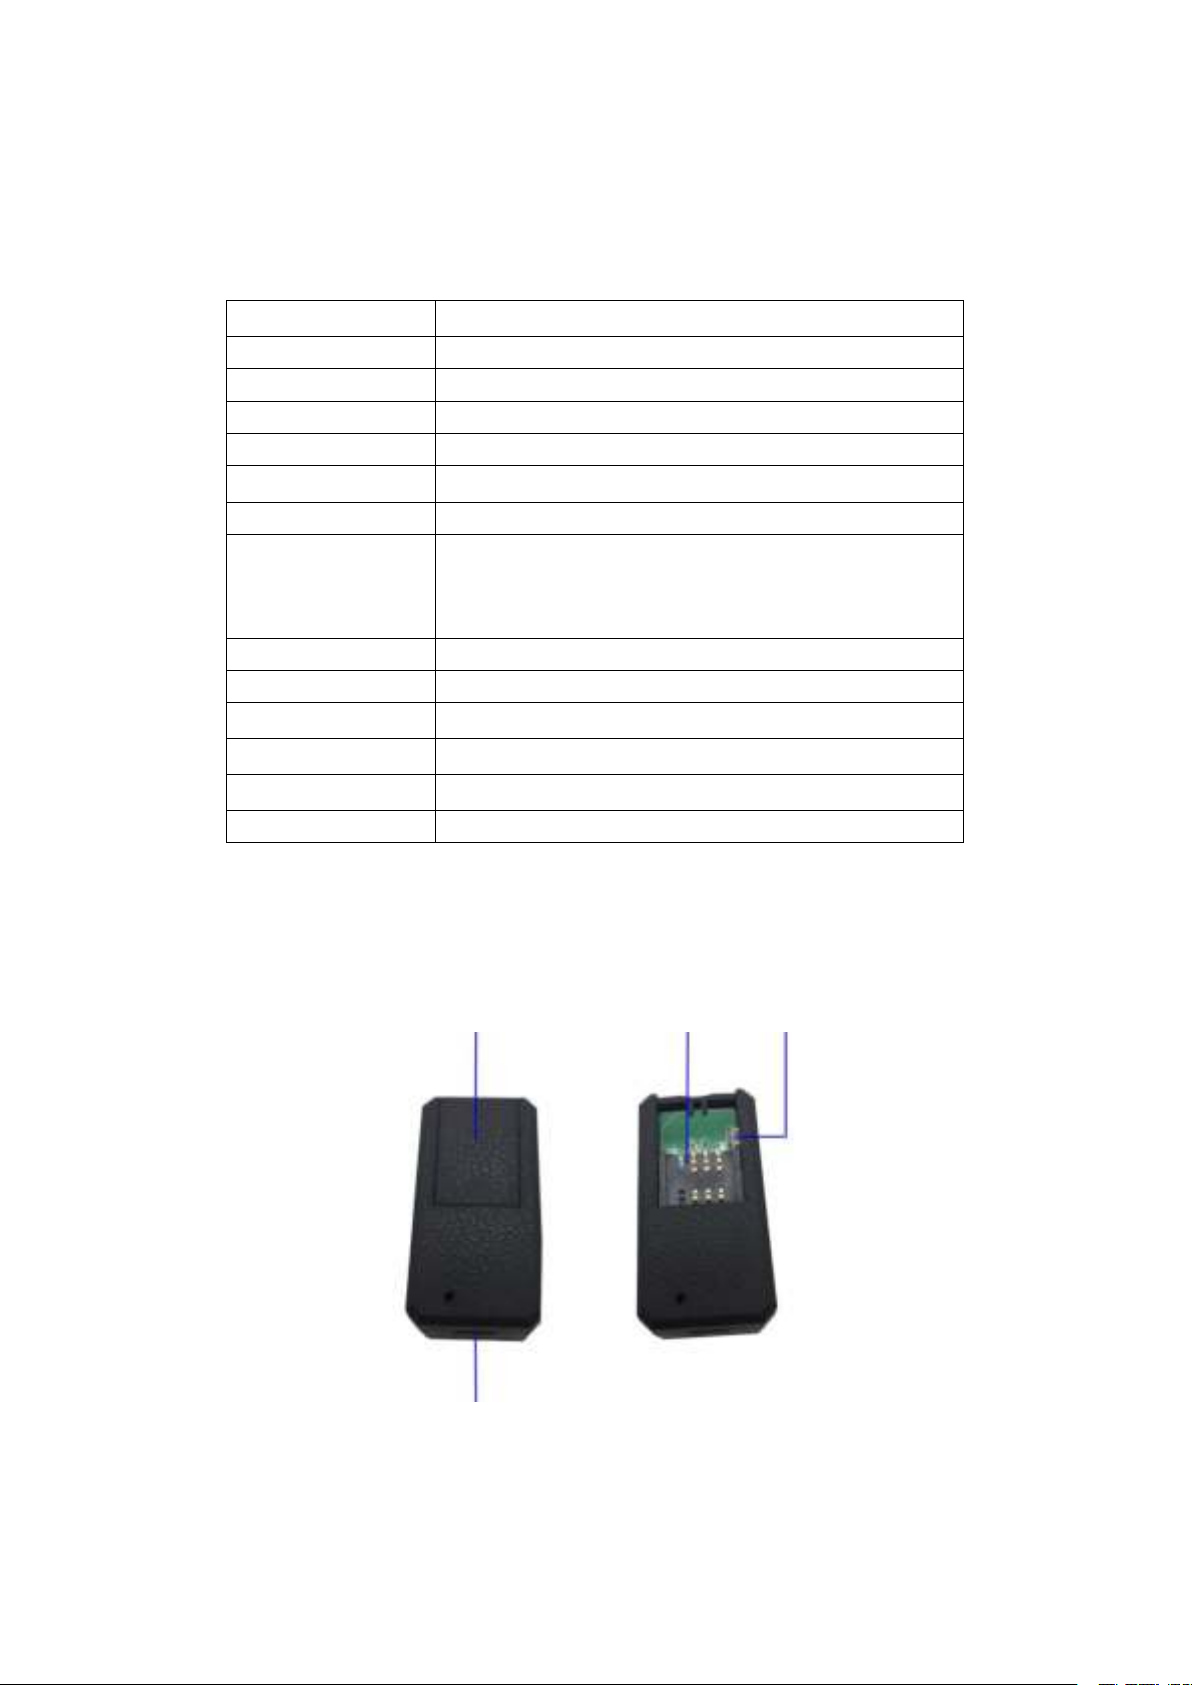
2.Hardware Description
1.USB PORT 2.COVER 3.GSM Card Slot 4. INDICATOR
LIGHT
Page 3
INDICATOR LIGHT STATUS
MEANING
Green light -Solid
No GPRS signal
Green light -Flash
GPRS connection
Blue light -Solid
No GPS signal
Blue light -Flash
GPS connection
Red light-Solid
Charging
Red light-off
Full charged
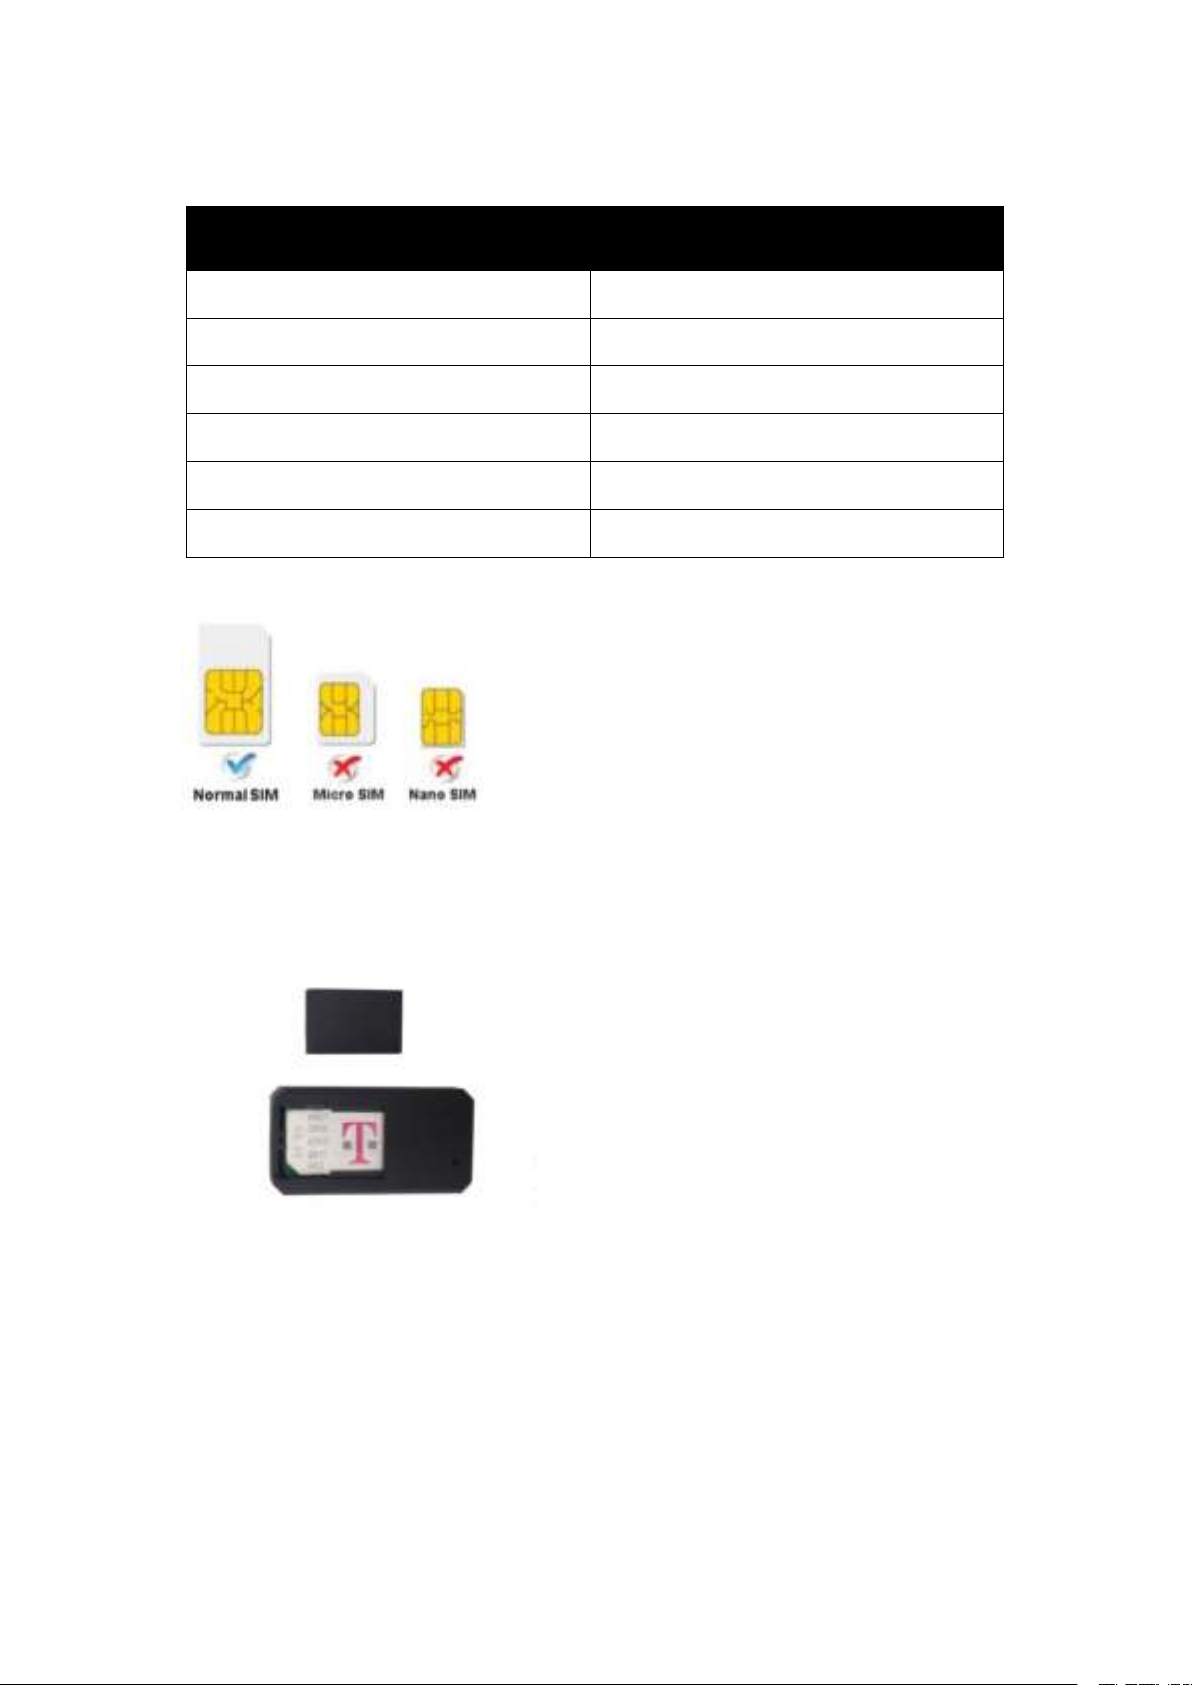
Note: GSM SIM CARD INSTALLATION GUIDE: Only GSM SIM card works in this model
Open the cover, insert the SIM card, the device auto starts.
In 30 or 60 seconds, the unit will begin to work and acquire the GSM signals as
well as the GPS signals. The indicator will keep flashing every 3 seconds when
the unit has received the signals.
When this unit receives GPS signals normally, you can use it and do any setting
as the instructions of this manual.
The device automatically turns off when the SIM card removed.
3.TURN ON THE DEVICE
Page 4
4.SMS TRACKING
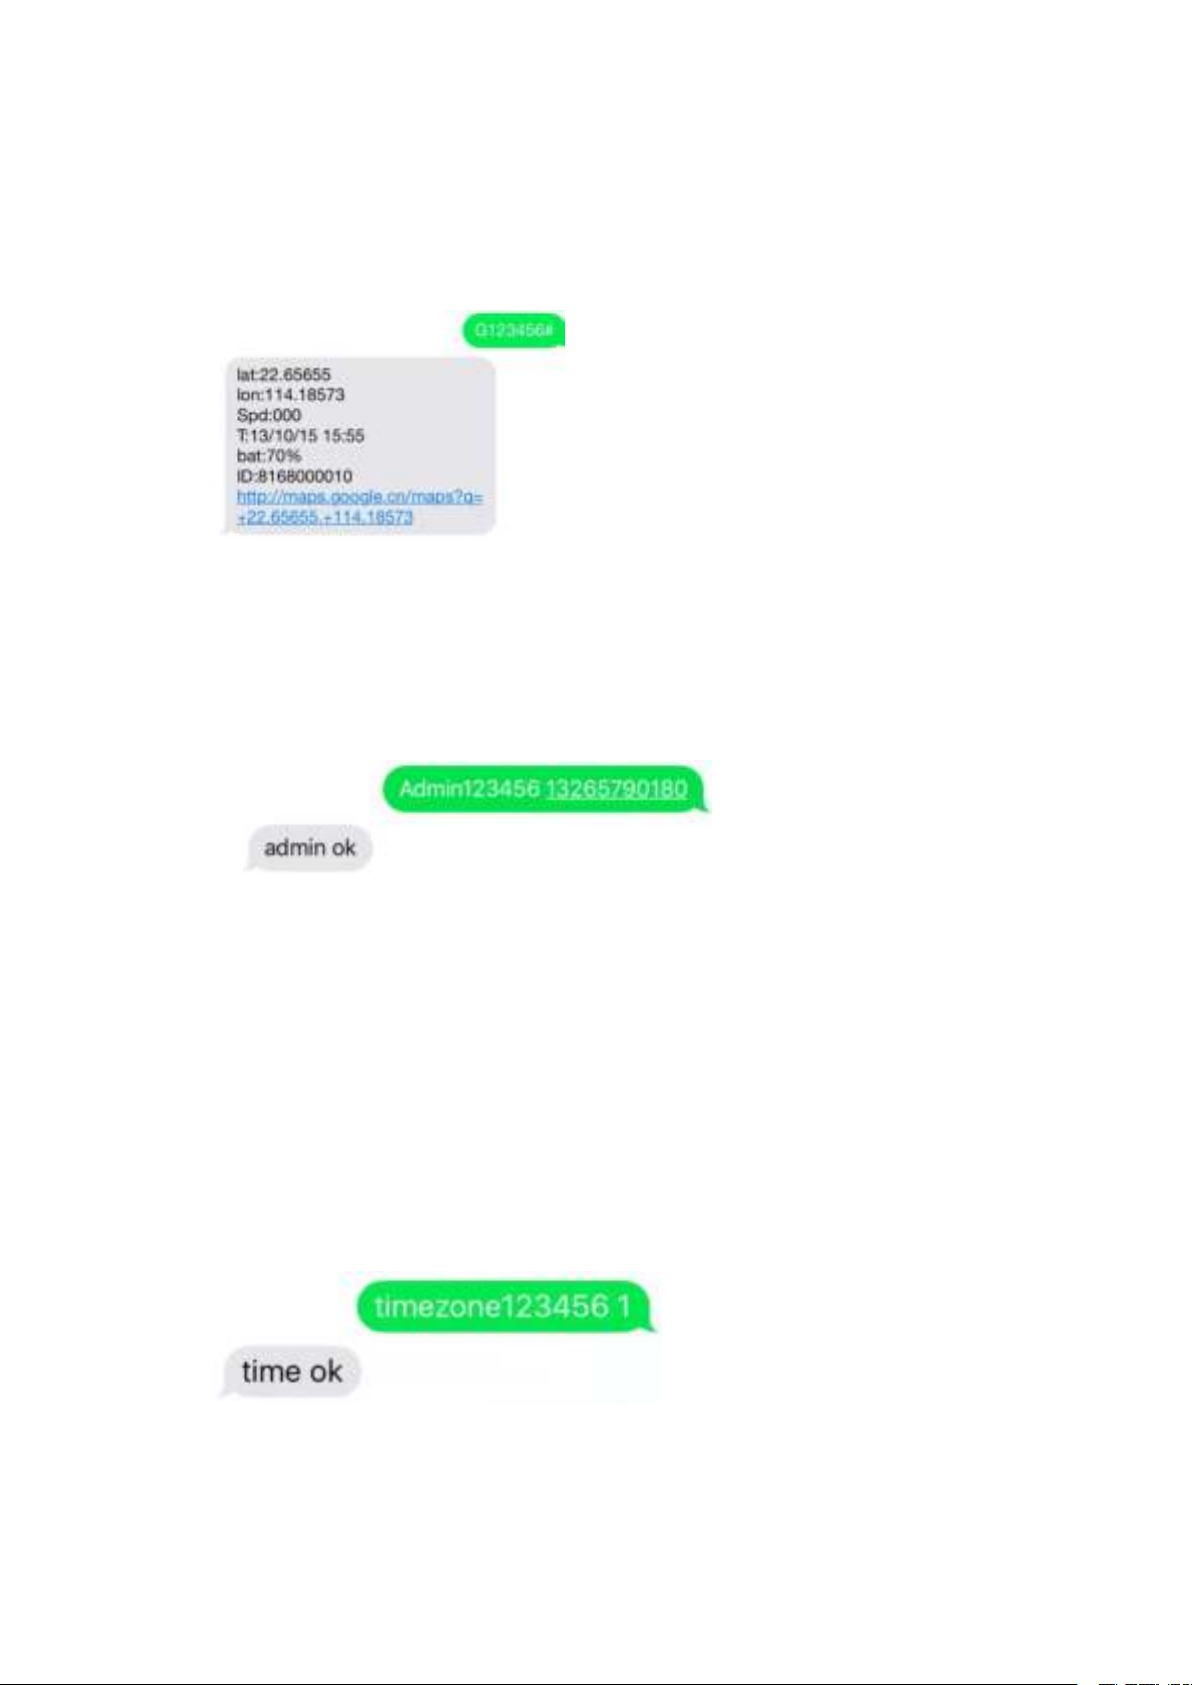
4.1. Call the SIM card phone number in tracker,you will receive a Google Maps link of position,
Command: admin123456 phone number ( This phone number is your own mobile phone
number , not the SIM card number in tracker .)
Reply:admin ok
Admin number Canceling:
Command :noadmin123456
Reply:noadmin ok
4.3.Terminal (local) Time Setting (factory setting GMT 0)
Command:timezone123456 local time zone
Reply:time ok!
E.g: timezone123456 1
timezone123456 -1
timezone123456 0
4.4. Reset Hardware
Command:begin123456
Reply:begin ok
or sending message “
E.g:
4.2. Admin number setting (After admin number setting, all SMS operations to the device are
under this number only.)
E.g:admin123456 xxxxxxxxxx
G123456#” to SIM card phone number in tracker .
When the unit is in over-speed alarm, shake sensor alarm, or low battery alarm, it will send alert to
the admin number.(13265790180)
Page 5
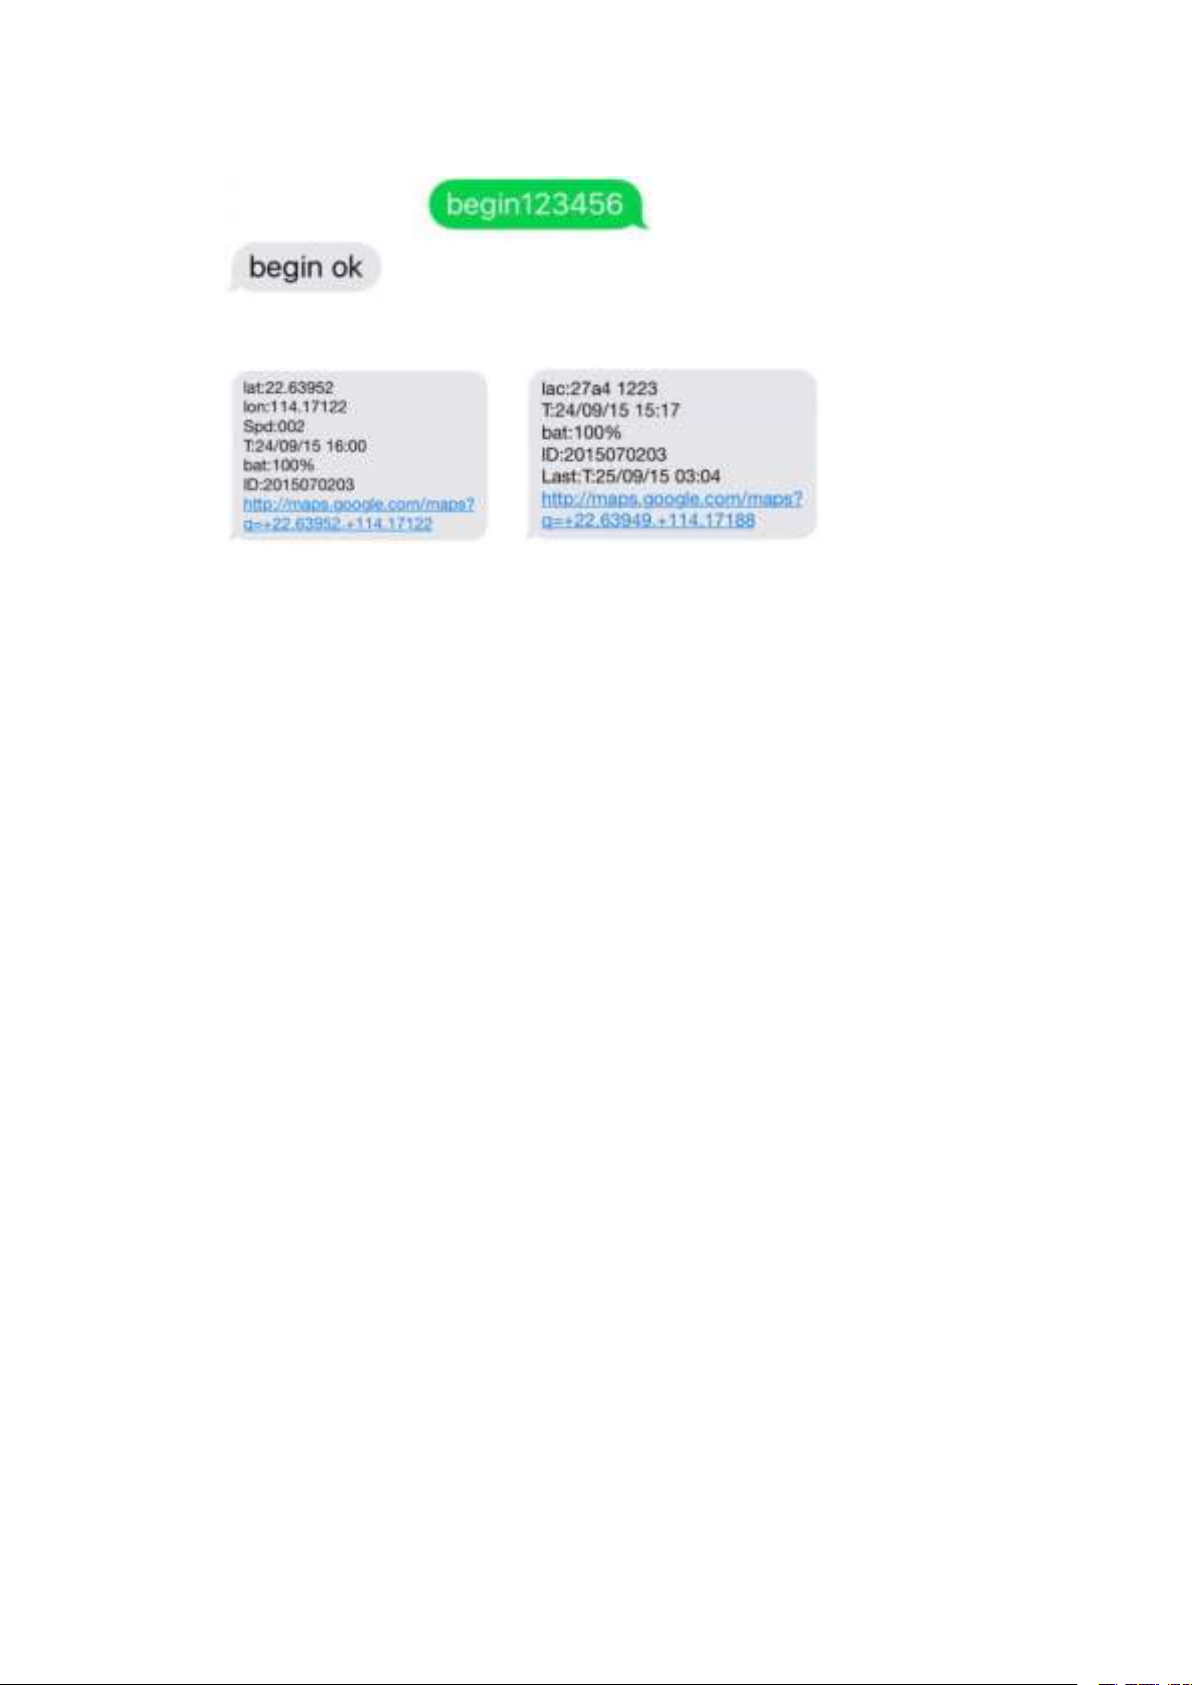
E.g:
Lat:22.63952 lon:114.17122 Positioning of the latitude and longitude values.
Spd:000 This refers to the device moving speed. The unit is km/h.
T:24/09/15 16:00 real-tracking time, the Default is London time. You can
set language and time zone in APP.
Bat:100% The battery value is between 10% and 100%. Once it is less
than 20%, it alarms.
2015070203: Device ID No. to log in APP and platform.
Google Link: This is the link to the Google map showing the position of
the device.
Lac:27a4 1223: Real-time LBS positioning data.
T:24/09/15 15:17 LBS positioning time.
Bat
:
100% The battery value is between 10% and 100%. Once it is less
than 20%, it alarms.
Last:T:25/09/15 03:04 The date and time stamp when the unit last
received a GPS signal.
Google Link: This is the position of last gps signal appeared
5. EXPLANATION OF PARAMETERS/CODES IN SMS MESSAGE
Pic(1
Pic 1
Pic 2
)
Replied real-time tracking information under GPS satellites signal.
:
Replied LBS tracking information without GPS satellites signal.
:
Pic(2
)
6. 0 START ONLINE TRACKING
Pls activate GPRS by sending command “
following steps.
Every sim card carrier has own APN content, we have two methods to find out apn content : check sim
card carrier on internet or put sim card into cell phone to find out APN
Two steps to set apn:
gprs123456” when the tracker is on, and set APN by
Page 6
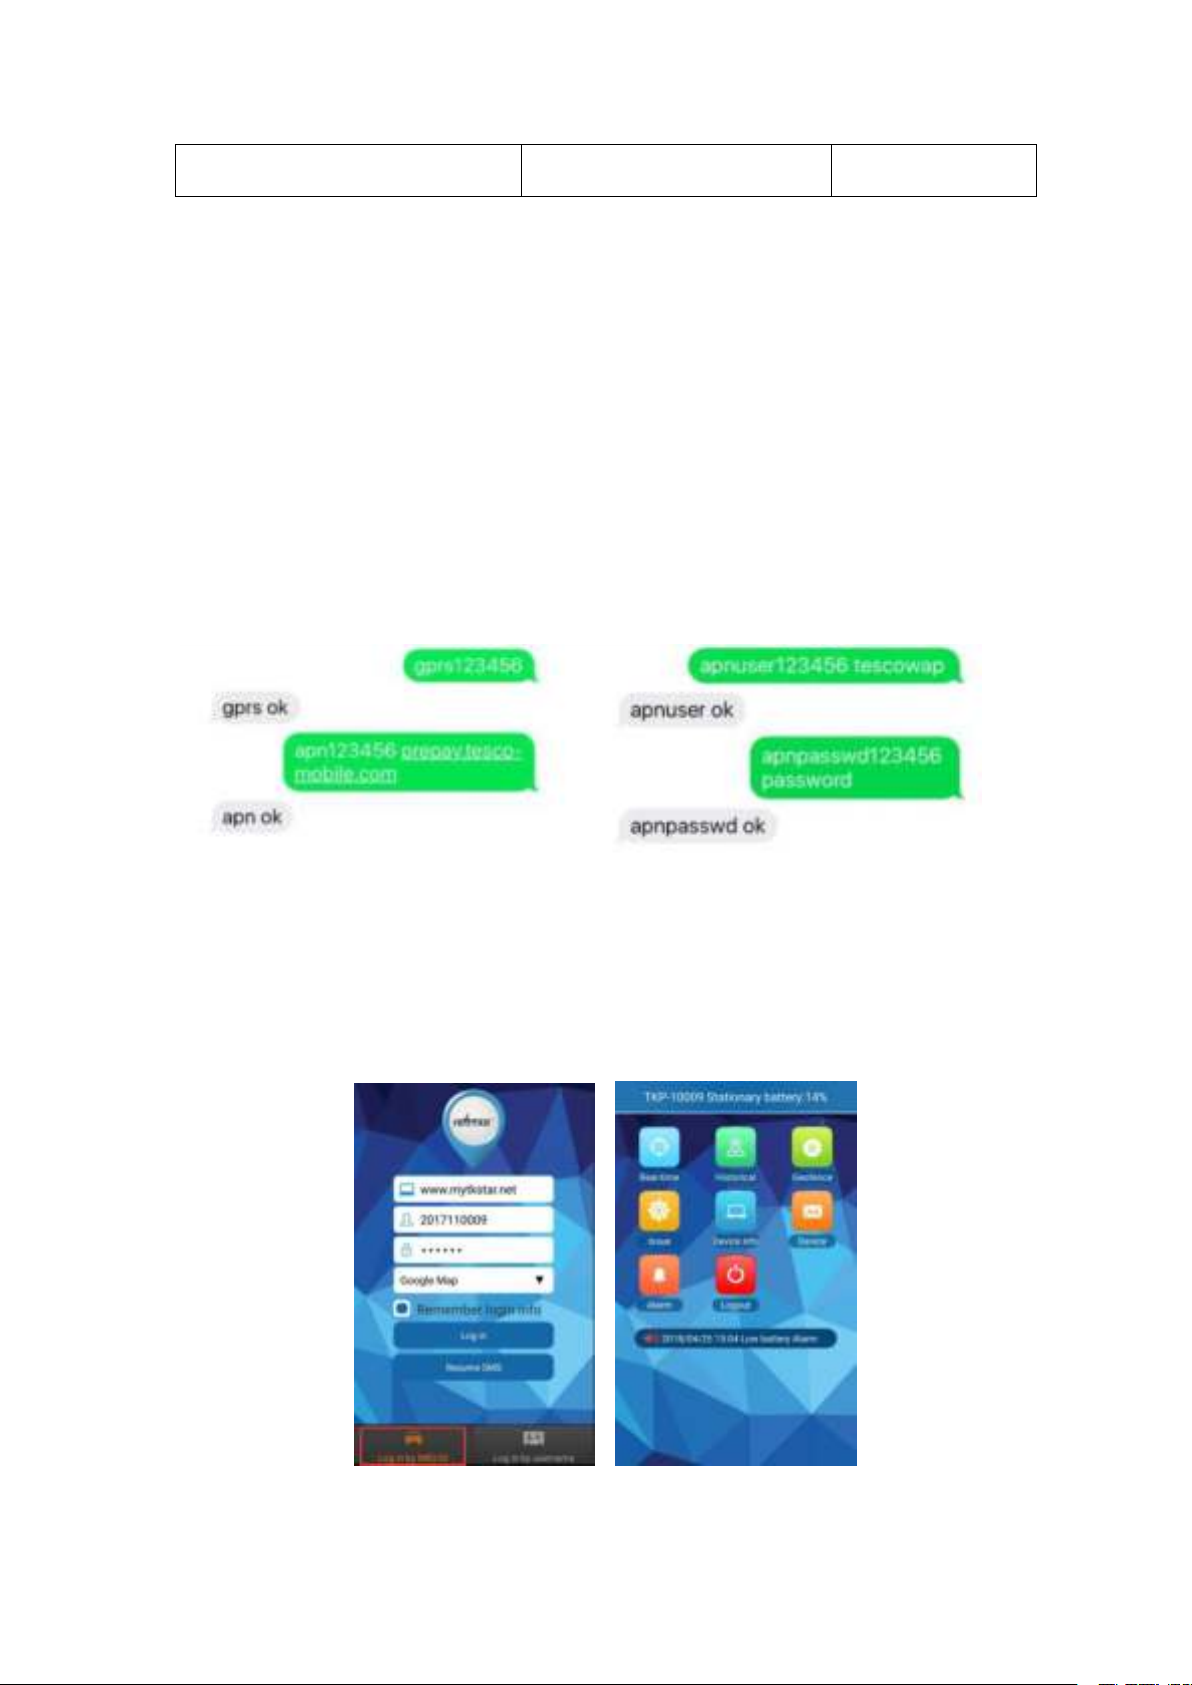
1), Turn on gprs function by sending command “gprs123456”
INSTRUCTION
COMMAND
REPLY
Turn on GPRS
GPRS123456
GPRS OK
Set APN
( any existing will be replaced)
apn123456 xxxx
apn ok
Set APN username
apnuser123456 xxxx
apnuser ok
2),Set apn by sending command “
content
” pls note the content is from SIM card carrier , there is small blank after 123456 in every
command.
apn123456 content” , “apnuser123456 content” ,“apnpasswd123456
6.1. WEBSITE TRACKING
Platform :
www.mytkstar.net
IMEI/ID No. : on the back side of cover
Password: 123456
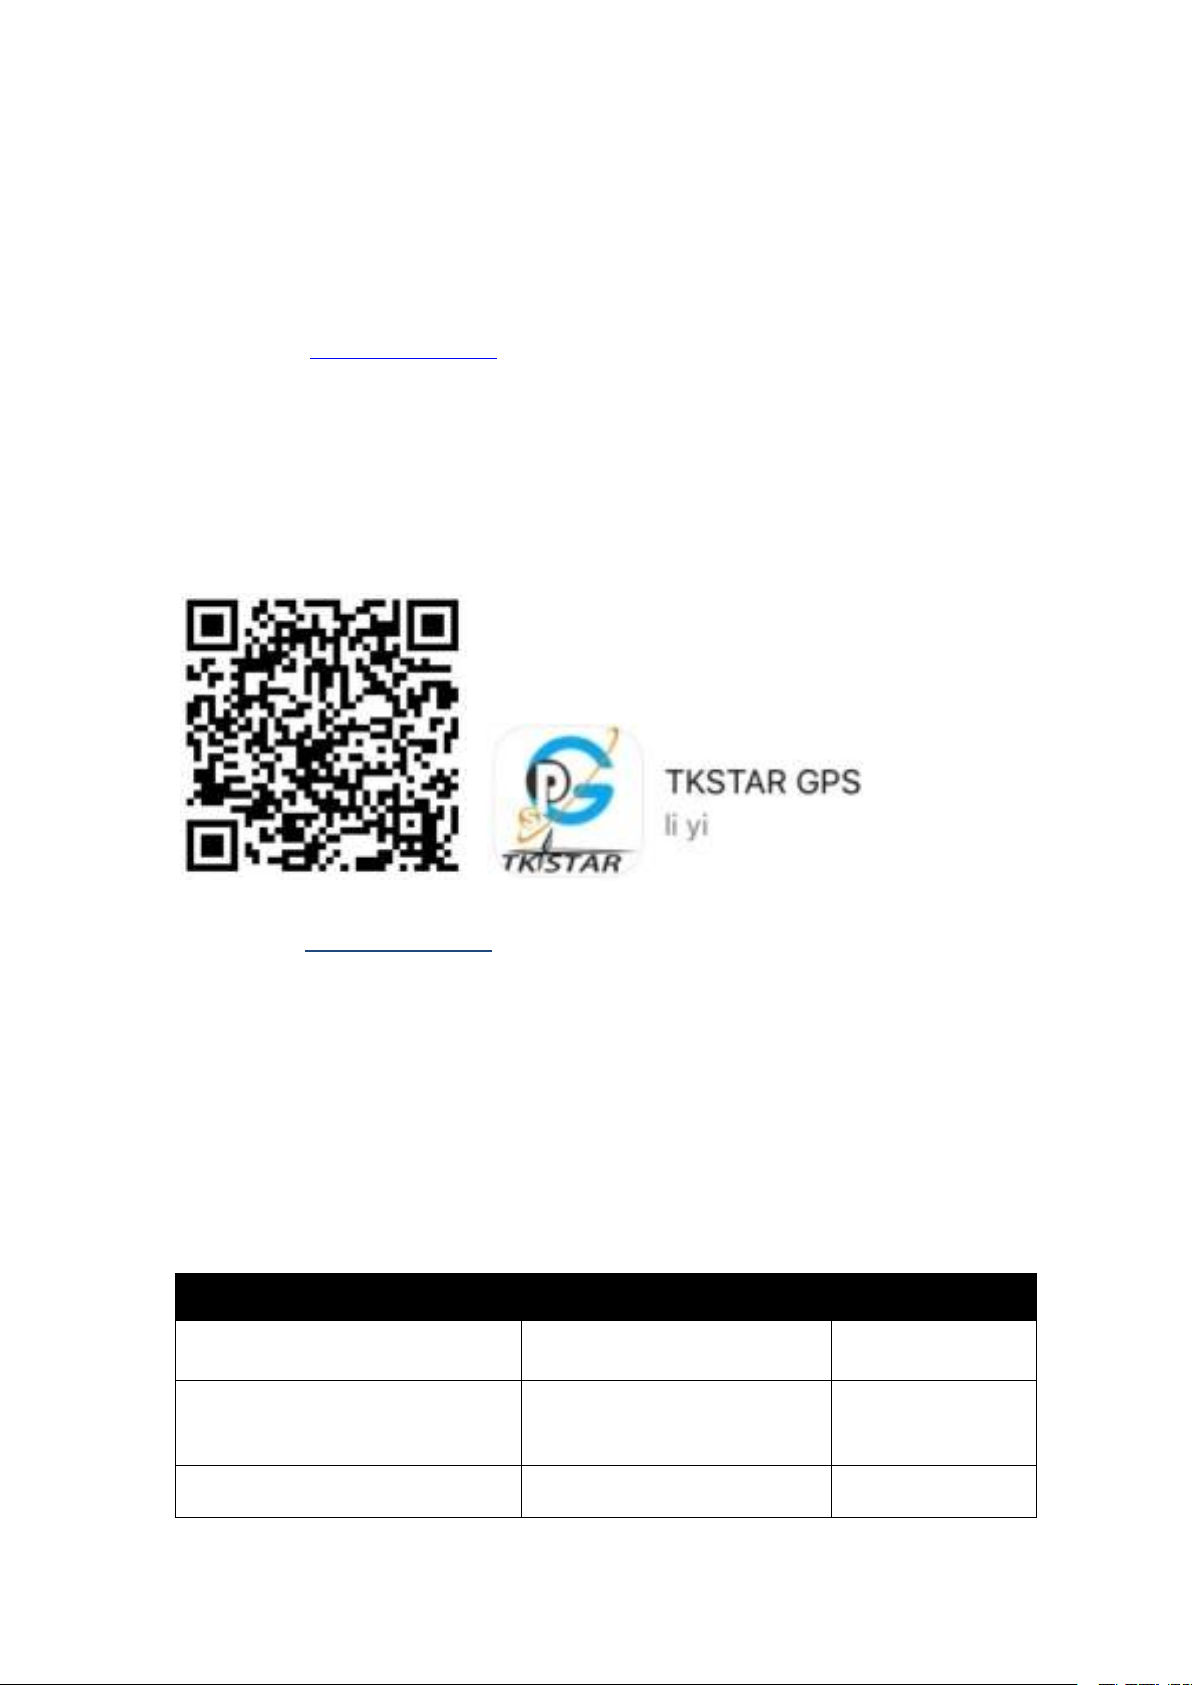
6.2. APPLICATIONS FOR ANDROID/IOS
Search “TKSTAR GPS” in the Apple App Store/Google Play
Store or Scan the QR Code to install the applications on
your cell phone.
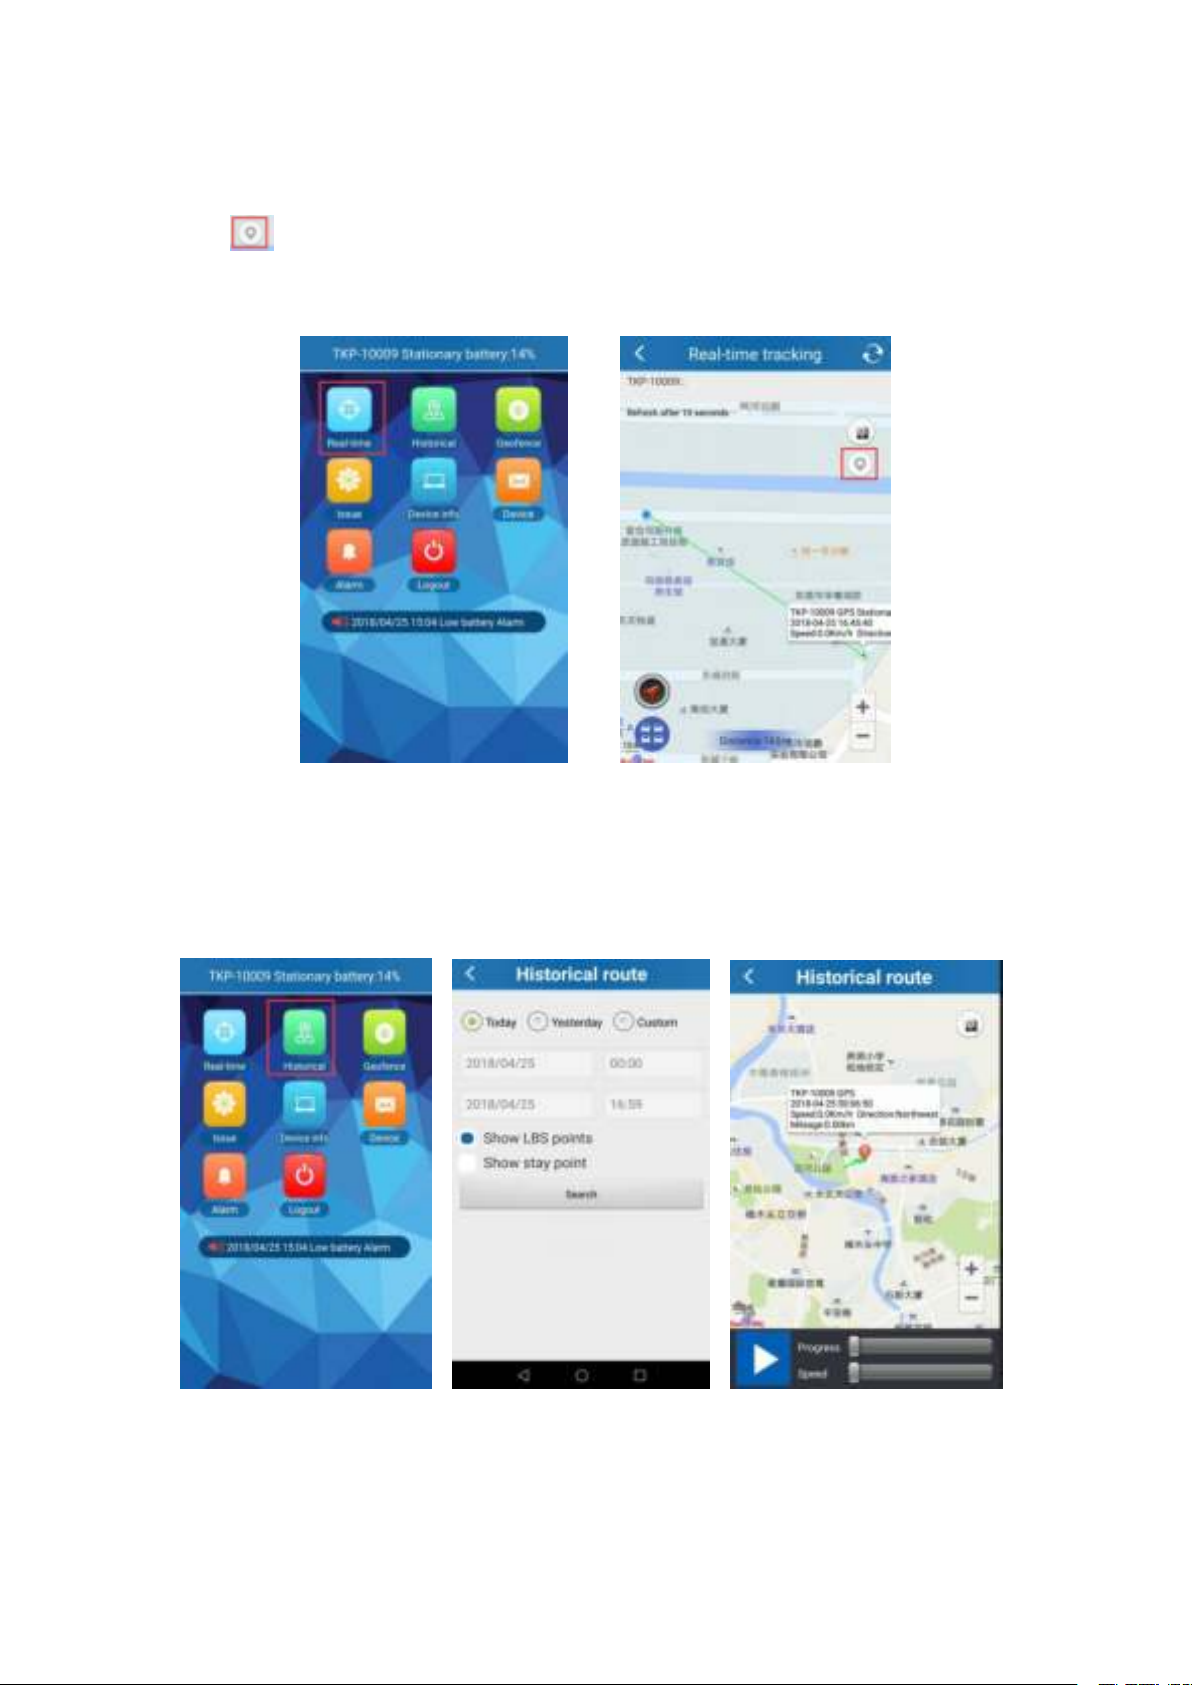
Select “Log in by IMEI/ID” on the bottom of screen
Server:
www.mytkstar.net
IMEI/ID : on the back side of cover
Password: 123456
6.3. GPRS and APN Seting
Turn on GPRS function by sending command “
GPRS123456” to the tracker, and set
the APN for the tracker, then its online tracking by APP and platform works. (if
you did it already in 6.0, no need to it one more time )
COMMAND INSTRUCTION TO SET APN
Page 7
E.g:
Set APN password
apnpasswd123456 xxxx
apnpasswd ok
For tesco mobile SIM card in UK, we got APN information below.
APN name:prepay.tesco-mobile.com
APN username:tescowap
APN password:password
Send SMS to set apn below
1.
gprs123456
2. apn123456 prepay.tesco-mobile.com
3. apnuser123456 tescowap (no need to set if without apnuser)
4.
apnpasswd123456 password (no need to set if without password)
6.4 Login the app
Click the icon “TKSTAR GPS” on desktop and then login the ID and the password of the device
(the default password is 123456). User can login by ID or by username, user need to contact
reseller to register a username if need to login by username.
6.5 Real-time tracking
Page 8
Real-time tracking can not only track the position of the device, but also can track the position of
smart phone, user can click “+” and “-” to zoom in and zoom out the map.
Click“
you will get the Google link in SMS.
” once , APP will show you the latest position;or call the phone number in tracker ,
6.6 Historical track playback
Historical track could find the route map for nearly six months by choosing the beginning and
endingtime.
6.7 Geo-fence
Clickon the upper right corner “+”under main menu for setup geo-fence. Then the device will
lock device’s present position as center automatically, then adjust the radius distance by “+”
Page 9
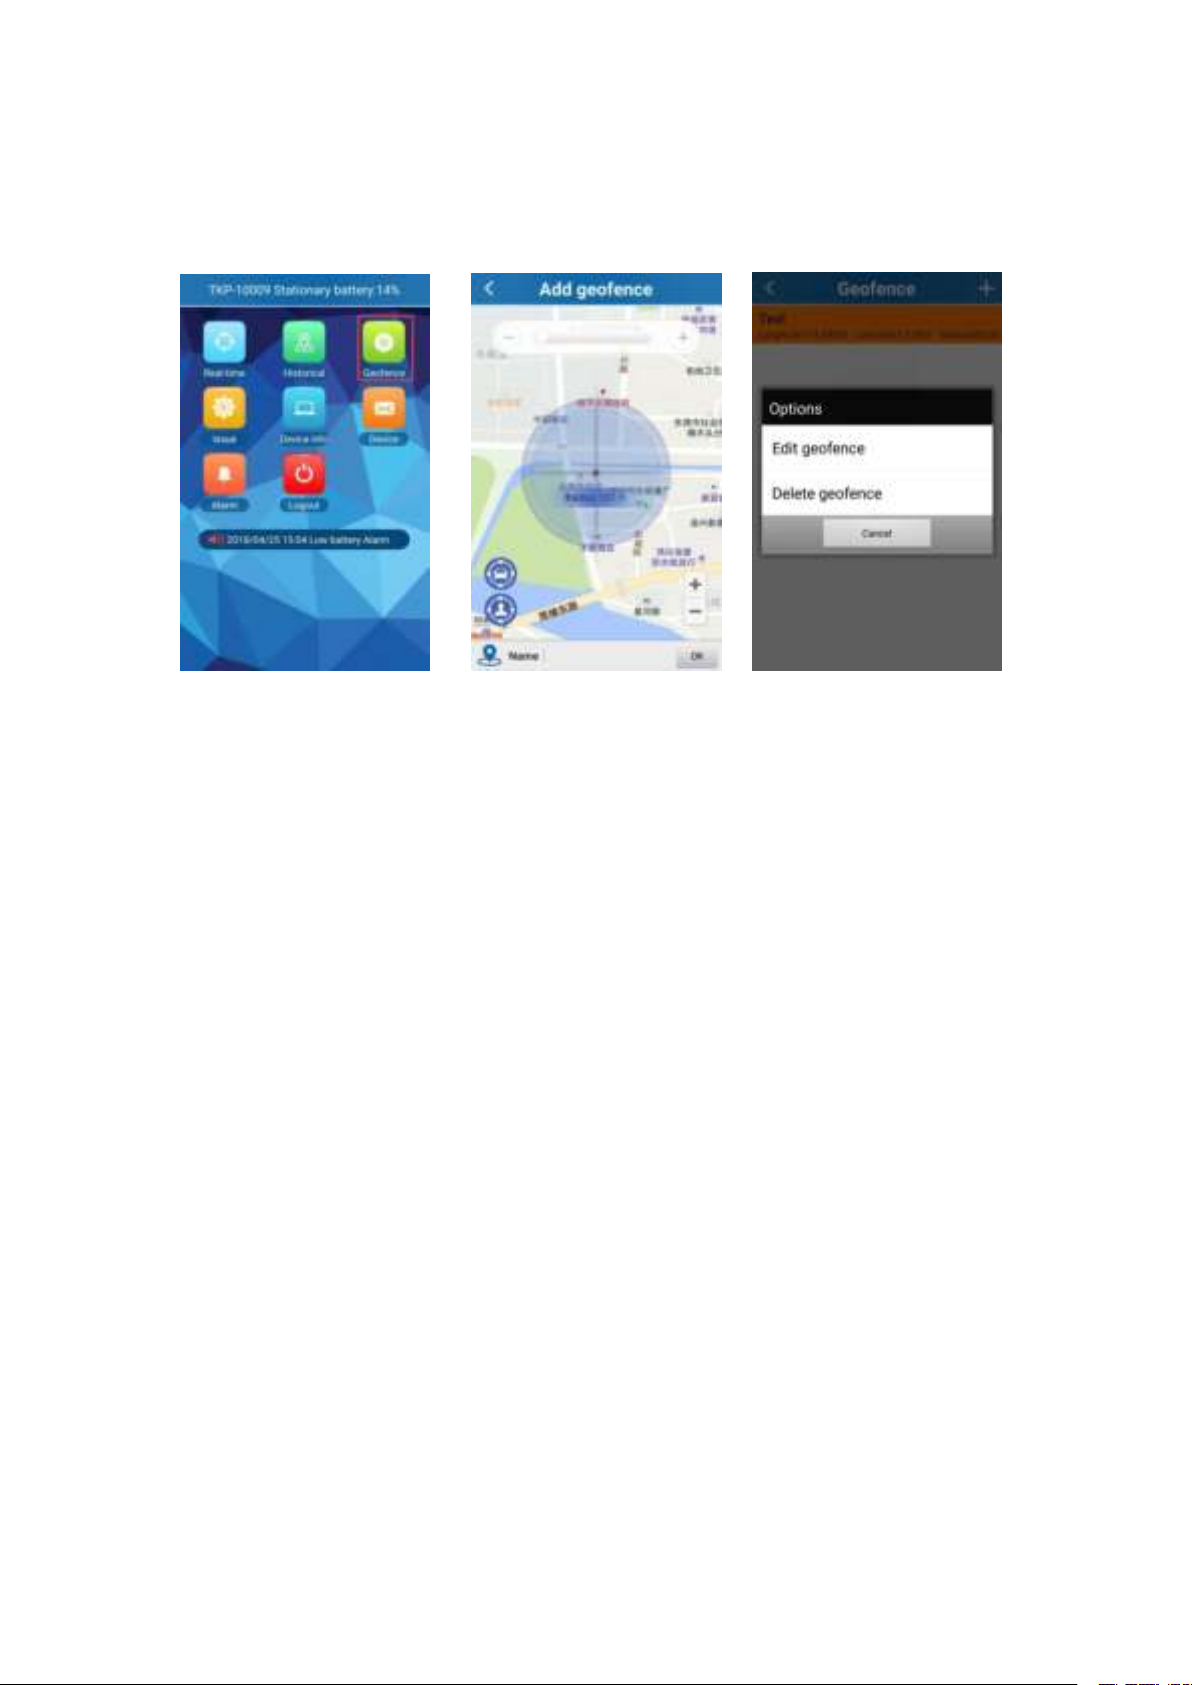
“-” onmap (default radius is 100 meters, recommended radius is 500 meters) .Save settingsby
clicking “OK”. The device will send message when the device is out ofthe range.
Page 10
7. Notices:
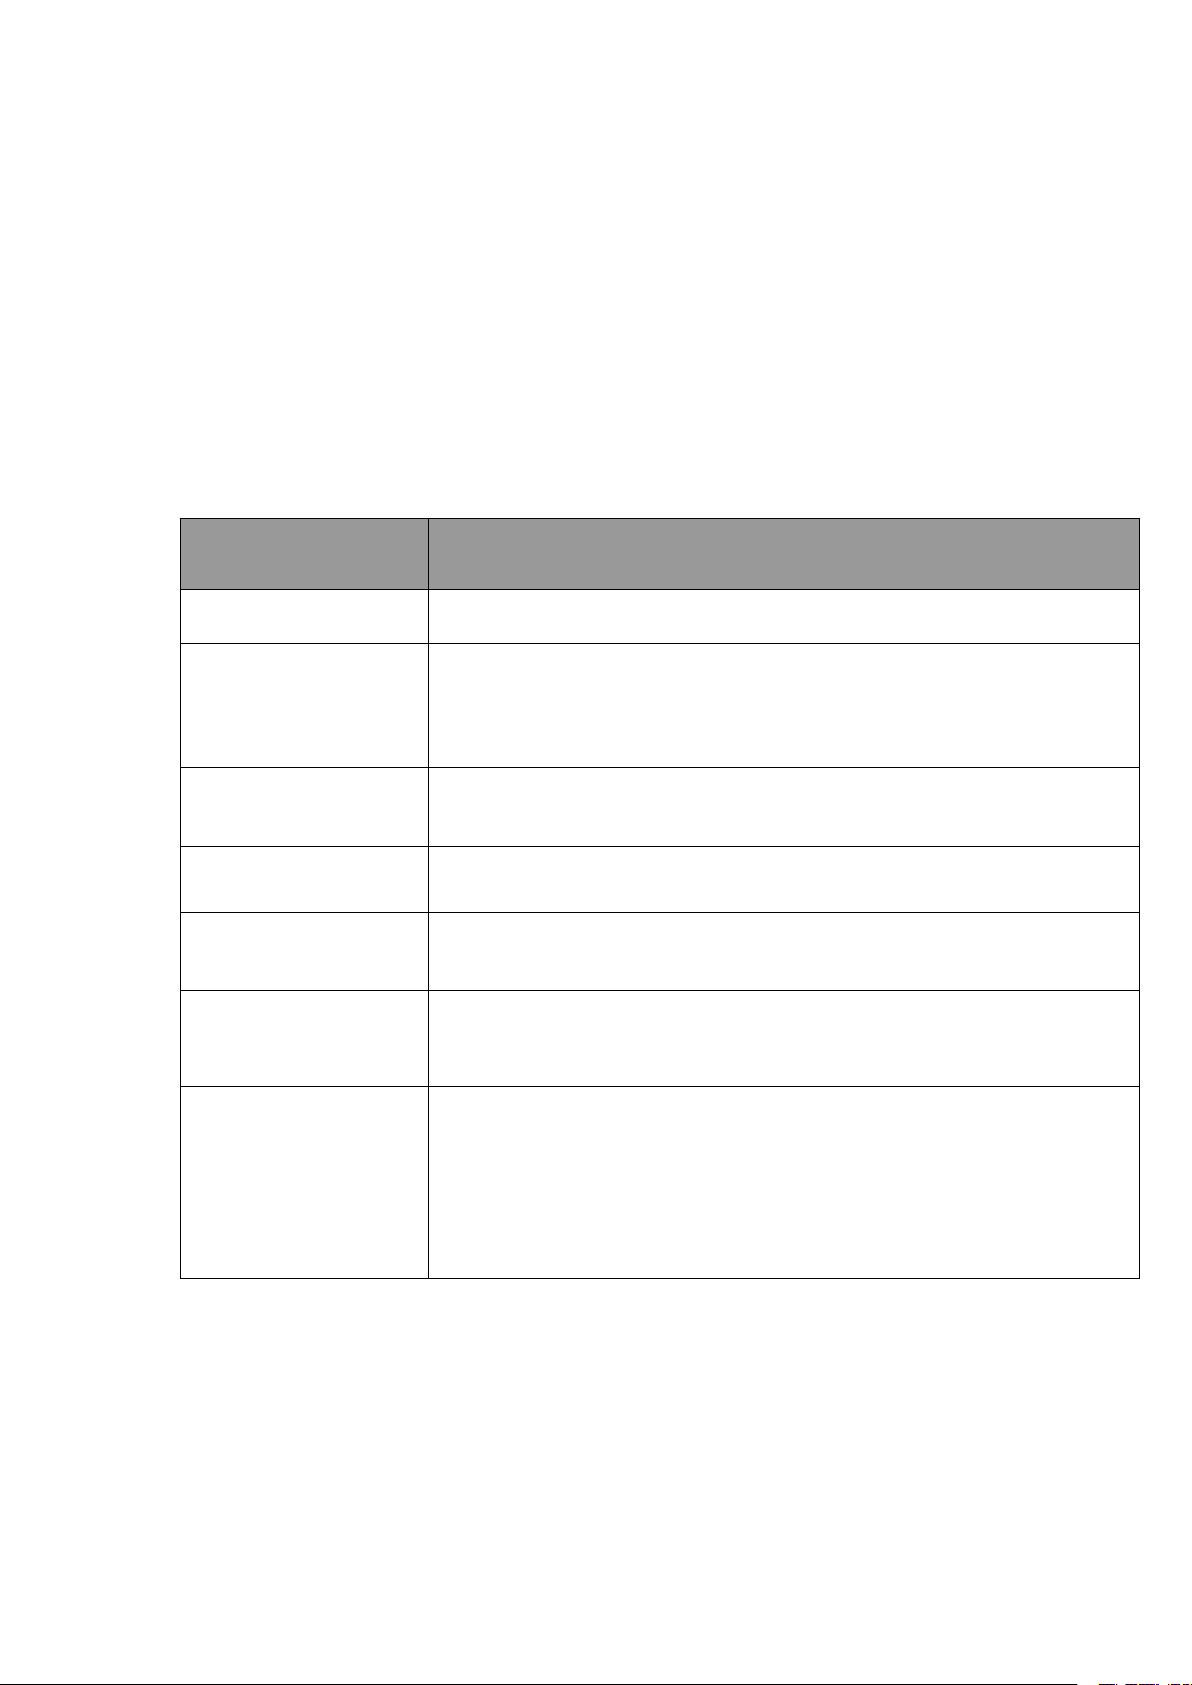
FAQ
Instructions/Solutions
Fail to turn it on
Please check if battery is charged
No GSM signal
Please check if SIM card installed correctly.
Please check if SIM card is GSM network.
Don’t turn on the PIN code
no calls can be diverted
No GPS signal
A more open view of the sky is recommended to make sure the device can receive
the GPS signal normally.
No reply to SMS command
Password wrong or the format is wrong.
No reply to calling & No
alarm message
Authorized / admin phone number is incorrect or has not setup.
SMS position OK, cannot
use the APP and web
platform
Pls check if APN is correctly set. And pls find out the correct APN content of the
SIM card. (Pls refer to 6.3 setting.).
Platform position is difference
from the actual position.
No uploading position time or no GPS signal: call the device phone number and receive
the position message. If it shows like Pic 2, it means no GPS signal. The position is the
last GPS positioning location; If it shows like Pic 1, it means the device doesn’t reach
the uploading time.
1.GPS tracking can be worked outdoor.
2.Please make sure GSM SIM card supports making calls, sending messages, GPRS
network.
3.Please make sure GSM SIM card is with sufficient balance.
4.Please make sure the GSM card has opened the call shows and turned off the call
transfer.
5.Please insert the GSM phone card correctly.
6.Do not assembly and disassembly device at will.
8. FAQ and processing methods.
 Loading...