

Page 1

File Sharing Application Guide
Rev: 2.0.0
1910011064
Page 2

Contents
Overview ...................................................................................................................................................... 1
How to Configure the Router ..................................................................................................................... 2
Share all files ..................................................................................................................................................... 3
Share the selected files ...................................................................................................................................... 4
How to Access ............................................................................................................................................. 7
LAN Access ........................................................................................................................................................ 7
WAN Access .................................................................................................................................................... 12
How to create a user account .................................................................................................................. 16
Page 3
Overview
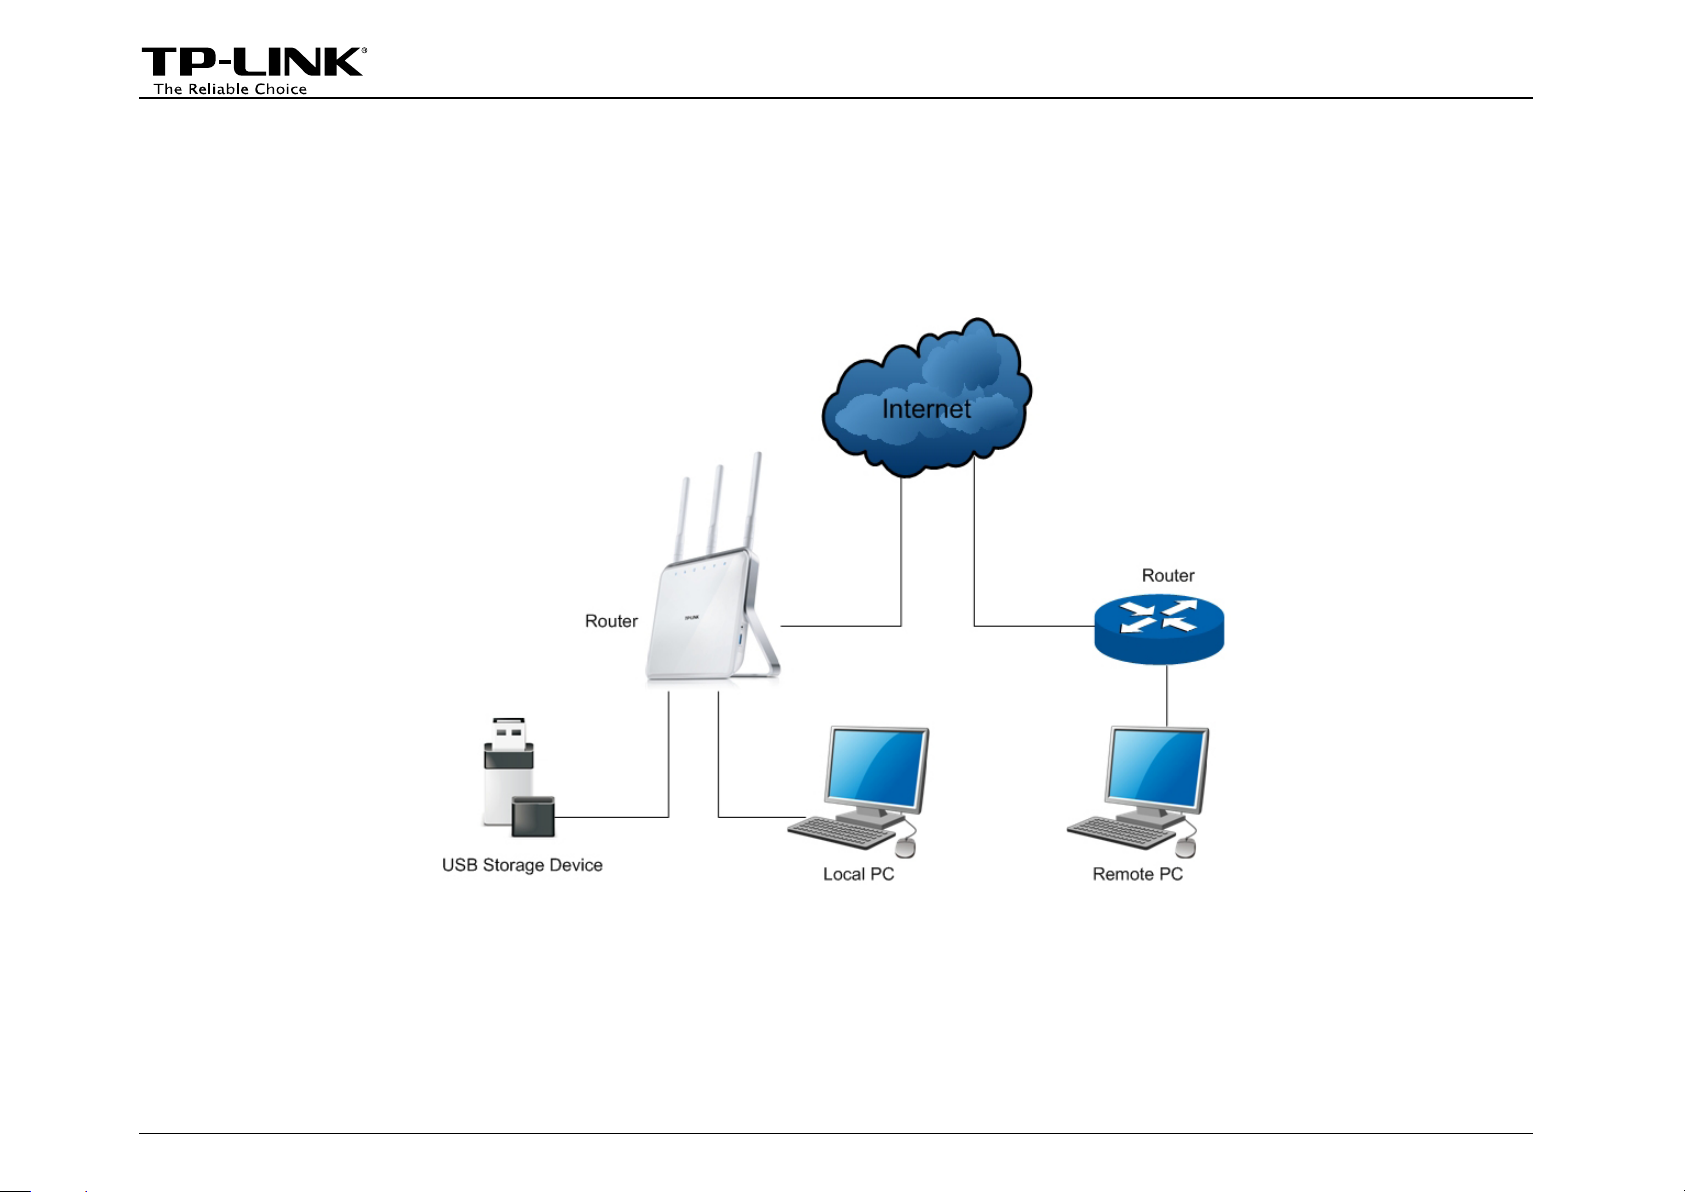
File sharing feature allows you to share a USB storage device that’s connected to the router, with users in the
local or public network.
Typical Topology
Note:
Here in this guide, we take the configuration procedures of Archer C8 for example.
-1-
Page 4

How to Configure the Router
1. Make sure an external USB hard disk drive or USB flash drive is plugged into the USB port of the Router. And
then log in to the router’s web management page.
2. Go to Basic→USB Settings→File Sharing, the screen will appear similar to figure below. Follow the steps
in the figure.
-2-
Page 5
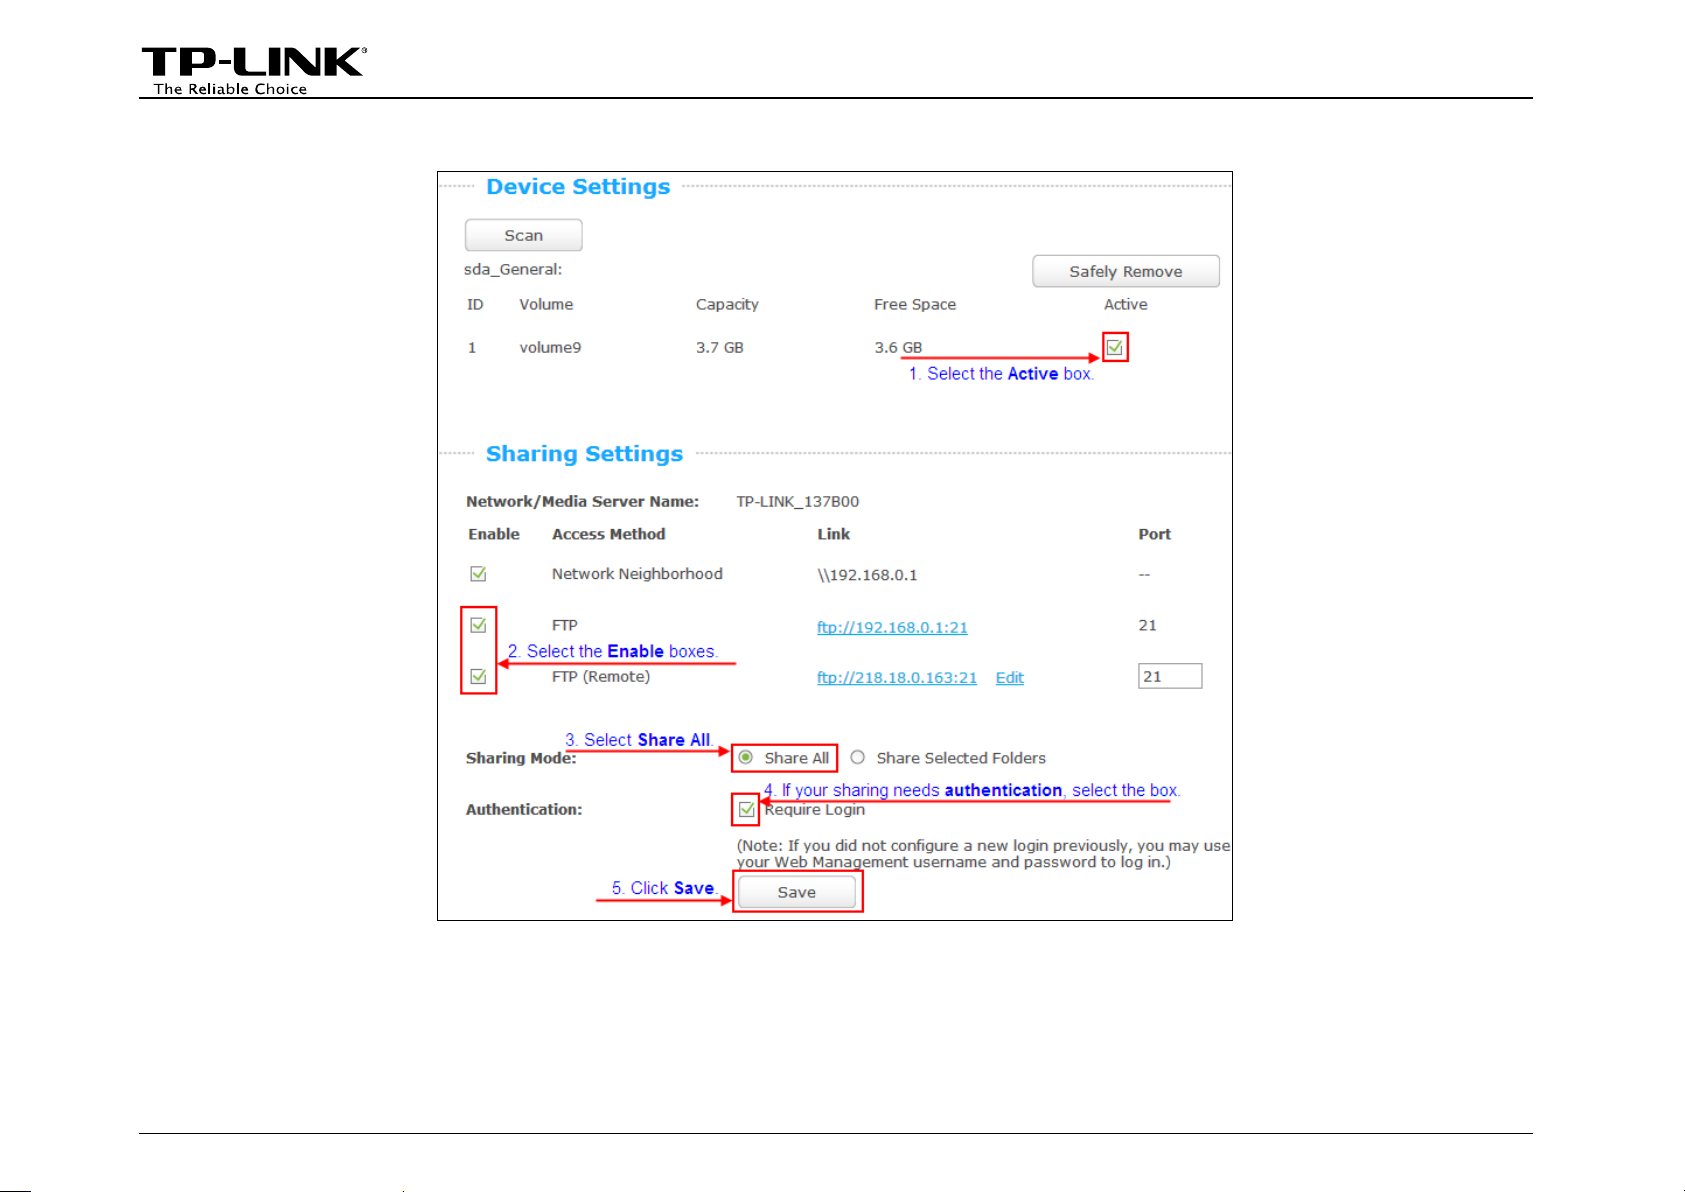
Share all files
-3-
Page 6
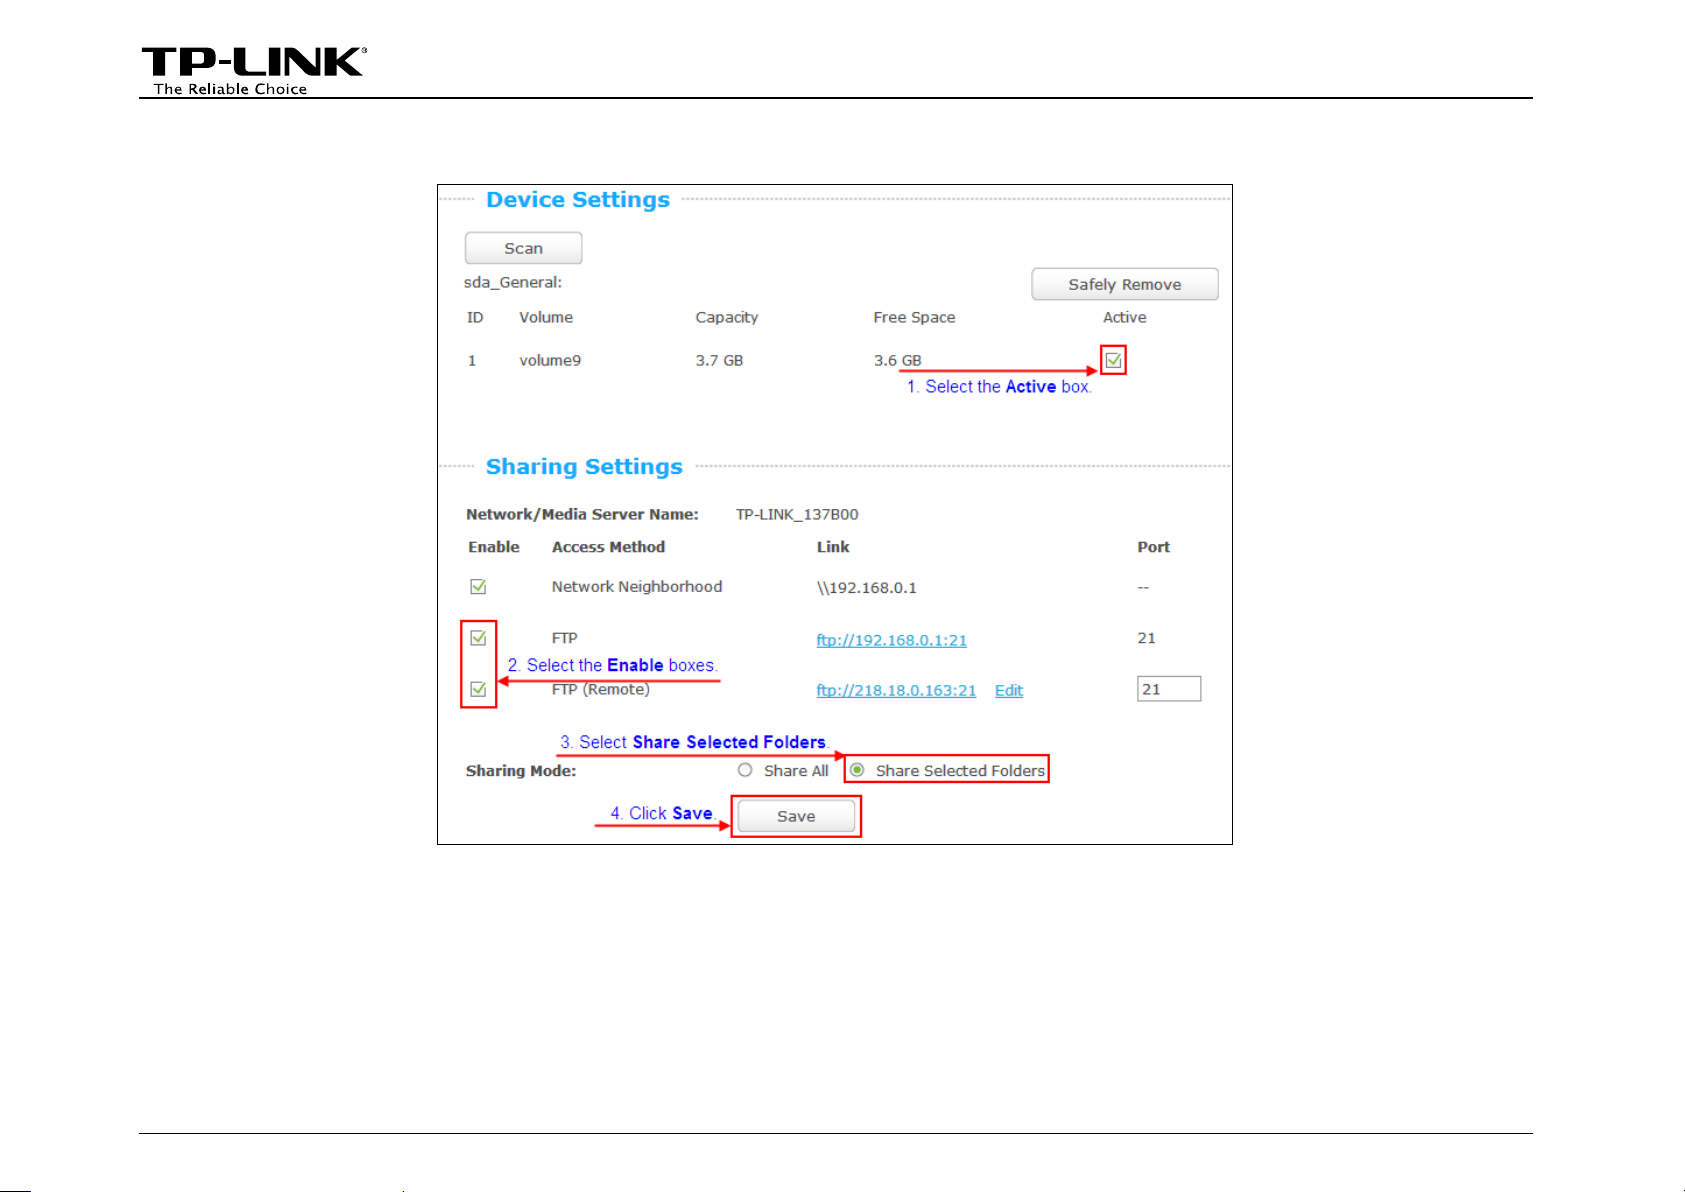
Share the selected files
-4-
Page 7

-5-
Page 8

-6-
Page 9

How to Access
LAN Access
• For Windows Users:
Windows XP:
• Go to Start > My Computer
• Input ftp://192.168.0.1:21 in the address
field
• Press Enter
Windows Vista/7:
• Go to Start > Computer
• Input ftp://192.168.0.1:21 in the address
field
• Click Go or press Enter
Windows 8:
• Move your mouse to the lower right corner
and you will see Search icon in the
Popups. Click it and search computer
• Go to computer page, and input
ftp://192.168.0.1:21 in the address field
• Click Go or press Enter.
-7-
Page 10

you will be
Note:
If Authentication is enabled,
required to enter the username and password
after pressing Enter.
-8-
Page 11

• On the top tray, go to Go > Connect to
you will be
required to enter the username and password
• For Mac OS X Users:
Server
• Input Server Address ftp://192.168.0.1:21
• Click Connect
Note:
If Authentication is enabled,
after pressing Enter.
-9-
Page 12
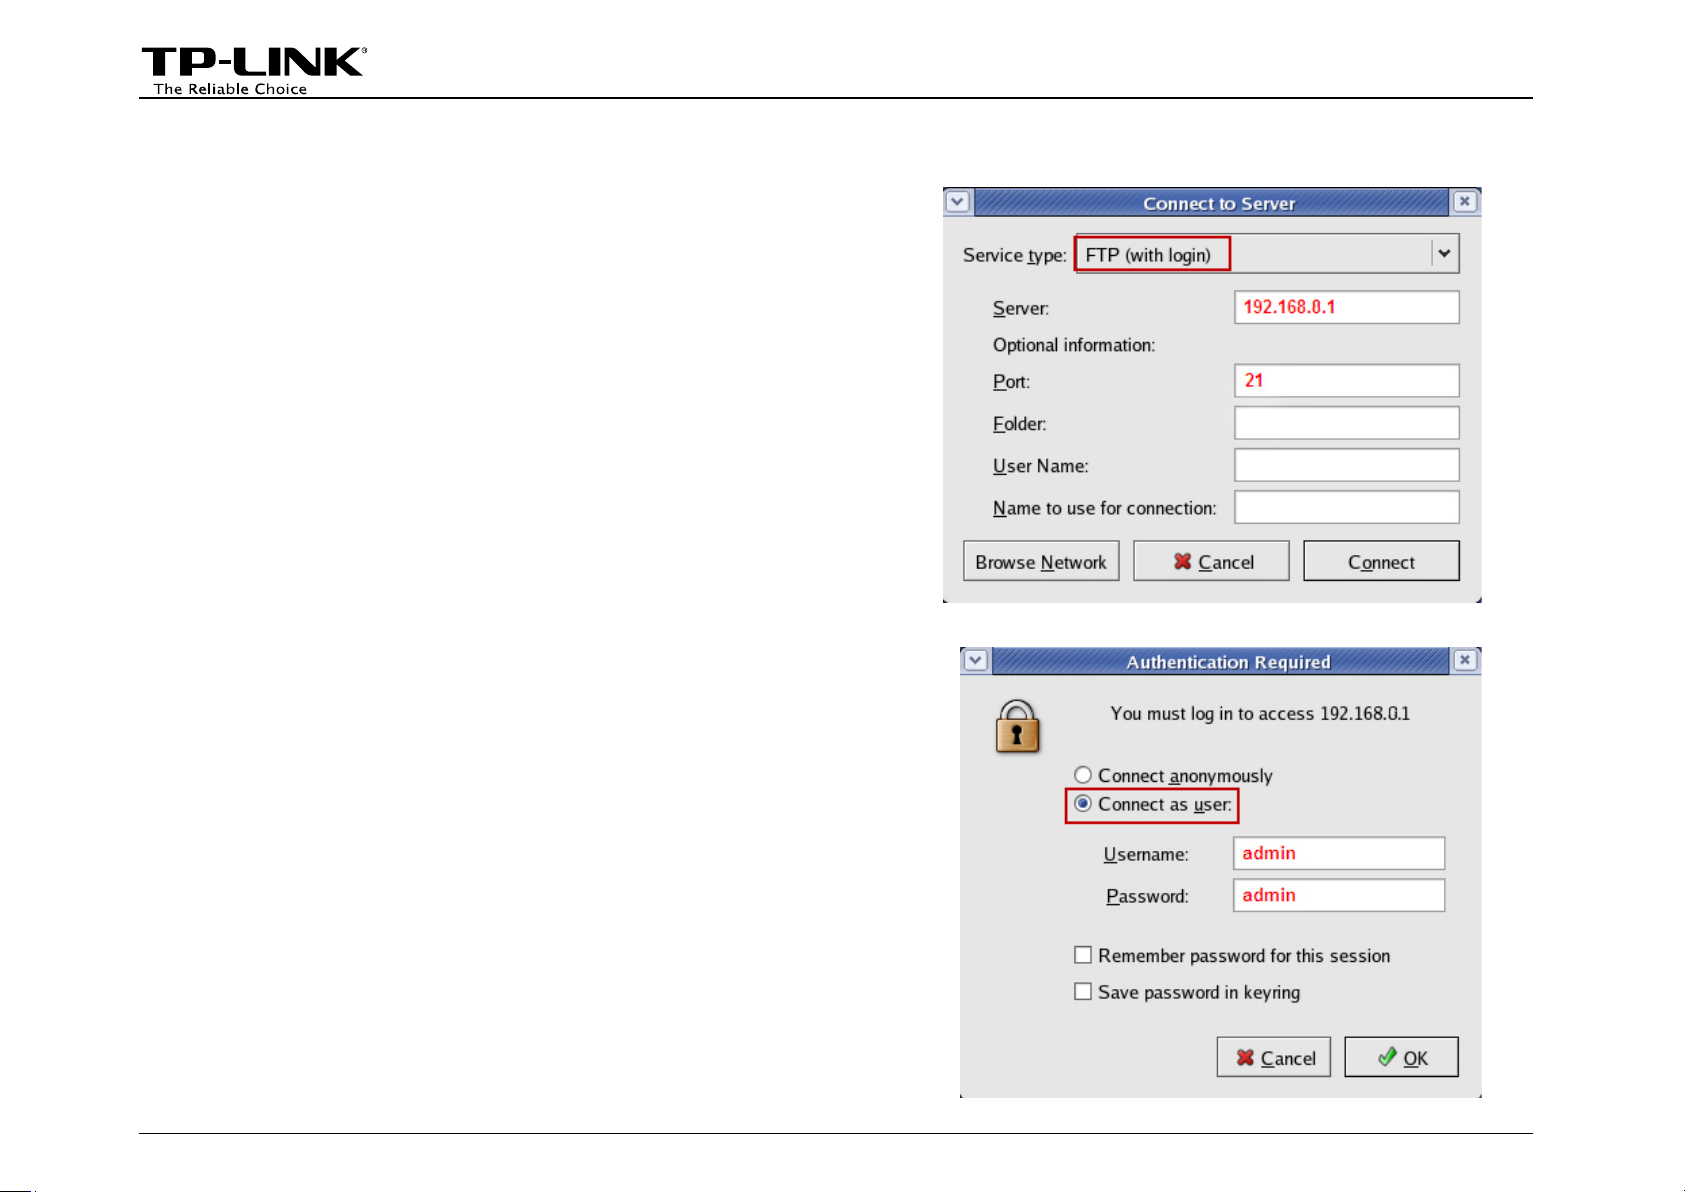
• On the top tray, go to Places > Connect to
you will be
he username and password
• For Linux Users:
Server
• Choose Service type FTP(with login)
• Input Server 192.168.0.1
• Input Port 21
• Click Connect.
Note:
If Authentication is enabled,
required to enter t
after clicking Connect.
-10-
Page 13

• For third party FTP client software users (Here we take CuteFTP Professional 8 for example.)
• Open the CuteFTP
you need to
enter the username and password before
• Go to File >New >FTP Site or press Ctrl+N
to open a new Site properties.
• Set the dialog box as shown in the figure
and click Connect.
Note:
If Authentication is enabled,
clicking Connect.
-11-
Page 14

WAN Access
Windows XP:
• For Windows Users:
• Go to Start > My Computer
• Input ftp://218.18.0.163:21 in the address
field
• Press Enter
Windows Vista/7:
• Go to Start > Computer
• Input ftp://218.18.0.163:21 in the address
field
• Click Go or press Enter
Windows 8:
• Move your mouse to the lower right corner
and you will see Search icon in the
Popups. Click it and search computer
• Go to computer page, and input
ftp://218.18.0.163:21 in the address field
• Click Go or press Enter
Note:
If Authentication is enabled, you will be
required to enter the username and password
after pressing Enter.
-12-
Page 15

• On the top tray, go to Go > Connect to
you will be
required to enter the username and password
• For Mac OS X Users:
Server
• Input Server Address ftp://218.18.0.163
• Click Connect
Note:
If Authentication is enabled,
after pressing Enter.
-13-
Page 16

• On the top tray, go to Places > Connect to
you will be
required to enter the username and password
• For Linux Users:
Server
• Choose Service type FTP(with login)
• Input Server 218.18.0.163
• Click Connect
Note:
If Authentication is enabled,
after pressing Enter.
-14-
Page 17

you will be
required to enter the username and password
• For third party FTP client software users (Here we take CuteFTP Professional 8 for example.)
• Open the CuteFTP
• Go to File >New >FTP Site or press Ctrl+N
to open a new Site properties.
• Set the dialog box as shown in the figure
and click Connect.
Note:
If Authentication is enabled,
after pressing Enter.
-15-
Page 18

How to create a user account
Log onto the web-based management page, then go to Advanced→USB Settings→File Sharing and follow the
steps in the figure below.
-16-
 Loading...