

Page 1
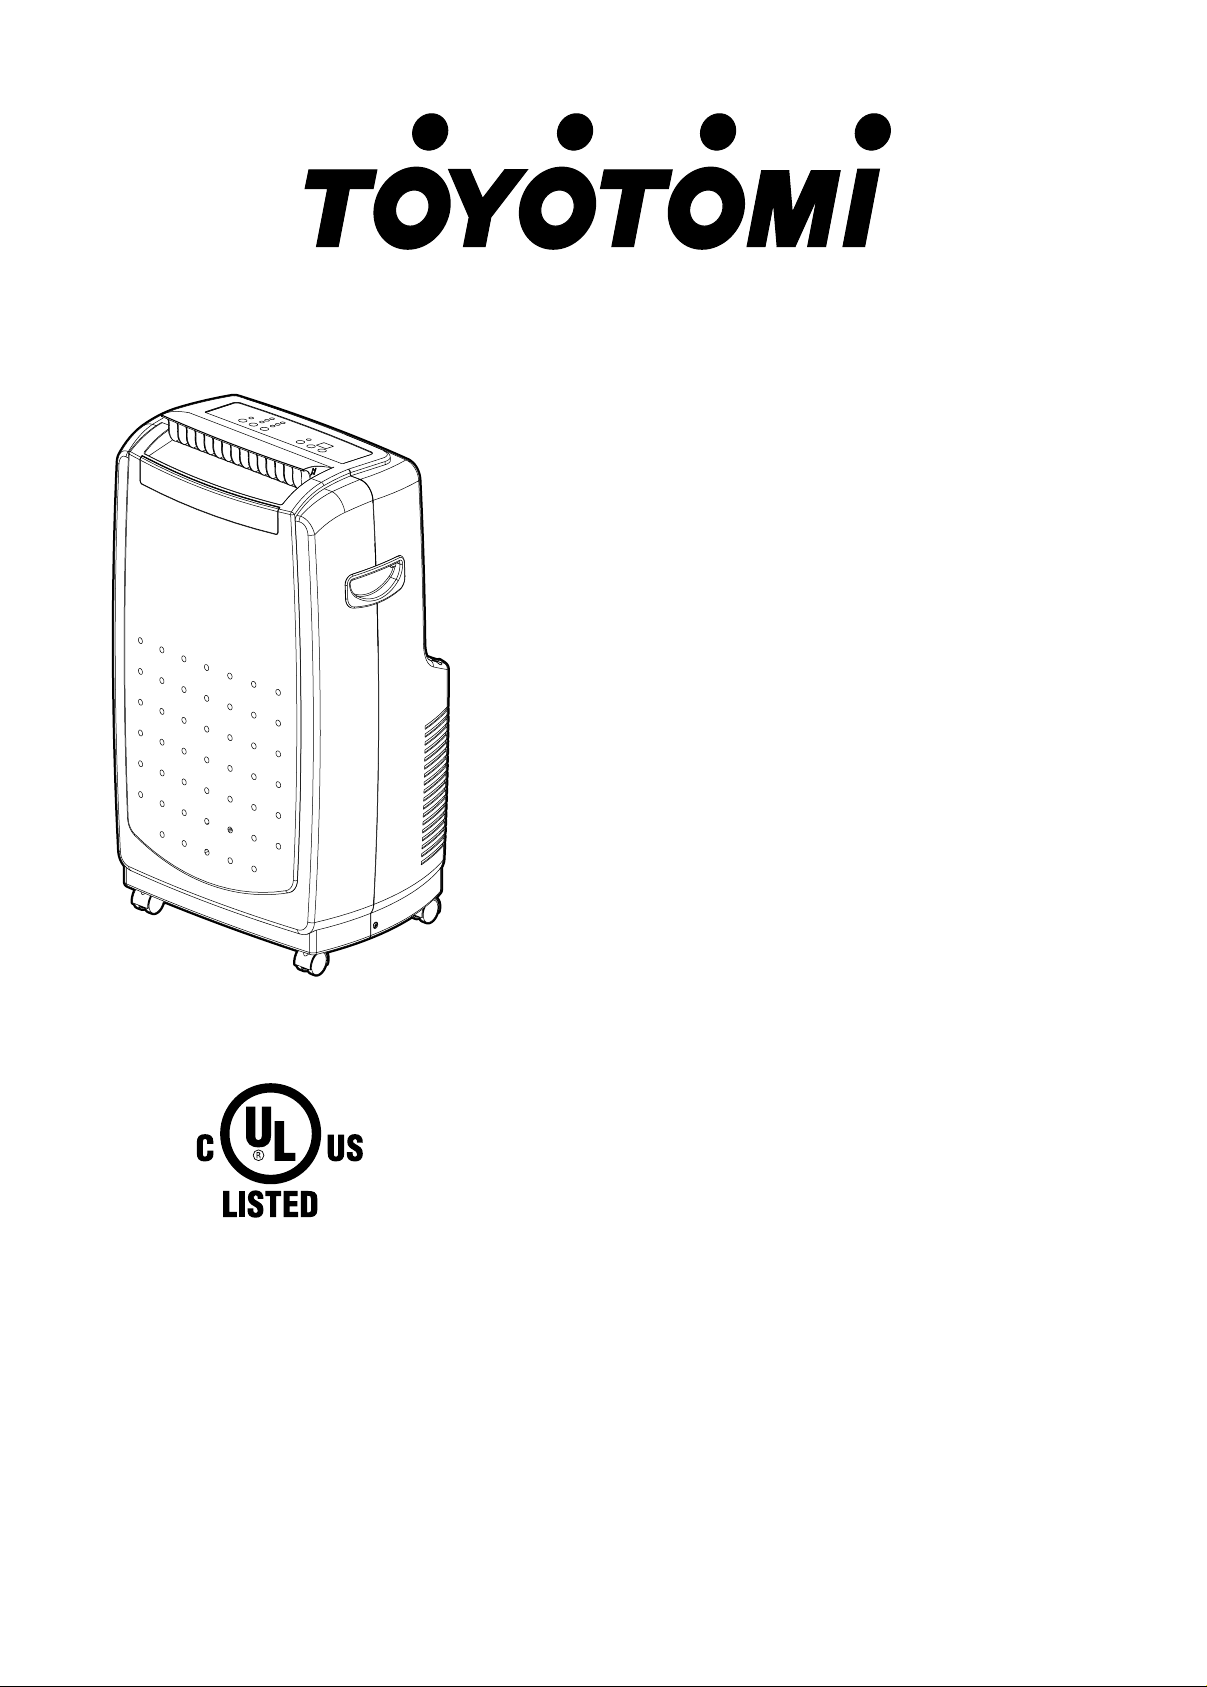
TAD-T40LW
PORTABLE AIR CONDITIONER
ACONDICIONADOR DE AIRE
PORTATIL
CONDITIONNEUR D’AIR
DEPLACABLE
INSTRUCTION MANUAL ENGLISH P. 1
MANUAL DE INSTRUCCIONES ESPAÑOL P. 5
MODE D’EMPLOI FRANCAIS P. 9
Page 2

A B F G
C
D
E J
I
H
1.5V
1.5V
1.5V
1.5V
ModeON/OFF
UpFanSpeed
DownTimer
B1
B7
B2
B3
B4
B6
B5
A1
A3
A6
A5
A4
A2
F1
C3
C1
C2
C5
C5
C4
C1 C2
C7 C8C9C6
C3 C5C4
C11 C12 C13C10
more than
20 in.(50cm
)
more than
20 in.(50cm
)
I1 I2
J3
J2J1
J3
J4
J4
J5
J2
J5
PA
NO.
1
2
3
4
5
6
7
8
9
10
11
Page 3
ModeON/OFF
UpFanSpeed
DownTimer
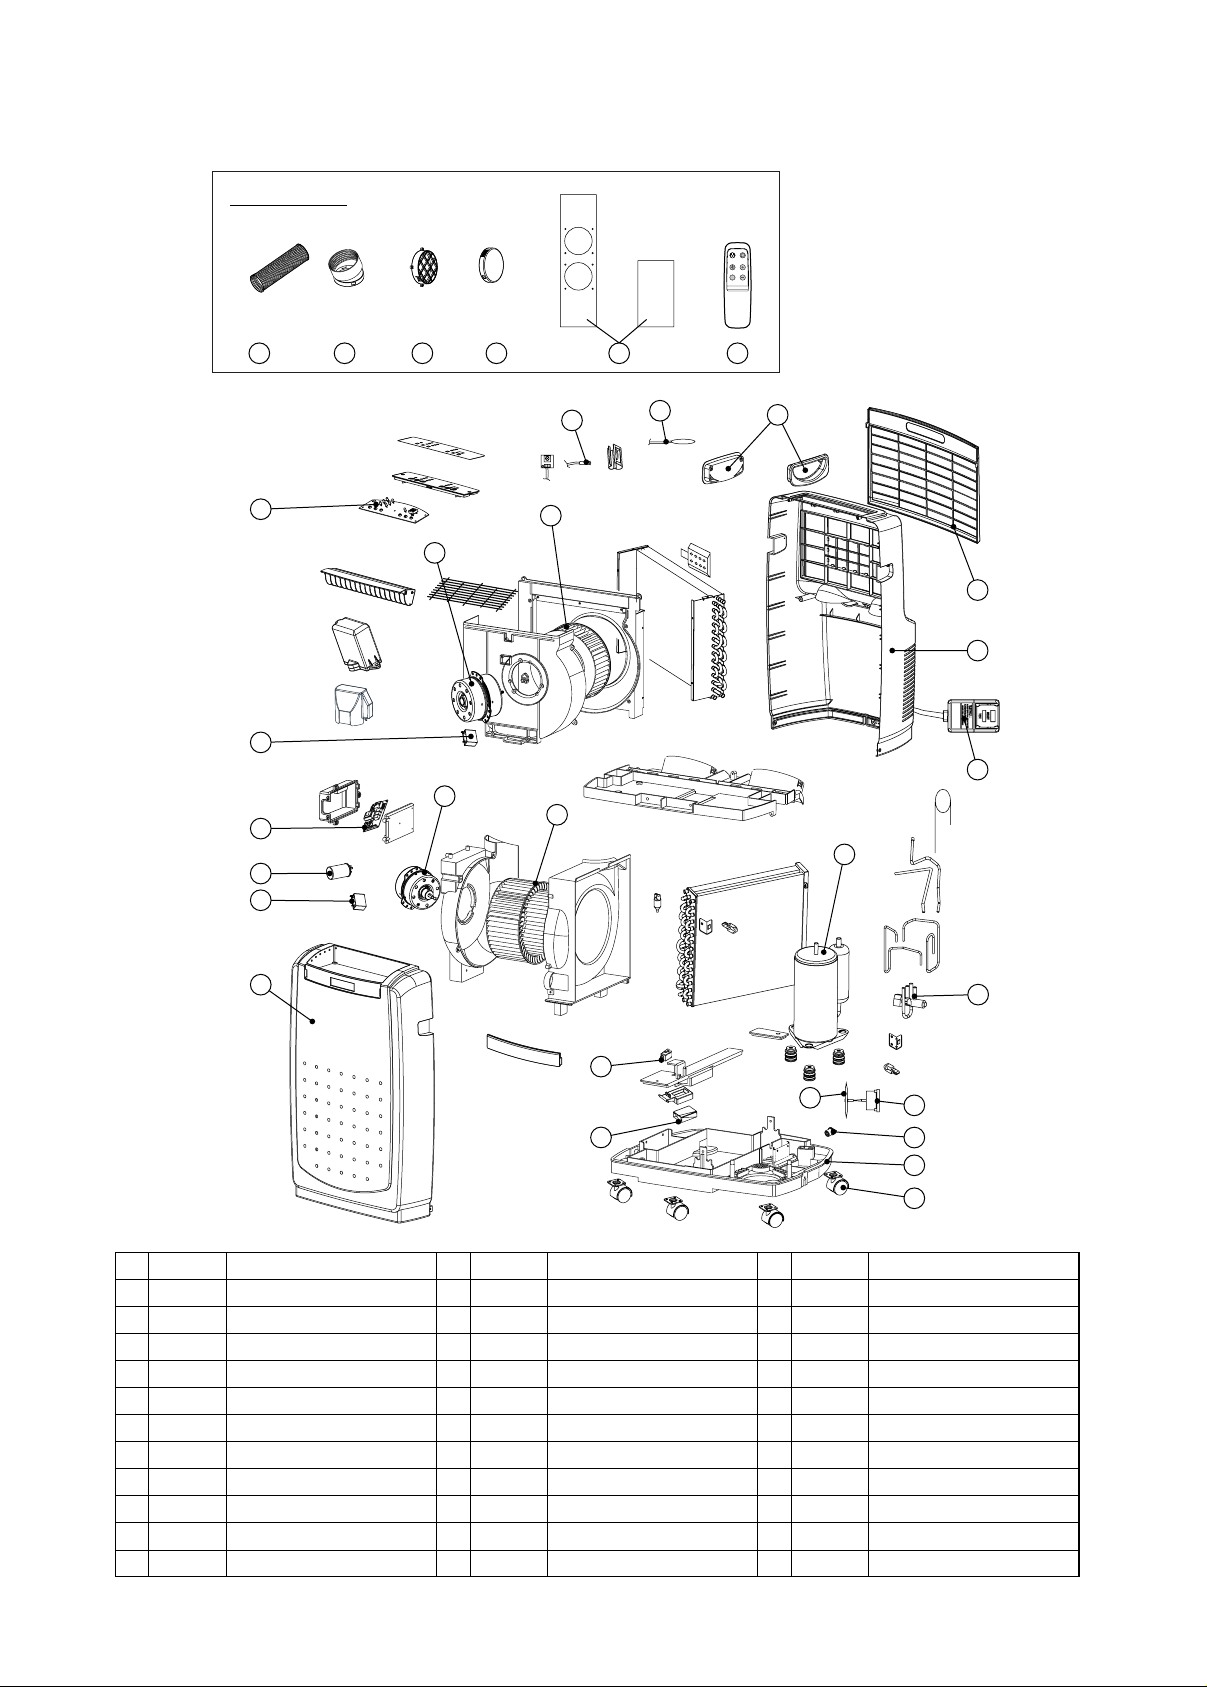
PARTS LIST
27 28 29 30 31 26
17
23
24
25
13
12
19
21
22
15
16
11
18
9
10
4
6
14
3
8
7
5
20
1
2
ACCESSORY
NO. PART # PART NAME NO. PART # PART NAME NO. PART # PART NAME
1
2
3
4
5
6
7
8
9
10
11
12
13
14
15
16
17
18
19
20
21
22
23
24
25
26
27
28
29
30
31
32
33
22740529
22740570
22740830
22740806
22740863
22740223
22740877
22740813
22740520
22740842
22740546
22740518
22740841
22740548
20470612
22740847
22740817
22740827
2270865
22740480
22740851
22740845
22740873
22740874
22740804
22740876
22740449
22740254
22740253
22740252
22740481
22740894
20740898
Base pan assembly
Caster
Float
Micro switch
Drain motor
Blade
4-way valve
Compressor
Rear fan motor
Rear fan
Capacitor A (Rear FM)
Front fan motor
Front fan
Capacitor C (Front FM)
Main circuit board
CapacitorB (Compressor)
Indication lamp circuit
Front panel
Power supply cord
Drain cap
Rear panel
Intake air grille
Thermistor
Room thermistor
Carrying handle
Remote control
Duct hose
Duct hose adapter nozzle
Duct hose grille
Cover
Window panel kit “C”
Instruction manual
Carton
Page 4
ENGLISH
SUMMARY
The idea behind the unit is to provide a localized supply of cool air.
The unit will greatly enhance your personal comfort whether at a
work station or even in your favorite chair.
Four (4) casters enable you to move the unit easily from room to
room. It cools and dries the air at the same time so that you can
stay comfortable even when it's humid or rainy outside. Also your
furnishings and fabrics are kept in good condition when it's used
as dehumidifier.
Conventional air conditioners use large quantities of energy to cool
an entire room, including walls and furniture. This unit creates a
zone of cool and dry air only where it is needed. It does not waste
energy cooling the surroundings.
It's easy to operate. The built-in timer allows from 1 to 24 hours of
operation, which will automatically turn the unit on and off. This is
especially convenient at bedtime.
Venting is not required. However, if the unit is to be used exclusively in one space, the cooling efficiency will be enhanced by using the venting kit accessory, which is included with the uit.
OPERATIONAL FEATURES
1. COOLING OPERATION:
Normally, cool air is directed out the front louvers by the circulation fan which has three (3) stages of fan speed.
2. HEATING OPERATION:
Warm air is directed out the air outlet grille by the circulation
fan which has three (3) stages of fan speed.
3. THERMO CONTROL
The compressor will automatically shift to ON or OFF to maintain the desired temperature.
4. TIMER OPERATION:
The unit will turn on and off after the designated period of time
(1, 2, 3, ...24 hours).
5. AUTOMATIC SHUT-OFF MECHANISM WHEN THE
DRAIN TANK IS FULL:
When the drain tank is full, the unit will be automatically shut
off. The warning lamp will light. It is always required to press
the power button twice to resume operation after the condensed water is removed from the tank.
6. AIR FILTER:
A pre-filter protects the unit from dust.
1. DESCRIPTION
Fig. A FRONT
A1 Air outlet
A2 Vertical louver
A3 Front panel
A4 Operation panel
A5 Carrying handle
A6 Caster
Fig. B REAR
B1 Air intake (Evaporator)
B2 Air intake opening
B3 Air intake (Condenser)
B4 Power supply cord
B5 Power plug
B6 Drain water outlet
B7 Air outlet opening
Fig. C OPERATION PANEL
C1 Power button
C2 Mode button
C3 Fan speed button
C4 Timer button
C5 Adjust buttons
C6 Warning lamp (Tank full)
C7 Cooling mode lamp (green)
C8 Dehumidifying mode lamp (orange)
C9 Heating/Fan mode lamp (red/yellow)
C10 Room temp lamp
C11 Set temp lamp
C12 Timer operation lamp
C13 Digital indicator
Fig. I DUCT SET
I1 Duct hose adapter nozzle (4 pcs.)
I2 Duct hose (2 pcs.)
Fig. J WINDOW PANEL KIT
J1 Window panel “C”
J2 Window panel extension (2 pcs.)
J3 Duct hose grille (2 pcs.)
J4 Cover (2 pcs.)
J5 Screws
2. SAFETY TIPS
IMPORTANT
¡ Read instructions carefully before operation.
¡ The unit should be operated when the room temperature is
between 64˚F (18˚C) to 95˚F (35˚C). If the room temperature is
below 64˚F (18˚C), ice may form on the coils. If the room temperature is above 95˚F (35˚C), the compressor will automatically shut off to protect itself.
¡ ALWAYS, wait 3 min. to restart after turning unit off.
WARNING
¡ NEVER expose infants, handicapped persons, or senior per-
sons directly to the airflow. Adjust the airflow direction.
¡ Keep children away from unit. Children are particularly liable to
this danger. The inside fan is running at high speed. Covering
them may deteriorate air conditioner performance or cause it
to become inoperative.
¡ NEVER insert objects of any kind into the air intake or air out-
let.
¡ DO NOT unplug if your hands are wet. An electrical shock may
occur.
¡ DO NOT operate in a wet location.
¡ ALWAYS plug into 115 V, 60 Hz, single phase electrical outlet.
¡ Be sure the power plug fits the receptacle securely.
¡ DO NOT run power cord under carpets, rugs, or floor mats of
any kind.
¡ DO NOT attempt to shorten or alter power cord in any way.
¡ DO NOT apply any excessive force or pressure to the power
supply cord.
¡ Make sure that the plug is free of dust.
¡ DO NOT use an extension cord.
¡ DO NOT turn on and off by inserting or removing the power
plug which may cause electric shock or fire.
¡ If there is a fear of lightning, stop the unit and disconnect the
power supply cord.
¡ DO NOT touch the evaporator, condenser and pipes.
¡ DO NOT operate with filter removed.
CAUTION
¡ Keep unit more than 20 in. (50 cm) away from any objects or
wall. (Fig. D)
¡ If the unit is operated in COOLING mode in an area of very
high moisture, the top plate and the rear plate may get covered with a mist. Wipe off any mist before it has a chance to
get on the floor or rug.
¡ Remove drain water before moving unit.
¡ To minimize corrosion, DO NOT use in damp, salty air area.
¡ DO NOT operate in direct sunlight.
¡ DO NOT use for such particular purpose as preservation of
foodstuff, animals, plants, precision appliances, arts and medicine.
¡ DO NOT place an animal, plants or combustion equipment in
a place which is subjected to the direct air flow of the unit.
¡ DO NOT ride or place the objects on the unit.
¡ DO NOT turn the unit on its side or upside down.
1
Page 5
ENGLISH
RESET
TEST
3. OPERATION
BEFORE OPERATION:
LCDI (Leakage Current Detection and Interruption) PLUG
TEST:
RESET: AFTER SOLVING THE PROBLEM
ALWAYS: MAKE SURE THE INDICATOR LAMP IS ON AFTER
HARD TO RESET BUTTON:
PRESSING BUTTON WITH A STICK SUCH AS PENCIL OR BALL
POINT PEN WITH THE FLAT END (NOT SHARP EDGE) MAY
MAKE IT EASIER TO RESET BUTTON.
NO POWER ON THE UNIT: MAKE SURE THE INDICATOR LAMP IS ON.
PLUGING INTO THE POWER. IF NOT, PRESS RESET
BUTTON UNTIL IT CLICKS AND INDICATOR LAMP
COMES ON.
OPERATING STEPS:
1. PRESS ''POWER'' BUTTON (C1) TO ''ON''.
Cooling mode lamp (C7) and Low lamp are lit at this time and
unit starts.
2. PRESS MODE BUTTON (C2).
Press the mode button (C2) to set your desired operation mode
"COOLING" (C7), "DEHUMIDIFYING" (C8), "HEATING", or
"FAN" (C9).
COOLING mode (C7)
When the “COOLING” mode is selected, the green lamp lights up.
During the "COOLING" mode the air is cooled and hot air is
exhausted to the outside air through the duct hose that it for
exhaust.
DEHUMIDIFYING mode (C8)
When the “DEHUMIDIFYING” mode is selected, the orange
lamp lights up.
Air is dehumidified as it passes through the unit, without being
in full cool mode.
In "DEHUMIDIFYING" mode operation, you cannot change the
fan speed.
HEATING Mode (C9)
When the “HEATING” mode is selected, the red lamp lights up.
The “HEATING” mode of this unit works on the heat pump
principle. This makes it more efficient than a normal electric
heater. The “HEATING” mode can only be activated when the
inside temperature is below 80˚F (27˚C). Depending on the outside temperature, the unit will stop heating regularly in order to
thaw ice that has accumulated. The lower the outside temperature, the more frequently this will occur. If the outside temperature is below 50˚F (10˚C), it is not recommended to use
this unit for heating. It will not produce enough heat and the
coils will ice up. When the unit is in “HEATING” mode between
50˚F (10˚C) and 61˚F (16˚C) outside temperature, it is not recommended to use the air intake hose.
In this mode, the desired temperature can be set between 61˚F
(16˚C) and 80˚F (27˚C).
NOTE: Actual cooling and heating capacity vary depending
FAN mode (C9)
When the “FAN” mode is selected, the yellow lamp lights up.
The "FAN" mode provides only circulation of room air, so that
you cannot set the room temperature.
3. PRESS TIMER/TEMPERATURE ADJUST BUTTONS (C5)
Set the desired room temperature by pressing UP button "▲"
or DOWN button "
When "▲" or "▼" button is pressed, the set temperature is
displayed and may be adjusted. After 15 seconds the display
on room temperature, humidity, insulation, window
sizes, etc.
To prevent damage to the unit, changing from the
cooling or dehumidifying mode to the heating mode
(or the reverse) takes two to three minutes.
▼". The default display is room temperature.
WHEN CURRENT LEAKING OR
PRESSING TEST BUTTON, THE INDICATOR LIGHT WILL TURN OFF
AND THE UNIT WILL CUT OUT.
PLEASE PRESS RESET BUTTON.
will revert back to room temperature.
By pressing both buttons at once, the display will toggle between Celsius and Fahrenheit.
4. PRESS FAN SPEED BUTTON (C3)
Press the fan speed button (C3) to set the desired air flow rate.
High · · · · · · · · · · · Operation at a high air flow
Med · · · · · · · · · · · Operation at a medium air flow
Low · · · · · · · · · · · Operation at a low air flow
5. AIR DEFLECTION
Always open the air outlet during operation. (Fig. E)
6. STOP OPERATION
Press the Power button (C1) and all lights will go out.
TIMER OPERATION
Auto turning OFF:
With unit in cooling mode, press Timer button (C4) to select
number of hours you would like the unit to run in cooling mode
until it automatically shuts off.
Auto turning ON:
With unit powered off, press Timer button (C4) to select number of hours until you would like the unit to automatically start.
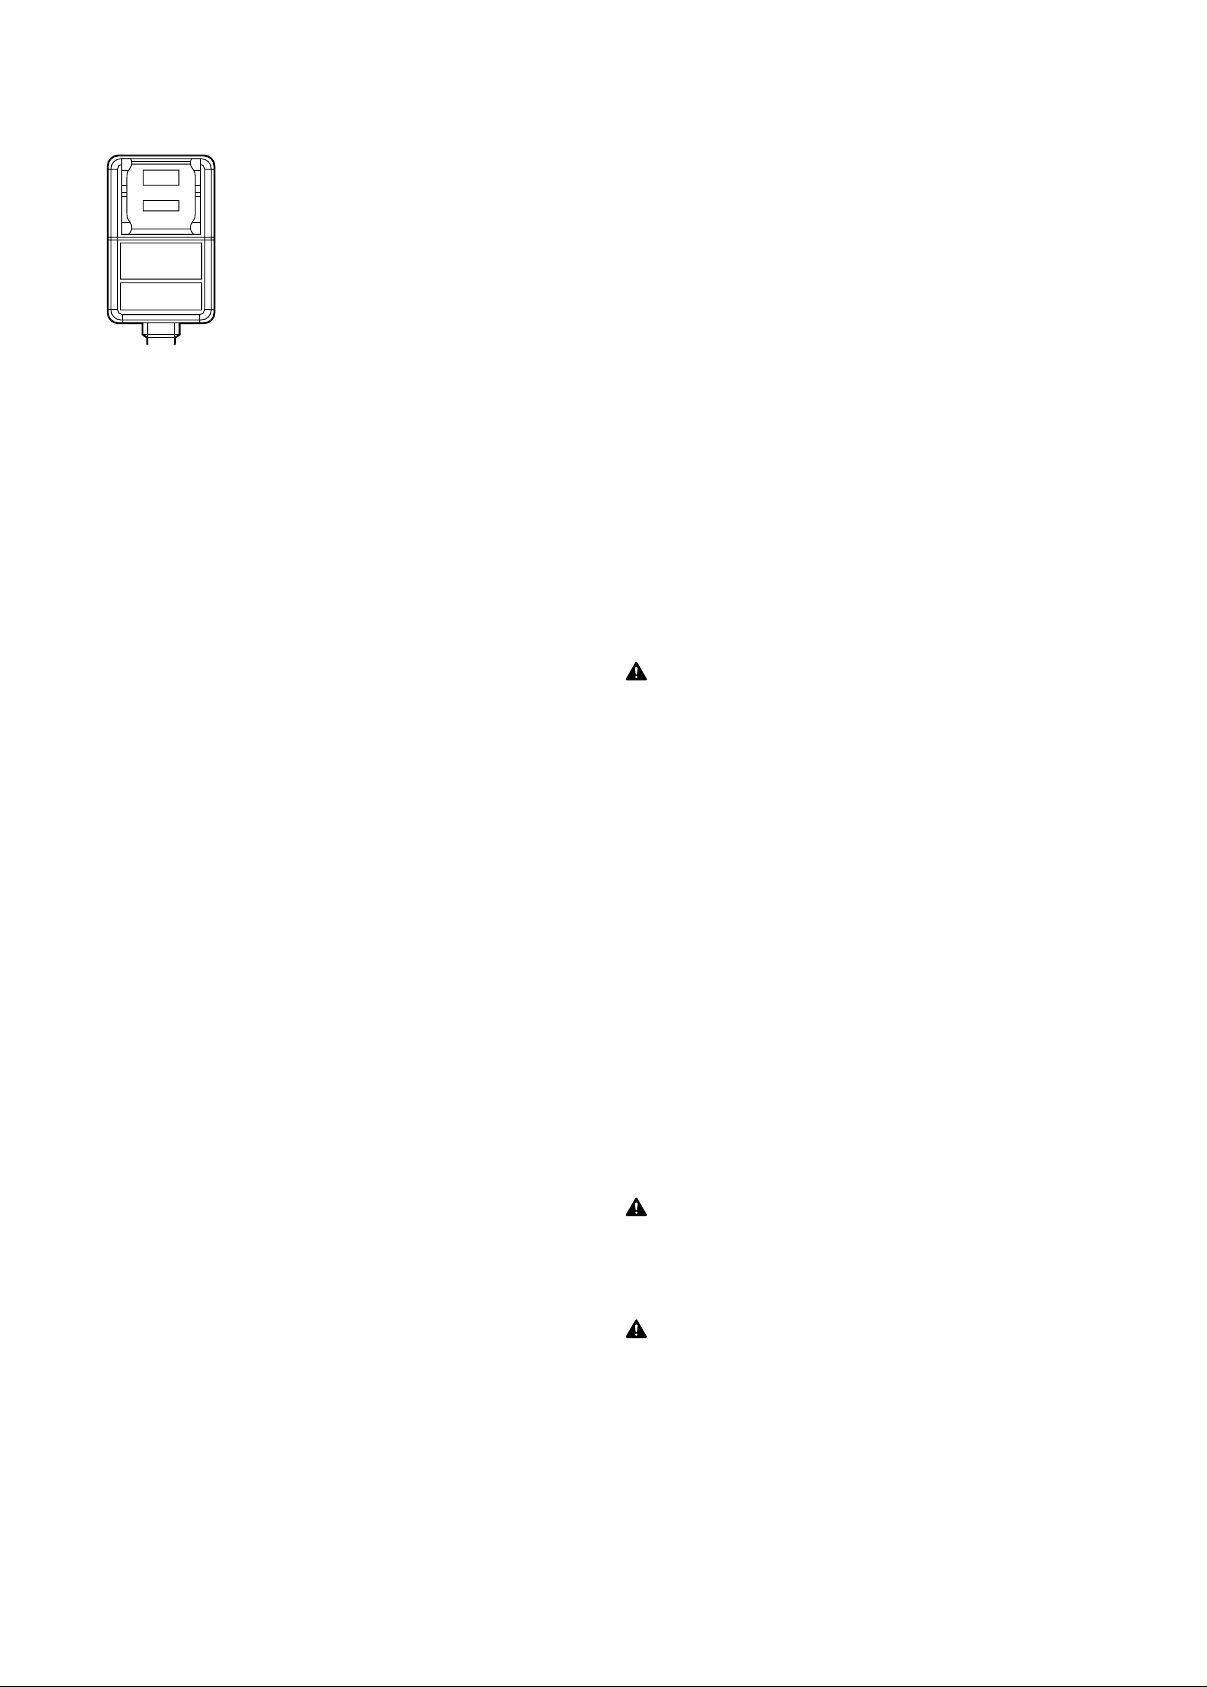
USING REMOTE CONTROL
The functions work the same as your air conditioner's operation panel. (Fig. C)
Batteries: Remove the cover on the back of the remote control
and insert the batteries with the (+) and (-) poles pointing in the
proper direction. (Fig. H)
CAUTION
¡ Use only AAA or IEC R03 1.5V batteries.
¡ DO NOT attempt to recharge the supplied batteries.
¡ All batteries should be replaced at the same time.
¡ DO NOT dispose of the batteries in a fire as they may explode.
¡ DO NOT install the batteries with the polarity (+/-) reversed.
¡ Keep batteries and other things that could be swallowed away
from young children. Contact a doctor immediately if an object
is swallowed.
4. DRAINING EXCESS WATER (Fig. F)
1. Drain excess water from the tank by placing a pan under the
drain water outlet.
Remove the drain plug, and let the water drain into the pan.
2.
3. When the water stops draining out, replace the drain plug.
4. Remove the pan of water.
5. Operate the unit in Fan mode to dry the interior of the unit.
NOTE: Remove the drain water from the tank once a week.
5. CLEANING
CLEANING AIR INTAKE GRILLE (Fig. G)
1. Clean the air intake grille (B1) once every two weeks.
2. To remove the air intake grille (B1), pull the grille off.
3. Remove the dust with a vacuum cleaner.
WARNING
¡ DO NOT touch the evaporator. It may cause injury or damage.
CLEANING SURFACE
Clean the outside of the unit with a soft damp cloth.
CAUTION
¡ NEVER use gasoline, solvents, chemical products or polish as
they could damage the surfaces.
6. LONG-TERM STORAGE
At the end of each season, or when you do not plan to use your
unit for an extended period of time, the following procedures are
recommended.
1. Run the unit 5 or 6 hours with only the ''FAN'' (C9) mode operating in order to dry the inside.
2. Remove the drain water from the tank and unplug the unit.
3. Clean the unit.
Wipe off any dirt or dust on the unit with a soft damp cloth or
a vacuum cleaner, and then wipe again using a soft dry cloth.
2
Page 6

ENGLISH
4 in.
4. Clean the air intake grill (B1) and replace it.
5. Store the unit.
The original shipping carton is the best place to store your unit.
If you do not have the original packing materials, cover the unit
with a large plastic bag and store in a cool dry place.
CAUTION
¡ ALWAYS store the unit in the vertical position.
¡ DO NOT put heavy objects on top of the unit.
7. TRANSPORTATION
Preferably keep the unit in the vertical position during transportation.
If this is not possible then lay it on its rear side, when at destination
put the unit back in the vertical position and wait at least ten (10)
minutes before using it. Before transporting/moving the unit make
sure the drain tank is empty.
8. TROUBLESHOOTING
SYMPTOM
Unit does
not work.
Unit suddenly stops during in operation.
Unit runs intermittently.
Unit functions but the
room is not
cooled.
Condensed
water is
spilled out
when moving
the unit.
- Power cut.
- The plug has been
- The full-tank indicator
- Current leaking or
- The indoor tempera-
- The preset time is up.
- The full-tank indicator
- Malfunction.
- Surrounding tempera-
- Duct hose is blocked.
- Window or door is left
- There is heat source in
- Air intake grille is
- Filter is too dirty.
- Temperature setting is
- The tank is nearly full.
CAUSE
plugged improperly.
is ON. Tank is full.
pressing test button of
LCDI plug.
ture has reached the
set temperature level.
is ON. Tank is full.
ture is too high or too
low.
open in the room.
the room or too many
of people in it.
clogged.
too high.
SOLUTION
- Wait for power to be
supplied again.
-Plug in again.
- Remove the drain water from the drain tank.
-Press reset button after solving the problem.
- Reset the temperature
level.
- Reset the timer.
- Remove the drain water from the drain tank.
- Contact your dealer.
- Check the duct hose.
- Close all windows and
door.
- Move out any heat
source in the room.
- Clean the air intake
grille.
- Replace the filter.
- Lower the temperature
setting.
- Remove the drain plug
on the rear bottom of
the unit, drain off the
water then the unit will
be in operation automatically.
9. SPECIFICATIONS
MODEL TAD-T40LW
COOLING CAPACITY 14,000 BTU/H
HEATING CAPACITY 11,000 BTU/H
DEHUMIDIFYING CAPACITY 0.48 gal/h (1.8 L/H)
POWER SOURCE Single Phase 115V, 60Hz
POWER CONSUMPTION 1200 W
OPERATING CURRENT
AIR FLOW (MAX.) 222 CFM (6.3 m3/m)
OPERATING TEMP. RANGE 64˚F~100˚F (18˚C~38˚C)
DIMENSIONS (WxHxD)
WEIGHT 77 Lbs. (35 kg)
COMPRESSOR ROTARY
REFRIGERANT R-410A
NOTE: Cooling air capacity will vary according to temperature and
humidity of the room.
(Cooling) 10.8 A
(Heating) 10.8 A
19-11/16" x 33-5/8" x 15-3/4"
(500 x 854 x 400 mm)
10.VENTING KIT ACCESSORIES
If the unit is to be used exclusively in one space, the cooling efficiency will be enhanced by using the following venting kit accessories.
DUCT SET (FLEXIBLE TUBE) (Fig. I)
2 pcs.
Max. 4 ft. (1.2 m)
WINDOW PANEL KIT "C" (Fig. J)
Window panel kit "C"
For sliding and double-hung windows
Max. 37 in. (94 cm)
Min. 28-1/4 in. (72 cm)
USING DUCT SET (Fig. I)
1. Extend one-side ends of the duct hose
(flexible tube) (I2) around 4 in. (100mm).
2. Insert both ends of duct hose (flexible
tube) (I2) into duct hose adapter nozzles
(I1) by twisting clockwise until it stops.
3. Fix one of the duct hose adapter nozzles onto the rear outlet of
the unit. This is completed by sliding the duct hose adapter
nozzle of the hose downwards over the outlet of the unit, which
will be assembled with the grooves on the connector of the unit.
(B2 or B7)
BEFORE CALLING FOR SERVICE
The followings are not defects.
A hissing noise or hollow
sound :
A squeaking noise :
Odor :
The unit does not start nor
change operation mode immediately :
This sound is generated from the
e
refrigerant flowing within pipes.
This noise is generated from the
unit when it is expands or con-
e
tracts with temperature changes.
Such odor as tobacco, cosmetics,
e
or foods may accumulate in the unit.
To prevent overloading the compressor motor, the unit will be
e
stopped for more than 3 minutes.
4. Extend the duct hose (I2) and close the window or door as far as
possible trapping the duct hose adapter nozzle (I1).
NOTE: Place the unit as close as possible to the window or door.
USING WINDOW PANEL KIT (Fig. J)
Window installations are possible by the use of the duct set
NOTE:
and window panel kit.
In case of twin duct type, always use the window panel kit
"C".
1. Fix the duct hose grille (J3) to the window panel with four (4)
screws. Make sure that the panel is extended so that screws do
not go into sliding portion of panel.
3
Page 7

NOTE: In case of twin duct type, fix the two duct hose adapter
nozzles.
2. Insert the end of the duct hoses (I2) into the duct hose adapter
nozzles (I1) by twisting it clockwise until it stops.
3. Open the window.
4. Place the window panel in the window, extending it to fit the
width of the window. Once panel is extended, the panel can be
locked into this width by tightening the two (2) screws (J5) on
the top panel.
5. Close the window.
6. Place the duct hose adapter nozzle (I1) on the duct hose grille
(J3).
7. When not in use, the duct hose adapter nozzle (I1)
may be closed off with the cover (J4) for duct hose grille (J3)
provided.
NOTE: The same procedure can be adapted for vertical installation
in sliding windows.
ENGLISH
LIMITED WARRANTY
TOYOTOMI CO., LTD. ("TOYOTOMI") warrants each product
and any parts thereof sold by it to be free from defects in materials or workmanship under normal use and service for TWELVE
(12) MONTHS from the date of delivery to the original purchaser
at retail subject to the following terms and conditions :
WHAT IS COVERED : Product or any parts thereof which are
defective in materials or workmanship.
WHAT IS NOT COVERED :
This warranty does not extend to any defect due to the negligence of others; failure to install, operate or maintain unit in accordance with instructions (operating and maintenance instructions are furnished with each new unit); unreasonable use, accidents, alteration, use of unauthorized or non-standardized TOYOTOMI parts and accessories; electrical malfunction, i.e., as resulting from large power surges, short circuit, etc.; incorrect installation; or repair by anyone other than a service facility specified by TOYOTOMI.
REMOVING DUCT SET (FIG. I)
1. Twist the duct hose adapter nozzles (I1) clockwise to remove the duct hose adapter nozzles
(I1) from the grooves on the connector of the
unit.(B2 or B7)
2. Pull out the duct hose adapter nozzles from the grooves on the
connector.
3. Twist the duct hose adapter nozzles (I1) clockwise to remove the
duct hose adapter nozzles (I1) from the grooves on the duct
hose grille (J3).
4. Pull out the duct hose adapter nozzles (I1) from the grooves on
the duct hose grille (J3).
OPTIONAL ACCESSORIES
When you need a longer size window panel, please purchase the
extension window panel "B" and use it with the original window
panel "C".
Part # 22740286 EXTENSION WINDOW PANEL "B" (M)
31-1/2" (80 cm)
Part # 22740288 EXTENSION WINDOW PANEL "B" (L)
56" (142 cm)
WHO IS COVERED : The original purchaser at retail.
WHAT WE WILL DO : TOYOTOMI will either repair or replace, at
its option, all defective parts free of charge that are covered by
this limited warranty on a carry-in basis, to your nearest authorized dealer or distributor of TOYOTOMI.
WHAT YOU MUST DO FOR WARRANTY SERVICE : You must
return the defective Product or part to any authorized dealer or
distributor of TOYOTOMI with this LIMITED WARRANTY and a
copy of your bill of sale or credit card charge receipt or other
document evidencing the date of the Product's delivery. If service is not available locally, please contact our CUSTOMER RELATIONS DEPARTMENT at :
TOYOTOMI U.S.A., INC.
604 Federal Road, Brookfield, CT 06804
(203)775-1909
THE FOREGOING EXPRESSES ALL OF TOYOTOMI'S OBLIGATIONS AND LIABILITIES WITH RESPECT TO THE QUALITY OF
PRODUCT FURNISHED BY IT. ALL OTHER WARRANTIES, EXPRESSED OR IMPLIED, INCLUDING THE WARRANTIES OF
MERCHANTABILITY OR FITNESS FOR A PARTICULAR PURPOSE ARE DISCLAIMED. TOYOTOMI SHALL NOT BE LIABLE
FOR THE LOSS OF USE OF THE PRODUCT, INCONVENIENCE, LOSS OR ANY OTHER DAMAGES, DIRECT OR CONSEQUENTIAL ARISING OUT OF, THE USE OF, OR INABILITY
TO USE, THE PRODUCT OR DAMAGES RESULTING FROM
OR ATTRIBUTABLE TO DEFECTS IN THE PRODUCT.
Part # 22740255 AIR OUTLET NOZZLE
No other than TOYOTOMI has authority to extend or modify the
terms of this Limited Warranty in any manner whatsoever.
Some states do not allow the exclusion or limitation of incidental or consequential damages or limitations on how long an implied warranty lasts, so these limitations or exclusions may not
apply to you. This Limited Warranty gives you specific legal
rights and you may also have other rights which vary from state
to state.
4
Page 8

ESPAÑOL
SUMARIO DEL UNIT
La unidad ha sido diseñada para proporcionar un acondicionamiento de aire localizado.
La unidad aumentará su confortabilidad ya sea que esté en su lugar
de trabajo o sentado cómodamente en su sillón preferido.
Cuatro (4) ruedas permiten desplazar fácilmente la unidad de una
habitación a otra. Refrigera y seca el aire simultáneamente para
crear un ambiente confortable aun en los días húmedos y lluviosos. Utilizado como deshumidifador, esta unidad le ayudará a
mantener sus muebles y tapices en buenas condiciones.
Los acondicionadores de aire convencionales consumen gran cantidad de energía para enfriar una habitación completa, incluyendo
las paredes y los muebles. En cambio, la unidad crea una zona de
aire frío y seco sólo donde es necesario. No derrocha energía enfriando los espacios circundantes.
Su operación es muy fácil. El timer incorporado permite ajustar la
unidad para que se active o desactive automáticamente al cabo de
un período de tiempo programable entre 1 a 24 horas. Esto es especialmente conveniente antes de irse a la cama.
No requiere ventilación. Sin embargo, si va a usar la unidad exclusivamente en un solo lugar, podrá aumentar la eficiencia de enfriamiento utilizando el kit para ventana ofrecido como accesorio.
CARACTERISTICAS FUNCIONALES
1. OPERACION DE ENFRIAMIENTO:
Normalmente el aire frío sale por las rejillas delanteras impulsado por el ventilador de circulación que tiene tres (3) etapas
de velocidad.
2. UTILIZACIÓN COMO CALEFACCIÓN
El aire caliente sale por las rejillas impulsado por el ventilador
de circulación, el cual dispone de tres (3) niveles de velocidad.
3. TERMOCONTROL
El compresor conmutará automáticamente a ON (conexión) u
OFF (desconexión) para mantener la temperatura deseada.
4. OPERACION DEL TIMER
El timer permite programar la unidad para que se active y desactive después de un cierto período de tiempo (1, 2,3 ... 24
horas).
5. MECANISMO DE DESACTIVADO AUTOMÁTICO DEBIDO
A TANQUE DE DRENAJE LLENO:
Cuando se llene el tanque de drenaje, la unidad se desactivará
automáticamente. La lámpara de advertencia se encenderá.
Oprima dos veces el botón "POWER" (conexión) para reanudar la operación después de vaciar el agua condensada
del tanque.
6. FILTROS DE AIRE:
Un filtro previo protege la unidad del polvo.
1. DESCRIPCION
Fig. A FRENTE
A1 Salida de aire
A2 Persiana vertical
A3 Panel delantero
A4 Panel de mandos
A5 Asa de transporte
A6 Rueda
Fig. B ATRAS
B1 Toma de aire (Evaporador)
B2 Abertura de toma de aire
B3 Toma de aire (Condensador)
B4 Cable de alimentación
B5 Enchufe
B6 Salida de agua de drenaje
B7 Abertura de salida de aire
Fig. C PANEL DE MANDOS
C1 Botón de conexión
C2 Botón de modalidad
C3 Botón de velocidad del ventilador
C4 Botón del timer
C5 Botones de ajuste
C6 Luz de advertencia (Tanque lleno)
C7 Luz de modelidad de enfriamiento (Verde)
C8 Luz de modalidad seca (anaranjado)
Luz de modalidad de calefucción/ventilador (raja/amarillo)
C9
C10 Luz de temperatura interior
C11 Luz de temperatura ajustada
C12 Luz de operation del timer
C13 Indicador digital
Fig. I JUEGO DEL CONDUCTO
I1 Tobera del adaptador de la manguera del conducto (4
pzas.)
I2 Manguera del conducto (tubo flexible) (2 pzas.)
Fig. J KIT DEL PANEL DE VENTANA DE PLASTICO
J1 Panel de ventana "C"
J2 Extensión del panel de ventana (2 pzas.)
J3 Rejilla de la manguera del conducto (2 pzas.)
J4 Cubierta (2 pzas.)
J5 Tornillos
2. INFORMACION SOBRE SEGURIDAD
IMPORTANTE
¡ Lea atentamente las instrucciones antes de usar la unidad.
¡ Haga funcionar la unidad a una temperatura ambiente com-
prendida entre 64˚F (18˚C) y 95˚F (35˚C). Si la temperatura ambiente es inferior a 64˚F (18˚C) se podrá formar hielo sobre los
serpentines. Si la temperatura ambiente está por encima de
95˚F (35˚C), el compresor se desactivará automáticamente
para fines de autoprotección.
¡ Espere SIEMPRE 3 minutos antes de volver a encender la
unidad.
ADVERTENCIA
¡
No permita NUNCA que los bebés, las personas con impedimentos o las personas ancianas queden directamente expuestos a la
corriente de aire. Ajuste la dirección del flujo de aire.
¡ Mantenga a los niños alejados de la unidad. Especialmente
tenga cuidado con los niños debido al peligro que representa
el ventilador interior funcionando a alta velocidad. Asimismo,
nunca cubra la unidad ya que se degradará el rendimiento del
acondicionador de aire o se volverá inoperante.
¡ No introduzca NUNCA objetos de ninguna clase dentro de la
toma o de la salida de aire.
¡ NO desenchufe con las manos mojadas. Podría sufrir un elec-
trochoque.
¡ NO lo haga funcionar en un sitio mojado.
¡ Enchufe SIEMPRE en una toma de 115 voltios, 60 Hz, corri-
ente monofásica.
¡ Asegúrese de que el enchufe quede firmemente conectado a
la toma.
¡ NO haga pasar el cable de alimentación debajo de las alfom-
bras, esteras, o tapetes de ninguna clase.
¡ NO intente nunca acortar ni alterar el cable de alimentación.
¡ NO aplique presión ni fuerza excesiva al cable de ali-
mentación.
¡ Asegúrese de que el enchufe esté libre de polvo.
¡ NO use un cable de extensión.
¡ NO intente nunca encender o apagar la unidad enchufando o
desenchufando el cable de alimentación.
¡ Si existe el peligro de que caiga un rayo, apague el acondi-
cionador de aire y desenchúfelo del tomacorriente.
¡ NO toque el evaporador, el condensador y los tubos.
¡ NO haga funcionar con el filtro desmontado.
PRECAUCION
¡ Mantenga la unidad alejada más de 20 in. (50 cm) de la pared
o de otros objetos. (Fig. D)
¡ Si la unidad está funcionando en la modalidad de ENFRI-
AMIENTO en un lugar de mucha humedad, las placas superior
y posterior podrían cubrirse de gotitas de agua. Seque completamente antes de que lleguen a mojar el piso o la alfombra.
¡ Saque el agua de drenaje antes de mover la unidad.
¡ Para reducir la corrosión al mínimo, NO la utilice en ambientes
de aire salino.
¡ NO la haga funcionar a la luz directa del sol.
¡ NO la utilice para fines particulares tales como la conser-
vación de alimentos, animales, plantas, dispositivos de precisión, artes y medicina.
¡
NO ponga nunca un animal, plantas o equipo de combustión en
un sitio sujeto al flujo directo de aire de la unidad.
¡ NO apoye ni coloque un objeto encima de la unidad.
¡ NO ponga la unidad de costado o boca abajo.
5
Page 9

ESPAÑOL
RESET
TEST
3. OPERACION
ANTES DE LA OPERACION:
ENCHUFE LCDI (Detección de Corriente de Fuga e Interrupción)
TEST (PRUEBA):
CUANDO HAY UNA FUGA DE CORRIENTE O SE PRESIONA EL BOTÓN
DE PRUEBA, LA LUZ INDICADORA
SE APAGARÁ Y LA UNIDAD SE DESCONECTARÁ.
RESET (REPOSICIÓN):
DESPUÉS DE RESOLVER EL PROBLEMA, PRESIONE EL BOTÓN DE
REPOSICIÓN.
SIEMPRE:
EL BOTON DE REPOSICION ESTA DURO:
PRESIONE EL BOTON CON UNA PUNTA COMO LA DE UN LAPIZ O
BOLIGRAFO CON LA PUNTA PLANA (NO LA PUNTA AFILADA) Y
PUEDE HACER QUE ENTRE EL BOTON DE REPOSICION.
NO HAY CONEXION DE LA UNIDAD:
ASEGURESE QUE LA LUZ INDICADORA ESTA ENCENDIDA.
PASOS DE OPERACION:
1. Oprima el botón "POWER" (conexión) (C1) para ponerlo
2. OPRIMA EL BOTON "MODE" (C2).
ASEGURESE QUE LA LUZ INDICADORA SE ENCIENDE
DESPUES DE ENCHUFAR EL CABLE DE ALIMENTACION. SI NO SE ENCIENDE, PRESIONE EL BOTON DE
REPOSICION HASTA QUE SE ESCUCHE UN CHASQUIDO Y SE ENCIENDA LA LUZ INDICADORA.
en "ON".
La luz de modalidad de enfriamiento “COOLING”(C7) y la luz de
Bajo se encienden en este momento y funciona la unidad.
Cuando el modo de “Enfriamiento” se selecciona, la luz verde
se enciende. Oprima el botón de modalidad (C2) para ajustar
su modalidad de funcionamiento deseado "COOLING" (enfriamiento) (C7), "DEHUMIDIFYING" (seco) (C8), "HEATING"
(calefacción), o "FAN" (ventilador) (C9)
Modalidad “COOLING” (enfriamiento) (C7)
Durante la modalidad "COOLING" el aire se enfría y sale el
aire caliente al exterior por la manguera del conducto que es
para la evacuación.
Modalidad “DEHUMIDIFYING” (seco) (C8)
Cuando el modo de “Calefacción” se selecciona, la luz roja se
enciende. El aire se deshumidifica al pasar por la unidad sin
estar en la modalidad de enfriamiento total. En el funcionamiento de la modalidad "DEHUMIDIFY" no puede cambiar la velocidad del ventilador.
Modalidad de “HEATING” (calefacción) (C9)
Cuando se selecciona el modo "HEATING", se ilumina el indicador luminoso de color rojo. El modo "HEATING" de esta
unidad funciona mediante el principio de bomba de calor.
Esto hace que la unidad sea más eficiente que una calefacción eléctrica normal. El modo "HEATING" puede ser activado
solamente cuando la temperatura interior es inferior a 80˚F
(27˚C). Dependiendo de la temperatura exterior, la unidad detendrá la producción de calor regularmente para de esta manera derretir el hielo que se haya acumulado. Cuanto más baja
sea la temperatura exterior, con mayor frecuencia ocurrirá esto. Si la temperatura exterior es inferior a 50˚F (10˚C), no se recomienda el uso de esta unidad como modo de calefacción.
No producirá suficiente calor y las bobinas se helarán.
Cuando la unidad esté en modo "HEATING" (calefacción) y la
temperatura exterior se encuentre entre 50˚F (10˚C) y 61˚F
(16˚C), no se recomienda usar el conducto de admisión de
aire. En este modo, la temperatura deseada puede ser ajustada entre los 16˚C y los 27˚C.
NOTA:
Modalidad “FAN” (ventilador) (C9)
Cuando el modo de “Ventilador” se selecciona, la luz amarilla
se enciende. La modalidad "FAN" sólo produce circulación del
La capacidad de refrigeración y calentamiento real varía
dependiendo de la temperatura ambiente, la humedad,
el aislamiento, el tamaño de las ventanas, etc.
Para prevenir el deterioro de la unidad, se debe esperar entre dos a tres minutos para cambiar de modo
refrigeración o deshumificación a modo calefacción
(o a la inversa).
aire interior y no puede ajustar la temperatura de la habitación.
3. OPRIMA LOS BOTONES DE TIMER/AJUSTE DE TEMPERATURA (C5)
Ajuste a la temperatura ambiente deseada presionando el
botón UP "
omisión es la temperatura de la habitación.
Cuando se oprime el botón "
ajustada y puede ajustarlo. Después de 15 segundos la indicación volverá a la temperatura de la habitación. Oprimiendo
ambos botones a la vez, la indicación se conmutará entre
Celsio y Fahrenheit.
▲" o el botón DOWN "▼ ". La indicación por
▲" o "▼", aparece la temperatura
4. OPRIMA EL BOTON SELECTOR DE VELOCIDAD DEL
VENTILADOR (C5).
Oprima el botón selector (C5) de velocidad del ventilador para
ajustar al régimen de flujo de aire deseado.
"HI" (alto).........................Funciona a un flujo de aire alto
"MED" (medio) ................Funciona a un flujo de aire medio
"LO" (bajo).......................Funciona a un flujo de aire bajo
5. DEFLECTOR DE AIRE
Siempre abierta la salida de aire durante el funcionamiento.
(Fig. E)
6. OPERACION DE PARADA
Oprima el botón "POWER" (C1) para que se apaguen todas
las luces.
FUNCIONAMIENTO DEL TIMER
Desactivación automática:
Con la unidad en la modalidad de enfriamiento, oprima el
botón Timer (C4) para seleccionar el número de horas que desea que la unidad funcione en la modalidad de enfriamiento
hasta su desactivado automático.
Activación automática:
Con la unidad desactivada, oprima el botón Timer (C4) para
seleccionar el número de horas que desea esperar hasta que
la unidad empiece a funcionar automáticamente.
USO DEL CONTROL REMOTO
Las funciones actúan de la misma forma que el panel de controles
del acondicionador de aire. (Fig. C)
Pilas: Desmonte la cubierta en la parte trasera del control remoto y coloque las pilas con las polaridades (+) y (-) apuntando en
el sentido correcto. (Fig. H)
PRECAUCION
¡ Utilice sólo pilas AAA o IEC R03 de 1,5V.
¡ NO trate de recargar las pilas entregadas.
¡ Todas las pilas deben cambiarse al mismo tiempo.
¡
NO se deshaga de las pilas al fuego ya que pueden explotar.
¡ NO instale las pilas con la polaridad (+/-) invertida.
¡ Mantenga las pilas y otros objetos que puedan tragarse fuera
del alcance de niños de corta edad. Llame inmediatamente a
un médico si tragara un objeto.
4. DRENAJE DE AGUA EXCESIVA (Fig. F)
1. Drene el exceso de agua del tanque colocando una bandeja
debajo de la salida de agua de drenaje.
2. Abra el tapón de drenaje y deje que el agua se drene en la
bandeja.
Cuando el agua deja de salir, vuelva a colocar el tapón de drenaje.
3.
4. Retire la bandeja de agua.
5. Haga funcionar la unidad en la modalidad de ventilador para
secar el interior de la unidad.
NOTA: Elimine el agua de drenaje del tanque una vez a la
semana.
5. LIMPIEZA
LIMPIEZA DE LA REJILLA DE ENTRADA DE AIRE (Fig. G)
1. Limpie la rejilla de entrada de aire (B1) una vez cada dos semanas.
Para desmontar la rejilla de entrada de aire (B1), tire de al rejilla.
2.
3. Elimine el polvo con una aspiradora.
ADVERTENCIA
¡ NO toque el evaporador. Podría causar lesiones o daños.
LIMPIEZA DE LA SUPERFICIE
Limpie el exterior de la unidad con un paño suave y húmedo.
6
Page 10

ESPAÑOL
4 in.
PRECAUCION
¡ No use NUNCA gasolina, solventes, productos químicos o
pulimentador pues se podrán dañar las superficies.
6. ALMACENAMIENTO DE LARGA DURACION
Al final de la estación o cuando no tenga planeado utilizar la
unidad durante mucho tiempo, se recomiendan los siguientes
procedimientos.
Haga funcionar la unidad 5 ó 6 horas únicamente en la modalidad
1.
"FAN" (ventilador) (C9) para que se seque el interior.
2. Vacíe el tanque de drenaje y desenchufe la unidad.
3. Limpie la unidad.
Limpie las manchas y la suciedad de la unidad con un paño
suave húmedo o con una aspiradora y luego pásele un paño
suave y seco.
4. Limpie la rejilla de toma de aire (B8) y reinstálelo.
5. Almacene la unidad.
La caja de cartón original es el mejor sitio para guardar su
unidad. Si no ha conservado los materiales de embalaje originales, cubra la unidad con una bolsa grande de plástico y
guárdela en un lugar seco y fresco.
PRECAUCION
¡ SIEMPRE almacene la unidad en posición vertical.
NO ponga objetos pesados encima de la unidad.
7. TRANSPORTE
Durante el transporte, se recomienda colocar la unidad en posición
vertical. Si no es posible, transpórtela acostada sobre el lado trasera
y al llegar a destino regrésela a la posición vertical. Espere por lo
menos diez (10) minutos antes de usarla. Antes de transportar/mover
la unidad compruebe que el tanque de drenaje esté vacío.
8. LOCALIZACION DE AVERIAS
SÍNTOMA
La unidad no
funciona.
La unidad se
detiene repentinamente durante el funcionamiento
La unidad
funciona intermitentemente
La unidad
funciona
pero no se
enfría la
habitación
El agua condensada se
derrama
cuando mueva la unidad
- Falla de la ali-
- Enchufe mal conecta-
- El indicador de tanque
- Fuga de corriente, o el
- La temperatura interior
- Se acabó el tiempo
- El indicador de tanque
- Mal funcionamiento
- Temperatura ambiente
- La manguera del con-
- La ventana o puerta se
- Hay una fuente de
- La rejilla de entrada de
- El filtro está muy su-
-El ajuste de temper-
- El tanque está casi
CAUSA
mentación.
do
lleno está encendido.
El tanque está lleno.
botón de prueba del
enchufe LCDI está
presionado.
ha llegado al nivel de
temperatura ajustado.
prefijado.
lleno está encendido.
El tanque está lleno.
demasiado alta o baja.
ducto está tapada.
dejó abierta en la
habitación.
calor en la habitación
o demasiadas personas en ella.
aire está tapada.
cio.
atura está demasiado
alto.
lleno.
SOLUCION
- Espere hasta que vuelva la electricidad.
- Enchufe nuevamente.
- Elimine el agua de
drenaje del tanque de
drenaje.
- Presione el botón de
reinicio después de resolver el problema.
- Reajuste el nivel de
temperatura.
- Reajuste el timer.
- Elimine el agua de
drenaje del tanque de
drenaje.
- Llame su tienda.
- Verifique la manguera
del conducto.
- Cierre todas las ventanas y puertas.
- Saque la fuente de
calor de la habitación.
- Limpie la rejilla de entrada de aire.
- Cambie el filtro.
- Baje el ajuste de temperatura.
- Abra el tapón de
drenaje en la parte inferior de la unidad,
drene el agua y la
unidad funcionará automáticamente.
ANTES DE LLAMAR EL SERVICIO
Las siguientes condiciones no son anomalías.
Silbido o ruido sordo:
Chirrido :
Olores :
La unidad no arranca ni
cambia inmediatamente de
modalidad de operación :
Producido por el refrigerante cir-
e
culando dentro de los tubos.
Producido por el acondicionador
de aire debido a la expansión o
e
contracción producida por los
cambios de temperatura.
El olor de los cigarrillos, cosméticos
o alimentos podría acumularse en la
e
unidad interior.
Para evitar que se sobrecargue el
motor del compresor, la unidad de-
e
jará de funcionar durante más de 3
minutos.
9. ESPECIFICACIONES
MODELO TAD-T40LW
CAPACIDAD DE ENFRIAMIENTO
CAPACIDAD CALEFACCIÓN 11.000 BTU/H
CAPACIDAD DE DESHUMIDIFICACIÓN
FUENTE DE ALIMENTACIÓN Monofásico 115V, 60Hz
CONSUMO ELÉCTRICO 1200 W
CORRIENTE DE
FUNCIONAMIENTO
FLUJO DE AIRE (MÁX.) 222 CFM (6,3 m3/m)
OPERATING TEMP. RANGE 64˚F~100˚F (18˚C~38˚C)
DIMENSIONES (AnxAlxProf)
PESO 77 Lbs. (35 kg)
COMPRESOR Rotatorio
REFRIGERANTE R-410A
NOTA: La capacidad del aire de enfriamiento variará según la
temperatura y la humedad de la habitación.
19-11/16" x 33-5/8" x 15-3/4"
14.000 BTU/H
0,48 gal/h (1,8 L/H)
(Enfriamiento) 10,8 A
(Calefacción) 10,8 A
(500 x 854 x 400 mm)
10. ACCESORIOS DEL KIT DE VENTILACION
Si se va a usar la unidad para uso exclusivo en un solo lugar, se
conseguirá mejorar la eficiencia de la refrigeración usando los
siguientes accesorios del kit de ventilación.
JUEGO DEL CONDUCTO (TUBO FLEXIBLE) (Fig. I)
2 pzas.
Máx. 4 pies (1,2 m)
KIT DEL PANEL DE VENTANA “C” (Fig. J)
Kit del panel de ventana “C”
Para ventanas correderas y de guillotina
Máx. 37 pulg. (94 cm)
Mín. 28-1/4 pulg. (72 cm)
EMPLEO DEL JUEGO DEL CONDUCTO (Fig. I)
1. Extienda un lado de los extremos del conducto de la manguera (flexible) (l2) alrededor 4 pul. (100mm)
Inserte ambos extremos de la manguera del
2.
conducto (tubo flexible) (I2) en las toberas
adaptador de la manguera del conducto de
(I1) girando en sentido antihorario hasta que
se bloquean.
3.
Fije una de las toberas adaptadoras de la manguera de conducto
en la salida trasera de la unidad. Este trabajo se completa deslizando la tobera adaptadora de la manguera conducto hacia atrás sobre la unidad trasera, la cual se ensamblará sobre la hendidura S
7
Page 11

ESPAÑOL
que hay en el conector de la unidad. (B2 o B7)
4. Alargue la manguera del conducto (I2) y cierre la ventana o
puerta hasta el máximo atrapando la tobera del adaptador de la
manguera del conducto (I1).
NOTA: Coloque la unidad lo más cerca que sea posible de la ven-
tana o puerta.
USO DEL KIT DEL PANEL DE VENTANA (Fig. J)
NOTA:
Es posible hacer instalaciones en la ventana utilizando el
juego del conducto y el kit del panel de ventana.
En el caso del tipo conducto gemelo, utilice siempre el kit
del panel de ventana “C”.
1. Fije la tobera de la rejilla de la manguera del conducto (J3) en el
panel de ventana con cuatro (4) tornillos. Asegúrese que el panel está alargado de tal forma que los tor
NOTA: En el caso del tipo conducto gemelo, fije las dos toberas
del adaptador de la manguera del conducto.
2. Inserte el extremo de las mangueras conductoras (l2) en las toberas adaptadoras de la manguera del conducto (l1), girándola
en dirección a las agujas del reloj hasta que pare de girar.
3. Abra la ventana.
4. Coloque el panel de ventana en la ventana, alargando hasta
que se adecúe al ancho de la ventana. Cuando se alarga el
panel, éste puede bloquearse en el ancho apretando los dos (2)
tornillos (J5) en el panel superior.
5. Cierre la ventana.
6. Coloque la tobera del adaptador de la manguera del conducto
(I1) en la rejilla de la manguera del conducto (J3).
7. Cuando no se utiliza, la tobera del adaptador de la manguera
del conducto (I1) puede cerrarse con la cubierta (J4) para la rejilla de la manguera del conducto (J3) entregada.
NOTA: El mismo procedimiento puede adaptarse para la insta-
lación vertical en ventanas deslizantes.
RETIRADA DEL JUEGO DE CONDUCTOS (Fig.I)
1. Gire las toberas adaptadoras de la manguera
conducto (l1) en dirección a las agujas del reloj
para retirar las toberas adaptadoras de las
mangueras conducto (l1) de las hendiduras que
hay en el conector de la unidad. (B2 o B7)
2. Tire hacia fuera de las toberas adaptadoras de la manguera
conducto de las hendiduras que hay sobre el conector.
3. Gire las toberas adaptadoras de la manguera del conducto (l1)
en dirección a las agujas del reloj para retirar las toberas de la
manguera (l1) de las hendiduras que hay sobre la rejilla de la
manguera conducto (J3).
4. Extraiga tirando hacia fuera de las toberas adaptadoras de la
manguera conducto (l1) de las hendiduras que hay sobre la rejilla de la manguera conducto (J3).
ACCESORIOS OPCIONALES
Cuando sea necesario un panel de ventana de tamaño más largo,
compre el panel de ventana de alargue “B” y utilice con el panel de
ventana original “C”.
Pieza #22740286 PANEL DE VENTANA DE ALARGUE “B” (M)
Pieza #22740288 PANEL DE VENTANA DE ALARGUE “B” (L)
31-1/2” (80 cm)
56” (142 cm)
Pieza #22740255 TOBERA DE SALIDA DE AIRE
GARANTIA LIMITADA
TOYOTOMI CO., LTD. ("TOYOTOMI") garantiza al comprador
que este producto y sus correspondientes piezas están libres
de defectos en material y mano de obra bajo empleo y servicio
normales por un período de DOCE (12) MESES a partir de la
fecha de la entrega al comprador original, sujeto a los siguientes términos y condiciones:
Esta garantía cubre : Al producto o cualquier pieza del mismo
que presente defectos de material o de mano de obra.
Qué es lo que no está cubierto:
Esta garantía no cubre ningún daño resultante de la negligencia
de terceros; error de instalación, operación o mantenimiento de
la unidad de conformidad con las instrucciones de instalación
(las instrucciones de operación y mantenimiento se entregan
con cada unidad nueva); uso indebido, accidentes, alteración,
empleo de piezas y accesorios no autorizados o no estandarizados de TOYOTOMI; fallo eléctrico que resultaren por
ejemplo de una sobreintensidad transitoria fuerte, cortocircuito,
etc.; instalación incorrecta, o reparación por personal ajeno al
establecimiento de servicio especificado por TOYOTOMI.
Titularidad : El comprador original al detalle.
Alcance: TOYOTOMI, a opción propia, reparará o sustituirá gratuitamente todas las piezas defectuosas cubiertas por esta
garantía limitada sobre una base de "devolución" a su proveedor o
distribuidor autorizado TOYOTOMI más cercano.
Cómo debe reclamar el servicio de garantía: Deberá devolver el
producto o componente defectuoso a cualquier proveedor o distribuidor autorizado de TOYOTOMI junto con esta GARANTIA LIMITADA y una copia de su boleta de compra, boleta de la tarjeta de
crédito o cualquier otra prueba fehaciente de compra y de la fecha
de entrega del producto. Si no dispone de servicio en su localidad,
comuníquese con nuestro DEPARTAMENTO DE ATENCION AL
CLIENTE en :
TOYOTOMI U.S.A., INC.
604 Federal Road, Brookfield, CT 06804
(203)775-1909
LO ANTERIOR EXPRESA TODAS LAS OBLIGACIONES Y RESPONSABILIDADES DE TOYOTOMI CON RESPECTO A LA CALIDAD
DEL PRODUCTO SUMINISTRADO POR EL MISMO. TODAS LAS
DEMAS GARANTIAS, EXPRESAS O IMPLICITAS, INCLUYENDO
GARANTIAS IMPLICITAS DE COMERCIALIDAD E IDONEIDAD
PARA UN PROPOSITO EN PARTICULAR, QUEDAN RECHAZADAS.
TOYOTOMI NO SERA RESPONSABLE DE NINGUNA MANERA
POR LOS LAS PERDIDAS QUE RESULTAREN DEL USO DE ESTE
PRODUCTO, NI DE CUALESQUIERA GASTOS O INCONVENIENTES INCURRIDOS, PÉRDIDA DE LUCRO O POR LOS DAÑOS
DIRECTOS O CONSECUENTES QUE PUDIERAN SURGIR DEL
USO O ERROR DE USO, DE INCAPACIDAD EN EL USO, O POR
LOS DAÑOS RESULTANTES DE O ATRIBUIBLES A DEFECTOS
DEL PRODUCTO.
Sólo TOYOTOMI cuenta con la autorización para extender o
modificar los términos de esta garantía limitada.
En algunos estados no se permiten limitaciones o exclusiones
en cuanto a la duración de las garantías implícitas, o no permiten la exclusión o la limitación de daños incidentales o consecuentes, de manera que es posible que la antedicha limitación o exclusión no se aplique a usted. Esta garantía limitada
le confiere a usted derechos legales específicos, y tal vez le
correspondan otros derechos que pueden variar de un estado a
otro.
8
Page 12

FRANCAIS
PRESENTATION GENERALE
Ce dispositif a été conçu pour fournir de l’air frais à l’endroit précis
désiré.
Il contribuera à l’amélioration de votre confort personnel aussi bien
lorsque vous êtes à votre poste de travail qu’en train de vous relaxer dans votre fauteuil.
Doté de quatre (4) roulettes, ce dispositif peut être aisément
déplace de pièce en pièce. Tout en rafraîchissant l’air, il le déshumidifie, créant ainsi une atmosphère agréable même lorsqu’il pleut
ou fait humide à l’extérieur. De plus, utilisé en tant que déshumidificateur, cet appareil permet de conserver en bon état les meubles
et les tissus d’ameublement.
Les conditionneurs d’air conventionnels utilisent énormément
d’énergie pour refroidir la pièce, y compris les murs et tout ce qui
se trouve dans la pièce. Le dispositif crée une zone d’air frais et
sec uniquement la où l’on en a besoin. Il ne gaspille pas d’énergie
à refroidir tout l’entourage.
Il est d’une utilisation facile : La minuterie incorporée vous permet
de régler la durée de fonctionnement de 1 à 24 heures, le dispositif
s’arrêtant automatiquement une fois ce temps écoulé. Cette fonction est pratique, surtout au moment d’aller se coucher.
L’évacuation de l’air rejeté n’est pas nécessaire. Cependant,
lorsque le dispositif est toujours utilisé au même endroit, il est possible d’accroître son efficacité en utilisant le kit d’évacuation
disponible comme accessoire optionnel.
CARACTERISTIQUES DE FONCTIONNEMENT
1. REFROIDISSEMENT
L’air rafraîchi sort à travers les volets, propulsé par le ventilateur brasseur d’air dont la vitesse est réglable (3 positions).
2. CHAUFFAGE
De l'air chaud est dirigé vers la grille de sortie d'air par le ventilateur brasseur à vitesse réglable (3 positions).
3. CONTROLE THERMIQUE
Le compresseur passe automatiquement sur ON ou OFF pour
maintenir la température voulue.
4. MINUTERIE
Le dispositif se met en marche ou s’éteint après l’écoulement
de la durée réglée (1, 2, 3, …24 heures)
5. ARRET AUTOMATIQUE EN CAS DE RESERVOIR PLEIN
Lorsque le réservoir de vidange est plein, le dispositif s’arrête
automatiquement. Le voyant avertisseur s'allumera. Dans ce
cas, vider le réservoir, le replacer et appuyer deux fois sur le
bouton marche/arrêt « POWER » pour remettre l’appareil en
marche.
6. FILTRE A AIR
Un pré-filtre protège le dispositif de la poussière.
1. DESCRIPTION
Fig. A VUE DE FACE
A1 Sortie d’air
A2 Persiennes vertical
A3 Panneau frontal
A4 Commandes
A5 Poignée de transport
A6 Roulette
Fig. B VUE DE DOS
B1 Prise d’air (évaporateur)
B2 Ouverture de la prise d’air
B3 Prise d’air (condenseur)
B4 Cordon secteur
B5 Fiche
B6 Sortie de vidange de l’eau
B7 Ouverture de la sortie d’air
Fig. C LES COMMANDES
C1 Bouton marche/arrêt
C2 Bouton de mode
C3 Bouton de vitesse de ventilation
C4 Bouton de minuterie
C5 Boutons de réglage
C6 Lampe de avertissement (Réservoir plein)
C7 Lampe de mode de refroidicsement (Vert)
C8 Lampe de mode de déshumidification (Orange)
C9 Lampe de mode de chauffage/ventilation (Rouge/Jaune)
C10 Lampe de température de la pièce
C11 Lampe de réglage de la température
C12 Lampe de la minuterie
C13 Indicateur digital
Fig. I TUYAUTERIE DE CONDUITE
I1 Buse d'adaptation du tuyau de conduite (4 pièces)
I2 Tuyau de conduite (2 pièces)
Fig. J KIT PANNEAU FENETRE
J1 Panneau de la fenêtre "C"
J2 Extension du panneau de la fenêtre (2 pièces)
J3 Grillede tuyau de conduite(2 pièces)
J4 Couvercle (2 pièces)
J5 Vis
2. CONSIGNES DE SECURITE
IMPORTANT
¡ Lire soigneusement le mode d'emploi avant de faire fonction-
ner l'appareil.
¡ L'appareil est conçu pour fonctionner à une température am-
biante comprise entre 64˚F (18˚C) et 95˚F (35˚C). Si la
température ambiante est inférieure à 64˚F (18˚C), l'eau risque
de geler dans les serpentins. Si la température ambiante est
supérieure à 95˚F (35˚C), le compresseur s'arrête automatiquement à des fins d'auto-protection.
¡ Après avoir arrêté l'appareil, TOUJOURS attendre 3 minutes
avant de le remettre en marche.
AVERTISSEMENT
¡ Ne JAMAIS laisser de petits enfants, de personnes handi-
capées ni de personnes ágées en plein dans le courant d'air.
Régler l'orientation du courant d'air.
¡ Empêcher les enfants d'approcher de l'appareil. Le ventilateur
qui se trouve à l'intérieur présente un danger réel pour les enfants du fait qu'il tourne à grande vitesse et l'appareil ne doit
pas être couvert car cela ferait baisser ses performances ou
l'empêcherait de fonctionner.
¡ Ne RIEN insérer à l'endroit des entrées ou des sorties d'air.
¡ NE PAS débrancher l'appareil avec des mains mouillées, cela
présente un risque d'électrocution.
¡ NE PAS faire fonctionner l'appareil dans un lieu humide
comme une salle de bain, par exemple.
¡ TOUJOURS brancher l'appareil sur une prise de courant de
115 volts, 60 Hz, monophasé.
¡ S'assurer que la fiche est fermement insérée dans la prise de
courant.
¡ NE PAS faire passer le cordon secteur sous une moquette, un
paillasson ni un tapis de quelque nature que ce soit.
¡ NE PAS raccourcir, abîmer ni modifier le cordon secteur de
quelque faêon que ce soit.
¡ NE PAS exercer une force ou une pression excessive sur le
cordon secteur.
¡ S'assurer qu'il n'y a pas de poussière sur la fiche du cordon
secteur.
¡ NE PAS utiliser de rallonge électrique.
¡ NE PAS mettre en marche et arrêter l'appareil en le branchant
et le débranchant, cela présente un risque d'incendie ou
d'électrocution.
¡ Par temps orageux (risque de foudre), arrêter l'appareil et le
débrancher.
¡ NE PAS toucher l'évaporateur, le condenseur ni les tuyauter-
ies.
NE JAMAIS utiliser lorsque le filtre n’est pas installé
PRECAUTIONS
¡ Laisser un espace d'au moins 20 in. (50 cm) entre l'appareil et
les murs ou tout autre objet. (Fig. D)
¡ Si l'appareil fonctionne en mode de REFROIDISSEMENT
dans un lieu à très haute teneur en humidité, la plaque de
dessus et la plaque arrière risquent de se couvrir de goutellettes de buée. Essuyer ces goutellettes avant qu'elles ne
tombent sur le parquet ou le tapis.
¡ Veuillez vidanger l’eau avant de déplacer le dispositif.
¡ Pour limiter la corrosion de l'appareil, NE PAS l'utiliser dans
une ambiance saline ou excessivement humide.
¡ NE PAS faire fonctionner l'appareil en plein soleil.
¡ NE PAS utiliser l'appareil dans des buts particuliers tels que
pour la conservation des aliments, des appareils de précision,
des objets d'art, des médicaments, etc. ou pour le soin des
animaux ou des plantes.
¡ NE PAS placer d'animaux, de plantes ni d'appareil à combus-
9
Page 13

FRANCAIS
RESET
TEST
tion (p. ex. cuisinère à gaz) en plein dans le courant d'air de
l'appareil.
¡ NE PAS s'asseoir et ne rien poser sur l'appareil.
¡
NE PAS coucher l'appareil sur le flanc ni à l'envers (haut en bas).
3. FONCTIONNEMENT
AVANT LA MISE EN MARCHE
PRISE LCDI (Détection du courant de fuite et arrêt)
TEST : LORS DU COURANT DE FUITE OU
RESET(REINITIALISATION) :
TOUJOURS:
ASSUREZ VOUS QUE LE VOYANT EST BIEN ALLUME APRES
AVOIR BRANCHE L’ALIMENTATION. SI CE N’EST PAS LE CAS,
APPUYEZ SUR LE BOUTON DE REINITIALISATION JUSQU'A CE
QU’IL EMETTE UN DECLIC ET QUE LE VOYANT S’ALLUME.
DIFFICULTES AVEC LE BOUTON DE REINITIALISATION:
APPUYER SUR LE BOUTON AVEC LA PARTIE PLATE D’UN BA-
TONNET TEL QU’UN CRAYON OU UN STYLO BILLE (ET NON SA
PARTIE POINTUE) PEUT FACILITER LA REINITIALISATION.
L’UNITE N’EST PAS ALIMENTEE ELECTRIQUEMENT:
ASSUREZ VOUS QUE LE VOYANT EST BIEN ALLUME.
PROCEDURE DE MISE EN MARCHE
APPUYEZ SUR LE BOUTON MARCHE/ARRET "POWER"
1.
(C1).
La lampe de mode "COOLING" (C7) et la lampe "Low" sont
alors allumées et le dispositif se met en marche.
2. APPUYEZ SUR LE BOUTON DE MODE (C2).
Appuyez sur le bouton de mode (C2) pour choisir le mode de
fonctionnement : refroidissement "COOLING" (C7), déshumidification "DEHUMIDIFYING" (C8), chauffage "HEATING", ou
ventilateur "FAN" (C9).
Mode "COOLING" (C7)
Quand le mode de “Refroidissement” est sélectionneé, la
lampe verte s’allume. Lors du mode "COOLING" (refroidissement), l’air est refroidi et l’air chaud est expulsé à l’extérieur à
travers le tuyau de conduite.
Mode "DEHUMIDIFYING" (C8)
Quand le mode de “Déshumidification” est sélectionneé, la
lampe orange s’allume. L’air est déshumidifié lors de son passage à travers le dispositif sans être en plein mode de refroidissement.
Lors du mode "DEHUMIDIFYING", vous ne pouvez pas
changer la vitesse du ventilateur.
Mode "HEATING" (C9)
Quand le mode de “Chauffage” est sélectionneé, la lampe
rouge s’allume. Le mode "HEATING" de cet appareil fonctionne sur le principe de la thermopompe, ce qui le rend plus
efficace qu'un chauffage électrique normal. Le mode “HEATING” (réchauffement) ne peut être activé qu’au moment où la
température intérieure est à l’inférieur de 80˚F (27˚C). Selon la
température extérieure, l'appareil arrêtera régulièrement le
chauffage pour faire fondre la glace accumulée. Plus la
température extérieure est basse, plus cela se produira
fréquemment. Si la température extérieure est à l'inférieur de
50˚F (10˚C), il ne faut pas utiliser cette unité pour le chauffage.
Elle ne produira pas assez de chaleur et la spire se gèlera. Si
l'unité est en mode "HEATING" alors que la temérature
extérieure est entre 50˚F (10°C) et 61˚F (16˚C), il ne faut pas
utiliser le tuyau d'entrée d'air. En ce mode, la température
souhaitée peut être réglée entre 61˚F (16˚C) et 80˚F (27˚C).
N.B: La capacité réelle de refroidissement et de réchauffement
varie selon la température d’air, l’humidité, l’isolement,
les tailles de fenêtre, etc.
Pour éviter d'endommager l'appareil, le passage du
mode refroidissement ou déshumidification au mode
chauffage (ou l'inverse) prend deux à trois minutes.
Mode "FAN" (C9)
Quand le mode de “Ventilateur” est sélectionneé, la lampe
SI LE BOUTON DE TEST EST
PRESSE, LA LAMPE INDICATRICE
S’ETEINT ET L’ALIMENTATION DE
L’APPAREIL EST COUPEE.
APRES AVOIR RESOLU LE PROBLEME, VEUILLEZ APPUYER SUR LE
BOUTON DE REINITIALISATION.
jaune s’allume. Le mode « FAN » permet seulement la circulation de l’air de la pièce et vous ne pouvez donc pas régler la
température de la pièce.
3. APPUYEZ SUR LES BOUTONS DE REGLAGE MINUTERIE/TEMPERATURE (C5)
Veuillez régler la température désirée de la pièce en appuyant
sur le bouton HAUT "
défaut est la température de la pièce.
Lorsque le bouton "
est affichée et peut être modifiée. Après 15 secondes, l
fichage revient à celui de la température de la pièce.
Par une pression simultanée des deux boutons, l’affichage
bascule entre un affichage Celsius et Fahrenheit.
▲" ou le bouton BAS "▼". L'faffichage par
▲" ou "▼"est pressé, la température réglée
4. APPUYEZ SUR LE BOUTON DE SELECTION DE
VITESSE DUVENTILATEUR (C5).
Appuyez sur le bouton de sélection de vitesse du ventilateur
(C5) pour choisir le débit d'air soufflé.
"HI":.....................Grand débit d'air
"MED": ................Fonctionnement avec un flux d’air moyen
"LO": ...................Faible débit d'air
5. DEFLEXION DE L’AIR
Toujours ouvrir la sortie d’air pendant le fonctionnement. (Fig. E)
6. MISE A L'ARRET
Appuyez sur le bouton marche/arrêt "POWER" (C1), tous les
voyants s'éteindront et l'appareil s'arrêtera.
FONCTIONNEMENT DE LA MINUTERIE
Arrêt automatique :
Lorsque le dispositif est en mode « COOLING », appuyez sur
le bouton de la minuterie (C4) pour sélectionner le nombre
d’heures que vous désirez voir le dispositif fonctionner en
mode « COOLING » avant de s’éteindre automatiquement.
Mise en marche automatique :
Lorsque que le dispositif est éteint, appuyez sur le bouton de la
minuterie (C4) pour sélectionner le nombre d’heures que vous
désirez voir s’écouler avant que le dispositif se mette en marche.
UTILISATION DE LA TELECOMMANDE
Les fonctions agissent exactement comme sur le panneau de
commande. (Fig C)
Piles : Veuillez retirer le couvercle à l’arrière du boîtier de la
télécommande et insérer les piles en vous assurant de bien respecter leur polarité (+) (-). (Fig H)
ATTENTION :
¡
Veuillez seulement utiliser des piles de 1,5V AAA ou IEC R03.
¡ Veillez NE PAS essayer de recharger les piles fournies.
¡ Toutes les piles doivent être remplacées en même temps.
¡ Veuillez NE PAS jeter les piles dans un feu où elles ris-
queraient d’exploser.
¡
Veuillez NE PAS insérer les piles en inversant leur polarité (+/-).
¡ Veuillez conserver hors de portée des enfants les piles ou tout
autre élément qui pourrait être avalé. Veuillez appeler
immédiatement un docteur si un élément est avalé.
4. VIDANGE DE L’EAU EN SURPLUS(Fig. F)
1. Veuillez vidanger l’eau en surplus dans le réservoir en plaçant
une casserole sous la sortie de vidange de l’eau.
2. Veuillez ôter le bouchon de vidange et laisser l’eau s’écouler
dans la casserole.
3. Lorsque l’eau cesse de couler, veuillez replacer le bouchon de
vidange.
4. Enlevez la casserole d’eau.
5. Faites fonctionner le dispositif en mode "FAN" afin de faire
sécher l’intérieur du dispositif.
NOTE :
5.
NETTOYAGE NETTOYAGE DU FILTRE A AIR
NETTOYAGE DE LA GRILLE DE PRISE D’AIR (Fig. G)
Nettoyez le filtre à air (A2) une fois tous les quinze jours. Le colmatage
du filtre à air entraîne une baisse des performances de l'appareil.
1. Veuillez nettoyer la grille de prise d’air (B1) une fois toutes les
deux semaines.
2. Pour ôter la grille de prise d’air (B1), veuillez la tirer.
3. Enlevez la poussière avec un aspirateur.
MISE EN GARDE
¡ NE touchez PAS l'évaporateur, vous pourriez vous blesser ou
l'endommager.
10
Veuillez vidanger l’eau du réservoir une fois par semaine.
'
faf-
Page 14

FRANCAIS
4 in.
NETTOYAGE DE L'EXTERIEUR DE L'APPAREIL
Nettoyez la surface extérieure de l'appareil avec un chiffon
doux, légèrement mouillé.
PRECAUTION
¡ N'utilisez JAMAIS d'essence, de solvent, de produits chim-
iques ni de poudre à récurer car ces produits pourraient endommager la surface de l'appareil.
6. ENTREPOSAGE DE LONGUE DUREE
A la fin de la saison chaude ou lorsque vous ne comptez pas utiliser le dispositif pendant une longue période, nous vous recommandons de suivre la procédure qui suit.
1. Faites marcher l'appareil durant 5 ou 6 heures en mode de
ventilation "FAN" (C9) afin de bien sécher l'intérieur.
Videz le réservoir de condensat et débranchez l'appareil.
2.
3. Nettoyez l'appareil.
Nettoyez l'appareil avec un chiffon doux humide et/ou un aspirateur, puis essuyez-le de nouveau avec un chiffon sec.
4. Nettoyez la grille de prise d’air (B8) et remettez-le en place.
5. Rangez l'appareil.
Le mieux est de ranger l'appareil dans son carton d'origine. Si
vous n'avez plus ce carton, recouvrez l'appareil d'un grand
sac en plastique et rangez-le dans un endroit frais et sec.
7. TRANSPORT
Il est préférable de transporter l'appareil en position verticale.
Lorsque cela est impossible, couchez-le sur son côté droit et,
une fois arrivé à destination, remettez l'appareil en position
verticale et attendez au moins 10 minutes avant de le mettre en
marche. Avant de déplacer ou de transporter l'appareil,
vérifiez que le réservoir de condensat est vide.
AVANT DE FAIRE APPEL AU SERVICE DE MAINTENANCE
Les conditions suivantes n'indiquent pas des défauts.
Un bruit de sifflement ou
un son creux :
Un bruit de grincement :
Odeur :
L'unité ne démarre pas ou
ne change pas de mode de
fonctionnement immédiatement :
Ce bruit provient du liquide de re-
e
froidissement s'écoulant dans les
conduites.
Ce bruit provient de l'unité lors de
dilatation ou de contraction avec
e
les changements de température.
Des substances telles que du tabac,
des produits cosmétiques ou des
e
produits alimentaires peuvent s'accumuler dans l'unité.
Pour empêcher toute surcharge du
moteur du compresseur, inter-
e
rompre le fonctionnement de l'unité
pendant plus de 3 minutes.
9. FICHE TECHNIQUE
MODELE TAD-T40LW
CAPACITE DE REFROIDISSEMENT
CAPACITE DE CHAUFFAGE 11.000 BTU/H
14.000 BTU/H
8. DEPISTAGE DES PANNES
SYMPTOMES
Le dispositif
ne fonctionne pas.
Le dispositif
s’éteint
brusquement
en cours de
fonctionnement.
Le dispositif
fonctionne
de façon intermittente.
Le dispositif
fonctionne
mais la pièce
n’est pas refroidie.
De l’eau condensée se
répand
lorsque le
dispositif est
déplacé.
CAUSES
-Il n’est pas allumé.
-La prise n’a pas été
branchée correctement
-L’indicateur de réservoir plein est allumé. Le
réservoir est plein.
-Fuite de courant ou
s’appuye sur le bouton
test de la prise LCDI.
-La température à
l’intérieur de la pièce a
atteint le niveau de
température réglé.
-Le temps réglé est parvenu à son terme.
-L’indicateur de réservoir plein est allumé. Le
réservoir est plein.
-Disfonctionnement.
-La température environnante est trop haute
ou trop basse.
-Le tuyau de conduite
est bloqué.
-Une fenêtre ou la porte
de la pièce est restée
ouverte.
-Il y a une source de
chaleur dans la pièce
ou un trop grand nombre de personnes.
-La grille de prise d’air
est obstruée.
-Le filtre est trop sale.
-La température réglée
est trop haute.
-Le réservoir est
presque plein.
SOLUTIONS
-Attendez que l’alimentation soit à nouveau
effectuée
-Effectuez à nouveau le
branchement
-Retirez l’eau de vidange du réservoir de vidange.
-Appuyez sur le bouton
de réinitialisation après
que se résoud le
problème.
-Réinitialisez le niveau
de température.
-Réinitialisez la minuterie.
-Retirez l’eau de vidange du réservoir de vidange.
-Contactez votre revendeur.
-Vérifiez l’état de gaine
d’évacuation d’air.
-Fermez toute les
fenêtre et la porte.
-Supprimez de la pièce
toutes les sources de
chaleur.
-Nettoyez la grille de
prise d’air.
-Remplacez le filtre.
-Baisser la température
réglée.
-Retirez le bouchon de
vidange en bas derrière
le dispositif, vidangez
l’eau et le dispositif
fonctionnera automatiquement.
CAPACITE DE DESHUMIDIFICATION
SOURCE D’ALIMENTATION Monophasé 115V, 60Hz
CONSOMMATION ELECTRIQUE
COURANT DE
FONCTIONNEMENT
FLUX D’AIR (MAX.) 222 CFM (6,3 m
CHAMP DE TEMP. DE FONCTIONNEMENT
DIMENSIONS (larg. x prof. x haut.)
POIDS 77 Lbs. (35 kg)
COMPRESSEUR ROTARY
FLUIDE FRIGORIGENE R-410A
REMARQUE: La capacité de refroidissement d'air varie en fonc-
tion de la température et de l'humidité ambiantes.
0,48 gal/h (1,8 L/H)
1200 W
(Refroidissement) 10,8 A
(Chauffage) 10,8 A
3
/m)
64˚F~100˚F (18˚C~38˚C)
19-11/16" x 33-5/8" x 15-3/4"
(500 x 854 x 400 mm)
10. ACCESSOIRES
Si le dispositif est destiné à une utilisation à un endroit unique, il
est possible d’accroître son efficacité en utilisant les accessoires
suivants du kit de ventilation.
TUYAU DE CONDUITE (TUYAU FLEXIBLE) (Fig. I)
2 pièces.
Max 4 ft. (1,2 m)
KIT PANNEAU FENETRE “C” (Fig. J)
Kit panneau fenêtre “C”
Pour fenêtres coulissantes et à guillotine
Max. 37 in. (94 cm)
Min. 28-1/4 in. (72 cm)
UTILISATION DU TUYAU DE CONDUITE (Fig. 1)
1. Elargir les extrémités d'un côté du tuyau
de conduite (tube flexible), (l2) d'environ 4
pouces (100 mm).
2. Insérer les deux extrémités du tuyau de
conduite (tube flexible) (l2) dans les buses
d'adaptation du tuyau de conduit (I1) par
torsion dans le sens horaire jusqu'à ce
qu'il s'arrête.
11
Page 15

FRANCAIS
3. Fixer une des buses d'adaptation du tuyau de conduite sur la
sortie arrière de l'unité. Cela est réalisé en faisant coulisser la
buse d’adaptation du tuyau de conduite vers le bas sur la sortie
de l'unité, qui sera assemblée avec les rainures sur le connecteur de l'unité. (B2 ou B7)
Elargir le tuyau de conduite (l2) et fermer la fenêtre ou la porte
4.
aussi loin que possible pour piéger la buse d’adaptation du tuyau
de conduite (I1).
NOTE: Placez le dispositif aussi près que possible de la fenêtre ou
de la porte.
UTILISATION DU KIT PANNEAU FENETRE (Fig. J)
N.B:
Les installations de fenêtre sont possibles par l'utilisation de
l'ensemble de conduit et le kit de panneau de fenêtre.
En cas de double type de conduite, utiliser toujours le kit de
panneau de fenêtre "C".
1.
Fixer la grille du tuyau de conduite (J3) sur le panneau de la
fenêtre avec quatre (4) vis. Assurer que le panneau est étendu
afin que les vis n’aillent pas dans la partie coulissante du panneau.
N.B: En cas de double type de conduite, fixer deux buses d'adap-
tation du tuyau de conduite.
2. Insérer l'extrémité du tuyaux de conduite (l2) dans les buses
d'adaptation du tuyau de conduite (l1), tourner dans le sens horaire jusqu'à ce qu'il s'arrête.
3. Ouvrez la fenêtre.
4. Placez le panneau de fenêtre sur la fenêtre en l’étirant pour
l’adapter à la largeur de la fenêtre. Une fois que le panneau est
étiré, il peut être bloqué à cette largeur par le serrage des deux
(2) vis (J5) sur le panneau supérieur.
5. Fermer la fenêtre.
Placer la buse d'adaptation du tuyau de conduite (l1) sur la grille
6.
du tuyau de conduite .
7.
La buse d'adaptation conduit de tuyau (l1) au repos peut être
fermée avec le couvercle (J4) pour la grille du tuyau de conduite (J3)
fournie.
N.B: La même procédure peut être adaptée à une installation verti-
cale pour des fenêtres coulissantes.
DÉMONTAGE DU TUYAU DE CONDUITE (Fig. I)
1. Tordre les buses d’adaptation du tuyau de conduite (l1) dans le sens horaire pour les enlever
des rainures sur le connecteur de l'unité. (B2 ou
B7).
2. Retirer les buses d'adaptation du tuyau de conduite des rainures
sur le connecteur.
3. Tordre les buses d'adaptation du tuyau de conduite (l1) dans le
sens horaire pour les retirer des rainures sur la grille du tuyau de
conduite (J3).
4. Retirer les buses d'adaptation du tuyau de conduite (l1) des
rainures sur la grille du tuyau de conduite(J3).
ACCESSOIRES EN OPTION
Lorsque vous avez besoin d’un panneau fenêtre plus long, veuillez
vous procurer le panneau fenêtre de rallonge “B” et l’utiliser avec
le panneau fenêtre “C” d’origine.
Pièce #22740286 PANNEAU FENETRE DE RALLONGE “B” (M)
31-1/2” (80 cm)
Pièce #22740288 PANNEAU FENETRE DE RALLONGE “B” (L)
56” (142 cm)
Pièce #22740288 CANULE DE SORTIE D’AIR
GARANTIE LIMITEE
TOYOTOMI CO., LTD. ("TOYOTOMI") garantit tous ses produits
et pièces en vente exempts de défauts matériels ou vices de
fabrication dans des conditions d'utilisation normales durant
une période de DOUZE (12) MOIS effective à la date de livraison
à l'acheteur au détail d'origine suivant les termes ci-après:
CE QUI EST COUVERT : Produit ou ses pièces avec défauts
matériels ou vices de fabrication.
CE QUI N'EST PAS COUVERT:
Cette garantie ne couvre pas tout défaut dû à la négligence de
tierces personnes: non observation des instructions d'installation (les instructions d'installation et de maintenance sont
fournies avec chaque unité) pour l'installation, l'utilisation et la
maintenance de l'unité; utilisation incorrecte, accidents, modifications, utilisation de pièces et accessoires non autorisés ou
non conformes aux normes TOYOTOMI; mauvais fonctionnement électrique, c'est-à-dire résultant de surtensions importantes, courts-circuits, etc.; installation incorrecte; ou réparations exécutées par un centre de services non agréé par TOYOTOMI.
QUI EST COUVERT : L'acheteur au détail d'origine.
LES MESURES QUE NOUS PRENDRONS: TOYOTOMI effectuera gratuitement les réparations ou le remplacement, selon
son jugement, de toutes les pièces défectueuses couvertes par
cette garantie limitée, remises à votre agent agréé ou distributeur TOYOTOMI le plus proche.
POUR BENEFICIER DE LA GARANTIE: Vous devez retourner
les produits ou pièces défectueux à un agent agréé ou distributeur TOYOTOMI, accompagnés par cette GARANTIE LIMITEE
et la copie de la facture ou le reçu du débit de votre carte de
crédit, ou tout autre document indiquant la date de livraison des
produits. Si un centre de services n'est pas disponible localement, veuillez contacter notre DEPARTEMENT SERVICE
CLIENTELE chez:
TOYOTOMI U.S.A., INC.
604 Federal Road, Brookfield, CT 06804
(203)775-1909
SONT INDIQUEES CI-DESSUS TOUTES LES OBLIGATIONS ET
RESPONSABILITES DE TOYOTOMI SE RAPPORTANT A LA
QUALITE DES PRODUITS FOURNIS. TOUTES AUTRES
GARANTIES, EXPRESSES OU IMPLICITES, INCLUANT LES
GARANTIES RELATIVES A LA COMMERCIALISATION OU
L'APPLICATION POUR DES BUTS PARTICULIERS SONT EXCLUES. TOYOTOMI NE PEUT ETRE TENU RESPONSABLE DE
TOUT CAS D'INUTILISATION DU PRODUIT, PROBLEMES OU
AUTRES DOMMAGES, DIRECTS OU INDIRECTS, RESULTANT
DE L'UTILISATION OU L'UTILISATION INCORRECTE DES
PRODUITS, OU ATTRIBUABLES A DES DEFAUTS DE PRODUITS.
TOYOTOMI se réserve le droit exclusif de proroger ou de modifier les termes de la Garantie Illimitée à sa discrétion.
Certains états n'acceptent pas l'exclusion ou la limitation de
dommages directs ou indirects, ou la limitation de la durée de la
garantie offerte. Pour cette raison, il se peut que ces limitations
ou exclusions ne vous soient pas applicables. Cette Garantie
Limitée vous confère des droits juridiques spécifiques et vous
pouvez aussi exercer d'autres droits qui varient d'état à état.
12
Page 16

INS
MA
MO
Printed in China
Rev. 07/14
Part No. 22740894
TOYOTOMI CO., LTD.
5-17, Momozono-cho, Mizuho-ku,
Nagoya, 467-0855 Japan
www.toyotomi.jp
 Loading...