

Toyotomi TAD-30F, PORTABLE AIR CONDITIONER Instruction Manual
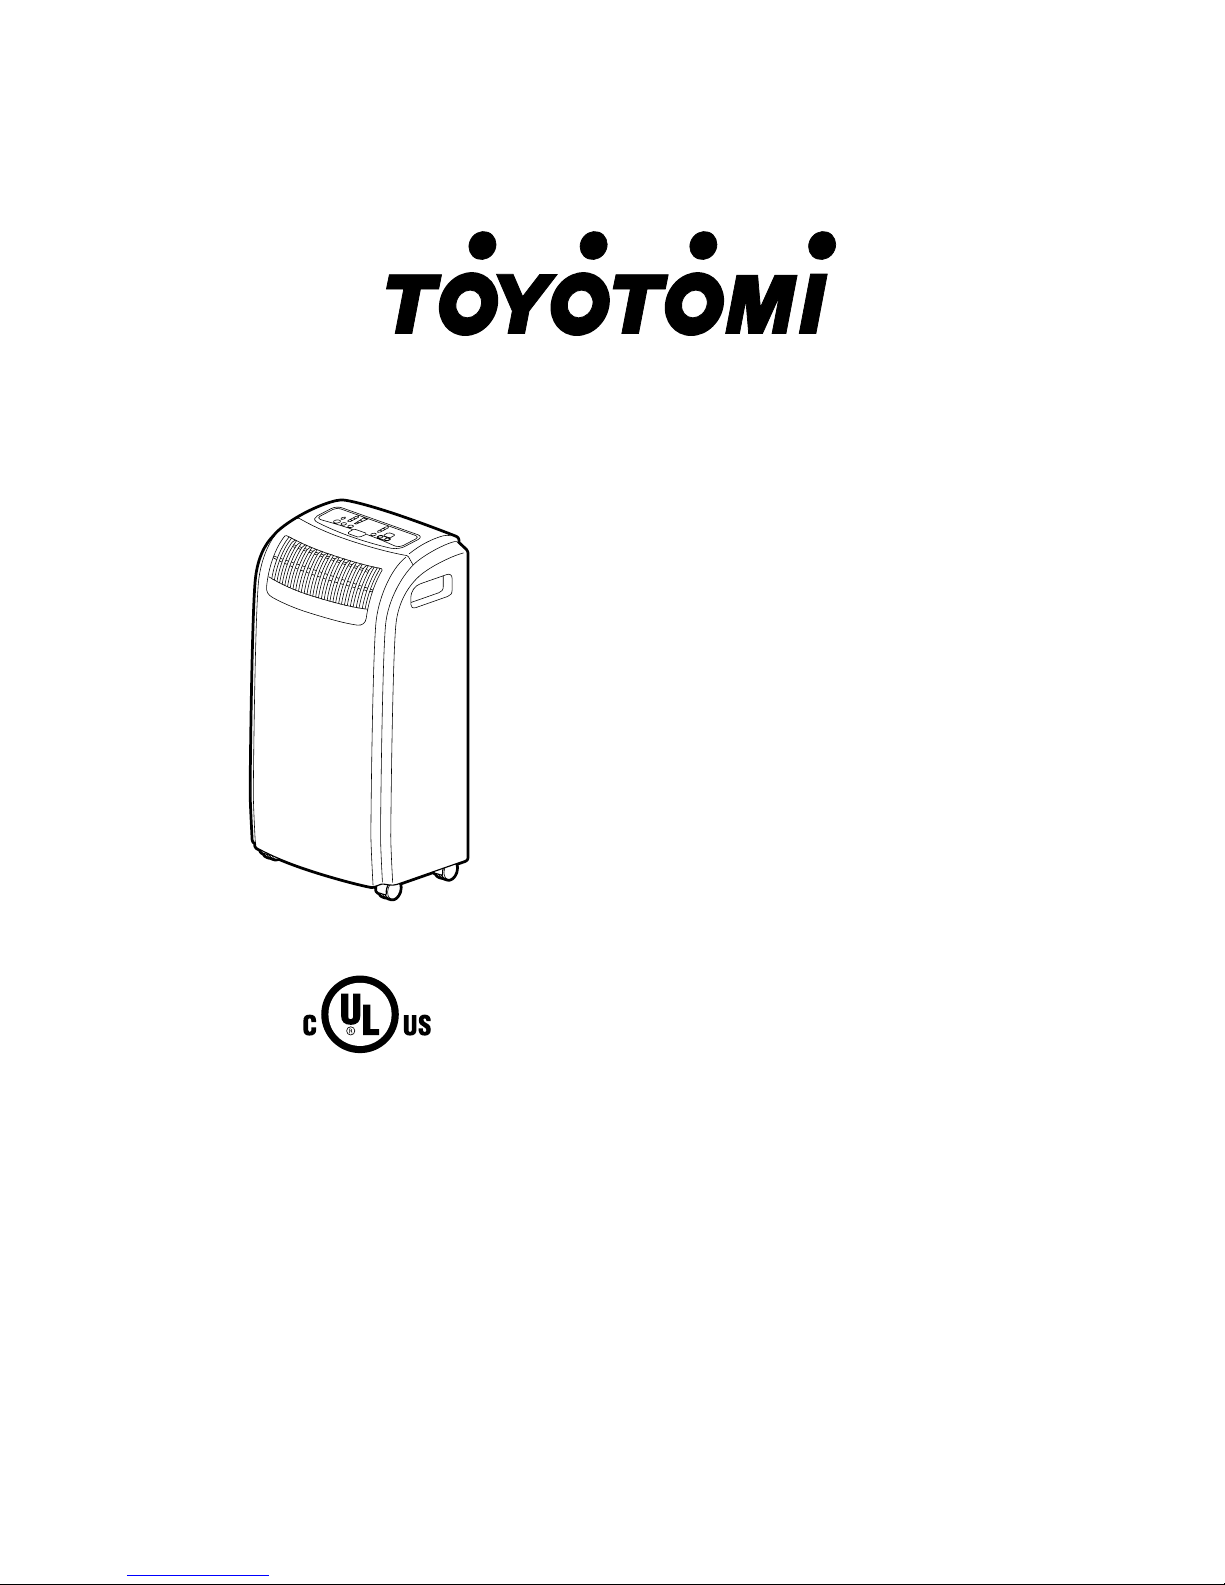
TAD-30F
PORTABLE AIR CONDITIONER
ACONDICIONADOR DE AIRE
PORTATIL
CONDITIONNEUR D’AIR
DEPLACABLE
INSTRUCTION MANUAL ENGLISH P. 1
MANUAL DE INSTRUCCIONES ESPAÑOL P. 5
MODE D’EMPLOI FRANCAIS P. 9

A B F G
C
D
!
E J
H
A1
A4
A5
A6
A7
A2
A3
more than
20 in.(50cm
)
more than
20 in.(50cm
)
F1
F2
J3
J5 J2J1
J4
B1
B2
B8
B3
B4
B5
B7 B6
Dry
Fan
High
Med
Power
Mode
Set TSet TempempSet Temp
Timer Setimer SetTimer Set
Timer
Timer/Temp
Adjust
Fan Speed
Tank Fullank FullTank Full
CoolCoolCool
LowLowLow
Room TRoom TempempRoom Temp
C1
C6
C9 C8 C7
C10 C11 C12 C13
C2 C3 C4 C5
C14
C13
C1
C5C5
C3
C15
C2
C4
!
2
!
1
!
3
P
26
32
2827 29 30
31
16
19 25
20
24
21
22
9
8
712106543
17
12
13
14 15
11
23
18
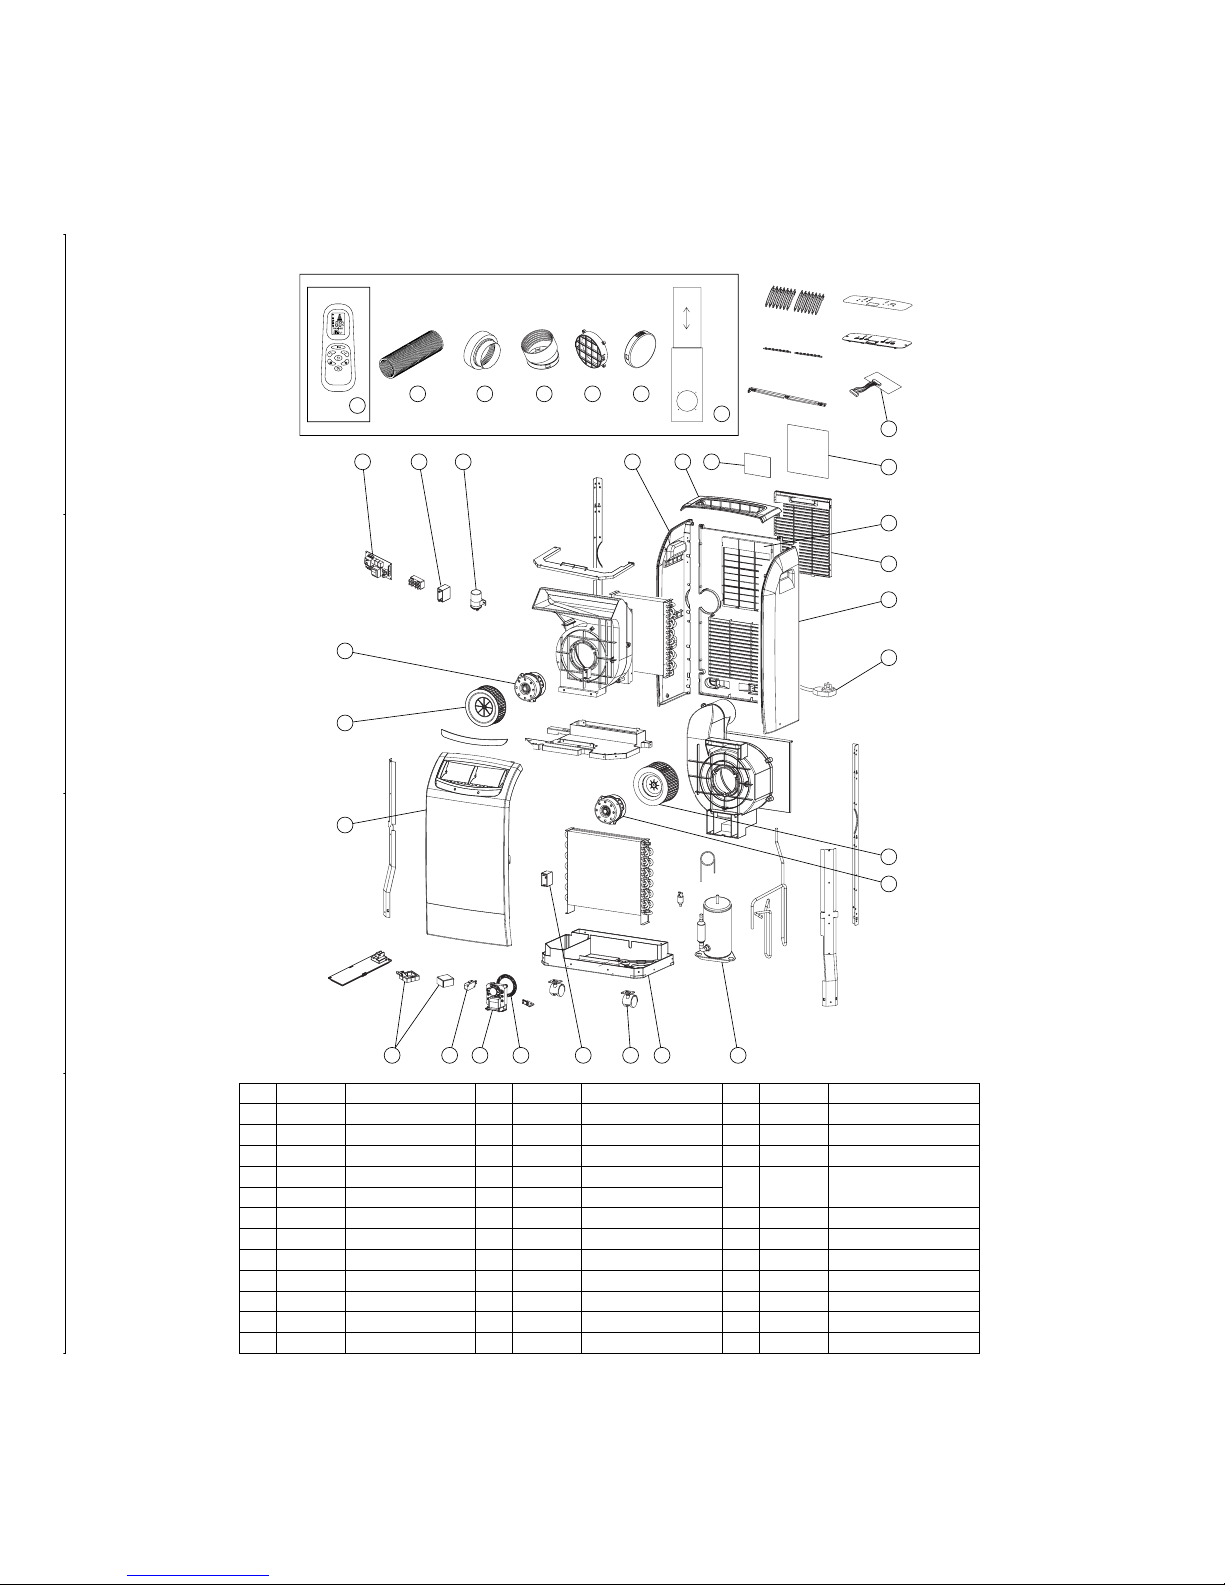
NO.
1
2
3
4
5
6
7
8
9
10
11
12
PART #
22740229
22740270
22740230
22740206
22740222
22740223
22740213
22740220
22740242
22740246
22740218
22740241
Base pan assembly
Caster
Float
Micro switch
Drain motor
Blade
Compressor
Rear fan motor
Rear fan
Capacitor A
Front fan motor
Front fan
NO.
13
14
15
16
17
18
19
20
21
22
23
24
PART #
22740247
22740212
22740248
22740217
22740227
22740235
22740201
22740251
22740245
22740263
22740264
22740203
Capacitor B
Main circuit board
Capacitor C
Indication lamp circuit
Front panel
Power supply cord
Top plate
Rear panel
Intake air grille
Right side panel
Left side panel
3M Filter
NO.
25
26
27
28
29
30
31
32
33
34
PART #
22740240
22740249
22740250
22740254
22740253
22740252
22740281
22740276
22740295
22740299
Charcoal filter
Exhaust duct hose
Exhaust duct connector
Exhaust duct hose
adapter nozzle
Exhaust duct hose grille
Cover
Window panel kit
Remote control
Instruction manual
Carton
PART NAMEPART NAMEPART NAME
PARTS LIST

1
SUMMARY
The idea behind the unit is to provide a localized supply of cool air.
The unit will greatly enhance your personal comfort whether at
a work station or even in your favorite chair.
Four (4) casters enable you to move the unit easily from room
to room. It cools and dries the air at the same time so that you
can stay comfortable even when it's humid or rainy outside.
Also your furnishings and fabrics are kept in good condition
when it's used as dehumidifier.
Conventional air conditioners use large quantities of energy to
cool an entire room, including walls and furniture. The unit creates a zone of cool and dry air only where it is needed. It does
not waste energy cooling the surroundings.
It's easy to operate. Once you set the desired function, all functions will be memorized in the unit. The built-in timer allows
from 1 to 12 hours operation, after which the unit is automatically turned on and off. This is especially convenient at bedtime.
Venting is not required. However, if the unit is to be used exclusively in one space, the cooling efficiency will be enhanced
by using the venting kit accessory.
OPERATIONAL FEATURES
1. COOLING OPERATION:
Normally, cool air is directed out the front louvers by the
circulation fan which has three (3) stages of fan speed.
2. AUTOMATIC OPERATION:
Once the desired function has been set, it is memorized as
long as it remains connected to the wall outlet. In the event
of a power failure, the desired function must be re-entered
when power is restored.
3. THERMO CONTROL
The compressor will automatically shift to ON or OFF to
maintain the desired temperature.
4. TIMER OPERATION:
The unit will turn on and off after the designated period of
time (1, 2, 3, ...12 hours).
5. AUTOMATIC SHUT-OFF MECHANISM WHEN DRAIN
TANK IS FULL:
When the drain tank is full, the unit will be automatically
shut off. It is always required to press power button twice
to resume operation after the condensed water is removed
from the tank.
6. TRIPLE AIR FILTER:
A pre-filter protects the unit from dust, 3MTMair filter cleans
circulation air and a charcoal filter eliminates unpleasant
odor.
1. DESCRIPTION
Fig. A FRONT
A1 Air outlet
A2 Vertical louver
A3 Front panel
A4 Operation panel
A5 Carrying handle
A6 Horizontal louver
A7 Caster
Fig. B REAR
B1 3MTMair filter
B2 Air intake (Evaporator)
B3 Exhaust outlet
B4 Air intake (Condenser)
B5 Power supply cord
B6 Power plug
B7 Drain water outlet
B8 Air intake grille (Pre-filter)
Fig. C OPERATION PANEL
C1 Power button
C2 Mode button
C3 Fan speed button
C4 Timer button
C5 Adjust buttons
C6 Tank full lamp
C7 Cool mode lamp
C8 Dry mode lamp
C9 Fan mode lamp
C10 Room temp lamp
C11 Set temp lamp
C12 Timer set lamp
C13 Digital indicator
C14 Signal receptor
C15 C/F toggle button (Remote control)
Fig. I EXHAUST DUCT SET
I1 Exhaust duct hose connector
I2 Exhaust duct hose adapter nozzle
I3 Exhaust duct hose
Fig. J WINDOW PANEL KIT
J1 Window panel
J2 Window panel extension
J3 Exhaust duct hose grille
J4 Cover
J5 Screws
2. SAFETY TIPS
IMPORTANT
¡ Read instructions carefully before operation.
¡ The unit should be operated when the room temperature is
between 64˚F (18˚C) to 95˚F (35˚C). If the room temperature
is below 64˚F (18˚C), ice may form on the coils. If the room
temperature is above 95˚F (35˚C), the compressor will automatically shut off to protect itself.
¡ ALWAYS, wait 3 min. to restart after turning unit off.
WARNING
¡ NEVER expose infants, handicapped persons, or senior
persons directly to the airflow. Adjust the airflow direction.
¡ Keep children away from unit. Children are particularly li-
able to this danger. The fan is running at high speed inside. Covering them may deteriorate air conditioner performance or cause it to become inoperative.
¡ NEVER insert objects of any kind into the air intake or air
outlet.
¡ DO NOT unplug if your hands are wet. An electrical shock
may occur.
¡ DO NOT operate in a wet location.
¡ ALWAYS plug into 115 V, 60 Hz, single phase electrical out-
let.
¡ Be sure plug fits receptacle securely.
¡ DO NOT run power cord under carpets, rugs, or floor mats
of any kind.
¡ DO NOT attempt to shorten or alter power cord in any way.
¡ DO NOT apply any excessive force or pressure to the pow-
er supply cord.
¡ Make sure that the plug is free of dust.
¡ DO NOT use an extension cord.
¡ DO NOT turn on and off by inserting or removing the plug
which may cause electric shock or fire.
¡ If there is a fear of lightning, stop the unit and disconnect
the power supply cord.
¡ DO NOT touch the evaporator, condenser and pipes.
¡ DO NOT operate with filter removed.
CAUTION
¡ Keep unit more than 20 in. (50 cm) away from any objects
or wall. (Fig. D)
¡ If the unit is operated in COOL mode in an area of very
high moisture, the top plate and the rear plate may get
covered with a mist. Wipe off any mist before it has a
chance to get on the floor or rug.
¡ Remove drain water before moving unit.
¡ To minimize corrosion, DO NOT use in damp, salty air
area.
¡ DO NOT operate in direct sunlight.
¡ DO NOT use for such particular purpose as preservation of
foodstuff, animals, plants, precision appliances, arts and
medicine.
¡ DO NOT place an animal, plants or combustion equipment
in a place which is subjected to the direct air blow of the
unit.
¡ DO NOT ride or place the object on the unit.
¡ DO NOT turn the unit on its side or upside down.
ENGLISH
3. OPERATION
BEFORE OPERATION:
INSTALLING FILTERS
CAUTION
¡ Be sure to assemble the filters before using the unit.
1. Pull the air intake grill (B8) toward you and remove it.
2. Take the 3M
TM
filter and the charcoal filter out of the bag.
3. Mount the charcoal filter and then install the 3M
TM
HAF fil-
ter properly.
LCDI (Leakage Current Detection and Interruption) PLUG
TEST:
WHEN CURRENT LEAKING OR
PRESSING TEST BUTTON, THE INDICATOR LIGHT WILL TURN OFF
AND THE UNIT WILL CUT OUT.
RESET: AFTER SOLVE THE PROBLEM
PLEASE PRESS RESET BUTTON.
OPERATING STEPS:
1. PRESS ''POWER'' BUTTON (C1) TO ''ON''.
Cool mode lamp (C7) and Low lamp are lit at this time and
unit starts.
2. PRESS MODE BUTTON (C2).
Press the mode button (C2) to set your desired operation
mode "COOL" (C7), "DRY" (C8) or "FAN" (C9).
COOL mode (C7)
During the "COOL" mode the air is cooled and hot air is exhausted to the outside air through the exhaust duct hose.
DRY mode (C8)
Air is dehumidified as it passes through the unit, without
being in full cool mode.
In "DRY" mode operation, you cannot change the fan
speed.
FAN mode (C9)
The "FAN" mode provides only circulation of room air, so
that you cannot set the room temperature.
3. PRESS TIMER/TEMPERATURE ADJUST BUTTONS (C5)
Set the desired room temperature by pressing UP button
" " or DOWN button " ". The default display is room
temperature.
When " " or " " button is pressed, the set temperature
is displayed and may be adjusted. After 15 seconds the display will revert back to room temperature.
By pressing both buttons at once, the display will toggle
between Celsius and Fahrenheit. When using the remote
control, press the C/F toggle button (C15).
4. PRESS FAN SPEED BUTTON (C3)
Press the fan speed button (C3) to set the desired air flow
rate.
High · · · · · · · · · · · Operation at a high air flow
Med · · · · · · · · · · · Operation at a medium air flow
Low · · · · · · · · · · · Operation at a low air flow
5. AIR DEFLECTION
The vertical louvers (A2) and the horizontal louvers (A6)
may be set on right and left and/or up and down manually
in desired direction. (Fig. E)
6. STOP OPERATION
Press the Power button (C1) and all lights will go out.
TIMER OPERATION
Auto turning OFF:
With unit in cool mode, press Timer button (C4) to select
number of hours you would like the unit to run in cool
mode until it automatically shuts off.
Auto turning ON:
With unit powered off, press Timer button (C4) to select
number of hours until you would like the unit to automatically start.
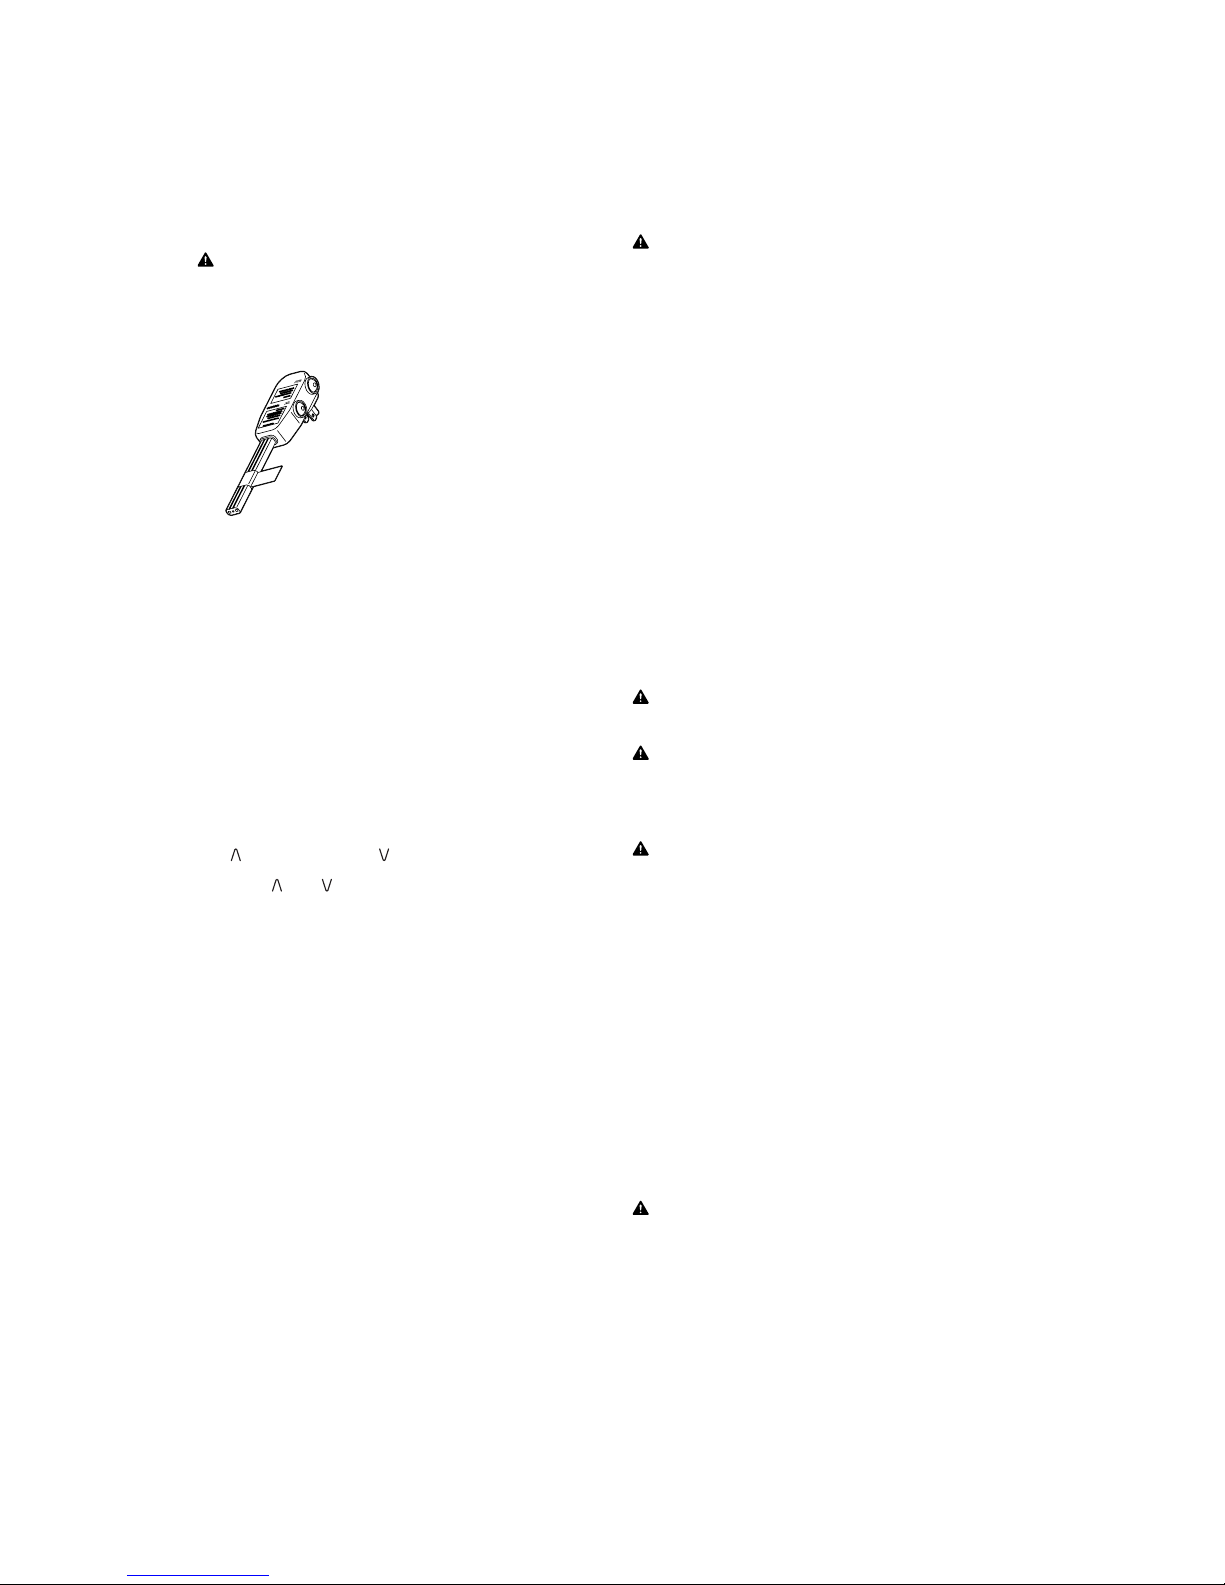
USING REMOTE CONTROL
The functions work the same as your air conditioner's operation panel. (Fig. C)
Batteries: Remove the cover on the back of the remote control and insert the batteries with the (+) and (-) poles pointing in the proper direction. (Fig. H)
CAUTION
¡ Use only AAA or IEC R03 1.5V batteries.
¡ DO NOT attempt to recharge the supplied batteries.
¡ All batteries should be replaced at the same time.
¡ DO NOT dispose of the batteries in a fire as they may ex-
plode.
¡ DO NOT install the batteries with the polarity (+/-) re-
versed.
¡ Keep batteries and other things that could be swallowed
away from young children. Contact a doctor immediately if
an object is swallowed.
4. DRAINING EXCESS WATER (Fig. F)
1. Drain excess water from the tank by placing a pan under
the drain water outlet. (Fig. B7)
2.
Remove the drain plug, and let the water drain into the pan.
3. When the water stops draining out, replace the drain plug.
4. Remove the pan of water.
5. Operate the unit in Fan mode to dry the interior of the unit.
NOTE: Remove the drain water from the tank once a week.
5. CLEANING
CLEANING AIR INTAKE GRILLE (Fig. G)
1. Clean the air intake grille (B8) once every two weeks.
2. To remove the air intake grille (B8), pull the grille off.
3. Remove the dust with a vacuum cleaner.
WARNING
¡ DO NOT touch the evaporator. It may cause injury or dam-
age.
CAUTION
¡ DO NOT rinse the charcoal filter with water.
CLEANING SURFACE
Clean the outside of the unit with a soft damp cloth.
CAUTION
¡ NEVER use gasoline, solvents, chemical products or polish
as they could damage the surfaces.
6. LONG-TERM STORAGE
At the end of each season, or when you do not plan to use your
unit for an extended period of time, the following procedures
are recommended.
1. Run the unit 5 or 6 hours with only the ''FAN'' (C8) mode
operating in order to dry the inside.
2. Remove the drain water from the tank and unplug the unit.
3. Clean the unit.
Wipe off any dirt of dust on the unit with a soft damp cloth
or a vacuum cleaner, and then wipe again using a soft dry
cloth.
4. Clean the air intake grill (B8) and replace it.
5. Store the unit.
The original shipping carton is the best place to store your
unit. If you do not have the original packing materials, cover
the unit with a large plastic bag and store in a cool dry place.
CAUTION
¡ ALWAYS store the unit in the vertical position.
¡ DO NOT put heavy objects on top of the unit.
7. TRANSPORTATION
Preferably keep the unit in the vertical position during transportation. If this is not possible then lay it on its rear side, when
at destination put the unit back in the vertical position and wait
at least ten (10) minutes before using it. Before
transporting/moving the unit make sure the drain tank is empty.
2
ENGLISH
 Loading...