

Toyota Celica NAV User Manual
TOYOTA NAVIGATION SYSTEM
PART NUMBER
NAVIGATION KIT PART N°
08545-00803
TOYOTA MOTOR CORPORATION
INSTALLATION INSTRUCTIONS
FOR **T23*R
Manual Ref. Nr.N1RT23-0-00
09-99 Celica (RHD) - 2
Celica TNS 500
PRECAUTIONS
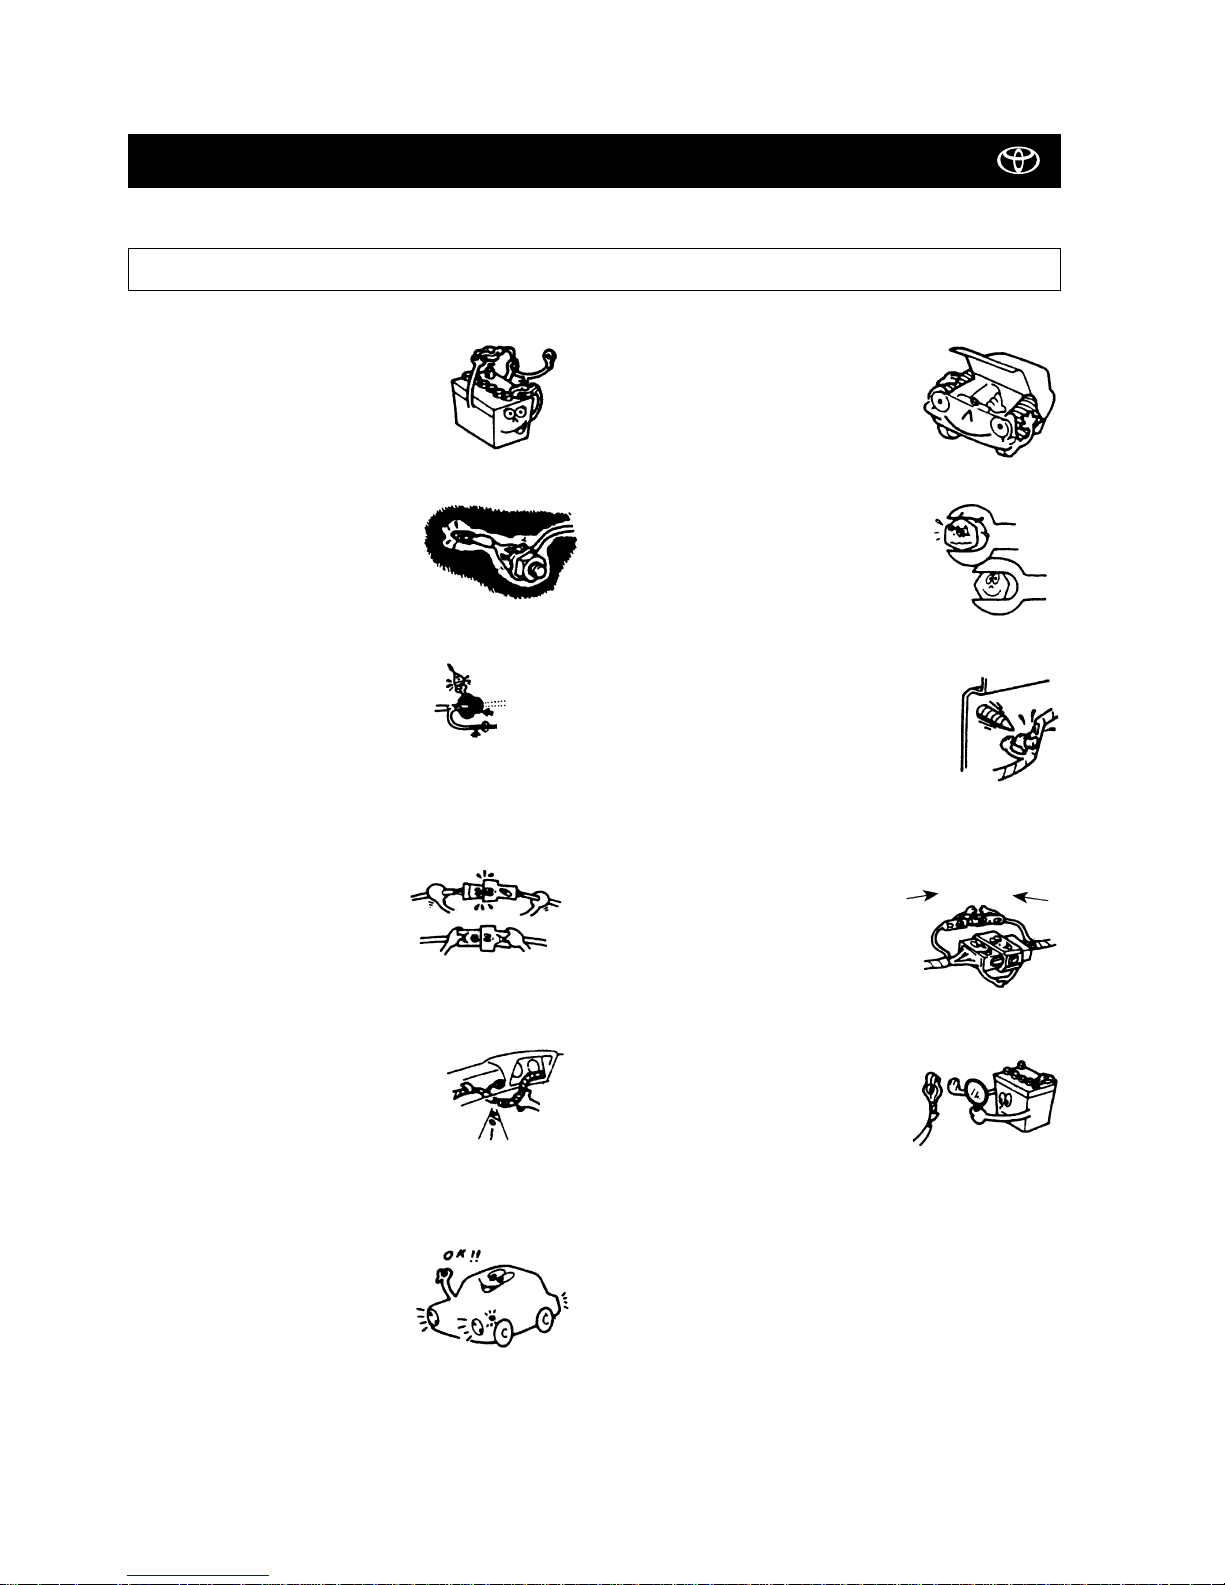
• Do not pinch the rear wiring or harness in the tightened part.
PLEASE READ THOROUGHLY THESE PRECAUTIONS BEFORE THE INSTALLATION
• Be sure to disconnect the negative
(-) lead from the battery terminals.
• When passing the wires through the
dashboard or other panels, use a
grommet to ensure waterproofing.
• Protect the wiring with tape when it is
passed through a hole.
• When disconnecting the connectors,
be sure to grip the connector body.
Do not tug on the wiring.
• Do not forcibly pull any car wiring harness.
Rough tugging may result in opened connections, or a broken wire or harness.
•
Confirm that lamps, horn, wiper and
other car accessories operate normally.
• Protect your car with fender covers, seat
and so on.
• Use the correct tool when tightening
bolts or nuts.
• Before drilling a hole, check that the rear of
the mounting wall is clear.
• Be sure to firmly tighten connectors
and terminals.
• Before connecting the power wiring to
the battery, check the wiring connections, harness, etc. to see that they
are properly secured.
• Check body and trim near area of installation to be certain no
dirt or scratches resulted from the installation.
waterproof - O.K. !!
Taping
Grommet
Insert
completely
Stop it !

09-99Celica (RHD) - 3
Celica TNS 500
Precautions ..................................................................................................................................................................... 2
Required Parts/Subkits ................................................................................................................................................... 4
Navigation System Assy ................................................................................................................................................. 5
Wire Harness .................................................................................................................................................................. 7
Installation Overview ...................................................................................................................................................... 8
How to connect .............................................................................................................................................................. 9
Fujitsu Ten Audio Unit (with AVC-LAN) .......................................................................................................................... 10
Matsushita Audio Unit (with AVC-LAN) .......................................................................................................................... 11
Audio Units with 13PIN Connector (without AVC-LAN) .................................................................................................. 12
Vehicle Disassembly........................................................................................................................................................ 13
Installation of the GPS Antenna ...................................................................................................................................... 17
Wire Harness Installation ............................................................................................................................................... 19
Installation of the Computer ........................................................................................................................................... 25
Monitor Installation ......................................................................................................................................................... 28
Wire Harness Connection ............................................................................................................................................... 31
Storage of the Remote Control ....................................................................................................................................... 34
System Start Up ............................................................................................................................................................. 35
TABLE OF CONTENTS
09-99 Celica (RHD) - 4
Celica TNS 500
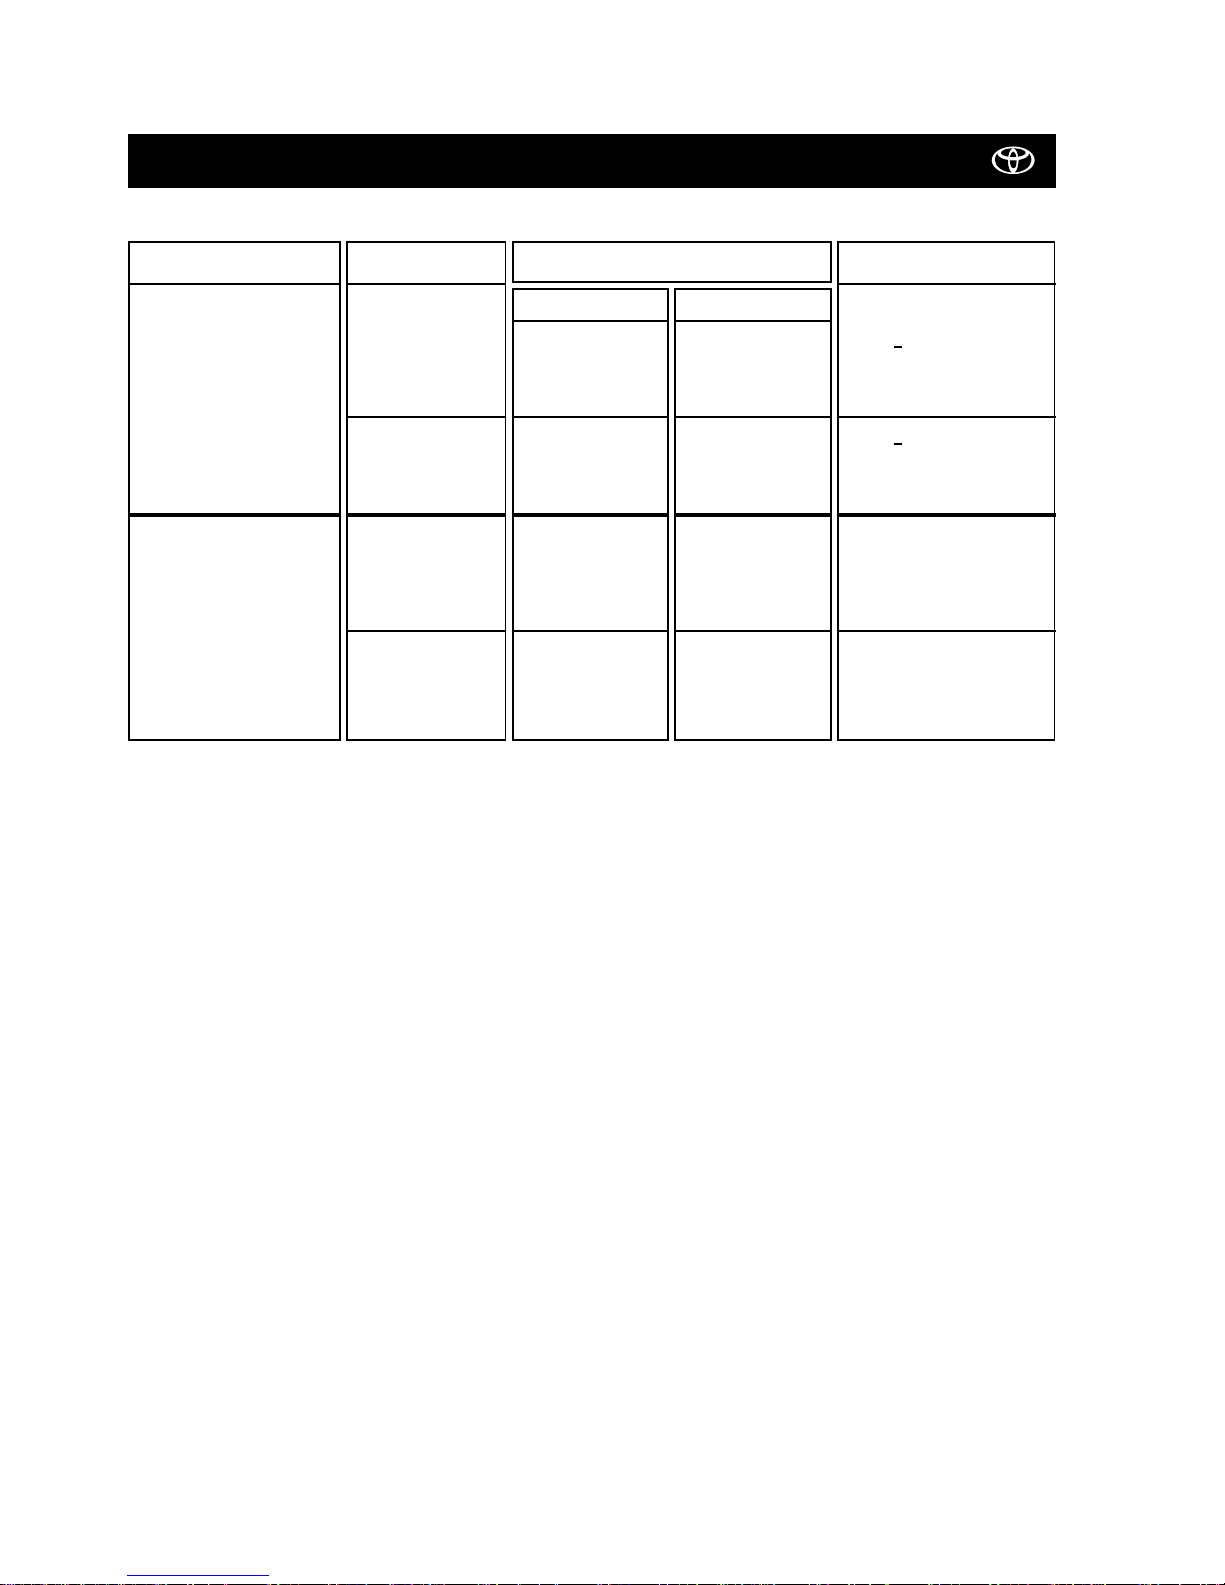
COMBINATION
Radio/Cassette + Navigation
Radio/Cassette + CD-Changer
+ Navigation
HEAD UNIT
TF4301 (08600-00922)
or
TM4000 (08600-00888)
18401 (86100-20510)
or
58408 (86100-60080)
TF4301 (08600-00922)
or
TM4000 (08600-00888)
18401 (86100-20510)
or
58408 (86100-60080)
ADD ON UNITS
CD-CHANGER
TM0461 (08601-00879)
TM0461 (08601-00879)
NAVIGATION-ASSY
08545-00803
08545-00803
08545-00803
08545-00803
NECESSARY PARTS
W/H (08695-00260)
W/H (08695-00260)
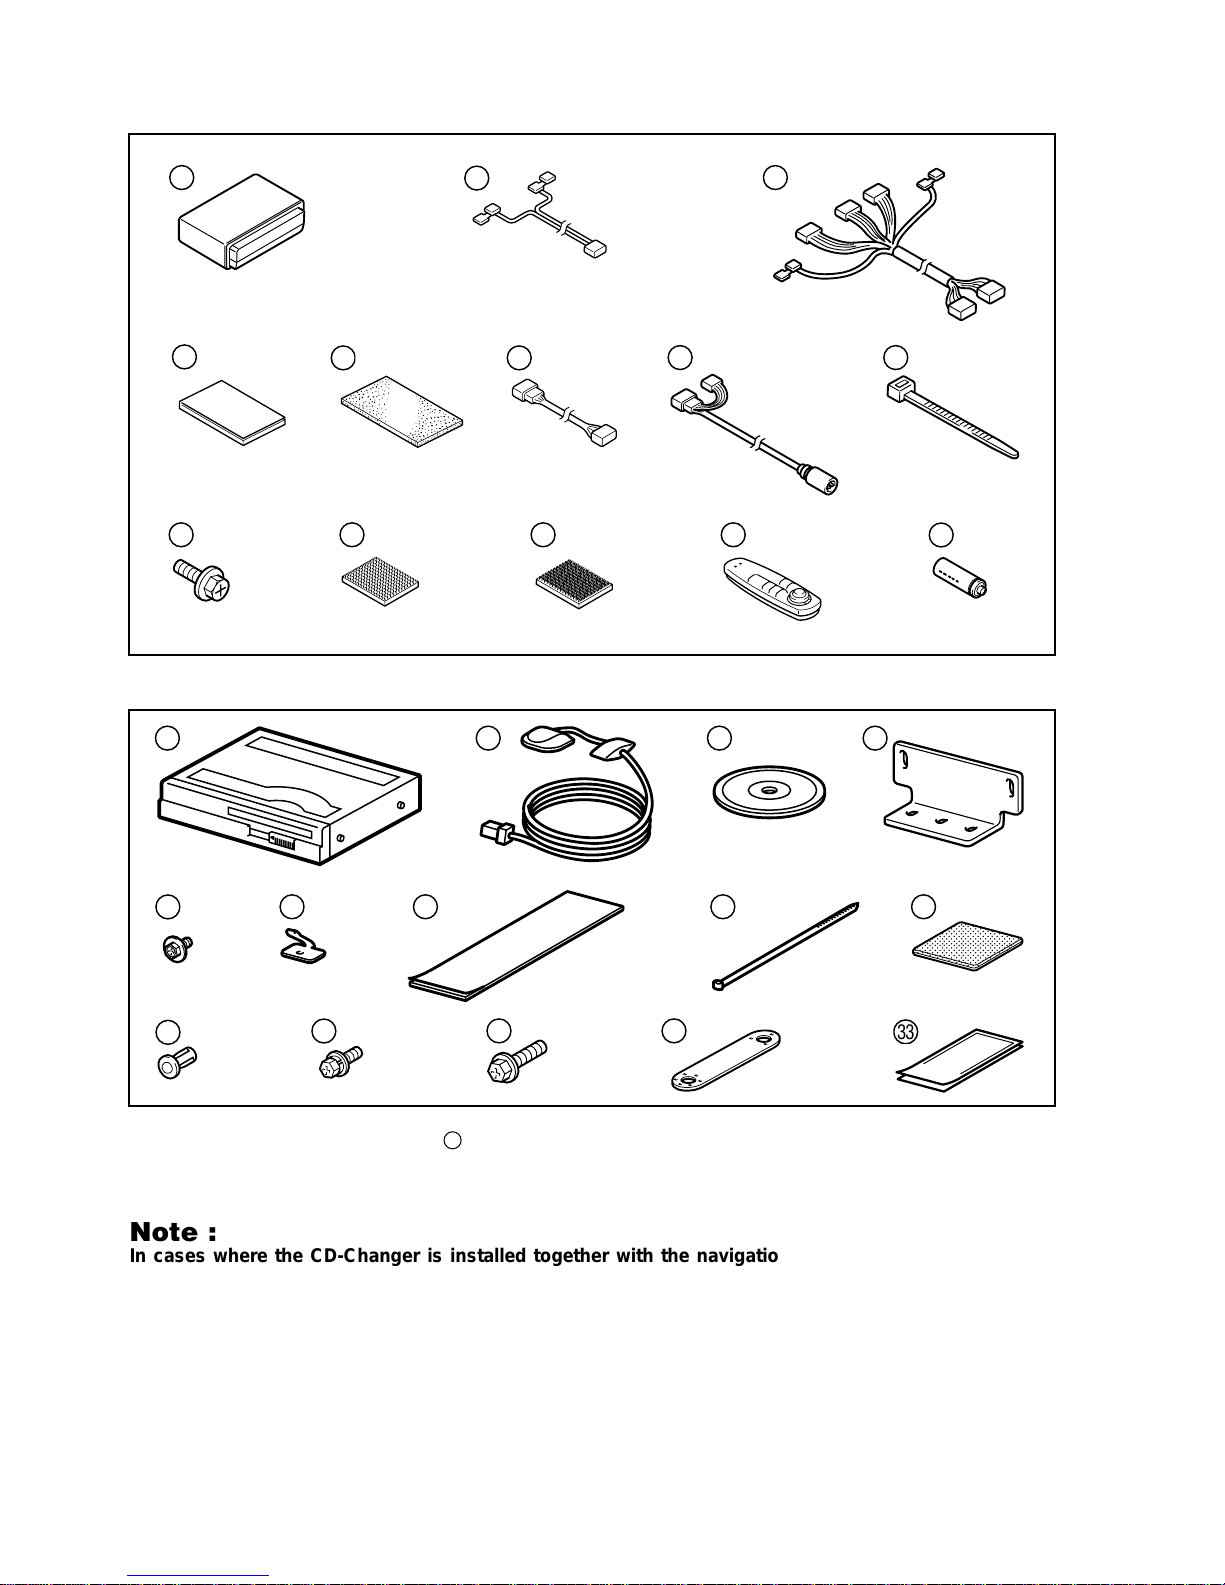
REQUIRED PARTS/SUBKITS
09-99Celica (RHD) - 5
Celica TNS 500
No. Description / Description Qty
MONITOR 1
W/H SUB-ASSY
1
WIRE HARNESS 1
TAPE 5
FOAM TAPE 3
W/H SUB-ASSY
1
W/H SUB-ASSY
1
WIRE TIE 15
SCREW (M5 x 8) 4
VELCRO (Yellow) 2
VELCRO (Blue) 2
REMOTE CONTROL 1
STORAGE BATTERY 2
13
12
11
10
987
654
321
COMPUTER 1
GPS ANTENNA 1
*
1
NAVIGATION DISC 1
COMPUTER BRACKET 2
SET BOLT (M5 x 8) 4
CORD CLAMP 6
TAPE 2
WIRE TIE 6
EARTH PLATE 1
ANCHOR BOLT 4
BOLT (M5 x 16) 4
BOLT (M5 x 20) 1
HOLD BRACKET 1
ADHESIVE TAPE 3
333231
30
292827
26
25
24
23
222120
*
1: NAVIGATION DISC (CD-ROM) is not included in the navigation kit.
22
NAVIGATION SYSTEM ASSY
09-99 Celica (RHD) - 6
Celica TNS 500
1
7891011
12
13
2
3
546
*
1: NAVIGATION DISC (CD-ROM) is not included in the navigation kit.
22
*
1
20
262728
29
30
31
32
212223
24
25
33
Note :
In cases where the CD-Changer is installed together with the navigation system, the wire harness n°
08695-00260 is needed (See page 7).
The wire harness is not included in the navigation kit.
09-99Celica (RHD) - 7
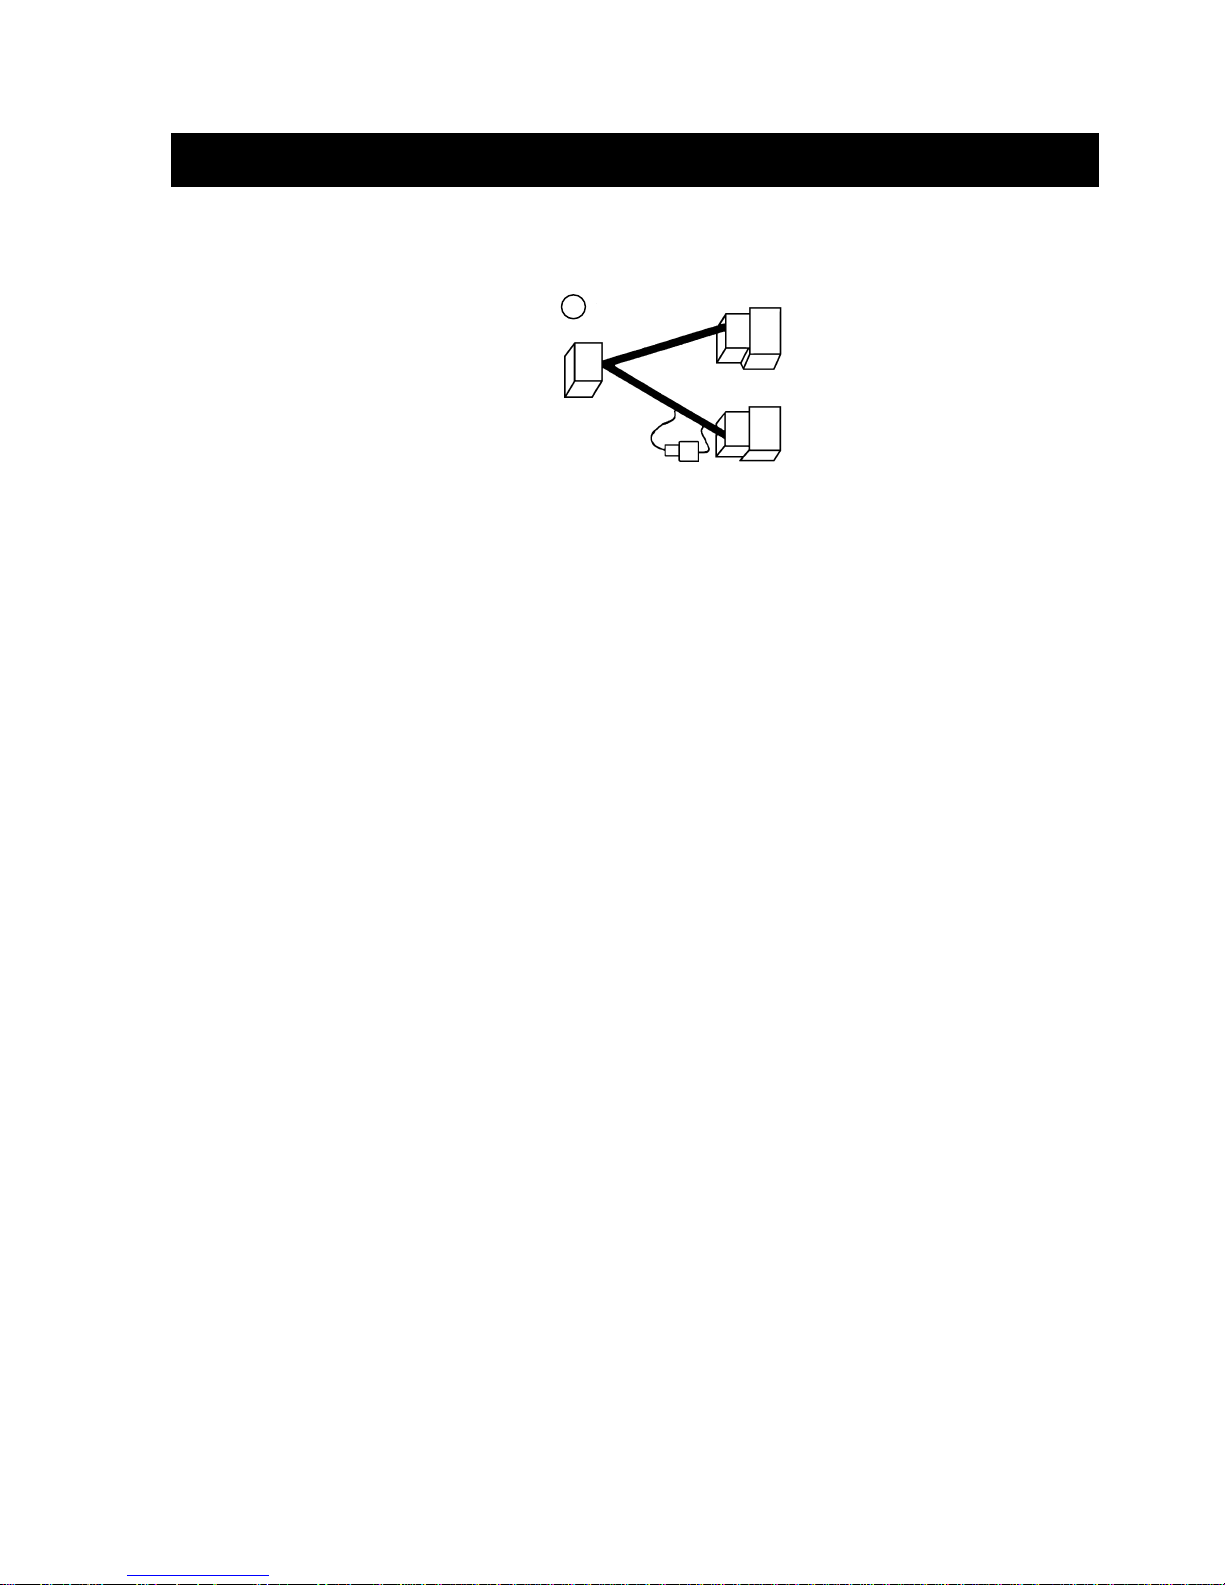
Celica TNS 500
For CD- and MD-Changer only
48
WIRE HARNESS 08695-00260
09-99 Celica (RHD) - 8
Celica TNS 500
WIRE HARNESS SUB-ASSY - SPEED LINE (VIOLET/WHITE)
WIRE HARNESS
ANTENNA WIRE
WIRE HARNESS REVERSE SENSOR WIRE (RED/BLUE)
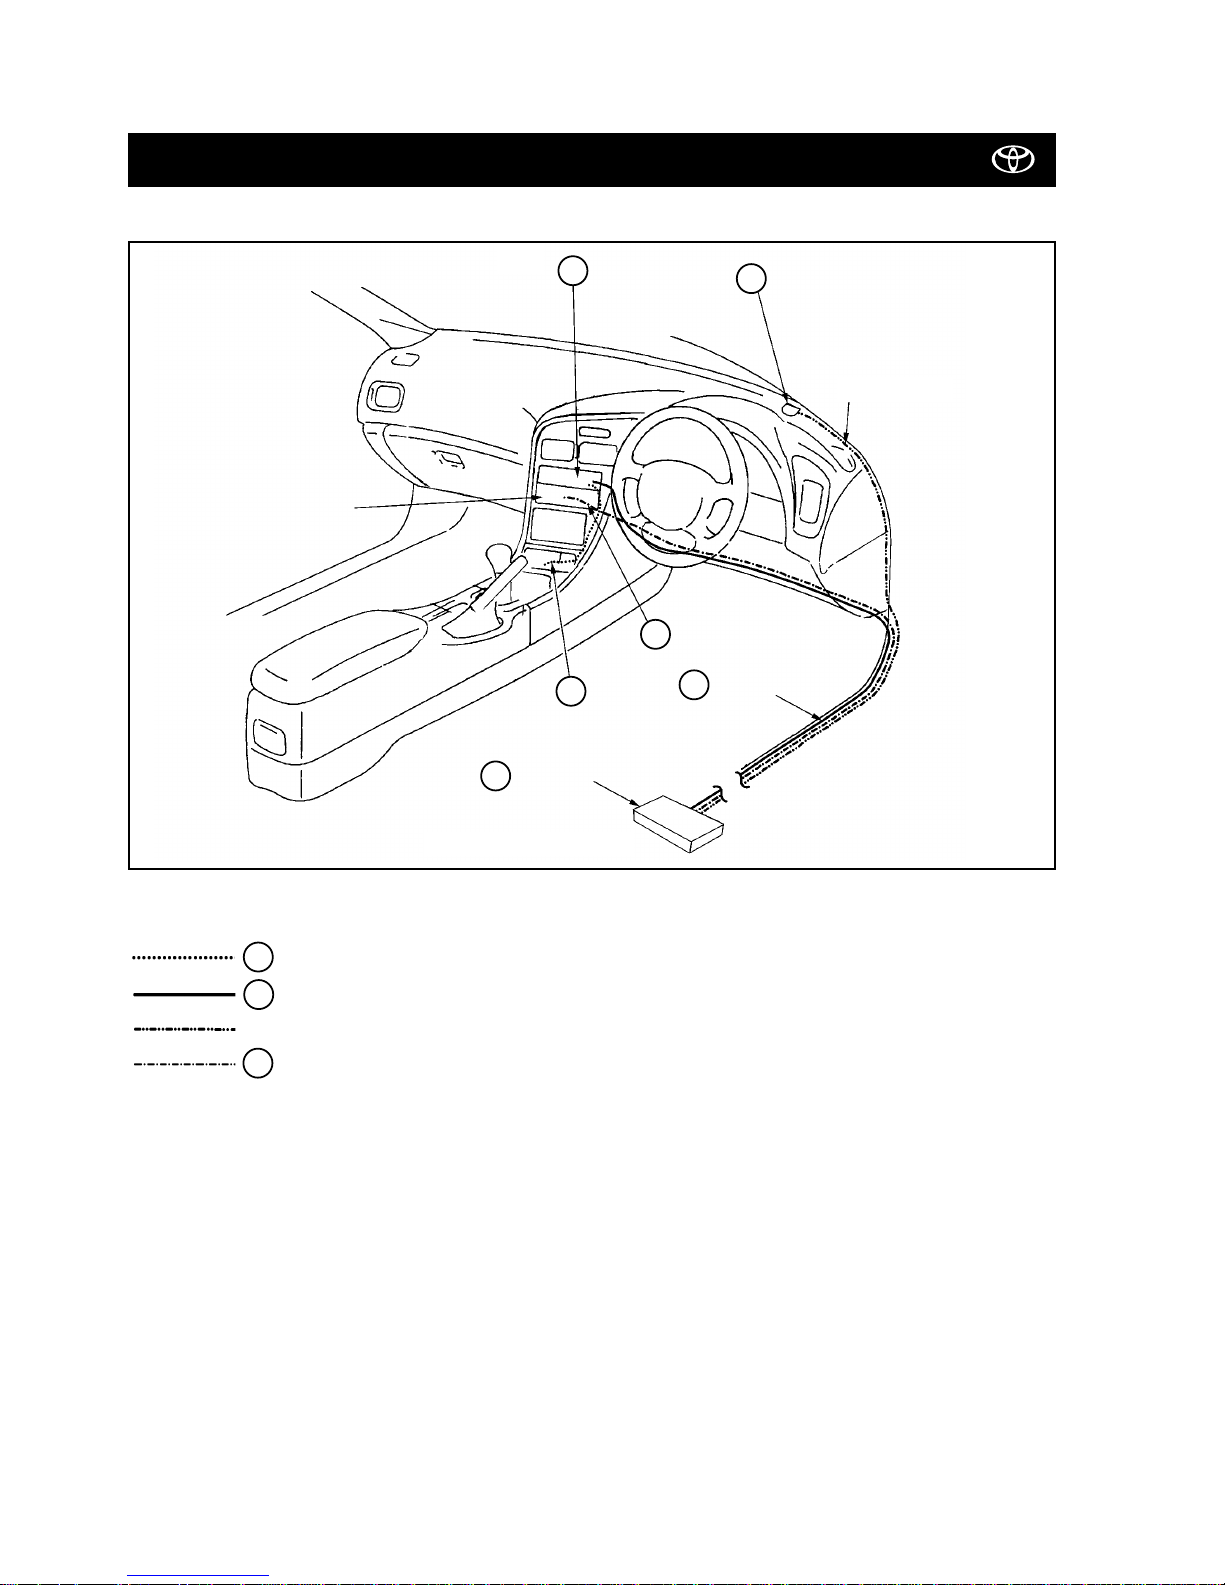
INSTALLATION OVERVIEW
2
6
Audio Assembly
Monitor
Wire Harness
3
Computer
20
Antenna Wire
(to the Deck Floor Box)
2
3
6
GPS Antenna
21
1
09-99Celica (RHD) - 9
Celica TNS 500
GENERAL OUTLINE (Audio with AVC-LAN)
Refer to the repair manual for information on removal of vehicle parts, installation methods, torque and so forth.
1
Monitor
Wire Harness
3
Computer
20
Antenna Wire
GPS Antenna
21
The wire harness connection depends on the type of audio; for more details see pages 10 - 11 - 1 2.
To connect the CD-Changer an additional subwire harness (08695-00260) is required.
See page 7.
Note : CD-Changer installation
Audio assy
Splicing connector
Vehicle wire harness
12P
10P
6P
8P
1P
13P
2P
8P
DIN-13P
*do not remove the cover
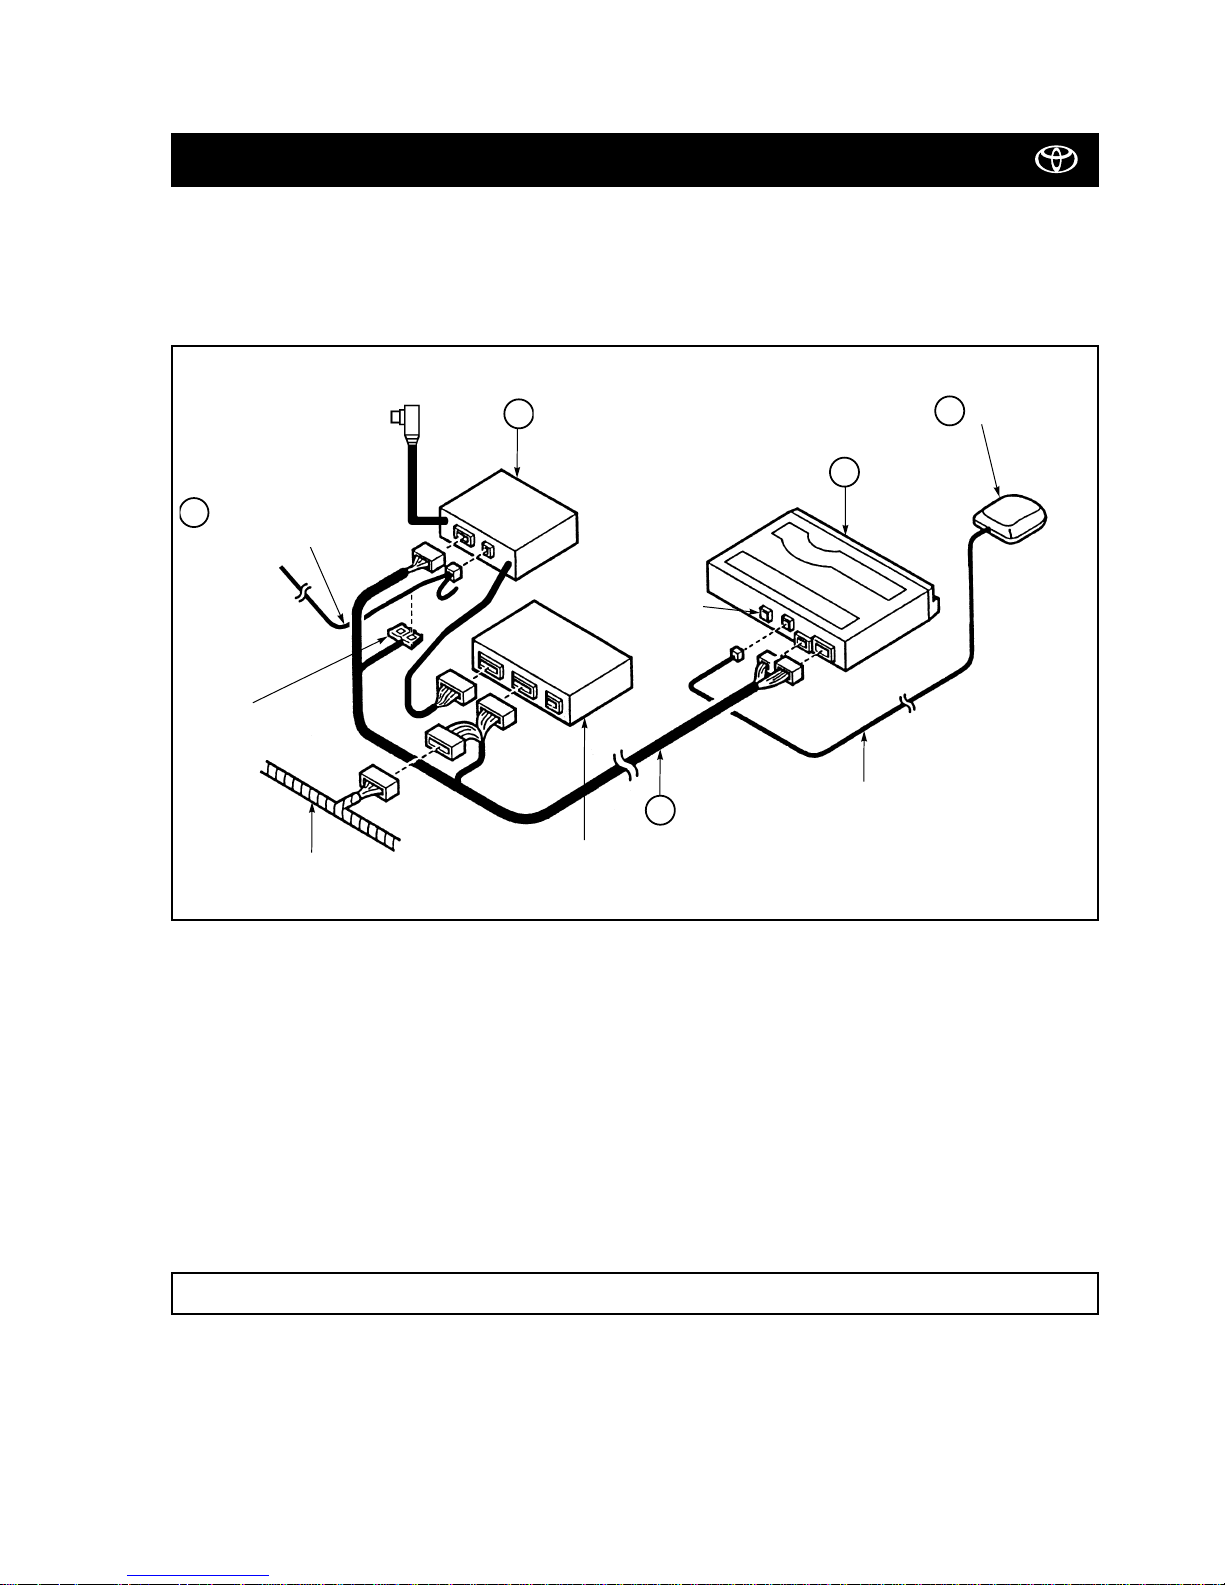
HOW TO CONNECT
Wire
Harness Sub-Assy
- Speed Line (violet/white)
2
*Connecting
Terminal for
Multi-CD Changer

Audio Assy
18401
TF4301
CD-Changer
TM0461
09-99 Celica (RHD) - 10
Celica TNS 500
8P 8P 6P13P 10P
10P
12P
2P
Antenna
Antenna
Audio Assy
DIN 13P (No use)
Reverse signal
Reverse signal
SPD
SPD
• Audio Unit Application
AUDIO ASSY + NAVIGATION SYSTEM
AUDIO ASSY + NAVIGATION SYSTEM + CD-CHANGER
2
3
20
21
1
8P
8P
6P
13P
10P
10P
12P
12P
12P
1P
2P
* 08695-00260 To be ordered separately
* 08695-00260
Disconnect
To CD-Changer unit
3
20
21
1
DETAILED CONNECTION OUTLINE
FUJITSU TEN AUDIO UNIT (WITH AVC-LAN)
DIN 13P (No use)
Audio Assy
2
CD-Changer
wire
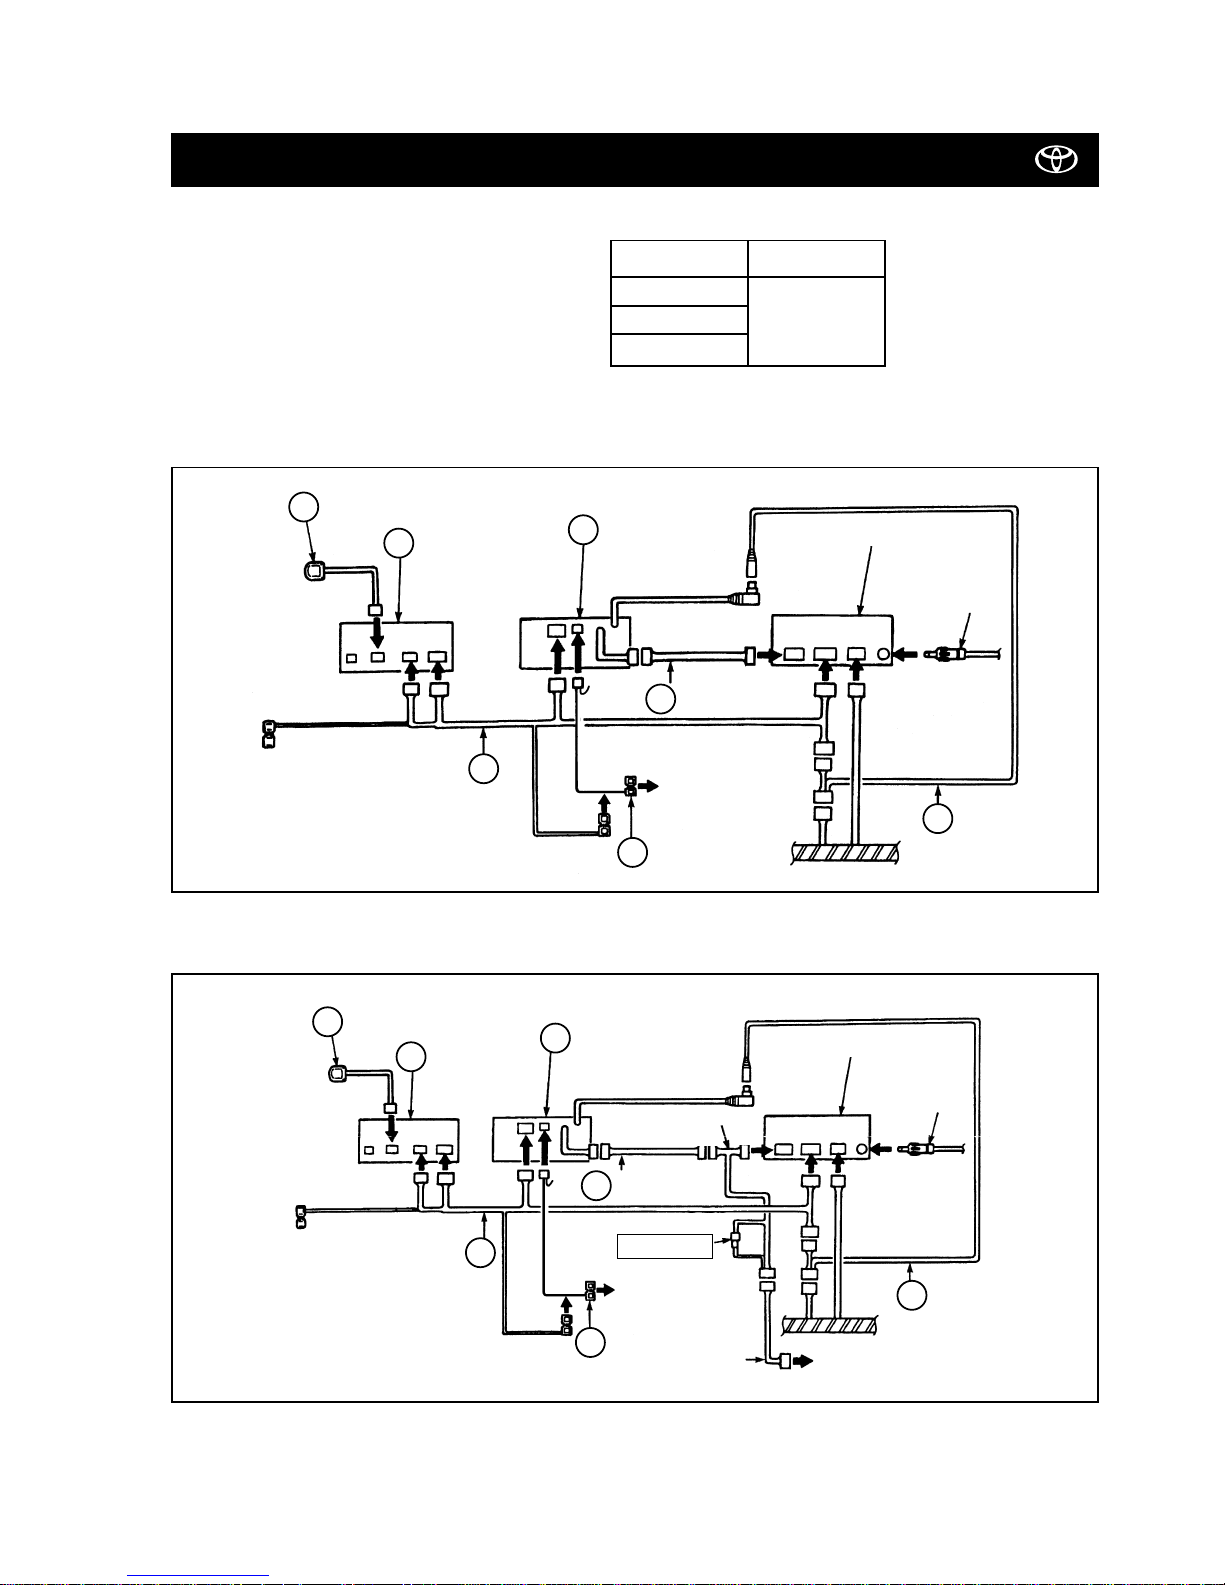
Audio Assy
58408
TF4301
TM4000
CD-Changer
TM0461
09-99Celica (RHD) - 11
Celica TNS 500
AUDIO ASSY + NAVIGATION SYSTEM
AUDIO ASSY + NAVIGATION SYSTEM + CD-CHANGER
8P
6P
13P
10P
10P
10P
12P
2P
WIRE HARNESS
WIRE HARNESS
2
6
7
7
3
20
21
1
10P
* 08695-00260
Connection
CD-Changer wire
To CD-Changer unit
2
3
20
21
1
6
8P
12P
12P
12P
12P
2P
13P
8P
8P
6P
10P
10P
1P
12P
MATSUSHITA AUDIO UNIT (WITH AVC-LAN)
Antenna
Antenna
Audio Assy
Reverse signal
Reverse signal
SPD
SPD
* 08695-00260 To be ordered separately
DIN 13P (No use)
Audio Assy
DIN 13P (No use)
• Audio Unit Application
DETAILED CONNECTION OUTLINE
 Loading...