

Page 1
Powerline Network Installation
LED
Indicator
POWER
LED
Status Indication
On
Blink
Off
On
The adapter is switched on.
The pair function is working or in
power-saving mode.
The adapter is powered off
The Ethernet port is connected,
but no data transferring
Blink The Ethernet port is transferring data
Off The Ethernet port isn’t connected
LAN
LED
LED Indicators Button Description
By default, PL200s can connect to each other when they’re powered on.
But you can also use Sec/Rst button to recreate a secure powerline network.
Please follow below instructions (we consider the two PL200s are A and B):
Sec/Rst Button
1. Press and hold the Sec/Rst button of Powerline adapter A for
2-3 seconds. The POWER indicator starts blinking.
2. Press and hold the Sec/Rst button of Powerline adapter B for
2-3 seconds. The POWER indicator starts blinking. (This
procedure must be done within 130 seconds after the Powerline
adapter A powered on.)
3. Wait for about 3 seconds while the PL200s are connecting.
After that, POWER indicator keeps solid light.
4. If you press and hold the Sec/Rst button for about 16 seconds,
PL200 will be reset to default factory settings. The POWER
indicator starts blinking, then both the POWER and LAN
indicator off and they resume to solid light at last.
Before Installation
Quick Installation Guide
PL200 Mini Powerline Adapter
Copyrights 2013 by TOTOLINK All rights reserved. Website: http://www.totolink.net
Information in this document is subject to change without prior notice.
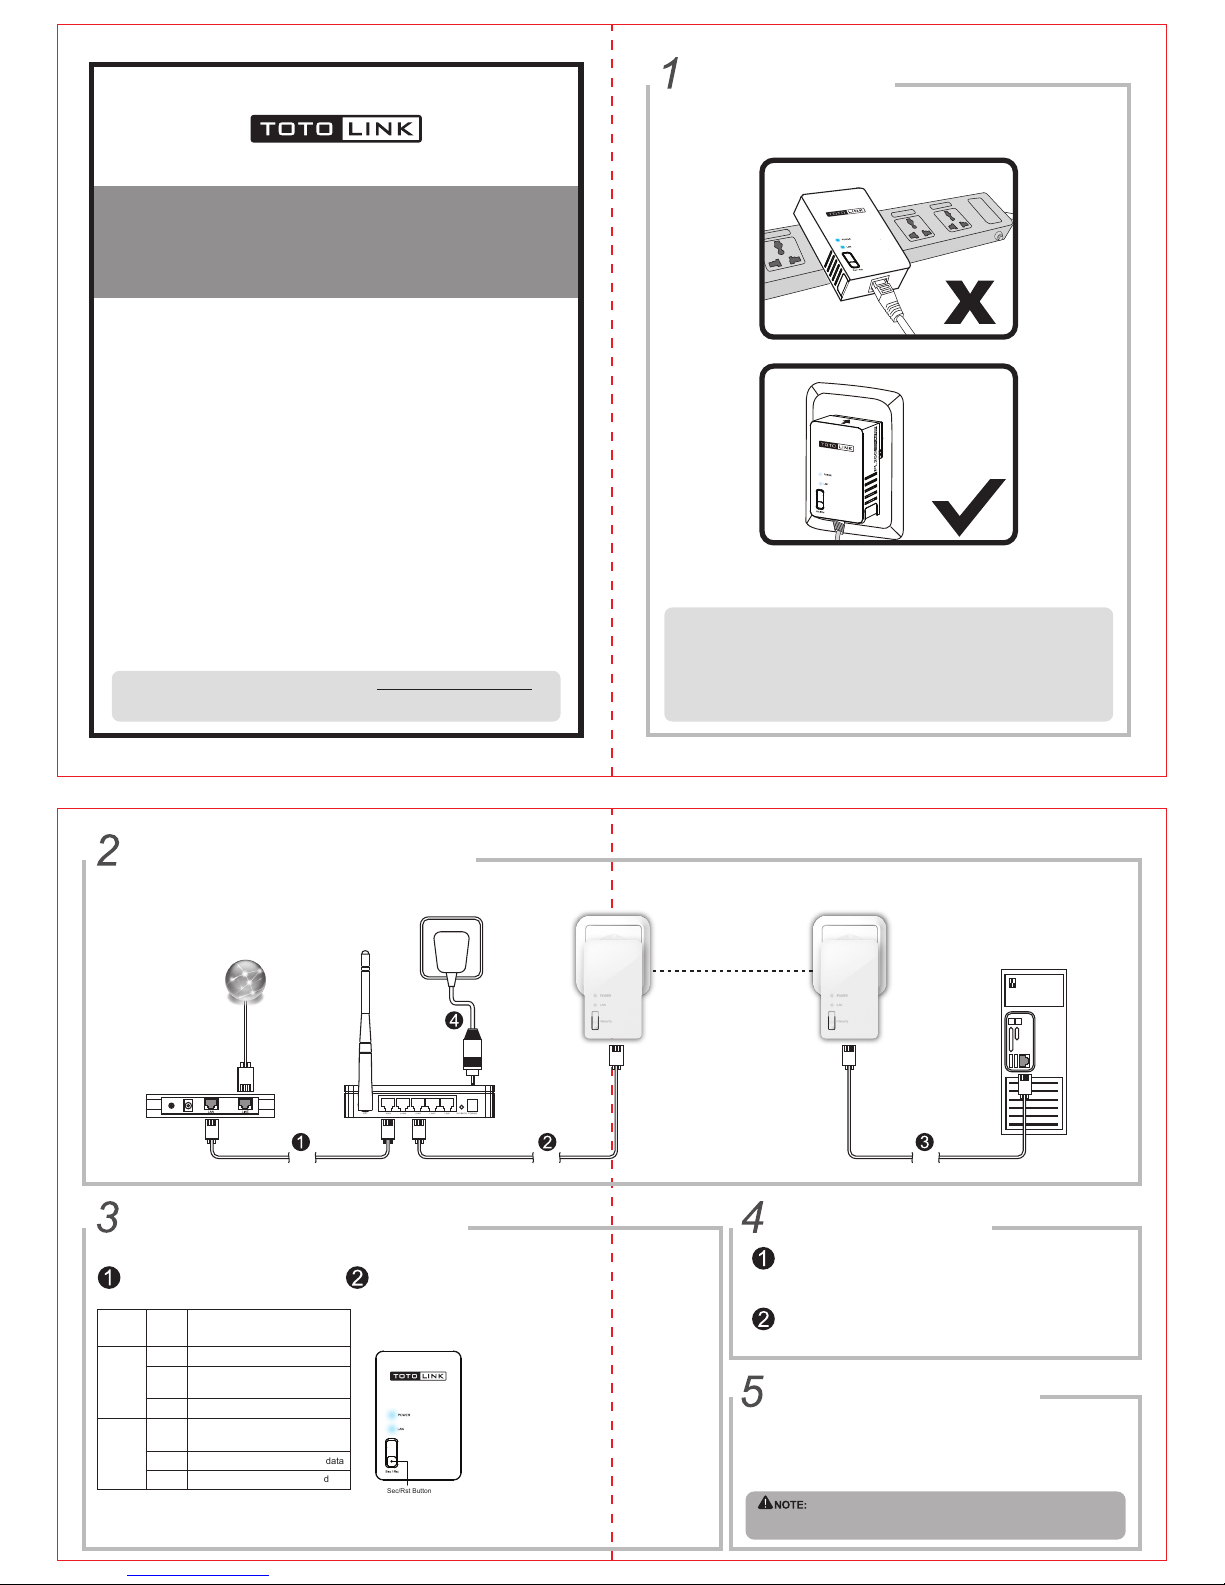
Wall Socket
To ensure the optimum performance of the Powerline Adapter
and significantly improve the transmission capacity of the network,
we recommend that you plug the Powerline Adapter directly into a
wall socket but not the multiple sockets.
Powerline Network Installation
Network
Cable
ADSL Modem
Internet
TOTOLINK Router
Power Supply
Wall Socket Wall Socket
Network
Cable
Network
Cable
A B
Power-Saving Mode
Enter Power-Saving Mode
Quit Power-Saving Mode
After connected with PC, this adapter will keep working. If you need it to “rest” without pulling it out
from the wall socket, please press Sec/Rst button, the POWER LED indicator will blink for 4s off and
1s on. It means the adapter has been in the power-saving mode.
Press Sec/Rst button for about 4s until the POWER LED lights, the adapter quit power-saving mode.
Generate New Password
By default, all PL200s have the same password and can connect to each other after powered on.
But if there are more than three PL200s in your network and you want to prevent others from joining
your PL200s group, the best solution is to change the password.
Operation: Press Sec/Rst button of Adapter A for 8s-12s, the password will change automatically.
Other PL200 have to re-pair with Adapter A for new network connection. (How to pair please refer
to Button Description.)
For more than three PL200s group, if two or more adapters have changed the password,
other adapters only need to re-pair with any one of them to join.
 Loading...