

Adapter supplied 5V 1AAdapter supplied 5V 1A
Quick Installation Guide
300Mbps USB Wi-Fi Range Extender
Model No.: EX200U
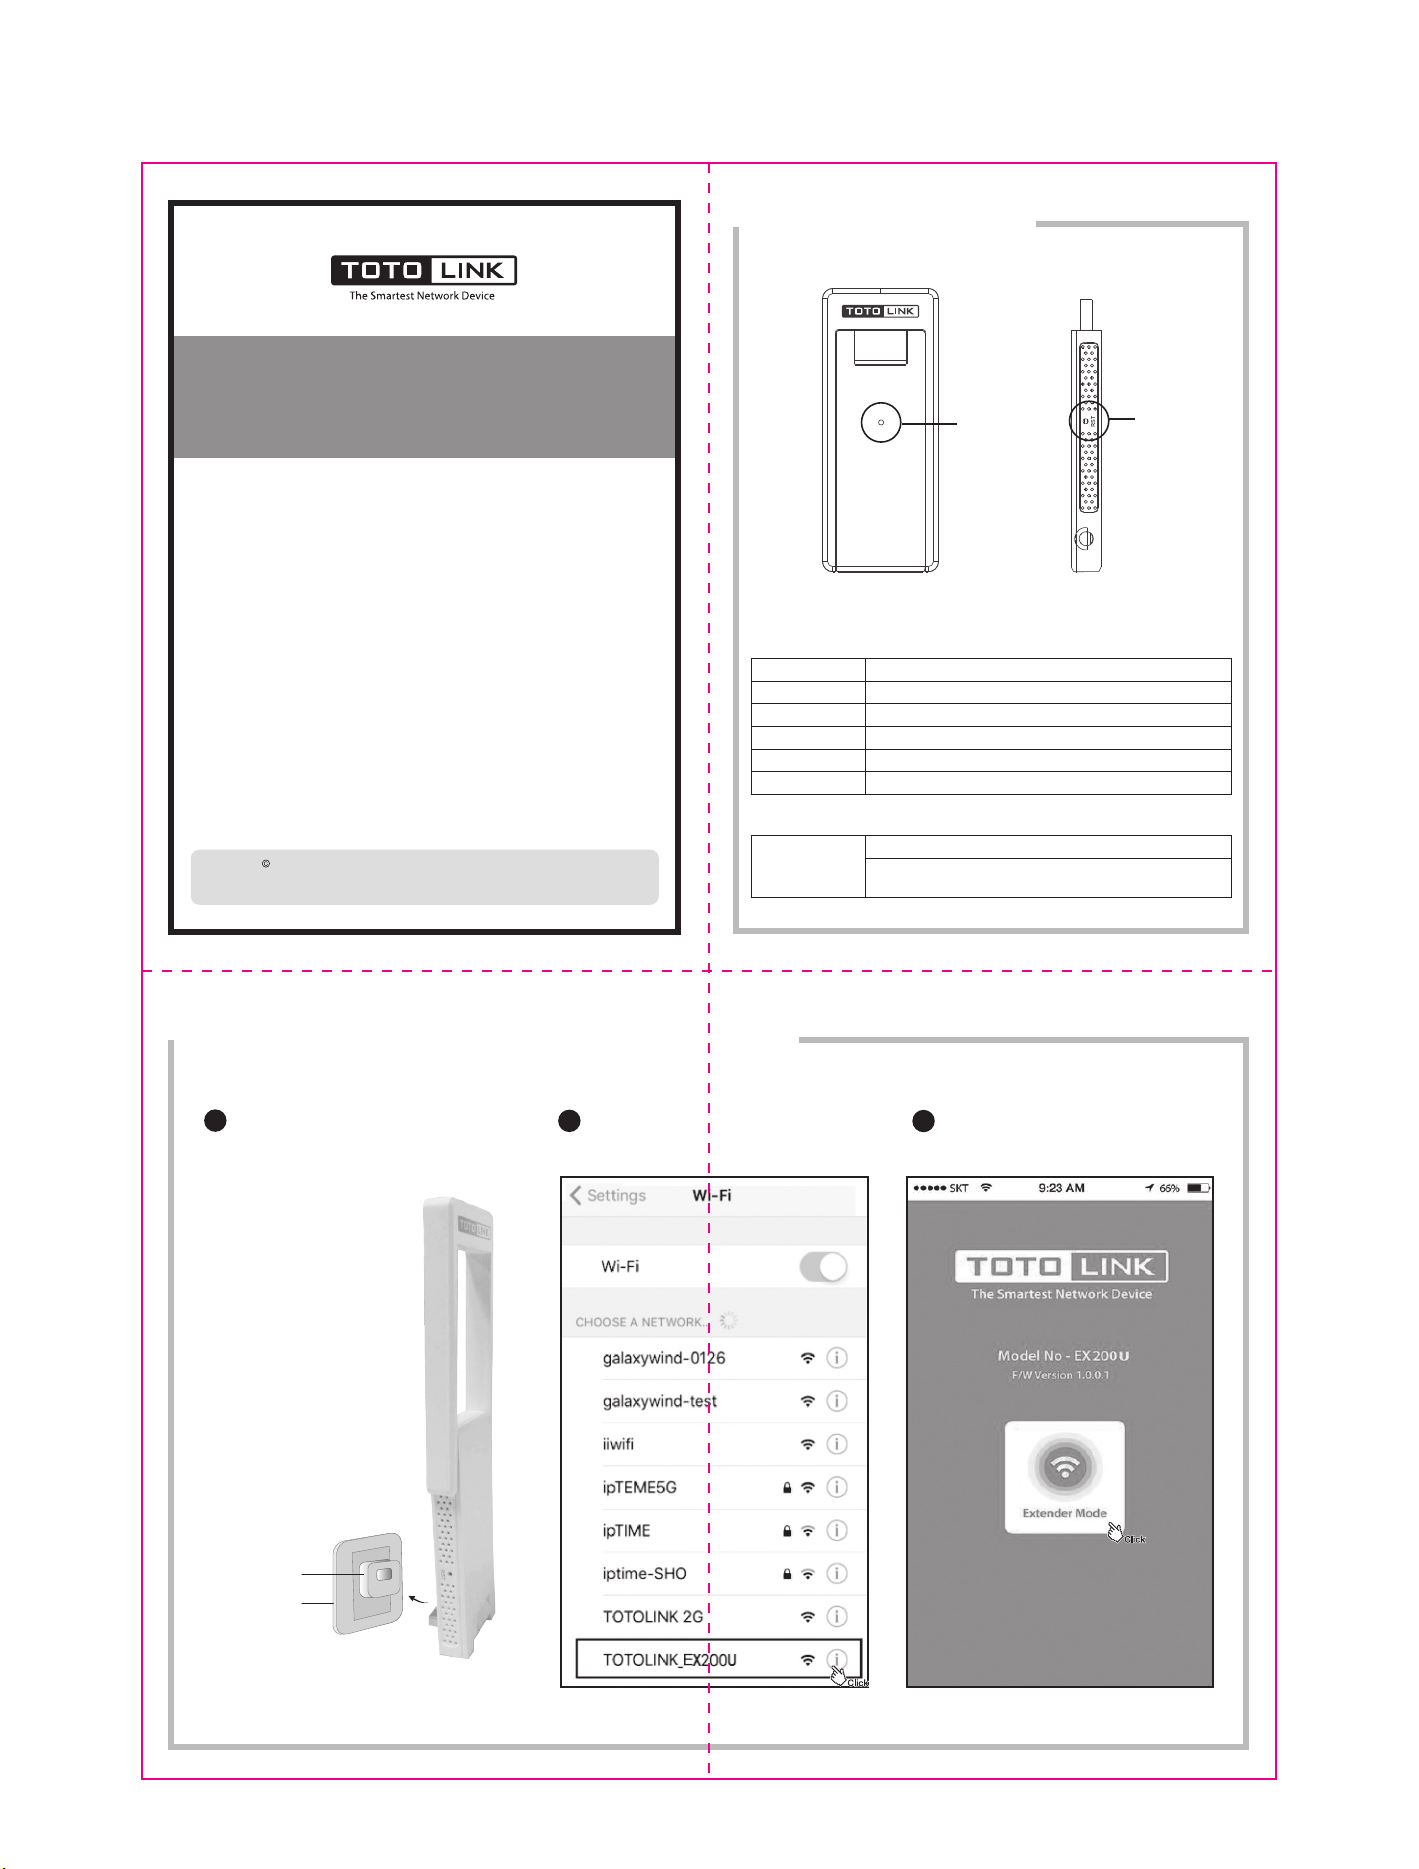
Appearance
1
LED Indicator
Button
V1.1706
Copyrights TOTOLINK. All rights reserved. Website: http://www.totolink.net
Information in this document is subject to change without prior notice.
Quick Setup by Smart Phone
2
Power on. Plug the device into any USB Adapter supplied
1
5V 1A that near the router.Wait until the LED turns to solid
orange.
Connect to the Extender. Using your smart phone to
search and connect Wi-Fi TOTOLINK_EX200U.
2
(Settings—Wi-Fi)
LED Status Description
DescriptionStatus
The extender is starting or extendingSolid Red
The extender finished starting or Wi-Fi extension failedSolid Orange
Wi-Fi extension is successfulSolid Green
WPS is enabledBlinking Red/Orange
The RST button has been pressed for more than 5 secondsBlinking Orange
Button
RST
Press the RST button for about 2 seconds, WPS function enabled.
Press the RST button for more than 5 seconds until the LED indicator
blinks orange, the device will restore to factory default settings.
Login. The Setting page will turn up automatically.
Click Extender Mode. If below window doesn’t
3
appear, please open a browser and enter
192.168.0.254 manually.
USB Power Plug
Wall Socket
Quick Setup by Smart Phone
2
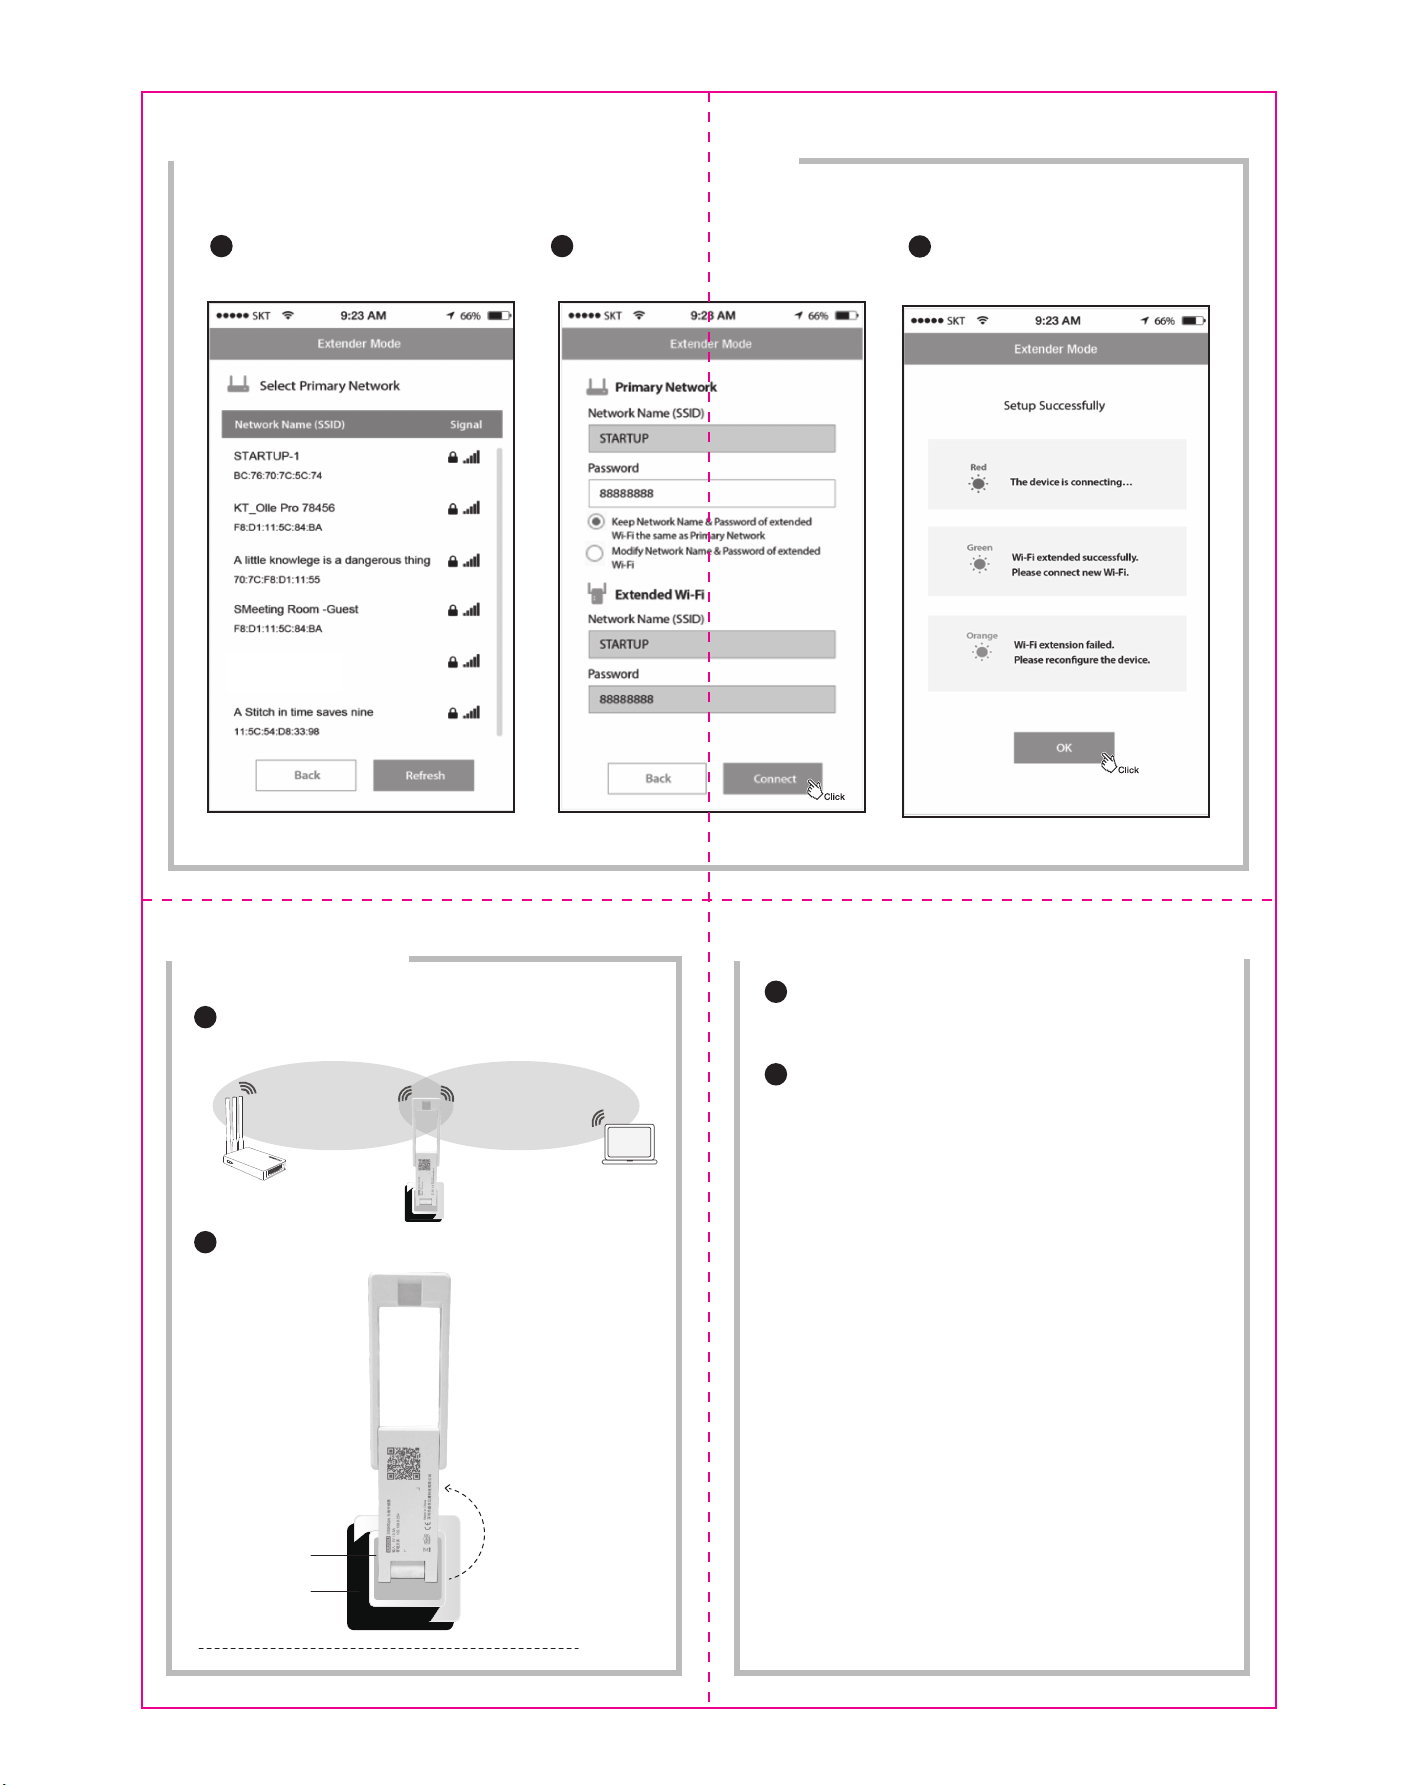
Extend Wi-Fi. Choose your router’s 2.4GHz SSID.
4
TOTOLINK-A7521
11:5C:D8:33:98
Configure. Enter its wireless password. Either keep the
default SSID or customize it for extended 2.4GHz wireless
5
network. Verify your settings and click Connect.
Verify. Check the LED status to verify whether the
6
Wi-Fi extension is successful.
Relocate
3
Plug the extender into USB port that halfway between your router and the Wi-Fi dead
zone. Wait about 30 seconds until the LED light turns to solid green. If not, please
1
relocate it closer to your router to achieve better signal quality.
Host Network Extended Network
In order to make full use of extender, please keep the antennas of the extender
2
perpendicular to the horizontal plane. See blow:
Vertically place the Extender
USB Power Plug
Wall Socket
Horizon Line
FAQ (Frequently Asked Questions)
4
What should I do if I cannot access the extender’s web management page?
1
A1: Make sure you have connected to the wireless network of the extender.
A2: Open any browser, enter 192.168.0.254 in the address bar and press Enter.
A3: Reset the extender and connect to it again.
How to reset the extender to factory default settings?
2
Keep the extender power on, use a pin to press the RST button on the side of
device. When the LED blinks orange, release the button.
FCC warning:
This device complies with Part 15 of the FCC Rules. Operation is subject to the
following two conditions: (1) this device may not cause harmful interference, and (2)
this device must accept
any interference received, including interference that may cause undesired operation.
changes or modifications not expressly approved by the party responsible for
compliance
could void the user's authority to operate the equipment.
NOTE: This equipment has been tested and found to comply with the limits for a
Class B digital device, pursuant to Part 15 of the FCC Rules. These limits are
designed to provide reasonable protection against harmful interference in a
residential installation. This equipment generates, uses and can radiate radio
frequency energy and, if not installed and used in accordance with the
instructions, may cause harmful interference to radio communications. However,
there is no guarantee that interference will not occur in a particular installation.
If this equipment does cause harmful interference to radio or television reception,
which can be determined by turning the equipment off and on, the user is
encouraged to try to correct the interference by one or more of the following
measures:
-- Reorient or relocate the receiving antenna.
-- Increase the separation between the equipment and receiver.
-- Connect the equipment into an outlet on a circuit different
from that to which the receiver is connected.
-- Consult the dealer or an experienced radio/TV technician for help.
For this device,SAR tests are conducted using standard operating positions
accepted by the FCC with the device transmitting at its highest certified power
level in all tested frequency bands, although the SAR is determined at the
highest certified power level, the actual SAR level of the device while operating
can be well below the maximum value,
For body worn operation, this device has been tested and meets
exposure guidelines when used with an accessory desi
when used with an accessory that contains no metal and that positions the
handset a minimum of 5 mm from the body.
the FCC RF
gnated for this product or
 Loading...