

Page 1
USER MANUAL / BEDIENUNGSANLEITUNG
ELECTRONIC CIGARETTE KIT
Page 2

2
Congratulations on purchasing your new
Totally Wicked arc Mini Electronic Cigarette.
The Totally Wicked arc Mini brings you a small, discreet easy to use device. Comfortable to
hold with outstanding variable power performance. The highlight is the LED display showing
power settings in volts or watts, battery charge level, ohms resistance and puff duration.
The voltage is adjustable from 3.3V to 5.0V and the wattage is adjustable from 5W to 20W
according to your vaping needs.
Page 3
3
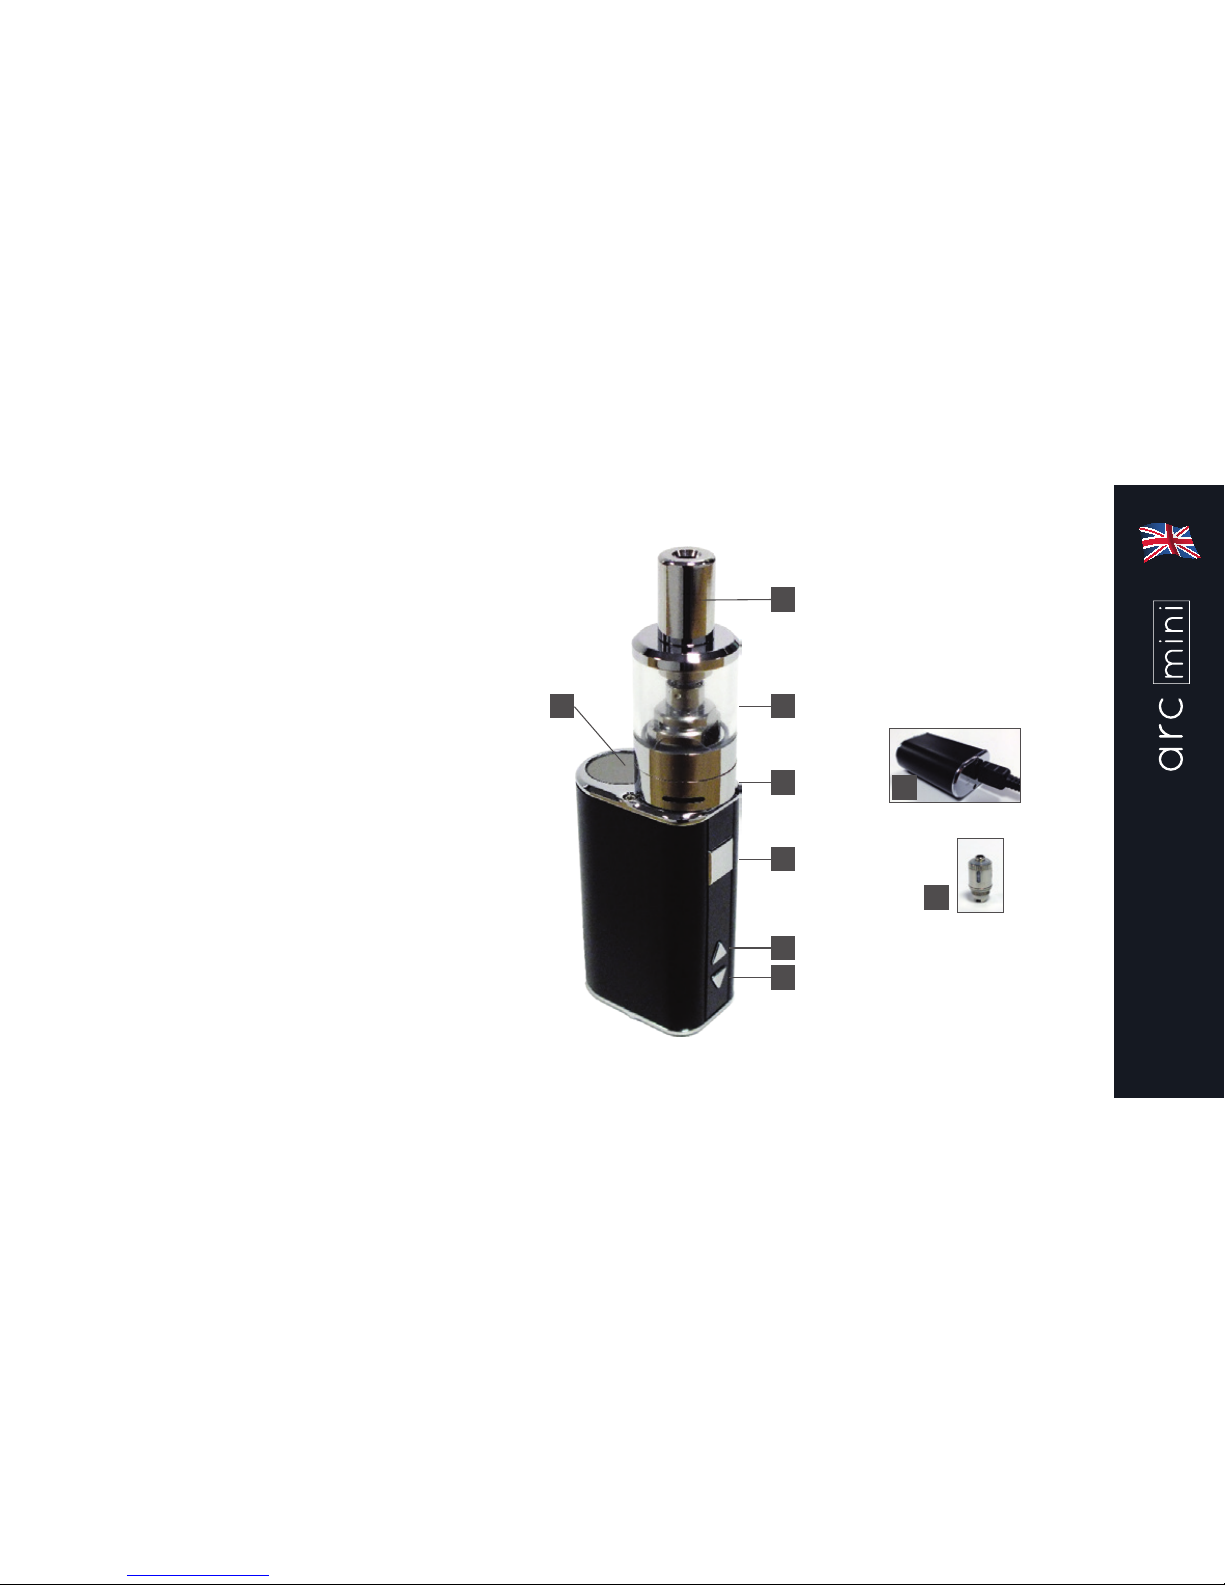
arc Mini Battery
1. LED display
2. Power button
3. “Up” button
4. “Down” button
5. Charging port
CS Micro Tank
6. Atomizer base
7. CS atomizer head (1.5 ohm)
8. Tank
9. Mouthpiece
1
2
6
8
9
3
4
7
5
Page 4
4
Using your arc Mini
Power on and off:
Press the power button 5 times in quick
succession; the LED display will light and
show the percentage of battery power
remaining, the arc Mini is now on and
ready to use. The display will turn off after
10 seconds of inactivity, but will seamlessly
recover when any button is pressed. To turn
the arc Mini off, press the power button 5
times in quick succession.
Page 5
5
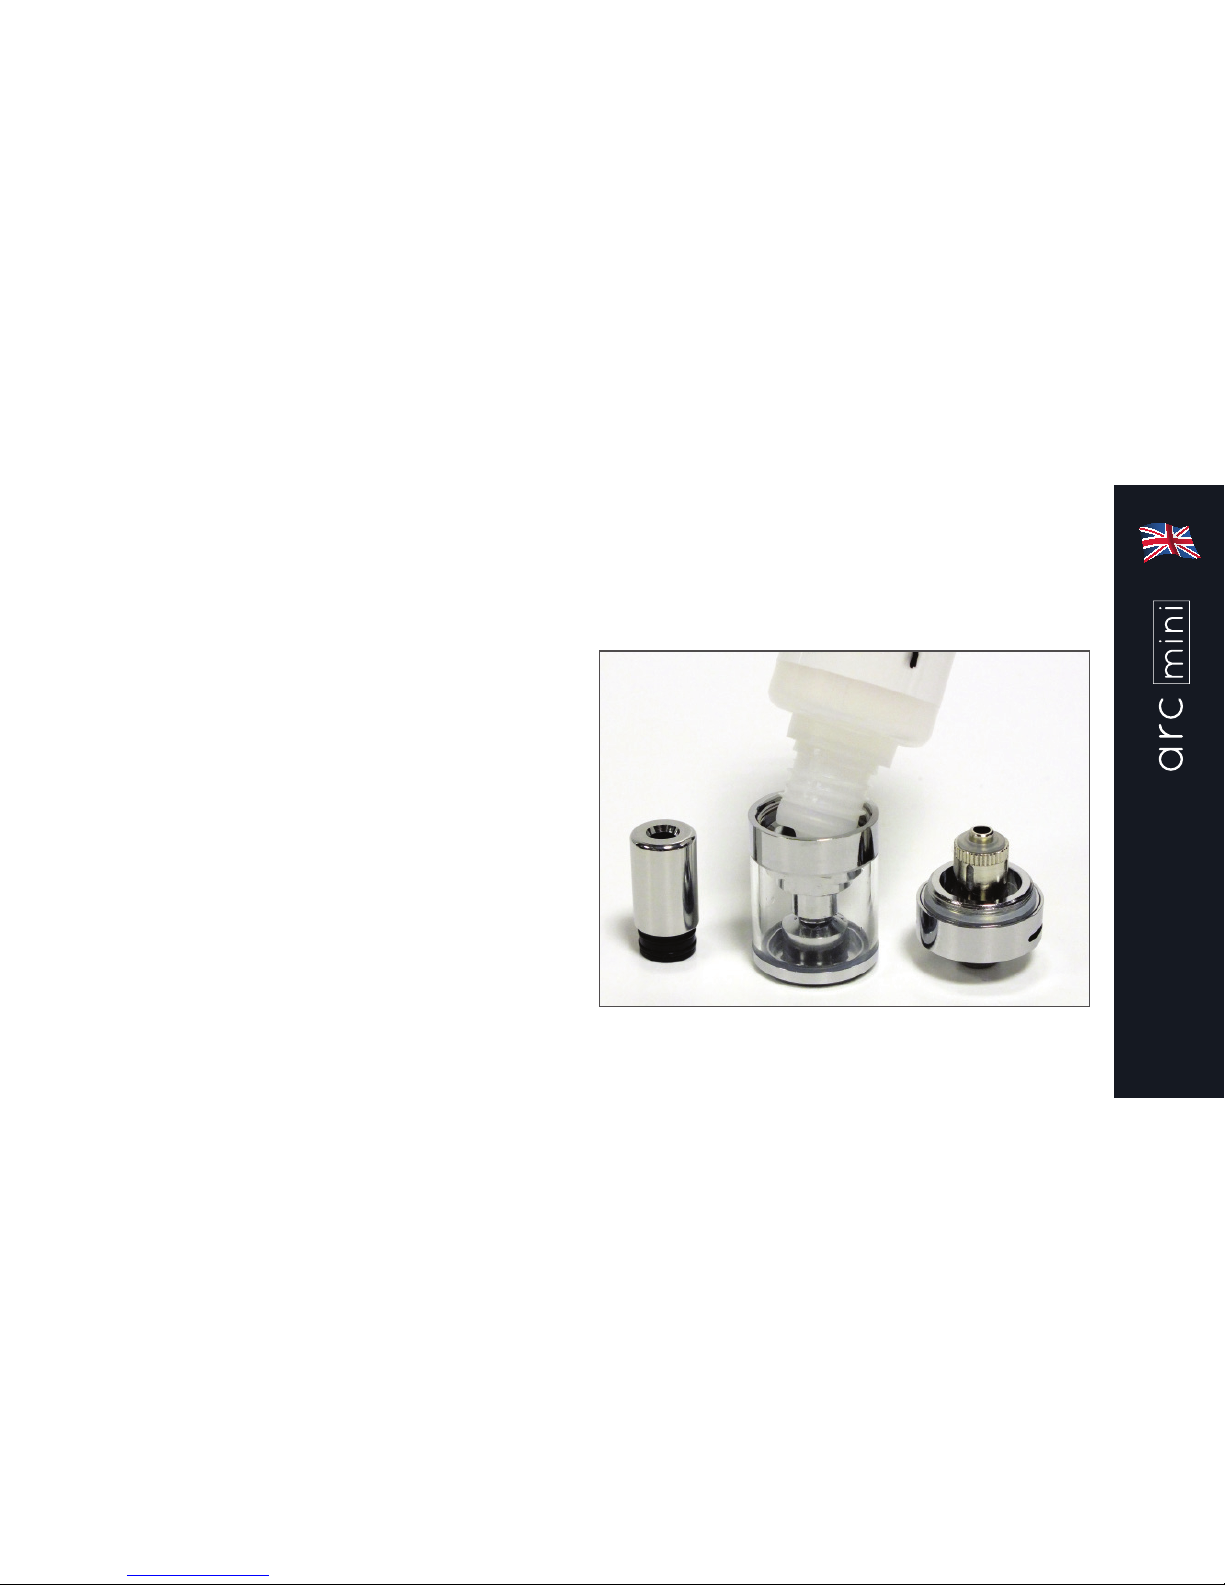
To fill the tank:
Remove the complete CS Micro Tank from the
arc Mini battery by unscrewing at the atomizer
base. Invert the tank, unscrew and remove the
atomizer base. Refill the tank through one of
the apertures either side of the central air tube.
Do not place liquid in the central tube. Refit the
atomizer base and screw the assembled tank
back onto the arc Mini battery.
Maximum refill nozzle diameter: 2.8mm
Using your arc Mini
Page 6
6
Using your arc Mini
Vaping:
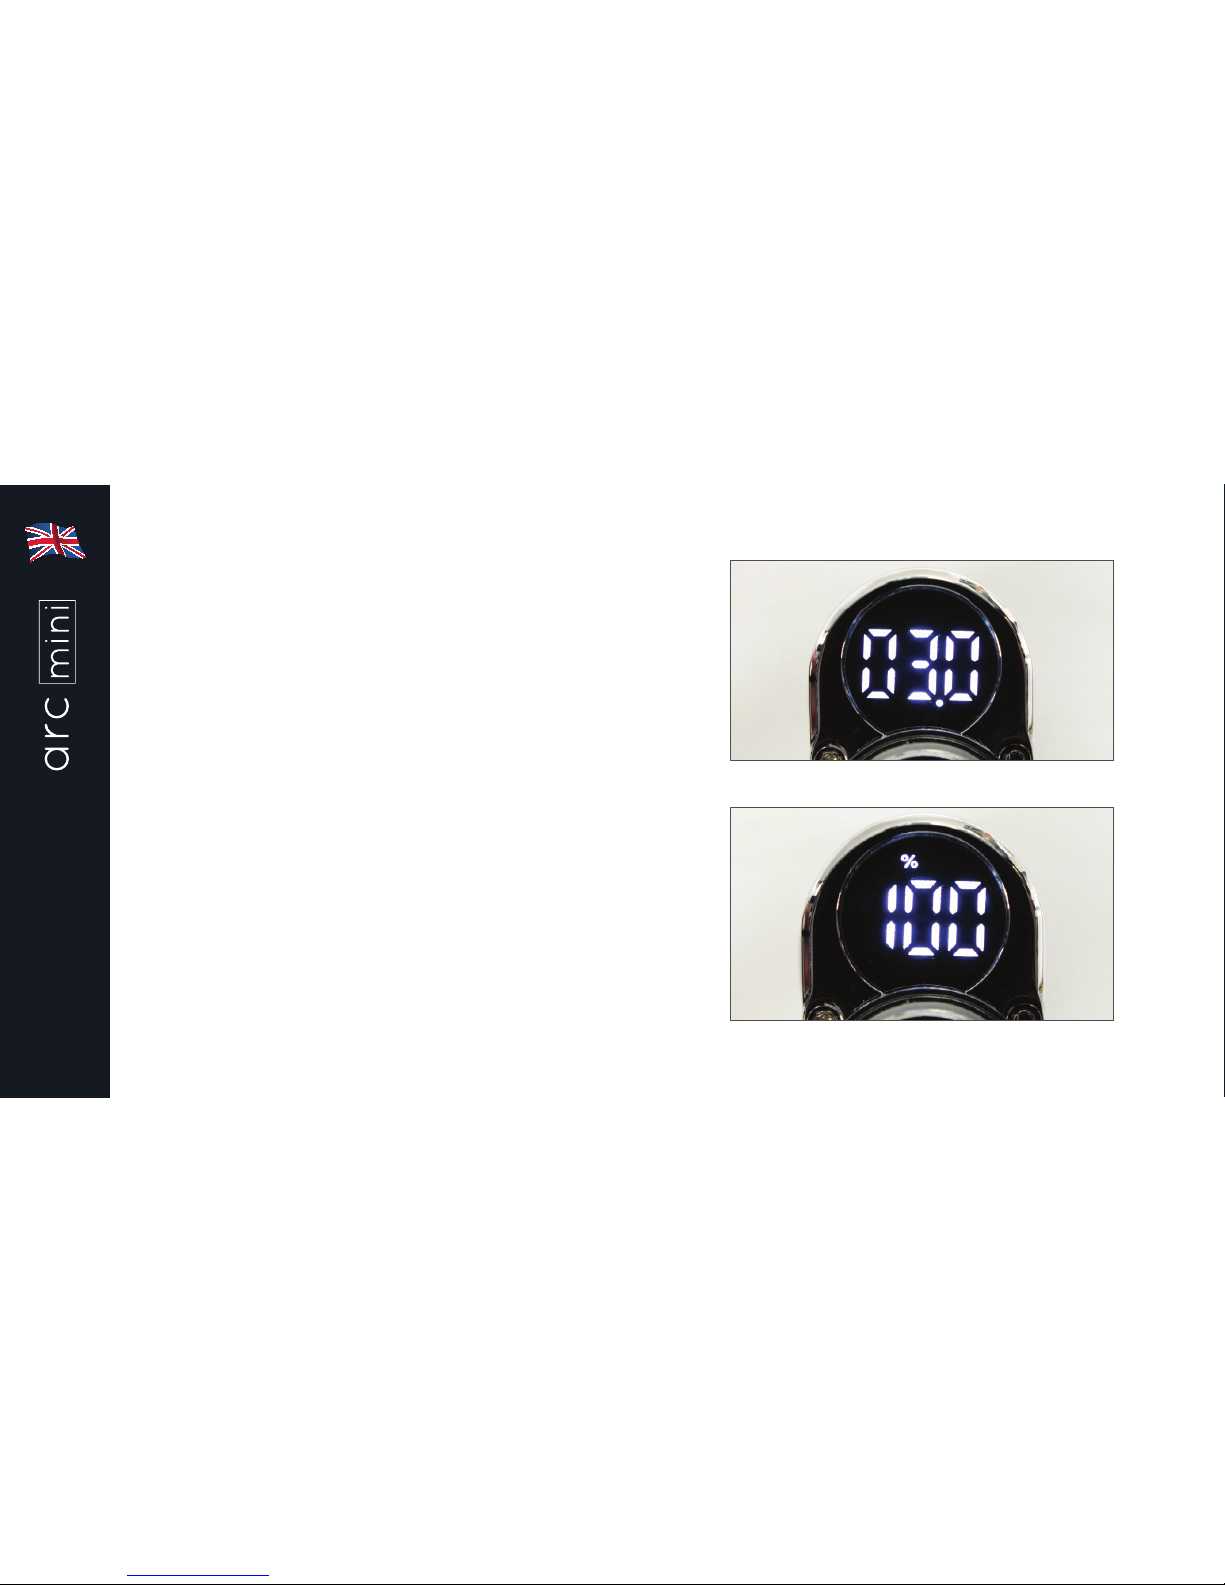
Press the power button as you inhale. When
the button is held down the LED display will
display vaping time in seconds for a period
of 2 seconds, the display will then show
battery power remaining as a percentage
for a further 2 seconds.
Vaping Time
Remaining Battery
Page 7
7
Using your arc Mini
Changing output between volts and
watts:
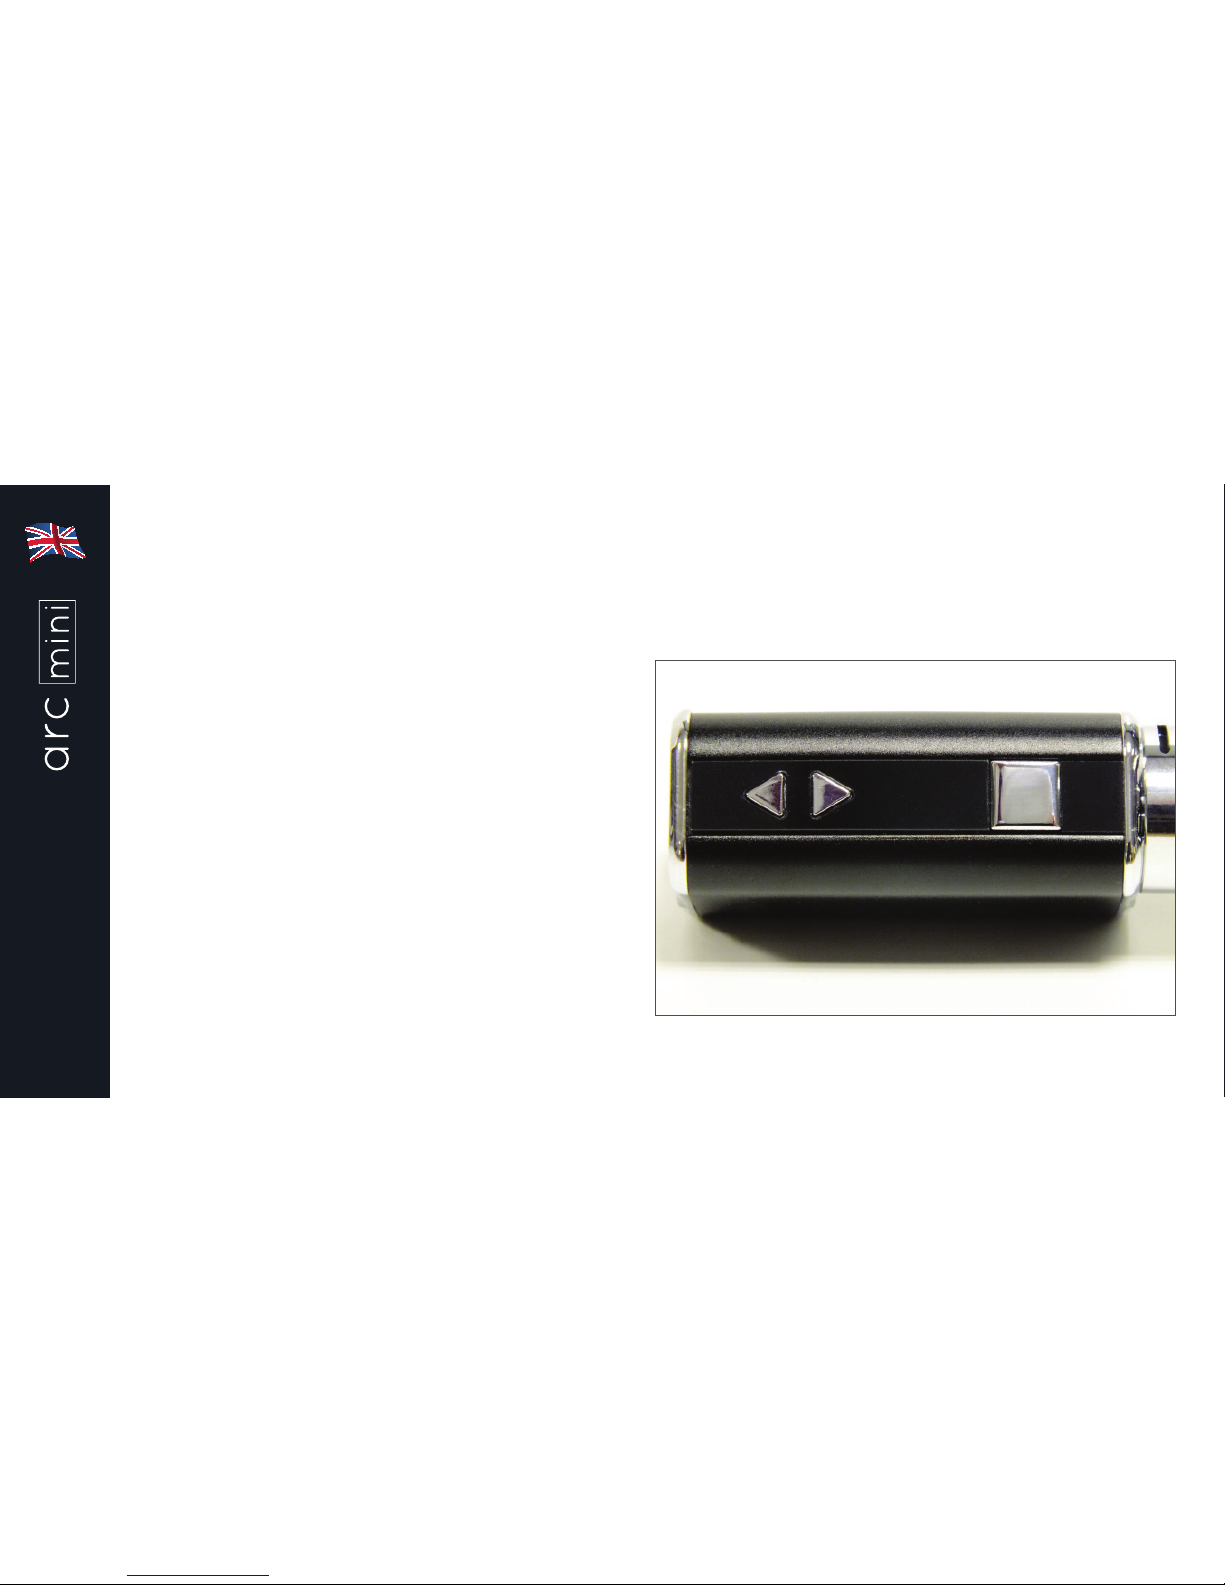
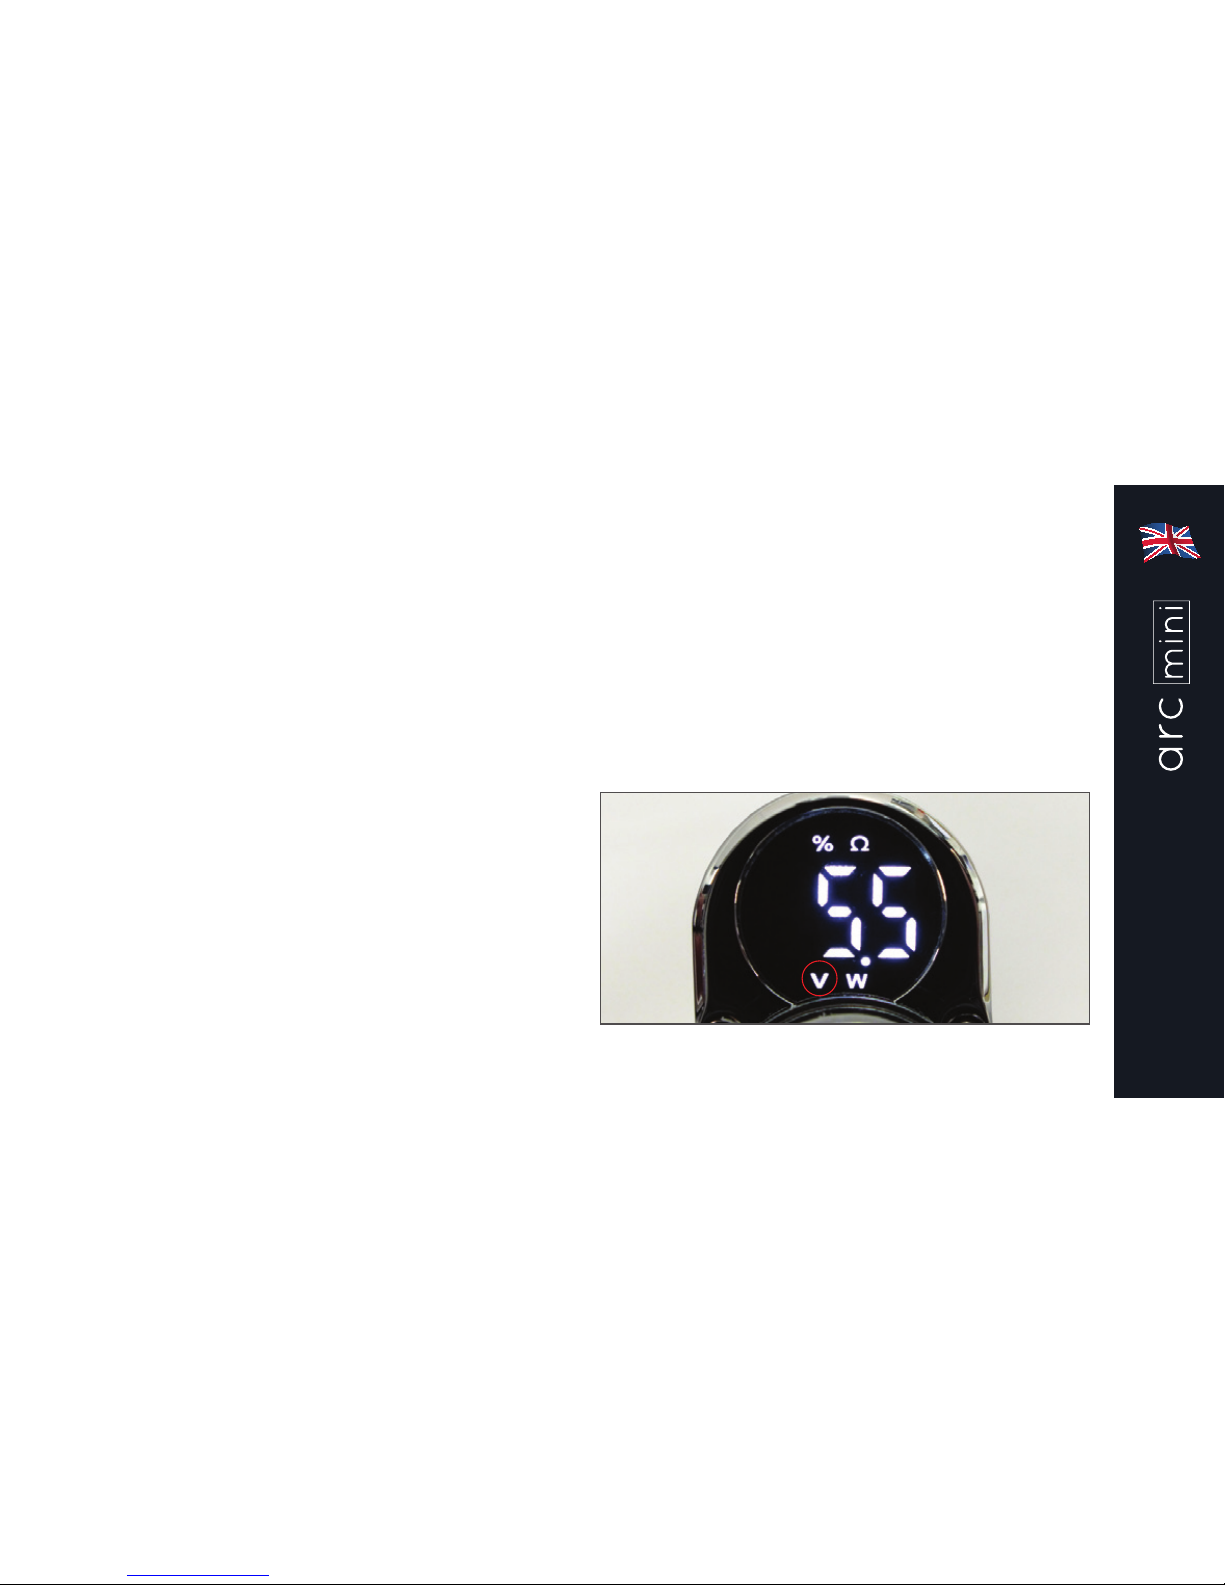
Press the power button 3 times to go into
the power selection mode. Press either the
“up” or “down” buttons to cycle through
options.
Volts:
Cycle through the selections until the “V”
flashes and then press the power button to
select voltage mode.
Page 8
8
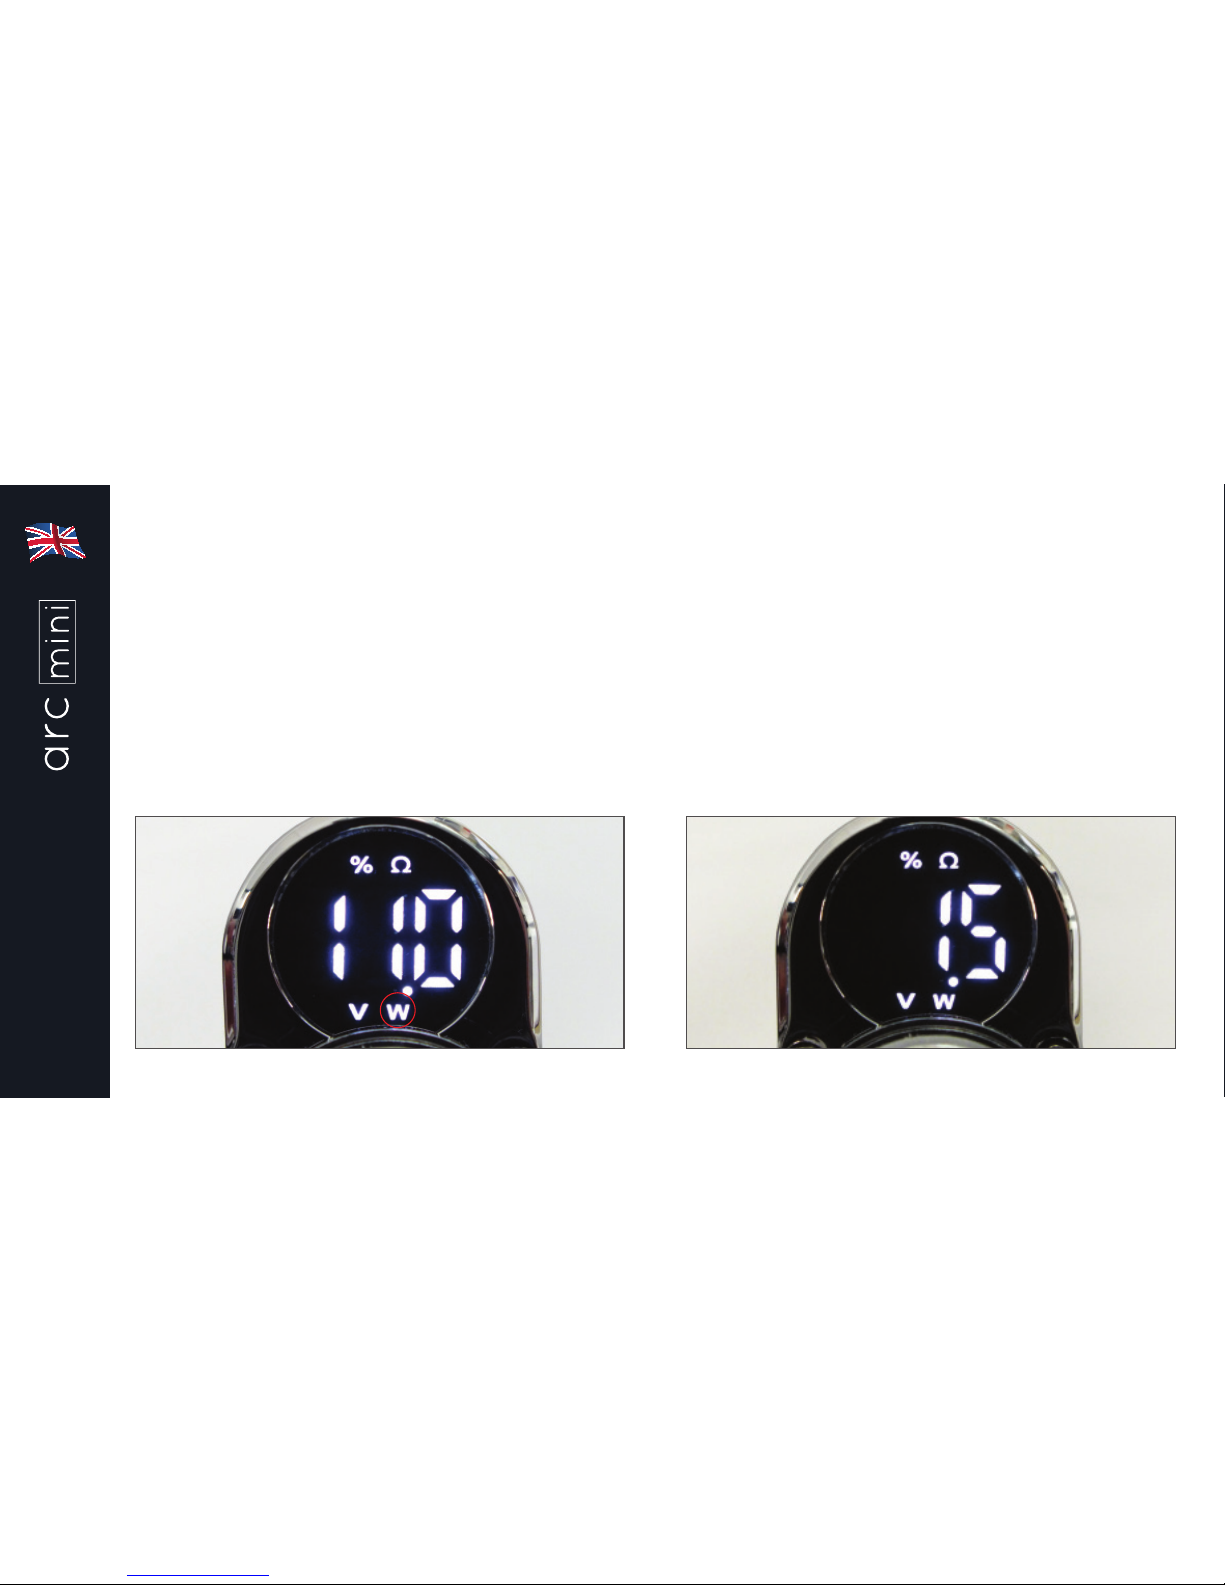
Watts:
Cycle through the selections until the “W”
flashes and then press the power button to
select wattage mode.
In selection mode you can see the
remaining power, ohms resistance of the
atomizer in use and the power mode you
selected by pressing the “up” or “down”
buttons.
Using your arc Mini
Page 9
9
Adjusting output level:
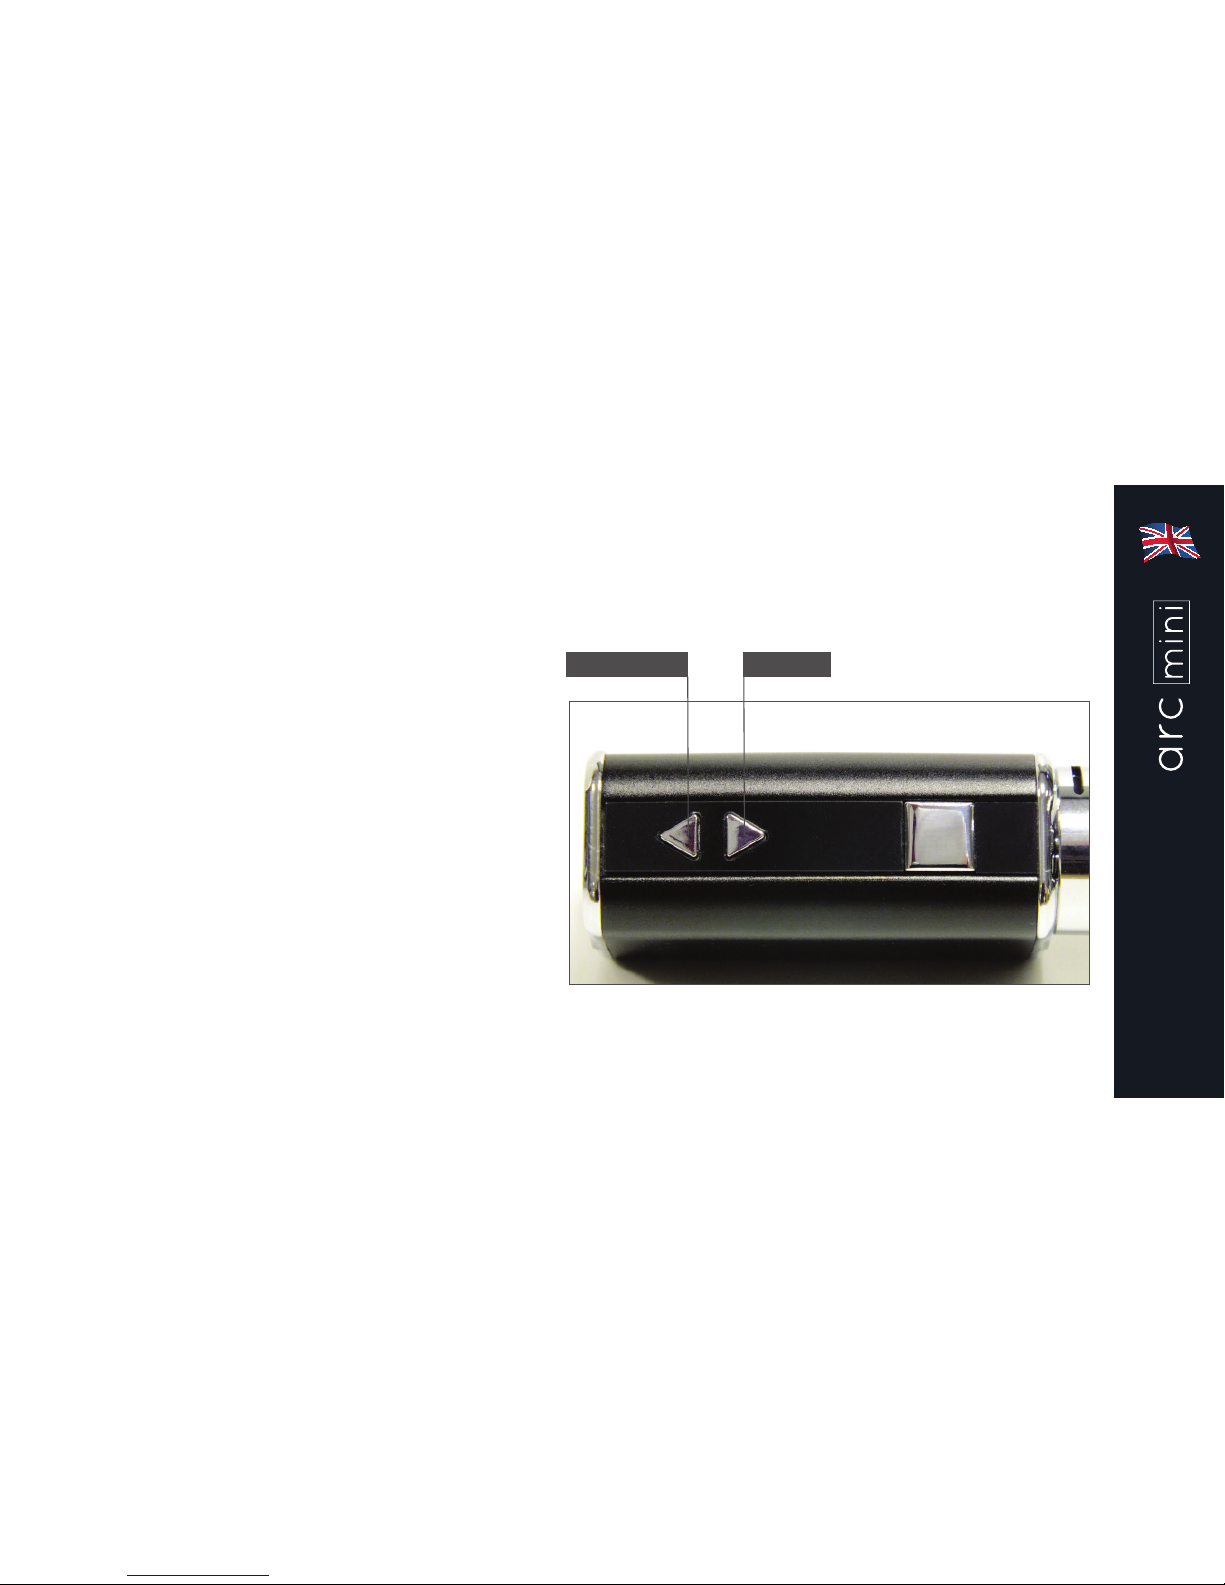
Output from the battery can be adjusted
by pressing the “up” or “down” buttons
momentarily whilst the arc Mini battery is
switched on. The LED display will show the
volts or watts as selected.
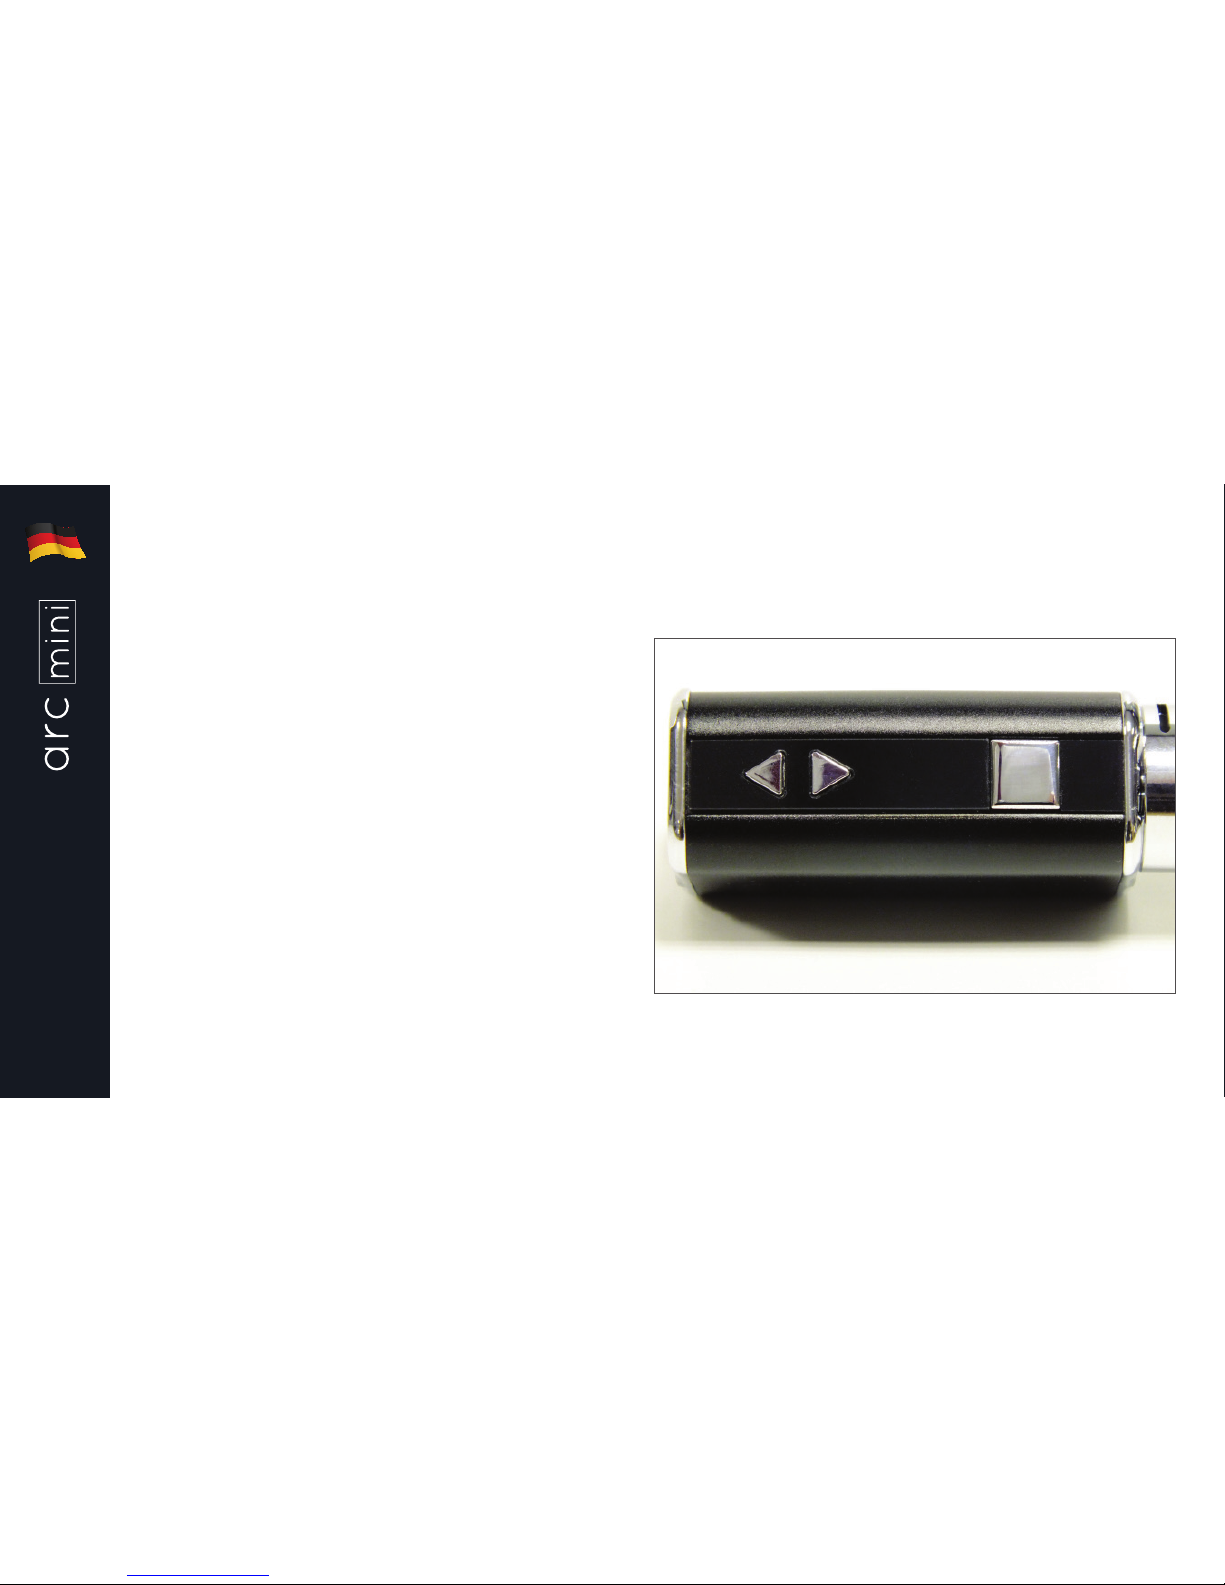
V/W DOWN V/W UP
Using your arc Mini
Page 10
10
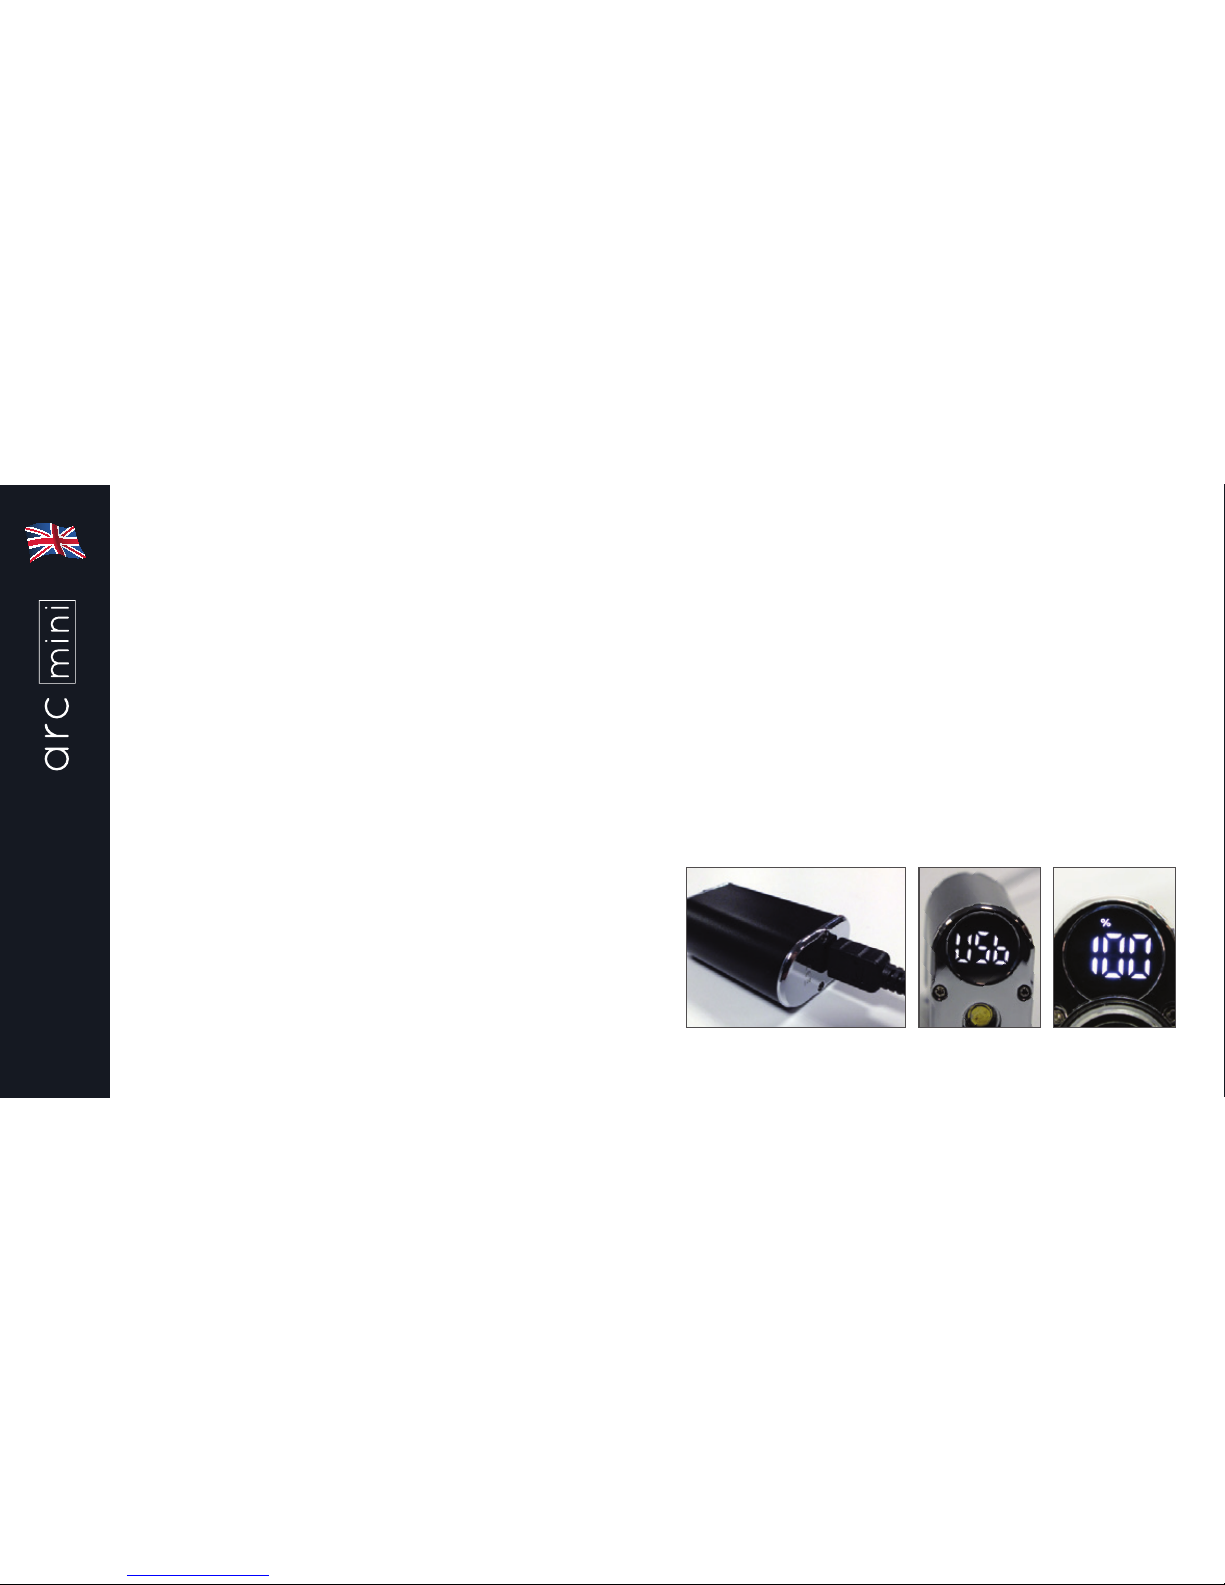
Charging the battery:
Remaining battery charge is indicated
on the LED display as a percentage of
remaining power, and the battery charge
indicator will flash several times when
remaining charge is 10% or below. The
battery can be recharged using the supplied
USB cable. Connect the large USB plug
into a dedicated USB port or wall adaptor,
and connect the micro USB plug into the
USB port on the base of the arc Mini. When
connected, the LED will display “USB” for 2
seconds and then change to show the level
of charge for 10 seconds. The “%” will flash
while the battery is charging, and will go out
when the battery is fully charged. The arc
Mini can be used normally during battery
charging.
Using your arc Mini
Page 11

11
Malfunction Indication and Protection
Over 10 Second Protection:
When the power button is pressed for over
10 seconds, the output will shut off. Normal
operation will resume after the power button
is released.
Atomizer Short-circuit Protection/
Resistance Low:
If an atomizer short-circuit occurs or the
atomizer resistance is too low, the LED
display will show “Lo Ω”. Replace the
atomizer head to continue.
Low-voltage Protection:
When the voltage of the battery is below
3.0V, the arc Mini battery will shut down and
will require charging.
Page 12
12
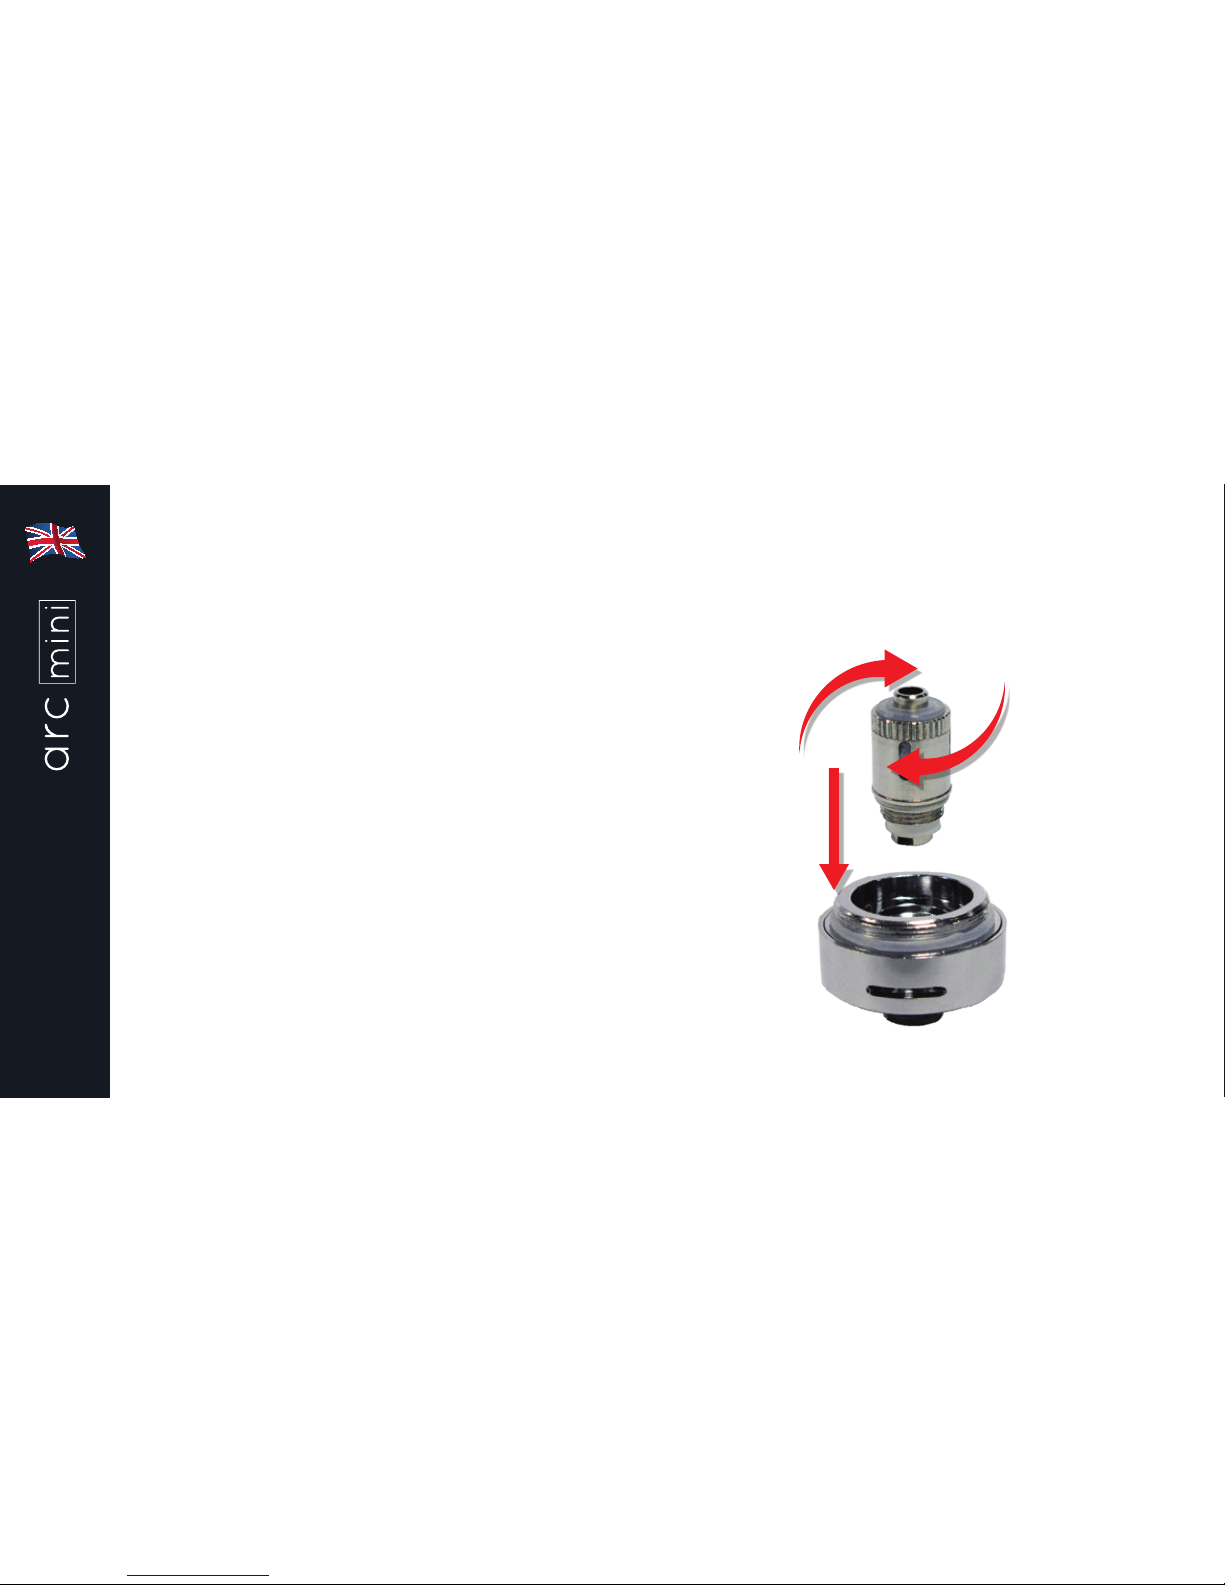
Atomizer Head Replacement
Remove the complete CS Micro Tank from
the arc Mini battery by unscrewing at the
atomizer base. Invert the Tank, unscrew and
remove the atomizer base. Unscrew the CS
atomizer head from the atomizer base and
replace. Refit the atomizer base and screw
the assembled tank back onto the arc Mini
battery.
Page 13

13
Specications
arc Mini battery
Size: 52 x 21 x 23.5mm
Weight: 60g
Capacity: 1050mAh
Voltage output: 3.3 – 5.0V
Power output: 20W max
Thread Type: 510 Thread
CS Micro Tank
Capacity: 1.5ml
Atomizer head: 1.5 ohm CS
Maximum refill nozzle diameter: 2.8mm
Page 14

14
Product storage and battery precautions
• Store the arc Mini e-cigarette and its accessories away from children whilst not in use.
• Please only use the charging cable provided.
• Please dispose of dead batteries in accordance with your country’s appropriate legislation.
• Do not charge the battery in a damp environment, in temperatures under 0°C or above
45°C.
• Do not carry batteries in a pocket or bag with other metallic objects.
• Do not attempt to repair a faulty arc Mini battery as these are sealed units with no
serviceable parts. Attempted repairs will void the warranty.
Additional product information
There are no reported medical side effects with this product. If you believe you experience
a side effect, please contact the manufacturer.
Page 15

15
Warranty
The arc Mini components contained in each kit have a 28-day parts warranty with the
exception of the atomizer heads which are covered by our Dead On Arrival warranty only. The
USB cable supplied has a 12-month warranty. If any parts are found to be faulty within this
time please contact our customer service team, whose details are on the back page of this
booklet and we will arrange for a replacement. We may require the goods to be returned for
further investigation.
Page 16

16
Wir gratulieren Ihnen zum Kauf der
Totally Wicked arc Mini E-Zigarette.
Die arc Mini ist ein kleines, unaufdringliches und handliches Dampfgerät, das leicht zu
bedienen ist und Ihnen eine ausgezeichnete Performance bietet. Das Highlight ist das LED
Display, welches den Akkuladestand, den Widerstand des Verdampfers, die Zugdauer und
die eingestellten Volt/Watt Parameter anzeigt. Die Spannung kann individuell von 3.3V bis
5.0V und die Leistung zwischen 5W und 20W eingestellt werden.
Page 17
17
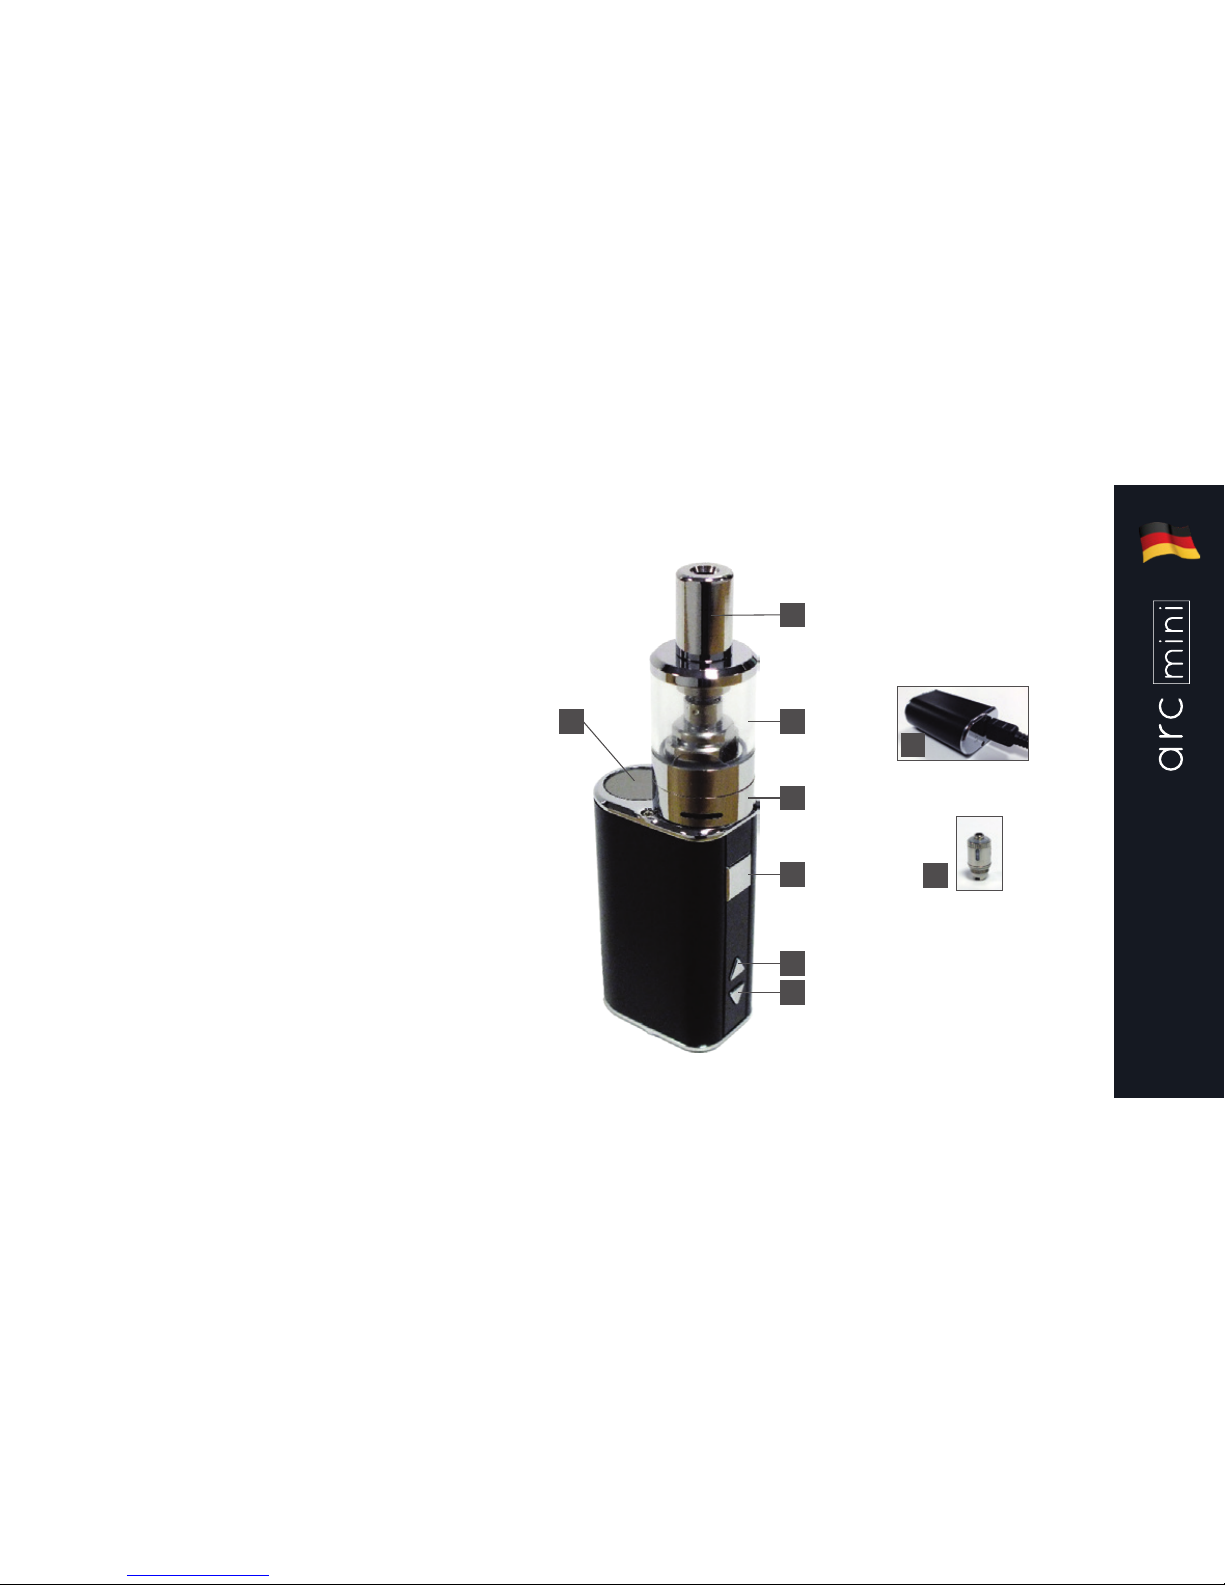
arc Mini
1. LED Display
2. Power-Taster
3. “Rauf” Taster
4. “Runter” Taster
5. Ladebuchse
CS Micro Tank
6. Verdampferbasis
7. CS Verdampferkopf (1.5 Ohm)
8. Tank
9. Mundstück
1
2
6
8
9
3
4
7
5
Page 18
18
Bedienung arc Mini
Power-Taster Ein/Aus:
Taster 5-mal hintereinander drücken; das
LED Display leuchtet auf und signalisiert,
dass die arc Mini an und zur Nutzung
bereit ist. Zum Ausschalten Taster ebenfalls
5-mal drücken. Im aktiven Modus geht das
Display nach ca. 10 Sekunden aus und
leuchtet erneut auf, wenn ein beliebiger
Taster gedrückt wird.
Page 19
19
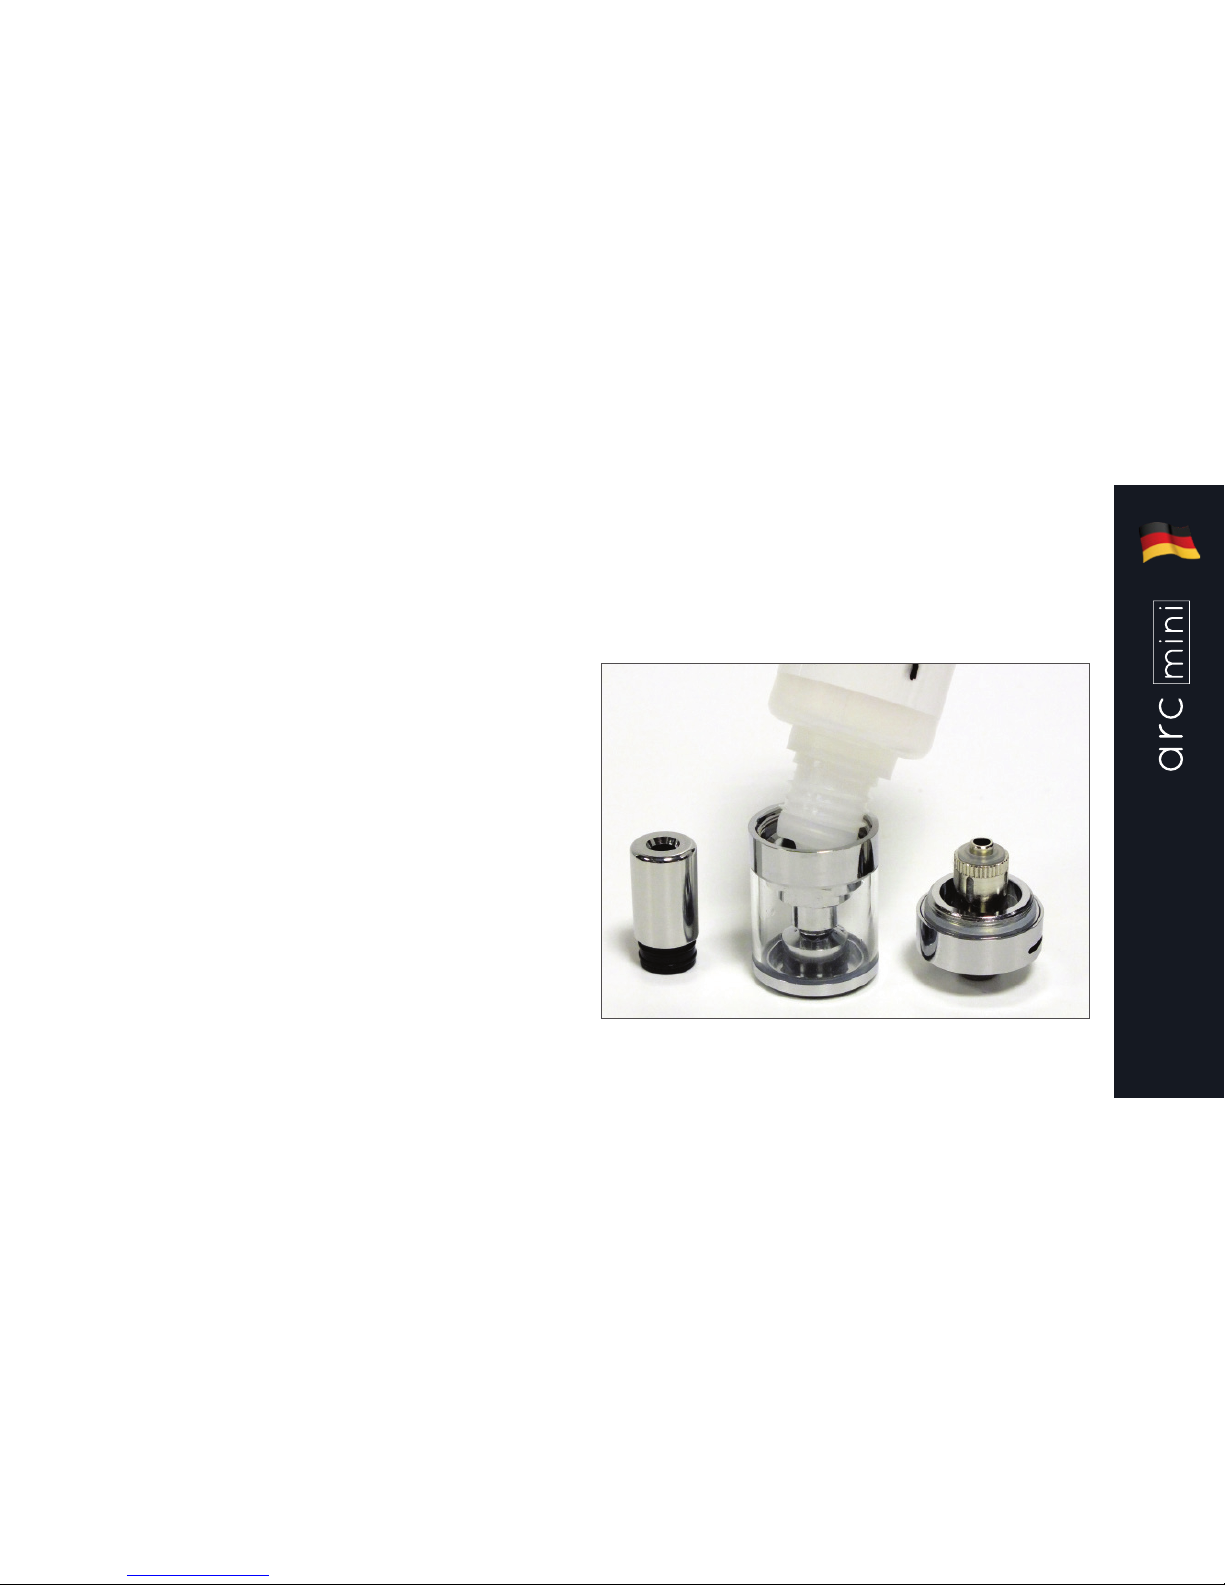
Tank befüllen:
CS Micro Tank an der Verdampferbasis
haltend von der arc Mini abschrauben.
Tank umdrehen und die Verdampferbasis
abschrauben. E-Liquid an der Tankwand,
um die Luftführung herum, einfüllen.
E-Liquid darf nicht in die mittlere
Luftführung gelangen. Verdampferbasis
samt Verdampferkopf wieder an den Tank
schrauben.
Maximaler Durchmesser für Einfüllstutzen:
2,8mm
Bedienung arc Mini
Page 20
20
Bedienung arc Mini
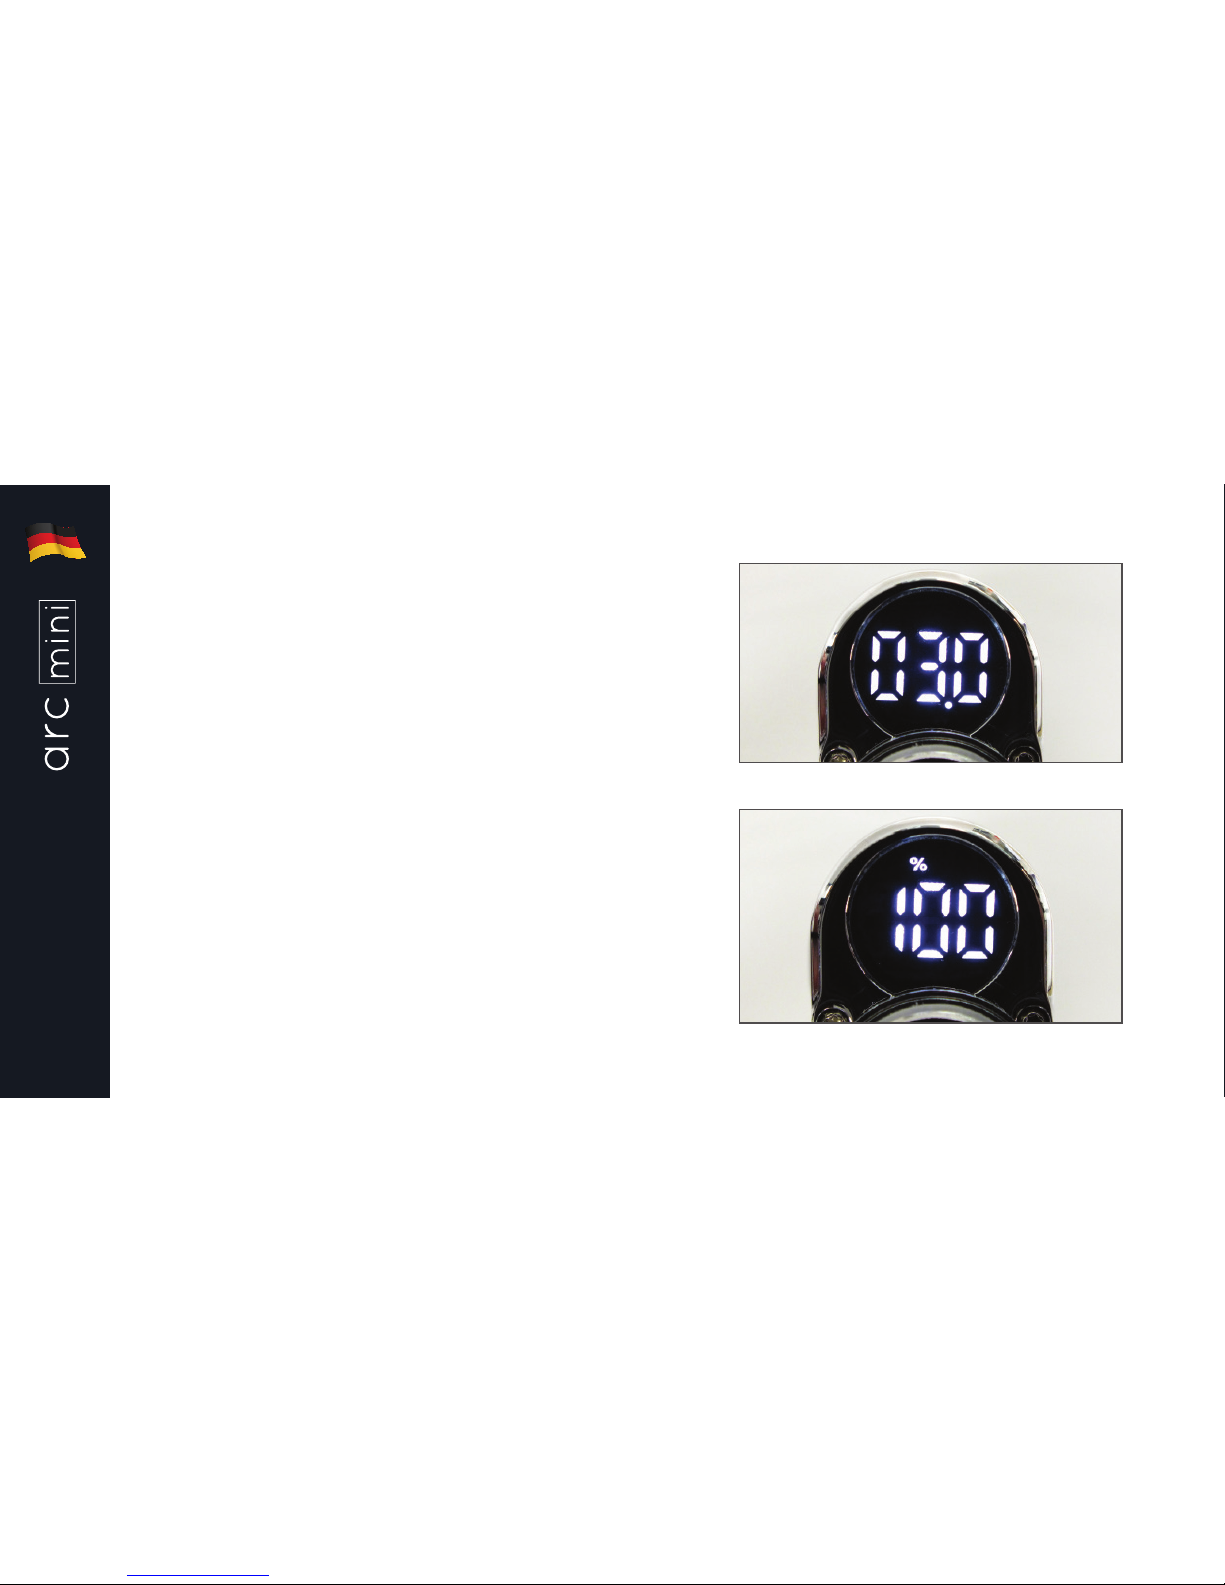
Dampfen:
Power-Taster drücken und inhalieren. Nach
dem Drücken zeigt das LED Display für ca.
2 Sekunden die Dampfdauer und danach
den Akkuladestand in Prozent an.
Zugdauer
Akkuladestand
Page 21
21
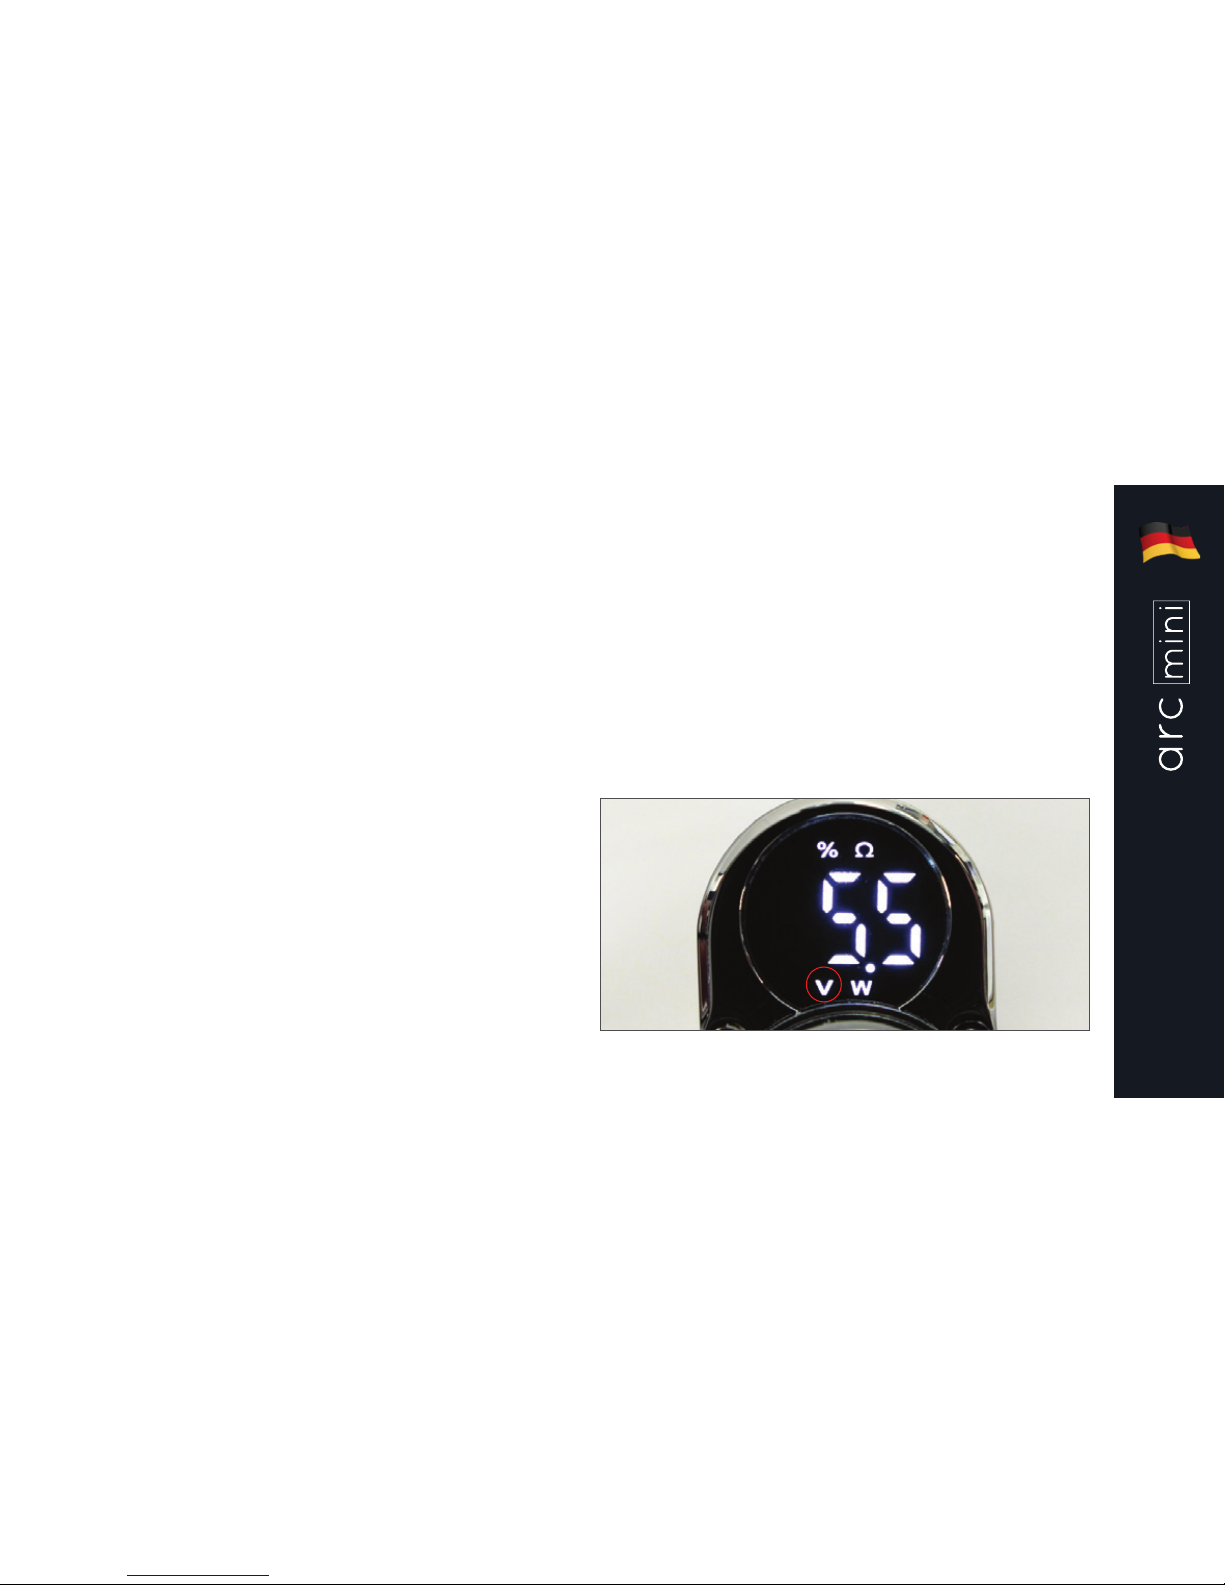
Zwischen Volt-/Watt-Modi wechseln:
Power-Taster 3-mal hintereinander drücken,
um in das Auswahlmenü zu gelangen. Für
den Wechsel zwischen den Volt-/WattModi die Pfeiltasten “Rauf” oder “Runter”
drücken.
Volt:
Durch das Auswahlmenü klicken, bis ein ‘V’
aufblinkt, danach Power-Taster drücken, um
den Volt-Modus auszuwählen.
Bedienung arc Mini
Page 22
22
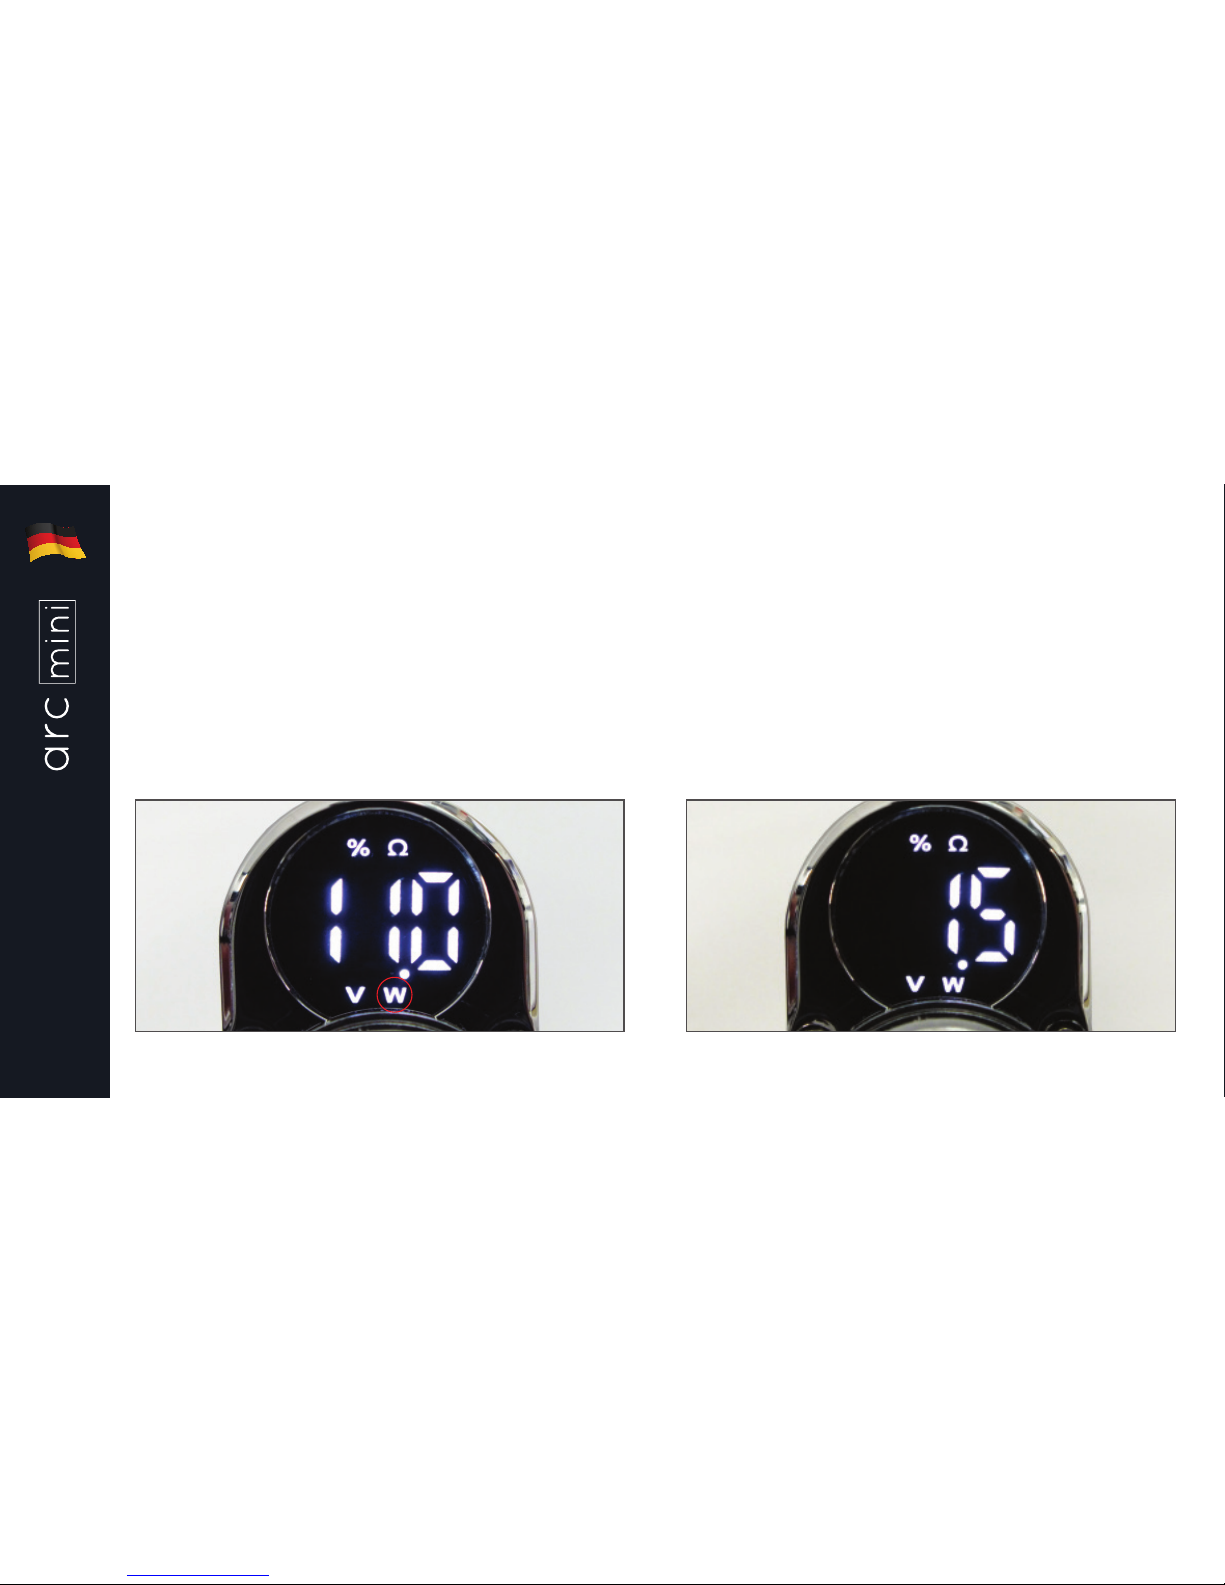
Watt: Durch das Auswahlmenü klicken,
bis ein ‘W’ aufblinkt, danach Power-Taster
drücken, um den Watt-Modus auszuwählen.
Im Auswahlmenü werden bei Betätigung
der Pfeiltasten, Akkuladestand,
Verdampferwiderstand und der jeweils
ausgewählte Volt-/Watt-Modus angezeigt.
Bedienung arc Mini
Page 23
23
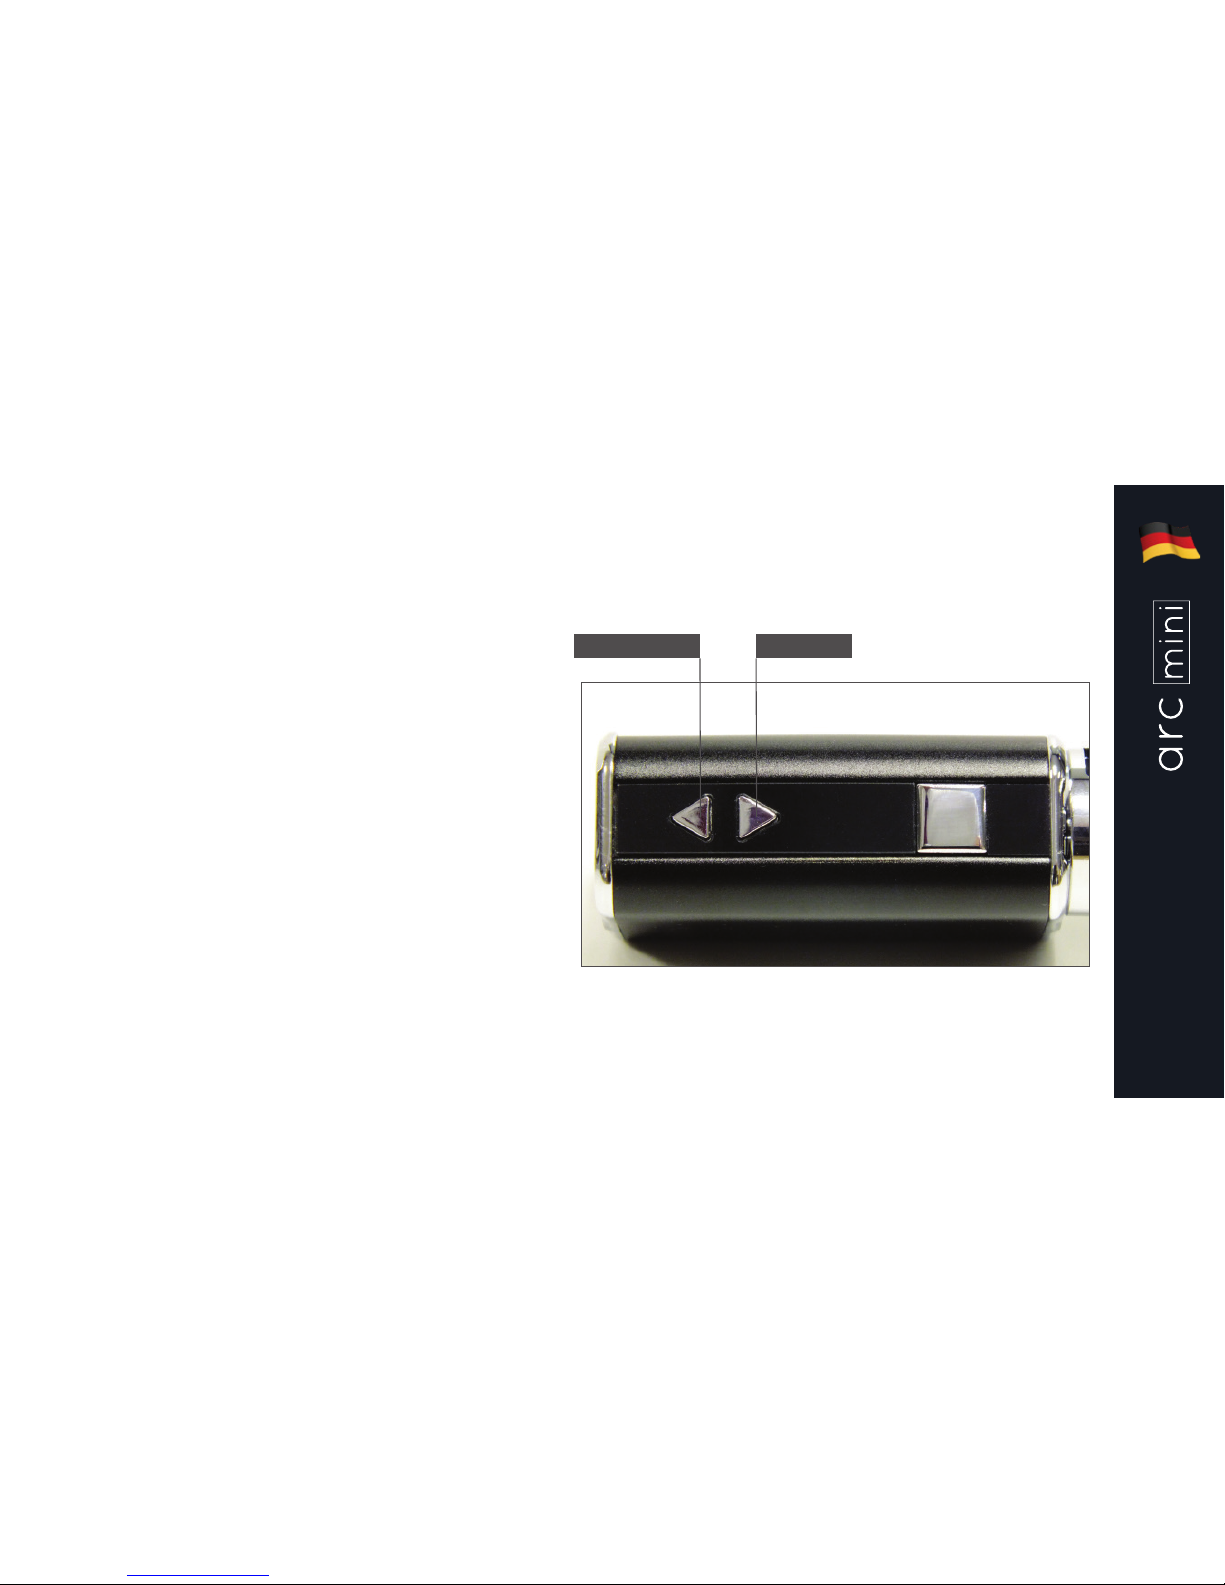
Volt-/Wattregulierung:
Die Spannung kann mittels der Pfeiltasten
erhöht oder verringert werden, nachdem die
arc Mini aktiviert wurde. Das LED Display
zeigt die eingestellte Spannung an.
V/W RUNTER V/W RAUF
Bedienung arc Mini
Page 24
24
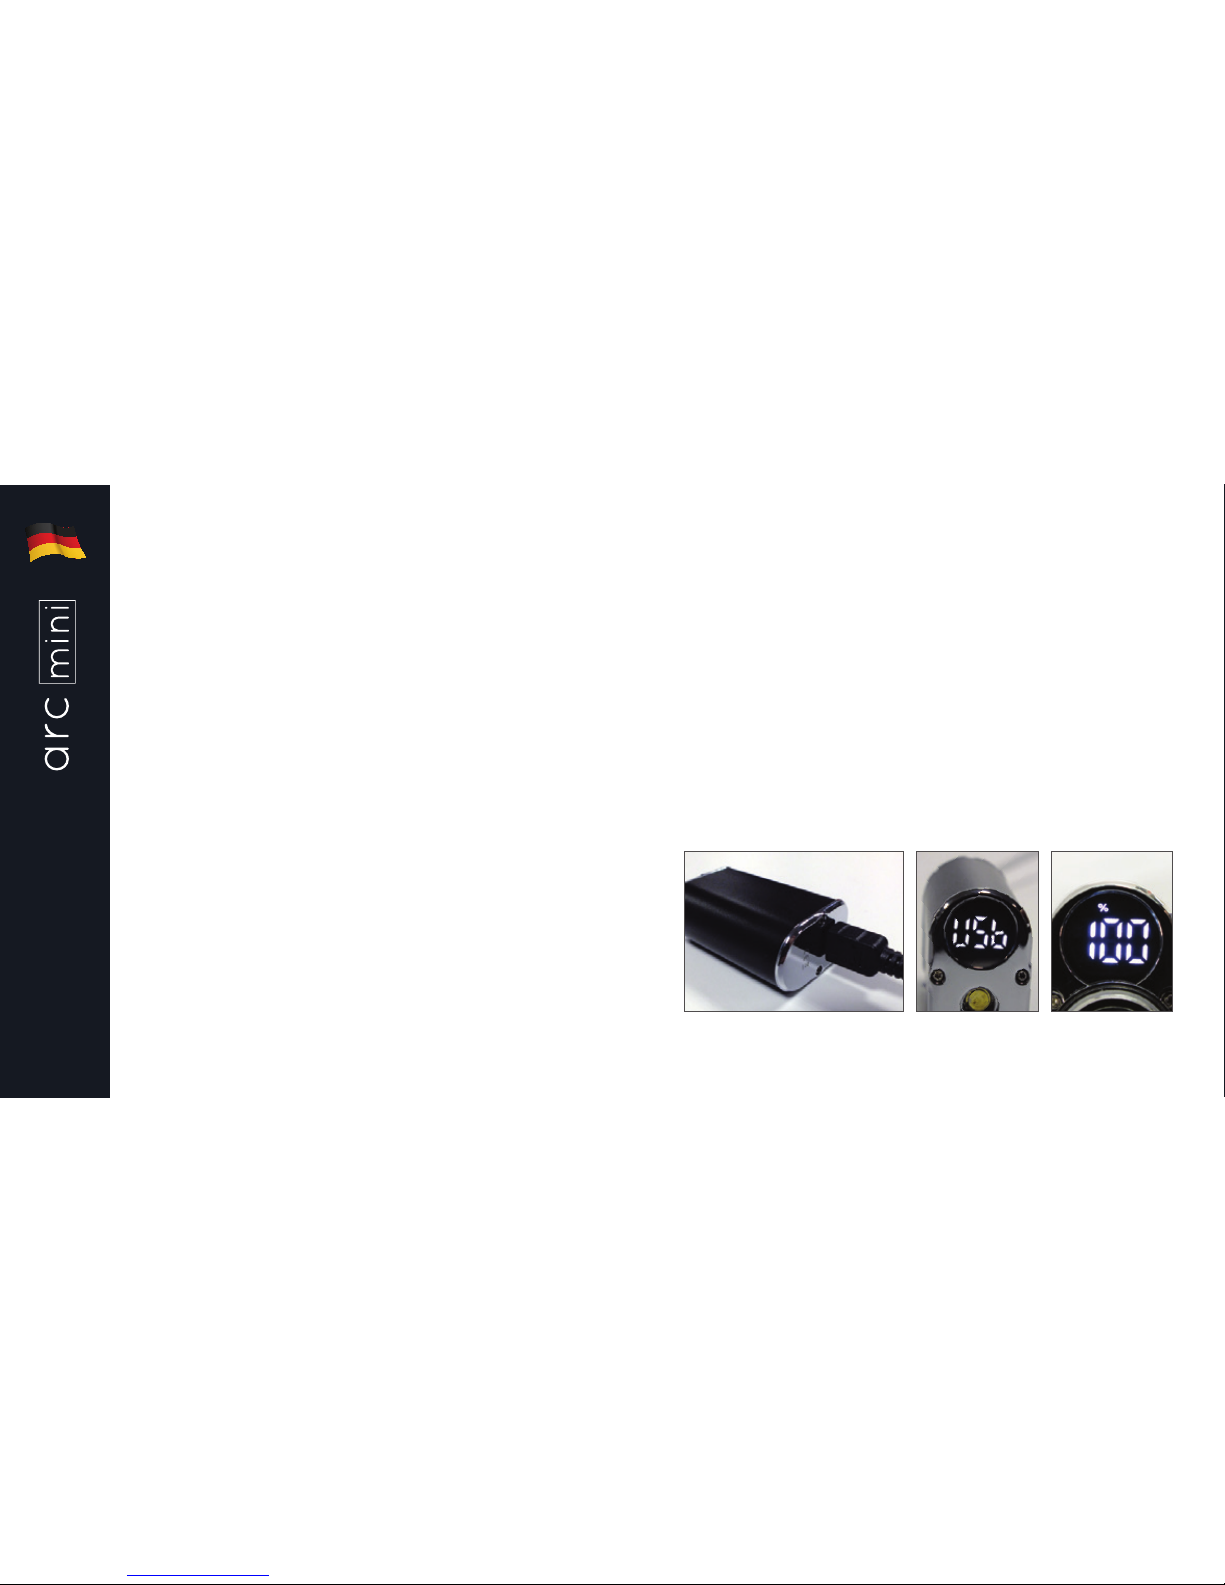
Akku aufladen:
Der Akkuladestand wird am LED Display in
Prozent angezeigt. Unter 10% beginnt die
Ladestandsanzeige am Display zu blinken.
Die arc Mini kann mittels mitgeliefertem
USB-Kabel an einem USB-Port oder
USB-Netzstecker aufgeladen werden.
Wenn das USB-Ladekabel angeschlossen
wurde, leuchtet das Symbol “USB” für ca.
2 Sekunden und danach der Ladestand für
ca. 10 Sekunden in Prozent auf. Das “%”
Symbol blinkt während des Ladevorganges
und erlischt bei vollem Akkuladestand.
Während des Ladevorgangs kann die arc
Mini weiter genutzt werden.
Bedienung arc Mini
Page 25

25
Fehleranzeige und Schutzfunktionen
10 Sek.
Sicherheitsabschaltung: Hält man den
Power-Taster länger als 10 Sekunden
gedrückt, wird die Stromzufuhr aus
Sicherheitsgründen unterbrochen.
Kurzschlussschutz/ Zu niedriger
Widerstand:
Wenn der Verdampfer einen Kurzschluss
aufweist oder der Widerstand zu niedrig ist,
zeigt das Display “Lo Ω”.
Tiefentladeschutz:
Fällt die Akkuspannung auf unter 3.0V
schaltet sich die arc Mini aus. Ein
Ladevorgang ist erforderlich.
Page 26
26
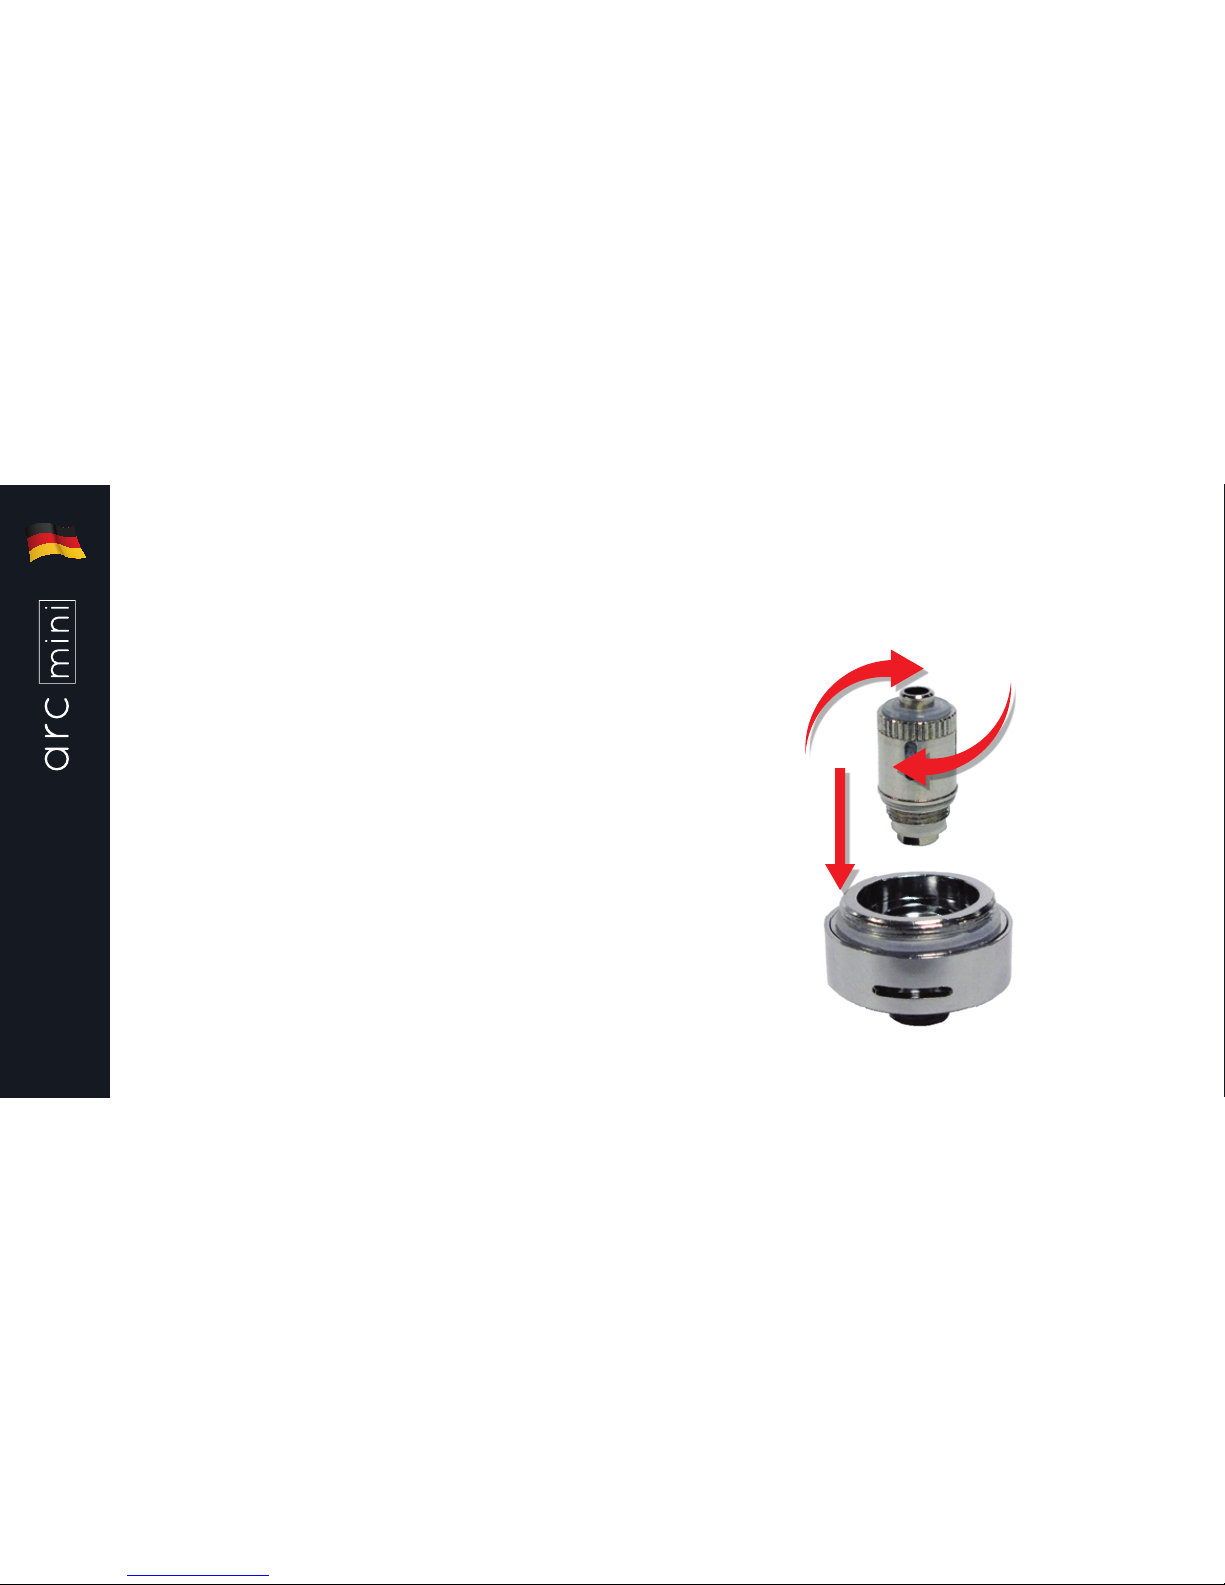
Verdampferkopf wechseln
CS Micro Tank (an der Verdampferbasis
haltend) von der arc Mini abschrauben.
Tank umdrehen und die Verdampferbasis
abschrauben. CS Verdampferkopf aus
der Basis schrauben und einen neuen
Verdampferkopf einsetzen. Verdampferbasis
samt Verdampferkopf wieder an den Tank
schrauben.
Page 27

27
Technische Daten:
arc Mini
Maße: 52 x 21 x 23,5mm
Gewicht: 60g
Kapazität: 1050mAh
Ausgangsspannung: 3.3-5.0V
Ausgangsleistung: max. 20W
Gewinde: 510er Anschluss
CS Micro Tank
Tankkapazität: 1,5ml
Verdampferkopf: CS 1.5 Ohm
Maximaler Durchmesser für Einfüllstutzen:
2,8mm
Page 28

28
Zusätzliche Produktinformationen
Es bestehen keine Erkenntnisse über medizinische Nebenwirkungen mit diesem Produkt.
Sollten Sie glauben eine Nebenwirkung zu verspüren, kontaktieren Sie bitte den Hersteller.
Page 29

29
Aufbewahrungshinweise und Akku-Sicherheitsinformationen
• Die arc Mini und das Zubehör außerhalb der Reichweite von Kindern und Tieren
aufbewahren.
• Verwenden Sie nur das beigefügte USB-Ladekabel.
• Alte oder defekte Akkus nach den gesetzlichen Bestimmungen entsorgen.
• Arc Mini nicht bei Temperaturen unter 0°C oder über 45°C aufladen.
• Akkus nicht in Taschen mit metallischen Gegenständen transportieren.
• Versuchen Sie nicht eine defekte arc Pico Grande zu reparieren. Beim Reparaturversuch
erlischt die Garantie.
Page 30

30
Garantie
Die arc Mini Komponenten haben eine 28 Tage Garantie. Die Verdampferköpfe werden
als Einwegartikel mit einer DOA Regulierung und das USB Ladekabel mit einer 12 Monate
Garantie ausgeliefert, ausgenommen hiervon sind Schäden durch unsachgemäße Nutzung
sowie beschädigte Kabel. Sollte ein Produkt fehlerhaft sein, bitten wir Sie den Totally Wicked
Kundenservice zu kontaktieren.
Page 31
Manufactured in China
under the authority
of Pillbox38 UK Ltd,
Stancliffe Street,
Blackburn, Lancashire,
BB2 2QR.
Tel 01254 692244
www.totallywicked.co.uk
Tel 1(888) 761-9425
www.totallywicked.com
Tel 0941-78447082
www.totallywicked.de
ELECTRONIC CIGARETTE KIT
 Loading...