

Page 1
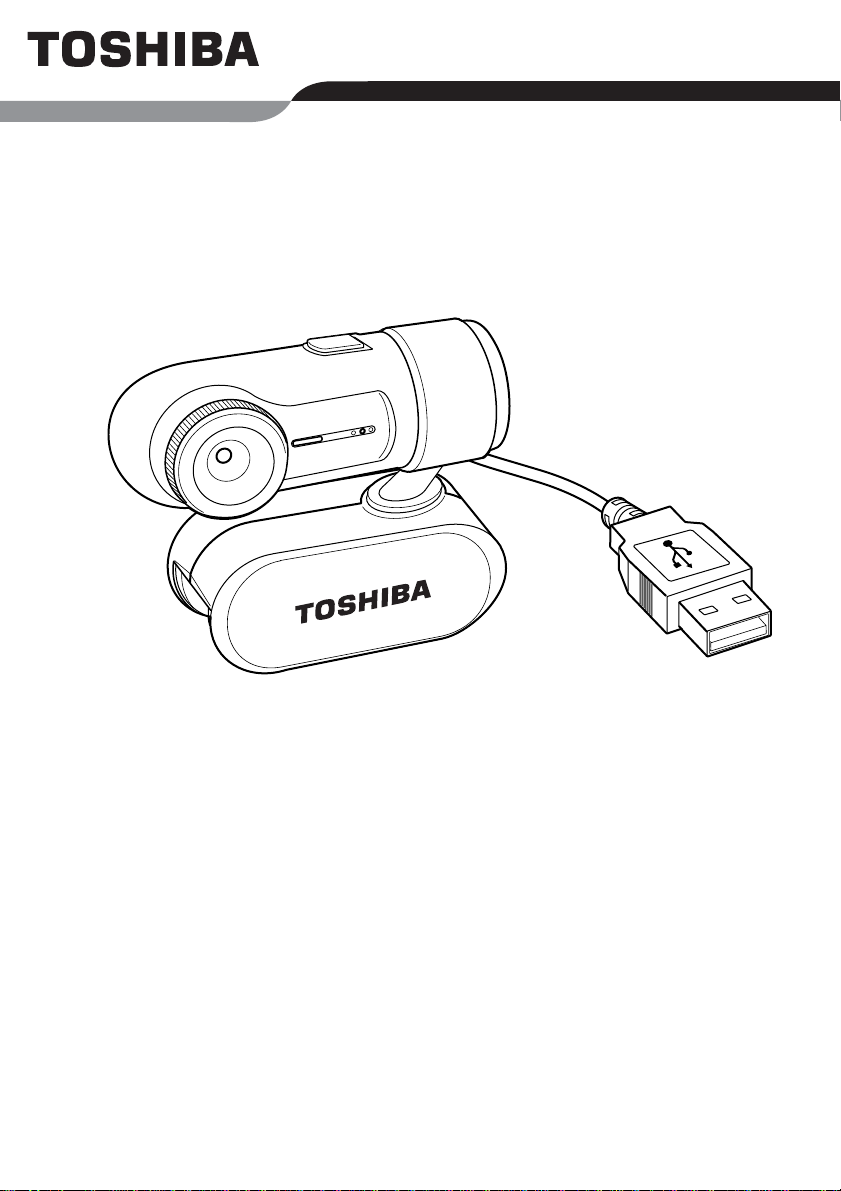
USB Webcam
User’s Guide
Page 2

Copyright
This manual is copyrighted by TOSHIBA Corporation with all rights
reserved. Under the copyright laws, this manual cannot be reproduced in
any form without the prior written permission of Toshiba. No patent liability
is assumed, however, with respect to the use of the information contained
herein.
© 2007 by TOSHIBA Corporation. All rights reserved.
T rademarks
Microsoft, Windows and Windows Vista are either registered trademarks or
trademarks of Microsoft Corporation in the United States and/or other
countries.
Intel is a trademark or registered trademark of Intel Corporation.
ArcSoft and the ArcSoft logo are registered trademarks of ArcSoft, Inc.
All other brand and product names are trademarks or registered
trademarks of their respective companies.
Safety Information
This manual contains safety instructions that must be observed in order to
avoid potential hazards that could result in personal injuries or damage to
your equipment. These safety cautions have been classified according to
the seriousness of the risk, and the icons highlight these instructions as
follows:
USB Webcam
Indicates an imminently hazardous situation which, if not avoided, will
result in death or serious injury.
Indicates a potentially hazardous situation which, if not avoided, could
result in death or serious injury.
Indicates a potentially hazardous situation which, if not avoided, may
result in minor or moderate injury.
Indicates a potentially hazardous situation which, if not avoided, may
result in property damage.
Provides important information.
User’s Manual 2
Page 3

Important Information
This manual contains important instructions for operating your product.
Please read the manual, follow the instructions, and heed all warnings and
cautions. Keep this manual where it can be used for future reference.
Precautions for Use
■ Do not attempt to disassemble, modify, tamper with or repair
product. Disassembly, modification, tampering or repairing the
product could cause fire or electric shock, possibly resulting in
serious injury.
Please contact an authorized Company service provider for any
repair service.
■ Never leave small parts such as covers, caps and screws within
the reach of infants or small children. Swallowing a small part may
cause choking and suffocation resulting in death or serious injury.
If a part is swallowed, immediately take appropriate emergency
action and consult a doctor.
■ When handling the cable, follow these precautions:
■ Never tamper with the cable or connecter.
■ Never splice a cable.
■ Never bend or twist a cable.
■ Never pull on a cable to remove a plug from an USB port.
Always grasp the connecter directly.
■ Never place heavy objects on a cable.
■ Never run a cable through a pinch point such as a door or
window.
■ Never place a cable near a heat source.
■ Never use nails, staples or similar objects to fasten or attach
cable in place.
Doing any of the above may damage the cable and/or result in a
fire or electric shock, possibly resulting in serious injury.
■ Always confirm that the connector has been fully inserted into the
USB port. Failure to do so may result in a fire or electric shock,
possibly resulting in serious injury.
■ Never allow metal objects, such as screws, staples and paper
clips, to enter the product. Foreign metal objects can create a short
circuit, which can cause product damage and fire, possibly
resulting in serious injury.
■ Never use or place the product in a bathroom or any other damp
environment or in an outdoor environment or location where it may
be exposed to rain, mist, fog or other source of water or moisture.
Such exposure could cause a fire or electric shock, possibly
resulting in serious injury. It may also cause product failure.
USB Webcam
User’s Manual 3
Page 4

■ Do not drop the product or subject it to strong impact. The product
may be damaged, or fire or electric shock may result, possibly
resulting in serious injury.
Please contact an authorized Company service provider for any
repair service.
■ Never attempt to connect or disconnect a connector with wet
hands. Failure to follow this instruction could result in an electric
shock, possibly resulting in serious injury.
Important Information on Use
■ Never place the product where it will be exposed to excess heat,
such as in direct sunlight, an unventilated vehicle or near a heater.
This may result in a system failure, malfunction, loss of data or
damage to product.
■ Never place the product in a location where it will be exposed to
extremely low temperatures. This may result in a system failure,
malfunction or loss of data.
■ Do not expose the product to dusty environments. If dust gets
inside the product, it could cause a system failure, malfunction or
loss of data. If dust contaminates the product, do not turn on the
power. Take it to an authorized Company service provider before
you use it.
■ Never subject the product to sudden temperature variations. This
may result in condensation, causing a system failure, malfunction
or loss of data.
■ Never place a heavy object on the product and be careful not to
drop a heavy object onto the product. It could damage the product
or cause system failure.
■ Never use benzene, thinner or other chemicals when cleaning the
product. The use of benzene, thinner or other chemicals may
result in deterioration, deformation or discoloration of those items
and the loss of data.
USB Webcam
■ This device should be used under the following conditions:
Temperature 0-50°C, humidity 10-90%.
Power Management Tips
■ If your computer should go into standby mode (Windows
Windows
will also enter standby mode. In this case, restart your computer from
Standby mode (Windows
(Windows Vista
User’s Manual 4
®
2000) or Sleep mode (Windows VistaTM), your USB Webcam
®
TM
), and the USB Webcam will also be reactivated.
XP and Windows
®
2000) or Sleep mode
®
XP and
Page 5

Introduction
Thank you for purchasing this Toshiba USB Webcam. This user's guide
describes how to connect the USB Webcam to your computer, install
software drivers and applications and how to operate the USB Webcam
and applications. In addition to this user's guide, this package contains:
■ Webcam
■ Quick Guide
■ Application CD (This disc contains the driver, Application software and
User’s Manual).
System requirements
T o use the USB W ebcam, your computer must meet the following hardware
requirements and run one of the operating systems listed below.
Hardware
■ Intel® Pentium4 processor 1.6GHz (or faster)
■ A hard disk drive with at least 1GB of free space
■ At least 512MB RAM or more, depending on your operating system
■ USB 1.1/2.0
■ Optical disc drive
Introduction
Operating system
■ Microsoft® Windows Vista
■ Microsoft® Windows XP
®
■ Microsoft
User’s Manual 5
Windows 2000
TM
Page 6
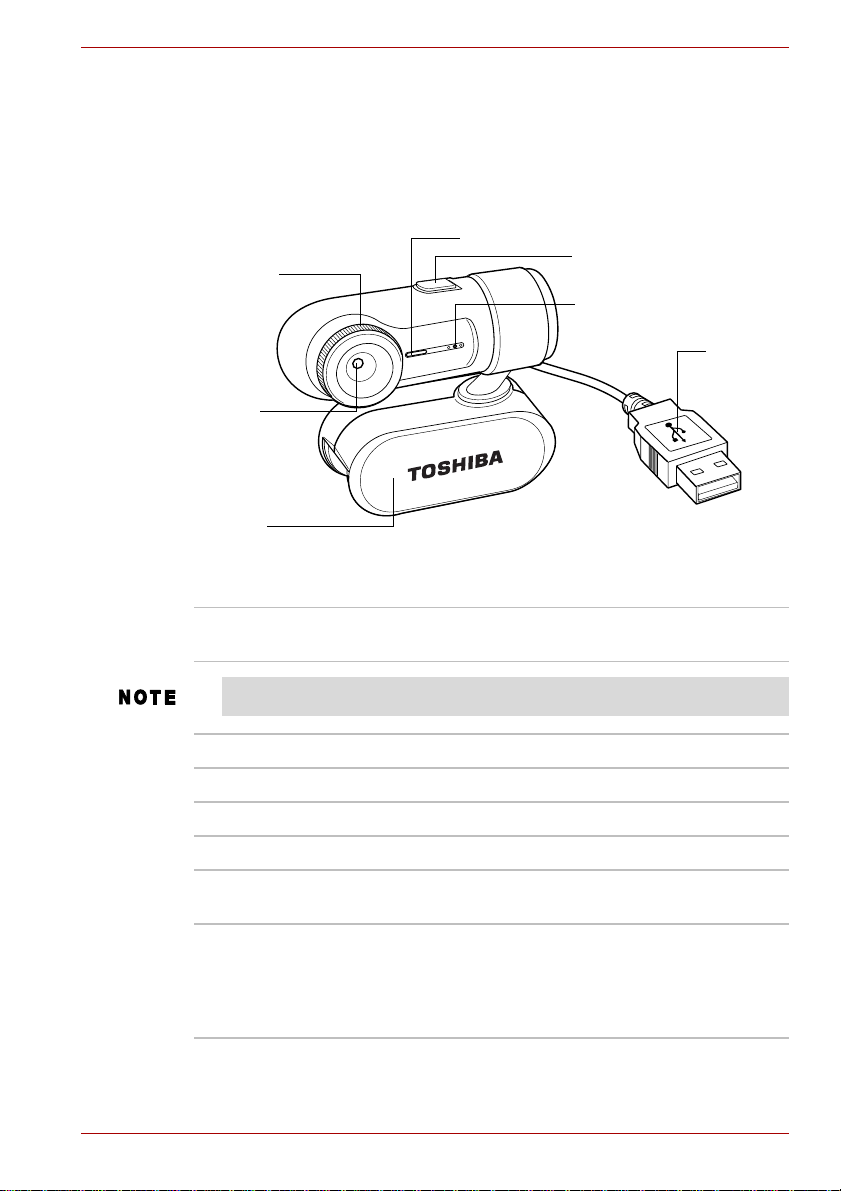
Features and functions
This section describes the various components of the USB Webcam.
The following figure shows the USB Webcam's features.
Indicator Light
Focus dial
Lens
Clip
Figure 1-1 Features of the USB Webcam
Features and functions
Snap shot button
Microphone
USB
connector
Indicator
Blinks when in preview mode.
Light
The Indicator will turn off when in sleep or hibernation modes.
Focus Dial Adjusts the lens focus.
Clip Attaches to the computer's display panel.
Lens Captures the subject to be recorded.
Microphone Records voices and sounds.
USB
Connects to the computer's USB port.
connector
Snap shot
Button
If pushed while the USB Webcam application is running,
this will capture the image currently being displayed as a
still image. If pressed when the USB Webcam
application is not running, this will start the "AMCAP"
image capture software.
User’s Manual 6
Page 7

Software Driver and Application Installation
Software Driver and Application
Installation
The USB Webcam driver and ArcSoft® VideoImpressionTM and
PhotoImpression
CD-ROM. This section explains the installation procedures for these items
and MSN
The camera driver, ArcSoft VideoImpression and PhotoImpression
software and MSN Messenger (or other instant messaging services)
must be installed on the computer in order to use the USB Webcam.
TM
software are included on the Manual and Application
®
Messenger.
Installing the software drivers and application program
Do not connect the camera to your computer yet.
1. Insert the Manual and Application CD-ROM into the Optical disc drive.
2. The Start Menu appears.
3. To install the camera driver, click the ''Install Device Driver''.
4. Follow the information that appears on the screen until the installation is
complete.
5. To install the application software, select ''Arcsoft VideoImpression''
and ''Arcsoft PhotoImpression''.
6. Click the Install Application Software. To click the Install Application
Software button, be sure to choose the application software.
7. Follow the information that appears on the screen until the installation is
complete.
8. Click on Read User's Manual to view the User’s Manua l .
9. Click Exit to close the software installation and restart your computer.
If the installer screen does not come up automatically, click Start, then
Run and execute the file launch.exe on the CD-ROM to start the
installer program.
User’s Manual 7
Page 8

Installing the MSN Messenger
1. Please log on to http://messenger.msn.com to download.
After the installation package is downloaded to your computer, it will
start installing MSN Messenger. All you have to do is follow the
instructions.
The download times of the file may vary according to your internet
connection speed.
2. Af ter the installation is complete, click Start, point to All Programs, and
click Windows Live Messenger.
3. After you run Messenger for the first time, you can add friends to your
list and send instant messages.
Hardware Installation
This section describes connecting the USB Webcam to the computer and
how to adjust it.
Connecting
1. Open the USB W ebcam clip and attach to the computer display panel or
other surface by sandwiching it between the two sides of the clip.
2. Plug the USB connector into any USB port on your computer.
Hardware Installation
Figure 1-2 Attaching the USB Webcam
Be careful not to press directly on the computer display screen w he n
attaching the USB Webcam clip. Failure to follow these instructions
may result in damage to the computer display screen.
User’s Manual 8
Page 9

Adjusting USB Webcam Direction and Focus
1. Start the VideoImpression application and open the video viewing
program.
2. Adjust the USB W ebcam up and down and left and right so that it faces
the subject to be recorded.
3. Adjust the USB Webcam focus by twisting the focus dial while looking
at the view screen.
Figure 1-3 Adjusting the USB Webcam
Using software
The following sections describe how to use the software.
Using software
How To Start the USB Webcam
1. Plug the USB Webcam into your computer first.
2. Click the "Messenger" to go to the main screen.
3. Click the Webcam icon during a conversation.
-orClick the Actions menu on the main window, click Start a Webcam
Conversation, select the name of the person you want to send video
to, and then click OK.
For a 2-way webcam conversation, both participants must have a Web
camera and each person must invite the other.
4. T o stop sending your video image during a conversation, click the arrow
under your video window, and then click Pause Webcam or Stop
Webcam. You can continue to receive the other person's image, but
your image will freeze in your contact's conversation window.
User’s Manual 9
Page 10

Using software
Getting Started With ArcSoft VideoImpression
ArcSoft VideoImpressionTM lets you create multimedia presentations for
home, business, and even the Internet by combining photos and video clips
with audio, text and scene transitions. It is an easy way to create and share
home videos. Y ou can even burn your videos onto a CD (requires a CD
writer), ready for playback on most commercial DVD players. Powerful and
feature-rich, yet extremely easy to use.
If you need more information or instructions on how to use a specific
feature or tool, click the [Help] button on the upper corner of the screen.
TM
When you first run the program, a window will appear that lets you choose
the type of project you want to make (you can also open previously saved
projects). Choose "Create a New Video." A new window will appear. It
will contain multiple options for gathering your video content.
User’s Manual 10
Page 11

For this walk-though, choose "Get From Album." Even if you choose one
of the other options, you will end up at your albums sooner or later. Albums
contain shortcuts to files stored on your system. You will grab most of your
"media" for movie construction from your albums.
MEDIA
This first step is where you select the "media" (still images, videos, and
sound clips) that you want to use to create your movie. All you need to do
is choose the components you want and add them to the Storyboard.
When you save - or "produce" - your movie, all the components on the
Storyboard will be combined together into a single video file.
Sample Storyboard illustration:
Video Clips & Still Images
Transitions
Figure 1-4 The Storyboard
The large squares are reserved for still images and video clips. The two
horizontal bars beneath are reserved for audio tracks. The smaller squares
between the still image/video clip components are for "transitions."
Audio Tracks
Using software
EDIT
You’re now ready to touch up and modify your movie components.
Different editing options are available depending on the component type.
MODIFYING IMAGE AND VIDEO BRIGHTNESS/CONTRAST
1. Single-click the desired still image or video clip on the Storyboard.
2. Click and drag the sliders to adjust brightness and contrast. You can
preview the effect within the Player.
TRIMMING VIDEOS AND AUDIO
1. Select the desired video or audio clip on the Storyboard.
2. Drag the Starting Mark to the spot where you would like the clip to begin
playback.
User’s Manual 11
Page 12

3. Drag the Ending Mark to the spot where you would like the clip to end.
EFFECTS-TRANSITIONS
The third step in the creation process lets you add cool scene transitions
between each still image or video component on the Storyboard.
Transitions are effects that occur as one movie component changes to
another. You can add/delete transitions in the same way that you
add/delete media components. Click the "Randomize" button to
automatically add a random transition to each spot. You can go back to
Step 2 to modify the display time for your transitions as well.
Using software
TEXT
This step lets you add text over any still image or video component on the
Storyboard. Click on the component you want, then type in your text. You
can modify all the standard parameters, such as font, size, style, alignment,
and color.
You can also add a shadow. To do this, check the Shadow box. Click and
drag within the preview to position the shadow behind the text. Use the
sliders to adjust the shadow blur and intensity.
NARRATE
In addition to being able to add audio files to the Storyboard, you can also
record audio directly within the program. To record audio:
1. Click the Audio Settings button and verify the audio configuration (in
general, higher settings will yield higher audio quality but larger file
sizes).
2. Click the red Record button.
User’s Manual 12
Page 13

3. Set the file name and save location for the recorded file. If you want,
you can have the file automatically added to an album for easy access
in another project.
4. Click the Start button and begin your narration. Press the Stop button to
stop recording.
5. Click the Apply button to add the recorded audio to the Storyboard.
PRODUCE
The final step lets you save your movie in a variety of ways. Consult the
Help file for details and more information. For this guide, we’ll save a movie
as a VCD. When you do this, you can pop the CD into most commercial
DVD players to see your movie on your TV.
1. Click on the CD tab.
2. Select the device/drive to which the movie will be written or "burned."
3. Choose the burn speed.
4. Choose the file type. (Remember, we’re creating a VCD, so choose
"Video CD File.")
Using software
User’s Manual 13
Page 14

5. Click Start when you’re ready.
Getting Started With PhotoImpression
ArcSoft PhotoImpressionTM is the all-in-one solution that blends powerful
photo editing with project te mp la te s and a slick, easy-to-use interface. You
can easily find and enhance your photos, create special effects and
projects, and print and share your photos with friends and family. Digital
photography has never been so easy and fun.
The following is a brief introduction of PhotoImpression. If you need more
information or instructions on how to use a specific feature or tool, click the
[Help] button on the upper corner of the screen.
Using software
1. Connect your camera and your computer with the supplied USB cable.
2. Click Start--> Select Programs--> PhotoImpression
User’s Manual 14
Page 15

3. PhotoImpression main Screen will appear on your desktop.
Viewing Camera Images through PhotoImpression
1. To capture a video from the camera to the PhotoImpression main
screen .
2. Click the [Camera/Scanner ] button.
3. Click the [VGA USB Camera ] button.
Using software
User’s Manual 15
Page 16

PHOTO VIEW OPTIONS
When viewing a single photo, use the set of tools along the top of the
screen to zoom in/out, skip to other photos stored in the same location, and
rotate the current picture le ft or right.
ENHANCING PHOTOS
When you’re ready to edit a photo, bring it up on the screen and then
proceed to the Enhance module. From there, you can perform various
types of modifications.
Specifications
Dimensions (main body of webcam)
Size
Width: 64 millimeters (2.5 inches)
Height: 50 millimeters (2 inches)
Depth: 25 millimeters (1 inches)
Specifications
Weight
52 grams (1.8 ounces)
Connection to the computer
USB 1.1/2.0
User’s Manual 16
Page 17

Hardware Specifications
Main Features
Feature Specifications
Image Sensor Color VGA CMOS
Display 1 Status LED
Color Depth 24 Bit True Color
Video Resolution
Stills Resolution Up to 1280x960
Exposure Auto
White Balance Auto & manual
Power source USB bus powered when connected to PC
PC connection USB 1.1 (Full speed)
Navigation Controls
Specifications
■ 640x480 (VGA) - up to 30fps@VGA
■ 800 x 600 (Interpolated)
Control Specifications
Snapshot button
User’s Manual 17
■ Single frame still image capture
■ Quick launch application software
 Loading...