

Page 1

TOSHIBA
USB Hybrid
TV Tuner
(Analog/DVB-T)
User Guide
Page 2

Introduction
About the Hybrid Dongle ................................................. 1
Minimum System Requirements...................................... 1
Package Contents ........................................................... 1
Installation
Software Installation ........................................................ 2
Hardware Installation ....................................................... 7
Setup
Opening the software....................................................... 9
Settings screen .............................................................. 10
Source .......................................................................... 10
Channels ...................................................................... 11
General.........................................................................12
Advanced...................................................................... 13
Hotkeys......................................................................... 14
Description of Toolbars
Main Display Screen...................................................... 16
Control Panel................................................................. 17
During TV viewing ........................................................17
During recording/playback ............................................18
Remote Control ............................................................19
Using Savvy TV
Basic operation .............................................................. 20
Changing Channel ........................................................ 20
Jump back to previous channel .................................... 20
Adjusting the Volume....................................................20
Page 3

Mute ..............................................................................20
Choosing Audio Stream ................................................21
Subtitles ........................................................................21
Snapshot .......................................................................21
Viewing Modes..............................................................21
Program Information .....................................................22
Picture In Picture (PIP)..................................................22
Picture Beside Picture (PBP) ........................................22
Swapping Main/Child Screens ......................................23
Changing Screen Modes...............................................23
Changing Current Device..............................................23
Channel Preview ...........................................................23
EPG (Electronic Program Guide)................................... 24
Recording ...................................................................... 25
Important Note about Macrovision Protection ...............25
Live Recording ..............................................................25
TimeShift Recording......................................................25
Scheduled Recording....................................................25
Watching a Recorded Program...................................... 27
Te le t ex t .......................................................................... 27
Adjusting the Display Properties.................................... 28
Troubleshooting Guide
Problem Solver .............................................................. 29
Compliance Information
CE.................................................................................. 31
WEEE ............................................................................ 32
Page 4

Introduction
About the Hybrid Dongle
The hybrid dongle is an analog/digital video broadcast receiver that plugs straight into
the USB port of your computer and requires no additional power source, making it
extremely portable. It can scan for and save all available analog/digital TV stations and
play any of these on your computer screen.
Minimum System Requirements
• USB 2.0 port
• DirectX 9c
• Windows 2000/XP/MCE
• Pentium IV 2.8 GHz or equivalent
• 512MB RAM
• DirectX 9c compatible sound card
• DirectX 9c compatible video card
• 32MB HDD space (installation only)
Package Contents
• Hybrid USB dongle
• Software CD
• Quickstart guide
• Antenna
• USB cable
• MCX-IEC cable
• Remote Control
CAUTION: Please note that the antenna has a magnetic base and
should not be placed near any items that can be affected by
magnetic fields, for example, computer or TV screens, floppy disks,
or credit cards.
NOTE: Microsoft, Windows, Windows 2000, Windows XP and Windows MCE are
registered trademarks of Microsoft Corp.
1
Page 5
Installation
Software Installation
Please install all necessary software BEFORE connecting your hybrid dongle.
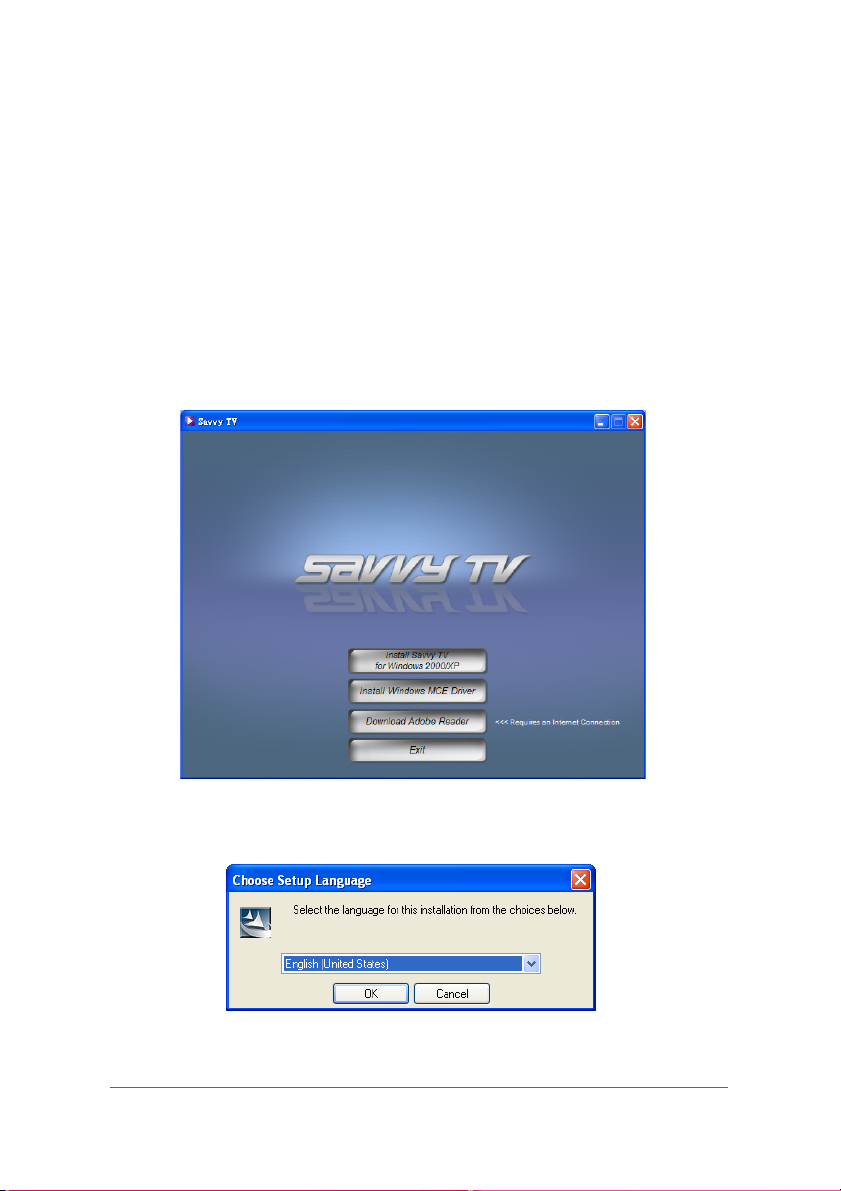
• Insert the provided CD-ROM into the CD drive of your computer.
• The installation screen will appear. However, if it does not, click on Start>Run and
type D:\setup.exe , where D refers to the letter assigned to your CD drive.
• If you have Windows 2000 or Windows XP, then choose Install Savvy TV for
Windows 2000/XP. If you have Windows MCE, then choose Install Windows
MCE Driver and then use MyTV, which is included with MCE, instead of Savvy TV.
You will be asked to choose the setup language, as follows:
Choose a language and then click OK.
2
Page 6
Installation
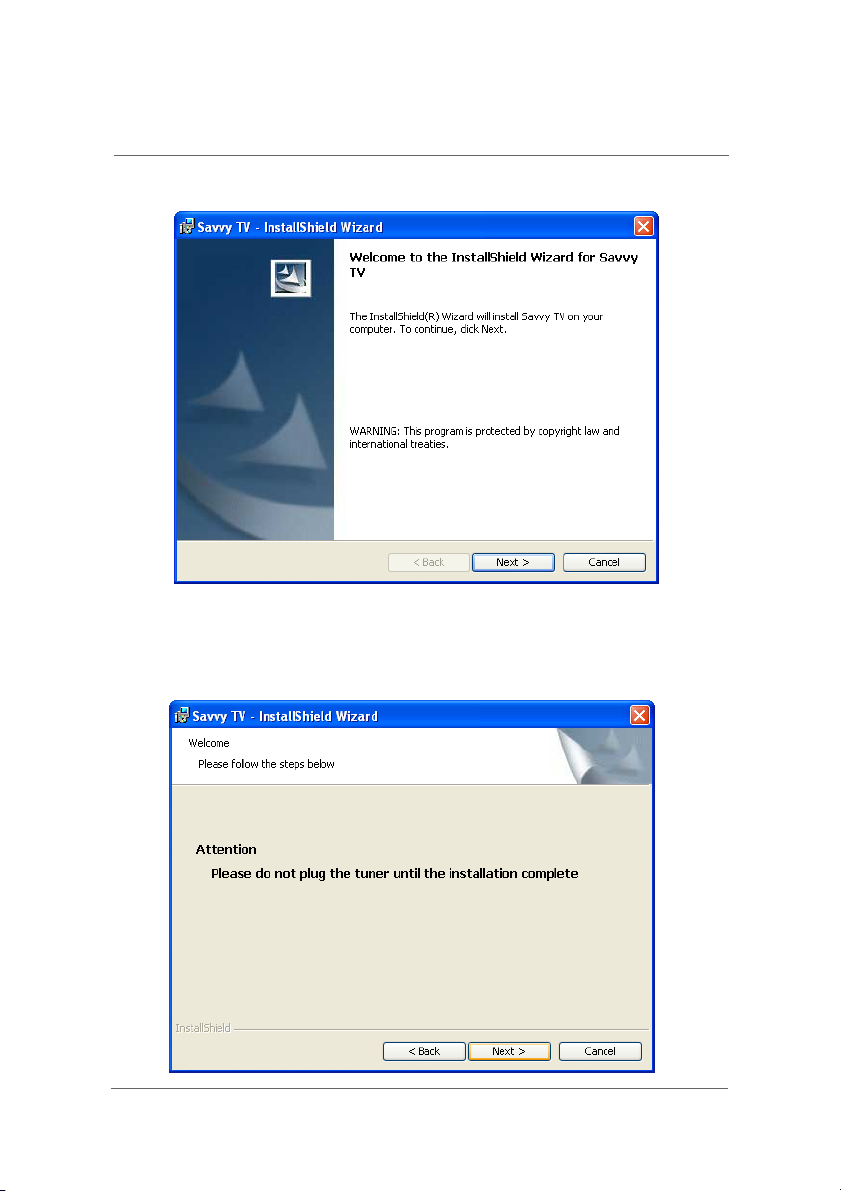
After a few seconds, the following screen will appear.
Click on Next to continue the installation.
A warning will appear asking you NOT to plug the tuner in until installation is complete.
Press Next.
3
Page 7

Installation
You will now be asked to accept the End User License Agreement. Be sure to check
the I accept the terms in the license agreement box, then click on Next.
The following screen will then appear. Press Next.
4
Page 8
Installation
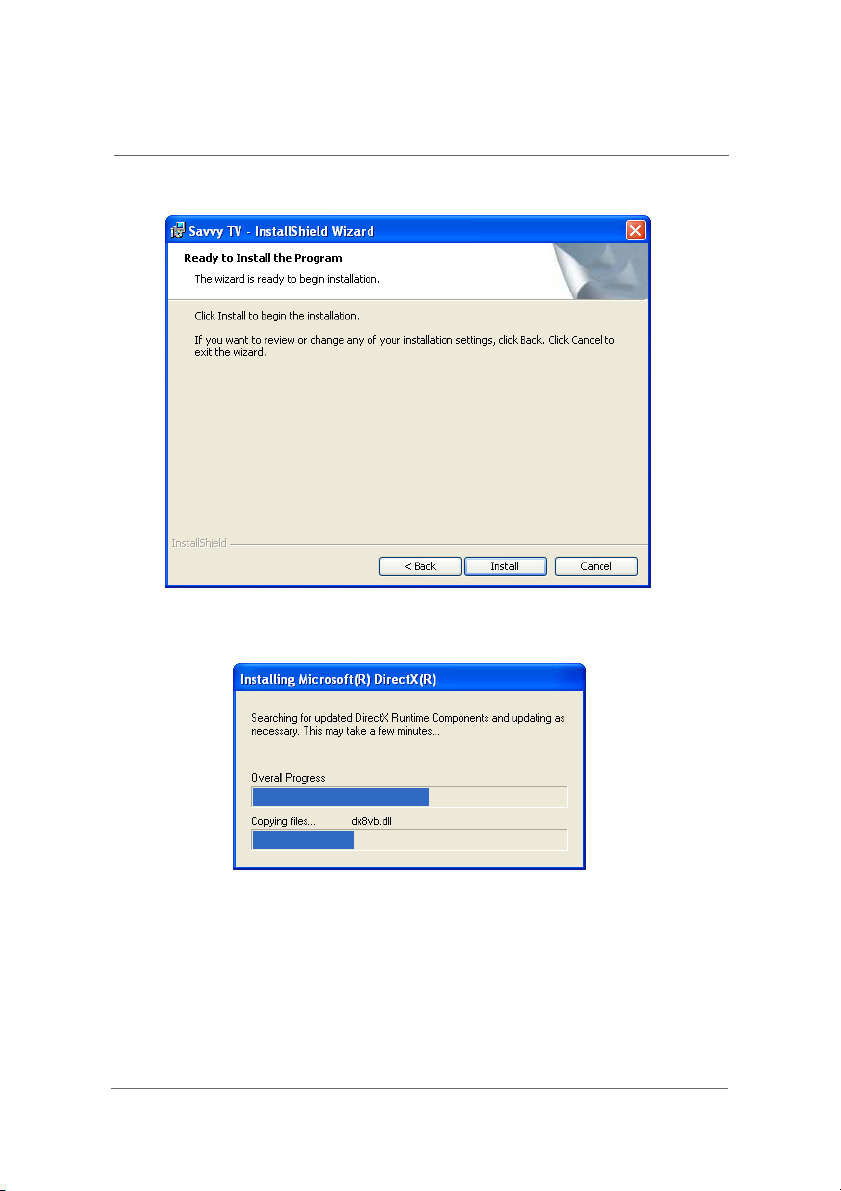
The following screen will then appear. Press Install.
The installation software will search for and update DirectX files as necessary.
5
Page 9
Installation
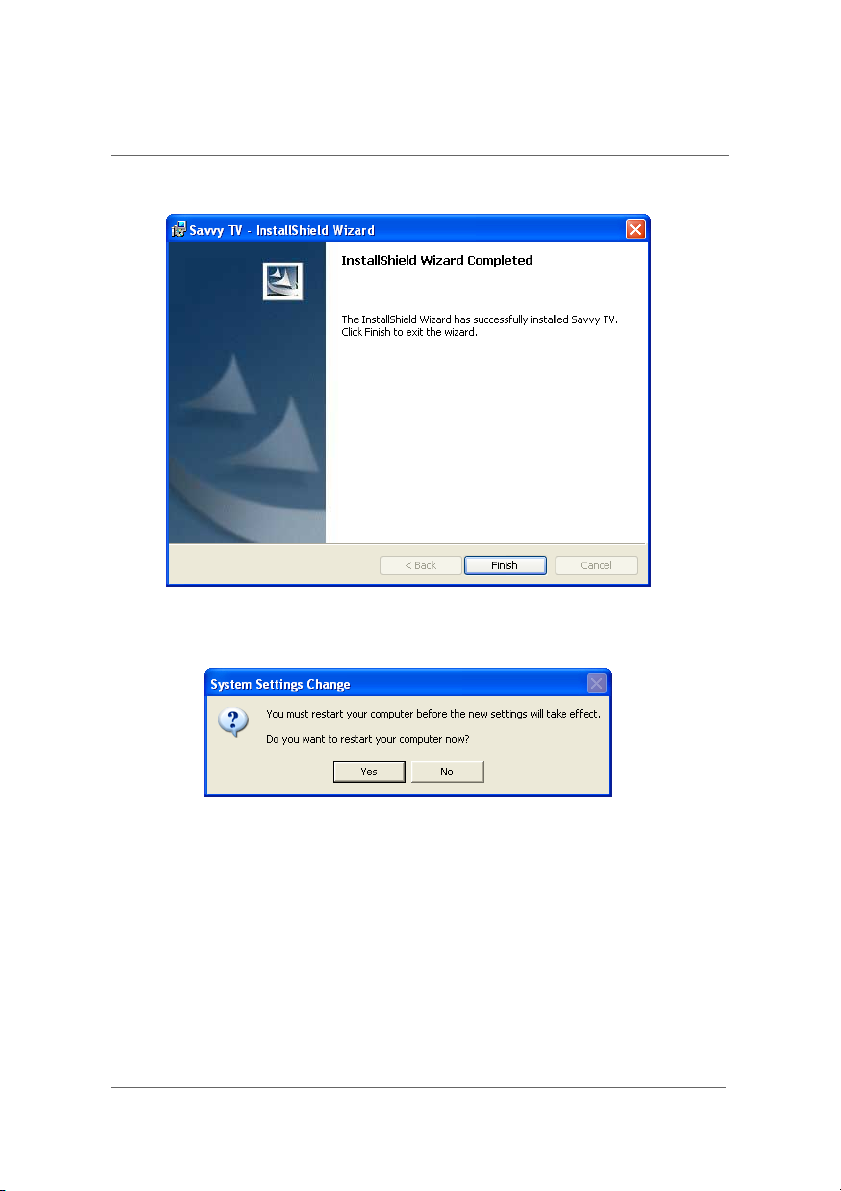
Once installation has finished, you will see the following screen. Press Finish.
You will be asked to restart the computer for the new settings to take effect. Press Yes.
6
Page 10
Installation
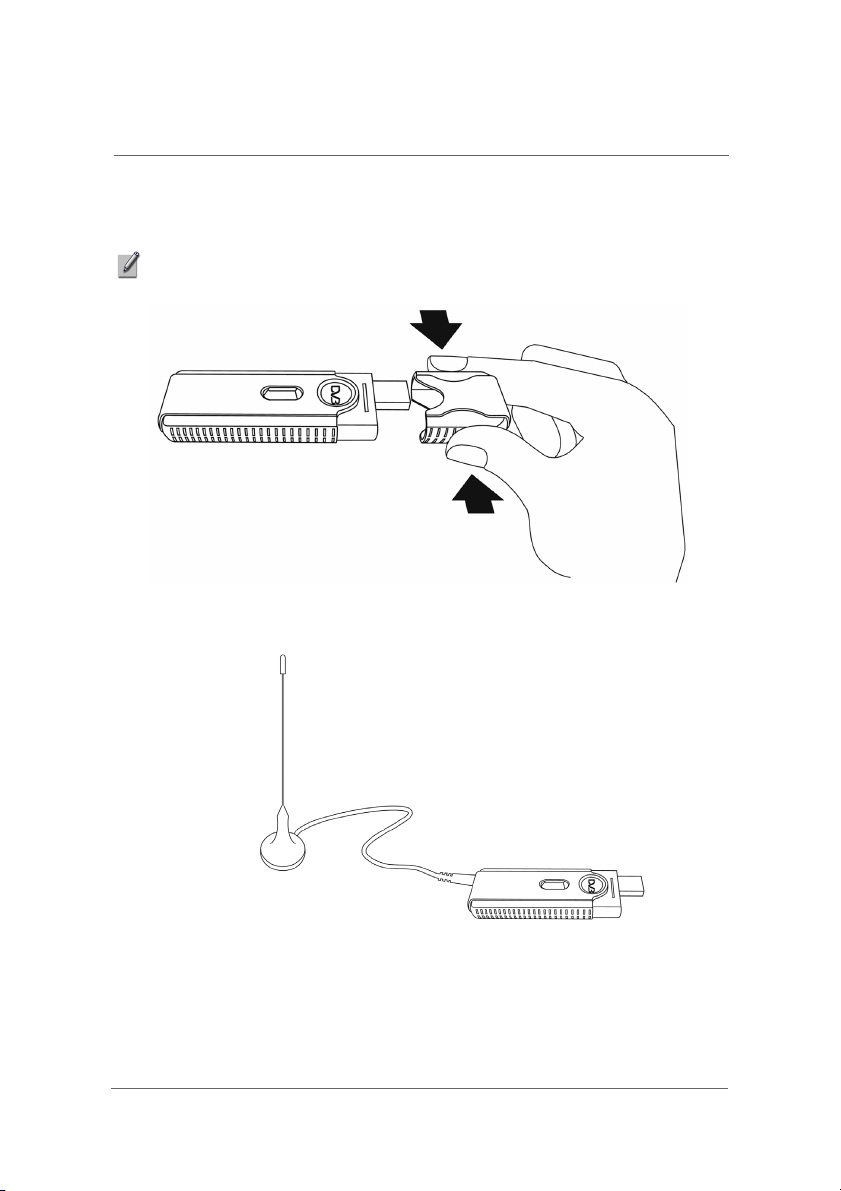
Hardware Installation
Remove the cap from the hybrid dongle.
NOTE: Hold the dongle cap at the sides when removing it, as shown in the following
image.
Plug in the antenna.
7
Page 11
Installation
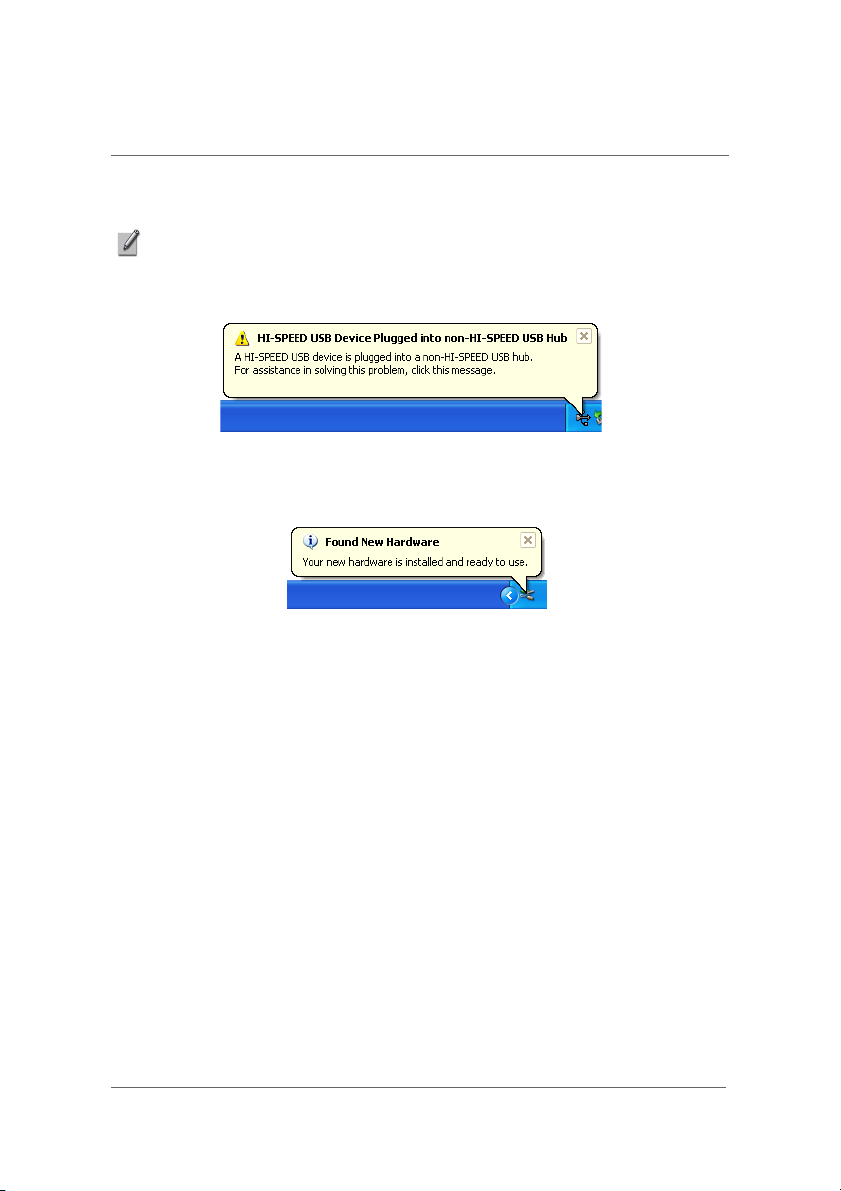
Locate a free USB 2.0 port on your computer and plug in the dongle. Once the
computer recognises the new hardware, the New Hardware wizard will begin.
NOTE: As the hybrid dongle is a Hi-Speed device, you may receive the following
message if it is plugged into an older USB 1.1 port. If this is the case, then you must
change to a USB 2.0 port.
Once all the hardware has been successfully installed, you will see the following
message:
8
Page 12

Setup
Opening the software
Double-click on the Savvy TV icon, which appears on your desktop.
The Savvy TV display panel and control panel will appear, as follows:
settings
The settings screen should also automatically appear the first time you open Savvy TV
(see next page). However, if you wish to access it at any time after that, press the
settings icon.
9
Page 13

Setup
Settings screen
The Settings screen is divided into five sections, which can be accessed on the lefthand side. They are: Source, Channels, General, Advanced and Hotkeys.
Source
On the Source screen, you have the following options:
• Primary Source - Choose which source you want to use, as follows:
0:[Digital]DVB-T BDA Digital Tuner - Digital signal
0:[Cable]Analog Capture - Analog signal through cable
0:[Antenna]Analog Capture - Analog signal through antenna
1:Video File(*.mpg; *.mpeg) - Video file from computer
• Secondary Source - It is not necessary to choose a secondary source. However, doing
so will allow you to use PIP (Picture in picture) or PBP (Picture beside picture). If no
secondary source is chosen, then these options (PIP & PBP) will be greyed out.
• Aspect Ratio - Choose between Normal or Fit to Screen (only available when PBP is
chosen and using full screen mode).
Also, at the bottom of the screen, you can choose from the following:
- Reset defaults
- Cancel
- Accept changes
10
Page 14

Setup
Channels
Device Select - Choose between Digital or Analog (This option is greyed out if only one
•
option is available)
• Region - Choose your country and press the magnifying glass to start auto-
scanning for available channels. (Click on magnifying glass again during search to
cancel)
- List in numeric order
- List in alphabetical order
- Rename selected channel
- Move selected channel up list
- Move selected channel down list
Also, at the bottom of the screen, you can choose from the following:
- Reset defaults
- Cancel
- Accept changes
11
Page 15
Setup
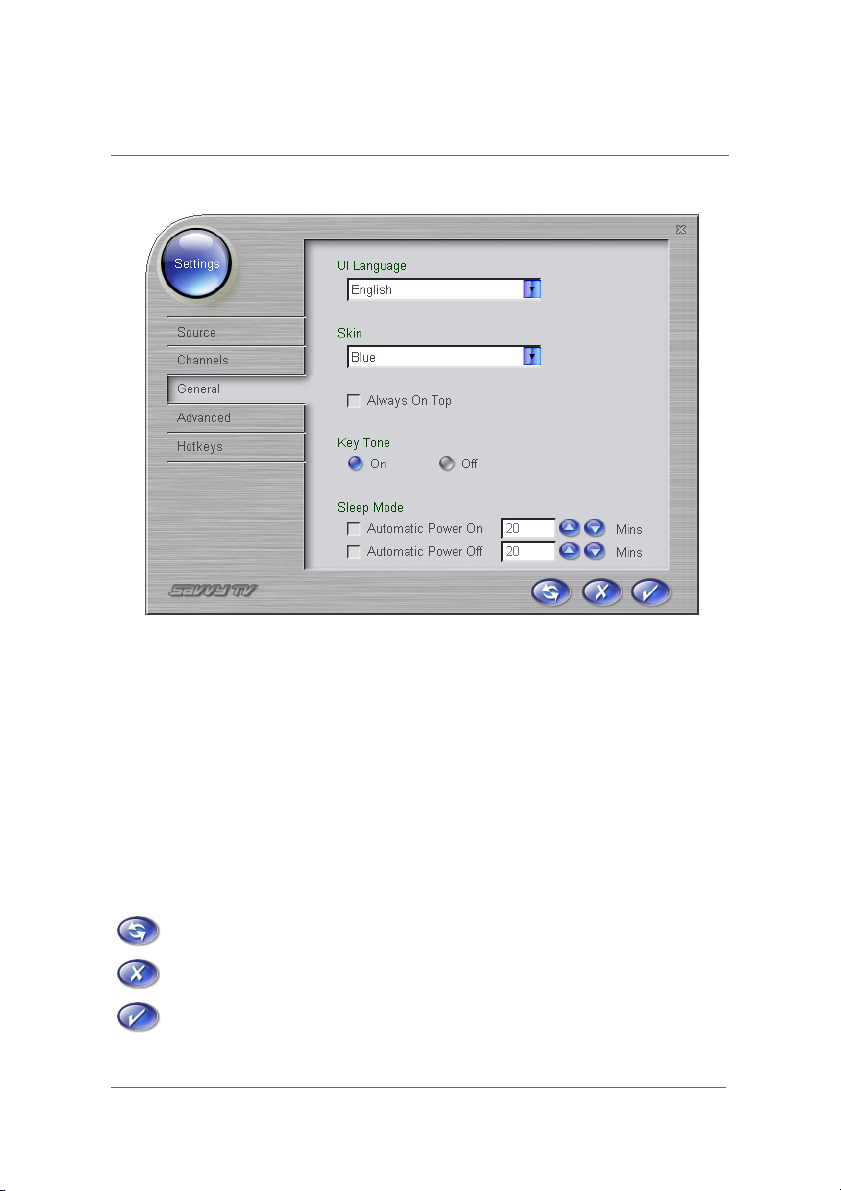
General
UI Language - Choose the UI menu language
•
• Skin - Choose the skin style that you most like
• Always on top - Select this option if you would like Savvy TV to always be on top of
other windows (i.e. It will not be hidden by other windows)
• Key Tone - Choose On to hear a tone every time you press a button, or Off for none.
• Sleep mode
Automatic power on will automatically open the Savvy TV software in the specified number
of minutes.
Automatic power off will automatically close the Savvy TV software in the specified number
of minutes.
Also, at the bottom of the screen, you can choose from the following:
- Reset defaults
- Cancel
- Accept changes
12
Page 16

Setup
Advanced
•
TimeShift Buffer - Choose the maximum TimeShift buffer in minutes (See “TimeShift
Recording” on page 26 for more information about TimeShift recording). A larger buffer
will take up more memory, but will allow you to TimeShift for a longer time.
• TimeShift Drive - Choose which drive you wish to use to temporarily store TimeShift
recordings.
• Video Record Folder - Choose where you would like to save video recordings.
• Snapshot Folder - Choose where you would like to store snapshot photos.
• Snapshot Times - Choose how many snapshot photos are taken each time the
snapshot option is used.
• Image Format - Choose whether to store snapshot photos in BMP or JPG format.
Also, at the bottom of the screen, you can choose from the following:
- Reset defaults
- Cancel
- Accept changes
13
Page 17

Setup
Hotkeys
The Hotkeys screen allows you to customise keyboard shortcuts for various options in
the Savvy TV software. For example, if you want to open the Settings screen, you can
simply press the F5 key (or you can change this to another key). The following
functions have keyboard shortcuts:
• Main/Child (F1) - Swaps images when using PIP (Picture In Picture), or PBP (Picture
Beside Picture)
• Snapshot (F2) - Takes a snapshot
• Teletext (F3) - Displays teletext, if available
• Subtitle (F4) - Displays subtitles, if available
• Settings (F5) - Opens the Settings screen
• EPG (F6) - Opens the Electronic Program Guide, if available.
• Visual (F7) - Displays on-screen program information
• Channel Preview (F8) - Opens the channel preview window
• TimeShift (F9) - Starts TimeShift recording
• Record (F10) - Starts Recording
• Mute (F11) - Mutes sound
• Recall (F12) - Goes to previously viewed channel
14
Page 18

Setup
• Play/Pause (p) - Plays/pauses recorded file
• Stop (s) - Stops recording/recorded file
• Forward wind (f) - Forward winds recording/recorded file
• Rewind (r) - Rewinds recording/recorded file
• Minimise (m) - Minimises Savvy TV to the taskbar
• Exit (x) - Closes Savvy TV
Also, at the bottom of the screen, you can choose from the following:
- Reset defaults
- Cancel
- Accept changes
15
Page 19

Description of Toolbars
Main Display Screen
1
2
1. Minimise display
2. Full screen display
16
Page 20

Description of Toolbars
Control Panel
During TV viewing
34
5
78
6
9
3. Open video file
4. Snapshot
5. Subtitles
6. Te le t ex t
7. EPG (Electronic Program Guide)
8. Settings
9. Volume
10. Signal
11. Channel down
12. Channel up
13. Record
14. Minimise
15. Close
16. Recall
17. Audio select
18. TimeShift
19. Mute/Unmute
20. Volum e up
21. Volume down
14
10
11
12 13
15
171819202122232425262728
16
17
Page 21

22. Channel information
23. Program information
24. Visual
25. Channel preview
26. Main/Child
27. Change screen mode
28. Change device
During recording/playback
29. Stop
30. Play/Pause
31. Rewind
32. Forward wind
Description of Toolbars
29
31
30
32
NOTE: Not all options will be available in all modes.
18
Page 22

Description of Toolbars
Remote Control
33
41
42
34
35
36
37
38
39
40
43
44
45
46
47
33. Power
34. Arrow/OK keys (For use with Teletext)/Volume/Channel keys
35. TimeShift
36. Play/Pause
37. Rewind
38. Forward wind
39. Stop
40. Number keys
41. Te l et ex t
42. Mute/Unmute
43. Change device
44. Record
45. Audio select
46. Change screen mode
47. Recall
19
Page 23

Using Savvy TV
Basic operation
This chapter assumes that you have already read and followed the
instructions given in previous chapters regarding setting up the Savvy TV
software. If you have not already followed these steps, please do so now.
To start watching TV, simply double-click on the Savvy TV icon, which
appears on your desktop. Please be patient, as the software may take a few
seconds to appear.
NOTE: To close the Savvy TV software, click on the X in the top right-hand corner of
the control panel.
Changing Channel
There are two ways to change channel.
1. Moving through the channels one at a time, by using the channel up/
down buttons (You can also use the up/down cursor keys on the
computer keyboard).
2. Jumping straight to a channel, by typing the channel number on the
computer keyboard.
Jump back to previous channel
To jump back to the previously viewed channel, click on the recall button.
Adjusting the Volume
To adjust the volume, click on the left (decrease) or right (increase) volume
buttons (You can also use the left/right cursor keys on the computer
keyboard).
NOTE: The volume indicator bar will show you the current volume level.
Mute
To mute the sound, press the mute button. To cancel the mute, click again.
20
Page 24

Using Savvy TV
Choosing Audio Stream
On certain channels you may be offered more that one audio stream (for
example, a second language may be offered). If this is the case, you can click
on the audio select button to choose which stream you prefer.
NOTE: This service is not available on all channels.
NOTE: On digital TV, this option is called SAP (Secondary Audio Program). On Analog
TV, it is called MTS (Mono, sTereo, Sap).
Subtitles
If subtitles are available, you can choose to display them by clicking on the
subtitles icon.
NOTE: Subtitles may not be available in all areas or for all channels.
Snapshot
To take a snapshot of the image currently on screen, click on the snapshot
icon. To later view the image, browse to the location of the snapshots
(specified in the Settings screen) and double-click on the file. It will be opened
by your default image viewing software.
Viewing Modes
Minimise Display Panel
This option will minimise the display panel. It can be restored from the
Windows taskbar (See note below).
Minimise Control Panel
This option will minimise the control panel. It can be restored from the
Windows taskbar (See note below).
NOTE: Both the display screen and the control panel can be restored from the
Windows taskbar as follows:
- Right-click on the Savvy TV tab in the Windows taskbar.
- Select Restore Display Panel or Restore Control Panel.
21
Page 25

Using Savvy TV
Full Screen Display
This option will display the TV full screen, and remove the control panel. Click
anywhere on the screen or press the space bar to return to normal viewing
mode.
NOTE: During Full Screen mode, the standard control panel will be hidden. However, if
you move the mouse to the bottom-right of the screen, a streamlined control panel will
appear, as follows:
Program Information
To display on-screen information about the program you are currently
watching, click on the program information icon.
Picture In Picture (PIP)
You can display two screens at the same time, one within the other. This way,
you can watch a recording at the same time as live TV. To set up Picture In
Picture, go to the Source settings screen and click the PIP option.
NOTE: The PIP option will only be available if two sources have been chosen in the
Source settings screen.
NOTE: For more information on the Source settings screen, please see “Source” on
page 10.
Picture Beside Picture (PBP)
You can display two screens at the same time, one beside the other. This
way, you can watch a recording at the same time as live TV. To set up Picture
Beside Picture, go to the Source settings screen and click the PIP option.
NOTE: The PBP option will only be available if two sources have been chosen in the
Source settings screen.
NOTE: For more information on the Source settings screen, please see “Source” on
page 10.
22
Page 26

Using Savvy TV
Swapping Main/Child Screens
When using PIP or PBP, you can instantly swap the screens by pressing the
main/child icon.
Changing Screen Modes
To instantly change between PIP, PBP and normal viewing, click on the
change screen mode icon.
Changing Current Device
To change which input device is currently being used, click on the change
device icon. Depending on which options are being used, this could be a
case of choosing between analog or digital, for example.
Channel Preview
To scan through and display a preview of all channels, click on the channel
preview icon. To jump to a channel, double-click on the thumbnail image of
that channel.
23
Page 27

Using Savvy TV
EPG (Electronic Program Guide)
Savvy TV is EPG compatible. This means that you can get instant access to
the list of scheduled programs available to you.
To access this feature, click on the open EPG icon. This will open up the
following screen:
You will find a list of channels down the left-hand side. These can be scrolled
through, using the up and down arrows to the left of the list. Clicking on any of
the channels will change which channel you are currently viewing (highlighted
in blue, with programs also highlighted in blue).
At the top, you will see the date. This can also be changed, by clicking on the
calendar icon (shown below).
To the top of the main section, you will see the time. Again, this can be
scrolled through, using the arrows.
You can schedule a recording by double-clicking on a program. Please see
“Scheduled Recording” on page 25 for more information.
NOTE: The EPG function may not be available in all areas or for all channels.
NOTE: The EPG function is only available when using DVB-T.
24
Page 28

Using Savvy TV
Recording
Important Note about Macrovision Protection
It is not possible to record content with Macrovision protection. When trying to
record programs with this protection, you will receive one of the following
messages, and the recording will be stopped:
• In Savvy TV, that a Macrovision violation has been encountered and that the program
cannot be recorded.
• In MCE (using MyTV), that due to restrictions set by the broadcaster and/or the originator
of the content, recording of the program is prohibited.
Live Recording
1. To record what is currently being shown on the screen, simply press the
record button. Pressing this button will instantly start recording the
current program.
2. To stop recording, press the stop button.
TimeShift Recording
TimeShift recording is very useful when you are watching a program and may
have to leave just for a moment, for example if the phone rings.
1. To activate TimeShift recording, simply press the TimeShift button. This
will start TimeShifting the program currently being shown. The computer
may now be left unattended.
2. When you return to the computer, you can use the forward wind or
rewind buttons to search within the recording. You can also press the
play button to start watching the program, or the pause button to pause
what you are viewing. None of these buttons will affect the recording
process.
3. To stop TimeShift recording, press the stop button. Please see
“Description of Toolbars” on page 17 for more information about the
buttons available on the control panel.
Scheduled Recording
1. Press on the open EPG icon (For more information on using and
navigating EPG, please see “EPG (Electronic Program Guide)” on
page 24).
2. Double-click on the program you wish to record.
25
Page 29
Using Savvy TV
NOTE: If you cannot find the program you wish to record, click on any program. You
can then edit the schedule manually.
NOTE: If EPG is unavailable for any reason, a list of channels will be displayed. Click
on the channel you wish to record. You can then edit the schedule manually.
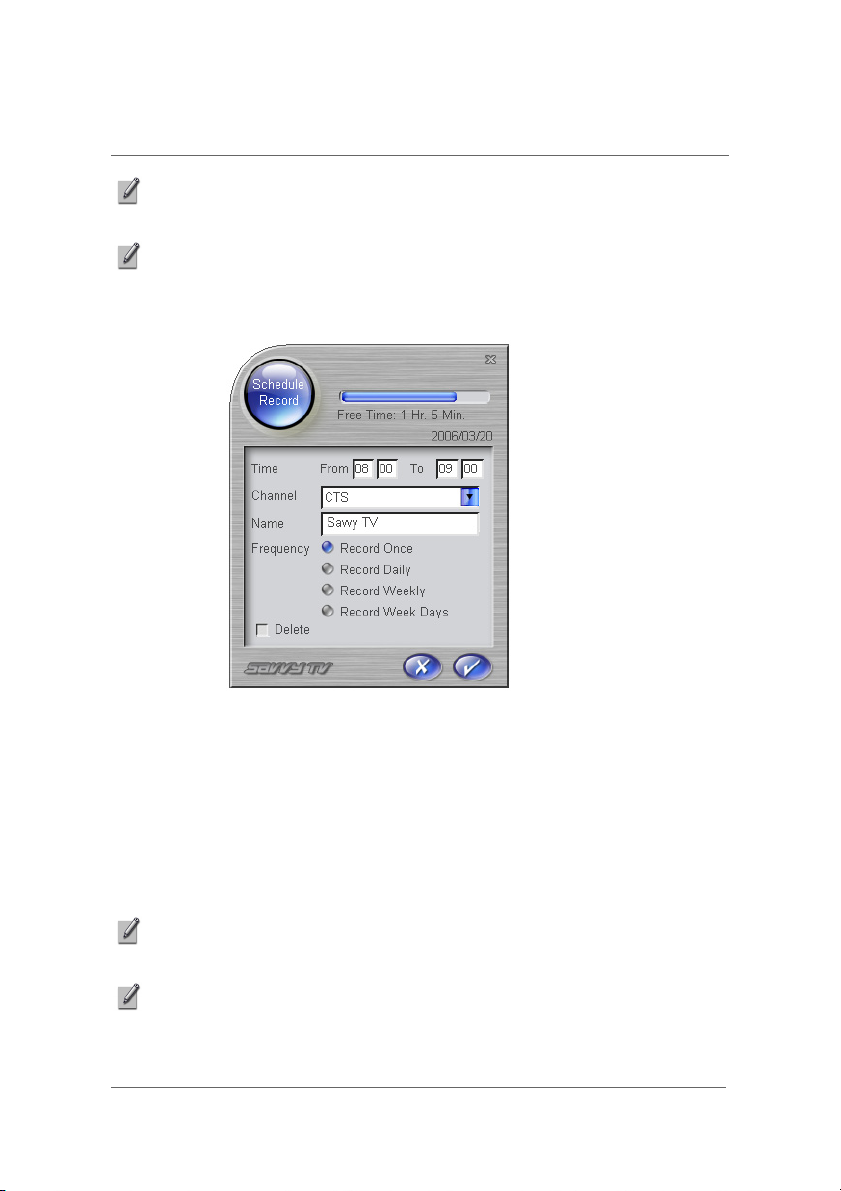
The Schedule Record window will appear as shown below:
The details should already be entered for the program you have selected.
However, you can change any of these settings manually.
• Time - Choose the start and end times for the recording (24 hour clock).
• Channel - Choose the channel from the drop-down list.
• Name - Type a name for the recording.
• Frequency - Choose whether you want to record once only, every day, once a week, or
on week days only (Monday to Friday).
• Delete - Tick this box if you wish to cancel a recording that you have already scheduled.
NOTE: AT the top of the Schedule Record window, you will see a representation of the
disc space assigned to store recordings.
NOTE: The Savvy TV software does not need to be running when it is time to start the
scheduled recording, but your computer needs to be switched on. If you are watching
another channel at the time the scheduled recording is due to start, the software will
automatically change channel.
26
Page 30
Using Savvy TV
NOTE: After setting up a scheduled recording, the EPG screen will indicate if a program
is scheduled to be recorded.
Watching a Recorded Program
Press the open video file icon. This will open up a browser window which will
allow you to search for recorded mpg/mpeg files. Note that this method
allows you to view both scheduled recordings and live recordings, as well as
other mpeg files on your computer.
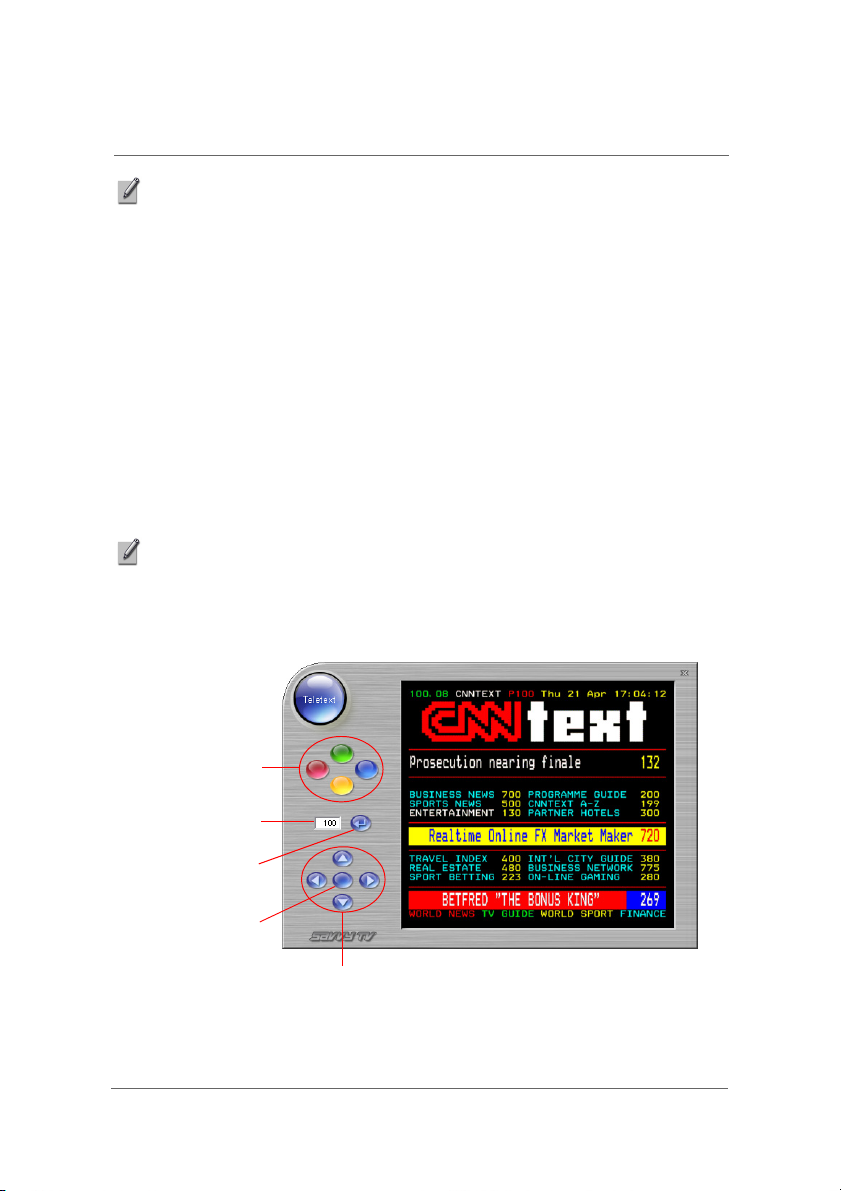
Teletext
The Savvy TV software can also access Teletext. To do so, click on the
Teletext icon.
NOTE: Teletext is not available in all countries, or on all channels. If this option is not
available, the Teletext icon will be greyed out.
The Teletext control panel and the Teletext display screen will appear as
follows :
coloured hotkeys
page number display
go to page button
OK button
arrow keys
There are several ways to navigate in Teletext mode:
27
Page 31

Using Savvy TV
• The left/right arrow keys can be used to move through the teletext pages one at a time. If
subpages are available, then the up/down arrow keys can be used to navigate through
these. In the above picture, for example, the page is 100, and the subpage is 08.
• The page number display field can also be typed into directly. After the page number is
typed, click on the go to page button in order to go to that page.
• The four coloured buttons (red, green, yellow and blue) can be used as hotkeys to go
directly to the coloured links which appear at the bottom of the teletext display screen.
• The OK button enables you to choose any page number displayed within the screen.
Once the OK button has been pressed, it will change colour. You can then use the arrow
keys to navigate within the screen. Once the page you would like to go to is highlighted,
press the OK button again to go to that page.
Adjusting the Display Properties
You can make certain adjustments to the display picture. These are:
• Hue
• Contrast
• Saturation
• Brightness
To access these, click on the Visual icon. You can make adjustments using
the cursor keys on your keyboard as follows:
• Left/right - decrease/increase value
• Up/down - scroll through Hue, Contrast, Saturation, Brightness, Reset and Exit.
• To reset all values to default settings, scroll up/down to Reset and press the Enter key.
• When you are happy with your settings, scroll up/down to Exit and then press the Enter
key.
NOTE: You cannot change these settings by using the mouse. You must use the
keyboard.
28
Page 32

Troubleshooting Guide
Problem Solver
Problem Possible Reason Solution
No picture Currently viewing radio
station
Tuner is not plugged in Plug in tuner, or if
No sound Mute mode is activated Click on the speaker icon
Volume level is set too low Increase volume
Cannot tune
stations
Picture
performance
is poor
Cannot
record
Poor signal Move the antenna for
Wrong country is chosen in
Settings
Not using latest version of
DirectX
Computer hardware does
not meet minimum
requirements
Too many programs are
being used at the same
time
Poor signal Move the antenna for
Laptop computer is using
battery power
Program is Macrovision
protected
No picture will appear on
radio channels
necessary, disconnect
and then reconnect.
beside the volume
indicator to restore the
sound
better reception
Choose the correct
country in Settings
Download latest version of
DirectX
Upgrade hardware to
meet minimum
requirements
Close unnecessary
programs
better reception
Try plugging the laptop
into its power supply
It is not possible to record
Macrovision protected
content
29
Page 33

Troubleshooting Guide
Live TV at
Fullscreen is
jerky
Live TV
stops playing
after
pressing
Ctrl-Alt-Del
in some computer, Live TV
at Fullscreen will be jerky
after resume from StandBy/Hibernation
While pressing Ctrl-Alt-Del,
Savvy TV stops playing the
TV program and switchesoff all source devices.
Close Savvy application
and restart it
Go to Settings -> source > select the sources
again. See “Source” on
page 10 for more
information.
30
Page 34

Compliance Information
CE
Working environment
This product was designed to fulfill the EMC (Electromagnetic Compatibility)
requirements for “residential, commercial and light industry environments”.
Please refer to the operator’s instructions of the product this option is being connected
to for further advices regarding intended working environment. If there are advices
unlisted, please refer to the following general advices.
The following environments are not approved:
• Industrial Environments (e.g. environments where a mains voltage of 380V three-
phase is being used).
In the following environments the use of this product can be restricted:
• Medical Environments: This product is not certified as a medical product according
to the Medical Product Directive 93/42/EEC.
• Vehicle Environments: Please read the operator’s manual of the vehicle manufac-
turer for further restrictions of use.
• Aircraft Environments: Please follow the advices of the flight personnel regarding
restrictions of use.
Any consequences resulting from the use of this product in working environments that
are not approved or the use is restricted are not the responsibility of Toshiba
Corporation. The consequences of the use of this product in those working
environments may be:
• Interference with other devices or machines in the nearby surrounding area
• Malfunction of, or data loss from, this product caused by disturbances generated by
other devices or machines in the nearby surrounding area
Furthermore, for general safety reasons, the use of this product in environments with
explosive atmospheres is not permitted.
CE compliance
This product is labelled with the CE Mark in accordance with the related European
Directives, notably CE Directive 93/68/EEC and Electromagnetic Compatibility
Directive 89/336/EEC.
CE marking under the trade brand TOSHIBA is the responsibility of TOSHIBA
EUROPE GmbH, Hammfelddamm 8, 41460 Neuss, Germany, phone +49-(0)-2131158-01.
For a copy of the related CE Declaration of Conformity please refer to the following
website: http://epps.toshiba-teg.com
31
Page 35

WEEE
Following information is only for EU-member states:
The use of the symbol indicates that this product may not be treated
as household waste. By ensuring this product is disposed of
correctly, you will help prevent potential negative consequences for
the environment and human health, which could otherwise be
caused by inappropriate waste handling of this product. For more
detailed information about recycling of this product, please contact
your local city office, your household waste disposal service or the
shop where you purchased the product.
Compliance Information
32
 Loading...