

Page 1

H
L
M
A
E
C
D
F
4
20
10
K
I
B
G
G
519 213239
01 02 03 G1
04 05 06 G2
1 2 3
5
7 8 9
0
64
07 08 09 G3
10 11 12 G4
13 14 15 G5
16 17 18 G6
N
17 18 21 15 22 14
16 11 126 8 7
13
1
Page 2

Welcome to your fax machine
A Cover
B Control panel
C Document exit
D Exit tray wire
E Recording paper cassette
1 LCD Display
Displays indications about the
operating modes of your fax
machine. Your control monitor for
all function settings.
2 Fault LED
Lights up if a malfunction occurs or
to indicate paper out or toner out.
3 Busy LED
Flashes or lights up when the fax
machine connects to the line or is
just transmitting or receiving.
4 Job Status
Queries the status of the entered
jobs.
5 Menu keys
Use these keys to start the menu or
select a particular menu item.
6 Cancel key
Deletes jobs in the memory or
deletes the last entry during
programming.
7 Group
Use this key for group selection.
8 One Touch Dialing keys
Sends documents at the push of a
button.
F Control panel lock
G Interface for Computer printer cable
H Document guides
I Recording paper exit tray
K T ray wire
9 Copy
Makes a copy of your original.
10 Option
When document hsa been inserted into
machine, press to select special settings
for document transmission.
11 Start
Indicates the sending and receiving
options, confirms entries.
12 Stop
Clears error messages and terminates
input.
13 Redial/pause
Activates the previously dialled number
and inserts a dialling pause.
14 Handset
Used for on-hook dialling.
15 Dial Keypad
Used for entering telephone numbers.
16 ABB. DIAL /ALPHABET
Press this key in order to select a stored
alphabet dial number or a name.
L Document tray wire
MDocument tray
N Telephone connection
17 RCV KEY
Switches between automatic and
manual reception.
18 Resolution Key
Changes the scan resolution of the
loaded originals.
19 Input
Activates selected menu items and
terminates data input.
20 Direct transmit
Press this key to send the
document directly from the
document feeder (avoiding the
stack memory).
21 Contrast
For adjusting the scanning of dark
or light documents.
22 TX report
The settings for printing out the TX
report can be adjusted individually.
23 ON LINE
Lights up to indicate data being
transmitted from the PC.
GB
Welcome to your fax machine
2
TOSHIBA
TF 610
Page 3

Contents
Preparation
Unpacking................................................... 4
Remove transport fittings:...........................5
Insert process unit....................................... 5
To make a good impression:
a new toner cartridge ................................. 6
Insert recording paper................................. 7
Make connections: ..................................... 8
Install recording paper tray ......................... 8
Insert memory card..................................... 9
Safety instructions ...................................... 9
Installation
The menu system ..................................... 10
Set language ............................................ 11
Enter terminal ID....................................... 12
Enter the user name ................................. 13
Setting dialling method............................. 14
Connection to PABX,
obtaining a public line............................... 15
Connection to PABX, further settings ........ 17
Set date and time..................................... 18
Reception of documents
Manual reception...................................... 19
Automatic reception ................................. 19
Set standby mode..................................... 19
T elephone/fax switch ................................ 20
Fax/T AD switch.......................................... 20
Setting the TAD time ................................ 21
Set remote reception (manual reception). 22
Reception reduction ................................. 23
Local copy ................................................ 24
Set call counter ........................................ 25
Memory reception..................................... 25
Cancel reception ...................................... 26
Transmit documents
Document format ..................................... 27
Stack mode .............................................. 28
Direct transmission ................................... 29
Automatic fax messages........................... 30
Transmission with alphabet dialling........... 31
Transmission with one-touch dialling......... 31
Transmission with telephone
(manual transmission)............................... 32
Long Dialling ............................................. 32
Transmission with directory function......... 33
Monitoring ................................................ 34
Set resolution ........................................... 35
Redial ....................................................... 35
Delayed transmission ................................ 36
Single multi-address transmission ............. 37
Stored broadcast ...................................... 38
Polling ....................................................... 39
Reserve polling.......................................... 40
Reduce transmission speed ...................... 41
Stop transmission ..................................... 42
Store numbers
Alphabet dial memory............................... 43
One-touch dial keys................................... 45
Group keys ................................................ 45
Report prints
Activate printing report ............................. 48
Transmission report................................... 48
Transmission and reception journal........... 49
The multitransmission report..................... 50
Number list ............................................... 50
Group list .................................................. 50
Jobs in progress........................................ 50
The function list ........................................ 51
Advanced settings
Functions .................................................. 52
Connection to PABX .................................. 56
Receive footer on/off ................................ 56
Change speaker volume............................ 57
Adjust ringing tone/key beeps ................... 58
Set transmission report output.................. 59
Temporarily activate TX report .................. 60
Remote maintenance (COMLINE) ............. 60
Power saver .............................................. 61
Switch off error correction ....................... 62
Possible problems
Error codes in journal ................................ 63
Error messages in the Display ................... 64
Transmission problems.............................. 65
Receiving problems................................... 66
How to clear a paper jam ......................... 67
How to clear a recording paper jam......... 67
Handling faxes on your PC
System requirements ................................ 68
Features .................................................... 68
Connection to the PC................................ 68
Scanning documents into the PC ............. 69
Sending fax messages from the PC .......... 69
Sending faxes to the PC ........................... 70
Your fax machineused as
a PC Printer
Introduction ............................................... 71
Connection to the PC................................ 71
Install printer driver ................................... 72
Settings of the printer driver ..................... 74
Printout ..................................................... 76
Delete printer driver .................................. 77
UK Connection information
EPA ENERGY STAR ................................... 78
Reset ........................................................ 78
Index
Index ......................................................... 79
TF 610
TOSHIBA
Contents
GB
3
Page 4
Preparation
Unpacking
When unpacking your machine, please check that all parts shown
here are present and in perfect condition.
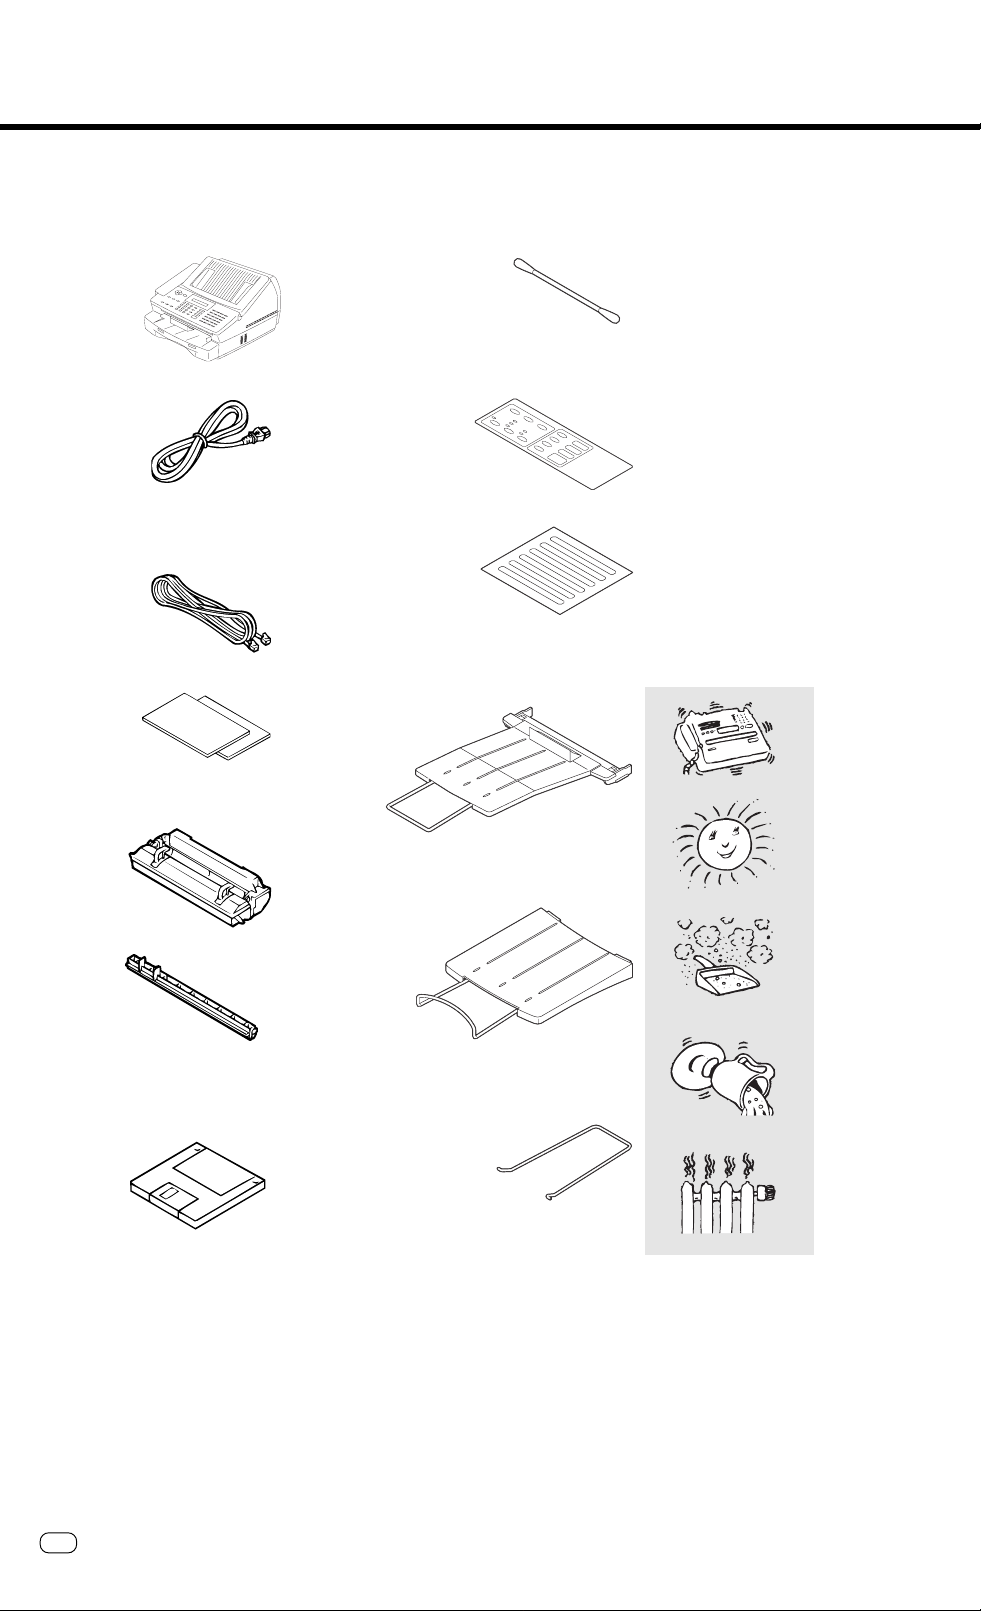
1. Fax machine
2. Power cable
3. Telephon cable
(not supplied in all
countries)
4. Instruction manualfax machine
PC printer manual
8. Cleaner
9. Local language label
10.One-touch dialling index
11.Document exit tray
(with wire)
The correct location
for your fax machine is:
• near a 230 V AC socket*,
• near a telephone connection, ideally
with a single line reserved for your fax
machine.
* No other equipment with high power
consumption (such as a photocopier) or
equipment which generates electrical
noise (such as a radio, computer, radio
transmitting and receiving equipment)
should be connected to this mains
supply.
AC power
You will find the mains connection on the
back of the machine.
Please protect your machine from:
vibration
5. Process unit and toner
cartridge
6. Fixer cleaner
7. Progam disk with
WindowsTM printer
driver
If anything is missing, or damaged,
please connect your dealer immediately.
direct
sunlight
12.Recording paper exit
tray (with wire)
dust
humidity
13.Wire for document tray
heat
GB
4
Preparation
TOSHIBA
TF 610
Page 5
Preparation
Remove transport fittings:
Transport fitting
Transport fittings
Insert process unit:
Before you start to use your fax machine,
please remove all transport fittings as
illustrated.
In order to transport or move
the machine the toner pack and
the process unit has to be
removed.
When installing the machine for the first time
and later when CHANGE PROC. UNIT is
displayed, insert the new process unit as
decribed below.
Transport fittings
Transport fittings
Open the control panel and housing
cover as illustrated.
1. The fixer cleaner
This is inserted when installing your machine
for the first time and each time the process
unit is replaced:
Open the control panel cover to the front. Slide
the cleaner underneath to the right, lift and
remove.
Insert the new cleaner first on the right, then
press down firmly on the left.
2. Prepare the process unit
Place a sheet of paper on an even surface and
lay the process unit on this. Remove the seal.
When holding the protective foil, be sure to
avoid contact with any toner.
TF 610
TOSHIBA
The print volume achieved with the
first filling of the toner cartridge is less
than that achieved with subsequent
fillings.
Preparation
GB
5
Page 6

Preparation
Shake the process unit
several times side to side to ensure even
spread of toner...
... insert the process unit
First slide the green lock lever on the inside left
of the machine to the back. The process unit is
then inserted with its pins into the lateral
guides and placed exactly in position by
applying slight pressure downwards.
Now pull the lock lever forward again.
Then close the top cover and the control panel
cover again.
Now (re)connect your fax machine to the
socket.
A damaged drum will affect the copy
quality. Therefore: Never touch the
drum surface or expose the drum to
sunlight.
To make a good impression: a new toner cartridge
After printing many pages, TONER NEAR
EMPTY and later TONER EMPTY appear
on the display. This means you must
insert a new toner cartridge in your fax
machine:
Open the top cover.
Don’t forget: First remove the mains plug from
the socket.
T o replace toner:
Slide the green lock lever on the left side of the
machine to the back and remove the process
unit.
Place the process unit on a piece of paper on
an even surface. Lightly tap on the toner
cartridge to prevent any toner residue falling
into the process unit. Pull the tape on the the
toner cartridge upwards before you slide it out
of ist holder.
First shake the new cartridge...
GB
6
Preparation
... then place on top of the process unit and
slide it until it locks into place.
TOSHIBA
TF 610
Page 7

Preparation
Now: remove the seal.
When holding the protective foil, be sure to
avoid contact with any toner residue.
Now shake the process unit several times
horizontally before you..
... install the process unit again.
Insert the pins into the lateral guides and then,
by applying slight pressure, lower the unit into
the correct position.
Now pull the lock lever forward again.
Never allow hair or dust to get into the process
unit as this will block the proper supply of toner.
Then close the top cover and the control panel
cover.
You can now connect your fax machine to the
mains again.
From time to time:
clean the housing
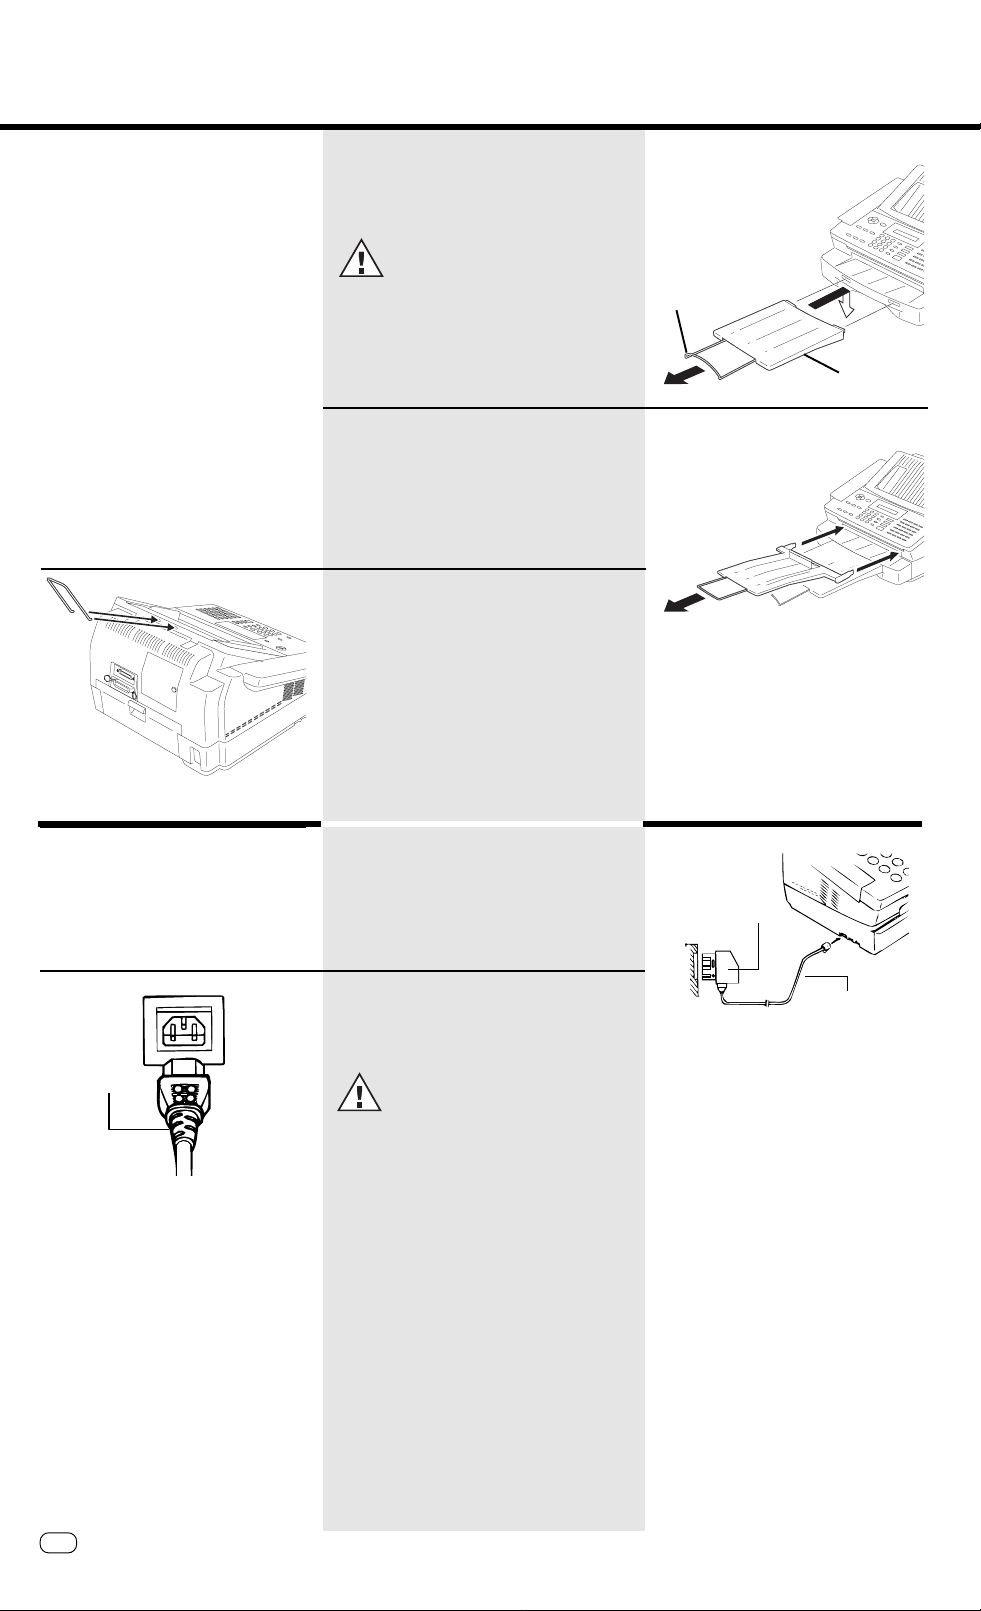
Insert recording paper
Never using abrasive materials to
clean your fax machine - the could
cause damage.
Remove the paper cassette
Press down the cassette plate until it locks into
place.
Insert a stack of A4 paper
Prepare the recording paper by flexing and
fanning out the stack to separate the sheets.
Place the paper so that it lies straight in the
cassette with the side to be printed face-down
and don’t forget:
The paper cassette holds a maximum
250 sheets (80 g/m2).
TF 610
TOSHIBA
Then: Slide the cassette into the slot
until you hear it lock into place.
Do not use damp, wrinkled or torn
paper.
Preparation
GB
7
Page 8
Preparation
Install recording paper tray
Recording Paper Exit T ray:
Insert the Recording Paper Exit Tray Wire into
the holes on the Recording Paper Exit Tray, then
pull down.
The following steps may be performed
more easily with the Recording Paper
Cassette removed from the facsimilie
machine.
Install the Recording Paper Exit Tray underneath
the Recording Paper Cassette.
Document Exit Tray:
Inster the Document Exit Tray into the
Recording Paper Exit opening.
Flip out the folded Tray Wire as shown.
Wire
Recording
Paper Exit
Tray
Make connections:
AC power cord
T elephone connection
Connect your fax machine (LINE) to the
telephone socket.
Connecting the AC power
The power connector is located on the rear
right of the machine.
Connect the machine to the mains
only after you have installed the
process unit and the fixer cleaner.
Phone Plug-in
Line cord
to the wall
socket
GB
8
Preparation
TOSHIBA
TF 610
Page 9
Preparation
Insert memory card
Safety instructions
When your fax machine is
open, always keep the
following in mind:
1. Pull the plug out of the mains socket.
2.2.
2. Remove the cover for the memory module
2.2.
(on the rear of the FAX machine) by
loosening the retaining screw.
3.3.
3. Press the retaining lug into the hole on the
3.3.
motherboard.
4. Position the memory expansion on the
connector of the motherboard and press
carefully until it snaps into place.
5. Close the cover of the memory module and
tighten the retainer screw again.
• Do not touch any parts inside the fax
machine other than those described here.
The fixer cover can be very hot - even after
the machine has been switched off.
• You should install the process unit as quickly
as possible as exposure to strong light can
demage the drum and reduce the life of the
process unit.
• Never throw old toner cartridges into an
open fire and ensure proper disposal of
packing from exchanged parts as organic
waste.
In case you come into contact
with toner:
• Wash hands in cold water and clean
thoroughly with soap.
• Wash eyes with plenty of water.
• If you have inhaled toner, breathe deeply
in the open air.
• If toner gets in your mouth, wash it out
with plenty of water.
• In an emergency, call a doctor.
TF 610
TOSHIBA
Preparation
GB
9
Page 10

Installation
The menu system
You fax machine has a wide range of
settings. The various settings are
presented to the operator via a menu
system in the display.
A special group of keys is used for
activating the menu and also for
navigating within the various menu levels:
The M - key activates the menu and
moves up through the menu
The N - key moves down through the
menu
The P - key selects the corresponding
submenu level.
The O - key selects the higher menu
level.
15-03 19:56 M 100%
2x
REPORTS
ACTIVITY REPORT
MEN U LIS T
ENTER
PRINTING
Standby mode
Page through the menu...
...until you reach this menu item
Select submenu
Page through the menu...
...until you reach this menu item
Confirm with ENTER *)
Menu list is printed out
As soon as a menu item is displayed, use
the ENTER key to select the
corresponding function.
Use the following example to get to know
the menu system: The machine prints out
menu list menu list
the
menu list with the complete menu
menu list menu list
structure of your fax machine.
*) Instead of using the ENTER key, you
can alternatively also use the START
key
The fax machine automatically
switches over to the standby
mode if the pause between
entries is longer than one minute. In this
case, entered data are NOT stored.
GB
10
Installation
TOSHIBA
TF 610
Page 11
Installation
_
Set language
Your fax machine is set to English. Please
carry out the following menu steps if you
wish to use another language for the
menu and the list prints.
15-03 19:56 M 100%
PROGRAM SETUP DATA
2 x
PARAMETER NUMBER =
ENTER
LANGUAGE ENGLISH
Standby mode
Start the menu
Select submenu (2x)
Make your selection
Enter function number
Confirm with ENTER
Set language
LANGUAGE ?????
ENTER
STOP
Page through the menu...
...until you reach this menu item
Confirm with ENTER
Press STOP, return to standby
mode
TF 610 TOSHIBA
Installation
11
GB
Page 12
Installation
Enter terminal ID
The terminal ID which is part of the
transmissing header contains the number
under which your fax machine can be
reached. The number should be entered
in the international format:
Example:
+44 1932 12345678
Fax number
Space
(to improve legibilitly)
Area code (without initial
0)
Country code
Plus symbol (for the
international form)
T o enter the characters:
Character Key to be pressed
+ ❊-key
Hyphen P - key
15-03 19:56 M 100%
PROGRAM SETUP DATA
2x
LOCAL ID NUMBER
ENTER
ID:
Standby mode
Start the menu
Select submenu
Page through the menu...
...until you reach this menu item
Confirm with ENTER
Make your selection
Enter the terminal ID
(see Infotext)
Enter the actual figures via the dial keypad
(as usual).
If you have entered a wrong
number, you can delete this
number by means of the
CANCEL key.
In Germany, the terminal ID entry
is mandatory!
+44 1932 12345678
ENTER
STOP
Terminal ID is complete
Confirm with ENTER
Press STOP, return to standy
mode
GB
12
Installation
TOSHIBA
TF 610
Page 13
Installation
Enter the user name
The transmission header not only contains
the terminal ID but also the user name.
This can contain up to 20 characters.
Each digit features several characters
which can be activated by repeatedly
pressing the corresponding key. If you
have found a character of your choice,
press the „P“ key to got to the next
position. Use the „O“ key to got back
one letter and make any corrections. Use
the „0“ key to select special characters.
If you enter too many characters, press
the CANCEL key to delete the unwanted
characters.
When the name is complete, press the
ENTER-key.
Example: TOSHIBA
15-03 19:56 M 100%
PROGRAM SETUP DATA
LOCAL NAME
ENTER
NAME:
Standby mode
Start the menu
Select submenu
Page through the menu...
...until you reach this menu item
Confirm with ENTER
Make your selection
Enter the name
Example: TOSHIBA
1 x 8 = T # 3 x 4 = I #
3 x 6 = O # 2 x 2 = B #
4 x 7 = S # 1 x 2 = A
2 x 4 = H #
NAME: TOSHIBA
ENTER
STOP
Name is complete
Confirm with ENTER
Press STOP, return to standy
mode
TF 610 TOSHIBA
Installation
13
GB
Page 14
Installation
Setting dialling method
There are two dialling methods. The
pulse-dialling method is normally used in
the public switched telephone network. If
your fax machine is connected to a
PABX*, the DTMF dialling method may
also be used. As the public network is
modernised, this dialling method may also
be used in the public network. If you are
in any doubt, first try the pulse-dialling
method (basic setting).
If the dialling procedure fails, try DTMP
dialling. How ever DTMF is the most
efficient.
✽ ) This function may not be available in
machines in certain countries.
✽
15-03 19:56 M 100%
Standby mode
Start the menu
PROGRAM SETUP DATA
2 x
PARAMETER NUMBER =_
Select submenu (2x)
Make your selection
Enter function number
ENTER
DIAL METHOD TONE
Confirm with ENTER
Set dial method
Example: Tone
DIAL METHOD 10PPS
ENTER
STOP
Page through the menu...
...until you reach the desired menu item
Example: 10PPS
Confirm with ENTER
Press STOP, return to standy
mode
GB
14
Installation
TOSHIBA
TF 610
Page 15

Installation
_
Connection to PABX, obtaining a public line
The TF 610 can be connected not only to
the public switched telephone network
(public line) but also to a PABX. In this
case, additional parameters have to be
entered.
With PABXs, the public line is obtained in
various ways:
• Number Dial one digit (or several
digits) in order to obtain
the public line
•Earth key Earth potential is
connected to the voice
wire(s) in order to obtain
the public line
• Flash key With this method of
obtaining the public line,
the connection circuit is
interrupted briefly.
When the method of obtaining a
public line has been entered, you
must always press the key ”❊”
before the actual number when you dial
your fax partner. This is also applicable for
saving the fax numbers (see page 43).
15-03 19:56 M 100%
PROGRAM SETUP DATA
2 x
PARAMETER NUMBER =
ENTER
ACCESS OFF
Standby mode
Start the menu
Select submenu (2x)
Make your selection
Enter function number
Confirm with ENTER
Set public line
Page through the menu...
Public line Flash: Flash function
Public line Earth key: Earth key function
Public line Digit: Code (see next page)
If you have problems if your
machine is connected to an
extension, please read the
“Comments concerning connection to
PABXs” under “Further settings” (page 56).
............
ENTER
STOP
...until you reach the desired menu item
Confirm with ENTER
Press STOP, return to standy
mode
TF 610 TOSHIBA
Installation
15
GB
Page 16
Installation
_
Only with CODE setting
PROGRAM SETUP DATA
2 x
PARAMETER NUMBER =
ENTER
ACCESS CODE =
Start the menu
Select submenu (2x)
Make your selection
Enter function number
Confirm with ENTER
Make your selection CODE
Enter the code(s)
(Example: 0)
ACCESS CODE = 0
ENTER
STOP
...until you reach the desired menu item
Confirm with ENTER
Press STOP, return to standy
mode
GB
16
Installation
TOSHIBA
TF 610
Page 17

Installation
_
Connection to PABX, further settings
If you wish to connect your fax machine
to a PABX, further settings are necessary.
The following menu procedure sets
default values for connecting a fax
machine to PABXs. If the machine does
not operate perfectly, please refer to page
56 for explanations concerning
connection to PABXs.
PROGRAM SETUP DATA
2 x
PARAMETER NUMBER =
ENTER
LINE = PUBLIC LINE
Start the menu
Select submenu (2x)
Make your selection
Enter function number
Confirm with ENTER
Current setting
The fax machine waits for the
dial tone sent by the exchange
before dialling starts.
LINE = PBX
ENTER
STOP
Page through the menu...
...until you reach the desired menu item
The setting INIT WAIT X SEC
involves a pause of X seconds
before dialling starts. The fax
not not
does
not check the presence of
not not
a dial tone.
Confirm with ENTER
Press STOP, return to standy
mode
TF 610 TOSHIBA
Installation
17
GB
Page 18
Installation
Set date and time
Enter the current date and time at this
point so that all details relating to date
and time is correct. The internal clock of
your fax machine then runs automatically
- even in the event of a power failure.
15-03 19:56 M 100%
PROGRAM SETUP DATA
4 x
DATE & TIME
ENTER
DD-MM- YY HH:MM
Standby mode
Start the menu
Select submenu
Page through the menu...
...until you reach this menu item
Confirm with ENTER
Make your selection date & time
Enter date and time
Example: March 15th, 19.56 hours
15.03. 98 19:56
ENTER
STOP
Confirm with ENTER
Press STOP, return to standy
mode
GB
18
Installation
TOSHIBA
TF 610
Page 19
Reception of documents
Set standby mode
If your fax machine is connected to the
PSTN or the PABX, there are four different
ways of receiving documents.
The standby mode is indicated with the AUTO
LED. Press the AUTO key to change between
two different reception modes (these are
indicated by the AUTO LED):
AUTO lamp on:AUTO lamp on:
AUTO lamp on:
AUTO lamp on:AUTO lamp on:
The following reception modes can be
alternatively set by individual setting of
function 38function 38
function 38 (see page 52 et seq.):
function 38function 38
• Fax reception mode
• Telephone/fax mode
• Fax/T AD mode
AUTO lamp off:
Manual reception
Manual reception
Press the AUTO key.
Automatic reception
Key functions:
••
Function 37Function 37
•
Function 37
••
Function 37Function 37
Number of rings before the fax
machine picks up the call (1-10)
••
Function 38Function 38
•
Function 38
••
Function 38Function 38
Setting of automatic reception
If the line is used primarily for telephone traffic
LED “AUTO” off
If the line is reserved exclusively for fax
operation.
The call must be accepted manually; the
fax machine is not activated when the
line rings. If you wish to transmit a
document, you must press the START key
of the fax machine.
Ensure that any fax calls can
indeed be accepted; it is always
necessary to press the START
key.
The fax machine switches over to
reception as soon as the line rings (see
page 25).
The fax machine is always
activated, even if the call is
initiated by a voice partner.
Press the AUTO key.
TF 610 TOSHIBA
LED “AUTO” is lit
Reception of documents
19
GB
Page 20
Reception of documents
Telephone/fax switch
Key functions:
Function 38Function 38
•
Function 38
Function 38Function 38
Setting of telephone/fax switch
Function 37Function 37
•
Function 37
Function 37Function 37
Number of rings until the fax machine
picks up the call (1-10)
Function 36Function 36
•
Function 36
Function 36Function 36
Number of rings (synthetic ringing tone)
from the loudspeaker (1-10)
Press the AUTO key.
If the line is used for telephone and also for
operation and if you are usually present in the
same room.
LED “AUTO” is lit
Incoming calls are automatically
distinguished between fax- and voice
calls:
If the call is a voice call the fax rings via
the loudspeaker to notify the user. At this
time the caller will hear a Ring which
indicates that the partner is beeing
called.
In this case take up the handset und
press STOP on the fax machine.
If the call is from another fax machine
the document will be receiverd
automatically without ringing.
Ensure that there is always
someone present in this mode
to accept the call. As soon as
ringing tone is generated, the connection
is established and the caller incurs
charges.
Fax/TAD switch
Key functions:
Function 38Function 38
•
Function 38
Function 38Function 38
Set the fax/TAD switch
Function 44Function 44
•
Function 44
Function 44Function 44
Specify the time in which the fax
machine identifies a partner fax (TAD
timer / 1-99 sec.)
Press the AUTO key
If the line is operated with a TAD or radio
telephone and if you wish to collect the call
from other rooms.
LED “AUTO” is lit
This mode enables you to receive
incoming fax messages and also to
answer telephone calls. There are two
situations:
You are present:
Switch off the call answering equipment
and collect the call at any point. If the
caller is a fax machine, your fax machine
will take over the call and print out the
fax message.
You are absent:
Switch on the call answering equipment.
The call answering equipment records all
telephone calls. Your fax machine
automatically receives any incoming fax
messages.
You must always ensure that
the TAD is connected in this
reception mode. Otherwise, fax
messages cannot be received when the
line is called.
GB
Reception of documents
20
TOSHIBA
TF 610
Page 21
Reception of documents
_
Setting the TAD time
If you wish to use your fax machine in the
fax/TAD mode, you also have to set the
TAD time.
This is the “listening-time” during which
the fax machine responds to a partner
fax.
TAD time = length of recorded message
+ 10 seconds.
15-03 19:56 M 100%
PROGRAM S ETUP DAT A
2 x
PARAMETER NUMBE R =
ENTER
FAX/TAD TIMER = 35
Standby mode
Start the menu
Select submenu (2x)
Make your selection
Enter function number
Confirm with ENTER
Set TAD time
Enter the new time
ENTER
STOP
Confirm with ENTER
Press STOP, return to standy
mode
TF 610 TOSHIBA
Reception of documents
21
GB
Page 22

Reception of documents
_
_
Set remote reception (manual reception)
If you have connected a (cordless)
telephone to your fax line (as described on
page 19), you may occasionally collect a
call (in the manual reception mode) which
was meant for your fax machine. This can
for instance be heard in the form of
periodic whistle. Enter a two-digit code in
your telephone (only DTMF) to activate
your fax machine (virtually by remote
control).
This function can be activated or
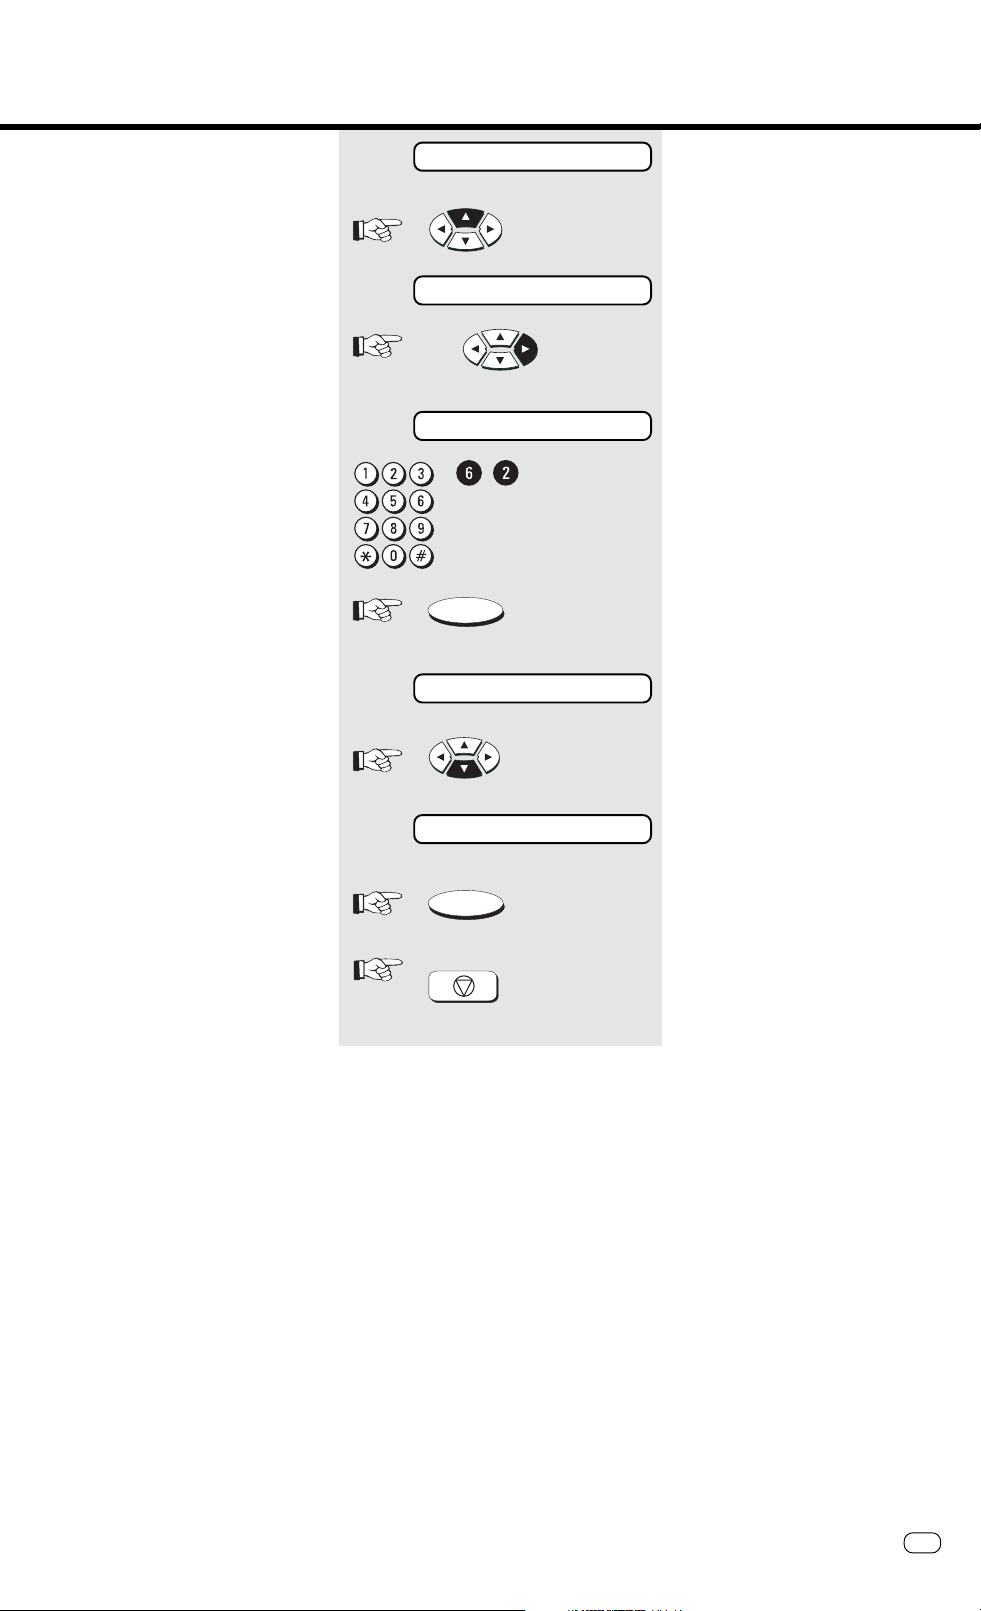
deactivated:
15-03 19:56 M 100%
PROGRAM SETUP DATA
2 x
PARAMETER NUMBER =
ENTER
RMT ACTIVATION OFF
Standby mode
Start the menu
Select submenu (2x)
Make your selection
Enter function number
Confirm with ENTER
Set remote reception
RMT ACTIVATION ON
ENTER
PARAMETER NUMBER =
ENTER
ACTIVATION CODE =**
Page through the menu...
...until you reach the desired menu item
Confirm with ENTER
Make your selection
Enter function number
Confirm with ENTER
Preset key code
Enter the 2-digit key code
(Delete the preset code with the CANCEL
key)
GB
Reception of documents
22
ENTER
STOP
Confirm with ENTER
Press STOP, return to standy
mode
TOSHIBA
TF 610
Page 23
Reception of documents
_
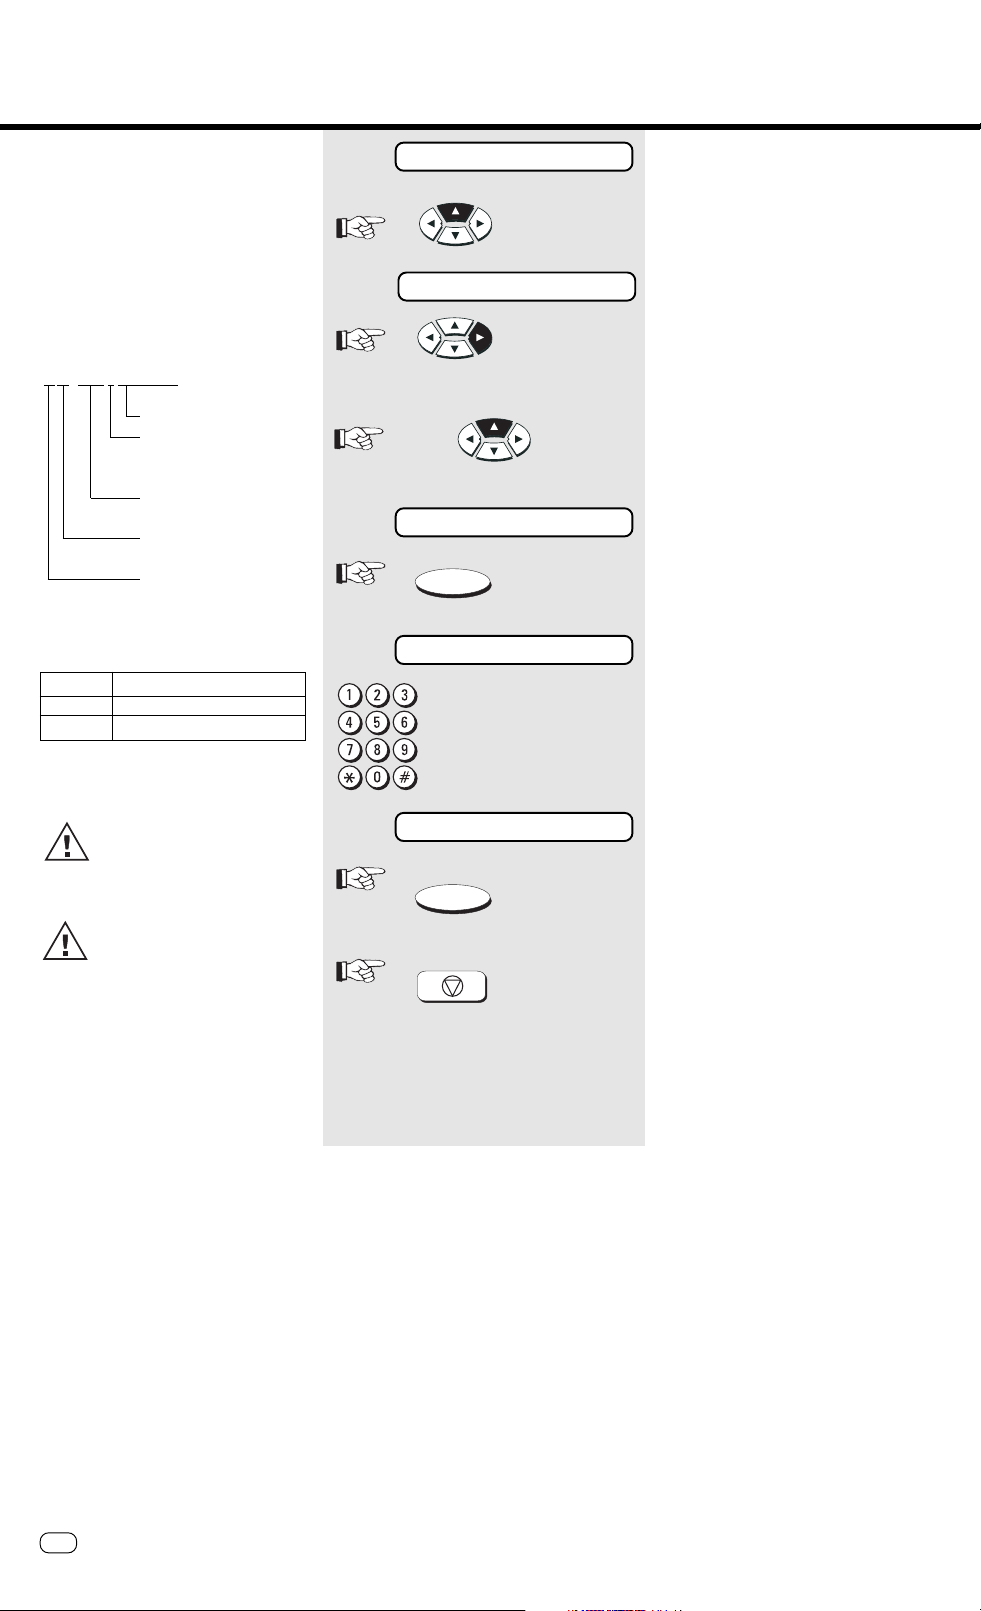
Reception reduction
Your fax machine uses A4 paper. For
technical reasons the entire length of this
page cannot be used. So the fax machine
reduces the length of the incoming
document. This means that the received
image may be slightly compressed.
In general, this effect is not
problematical. However, if the sizes of the
documents must be absolutely identical, it
is necessary to deactivate the reception
reduction facility. In this case, that part
of the copy which no longer fits on the
page is printed out on a second page.
Original (A4)
Reception reduction: ON
15-03 19:56 M 100%
2 x
PARAMETER NUMBER =
ENTER
RX REDUCTION AUTO
Standby mode
Start the menu
Select submenu (2x)
Make your selection
Enter function number
Confirm with ENTER
Current setting
Change setting
RX REDUCTION OFF
ENTER
STOP
Confirm with ENTER
Press STOP, return to standy
mode
TF 610 TOSHIBA
Reception of documents
23
GB
Page 24
Reception of documents
Local copy
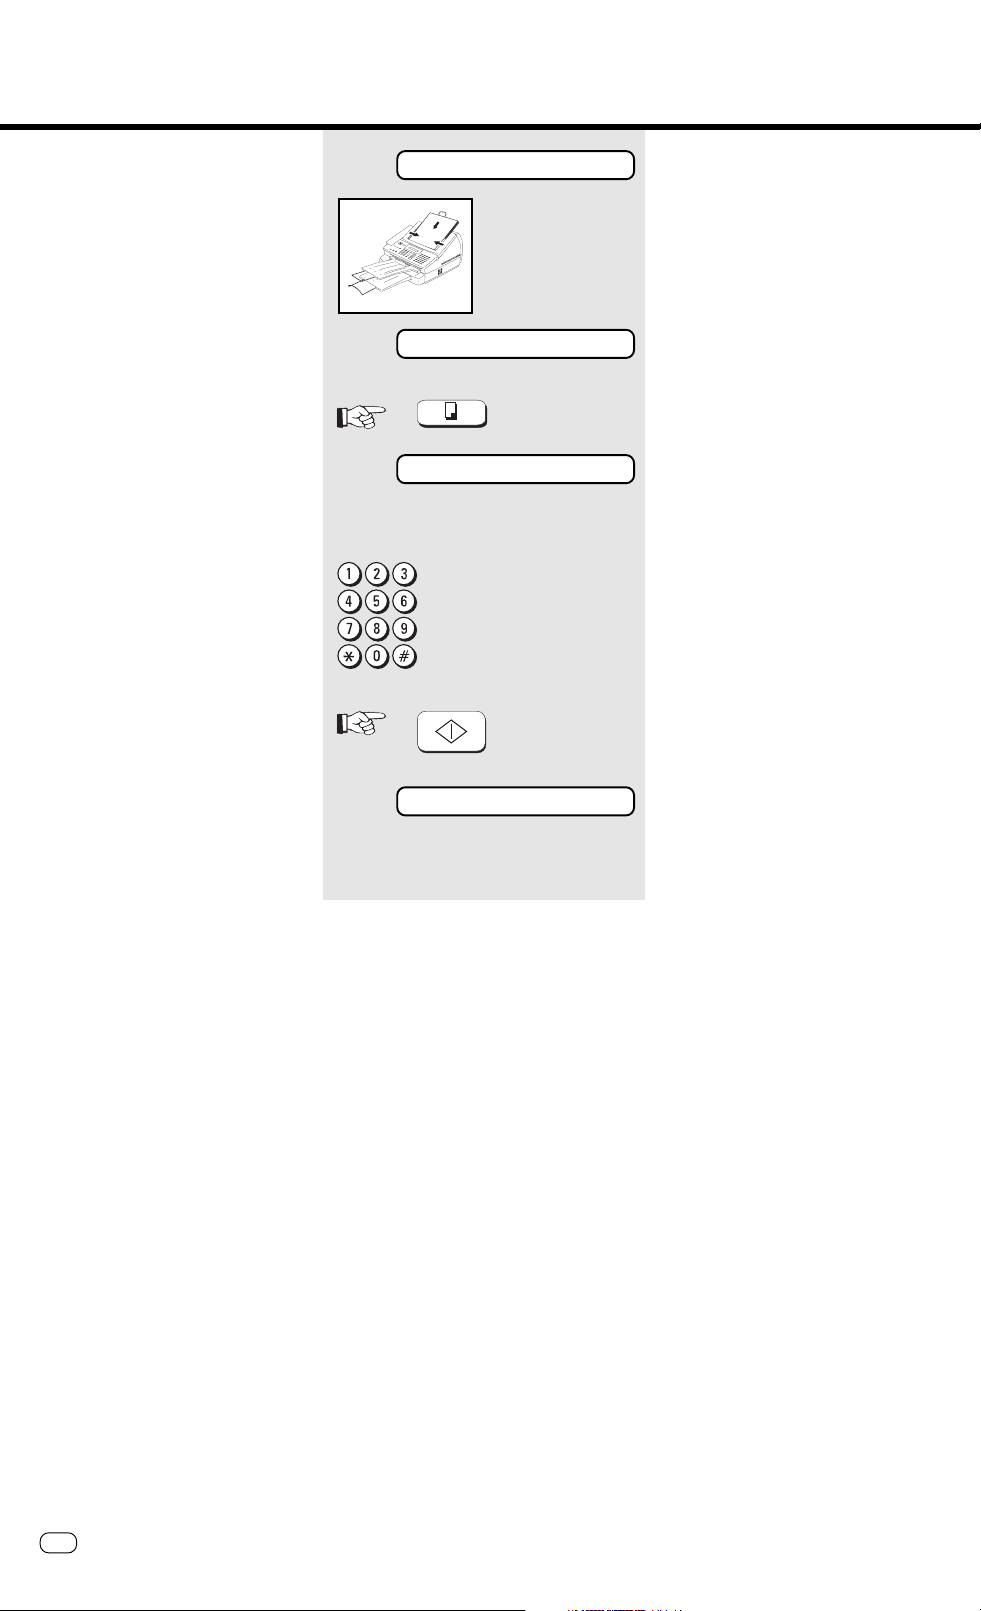
You can use your fax machine to make
one or more copies (up to 99).
15-03 19:56 M 100%
DOCUMENT SET
COPY
NUMBER OF COPY =
START
Standby mode
Load original
Remember:
Printed side face down
Document ready
PRESS COPY KEY
Make your selection
(if only one copy is to be made, please
now press the START key)
Enter number of copies
Confirm with START
*) The copy is reduced to 96% due to
technical considerations.
COPY
Copies are printed *)
The FINE resolution is used for the copy. If
you wish to copy a photograph or a
colour document, please select the
PHOTO resolution (see page 35).
GB
Reception of documents
24
TOSHIBA
TF 610
Page 25

Reception of documents
_
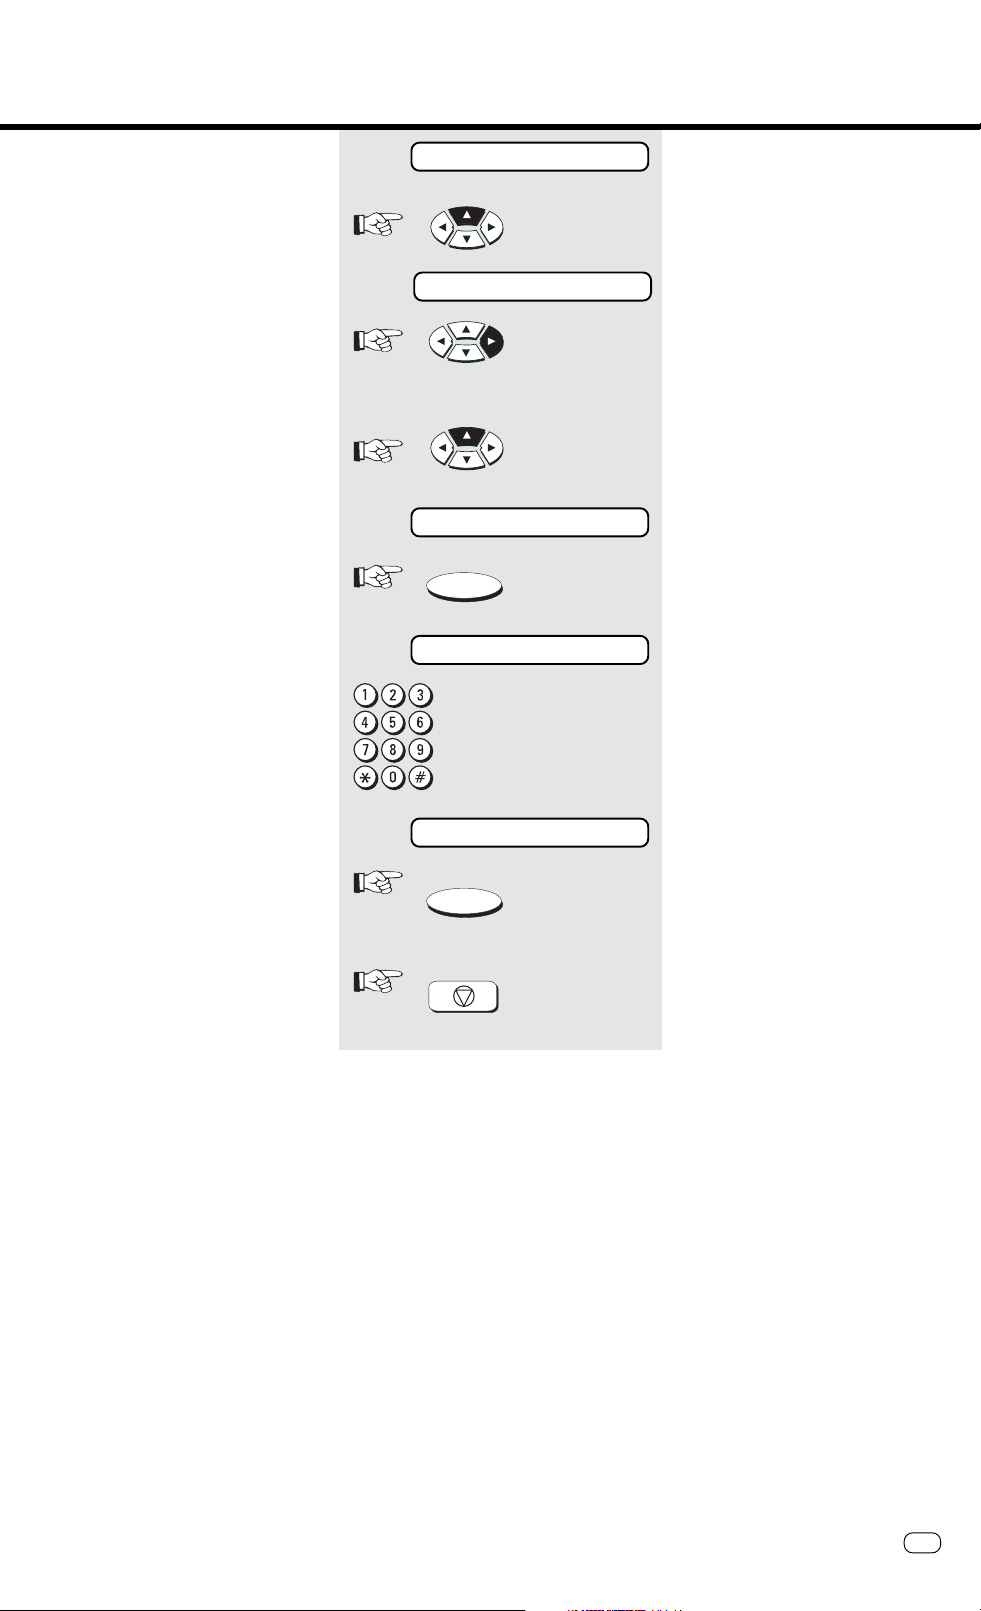
Set call counter
If your fax machine is set to automatic
reception (FAX, TEL/FAX, see page 20), it
will switch on as soon as it is called.
Under these circumstances, it is thus not
possible for the call to be intercepted by
the telephone.
However, it is possible for your fax
machine to be set in such a way that - in
the event of a telephone call - it is
activated after a specific delay. The call
counter is used for this purpose. You can
use this facility to set the number of
incoming calls (max. 10) before the fax
machine connects to the line.
15-03 19:56 M 100%
PROGRAM SETUP DATA
2 x
PARAMETER NUMBER =
ENTER
AUTO DELAY 01
/
Standby mode
Start the menu
Select submenu(2x)
Make your selection
Enter function number
Confirm with ENTER
Set number of rings
Page through the menu...
Memory reception
Under certain circumstances, the
machine cannot print out any further
incoming copies:
• If there is no recording paper
• If there is a paper jam
In order to prevent problems with
reception, the remaining pages are
buffered in the memory of your fax
machine. Once the problem has been
solved, the document is printed out
automatically.
Do not switch off the power
supply as otherwise the contents
of the memory will be lost.
AUTO DELAY XX
ENTER
STOP
ADD PAPER M 86%
ERROR flashes
...until you reach the desired value
Confirm with ENTER
Press STOP, return to standy
mode
No paper, memory full
Paper out
Incoming copy is printed out
TF 610 TOSHIBA
Reception of documents
25
GB
Page 26

Reception of documents
Cancel reception
It is not immediately evident whether your
fax machine is transmitting or receiving a
document, as the BUSY lamp does not
provide specific information in this
respect. Press the CANCEL key to display
the job currently being processed by the
fax machine.
15-03 19:56 M 66%
CANCEL
RECEIVING JOB
ENTER
CANCEL OK ?
ENTER
CANCELED
Standby mode
The fax machine is in the transmission or
reception mode
BUSY flashes
Press CANCEL
Display message indicates current
reception
Confirm with ENTER
Are you sure?
Confirm with ENTER
Current reception is cancelled
GB
Reception of documents
26
TOSHIBA
TF 610
Page 27

Transmit documents
Document format
The following table gives you an idea of
which documents your fax machine can
handle.
Please note:
• Documents longer than 381 mm can
only be loaded manually.
• If you load severeal sheets at one
time, they should all be of the same
size and paper quality.
Single sheet 2 or more sheets
Document size (max) 216 mm (W) x 1000 mm (L) 216 mm (W) x 381 mm (L)
Document size (min) 148 mm (W) x 105 mm (L)
Effective scanning width 210 mm
How many sheets stacks up to
can be loaded at 20 sheet A4
one time?
Thickness of paper 0,05 ~ 0,15 mm 0,06 ~ 0,1 mm
Quality of paper Uncoated on both sides
Problem documents ...
May not feed. This applies to
• torn, wrinkled or damp pages
• folded pages or pages with holes
• transparent pages or pages with a smooth,
shiny finish
• textile or metallic douments
There are two ways of avoiding this problem:
...by photocopying or using a carrier
sheet.
Your TOSHIBA dealer can supply you
with the necessary carrier sheets.
Use of carrier sheets:
Place your document face-up on the carrier
sheet under the transparent cover. Carrier
sheets can be used like normal documents
except for one restriction: only one carrier
sheet can be fed at one time.
How to load documents correctly
Remove any paper-clips, staples and similar
objects before transmitting the document. Now
place your documents on the document tray up to 20 at one time - as shown.
All documents must be located with the
printed side face down!
TF 610 TOSHIBA
Transmit documents
27
GB
Page 28

Transmit documents
Stack mode
A frequently encountered problem with
fax machines is that the document tray is
blocked while a document is being
transmitted; no other documents can be
transmitted while the fax machine is
transmitting or receiving documents. This
is different with your fax machine: All
documents are read into the memory and
are then transmitted from this memory.
Incoming documents are also read into
the memory before they are printed out.
The advantage of this method is that the
document tray is virtually always free and
that documents can be transmitted
almost irrespective of the transmission or
receiving status of the fax machine.
Each procedure is known as a job. A job
may consist of one or more documents
which you can transmit to your partners.
A job can also be a multi-address
transmission or a delayed transmission.
Your fax machine is able to manage 15
such jobs. Each of these jobs is placed on
a stack, from where they are processed in
sequence. Your fax machine accepts jobs
even while it is transmitting or receiving
documents; this means that the
document tray is always ready. With every
procedure, the fax machine assigns a
reference number to the job; this number
is available via the job list (see Page 50).
This number can also be used for deleting
a specific job.
INPUT
MAX. 15 JOBS
JOB NBR. 11
JOB NBR. 10
JOB NBR. 9
JOB NBR. 8
JOB NBR. 7
JOB NBR. 6
JOB NBR. 5
JOB NBR. 4
JOB NBR. 3
JOB NBR. 2
JOB NBR. 1
LINE
AUSGABE
TRANSMISSION
GB
Transmit documents
28
TOSHIBA
TF 610
Page 29

Transmit documents
Direct transmission
In the normal transmission mode your fax
machine reads all documents into the
memory before they are transmitted. If
the documents are too large for the
memory or if you have too many
documents, you can also send directly
from the document tray without reading
the documents into the memory.
If you find that the memory is
frequently too small, ask your
dealer for a memory expansion!
15-03 19:56 M 100%
DOCUMENT SET
DIRECT SEND
DIRECT SEND READY
TEL: 123456789
Load original
Remember:
Printed side face down
Document ready
Press DIRECT SEND
Enter fax number
or enter alphabet dialling or one-touch
dialling
Confirm with START
START
Document is transmitted
TF 610 TOSHIBA
Transmit documents
29
GB
Page 30

Transmit documents
Automatic fax messages
To send fax messages in the traditional
manner: Insert document(s), enter the fax
number and the connection is
automatically established.
Your benefit: Your documents will leave
the fax immediately. (Refer to page 28)
If you decide to use the listening-in
version (see page 34) , you can also
acoustically monitor the call
establishment process. This is useful
whenever you have problems with
establishing a connection. The reason is
frequently a wrong number, or a fax
machine which is not ready to receive.
With the listening-in alternative,
the document is not read into
the memory; it is retained on the
tray until the receiving fax
machine has been contacted.
Residual memory depends on
the size of the stack!
15-03 19:56 M 100%
DOCUMENT SET
TEL: 123456789
START
Load original
Remember:
Printed side face down
Document ready
If you have inadvertently taken the wrong
document, press the STOP key before
removing the document from the
document feed.
Enter fax number
The entered fax number is displayed. Use
the CANCEL keys to make any
corrections, or press the STOP key to
delete the complete number. Press the
STOP key again if you wish the machine
to eject the document(s) without being
processed.
Confirm with START
DOC.READING M98%
JOB ACCEPTED NO.007
15-03 19:56 M 98%
LINE flashes
15-03 19:56 M 100%
While the document is being read:
current memory capacity is displayed.
When the document is read into the
machine, the job number is briefly
displayed.
Dialling the fax partner
The flashing LINE lamp always
indicates when your fax
machine is transmitting or
receiving a document.
After transmission:
Change to standby display: the job is
deleted from the stack memory (can be
identified by means of the changed
memory display).
GB
Transmit documents
30
TOSHIBA
TF 610
Page 31

Transmit documents
Transmission with alphabet dialling
Alphabet dialling enables you to enter a
double-digit “address” instead of the
(frequently-long) fax number of your
partner. The real fax number is
permanently stored under this “address”.
The alphabet dialling facility enables you
to save time with frequently used fax
numbers.
Please refer to page 43 for
details of how to save alphabet
dialling numbers.
15-03 19:56 M 100%
DOCUMENT SET
ABB/AL PHA
ABB :
TOSHIBA
Load original
Remember:
Printed side face down
Document ready
Activate the alphabet dial facility
Make your selection: alphabet dial
number
Enter the alphabet dial number
The name is displayed
The connection is established (for
procedure, see page 30, Automatic fax
transmission).
Transmission with onetouch dialling
One-touch dialling provides you with a very
easy method of dialling the number of
your partner. Your can assign any fax
numbers to 18 keys. You need to press a
key only once in order to reach your
partner.
Please refer to page 45 for
details of how to store one-touch
dialling numbers.
15-03 19:56 M 100%
DOCUMENT SET
TOSHIBA
Load original
Remember:
Printed side face down
Document ready
Press a one-touch dial key
The name is displayed
The connection is established (for
procedure, see page 30 , Automatic fax
transmission).
TF 610 TOSHIBA
Transmit documents
31
GB
Page 32

Transmit documents
Transmission with telephone (manual transmission)
The call in this case is established with a
telephone which is additionally connected
to the wall socket. You can thus speak to
the other party before you send the fax
message.
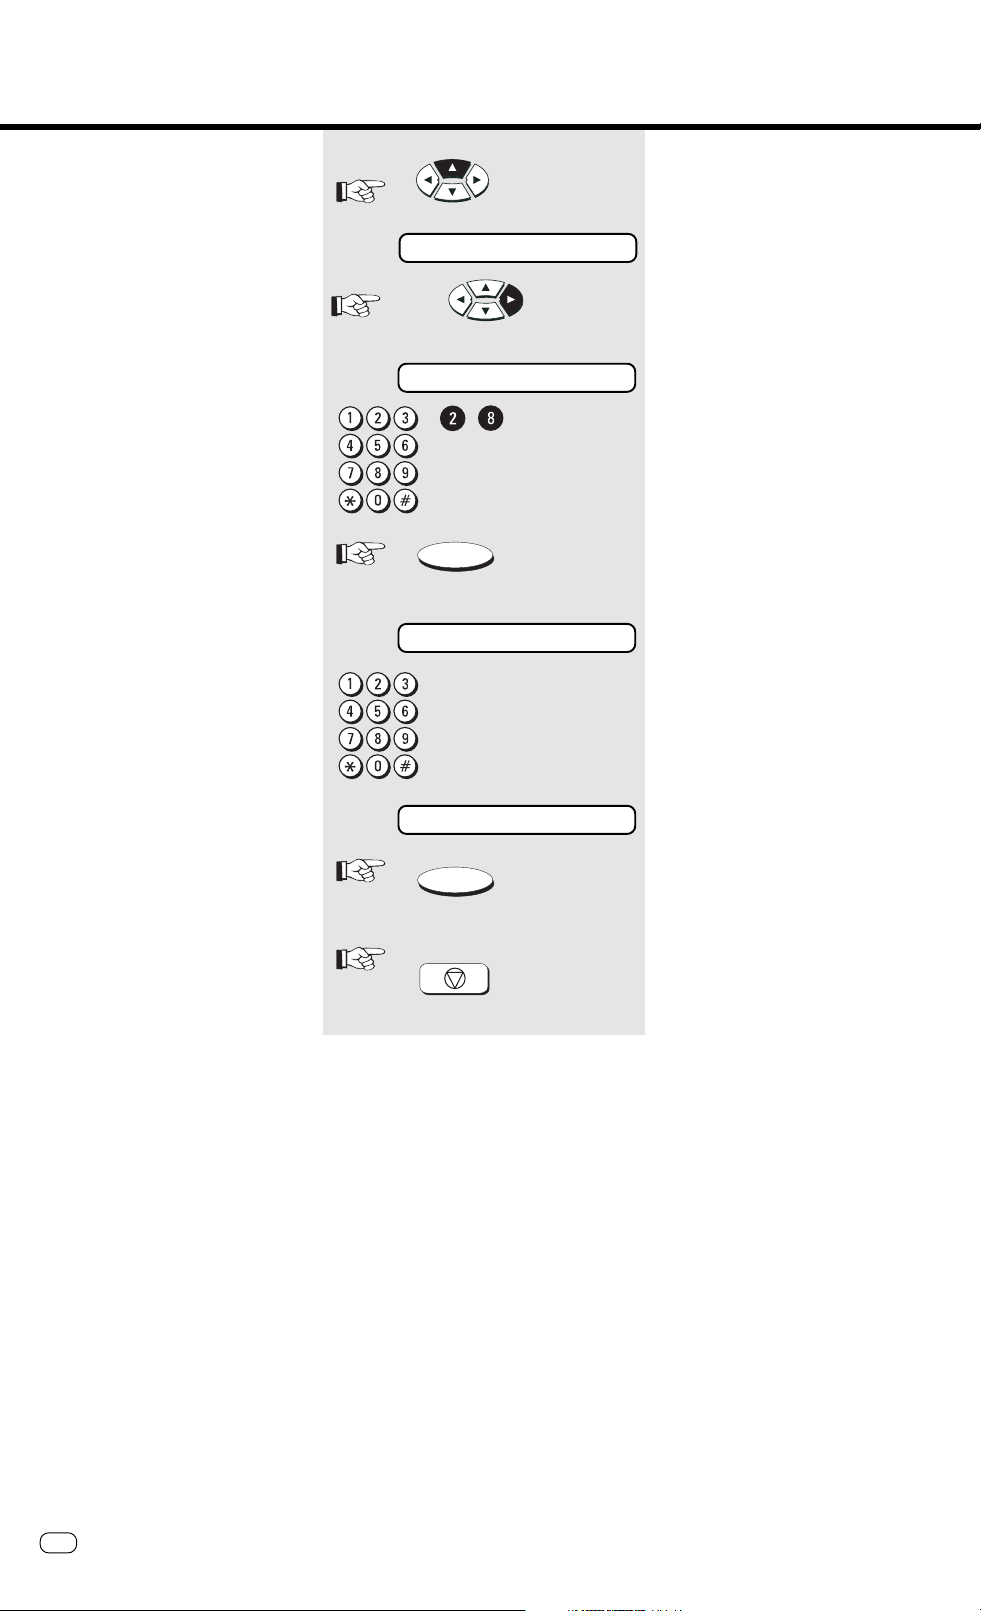
Long dialling
With the long dialling facility, a fax
number which is stored under a speed
dialling key is combined with an additional
fax number. The additional fax number
can be a further speed dialling number, an
alphabet dialling number or a user-defined
number.
For instance, access numbers to private
telephone companies can be easily
combined with other stored fax numbers
at the push of a button.
Criteria for long dialling:
• The first fax number is stored on a
speed dialling key (see page 31)
• The first fax number is terminated with
PAUSE (see page 2)
• Further numbers may be speed dialling
numbers, alphabet dialling numbers or
user-defined numbers
The long dialling facility is also
compatible with the listening-in
function (see page 34). In this
way, you can listen to any
messages, etc. between the
numbers.
15-03 19:56 M 100%
DOCUMENT SET
START
15-03 19:56 M 100%
DOCUMENT SET
TOSHIBA
START
Load original
Remember:
Printed side face down
Document ready
Dialling with telephone
If you have agreed the transmission with
your fax partner, or if you hear the fax
tone at the other end:
Confirm with START
Transmission commences
(You can replace the handset, as the fax
machine has now assumed control).
Load original
Remember:
Printed side face down
Document ready
Press the one-touch dialling
key *)
The name which is stored under the onetouch dialling key is briefly displayed, or
the stored fax number is displayed.
Enter additional number
• Speed dialling key
• Alphabet dialling number
• User-defined number
Press the START key
*) Example of a long dialling number:
✽ 01234- (the number is terminated
with PAUSE)
GB
Transmit documents
32
TOSHIBA
TF 610
Page 33

Transmit documents
Transmission with directory function
This type of dialling is similar to searching
in a telephone directory. Enter the initial
letter of your partner to search for the
corresponding fax number in the alphabet
dialling memory. This type of dialling is
particularly useful if you know the name of
a specific partner
15-03 19:56 M 100%
DOCUMENT SET
ABB/AL PHA
2 x
SELECT NAME
Load original
Remember:
Printed side face down
Document ready
Activate directory function
You can now enter the initial letter of
your fax partner.
(see letter input, page 13) *).
(Example: ,B“)
Key „2“
ALBR ECHT
BAUER
BLUME
START
The first name of the corresponding letter
(here "A") is displayed.
Key „2“
Presse the key "2" to display the next
letter (here "B") which is stored under this
key.
Use the keys ▲ and ▼ to select the
desired fax partner with identical starting
letters.
Confirm with START
The connection is established (for
procedure, see page 30, Automatic fax
transmission).
TF 610 TOSHIBA
*)
NO ENTRY
*) This display appears if no name is
stored under the selected letter.
Transmit documents
33
GB
Page 34

Transmit documents
Monitoring
In case of transmission problems, this
function is very helpfull. Check dialling by
this method allows you to detect wrong
numbers and busy parties also.
With the listening-in alternative,
the document is
the memory; it is retained on the
tray until the receiving fax machine has
been contacted.
not not
not read into
not not
15-03 19:56 M 100%
DOCUMENT SET
MON ITOR
TEL:
TEL: 12345
Load original
Remember:
Printed side face down
Document ready
Activates monitoring
Make your selection
Your entry
(or alphabet dial number, or one-touch
dial number)
Dialling starts
Piiiiep
START
If another fax machine can be heard
(beep)
Confirm with START
The connection is established
(for procedure, see page 30,
Automatic fax transmission).
If no connection is established,
press the STOP key to
disconnect the fax machine
from the line.
GB
Transmit documents
34
TOSHIBA
TF 610
Page 35

Transmit documents
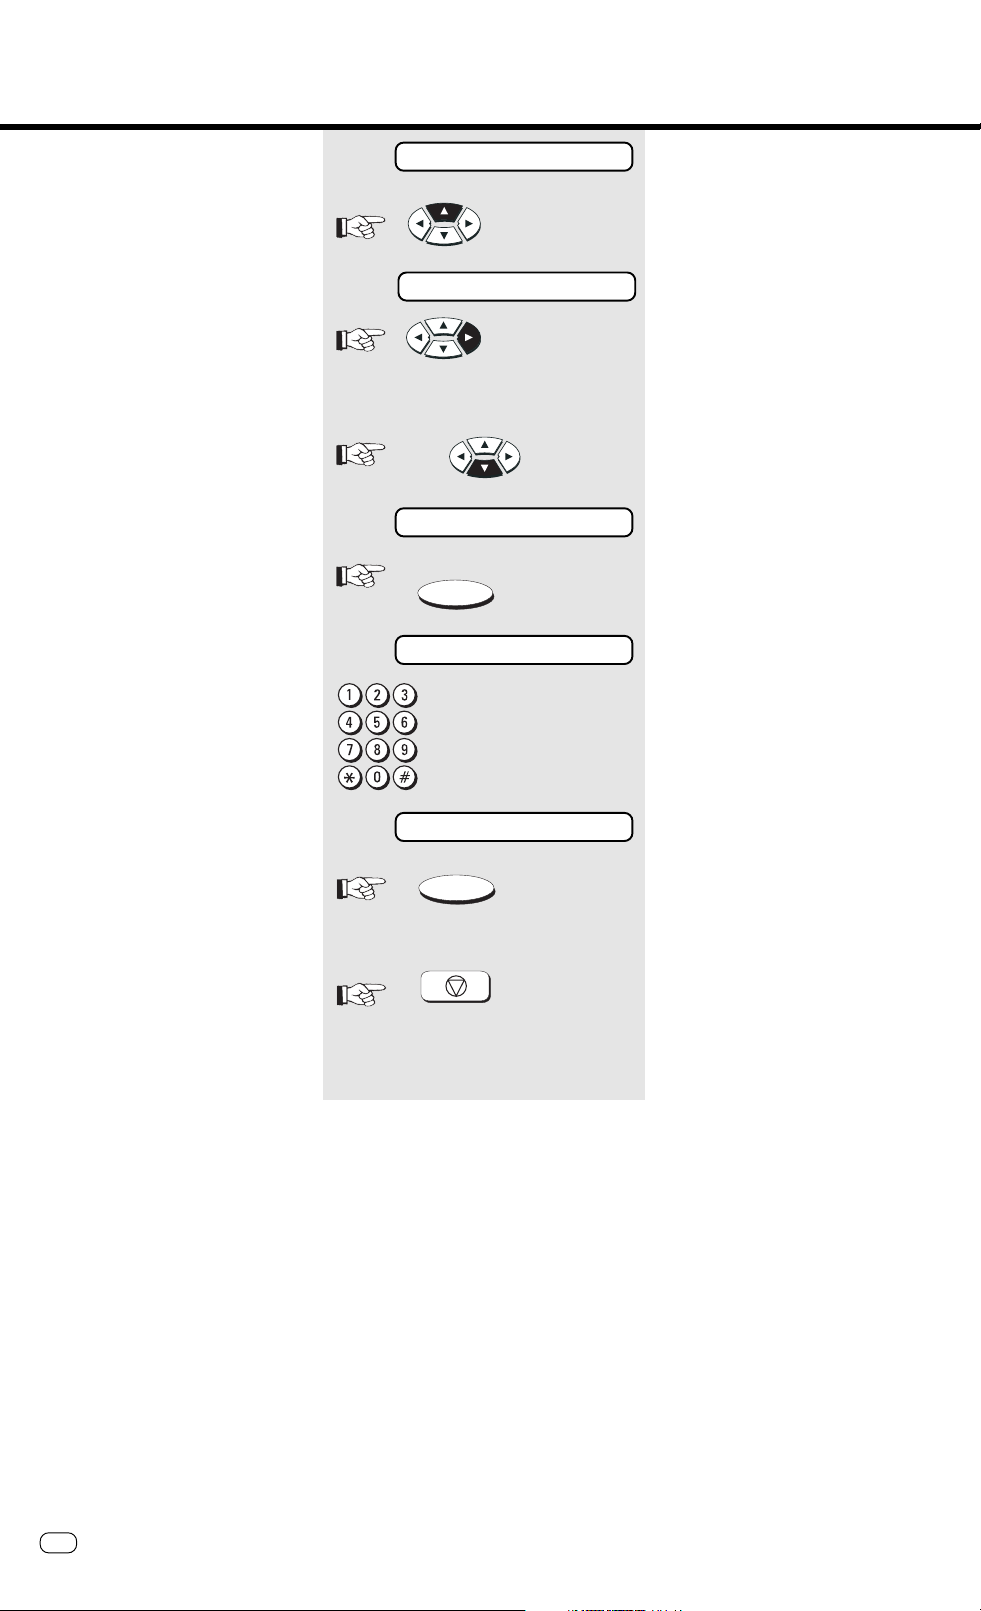
Set resolution
In its basic setting, your fax machine uses
high resolution for transmitting or copying
your documents. You can however also
adjust the resolution to suit the particular
documents. Use the following as a rough
guide:
STD (basic setting) For hand-written
or typewritten documents
FINE For documents with small type
such as newspapers and
diagrams
SF For documents with very small
and detailed diagrams
GREY 64 grey stages for photographs
or colour documents
Higher resolution has an impact
on transmission time!
To change the resolution, press
the MODE key several times. The
LEDs above this key indicate the
set mode:
LED litLED lit
LED lit
LED litLED lit
FINE fine resolution
S-FINE superfine resolution
GREY STAGE grey-stage mode
all off standard resolution
mode setmode set
mode set
mode setmode set
Redial
If it was not possible for your fax message
to be sent, this may be due to various
reasons (please read page 65). One
reason may be that the other fax machine
is busy. In this case, it would make sense
to call your partner again at a later time.
This is done automatically by your fax; it
attempts to send the fax message again
approx. every three minutes.
The quantity of last number redial
attempts and the relevant intervals
between attempts can be set in the user
functions (see page 52).
If you have established a
connection via the MONITOR
key, you can redial a number
using the REDIAL/PAUSE key.
TF 610 TOSHIBA
Transmit documents
35
GB
Page 36

Transmit documents
Delayed transmission
You are able to define a certain time at
which the documents will be transmitted;
this enables you to overcome the
problems involved with different time
zones or will enable you to transmit
documents at off-peak rates
The benefit of reading into the memory is,
that your ADF can be used for the next
transmission.
15-03 19:56 M 100%
DOCUMENT SET
CO MM.OPTION
1 x
SET DELAYED TX TIME
ENTER
TX TIME --:--
Load original
Remember:
Printed side face down
Document ready
Activate send options
Page through the menu...
...until you reach this menu item
Confirm with ENTER
Make your selection for start time
ENTER
ENTER TEL NUMBER
ABB/AL PHA
ENTER
START OR TEL NO.
ENTER
Enter start time
Confirm with ENTER
Make your selection for fax number
Enter the fax number directly, or
via alphabet dialling or via onetouch dialling
Confirm with ENTER
Make your selection for further fax
numbers (max. 20 numbers)
-or-
Confirm with ENTER
GB
Transmit documents
36
The documents are read into the memory
and sent to the various users.
Max. 5 jobs can be
programmed with a delay.
TOSHIBA
TF 610
Page 37

Transmit documents
Single multi-address transmission
If you wish to send one document to
several partners without spending a lot of
time, this function can be used to create
a group on one single occasion. The
group is deleted after the procedure has
been completed. Up to 20 users can be
grouped together from one-touch dialling
numbers, alphabet dialling numbers or
standard numbers.
MANUAL BROADCAST
FAXNO.
TOUCH
+
FAXNO. FAXNO.
or
ABB
or or or
ONE
TOUCH
+
or or
ABB ABB
ONE
TOUCH
ONE
15-03 19:56 M 100%
DOCUMENT SET
CO MM.OPTION
MANUAL BROADCAST
ENTER
ENTER TEL NUMBER
ABB/AL PHA
ENTER
Load original
Remember:
Printed side face down
Document ready
Activate send options
Confirm with ENTER
Make your selection
Enter the fax number directly, or
via alphabet dialling, or via onetouch dialling
Confirm with ENTER
START OR TEL NO.
ENTER
Make your selection for further fax
numbers (max. 20 numbers)
-or-
Confirm with ENTER
The documents are read into the memory
and transmitted to the individual users.
TF 610 TOSHIBA
Transmit documents
37
GB
Page 38

Transmit documents
Stored broadcast
If you have a fixed group of fax partners
to whom you frequently have to send
broadcast fax messages, the stored
broadcast facility is just what you need.
You can compose 6 groups of your
choice. These groups are then available
at the push of a button (use the dark grey
one-touch dialling keys).
GROUP BROADCAST 1
ABB 1
+
ABB 2 ABB 3
+
Please refer to page 45 for
details of how to program
permanent groups.
15-03 19:56 M 100%
DOCUMENT SET
SUPERGROUP
Load original
Remember:
Printed side face down
Document ready
Press the dark group dialling key
The group name is displayed briefly
The connection is established (for
procedure, see page 30, Automatic fax
transmission).
GB
Transmit documents
38
TOSHIBA
TF 610
Page 39

Transmit documents
Polling
A type of self-service facility enables you
to fetch documents from another partner
if your partner has prepared this function.
“Fax on demand”, i.e. obtaining
information from mailboxes such as
weather reports, traffic reports or stock
market reports, is also possible with this
function.
15-03 19:56 M 100%
CO MM.OPT ION
4 x
POLLING
ENTER
RX POLLING
ENTER
ENTER TEL NUMBER
Standby mode
Activate send options
Page through the menu...
...until you reach this menu item
Confirm with ENTER
Confirm with ENTER
Make your selection for fax number (from
which a document is to be polled)
ENTER
ABB/AL PHA
Enter the fax number
via the keyboard, or via alphabet dialling,
or one-touch dialling
Confirm with ENTER
The document is polled
TF 610 TOSHIBA
Transmit documents
39
GB
Page 40

Transmit documents
Reserve polling
Other fax partners can poll information
from your fax machine if you set up this
facility with this function.
Your document which you reserve for
polling is read into the memory of the
machine so set the document tray is not
blocked.
This reserve polling facility is unprotected.
This means that any fax machine with a
polling facility will be able to poll the
document.
When the document has been polled, it is
deleted from the memory.
Only one document can be
reserved for polling
15-03 19:56 M 100%
DOCUMENT SET
CO MM.OPTION
4 x
POLLING
ENTER
Standby mode
Load original
Remember:
Printed side face down
Document ready
Activate send options
Page through the menu...
...until you reach this menu item
Confirm with ENTER
1 x
POLLING STANDBY
ENTER
Page through the menu...
...until you reach this menu item
Confirm with ENTER
The document is read into the memory
and is available for the next polling
procedure
GB
Transmit documents
40
TOSHIBA
TF 610
Page 41

Transmit documents
Reduce transmission speed
Poor quality telephone lines or bad
connections can cause problems. Sending
and receiving problems are most common
when sending documents to long distance
or overseas. You can set your unit's
transmission speed to 4800BPS for safer
data transfer. This setting is automatically
canceled after the sending session.
15-03 19:56 M 100%
DOCUMENT SET
CO MM.OPTION
5 x
TX SPEED
ENTER
TX SPEED 9600
ENTER
Load original
Remember:
Printed side face down
Document ready
Activate send options
Page through the menu...
...until you reach this menu item
Confirm with ENTER
Speed reduced by one stage (9600 bit/
sec.)
Confirm with ENTER
-or-
TX SPEED 4800
ENTER
DOC. READY 4800
ABB/AL PHA
ENTER
Select the next stage
Speed reduced by one stage ( 4800 bit/
sec.)
Confirm with ENTER
Preset transmission speed for the
following TX job
Enter the fax number
via the keyobard, or via alphabet dialling
or one-touch dialling
Confirm with ENTER
The connection is established (for
procedure, see page 30, Automatic fax
transmission).
TF 610 TOSHIBA
Transmit documents
41
GB
Page 42

Transmit documents
Stop transmission
You may inadvertently dial the wrong
partner or you may enter a wrong
number. You then have to interrupt this
procedure. It is possible for this procedure
to be situated between other jobs. As a
result of stack mode, it is possible for the
current transmission not to be directly
related to the actions of the operator.
These procedures are deleted by „paging“
through the job stack; search for the
appropriate job and delete the specific
job.
As the display indicates only the job
numbers and the time, it is advisable for
the job list to be printed out (see page 50)
in order to obtain a more precise
allocation.
JOB DELETE
JOB NBR. 15
JOB NBR. 9
JOB NBR. 8
JOB NBR. 7
JOB NBR. 6
JOB NBR. 5
JOB NBR. 4
JOB NBR. 3
JOB NBR. 2
JOB NBR. 1
15-03 19:56 M 100%
CANCEL
JOB NR. 005 18:11
JOB NO.007 19:32
ENTER
DELETE OK ?
ENTER
DELETED
Standby mode
Activate CANCEL
The first job is displayed
The time indicated after the job
number is the time at which the
job was entered.
Page through the various jobs
...until you reach the desired job
Confirm with ENTER
Are you sure?
Confirm with ENTER
The job is cancelled
JOB CANCELED
GB
Transmit documents
42
TOSHIBA
TF 610
Page 43

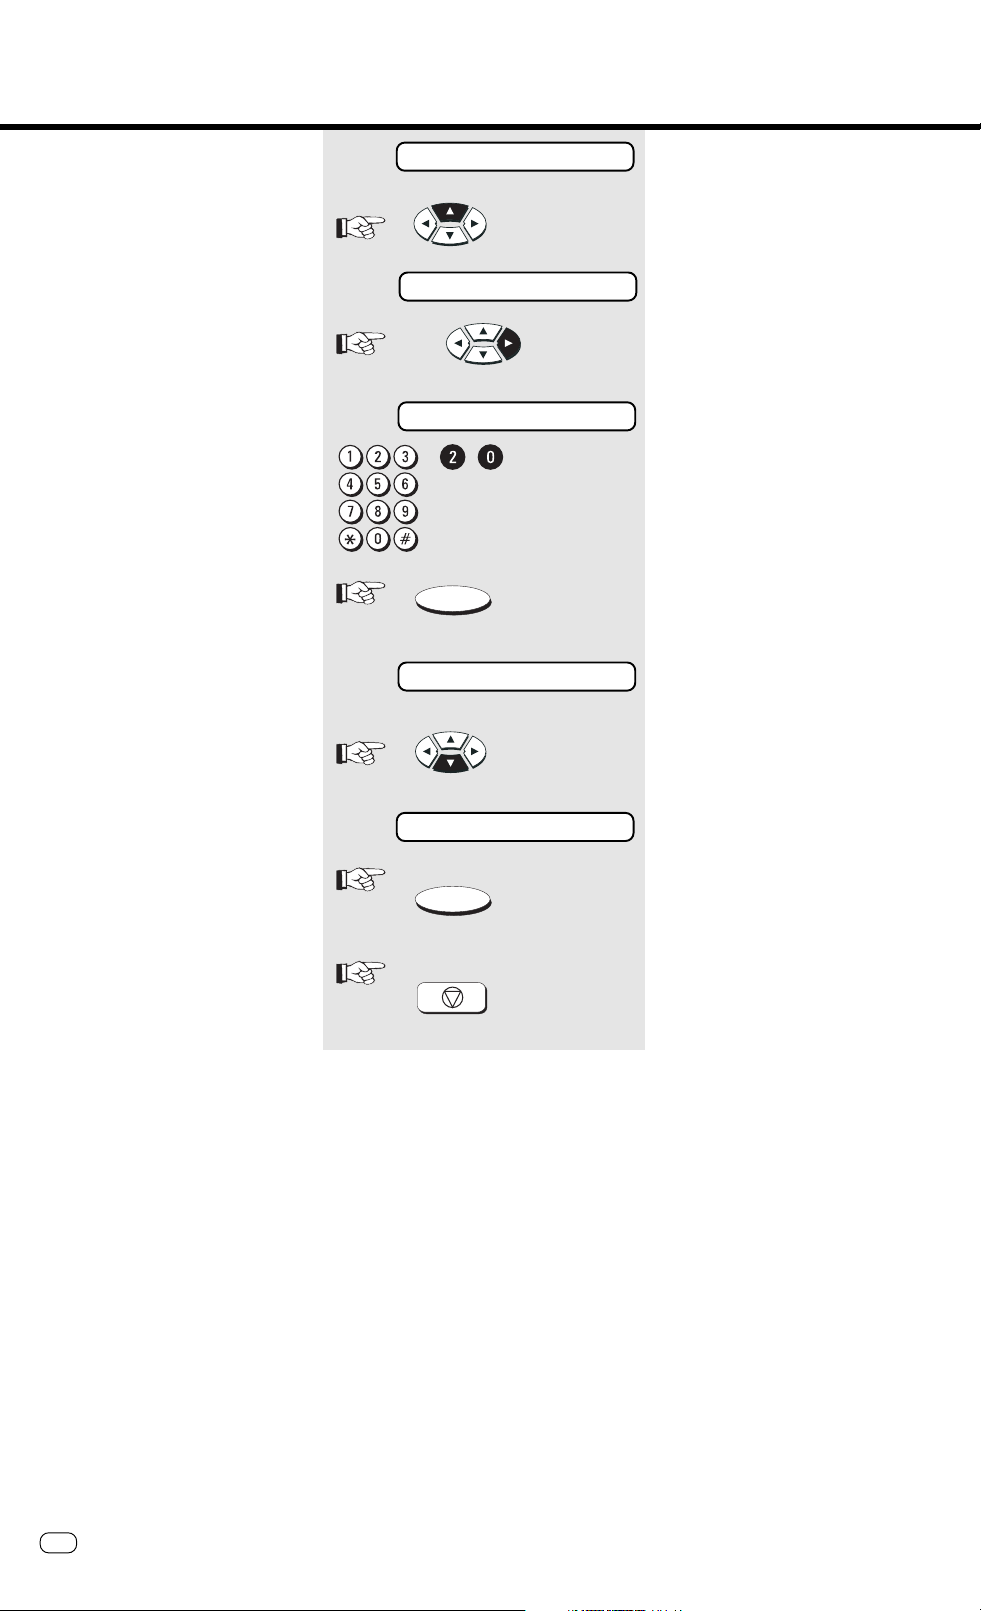
Store numbers
Alphabet dial memory
The alphabet dial facility enables you to
enter a short “address” instead of the
(frequently long) fax number of your
partner.
The real fax number is stored under this
„address“. With frequently used fax
numbers, the alphabet dial facility enables
you to save time.
120 alphabet dial memories are available
and the name as well as the number of
your partner can be stored in this
memory. You can use up to 15 characters
of your choice in this memory.
ABB NO. 120
ABB NO. 119 024/8768 EVENS
•
•
•
ABB NO. 003 054/938734 IRVING
ABB NO. 002
ABB NO. 001
09154/87823 BROWN
04544/6723 MARKS
054/376014 MILES
ENTER
Go to A
AENTER
15-03 19:56 M 100%
3x
ENTER DIAL NUMBER
ENTER ABB DIAL
ENTER
ENTER:1 DELETE:2
Go to B
Standby mode
Page through the menu...
...until you reach this menu item
Select submenu
Confirm with ENTER
Decision:
Enter: Go to A
Delete: Go to B
DELETE
Use the numeric keys for entering the
alpha-numeric characters. Each digit
features several characters which can be
activated by repeatedly pressing the
corresponding key. If you have found a
character of your choice, press the E key
to go to the next position. Use the „F“
key to go back one letter and make any
corrections. Use the CANCEL key to
delete the left-hand character.
Please note that you must press
the „❊“ button before the actual
fax number if your fax machine
is connected to a PABX.
ENTER ABB NUMBER =
ENTER ABB NUMBER =1
ENTER
TEL:_
TEL: 123456789
ENTER
Select a menu item
Make your selection for alphabet dial
number
Enter alphabet dial number
Example: 1
Confirm with ENTER
Make your selection for fax number *)
Enter fax number
TF 610 TOSHIBA
NAME:_
Confirm with ENTER
Make your selection for the name
(press START to skip)
Store numbers
43
GB
Page 44

Store numbers
Enter the name
(Example TOSHIBA)
T= 1 x 8 # I= 3 x 4 #
O= 3 x 6 # B= 2 x 2 #
S= 4 x 7 # A= 1 x 2 #
H= 2 x 4 #
NAME: TOSHIBA
ENTER
Confirm with ENTER
PRESS OT OR START
B DELETE
ENTER
ENTER ABB NUMBER =
STOP
ENTER ABB NUMBER =
Input option: one-touch dial key (see page
45)
-or-
Confirm with ENTER
Make your selection for the next alphabet
dial number
-or-
Press STOP, return to standy
mode
Select a menu item
Make your selection for the alphabet dial
number to be deleted
Enter alphabet dial number
Example: 01
GB
44
Store numbers
ENTER
ABB :TOSHIBA
ENTER
DELETED
ENTER ABB NUMBER =
STOP
Confirm with ENTER
The name stored under alphabet dial is
displayed.
Confirm with ENTER
Alphabet dial deleted
Make your selection for further alphabet
dial numbers to be deleted
Press STOP, return to standy
mode
TOSHIBA
TF 610
Page 45

Store numbers
One-touch dial keys
The one-touch dial facility is a very easy
method of dialling your partner. You can
store fax numbers on 16 keys. You need
only press one key in order to dial your
partner.
It is essential that the number has already
been stored under an alphabet dial
number previously.
ABB NO. 120
ABB NO. 119
ONE TOUCH NBR. 16
ONE TOUCH NBR. 15
•
•
•
ABB NO. 003
ABB NO. 002
ABB NO. 001
ONE TOUCH NBR. 2
ONE TOUCH NBR. 1
Group keys
PRESS OT OR START
ENTER ABB NUMBER =
STOP
15-03 19:56 M 100%
The procedure is the same as that
described on page 43(alphabet dialling)
If alphabet dial numbers have already
been entered, simply press the START
key until you arrive at this point in the
menu:
Input option: one-touch dial key
Press one-touch dial key
Make your selection for the next alphabet
dial number
-or-
Press STOP, return to standby
mode
Standby mode
If you have a fixed number of partners to
whom you frequently send broadcast
transmissions, the stored broadcast
facility is just what you need. There are 6
methods of creating groups of your
choice. You can also assign four of these
groups to four special keys so that a
broadcast transmission can be initiated at
the push of a button. If a permanent
group is to be defined, all users of a
group must be already be in the alphabet
dial directory.
GROUP BROADCAST 1
ABB 1
ABB 2 ABB 3
+
+
ENTER DIAL NUMBER
ENTER ABB DIAL
ENTER GROUP DIAL
ENTER
Go to A
3x
1 x
ENTER
ENTER:1 DELETE:2
ERASING
THE WHOLE
GROUP
Go to B
ERASING
SINGLE
NUMBERS
FROM THE
GROUP
Go to C
Page through the menu...
...until you reach this menu item
Select submenu
Page through the menu...
...until you reach this menu item
Confirm with ENTER
Decision:
Enter: Go to A
Erasing the whole
group: Go to B
Erasing single numbers
from the group:Go to C
TF 610 TOSHIBA
Store numbers
45
GB
Page 46

Store numbers
A ENTER
Select a menu item
SELECT GROUP BUTTON
ABB :
ENTER
NAME: TOSHIBA
ENTER
ABB :
Make your selection for the group button
Press the desired group button
Make your selection for the alphabet dial
number to be assigned to the group
Enter the alphabet dial numbers
Confirm with ENTER
The corresponding name is displayed
Confirm with ENTER
Make further selection of alphabetdial
number to be assigned to the group
NAME:
ENTER
ENTER
STOP
-orConfirm with ENTER
Make your selection group name
Enter the group name
(Example of entry: see page 13)
Confirm with ENTER
Press STOP, return to standy
mode
GB
46
Store numbers
TOSHIBA
TF 610
Page 47

Store numbers
B ERASING THE
WHOLE GROUP
Select a menu item
SELECT GROUP BUTTON
TOSHIBA
ENTER
DELETE OK ?
ENTER
STOP
C ERASING SINGLE
NUMBERS FROM
THE GROUP
Make your selection for the group button
to be deleted
Press the desired group button
The corresponding name is displayed
Confirm with ENTER
Are you sure?
Confirm with ENTER
Press STOP, return to standby
mode
Select a menu item
SELECT GROUP BUTTON
TOSHIBA
/
12345678 ect.
ENTER
DELETE OK ?
ENTER
ENTER:1 DELETE:2
STOP
Make your selection for the group button
to be deleted
Press the desired group button
The corresponding name is displayed
Select the appropriate numbers
Confirm with ENTER
Are you sure?
Confirm with ENTER
Further changes
- or -
Press STOP, return to standby
mode
TF 610 TOSHIBA
Store numbers
47
GB
Page 48

Report prints
Activate printing report
Not all reports are printed out
automatically; they have to be requested
specially. These lists can provide
information concerning the current state
of the fax machine. The following reports
can be printed:
• Transmission report
• Multitransmission report
• Transmission and reception journal
• ABB Number list
• Group list
• Function list
• List of jobs in memory
15-03 19:56 M 100%
2x
REPORTS
ENTER
ACTIVITY REPORT
............
ENTER
The lists are retrieved as follows:
Standby mode
Page through the menu...
...until you reach the desired menu item
Confirm with ENTER
The first menu item is displayed
Page through the menu...
...until you reach the desired menu item
Confirm with ENTER
Transmission report
This report can be printed after every
transmission or in the event of a defective
transmission. It provides information about
the most important transmission data.
Please refer to page 59/60 for switching
ON/OFF.
The list is printed out
*** SUCCESSFUL TX REPORT ***
01-04-98 01:19 ID:+44193212345678
TEG FT TF610
JOB NBR. ------------- 001
START TIME ------------- 01:19
ID No. ------------- 111
RESOLUTION ------------- STANDARD
TOTAL PAGE ------------- 00
MACHINE ENGAGED ------------- 00'28
INFORMATION ------------- OK
GB
48
Report prints
TOSHIBA
TF 610
Page 49

Report prints
Transmission and reception journal
Your fax machine will record messages
which you transmit or receive in the form
of transmission and reception journals.
These lists are printed out automatically
after every 20 transmissions or receptions
or at your request.
The journal also informs you of the
number of copies printed per process unit
(drum counter) or all copies (total printed
pages).
*** ACTIVITY REPORT ***
01-04-98 15:02 ID: +44 1932 12345678
FAX/TELECOM MKTG
DRUM COUNTER = 000002
SCAN PAGE = 000245
No . DATE START IDENTIFICATION PAGE TIME INFO JOB No.:
ab c d e f g h
TRANSMISSION
01 11-08 08:00 00 00'00 008 001
02 11-10 09:17 12345678 00 00'35 STOP 002
03 11-00 09:24 987654321 01 00'30 OK ECM 004
RECEPTION
04 11-08 14:17 +04965321 01 00'36 OK ECM
05 21-08 06:00 00 00'45 011
06 15-10 14:30 5432101 04 01'58 OK ECM
a NO. Lists the communications in the order they
occurred.
b DATE Date of transmission
c START Start of transmission
d IDENTIFICATION Number pf faxpartner
e P AGE Gives the number of pages per transmission or
reception.
f TIME Time of transmission
g INFO Result of transmission (see 58, 59)
OK
OK_ECM
STOP
001-360
OK-PC
OK PEC
Group without any errors
ECM
the operator has stopped
the transmission
description of the
transmission error
(see page 59)
transmission as PC Fax
h JOB NO. Current job number
TF 610
TOSHIBA
Report prints
49
GB
Page 50

Report prints
The multitransmission report
After a broadcast transmission (group
dialling), the machine prints out a list of
fax partners who have been reached or
who have not been reached by group
dialling. This list is always printed out
when group dialling has been completed.
Number list
This list contains all numbers and
corresponding names in the alphabet dial
memory. The list also sets out the
assignation of the various one-touch dial
keys.
*** BROADCAST REPORT***
01-04-98 09:15 ID: +44 1932 12345678 NAME: TOSHIBA
TF610
JOB No. 050
NO. TELEPHONE NUMBER ENTRY INFO.
01 11 NG
02 12 NG
03 13 OK
04 14 OK
*** ABBREVATED DIAL LIST ***
01-04-98 09:15 ID: +44 1932 12345678 NAME: TOSHIBA
No. OT No. NAME TELEPHONE NUMBER
01 OT01 ALBRECHT 01010101
02 OT02 BAUER 02020203
03 OT03 BLUME 03030303
04 OT04 MEIER 04040404
05
06
Group list
This is a list of the alphabet dial numbers
allocated to the particular groups.
Jobs in progress
This list indicates which jobs are still
stored by the fax machine or which jobs
still have to be progressed. This
information may be useful if you have
stored any urgent jobs or if you wish to
delete a particular job.
*** GROUP LIST ***
01-04-98 09:15 ID: +44 1932 12345678 NAME: TOSHIBA
GROUP1 NAME: SUPER
No. ENTRY NAME TELEPHONE NUMBER
01 ABB01 ALBRECHT 0123456
02 ABB02 BAUER 6543210
03 ABB03 BLUME 987654321
GROUP2 NAME:
No. ENTRY NAME TELEPHONE NUMBER
01
02
*** PENDING JOBS LIST ***
01-04-98 09:15 ID: +44 1932 12345678 NAME: TOSHIBA
JOB No. CONTENTS TIMER ACCEPT REMOTE TELEPHONE NUMBER /NAME
003 TRANSMISSION 16:14 OT02 BAUER
004 BROADCAST 16:15 GROUP1 SUPER
007 POLLING STANBY 16:21
GB
50
Report prints
TOSHIBA
TF 610
Page 51

Report prints
The function list
This list provides information concerning
all settings of the fax machine. They
correspond with the settings which you
have made (For explanations, see page
53).
The following operating data were also
displayed:
DRUM COUNTER:
Number of pages printed per process unit
TOTAL PRINT COUNTER:
Total number of pages printed by the fax
machine
TOTAL TX PAGES:
Total number of pages transmitted
TOTAL RX PAGES:
Total number of pages sent
TOTAL COPY PAGES:
Total number of copied pages
OPTION MEMORY:
Memory expansion available?
123...ABC...:
Operating software version
Keep this list for any service work which
may be necessary.
*** OPTIONS REPORT ***
01-04-98 09:15 ID: +44 1932 12345678 NAME: TOSHIBA
USER OPTIONS
No. CONTENTS
01 ECM FUNCTION ON
02 CONFIRMATION OFF
03 FIRST PAGE IMAGE OFF
04 HEADER PRINT INSIDE
05 RECEIVE FOOTER ON
06 TX SPEED 14400
07 RCV SPEED 14400
08 NOT USED
09 NOT USED
10 NOT USED
11 NOT USED
12 NOT USED
13 RDC ACCEPTANCE ON
14 NOT USED
15 NOT USED
16 NOT USED
17 NOT USED
18 NOT USED
19 NOT USED
20 DIAL METHOD TONE
21 REDIAL TIMES 5
22 REDIAL INTERVAL 2 MIN
23 DUAL INTERVAL 5 MIN
24 BUSY TONE ON
25 INITIAL WAIT
26 PAUSE WAIT 3 SEK
27 ACCESS DIGIT
28 ACCESS CODE =0
29 NOT USED
30 NOT USED
31 NOT USED
32 NOT USED
33 NOT USED
34 NOT USED
35 NOT USED
36 PSEUDO RING TIMES04
37 AUTO DELAY 01
38 RCV MODE=FAX/TAD
39 TEL DELAY 06
40 NOT USED
41 RMT ACTIVATION OFF
42 ACTIVATION CODE = **
43 DEACTIVATION CODE = ##
44 FAX/TAD TIMER =35
45 SILENT DETECTION
46 PC TRANSFER DEF. OFF
47 CNG DETECTON ON
48 NOT USED
49 NOT USED
50 NOT USED
✽
DRUM COUNTER = 00000
TOTAL PRINT COUNTER = 00000
TOTAL TX PAGES = 00000
TOTAL RX PAGES = 00000
TOTAL COPY PAGES = 00000
OPTION MEMORY = NO
0200KFNMOESBJa DE
TF610
No. CONTENTS
51 NOT USED
52 NOT USED
53 NOT USED
54 NOT USED
55 PAPER SIZE A4
56 DEFAULT RES. STD
57 COPY REDUCT. 96%
58 POWER SAVE ON
59 DOC. LENGTH 1 M
60 NOT USED
61 CALENDAR DD-MM-YY
62 LANGUAGE ENGLISH
63 SCAN CNT. DEF NORMAL
64 NOT USED
65 RX REDUCTION AUTO
66 NOT USED
67 NOT USED
68 NOT USED
69 NOT USED
70 NOT USED
TF 610
TOSHIBA
Report prints
51
GB
Page 52

Advanced settings
_
_
Functions
This functions are used to setup how your
fax machine operates. The actual settings
can be viewed by printing a function list
(see page 51).
The following sheme shows you how to
change each setting:
15-03 19:56 M 100%
2 x
PARAMETER NUMBER =
ENTER
SELECT OPTIONS
Standby mode
Start the menu
Select submenu (2x)
Make your selection for function number
Enter function number
Confirm with ENTER
Function is displayed
Change the function value, depending on
the particular type, by paging or by
entering data via the numeric keypad
ENTER
PARAMETER NUMBER =
STOP
Confirm with ENTER
Enter further data
-or-
Press STOP, return to stanby
mode
GB
Advanced settings
52
TOSHIBA
TF 610
Page 53

Advanced settings
The following functions (Parmeter)
are available:
Function no.
01
Function
ECM
Description
Error correction (ECM) is as follows:
ON: Activated
OFF: Deactivated
02
03
04
05
06
07
CONFIRMATION
FIRST PAGE IMAGE
HEADER PRINT
RECEIVE FOOTER
TX SPEED
RCV SPEED
Transmission report is produced:
ON: After every transmission
CONFIRMATION OFF: Only after
transmission errors.
A part of the document (to recognize it)
can be printed on the report.
REPORT VISUAL ON: print
REPORT VISUAL OFF: print not
Select, if the TX header will be transmitted
to te other party.
ON: Is transmitted
OFF: Is not transmitted
Select, if the actual date and time will be
printed on the footer line of received
documents.
ON: Is printed
OFF: Is not printed
Preset transmission speeds, transmission
BPS = BIT / Sec.
9600 BPS, 7200 BPS, 4800 BPS, 2400 BPS
Preset transmission speed, reception
BPS = BIT / Sec.
9600 BPS, 4800 BPS
13
]
20
21
22
23
✽ ) This function may not be available in machines in certain countries.
RDC ACCEPTANCE
DIAL METHOD TONE
REDIAL TIMES
REDIAL INT.
DUAL INTERVAL
Actual COMLINE status
ON COMLINE enabled
OFF COMLINE disabled
ONE only one COMLINE session
Dialling method:DTMF
PULSE DIALLING
Number of redial attempts if transmission
is not successful
02 2 twice
~
10 10 times
Period between redial attempts if
transmission is not successful
30 SEC 30 seconds
~
1 MIN
2 MIN
3 MIN
10 MIN
20 MIN 20 minutes
Period between redial attempts if line is
busy
1 MIN 1 minute
~
10 MIN 10 minutes
TF 610
TOSHIBA
Advanced settings
53
GB
Page 54

Advanced settings
Function no:
24
25
26
27
Function
BUSY TONE
PUBLIC LINE
PAUSE WAIT TONE
ACCESS
Description
The successful detection depend on the
PBAX.
ON: active
OFF: not active
Type of connection
PUBLIC LINE: Before dialling a tone check
is made, PABX tones are not accepted
PABX: Dialling after a delay of 3 sec., no
tone check before begin of dialling
INIT WAIT 4 SEC: Dialling after a delay of
4 sec., no tone check before begin of
dialling
~
INIT WAIT 6.0 SEC: Dialling after a delay
of 6 sec., no tone check before begin of
dialling
Procedure after obtaining public line/
pause wait
PAUSE WAIT TONE: Further dialling only
after line access dial tone, PABX tones
are not accepted
PAUSE WAIT 3.0 SEC: Dialling after a
delay of 3 sec., no tone check, after
obtaining public line/pause wait
~
PAUSE WAIT 6.0 SEC: Dialling after a
delay of 6 sec., no tone check, after
obtaining public line/pause wait
Procedure for obtaining public line
(*-key)
NO PUBLIC LINE
PUBLIC LINE FLASH:Flash-Function
PUBLIC LINE EARTH KEY:
Earth key Function
PUBLIC LINE DIGIT: Public line
obtained via code
28
36
37
38
39
ACCESS CODE
CALLING TIMES
AUTO DELA Y
RCV MODE=
TEL DELAY
Enter a (max.) 4-digit code for obtaining
public line. (only useful by ACCESS DIGIT)
Number of synthetic ring signals set in
the TEL/FAX mode
1 SYNTH. RING TEL/FAX 1 ring
~
10 SYNTH. RINGS TEL/FAX 10 rings
Number of rings before the fax machine
connects to the line in the automatic
receive mode (AUTO lamp is lit)
1st RING
~
10th RING
Reception type in automatic mode (AUTO
LED is lit)
TEL/FAX TEL/FAX mode
FAX/T AD FAX/TAD mode
Not relevant for European models
GB
Advanced settings
54
TOSHIBA
TF 610
Page 55

Advanced settings
Function no:
41
42
43
44
45
46
47
55
56
57
58
59
61
62
Function
RMT ACTIVA TION
ACTIVA TIONCODE=
DEACTIVATION CODE
FAX/T AD TIMER=
SILENT DETECTION=
PC TRANSFER
CNG DETECTION
PAPER SIZE
DEFAULT RES
COPY REDUC.
POWER SAVE
DOC. LENGTH
CALENDAR
LANGUAGE
Description
Activate the fax machine with a DTMF
remote control code
ON Enabled
OFF Disabled
Enter the sequence of characters to be
used as the remote control code
Enter the sequence of characters to be
used to disconnect the fax machine from
the line.
Period during which the fax machine can
detect another fax machine (in FAX/TAD
mode)
Minimum length of pause in speech
before fax machine switches into the FAX
mode (with FAX/T AD mode)
Fax dates are transferred to the
connected PC
ON OFF
To realize another fax in the FAX/TADMode.
ON OFF
Paper sizes for PC printer operation:
A4 DIN A4 size
LETTER Letter size
LEGAL Legal size
Preset resolution
STD Standard resolution
FINE Fine resolution
Reduction for copy
OFF 100%
96%
92%
90%
86%
83%
72%
Power saver (heater turns off)
ON / active OFF / not active
Max. length of documents
1m / 1meter 10m / 10meter
Format of date in display and in the lists
(example: March 15th, 1998)
YY-MM-DD99-03-18
DD-MM-YY15-03-98
MM-DD-YY03-15-98
To select a language for display and lists.
TF 610
63
65
TOSHIBA
SCAN CONTRAST
RX REDUCTION
Default contrast setting for a scanning
document
BRIGHTER Low coverage on
NORMAL Normal coverage on
DARKER High coverage on
Reduction of received documents
OFF: no reduction
AUTO: dynamic reduction
Advanced settings
document
document
document
55
GB
Page 56

Advanced settings
_
Connection to PABX
If the TF 610 is connected to a PABX, the
functions have to be modified. The
standard setting for this case is described
starting on page 14. If any problems or
malfunctions occur, please consider the
following items; you may have to discuss
these items with the operator of the PABX:
Receive footer on/off
As proof of the date on which the
document is received, your fax machine
can print the local date and time as an
additional line on the received document.
If this facility has been activated, the
receive footer is printed at the bottom of
the received document.
15-03 19:56 M 100%
2 x
• Does the PABX have public line
capability?
• Does the PABX have DDI capability?
• Have you entered the ”❊” key before
the actual fax number?
• How is the public line obtained (earth
key, flash, number)?
• What dialling method is used (pulsedialling, DTMF dialling)?
• Is function 25 set to EXTENSION?
• Is function 26 set to TONE CHECK
PAUSE BUTTON*?
• Is the correct dialling method set in
function 20?
• Has the correct method of obtaining
a public line been set in function 27?
• Have the correct codes for obtaining
a public line been set in function 28
(if the public line is obtained via a
code)?
• Is line access made with "❊"-key?
*) Alternatively, you can set function 26
to 4 seconds.
Standby mode
Start the menu
Select submenu (2x)
PARAMETER NUMBER =
ENTER
RECEIVE FOOTER OFF
RECEIVE FOOTER OFF
ENTER
STOP
Make your selection for the function
number
Enter function number
Confirm with ENTER
Current setting
Change setting
Confirm with ENTER
Press STOP, return to standby
mode
GB
Advanced settings
56
TOSHIBA
TF 610
Page 57

Advanced settings
Change speaker volume
If you listen into a fax transmission
process, the call establishment procedure
is relayed via the built-in speaker. This
means that you can also listen to the
actual call establishment process. The
volume can be adjusted as follows:
15-03 19:56 M 100%
SELECT OPTIONS
2 x
SPEAKER VOLUME
ENTER
SPEAKER VOL. >>>
Standby mode
Start the menu
Select submenu
Page through the menu...
...until you reach the desired menu item
Confirm with ENTER
Current volume is displayed and indicated
acoustically
Change the volume
ENTER
Confirm with ENTER
TF 610
TOSHIBA
Advanced settings
57
GB
Page 58

Advanced settings
Adjust ringing tone/key beeps
The volume of the ringing signal (synthetic
ringing) in the TEL/FAX mode can be
adjusted as follows. This setting also
affects the key beep. No beeps are
generated if the volume is set to
minimum.
15-03 19:56 M 100%
15-03 19:56 M 100%
SELECT OPTIONS
RINGER VOLUME
ENTER
RINGER VOL. >>>
Standby mode
Start the menu
Select submenu
Page through the menu...
...until you reach the desired menu item
Confirm with ENTER
The current volume is displayed and
indicated acoustically
Adjust the volume
ENTER
Confirm with ENTER
GB
Advanced settings
58
TOSHIBA
TF 610
Page 59

Advanced settings
_
_
Set transmission report output
This report can be printed after every
transmission or only for errored
transmissions. It provides information
concerning the most important
transmission data.
It is also possible to print part of the first
document of the job in the transmission
report.
15-03 19:56 M 100%
2 x
PARAMETER NUMBER =
ENTER
CONFIRMATION ERROR
Standby mode
Start the menu
Select submenu (2x)
Make your selection for the function
number
Enter function number
Confirm with ENTER
Current status
Change the status as follows
ON Transmission reported printed
after every transmission
OFF Transmission report printed only
for errored transmissions
ENTER
PARAMETER NUMBE R =
ENTER
FIRST PAGE IMAGE OFF
FIRST PAGE IMAGE ON
ENTER
Confirm with ENTER
Make your selection for the function
number
Enter function number
Confirm with ENTER
Current setting
Change setting
Confirm with ENTER
TF 610
TOSHIBA
STOP
Press STOP, return to standby
mode
Advanced settings
59
GB
Page 60

Advanced settings
_
Temporarily activate TX report
If output of the TX report is restricted with
function 02function 02
function 02 (see page 59), a general
function 02function 02
printout of the TX report can be requested
for a set transmission job.
DOCUMENT SET
TX REPORT
TX REPORT ON
ENTER TEL NUMBER
TEL: 12345
START
Load original
Remember:
Printed side face down
Document ready
Press TX report key
Preparation of TX report printout
Enter fax number
or enter alphabet dial or one-touch dial
number
Confirm with START
Document is transmitted, and TX report is
then printed out
Remote maintenance (COMLINE)
Your fax machine permits remote
diagnosis. This means that the internal
settings can be read and changed via a
telephone line. In order to ensure that
data protection is assured, COMLINE is
possible only after you enable your
machine for this facility.
15-03 19:56 M 100%
2 x
PARAMETER NUMBER =
ENTER
RDC ACCEPTANCE OFF
RDC ACCEPTANCE ONE
Standby mode
Start the menu
Select submenu (2x)
Make your selection for the function
number
Enter function number
Confirm with ENTER
Current setting
Change setting
GB
Advanced settings
60
ENTER
STOP
Confirm with ENTER
Press STOP, return to standby
mode
TOSHIBA
TF 610
Page 61

Advanced settings
_
Power saver
The printing unit of your fax machine
requires a heat source of approx. 170°
Celsius to be able to print spontaneously.
This heat source is heated at certain
intervals in order to maintain the
temperature at the required level. This
consumes electricity, and the fan also has
to run constantly. If you wish to save
power or prevent the fan noise, you can
switch off the constant heating facility.
The heating would then only be activated
when a fax is received. The delay involved
before the fax document is printed out is
approx. 1 minute.
15-03 19:56 M 100%
2 x
PARAMETER NUMBE R =
ENTER
POWER SAVE ON
Standby mode
Start the menu
Select submenu (2x)
Make your selection for the function
number
Enter function number
Confirm with ENTER
Current setting
Change setting
POWER SAVE OFF
ENTER
STOP
Confirm with ENTER
Press STOP, return to standby
mode
TF 610
TOSHIBA
Advanced settings
61
GB
Page 62

Advanced settings
_
Switch off error correction
Your fax machine is equipped with an
error correction facility (ECM). If your fax
partner also has an error correction
facility, this permits error-free fax
transmission. One effect linked with ECM
is that the transmission time increases if
there are any problems on the line. This
may involve very high costs with oversees
calls. For this reason, the error correction
facility can be temporarily disabled.
15-03 19:56 M 100%
2 x
PARAMETER NUMBER =
ENTER
ECM FUNCTION ON
Standby mode
Start the menu
Select submenu (2x)
Make your selection for the function
number
Enter function number
Confirm with ENTER
Current setting
ECM FUNCTION OFF
ENTER
STOP
Change setting
Confirm with ENTER
Press STOP, return to standby
mode
GB
Advanced settings
62
TOSHIBA
TF 610
Page 63

Possible problems
Error codes in journal
The display message transmission error is
expained by the indicated error code.
The same code if shown also in the in the
jounal and transmission repot.
Code Number
STOP
OK
001
002
003
005-007
Press STOP to clear error messages.
Cause
The transmission is interrupted by the stop
button.
The document has been transmitted without
any errors.
Top cover or rear cover open
Paper jam or document too long. Is the
memory full? Ask your dealer for a memory
extension.
Recording paper jam or recording paper
cassette is empty
Line error
How to correct
Try again
This is how it should be
Close all parts
Remove the document. See also page 67
Send the document from the document
feed
Remove jammed paper or load new
paper without switching off the machine,
see page 67
Repeat transmission, try switching over to
4800 BPS.
008
009-011
014
020
100-103
104-106
111
112-126
141
142-157
Line error
Line error
Printing error
Errors on the line mean that parts of the
document are difficult to read; however, the
document is transmitted completely.
Line error
Unsuccessful polling
Mailbox transmission
Line error
Line error
Line error
No telephone line was detected.
Repeat transmission, try switching over to
4800 BPS.
Check toner, process unit and paper
transport
No special measures necessary. If this
frequently occurs with one particular fax
partner, switch over to 4800 BPS.
Repeat transmission, try switching over to
4800 BPS.
An incorrect password has been used, or
no document was loaded for polling
An attempt has been made to transmit a
document to a box or relay. Check
whether a TF 861/831/631 is installed at
the far end.
Repeat transmission, try switching over to
4800 BPS.
No telephone line was detected.
Repeat transmission, try switching over to
4800 BPS.
TF 610
252-355
TOSHIBA
A remote control error occurs
Consult your dealer
Possible problems
63
GB
Page 64

Possible problems
Error messages in the Display
Your fax machine reports an operating
error or fails to perform the required
function. Before you make an unnecessary
call on your service technician, take your
time and see if you can help yourself. This
checklist will help
you recognise and eliminate errors.
Display
DOCUMENT JAM
ADD PAPER
PAPER JAM
CLOSE TOP COVER
NO PROCESS UNIT M100%
PROCESS UNIT NEAR END
CHANGE PROCESS UNIT
TONER NEAR EMPTY
Cause
Documents are jammed in the document tray.
The recording paper cassette is empty.
The recording paper is jammed.
The top cover is open.
The process unit is not installed.
The process unit is running out.
The process unit is empty.
The toner is running out.
Corrective action
Press STOP key and remove the paper
Load a new recording paper in the
cassette (see page 7). Do not switch the
machine off! or any data in the memory
are lost.
Remove the jammed paper (see
instructions on page 67).
Close the top cover. Have you inserted
the process unit correctly?
Install the process unit correctly. Pull the
lock lever forward.
Order a new process unit from your
TOSHIBA dealer.
Replace the process unit.
Order a new toner cartridge. Install a new
toner cartridge. About 100 sheets can be
printed after this is displayed. See page
6.
TONER EMPTY
MEMORY FULL
CHECK CARTRIDGE M100%
NO DOCUMENT
PC COMM. ERROR M100%
SYSTEM ERROR XXX
COMM. FX XXX
GB
Possible problems
64
There is not enough toner for printing.
The memory is full.
There is no ink cartridge, or the ink cartridge
has not been inserted correctly.
No document present
Communication to the PC has failed
The fax machine has malfunctioned
The fax machine has malfunctioned
Install a new toner cartridge. See page 6.
Contact your dealer, as a memory
expansion unit is availiable. Use the
document tray to transmit documents.
Insert the cartridge correctly. See page 5.
The action requires a document
Try to remedy by pressing the STOP
button
Contact your TOSHIBA dealer
Attempt to clarify the problem unsing the
following pages.
TOSHIBA
TF 610
Page 65

Possible problems
Transmission problems
Problem
Your document is not automatically pulled
into the feeder.
The line LED does not flash when you
press the START button
The document is damaged during sending
or copying.
Your fax machine performed transmission
correctly but the message was not
received by the receiver.
Your fax machine reports an operating error or
fails to perform the required function. Before
you make an unnecessary call on your service
technician, take your time and see if you can
possible causes ...
Your machine displays an error.
The display is blank.
Document size or thickness of paper are not
acceptable.
The operator control panel is not firmly locked.
You replaced the receiver before pressing
START.
Document format or paper thickness not as
specified.
The document guides are not properly adjusted
to the paper size.
The other machine is out of paper.
help yourself. This checklist will help
you recognise and eliminate errors.
... and solutions
If the display gives an error message,
clear the fault and delete the display with
STOP.
Check there is power on the machine.
The machine must be switched on (see
page 8).
Use acceptable documents only (see
page 27).
Close the cover. It should be firmly locked
in place on both sides.
Try again. Replace the receiver only when
you have pressed START.
Use acceptable documents only (see
page 27).
Adjust the document guides accordingly.
Ask the receiver to put paper in his
machine.
The receiver received a blank sheet
instead of the document sent.
The receiver reports: The document
transmitted is difficult to read.
Abbreviated or one-touch dialling do not
work.
No dial tone is heard when handset is offhook.
Your call does not arrive although you
have dialled the correct number.
You loaded your document in the machine with
the image face-up.
Your machine’s document reader is dirty or
damaged.
RESOLUTION and CONTRAST are not set
correctly.
The telephone connection is poor.
Abbreviated or one-touch dialling number is not
correctly stored.
The telephone is not correctly connected.
The fax machine is not correctly connected.
Your fax machine has been set to the wrong
dialling mode.
Send your document again: the image
must be face-down on your document
feeder.
Make a copy of your document on your
fax machine (see page 24). If your copy is
also difficult to read, clean the document
reader.
Make a copy on your fax machine (see
page 24) and adjust the settings to your
document. You can also improve
document quality: By making the print on
the photocopy darker, enlarging or
reducing. (see page 35). Then send
again.
Redial. You may get a better connection.
Check and correct stored numbers (see
page 43).
Check that your telephone is connected
correctly to the socket (see page 8).
Plug the connecting cable of your fax
machine into the socket (see page 8).
Switch to the correct dialling procedure:
DTMF or pulse-dialling (see page 14).
TF 610
TOSHIBA
If you are connected to a PABX: You have set
the wrong line type.
Your fax machine is not connected to the
PSTN.
Set the line types to EXTENSION (see
page 15).
Plug the connecting cable of your fax
machine into the socket (see page 8).
Possible problems
65
GB
Page 66

Possible problems
Receiving problems
Problem
You press START to receive an document.
But you receive nothing.
Your recording paper is not fed out.
Your fax machine reports an operating error or
fails to perform the required function. Before
you make an unnecessary call on your service
possible causes ...
Your have an error displayed.
The fax machine is not correctly connected.
The display is blank.
There is still a document in the feeder.
Your fax machine is set in manual receiving
mode and you replaced the handset before
pressing START.
The operator control panel is not closed.
The recording paper in your machine is
jammed.
technician, take your time and see if you
can help yourself. This checklist will help
you recognise and eliminate errors.
... and solutions
If the display shows an error message,
eliminate the fault and delete the display
with STOP.
Check the wiring. See page 8.
Check there is power to the machine.
The machine must be switched on (see
page 8).
Press STOP and remove the document.
When receiving the next fax, be sure to
replace the handset only after you have
pressed START.
Close the cover. Both sides of the cover
must be firmly locked in place.
Remove the jammed paper (see page
67).
The dcoument received is difficult to read.
You receive a completely blank document.
The document received is partially printed.
Document quality is poor.
The telephone connection is poor.
The sender made a mistake when loading the
document.
The operator control panel of your fax machine
is not closed properly on both sides.
Ask the sender to reset the resolution and
contrast or improve the quality of the
document e.g. by making the print on the
photocopy darker, enlarging or reducing.
Then have it send again.
Ask the sender to transmitt the document
again (see Page 7).
Check whether the sender loaded in the
correct manner.
Close the cover. Both sides of the cover
must be firmly locked in place.
GB
Possible problems
66
TOSHIBA
TF 610
Page 67

Possible problems
How to clear a paper jam...
When documents are fed in and
recording paper fed out, this can lead to
minor problems from time to time which,
however, you can easily put right yourself.
Just one point to remember: your fax
machine should not be switched off as
this would delete all the stored fax
messages.*
* If you switched off your fax machine by
mistake and thus deleted any fax message
stored in the memory, ask for a reception
report to be printed out. This gives the
sender and you can ask him to send the
message again.
How to clear a document jam
Press the release button
top open the control panel cover.
Keep the power ON!
The jammed document
can be carefully removed.
Do not try to send the jammed
document again. Use a carrier sheet
or make a photocopy and transmit this
instead.
Close the control panel.
Take care that the cover locks firmly into place.
Now by pressing STOP delete the error
message.
How to clear a recording paper jam
After opening
the rear cover of the housing or the top cover,
you will see whether paper has jammed here.
Carefully remove any jammed paper without
applying force. Don’t forget to firmly close the
back cover again!
If paper has jammed under the process unit, lift
the paper guide upwards and remove the
process unit. You can then easily free any
jammed paper without applying force.
Has the recording paper jammed around the
fixer unit?
Then - if necessary - press the release lever of
the fixer unit downwards and at the same time
carefully pull out the jammed paper.
Caution: HOT!
When closing the machine,
ensure that all covers firmly lock into place.
Do not touch any parts inside the
machine other than those described
here. The header cover may be very
hot - even when the machine is switched off.
Never open the recording paper cassette when
paper is jammed.
TF 610
TOSHIBA
Possible problems
67
GB
Page 68

Handling faxes on your PC
System requirements
You can also use the features of your fax
machine your PC. The fax functions can
also be used in addition to the printer
function. The following minimum
requirements are essential in this respect:
• IBM compatible PC with i80486
processor or higher
• 8 MB RAM or higher
• Serial (V.24) interface for connection
to the TF 610
• Microsoft Windows 3.11 / 95
operating system
• Fax software
TOSHIBA SmartLinkTOSHIBA SmartLink
TOSHIBA SmartLink
TOSHIBA SmartLinkTOSHIBA SmartLink
Features
The following features are available in
conjunction with the software TOSHIBA
SmartLinkSmartLink
SmartLink:
SmartLinkSmartLink
The PC fax interface complies
fax class1fax class1
with the
fax class1 standard
fax class1fax class1
Connection to the PC
Mode Description
PC scanner Scans documents into the PC via the document feeder of the fax
machine.
PC fax, transmission Files created under Windows can be transmitted directly via the
fax machine (i.e. without being printed out)
PC fax, reception Incoming faxes are transferred to the PC as an image file via the
fax machine without being printed out. If the PC is not switched
on, the pages are automatically printed out.
OCR Received faxes or scanned texts are converted into readable
ASCII text with the OCR module.
1. Switch off the PC and the TF 610.
2. Connect the 25-pin sub-D connector to the
corresponding socket on the fax machine,
and secure the connection with the
connector screws.
Pin assignment of serial cable
GB
Handling faxes on your PC
68
Sub-D 9 pin socket (female)
Sub-D 25 pin socket (male)
3. Connect the cable to the serial interface of
your PC.
PC-Fax
Connect the TF 610 before the
installation.
TOSHIBA
TF 610
Page 69

Handling faxes on your PC
Scanning documents into the PC
You can transfer your documents to your
PC via the sheet feed of your TF 610. The
document is then available as an image
file in your PC, and can be processed as
required.
*) This display indicates whether your PC
is actually ready to receive.
The following conditions must be fulfilled:
• Ensure that the cable has been
connected correctly
• The PC must be switched on
• The fax program must be loaded and
active
• The fax program must be set to
automatic reception
Otherwise, the TF 610 will display the
following after a certain amount of time:
PC COMM. ERROR #001
In this case, clear the error message by
pressing the STOP button, and remedy the
problem
DOCUMENT SET
CO MM.OPTION
TRAY SEND
1x
PC SCANNER
ENTER
PC READY ?
ENTER
Insert document with text side
down
Document is ready
Press TX OPTIONS key
Page through the menu...
...until you reach the desired menu item
Confirm with ENTER
PC ready? *)
Confirm with ENTER
Documents scanned in this way
are stored in the form of image
files in your PC. An OCR program
must process this file if it is to be
integrated within a word processing
program. This process is essential if the
file is to be used as a text file.
Sending fax messages from the PC
If you have for instance created text or
graphics via a word processing program,
you do not need to print out the text or
graphics in order to send a fax document.
PC-fax Software transfers your document
via the cable from your PC to the fax
machine together with the fax number
which you have specified when you were
processing the document. Following
internal transmission, the job is then
handled as a normal job in your fax
machine.
DOC.READING M98%
TRANSMITTING TO PC
15-03 19:56 M 100%
REC EIVING FROM PC
JOB ACCEPTED NO.007
15-03 19:56 S 89%
Return to the standby mode
PC is transmitting the fax data to the fax
machine
PC transfer complete: the job is stored as
a new job in the stack
Return to the standby mode
Depending on the contents of the stack,
the job is soon sent by the fax machine.
TF 610
TOSHIBA
Handling faxes on your PC
69
GB
Page 70

Handling faxes on your PC
Sending faxes to the PC
If you have connected a PC to your fax
machine, you can send documents
directly to your PC.
The following requirements are essential
for this process:
• Function number 46 (receive to PC) is
set to ON (for setting, see page 55).
• The fax software is loaded and
activated.
• The connection to the PC has been
established.
The following error message is displayed if
your fax machine cannot reach the PC:
PC COMM. ERROR #001
In this case, the incoming fax document
is printed out on the fax machine. The
error message does not affect the ability
of the fax machine to receive further
documents.
A fax document received in this
way is stored in the form of an
image file in the PC. An OCR
program must process a file before any
received text can be integrated in a word
processing program. This is essential if
this file is to be used as a text file.
GB
Handling faxes on your PC
70
TOSHIBA
TF 610
Page 71

Y our fax machine used as a PC printer
Introduction
Your fax machine can be used as a PC
printer under Microsoft Windows 3.11 /
95 / N. For this purpose, you have to
install a printer driver on the supplied disk.
The printout speed very much depends on
the performance of the connected PC.
If software is to be updated from Win
3.11 to Win 95, we recommend that you
deinstall the TOSHIBA printer driver before
the update (see page 27).
The printer driver can be
reinstalled when the software
has been successfully updated
to a higher Windows version.
Connection to the PC
You need a bidirectional parallel printer
cable (IEEE 1284-1994 standard) for the
connection to the PC.
1. Switch off the PC and the fax
machine
2. Connect the PC and the fax machine
with the printer cable
3. Switch the fax machine on, and then
switch the PC on
4. Start Windows
TF 610
TOSHIBA
Y our fax machine used as a PC printer
71
GB
Page 72

Y our fax machine used as a PC printer
Install printer driver
The illustrated examples refer to the
Windows 95 interface.
• Insert the installation disk in the drive
of your PC
• Click on “Start“
• Select “Run” in the menu
• Click on the “Browse“ button
• Select the drive containing the
installation disk
• Open the directory with the language
of your choice
• Double click on the “Setup“ entry
• Click on OK to start the installation
GB
Your fax machine used as a PC printer
72
TOSHIBA
TF 610
Page 73

Y our fax machine used as a PC printer
• Click on “Next“
• Select the printer port (LPT) where the
fax machine is connected. LPT1 is the
default setting.
• If you wish, you can change the
proposed printer name.
• If the fax machine is to be defined as
the standard printer in Windows, click
on “Yes“
• Click on “Finish“
A new program group is created
• Remove the installation disk from the
drive.
TF 610
TOSHIBA
Y our fax machine used as a PC printer
73
GB
Page 74

Y our fax machine used as a PC printer
Settings of the printer driver
The printer driver has a wide range of
settings for providing the best results in
various print applications.
The following examples illustrate some of
the most important settings.
Access the settings of the printer
driver:
• Click on “Start“
• Select the menu item “Settings“
• Select the submenu item “Printers“
• Double click on the THOSHIBA printer
driver.
• Click on the “Printer“ menu
• Select the menu item “Properties“
The system opens the “
window of the printer driver.
PropertiesProperties
The “
Properties“ window consists of
PropertiesProperties
registers which can be selected with a
mouse click. The printer functions are
controlled by the registers “General“ and
“Details“, which are automatically created
during installation and contain technical
program parameters, and also by the
registers “Paper“, “Graphic“ and “Device
Options“ .
These three registers are available in any
Windows application; simply select the
corresponding printer device in the
program’s own “File“ menu.
PropertiesProperties
Properties“
PropertiesProperties
GB
Your fax machine used as a PC printer
74
TOSHIBA
TF 610
Page 75

Y our fax machine used as a PC printer
Contents of the “Paper“ register:
Paper Size:
Size of the print paper
Orientation:
Landscape or portrait output
Paper Source:
Choice of paper cassette (permanent
setting in TF610)
Copies:
Number of copies to be printed per page
More Options, Output Bin:
Facility for defining the printout sequence
Contents of the “Graphics“
register:
Resolution:
Choice of resolution (permanent setting in
TF610)
Dithering:
Type of grey scale reproduction
None:
No grey scale reproduction
Coarse:
Coarse rastering
Fine:
Fine rastering
Line Art:
Grey reproduction with special patterns
Error Diffusion:
Airbrush effect, best grey reproduction
Processing speed various with
the choice of grey scale
reproduction.
Intensity:
Use this slide bar to regulate the intensity
of the printer (click on and drag the slide
bar). Only meaningful for reproducing grey
scales.
TF 610
TOSHIBA
Y our fax machine used as a PC printer
75
GB
Page 76

Y our fax machine used as a PC printer
Contents of the “Device Options“
register:
Print Quality:
Quality of printout (permanent setting in
TF610)
Printout
Documents are generally printed out with
the “Print“ command in the particular
application.
As soon as the print job has been sent to
the printer driver, the status window of the
printer driver is displayed (depending on
the particular setting, you have to click on
the small rectangular symbol in the status
line).
This window provides detailed information
concerning the current print status. You
are also notified of the current operating
statuses of the printer; the current
situation is indicated by graphical
elements.
Use the “Pause“, “Resume“ and “Cancel“
keys to monitor the print job at any time.
GB
Your fax machine used as a PC printer
76
TOSHIBA
TF 610
Page 77

Y our fax machine used as a PC printer
Delete printer driver
In order to delete the printer driver from
the operating system, please proceed as
follows (example from Windows 95):
••
Click on the entry “Click on the entry “
•
Click on the entry “
••
Click on the entry “Click on the entry “
Windows Printer“ in the task lineWindows Printer“ in the task line
Windows Printer“ in the task line.
Windows Printer“ in the task lineWindows Printer“ in the task line
• Double click on the “Uninstall“ icon
You are subsequently informed of the
deinstallation procedure. The printer driver
is deleted when the system is next
started.
If there is no entry in the task
line, select the “Uninstall“ icon
via your program library
TT
OSHIBAOSHIBA
T
OSHIBA
TT
OSHIBAOSHIBA
TF 610
TOSHIBA
Y our fax machine used as a PC printer
77
GB
Page 78

UK Connection information
Reset
You can restore the original factory
settings or reset your fax machine if you
are unable to eliminate the error code by
taking the action suggested on pages 63-
66.
We declare, that TOSHIBA is using
mark in compliance with
EN 50 082-1, EN 55 022/B and
EN 60 950
This TOSHIBA Facsimile
Transceiver is intended for
connection to public
telecommunication services as
follows:
By using the cable described as
TEL LINE CABLE in the packaging
list of the instruction manual. This
cable plugs into the socket on the
left hand side of the TF 610 which
is marked LINE and the other end
into the standard PSTN analogue
socket found in the UK.
START
This terminal equipment complies with
the following requirements:
Group 3 fax modem
Automatic call initiation
Storage of telephone numbers for
retrieval by a predetermined code
Automatic dialling
Automatic repeat attempts
Call progress monitor
Series connection facility
LD or MF dialling
Operation with or without dial tone
being present.
STOP
15.03. 98 19: 56
Switch off your fax machine.
Keep START and STOP pressed down
while switching your machine back on.
As soon as a message is displayed,
release.
After reset, repeat the installation
procedure (see page 10).
The abbreviated numbers, date
and time will NOT be erased.
Any other usage will invalidate
the approval of the apparatus if as
a result, it then ceases to conform
to the standards against which
approval was granted.
EPA ENERGY STAR
Addendum to the TF610 Operator’s Manual
The United States Environmental Protection Agency (EPA) has introduced a voluntary program, the ENERGY STAR
Program, to encourage the widespread and voluntary use of energy-efficient technologies that enhance the
workplace, improve product performance, prevent pollution, and reduce your energy costs. As an ENERGY ST AR
Partner, to Toshiba Europa (I.G .) GmbH has determinded that this facsimile model meets the ENERGY STAR
guidelines for energy efficiency. ENERG Y ST AR guidelines require that all ENERG Y STAR facsimiles maintain very low
power consumption during idle state or have a „Power Saver“ feature that will automatically stand-down to an idle
state after a period of inactivity.
For more information on the ENERGY ST AR P rogram, please contact:
ENERGY ST AR P rinters/F ax Machines
US EP A (62021)
Washington, DC 20460
ENERGY ST AR is an U.S. registered mark.
GB
UK Connection information
78
TOSHIBA
TF 610
Page 79

Index
Alphabet dial memory............................... 43
Alphabet dialling ....................................... 31
Broadcast report ....................................... 50
Broadcast, single ...................................... 37
Broadcast, stored...................................... 38
Call counter .............................................. 25
Cleaner ....................................................... 5
Code ......................................................... 16
Comline .................................................... 60
Copy ......................................................... 24
Date.......................................................... 18
Dialling method......................................... 14
Document jam .......................................... 67
Documents ............................................... 27
Drum counter ........................................... 51
Earth key................................................... 15
ECM.......................................................... 62
Error codes ............................................... 63
Error correction......................................... 62
Error messages ......................................... 64
Establish connections.................................. 8
Fax class1 ................................................. 68
Flash key ................................................... 15
Function list............................................... 51
Functions .................................................. 52
Group dialling...................................... 37, 38
Group keys ................................................ 45
Group list .................................................. 50
ID.............................................................. 12
Journal ..................................................... 49
Key beeps................................................. 58
Key beeps, volume ................................... 58
Language .................................................. 11
Last number redial .................................... 35
List, functions ........................................... 51
List, groups ............................................... 50
List, numbers ............................................ 50
List, reservation......................................... 50
Long dialling.............................................. 32
Memory card .............................................. 9
Memory expansion.................................... 51
Memory reception..................................... 25
Memory .................................................... 29
Menu ........................................................ 10
Number list............................................... 50
Obtain outside line .................................... 15
One-touch dialling keys ............................. 45
One-touch dialling ..................................... 31
PABX ......................................................... 15
PABXs........................................................ 56
Paper jam ................................................. 67
PC............................................................. 68
Polling ....................................................... 39
Power saver .............................................. 61
Printer driver ............................................. 72
Printer ....................................................... 71
Problems, receiving................................... 66
Problems, transmission ............................. 65
Process unit ................................................ 5
Provider..................................................... 32
Receive footer .......................................... 56
Reception problems.................................. 66
Reception reduction ................................. 23
Reception, automatic ............................... 19
Reception, manual ................................... 19
Recording paper exit tray, install................. 8
Recording paper, insert............................... 7
Reports, broadcast ................................... 50
Reservation list.......................................... 50
Reservation, polling................................... 40
Reset ........................................................ 78
Resolution ................................................. 35
Ring, volume............................................. 58
Ringer ....................................................... 58
Scanning .................................................. 69
Screening volume ..................................... 57
Screening ...........................................34, 57
SmartLink.................................................. 68
Stack memory .......................................... 28
Switch, TAD.............................................. 20
Switch, telephone..................................... 20
TAD time................................................... 21
Telephone companies............................... 32
Telephone directory................................... 33
Telephone................................................. 32
Time ......................................................... 18
Toner cartridge............................................ 6
Toner change .............................................. 6
Transmission problems.............................. 65
Transmission speed................................... 41
Transmission, delayed............................... 36
Transmission, stop..................................... 42
Transport..................................................... 5
Transport fittings ......................................... 5
TX report.......................................48, 59, 60
TF 610
TOSHIBA
User name ................................................ 13
Index
79
GB
 Loading...