

Toshiba 53HX71, 53H71, TAC0158, TAC0160 Service Manual

SERVICE MANUAL
COLOR TELEVISION
FILE NO. 023-200119
N1PSP Chassis
53HX71, 53H71
(TAC0160)(TAC0158)
– SUMMARY –
53HX71, 53H71 are the same as 50H81 except for the parts and bus data of micro-processor
Convergence adjustment and Mechanical disassembly tabled on back of this sheet.
Use this service manual together with the service manual of 50H81 (File No. 020-200109).
PUBLISHED IN JAPAN, Aug., 2001 So
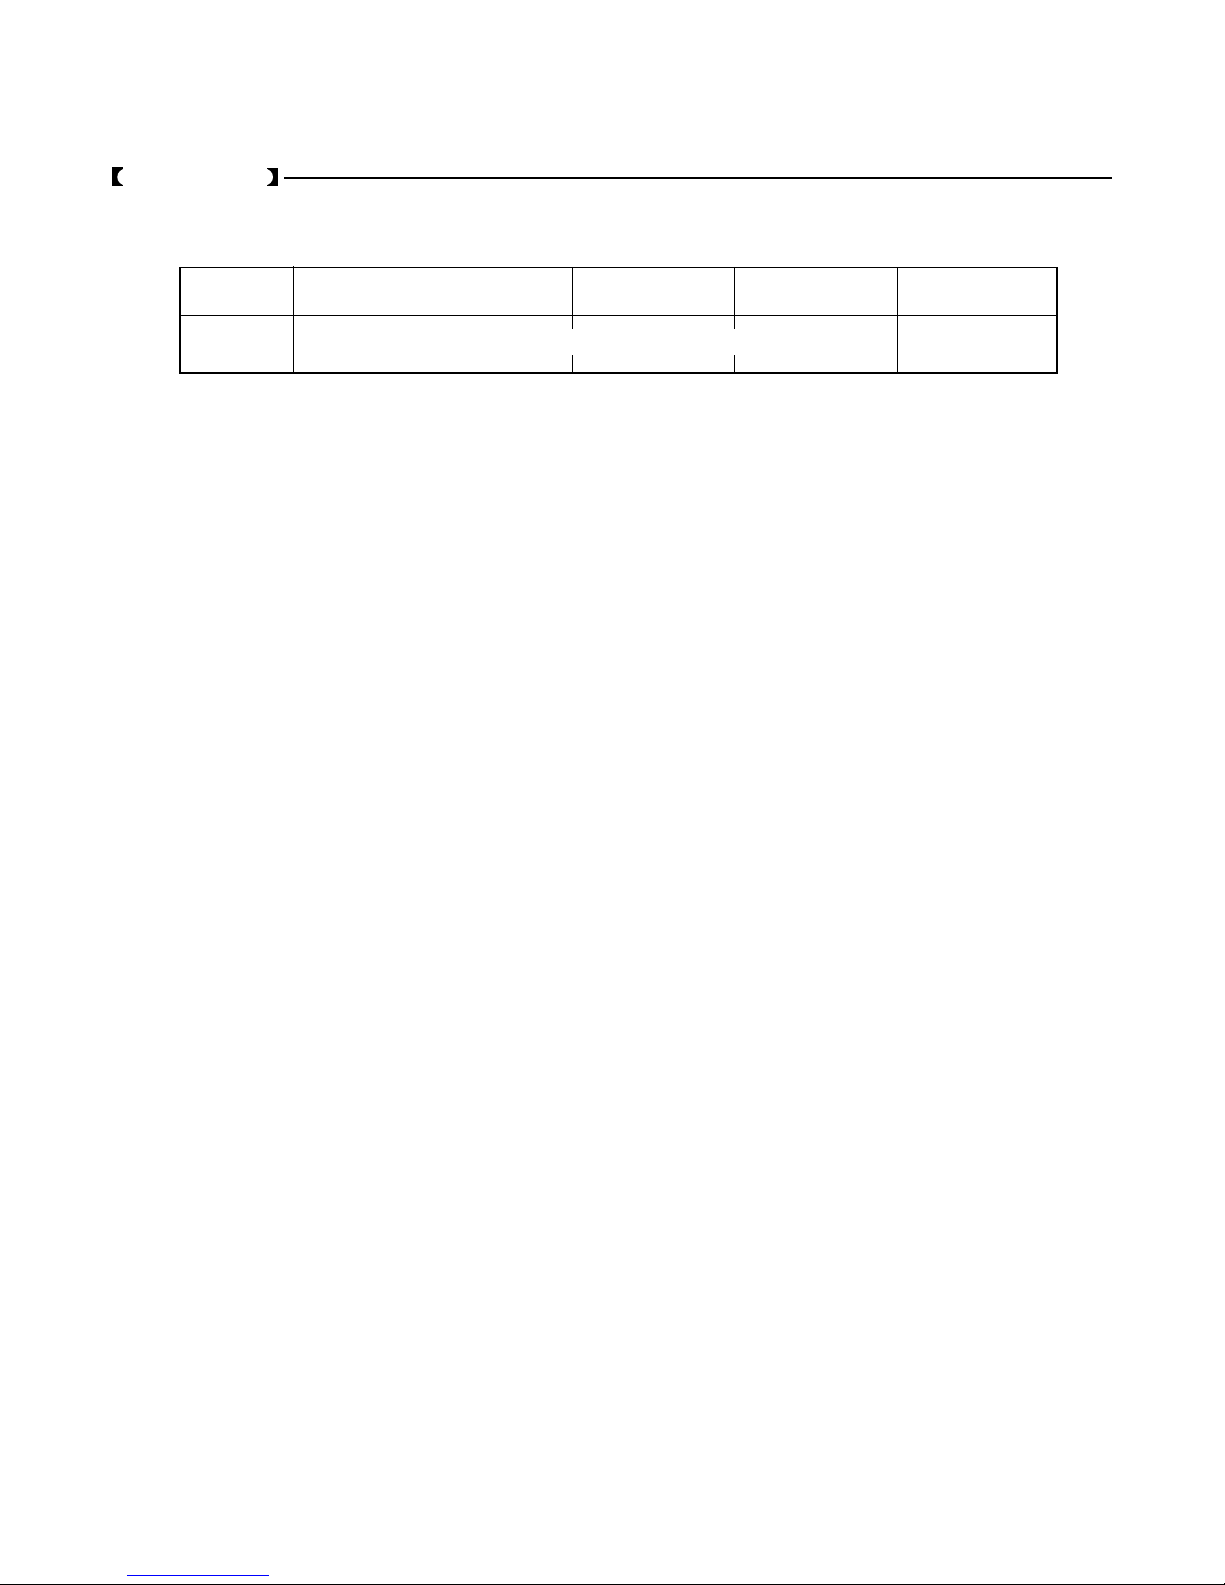
SETTING & ADJUSTING DATA DIFFERENCES
SERVICE MODE
ADJUSTING ITEMS AND DATAS IN THE SERVICE MODE:
Item Name of adjustment Preset 53" Remarks
* There are no adjustments in the Service mode.
Table-3
– 2 –

CONVERGENCE ADJUSTMENT
Adjust convergence from center to circumference in order.
KEY FUNCTION IN THE CONVERGENCE ADJUSTMENT:
Up : 2 button
Selet Green color: 3 button
Left : 4 button
Blinking of cursor ON/OFF: 5 button
Right: 6 button
Adjust mode ON/OFF: 7 button
Down: 8 button
Erase Green line: 0 button
Erase Red line: 100 button
Erase Blue line: CHRTN (ENT) button
Note:
Adjusting procedure in replacing convergence board.
1. User convergence center check. Mak e sure the best convergence setting is about the center of adjustable range.
2. CENTERING ADJUSTMENT
3. PICTURE POSITION ADJUSTMENT
4. HIT, WID ADJUSTMENT
5. CONVERGENCE ADJUSTMENT
1. Select the adjustment mode following the steps on page 9
of original servicemanual.
RCUT
40H
2. Press “7” button to display the built-in cross-hatch pattern.
3.5 (43", 50")
4.0 (53", 55")
5.0 (61")
Cursor
P=72.2×12 (43")
84.0×12 (50")
92.5×12 (53", 55")
102.5×12 (61")
3.5 (43", 50")
4.0 (53", 55")
5.0 (61")
21.5 (43")
26.5 (50")
28.5 (53", 55")
31.0 (61")
P=43.7×14 (43")
50.5×14 (50")
55.8×14 (53", 55")
62×14 (61")
21.5 (43")
26.5 (50")
28.5 (53", 55")
31.0 (61")
The pattern includes three control (R, G, B).
The cursor should be blinking in Red.
This means that the Red color is adjustable.
Adjustment around cursor can be done.
3. Press “3” button to select Green color to be adjusted.
4. Press “5” button to stop the blinking of cursor.
5. Press “2 (up)”, “8 (down)”, “4 (left)” or “6 (right)” to obtain
the correct cross-hatch pattern as above.
If necessary, the specified color line can be erased from
the screen.
100 button ...................... to erase Red line
0 button ...................... to erase Green line
RTN button ......................to erase Blue line
6. Press “5” button to make the cursor blinking.
7. Press “2”, “8”, “4”, “6” buttons to move the cursor to other
point to be adjusted.
8. Repeat steps 4 to 7.
9. Repeat steps 3 to 8 to adjust Red and Blue colors.
Converge the selected color line into the Green line.
10.Press “7” button to memorize the adjusted states.
At this time, picture changes for about 1 second.
11.Press “7” button again to return to the normal picture.
– 3 –
 Loading...