


Synappx Go
Quick Start Guide
Synappx Go Quick Start Guide| Page 1
DOWNLOAD
DOWNLOAD SYNAPPX GO TO YOUR MOBILE DEVICE
Once your administrator adds you as a licensed user, you will receive an automatically-generated email
prompting you to download the Synappx Go mobile app.
iOS
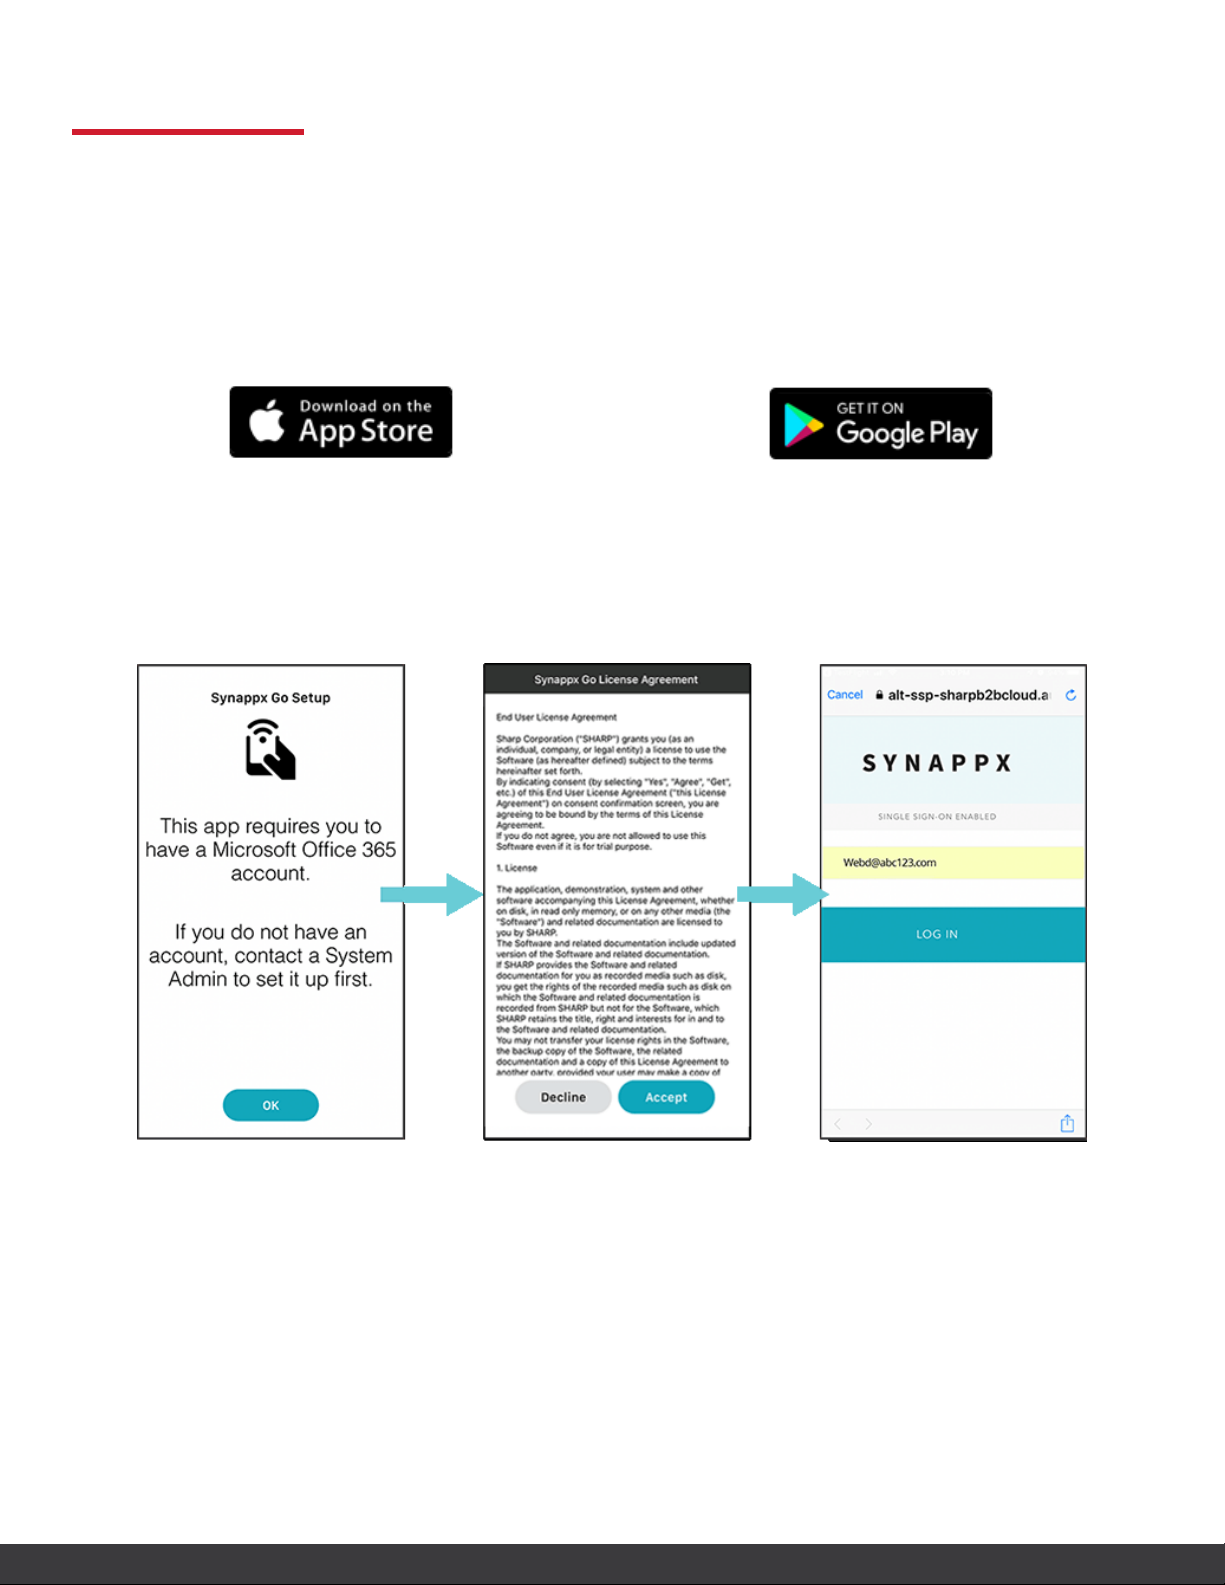
1. Download Synappx Go from the Apple® App Store.
2. Open the app.
Select OK to acknowledge the Microsoft® Office 365® account notice.
Accept the Synappx Go End User License Agreement.
Enter your Office 365 email address and select LOG IN.
1. Download Synappx Go from Google® Play.
Android
Synappx Go Quick Start Guide| Page 2

SETUP
CLOUD STORAGE
1
FOR SHARING
1. Select Configure.
2. Sign in to cloud account(s).
3. A request will appear to allow
Synappx Go to access your files.
Select Allow.
4. Repeat to add another cloud
service or select Next.
EMAIL DISTRIBUTION
2
LIST FOR SCANNING
1. The Setup - Scan and Print screen
will appear next. Select Configure.
2. Choose to allow or deny access to
mobile contacts.
3. Type a distribution list title in the
Scan to Email List field.
4. Type an email address or a few
characters of a mobile contact.
5. Select (+) to add more addresses.
Addresses will appear in the Send
to: list below (ten maximum).
6. Select Save when done.
CLOUD STORAGE
3
FOR SCANNING
1. Next, the Scan to Cloud Folder
screen will load accessible cloud
storage.
2. Select a service to use as a scan
destination option.
3. Select a folder and Save. Your
folder will appear as a Scan to
Cloud Folder destination.
Synappx Go Quick Start Guide| Page 3

SETUP
PRINT RELEASE DEFAULT BEHAVIOR
4
There are two options for print release.
1. Release all files allows Synappx Go to print all
files in the print queue at once.
2. Select files at print time allows you to choose
specific files to print.
Choose your preference. Then select Next.
SCAN DEFAULT SETTINGS (OPTIONAL)
5
1. Select the menu icon from the home screen.
2. Select Settings.
3. Select Scan and Print Settings
4. Select the scan settings gear icon.
5. From the scan settings page, you can set the
color mode, resolution, file format, and more.
Synappx Go Quick Start Guide| Page 4

HOW IT WORKS
SHARE TO DISPLAY
1. Select Share on the home screen. Recently modified files from configured cloud services will appear.
2. Choose a recently modified file from the list OR use the search, browse, or filter features to find a file.
3. Once you select a file, select Share. The app will prompt you to tap the NFC tag.
Synappx Go Quick Start Guide| Page 5

HOW IT WORKS
SCAN PRINT
1. Select Scan and Print on the
home screen.
2. Then select Scan.
3. Choose your scan destination.
4. Select Start Scan. The app will
prompt you to tap the NFC tag
on the display board.
1. Select Scan and Print on the
home screen.
2. Then select Print.
3. The app will prompt you to tap
the NFC tag on the MFP.
For detailed setup instructions, visit the Synappx support site at
https://business.sharpusa.com/synappx-support/.
©2019 Sharp Electronics Corporation. All rights reserved.
Design and specifications subject to change without notice.
Sharp, Synappx and all related trademarks are trademarks or registered trademarks of Sharp Corporation and/or its affiliated
companies. Internet Explorer, Microsoft, Office 365, OneDrive and Azure are registered trademarks of Microsoft Corporation
in the United States and/or other countries. Android and Google are trademarks of Google Inc. All other trademarks are the
property of their respective holders.
Synappx Go Quick Start Guide| Page 6
 Loading...