

Page 1
--Electronic-Telephone
--User-Guide--
Page 2

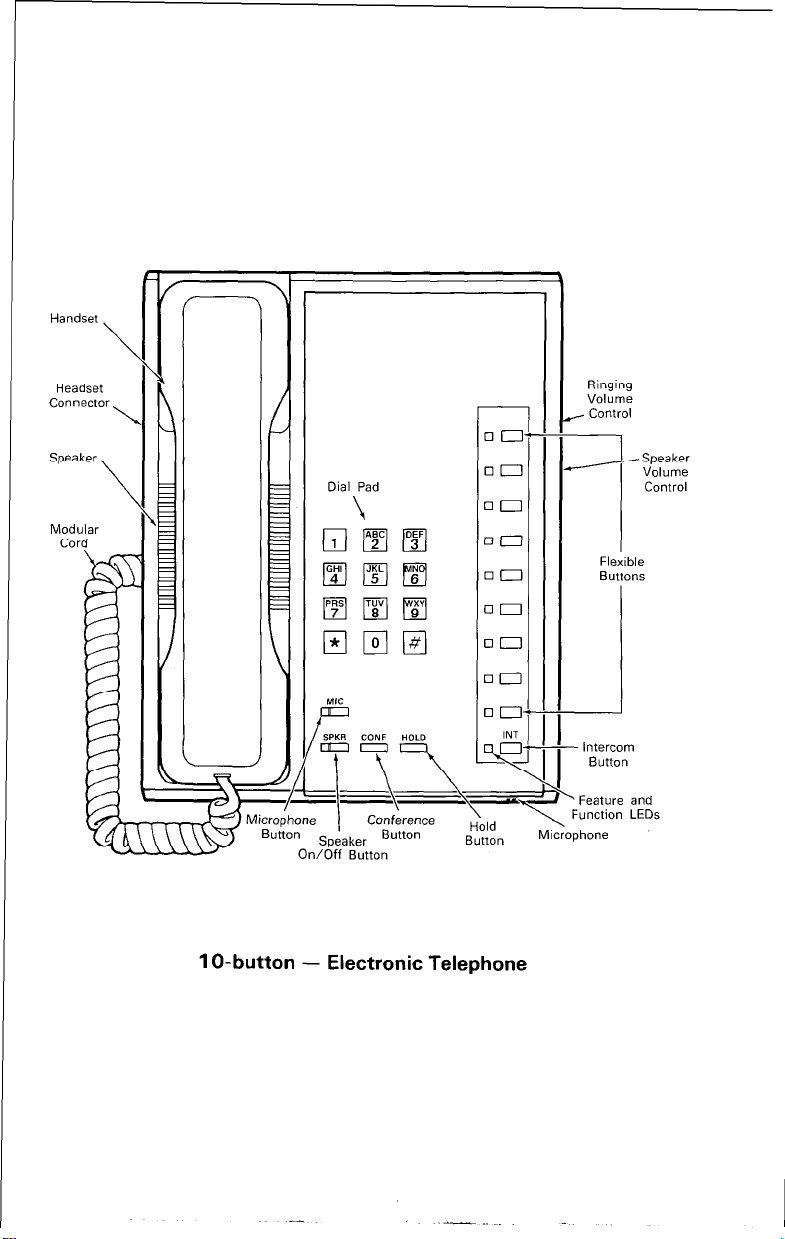
Handset
Speaker
Modular
Cord
Dial Pad
\
Conference
Button
’ Hold Button
Ringing
I
Volume
Control
Speaker
y Volume
Control
c Message
Waitmg
Light
-Intercom (INT)
Button
Single-Line Electronic Telephone
Page 3
Handset
\
Headset
connector
Speaker
Modular
Ringing
\
\
Cooference
Speaker Button
Un/Vtt Button
Hbld
Button
Volume
/ Control
2 Speaker
Feature and
1 Function LEDs
Microphone
Fl&ble
Buttons
Intercom
Button
Volume
C0ntKJl
1 O-button - Electronic Telephone
Page 4
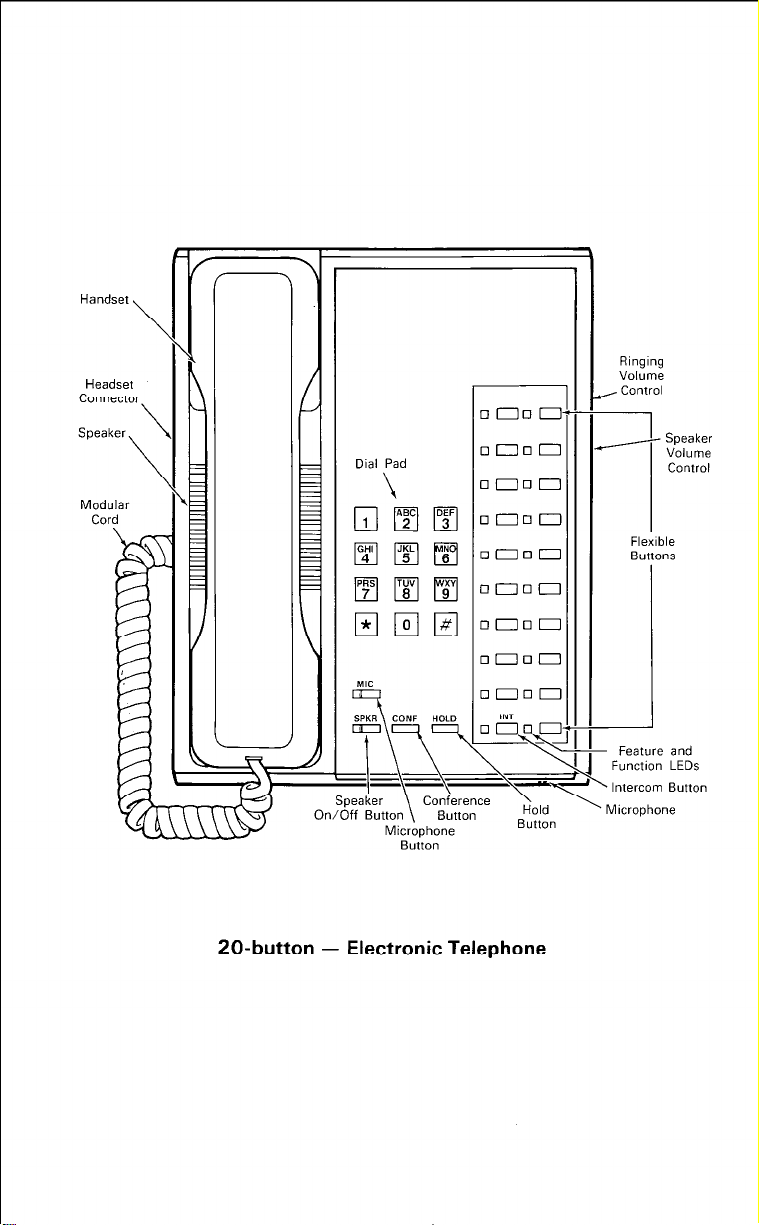
Handset
Headset
connector
Speaker
Modular
Cord
\
\
Ringing
VOlUme
, Control
\
\
Flexible
Buttons
!
Feature and
Function LEDs
Speaker \ Conference
On/Off Button Button
Microphone
Button
tiold
Button
- Intercom Button
’ Microphone
20-button - Electronic Telephone
Page 5
P-TOSHIBA
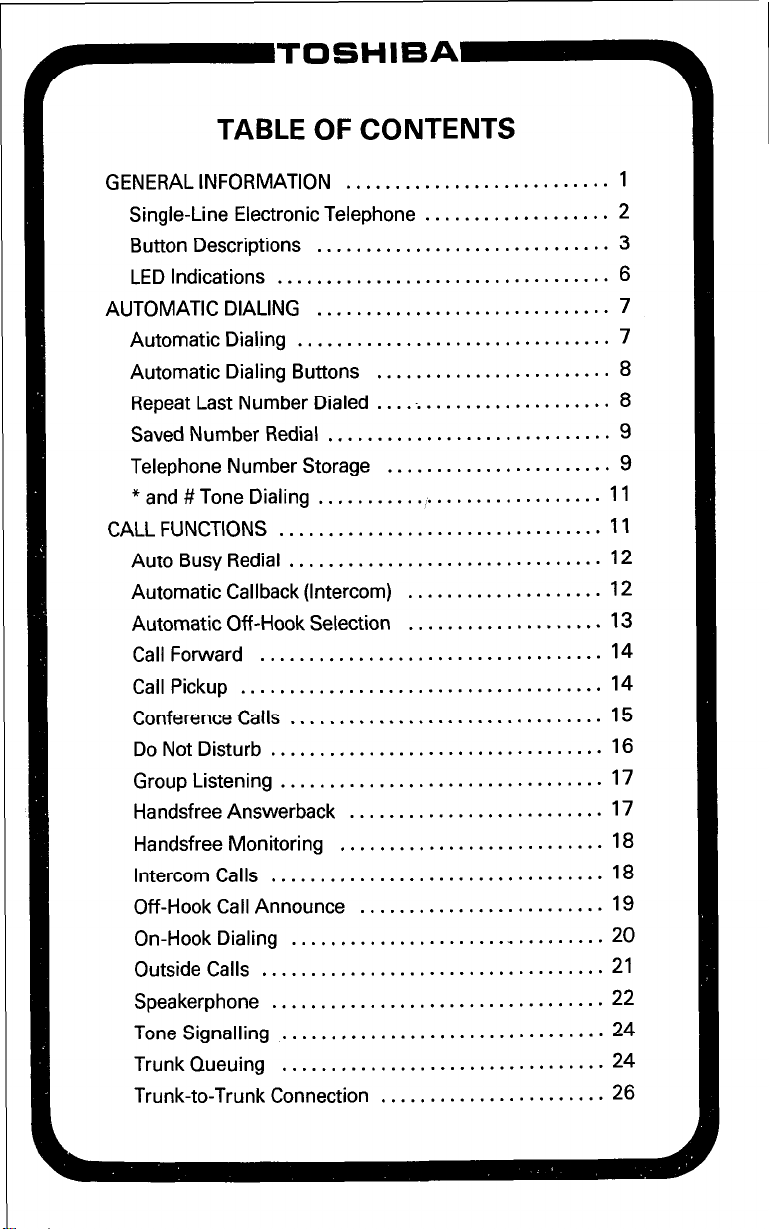
TABLE OF CONTENTS
GENERAL INFORMATION
Single-Line Electronic Telephone
Button Descriptions
LED Indications ..................................
AUTOMATIC DIALING
Automatic Dialing ................................
Automatic Dialing Buttons
Repeat Last Number Dialed
Saved Number Redial
Telephone Number Storage
*and#ToneDialing
CALL FUNCTIONS
Auto Busy Redial
Automatic Callback (Intercom)
Automatic Off -Hook Selection
Call Forward
Call Pickup
Conference Calls
Do Not Disturb
Group Listening
Handsfree Answerback
Handsfree Monitoring
Intercom Calls ..................................
Off-Hook Call Announce
On-Hook Dialing
Outside Calls ...................................
Speakerphone
Tone Signalling
Trunk Queuing
Trunk-to-Trunk Connection
.................................
...................................
.....................................
..................................
.................................
.................................. 22
.................................
.................................
........................... 1
..............................
..............................
........................
....
............................. 9
.......................
............................. 11
................................
................................
.......................... 17
...........................
......................... 19
.....................
....................... 26
...................
.................... 8
.
....................
.................... 13
........
.-.
2
3
6
7
7
8
9
11
12
12
14
14
15
16
17
18
18
20
21
24
24
Page 6
P-TOSHIBA
TABLE OF CONTENTS
CALL HOLD and TRANSFER
Call Holding
Call Transfer with Camp-on
Exclusive Hold
Night Transfer
MISCELLANEOUS FEATURES
Account Code Recording
Alarm .........................................
Background Music (BGM)
Direct Station Selection
DoorLock ......................................
Door Phone
Message Waiting
Modem ........................................
Override
Paging .........................................
Privacy/Non-Privacy
Station Security
Toll Restriction Override
Tone/Pulse Sending
Timed Reminders ..........
Voice Mail
CENTREX APPLICATION
....................................
..................................
.................................. 31
.........................
..........................
....................................
...............................
.......................................
............................. 39
................................. 39
.........................
............................
......................................
............................ 43
(continued)
........................
......................
......................
........................ 33
......................
27
27
27
30
32
32
33
33
33
34
35
37
38
38
40
40
41
41
Page 7

GENERAL INFORMATION
Your electronic telephone has been designed to provide easy
access to the wide range of features offered by your telephone
system. Each phone is equipped with a dial pad, 4, 14 or 24
feature buttons, a speaker with volume control, and a handset.
All the feature buttons are plainly marked as to their purpose.
Four buttons have fixed assignments: m, m*, m, and
m. The remaining 10” or 20* buttons are assigned flexibly as
m buttons, or as access buttons for the various features.
The voice and ring tone volume levels are controlled by separate
volume controls located on the right side of the telephone. The
lower control adjusts speaker volume for dial tone and voice
level; the upper control adjusts ring tone and voice announce-
ment volume.
This guide also contains a section on the CENTREX Application,
which enhances the system feature capability when installed
behind a CENTREX or PBX system.
Please be aware that some of the features listed in this guide may
not appear in your telephone system due to hardware configuration or programming.
NOTE:
Wherever a CO line is indicated. it can also be a CENTREX (CTX)
and/or PBX line.
*Not available on Single-Line electronic telephone.
Page 8

GENERAL INFORMATION
SINGLE-LINE
ELECTRONIC TELEPHONE
Your Single-Line electronic telephone is equipped with a blank
single-line button/LED that functions as both an intercom (INT)
and CO line button/LED.
Features are accessed through the use of dial codes listed in this
guide. To access the features that are allowed using the SingleLine electronic telephone, a dial code must be used instead of a
feature button.Adialcodemustbeavailabletoallowthefeature
to function. For example, the Automatic Callback(ACB)feature is
allowed due to the dial code 1, while the Do Not Disturb (DND)
feature is not allowed.
The following features cannot be used with a Single-Line electronic telephone:
l
Automatic Dialing Buttons
l
Do Not Disturb
l
Trunk-to-Trunk Conferencing
l
Two-CO Line Conferencing
l
Pooled Line Button
The Single-Line electronic telephone is a non-speakerphone
model that allows handsfree monitoring, but not handsfree answerback. Also, the second modular headset connector is not
available for headset or external interface operation. The Single-
Line electronic telephone may or may not be equipped with an
optional Message Waiting LED.
SPECIAL OPERATION
l
TO hook flash when connected to a Centrex or PABX line:
Dial: 1 1 fl.
NOTE
The Single-Line electronic telephone is proprietary to Toshiba
Telephone Systems and will not function when connected
directly to other telephone systems.
Page 9
I _
GENERAL INFORMATION
BUlTON DESCRIPTIONS
ALARM BUTTON m
A station lo-only programmable option that causes a signal if
connected to an alarm mechanism.
ALL CALL VOICE PAGE BUlTON m (Se only)
A single dedicated button that allows a station to voice page all of
the electronic telephones in the system simultaneously.
ALPHANUMERIC MESSAGING BUlTON m
Allows system and personal messages to be displayed on the
32-character Liquid Crystal Display (LCD).
ANSWER/CALL BUlTON m
Places the modem in the answer or originate call mode.
AUTO BUSY REDIAL BUlTON m (Xlle/XXe only)
Allows the user to set up an Automatic Busy Redial after
receiving busy tone on a dialed CO line call.
AUTOMATIC CALLBACK BUlTON m
Recalls a busy or DND station on intercom as soon as that station
becomes idle.
AUTOMATIC DIALING BUlTON m
Provides single-button automatic dialing of telephone number.
!.
:.
,.
,.
:. :
/ I- I. -c: :
.:
. .
; .
.
.r . . . :
CALL FORWARD BUlTON m
Routes all calls on intercom* to another station.
CALL PICKUP Bull-ON m
Allows CO or intercom calls to be picked up from another station.
CENTRAL OFFICE LINE BUTTON [9
Accesses an outside line.
CONFERENCE BUTTON m
Sets up conference calls and also used to transfer calls.
DIRECT STATION SELECTION BUlTON m
Causes a selected electronic telephone to ring by pressing an
assigned button.
“A CO line that is programmed to ring at only one station willalso
be forwarded from that station.
(continued)
.
,y.. ;.. ,.. . .
Page 10
P-TOSHIBA
GENERAL INFORMATION
BUlTON DESCRIPTIONS
DO NOT DISTURB BUlTON m
Locks the individual station in or out of the Do Not Disturb mode.
DOOR LOCK BUlTON
Controls a door lock mechanism.
HOLD BUlTON m
Holds outside calls.
INTERCOM BUlTON m
Accesses an intercom line.
MANUAL/AUTO BUlTON m
Places the modem into manual or automatic answer mode.
MESSAGE WAITING/FLASH BUlTON m
MW: Indicates a message is waiting.
FL: Disconnects and recalls dial tone on a CO line, or is used to
access CENTREX or PBX features.
MICROPHONE BUlTON m
Cuts off the microphone for private conversation.
MICROPHONE CUTOFF BUlTON m
Allows a station to turn its microphone off/on while idle.
q
(1 - 4)
(continued)
MODEM BUTTON m
Transfers calls from the station’s INT or CO button to the modem
phone when used with Voice/Data switching and also disconnects modem calls.
NIGHT TRANSFER BUTTON
Controls the system’s CO line ringing pattern; takes the place of
the DND button on the operator’s station.
PAUSE BUlTON m
Applies a pause after the CO line access code in automatic
dialing telephone numbers behind a PBX.
POOLED LINE BUlTON
Allows a group of CO lines to appear under one button.
q
q
(Xlle/XXe only)
(continued) A
Page 11
p-ITOSHIBA
GENERAL INFORMATION
BUlTON DESCRIPTIONS
PRIVACY/NON-PRIVACY BUlTON m
Allows selection of CO line privacy in a non-private system.
REDIAL BUlTON m
Redials the last telephone number dialed.
REPERTORY BUTTON m
Provides access to automatic dialing numbers.
SAVE BUTTON m
Saves telephone number during conversation and automatically
redials that number when button is depressed in the idle state.
SPEAKER BUlTON m
Turns the speaker on/off.
TONE BUTTON m
Changes the outpulsing of the CO line in use from DTMF tone to
rotary pulse and back.
(continued)
Page 12

GENERAL INFORMATION
LED INDICATIONS
CO INCOMING CALL
Aslowflash rate(Yz-sec. on -%sec. off) indicatesthe CO/PBX
line on which the call is coming in.
CONFERENCE
Avery fast flash rate (10 impulses per second (IPS)) indicates the
CO line presently in the Conference mode. Other stations’ LEDs
also show same indication for that line.
EXCLUSIVE HOLD
A very fast flash rate (10 IPS) indicates the CO line is placed on
Exclusive Hold.
HOLD RECALL
A quick flash rate matching the tones (2 IPS for 1 sec. - 10 IPS
for 1 sec.) reminds a station which line has been on hold for the
programmed period of time.
INTERCOM CALL
A pulsating on/off flash rate (10 IPS for 1 sec. on and 1 sec. off)
appears on the INT LED at the station that is being called.
IN-USE
A steady, double flash rate{2 sec. on - %-sec. off - %-sec. on
- l/s-sec. off) indicates the CO line presently in use at the station
that originated the call. Other stations’ LEDs are on steady for
that time.
ON-HOLD
A fast (4 IPS) flash rate (‘/a-sec. on - ‘/a-sec. off) indicates the
CO line placed on hold at the station. The LEDs of the CO line on
hold flash at a medium rate@-sec. on - %-sec. off)at theother
stations. If using the Pooled Line button, the hold indication is
only at the station that places the call on hold.
6
Page 13

~-TOSHIBA
AUTOMATIC DIALING
AUTOMATIC DIALING
TO CALL AN AUTOMATIC DIALING NUMBER
1) Lift the handset.
2) Depress any available a line button.
l
Listen for dial tone.
3) Depress the m (or the 1) button.
4) Dial the 2-digit automatic dialing code for the desired telephone number.
l
Your system will automatically dial the number for you.
5) Hang up when the call is completed.
TO CHAIN DIAL AUTOMATICALLY
Dials two or more automatic dialing numbers during one call.
1) Lift the handset.
2) Depress any available m line button.
l
Listen for dial tone.
3) Depress the m (or the 1) button.
4) Dial the 2-digit automatic dialing code for the first telephone
number to be dialed.
5) Depress the m (or the 0 ) button.
6) Dial the 2-digit automatic dialing code for the second telephone number to be dialed.*
7) Repeat the above steps for each subsequent number to be
dialed.
l
Your system will automatically dial the number for you.
8) Hang up when the call is completed.
*Only the first number dialed during the chain dial will be
repeated by the Repeat Last Number Dialed feature.
Page 14
P-TOSHIBA
AUTOMATIC DIALING
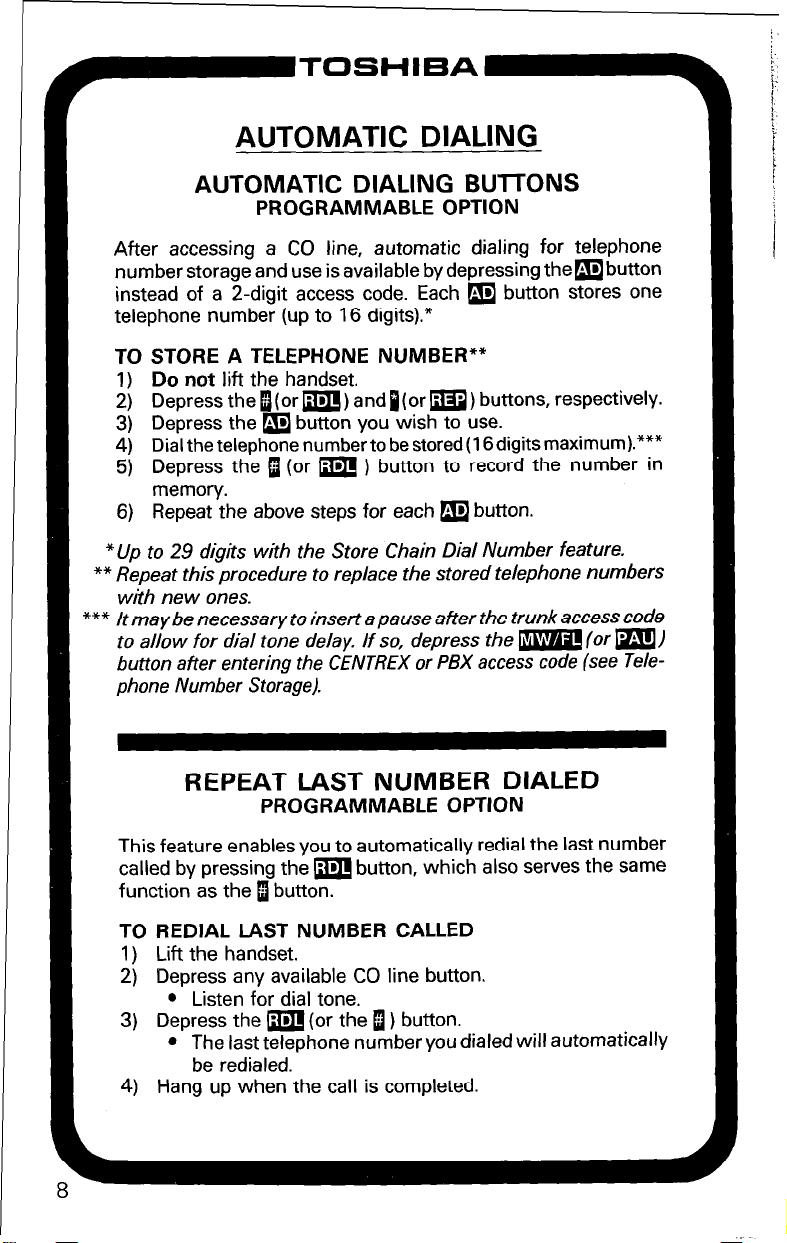
AUTOMATIC DIALING BlJlTONS
PROGRAMMABLE OPTION
After accessing a CO line, automatic dialing for telephone
number storage and use is available by depressing thembutton
instead of a 2-digit access code. Each m button stores one
telephone number (up to 16 digits).*
TO STORE A TELEPHONE NUMBER**
1) Do not lift the handset.
2) Depress thefl(or m) andp(or m) buttons, respectively.
3) Depress the m button you wish to use.
4) Dial the telephone number to be stored (16 digits maximum).***
5) Depress the B (or m ) button to record the number in
memory.
6) Repeat the above steps for each m button.
*Up to 29 digits with the Store Chain Dial Number feature.
** Repeat this procedure to replace the stored telephone numbers
with new ones.
*** It may be necessary to insert a pause after the trunk access code
to allow for dial tone delay. If so, depress the m (or m)
button after entering the CENTREX or PBX access code (see Tele-
phone Number Storage).
REPEAT LAST NUMBER DIALED
PROGRAMMABLE OPTION
This feature enables you to automatically redial the last number
called by pressing the m button, which also serves the same
function as the B button.
TO REDIAL LAST NUMBER CALLED
1) Lift the handset.
2) Depress any available CO line button.
l
Listen for dial tone.
3) Depress the m (or the a ) button.
l
The last telephone number you dialed will automatically
be redialed.
4) Hang up when the call is completed.
Page 15
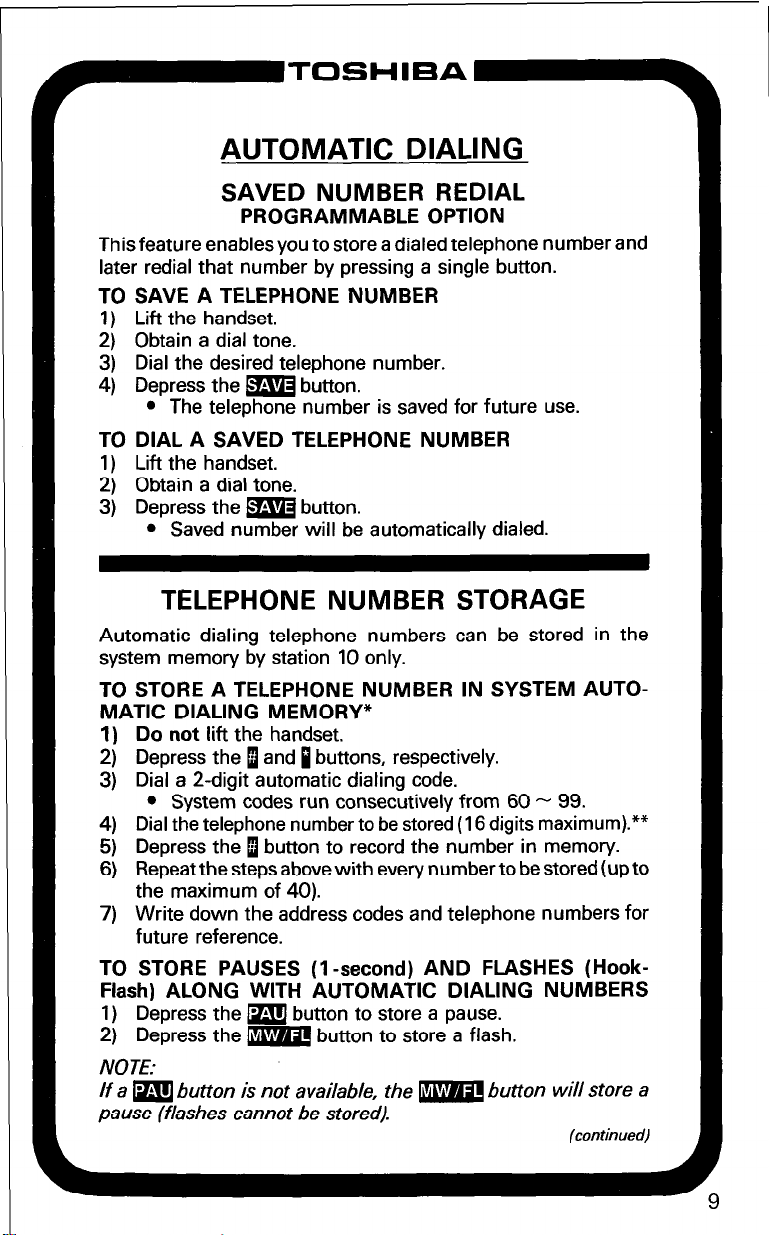
AUTOMATIC DIALING
SAVED NUMBER REDIAL
PROGRAMMABLE OPTION
This feature enables you to store a dialed telephone number and
later redial that number by pressing a single button.
TO SAVE A TELEPHONE NUMBER
1) Lift the handset.
2) Obtain a dial tone.
3) Dial the desired telephone number.
4) Depress the m button.
l
The telephone number is saved for future use.
TO DIAL A SAVED TELEPHONE NUMBER
1) Lift the handset.
2) Obtain a dial tone.
3) Depress the m button.
l
Saved number will be automatically dialed.
TELEPHONE NUMBER STORAGE
Automatic dialing telephone numbers can be stored in the
system memory by station 10 only.
TO STORE A TELEPHONE NUMBER IN SYSTEM AUTO-
MATIC DIALING MEMORY*
1) Do not lift the handset.
2) Depress the 1 and 1 buttons, respectively.
3) Dial a 2-digit automatic dialing code.
l
System codes run consecutively from 60 - 99.
4) Dial the telephone number to be stored (16 digits maximum).**
5) Depress the 1 button to record the number in memory.
6) Repeat the steps above with every number to be stored(up to
the maximum of 40).
7) Write down the address codes and telephone numbers for
future reference.
TO STORE PAUSES (1 -second) AND FLASHES (Hook-
Flash) ALONG WITH AUTOMATIC DIALING NUMBERS
1) Depress the m button to store a pause.
2) Depress the m button to store a flash.
NOTE:
If a m button is not available, the m button will store a
pause (flashes cannot be stored).
(continued)
Page 16
p-TOSHIBA7
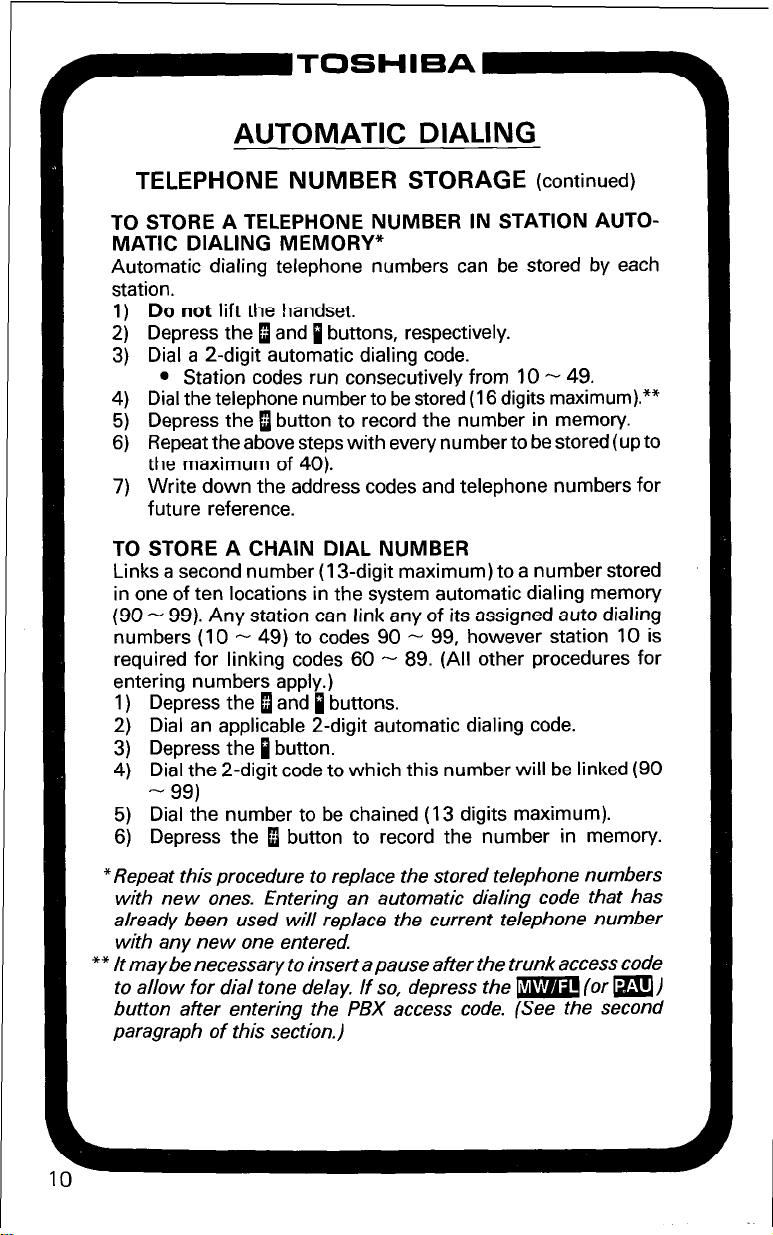
AUTOMATIC DIALING
TELEPHONE NUMBER STORAGE
TO STORE A TELEPHONE NUMBER IN STATION AUTO-
MATIC DIALING MEMORY*
Automatic dialing telephone numbers can be stored by each
station.
1) Do not lift the handset.
2) Depress the 1 and i buttons, respectively.
3) Dial a 2-digit automatic dialing code.
l
Station codes run consecutively from 10 - 49.
4) Dial the telephone number to be stored (16 digits maximum).**
5) Depress the a button to record the number in memory.
6) Repeat the above steps with every number to be stored (up to
the maximum of 40).
7) Write down the address codes and telephone numbers for
future reference.
TO STORE A CHAIN DIAL NUMBER
Links a second number (13-digit maximum) to a number stored
in one of ten locations in the system automatic dialing memory
(90 - 99). Any station can link any of its assigned auto dialing
numbers (10 - 49) to codes 90
required for linking codes 60 - 89. (All other procedures for
entering numbers apply.)
1) Depress the 1 and p buttons.
2) Dial an applicable 2-digit automatic dialing code.
3) Depress the p button.
4) Dial the 2-digit code to which this number will be linked (90
- 99)
5) Dial the number to be chained (13 digits maximum).
6) Depress the u button to record the number in memory.
- 99, however station 10 is
(continued)
‘Repeat this procedure to replace the stored telephone numbers
with new ones. Entering an automatic dialing code that has
already been used will replace the current telephone number
with any new one entered.
** It may be necessary to insert a pause after the trunk access code
to allow for dial tone delay. If so, depress the m (or m)
button after entering the PBX access code. (See the second
paragraph of this section.)
Page 17

P-TOSHIBA
AUTOMATIC DIALING
* AND # TONE DIALING
When the * or # tones must be output (for computer input service
or other use), the Automatic Dialing feature must be disabled to
permit manual dialing of the 1 and 1 buttons. (Applicable only if
m and m buttons are not programmed.)
TO OUTPUT * AND # TONES
1) Lift the handset.
2) Depress any available m line button.
2) Dial any desired directory number.
4) To enable * and # tones to be sent, depress p a.
NOTE:
Only manual dialing willbe possible; the special * and # tones as
well as digits 0 - 9 will be output as dialed. The Automatic
Dialing feature will be restored when the station is hung up or
placed on hold
Page 18

CALL FUNCTIONS
AUTO BUSY REDIAL m (XII,/XX, only)
After reaching a busy outside number, the system will automatically redial that number at programmed intervals.
TO USE AUTO BUSY REDIAL
1) Lift handset.
2) Depress any available CO line and dial the telephone number.
l
Receive busy tone.
3) Depress m button or m 11.
l
ABR LED blinks.
4) Hang up.
5) At programmed intervals (30/60 seconds), the system will
redial the number (15 times maximum).
l
With each attempt, if busy, ABR will reset for next try.
6) When the called party is ringing:
l
CO or INT LED blinks.
l
Warning tone is heard.
7) Pick up handset and wait for party to answer.
TO CANCEL ABR
1) Depress the m button or m (il a .
NOTE:
ABR will not be attempted while the station is busy on another
call but will continue to time out.
AUTOMATIC CALLBACK (INTERCOM)
After reaching a busy or DND station on an intercom call, you
may use Automatic Callback.
TO USE AUTOMATIC CALLBACK
1A) Dial i or 1 for Override (see OVERRIDE).
1 B) Depress them button or”~i,i~to set Automatic Callback.
l
Busy tone stops.
l
You will hear dial tone for 2 seconds and then busy tone
again.
(continued)
Page 19

CALL FUNCTIONS
AUTOMATIC CALLBACK (INTERCOM)
(continued)
2) Go on-hook. You may make other calls while waiting for the
called station to become available.
3) When the called station becomes idle:
l
Your telephone rings at a fast rate.
Answer the call within 9 seconds to prevent the callback
4)
from being cancelled.
l
You hear a single tone.
5) Proceed to voice announcement.
6) Proceed with the conversation.
NOTES:
1. You may cancel the request anytime prior to the callback by
depressing the m button and dialing 0 0.
2. If after answering a callback, you hear a busy tone, it means
the called party has already received or originated another
call. Your request is not cancelled. You will be called again
the next time the station becomes idle.
AUTOMATIC OFF-HOOK SELECTION
PROGRAMMABLE OPTION
Allows Automatic Off-hook Selection of either an intercom (INT)
or a CO line.
TO MAKE A CALL
1) Lift the handset.
l
You will be connected to the option programmed.
NOTE:
If you hear silence after going off-hook, you must depress the m
button or a m line button before making a call.
Page 20

TOSHIBA-q
CALL FUNCTIONS
CALL FORWARD
PROGRAMMABLE OPTION
For intercom calls* (all calls will be forwarded).
TO SET A CALL FORWARD
1) Depress the m button or dial 11 a 0 .
l
CFD LED flashes.
Dial the station number to which calls are to be forwarded.
2)
Depress the m button or dial 1.
3)
l
CFD LED on steady.
l
Calls will be forwarded to stored station number.
TO CANCEL A CALL FORWARD
1) Depress the m button or dial B 110 I.
l
CFD LED goes off.
“A CO line that only rings at your station will forward.
CALL PICKUP
TO ANSWER A CALL THAT IS PAGING, RINGING OR
ON HOLD
1) Lift the handset.
2) Depress the m button and dial 10 (or depress the m
button).
3) Dial one of the following:
Station number (intercom, CO and on hold)
al = All Call
p I= External Page
a I= Any CO line ringing
NOTES:
In Tenant Service, substituting a m button picks up COs
1.
assigned to Group 1 or a mbutton picks up COs assigned
to Group 2 without step 3.
It is not necessary to press m if using the m button.
2.
Page 21

r’-TOSHIBA
CALL FUNCTIONS
CONFERENCE CALLS
TO CONFERENCE UP TO THREE STATIONS AND TWO
CO LINES, OR FOUR STATIONS AND ONE CO LINE
Establish a CO line call via a m line button.
TO ADD A SECOND CO LINE*
1) Depress the m button.
l
You hear intercom dial tone.
l
CO LED flashes at the Conference rate.
l
INT LED flashes at the In-use rate.
2) Depress a secondmline button and dial the next telephone
number.
3) Depress the m button after the party answers.**
l
CO LEDs flash at the In-use rate.
l
All parties will be conferenced.
* When the Amplified Conference feature is installed the confer-
ence between both CO lines willbe amplified However, only the
second CO line and your station will be amplified
*+ If you receive a busy tone or no answer, return to the original
connection by depressing the original m line button.
TO ADD ANOTHER STATION
1) Depress the m button.
l
You hear intercom dial tone.
l
CO LED flashes at the Conference rate.
l
INT LED flashes at the In-use rate.
2) Dial the number of the other station.
3) Depress the m button after the party answers.*
l
CO LED(s) will flash at the In-use rate.
l
All parties will be conferenced.
4) Repeat to add another party:
l
Three stations/two CO lines maximum.
l
Four stations/one CO line maximum.
5) Hang up when conference call is completed.
“If you receive a busy tone or no answer, return to the original
connection by depressing the m button.
(continued)
Page 22

P-TOSHIBA
CALL FUNCTIONS
CONFERENCE CALLS
(continued)
TO CONFERENCE UP TO FOUR STATIONS ON ONE
INTERCOM LINE
1) Establish a two-station intercom call.
2) Depress the w button.
l
You hear intercom dial tone.
l
INT LED flashes at the Conference rate.
3) Dial the third station’s number.
4) Depress the w button after the party answers.*
l
INT LED flashes at the In-use rate.
l
All parties will be conferenced.
5) Repeat to add a fourth station.
“NOTES:
1. If you receive a busy tone or no answer, return to the original
connection by depressing the m button.
2. The new station willnot be conferenced unless the user lifts
the handset or depresses the m button.
DO NOT DISTURB
Allows you to prevent incoming calls from accessing your station. You can still make out-going calls.
16
TO USE DO NOT DISTURB MODE
1) Depress the m button.
l
DND LED goes on.
TO RELEASE THE DO NOT DISTURB MODE
1) Depress the m button.
l
DND LED goes off.
NO
JE:
Do Not Disturb prevents Off-hook Call Announce.
Page 23

CALL FUNCTIONS
GROUP LISTENING
Allows all persons present to hear the distant party’s responses.
TO USE GROUP LISTENING
1) With the handset off-hook, depress and hold the m
button.
l
SPKR LED lights and the distant party’s voice is heard
via the telephone’s speaker (handset is off-hook but
inoperative).
2) When local response is required, release the m button.
l
SPKR LED goes off.
l
Telephone speaker is silenced.
l
Handset is activated.
NOTE:
Repeat the procedure as required.
HANDSFREE ANSWERBACK
TO RECEIVE AN INTERCOM CALL (HANDSFREE)
1) You will hear a single long tone, followed bythe caller’s voice.
l
INT LED flashes at the Incoming Call rate.
2) Leave the handset on-hook.
3) To assure a private conversation, depress the m button.
l
INT LED flashes at the In-use rate.
4) Speak at a normal voice level in the direction of the telephone.
5) If you depressed the m button earlier, depress the m
button when the call is completed.
Page 24

P-TOSHIBA
CALL FUNCTIONS
HANDSFREE MONITORING
Calls placed on hold by the distant party may be monitored
“handsfree.”
TO USE HANDSFREE MONITORING
1) Depress and hold the m button.
2) Place the handset on-hook.
3) Release the m button.
l
Sounds from the distant party are heard via the tele-
phone’s speaker.
4) Lift the handset to continue the conversation when the distant party returns.
INTERCOM CALLS
TO MAKE AN INTERCOM CALL
1) Lift the handset.
2) Depress the m button.*
l
You hear intercom dial tone.
l
INT LED flashes at the In-use rate.
3) Dial the desired station number.
l
You hear a single ring tone.
4) Speak when the ring tone ends.
5) Hang up when the call is completed.
NOTE:
Tone Signalling can be accomplished b y dialing 0 after the station
number.
TO RECEIVE AN INTERCOM CALL
1) You hear a single long tone, followed by the caller’s voice.
l
INT LED flashes at the Incoming Call rate.
2) Lift the handset.
l
INT LED flashes at the In-use rate.
3) Hang up when the call is completed.
*See Automatic Off-hook Selection.
18
Page 25

CALL FUNCTIONS
OFF-HOOK CALL ANNOUNCE (OCA)
Allows a station user to call and speak to an off-hook, busy
electronic telephone through the speaker.
TO USE OFF-HOOK CALL ANNOUNCE
1) Lift the handset.
2) Call the desired station.
l
Hear warning tone.
3) Speak to called party (automatic OCA).
4) If a busy tone is heard, dial 1.
l
Hear warning tone.
5) Speak to called party.
TO FORCE A DISCONNECT
A forced disconnect allows you to receive an OCA call and
disconnects the calling party.
1) Depress the m button to disconnect an OCA caller.
NOTES:
1. DND prevents OCA calls.
2. The m and= buttons can prevent the OCA caller from
listening to your conversation.
Page 26

CALL FUNCTIONS
ON-HOOK DIALING
(Handsfree model only - see Speakerphone for speakerphone electronic telephones)
TO MAKE AN OUTSIDE CALL
1) Leave the handset on-hook.
2) Depress any available m line button or q button and listen
for dial tone.
l
CO LED flashes at the In-use rate.
3) Dial the desired telephone number.
4) Lift the handset when the distant party answers.*
5) Hang up when the call is completed.
TO MAKE AN INTERCOM CALL
1) Leave the handset on-hook.
2) Depress the m button.
l
INT LED flashes at the In-use rate.
3) Dial the desired station number.
l
You hear a single ring tone.*
4) Lift the handset to converse.
5) Hang up when the call is completed.
*If busy tone is heard, depress the m button to disconnect.
OUTSIDE CALLS
TO MAKE AN OUTGOING CALL (Direct Access)
1) Lift the handset.
2) Depress any available m line button or pooled line button.
l
Listen for dial tone.
l
CO/PL LED flashes at the In-use rate.
3) Dial the desired telephone number.
4) Hang up when the call is completed.
(continued)
Page 27

CALL FUNCTIONS
OUTSIDE CALLS
(continued)
TO MAKE AN OUTGOING CALL (Dial Access)
1) Lift the handset.
2) Depress the m button.
l
Listen for intercom tone.
l
INT LED flashes at In-use rate.
3) Dial CO line access code
l
Listen for CO dial tone.
4) Dial desired number.
5) Hang up when the call is completed.
TO USE LEAST COST ROUTING (Vle, Xlle/XXe only)
1) Lift the handset.
2) Depress the m button.
3) Dial 1.
4) Dial desired number.
5) The call will be directed to the least costly route.
TO RECEIVE AN INCOMING CALL
1) You hear a ringing tone.
l
CO LED flashes at the CO Incoming Call rate.
2) Lift the handset.
l
CO LED flashes at the In-use rate.
3) Hang up when the call is completed.
TO RECEIVE INCOMING CALLS WITH POOLED LINE BUT-
TON (Xlle/XXe only)
1) Ringing tone is heard.
l
PL LED flashes at the CO Incoming Call rate.
2) Lift the handset.
l
PL LED on steady.
3) A muted ringing indicates a new incoming call, or recall.
4) Transfer the present call or place it on hold.*
5) Depress and release the hook-switch to answer the next call.
6) Repeat Steps 4 and 5 until all calls are completed.
7) Hang up.
*NOTES:
7. Transfer to a busy station will automa;tically Camp-on.
2. If Step 5 is performed before Step 4, the present call
terminated.
is
Page 28

~ToSH’EA-
CALL FUNCTIONS
SPEAKERPHONE
TO MAKE AN OUTSIDE CALL (On-hook Dialing)
1) Leave the handset on-hook.
2) Depress any available m line button.
l
Listen for dial tone.
l
CO LED flashes at the In-use rate.
3) Dial the desired telephone number.
4) Speakat a normal voice level in thedirection of the telephone.
5) Depress the m button when the call is completed.
TO RECEIVE AN INCOMING CALL
1) You hear a ringing tone.
2) Leave the handset on-hook.
3) Depress the button of the CO line that is flashing at the CO
Incoming Call rate.
l
CO LED flashes at the In-use rate.
4) Speak at a normal voice level in the direction of the telephone.
5) Depress the m button when the call is completed.
TO MAKE AN INTERCOM CALL (ON-HOOK DIALING)
1) Leave the handset on-hook.
2) Depress the m button.
l
Listen for intercom dial tone.
l
INT LED flashes at the In-use rate.
3) Dial the desired station number.
l
You hear a single ring tone.
4) Speakat a normal voice level in the direction of the telephone.
5) Depress the m button when the call is completed.
(continued)
Page 29

CALL FUNCTIONS
SPEAKERPHONE
(continued)
MICROPHONE CONTROL*
The m button cuts off the speakerphone’s microphone for private conversations. The MIC LED indicates the status of the
microphone:
LED
MICROPHONE
ON
EF
OFF
Thembutton can function in one of two modes. Your electronic
telephone is equipped with the mode that is checked:
0 Momentary-The microphone and accompanying LED are
always ON when the speakerphone is activated unless the
m button is depressed. The MIC LED and microphone will
be OFF while them button is depressed and return to ON
when the button is released.
0 Push-on/Push-off - The microphone and accompanying
LED are OFF during on-hookdialing and ON at all other times
while the speakerphone is activated. They can be switched
OFF/ON or vice versa by a momentary depression of the
mbutton. They will then remain in the same state until the
m button is depressed again or the call is terminated.
NOTES:
1. To change from speakerphone to handset:
l
Lift handset.
2. To change from handset to speakerphone:
l
Depress and hold the m button.
l
Return handset on-hook.
l
Release the m button.
3. The m and m keys function on Off-hook
Call Announce type calls for privacy.
*See Station Security ( m button.)
Page 30

P-TOSHIBA
CALL FUNCTIONS
TONE SIGNALLING
PROGRAMMABLE OPTION
Provides ringing on incoming intercom calls when voice announcing is not activated.
TO MAKE A TONE SIGNAL CALL
1) Call another station via intercom.
l
The called party hears ringing while you hear ringback
tone until the call is answered.
2) Speak to the party when the call is answered.
NOTE:
To make a voice call, dial 0 after the station number.
TO ANSWER A TONE SIGNAL CALL
1) Lift handset or depress thembutton (handsfree answerback is inoperative).
2) Hang up when the call is completed.
TRUNK QUEUING
Provides a means for station users to be placed in a waiting
queue for a busy outgoing trunk group, and to be called back
when a trunk in the group is available.
TO USE TRUNK QUEUING
1) Lift the handset.
2) Depress the m button.
l
You hear intercom dial tone.
l
INT LED flashes at the In-use rate.
3) Dial the desired trunk group access code, dial 0 to access
Least Cost Routing, or dial 0 and the CO line numbers:
(continued)
Page 31

CALL FUNCTIONS
TRUNK QUEUING
(continued)
4A) If there is an idle trunk, you will be connected and can dial the
desired telephone number.
l
You hear CO dial tone.
l
CO LED flashes at the In-use rate.
l
INT LED goes off.
4B) If all trunks are busy, you will hear busy tone.
5) Depress them button or dial flto set Automatic Callback.
l
Busy tone stops. You will hear dial tone for 2 seconds
and then busy tone again.
l
You may go on-hook or make other calls while waiting
for a trunk to become available.*
6) When a trunk becomes idle:
l
Your telephone rings at a fast rate.
l
CO LED flashes at the Incoming Call rate.
7) Lift the handset within 6 seconds to prevent the callback
from being cancelled.
l
You hear CO dial tone.**
l
CO LED flashes at the In-use rate.
8) Dial the desired telephone number.
9) Hang up when the call is completed.
* You may cancel the request at anytime prior to the actual callback
by depressing the m button and dialing i p.
** It after answering a callback, you hear a busy tone, it means the
trunk has already been seized or received an incoming call. Your
request is not cancelled. You will be called again the next time a
trunk becomes idle.
Page 32

P-TOSHIBA
CALL FUNCTIONS
TRUNK-TO-TRUNK CONNECTION
TO ESTABLISH A TRUNK-TO-TRUNK CONNECTION
1) Establish a one-CO line call.*
2) Depress the m button.
l
You hear intercom dial tone.
l
CO LED flashes at the Conference rate.
l
INT LED flashes at the In-use rate.
3) Select a second CO line and dial the next telephone number.*
4) Depress the m button after the party answers.**
l
CO LEDs flash at the In-use rate.
l
All parties will be conferenced.
5) Depress the m button.
l
You hear intercom dial tone.
l
CO LEDs flash at the Exclusive Hold rate.
l
INT LED flashes at the In-use rate.
6) Hang up.
l
Both CO LEDs continue flashing at the Exclusive Hold
rate.
l
INT LED goes off.
l
COs are connected and in Exclusive Hold on your station.
l
Connection is released automaticallywhen parties hang
**x
up.
On some systems, the connection must be supervised and
released as follows:
1) Depress either m button.
l
Both CO LEDs flash at the In-use rate.
l
You will be connected to both CO lines.
2) If the parties have hung up, go back on-hook.
l
Both CO LEDs go off.
l
Connection is released.
3) If the parties are still talking, proceed to step 5 and then 6
above.
*You must use m buttons to select CO lines.
+* If you receive a busy tone or no answer, return to the original
connection by depressing the original CO line button.
*** Depends on the public telephone company; some provide auto-
disconnect and some do not.
26
Page 33

CALL HOLD and TRANSFER
CALL HOLDING
TO HOLD A CALL (CO line appears on your station)
1) Whileconnected toan outsidecall, depressthembutton
(or depress the m button and dial 0 I).
l
CO LED flashes at the On-hold rate.
l
To reconnect the call, depress them button on hold (or
depress the m button and dial 0 I).
TO HOLD A CALL (CO line does not appear on your station)
1) Whileconnectedtoan outsidecall,depressthembutton
(or depress the m button and dial 0 1).
l
INT LED goes off.
l
To reconnect the call, depress the m button and the
m button (or depress the m button and dial 0 [iI).
NOTE:
The on-holdreminder tone willbe heard within a predetermined
time. CallHolding willbe releasedautomaticallyif the other party
hangs up.
When a CO line is placed on hold, it may be picked up at any
station with that CO line appearance, or from any station that
dials 0 1 and the station number that placed the CO line on hold
CALL TRANSFER WITH CAMP-ON
Allows you to transfer an outside call to a station that is either idle
or busy.
TO TRANSFER A CALL
1) While connected to an outside call, depress the m
button.
l
CO LED changes to the Conference flash rate.
l
INT LED flashes at the In-use rate.
2) Dial the station number to which the call is to be transferred.
3A) If the called station is idle:
l
You hear a single ring tone.
4A) Announce the call.
. . . or . . .
(continued)
27
Page 34

CALL HOLD and TRANSFER
CALL TRANSFER WITH CAMP-ON
(continued)
5A) Hang up.
l
INT LED goes off.
l
CO LED changes to the On-hold flash rate.
l
CO line rings the called station.
l
CO LED illuminates steadily when the called station
connects with the transferred call.
l
If the station fails to answer the call, you will receive a
recall ring after a predetermined time.
. . . or . . .
3B) If the called station is busy:
l
Busy tone is heard.
48) Hang up.
l
INT LED goes off.
l
CO LED changes to On-hold flash rate.
l
CO line is camped-on to the called station.
l
Called station hears a warning tone.
l
CO LED illuminates steadily when the station connects
with the transferred call.
NOTES:
1. The Busy Override feature may be used instead of Call
Transfer with Camp-on.
2. The call willrecall you andcamp-on is cancelledif the station
does not pick it up within a predetermined time. Inform the
caller of the situation, andrepeat the procedure (if necessary).
3. You may reconnect to a transferred line (anytime before it is
answered) by depressing the appropriate m button.
TO ANSWER A TRANSFERRED CALL (if your station is idle)
1) Voice Signalling:
a) You will hear a single long tone, followed by an
announcement.
l
INT LED flashes at the Incoming Call rate.
b) Acknowledge the announcement.
c) When the transferring station hangs up, you will hear a
ringing tone.
l
CO LED changes to the Incoming Call flash rate.
d) Depress the appropriate a button.
l
CO LED changes to the In-use flash rate.
/continued)
Page 35

TOSHIBA
CALL HOLD and TRANSFER
CALL TRANSFER WITH CAMP-ON
(continued)
NOTE:
If your electronic telephone has the Ringing Line Preference
feature, you may depress the m button or lift the handset
instead of depressing the m button.
2) Tone Signalling:
a) You will hear intercom ringing.
l
INT LED flashes at the Incoming Call rate.
b) Lift the handset (or depress the m button).
l
INT LED changes to the In-use flash rate.
c) Speak to the transferring station.
d) You will be connected to the outside call when the
transferring station hangs up.
l
INT LED goes off.
l
The LED of the transferred CO line changes to the
In-use flash rate.
NOTE:
If your electronic telephone has the Ringing Line Preference
feature, it is not necessary to depress the mbutton or them
button before lifting the handset.
TO ANSWER A TRANSFERRED CALL (if your station is busy)
1) You will hear a 1 -second warning tone.
l
The outside call is camped-on your station.
l
CO LED flashes at the On-hold rate.
2) You have several choices:
a) Depress the appropriate m button.
l
Existing call is terminated.
l
The new line is answered and its LED changes to
the In-use flash rate.
. . . or . . .
bl) Hang up.
l
Existing call is terminated.
l
The camped-on line rings at your electronic telephone.
l
CO LED changes to the Incoming Call flash rate.
b2) Depress them button or lift the handset to answer the
call.
l
CO LED changes to the In-use flash rate.
or . . .
. . .
(continued)
Page 36

CALL HOLD and TRANSFER
CALL TRANSFER WITH CAMP-ON
(continued)
cl) Depress the m button (if conversing on a CO line).
l
Existing CO call is put on hold.
l
The camped-on line rings at your electronic tele-
phone.
l
CO LED changes to the Incoming Call flash rate.
c2) Depress the m button to answer the call.
l
CO LED changes to the In-use flash rate.
NOTE:
If your electronic telephone has the Ringing Line Preference
feature, you may depress the m button or lift the handset
instead of depressing the m button.
EXCLUSIVE HOLD
TO USE EXCLUSIVE HOLD (CO line must appear on your
station)
1)
While connected to an outside call, depress thembutton
twice.
l
CO LED flashes at a fast (10 IPS) rate.
l
To reconnect the call, depress them button that is on
hold.
NOTE:
When a CO line is placed on Exclusive Hold it may be picked up at
another station by dialing00 and the station number that placed
the call on Exclusive Hold; however it cannot be picked up by
depressing a common m button at another station.
Page 37

TOSHIE
CALL HOLD and TRANSFER
NIGHT TRANSFER
PROGRAMMABLE OPTION
On an optional basis, your system can function with two or three
ringing patterns. If three patterns are selected, they are designed
DAY, DAY 2, and NIGHT. If only two patterns are selected,
DAY, and NIGHT designations are used.
In both cases, different ringing patterns are chosen by sequential
depressions of the q button on station 10.
The active pattern is shown bythe state of the NT LED as follows:
DAY
DAY 2
NIGHT
Three-pattern
OFF
FLASH
ON
Two-pattern
OFF
N/A
ON
Page 38

p-ITOSHIBA-q
MISCELLANEOUS FEATURES
ACCOUNT CODE RECORDING
On some calls, you may be required (forced) to dial an account
code before dialing an outside number. On other calls, you may
wish to record an account number voluntarily after either dialing
an outside number or receiving an incoming call. The code you
enter will be recorded on the Station Message Detail Recording
(SMDR) printout with the details of your call.
TO RECORD A FORCED ACCOUNT CODE
1) Access a CO line.
l
You hear dial tone.
2) Dial the __ -digit account code on the dial pad.
l
Dial tone disappears as you dial the first digit.
l
You hear dial tone as you depress the last digit.
3) Dial the outside directory number.
TO RECORD A VOLUNTARY ACCOUNT CODE
1) An incoming or outgoing call is in progress.
2) Dial PIi on the dial pad.
l
The other party is put on hold.
3) Dial the - -digit account code on the dial pad.
l
You are reconnected when you dial the last digit.
4) Resume your conversation.
NOTES:
1. Unless you dial the correct number of digits, you will not
receive dial tone (forced) or be reconnected (voluntary).
2. With Forced Account Code, any digits dialed after the code
will be treated as part of the outside directory number.
3. With Voluntary Account Code, any digits dialed after the
code will be heard as tones by the other party.
Page 39

TOSHIBA
MISCELLANEOUS FEATURES
ALARM
A station lo-only programmable option used with an optional
Door Phone Control Unit and alarm system to cause a signal in
the system. Depressing the-button resets the alarm signal
,in the system.
BACKGROUND MUSIC (BGM)
If Music-on-Hold is available on your system, you may listen to
background music via your station’s speaker by depressing the
m button. Adjust the volume with the control on the lower
right side of your electronic telephone.
DIRECT STATION SELECTION BUlTONS
(HOTLINE)
PROGRAMMABLE OPTION
Allows stations to be dialed directly by depressing the m but-
ton. The button’s LED also shows the status (busy/DND) of that
station. If connected to a CO line, depressing this button will put
the party on hold. Transfer the call as you would normally, by
voice announcing or camping on.
DOOR LOCK
Depressing the q button controls a switch connected to a door
lock or similar device. Depending upon system in use, up to four
q
buttons are available.
33
Page 40

F-TOSHIBA
MISCELLANEOUS FEATURES
DOOR PHONE
TO ANSWER THE DOOR PHONE
1) You hear a distinctive ringing tone.
2) Lift the handset.
l
INT LED lights.
l
You are connected to the door phone.
3) Hang up when the call is completed.
TO CALL/MONITOR A DOOR PHONE
1) Lift the handset.
2) Depress the m button.
l
You hear intercom dial tone.
l
INT LED flashes at the In-use rate.
3) Dial the number for the desired door location.
661 or 66” Location
662 or 67” Location
663 or 68” Location
664 Location
665 Location
666 Location
667
668 Location
669
670 Location
671 Location
672 Location
673 Location
4) Hang up when the call is completed or when you no longer
wish to monitor the door phone.
Location
Location
*Depends on system program/configuration.
TO USE A DOOR PHONE
1) Depress the button.
l
You hear a distinctive ringing tone.
2) When answered, speak at a normal voice level in the direction of the door phone.
Page 41

MISCELLANEOUS FEATURES
MESSAGE WAITING
PROGRAMMABLE OPTION
If someone calls your telephone and you are unable to answer or
vice versa, the calling party may set the Message Waiting indicator (a flashing LED) on the called party’s telephone.
The Message Waiting indicators for each type of electronic tele-
phone are:
1) MW/FL LED on the lo- or 20-button electronic telephone.
2) MW LED on the single-line electronic telephone.
Up to four Message Waiting indications may be queued on the
message indicator at one time. One of the four message indica-
tions is always reserved for the Message Center; the other three
may be set from any other electronic telephone.
The button associated with the message indicator on the lo- or
20-button telephone is shown as m.
NOTE:
If your telephone does not have a m button, dial 1 li] 1
whenever the m button is indicated.
TO ANSWER A MESSAGE WAITING INDICATION ON
YOUR TELEPHONE
1) If the MW/FL LED is flashing on your telephone: Lift the
handset, depress the m and m buttons, respectively.
l
This calls the station that set the message indicator.
l
Wait for an answer to receive the message.
NOTE:
If there is no answer, hang up and try at a later time (the M W/ FL
LED continues to flash).
2) After receiving the message: Place the handset on hook.
l
If the MW/FL LED turns off, you have no more
messages.
l
If the MW/FL LED continues to flash, you have more
messages - repeat steps 1 and 2 to retrieve them.
Page 42

MISCELLANEOUS FEATURES
MESSAGE WAITING
(continued)
TO SET THE MESSAGE WAITING INDICATOR ON
ANOTHER TELEPHONE
1) At your telephone: Lift the handset, depress m and dial the
desired intercom number.
2) If the called telephone does not answer: Depress them
button to set the message indication.
l
The MW/FL LED flashes at the called telephone.
l
The MW/FL LED illuminates at your telephone.
3) Place the handset on hook.
l
The MW/FL LED turns off at your station.
l
The MW/FL LED continues to flash at the called
telephone.
TO CANCEL THE MESSAGE WAITING INDICATION SET
FROM YOUR TELEPHONE
1) Lift the handset, dial the intercom number of the telephone
that has the message indication, and depress the m
button twice.
TO CANCEL THE MESSAGE WAITING INDICATION SET
ON YOUR TELEPHONE
1) Answer the Message Waiting indication and receive the
message.
NOTE:
The called party must answer (off-hook or m button) for the
message indication to be canceled
36
. . or . . .
2) Depress them button (do not depress them button).
NOTE:
If the telephone does not have a m button, the message
indication can only be canceled via step 1.
Page 43

TOSHIBA-9
‘:
I:.‘:
MISCELLANEOUS FEATURES
MODEM
Calls may be originated from the station’s intercom or CO line
and then transferred to the modem line.
TO ORIGINATE A MODEM CALL
1) Set the m button to call mode.
l
LED goes off.
2) Set the m button to manual mode.
l
LED goes off.
3) Call another modem/device via the CO or intercom line.
4) Depress the m button when a modem tone is received
from the other end.
5) To disconnect the call, depress the m button.
TO SET THE MODEM FOR AUTO-ANSWER
1) Set the m button to answer.
l
LED goes on.
2) Set the m button to auto.
l
LED goes on.
3) When another party dials the modem station number (not
the electronic telephone station number), the modem will
auto answer and the m LED goes on.
4) To disconnect the call, depress the m button.
: :
I‘
Page 44

~ToSH’=A-
MISCELLANEOUS FEATURES
OVERRIDE
TO INITIATE A BUSY OVERRIDE SIGNAL
1) After reaching a busy station, you may signal that station
that a call is waiting by dialing 1.
l
A tone signal is heard at the busy station.
TO OVERRIDE DND (Programmable Option)
1) After reaching a DND station, you may signal that station
that a call is waiting by dialing 1.
l
A tone signal is heard at the DND station.
TO INITIATE EXECUTIVE OVERRIDE (Programmable Option)
1) After reaching a busy station, Executive Override allows you
to enter an established conversation by dialing 1.
l
A tone signal is heard prior to entering the conversation.
PAGING
TO PAGE
1) Lift the handset.
2) Depress the m button and dial the following:
11 = All Call
Ip = Group #l
Dp = Group #2
mp = Group #3
Bu = Group #4
11 = All Call (with External Page)*
41 = External Page
3) Make your announcement in a normal voice level and repeat
it.
4) Hang up when you have completed your announcement.
*Programmable Option
: ,. -_
Page 45

MISCELLANEOUS FEATURES
PRIVACY/NON-PRIVACY
PROGRAMMABLE OPTION
In a non-private system, them button prevents other stations
from breaking into an in-progress CO line call.
TO USE PRIVACY/NON-PRIVACY FEATURE
1) Depress the m button.
l
PRV LED goes on.
l
Your station has CO line privacy.
STATION SECURITY
PROGRAMMABLE OPTION
The m button allows a station to turn its microphone off/on
while idle. Handsfree Answerback is inoperable while the microphone is off.
TO USE STATION SECURITY
1) Depress the m button.
l
MC0 LED goes on.
l
Microphone is turned off.
2) Depress them button to turn the microphone on again.
l
MC0 LED goes off.
Page 46

MISCELLANEOUS FEATURES
TOLL RESTRICTION OVERRIDE
TO OVERRIDE TOLL RESTRICTION AT A STATION FOR A
SINGLE CALL
1) Lift the handset.
2) Depress a Toll Restricted m button.*
l
Listen for dial tone.
l
CO LED flashes at the In-use rate.
3) Dial pii.
l
You no longer hear dial tone.
4) Dial oneof thetwoToll Restriction Override Codes(4digits).
l
You hear dial tone.
5) Dial the desired telephone number.
6) Hang up when the call is completed.
* Or depress the m button and dial access a CO line; see Trunk
Queuing.
TONE/PULSE SENDING
PROGRAMMABLE OPTION
In some areas, CO line calls must be
made
using rotary-dial
pulses. In order to access remote equipment requiring tones in
these areas (such as automatic tellers or answering machines),
you must change to DTMF tone sending after you have dialed the
outside directory number.
Depressing the m button changes the outpulsing status of
the CO line in use: TONE LED ON indicates DTMF tones are
output; LED OFF indicates Dial Pulses are output.
TO CHANGE TO TONE SENDING
1) After you have dialed a telephone number and the call is in
progress, depress the m button.
l
TONE LED goes on.
l
Depressing the dial pad buttons will cause DTMF tones
to be transmitted.
2) To switch back to rotary-dial pulse transmission, depress the
m button again.
l
TONE LED goes off.
l
Depressing the dial pad buttons will now cause rotary-
dial pulses to be transmitted.
Page 47

r
MISCELLANEOUS FEATURES
TIMED REMINDERS
Allows five separate reminders to be set at each station.
These reminders will be an audible beeping at the times
(hour and minute) set by the station user. They can occure
just once or repeated on a daily basis.
TO ENTER A TIMED REMINDER
1) Depress the 1 i buttons.
2) Dial a 2-digit reminder number (05 - 09).
3) Enter the desired time (24-hour clock format; i.e.,
HHMM) for the message to be displayed.
4) Dial 1 if message will be repeated every day, or 0 if it
is a one-time message only.
5) Depress 1 to record the data in memory.
l
A beeping tone will be heard for 30 seconds (or until
cancelled by going off-hook).
TO CANCEL A TIMED REMINDER
1) Depress the 11 buttons.
2) Dial the 2-digit reminder number (05 - 09).
3) Depress 1.
VOICE MAIL (VM)
Whenever your station is call forwarded to voice mail,
certain digits will automatically be sent to the voice mail unit
to direct the call to your voice mail box.
TO STORE THE DIGITS TO BE SENT
1) Depress the 11 buttons.
2) Dial 11.
3) Dial the digits (up to 16) and pauses (MW/FL) to be sent.
4) Depress the i button to store data.
When you wish to retrieve your messages from voice mail,
certain digits will automatically be sent to the voice unit to
play back your messages.
TO STORE THE DIGITS TO BE SENT
1) Depress the 1 i buttons.
2) Dial 4 0.
3) Dial the required digits and pauses to be sent.
4) Depress the 1 button to store data.
/continued)
:_
i
Page 48

MISCELLANEOUS FEATURES
VOICE MAIL (VM)
TO RETRIEVE MESSAGES
1) Depress the m and m buttons.
TO CLEAR ALL DIGITS
1) Depress the i 1 (1 1 or 1 0) 1 buttons.
NOTES:
1. The above procedures are required for initial VM set-up
only. The digits remain in memory until changed.
2. Digits are not sent to camped-on VA4 calls.
(continued)
Page 49

r
CENTREX APPLICATION
Your system may be equipped with the CENTREX Application,
which enhances the system feature capability when installed
behind a CENTREX or PBX system.
NOTE:
Wherever a CENTREX line is indicated in this section, it can also
be a CO and/or PBX line.
Your electronic telephone may be equipped with one or more of
the enhanced CENTREX features listed below:
A) Flexible Intercom Numbering (Up to 4 Digits)
A station intercom number can be 1,2,3 or 4 digits. It is, therefore,
possible to match a station’s intercom and CENTREX line extension
number. Dial the entire station number when indicated.
NOTE:
To avoid system numbering plan conflicts, the access codes of
the door phone, paging and CENTREX line access features may
have been changed
B) CENTREX Feature Buttons
Certain CENTREX features may be operated by pressing a button on
your electronic telephone. The CENTREX access code, including the
necessary Flash and/or Pause sequence, is activated when the
appropriate button is pressed. Press the appropriate CENTREX feature button instead of dialing a CENTREX access code when operation of the feature is desired. See your CENTREX or PBX Operations
Manual for specific details.
C) Ringing Repeat
The distinctive ring patterns available in your CENTREX system are
automatically repeated with your electronic telephone, allowing you
to answer appropriately for either outside, inside or callback calls.
D) Delayed Ringing
CENTREX line(s) may be programmed for a 1Zsecond and/or 24-
second ring delay at stations to permit alternate answering conditions. Answer the line when your electronic telephone is ringing.
E) lA2 Interface
Your electronic telephone may be sharing a CENTREX line with a
lA2-type key system. The LEDs and lamps in both systems will
indicate simultaneous status (such as ringing, in use or on hold)
for all telephones where those lines appear. Additionally, some
1 A2 key systems do not offer line privacy; therefore, it is possible
for the lA2 station to enter an existing conversation.
Page 50

CENTREX APPLICATION
F) SINGLE-LINE ELECTRONIC TELEPHONE
l
To hook-switch a single-line electronic telephone for
Centrex/PBX feature access:
Dial: i d p.
NOTE:
The person with whom you are talking will not hear the
tones when you dial.
Page 51

Toshiba America, Inc.
.~~~~ ~~~~ ~~
Telecommunication Systems Division
9740 Irvine Boulevard
Irvine, CA 92718
~~~ ~~~
714-583-3700
111 Business Park Drive
Armonk, NY 10504
91‘4-273-1750 .
-r---
-.
TSD 88-05-10 50M l&SUE 5.2 PRINTED IN U.S.A.
 Loading...