

Page 1
Owners Manual
TEC LOAD CELL SCALE
(WITH LABEL PRINTER)
MODEL SL57 SERIES
(US. Version)
TEC
TOKYO ELECTRIC CO., LTD.
Page 2

WARNING
This equipment generates, uses, and can radiate radio frequency energy and if not installed
and used in accordance with the instruction manual, may cause interference to radio
communications. It has been tested and found to comply with the limits for a Class A
computing device pursuant to Subpart J of Part 15 of FCC Rules, which are designed to
provide reasonable protection against such interference when operated in a commercial
environment. Operation of this equipment in a residential area is likely to cause interference
in which case the user at his own expense will be required to take whatever measures may
be required to correct the interference.
Page 3

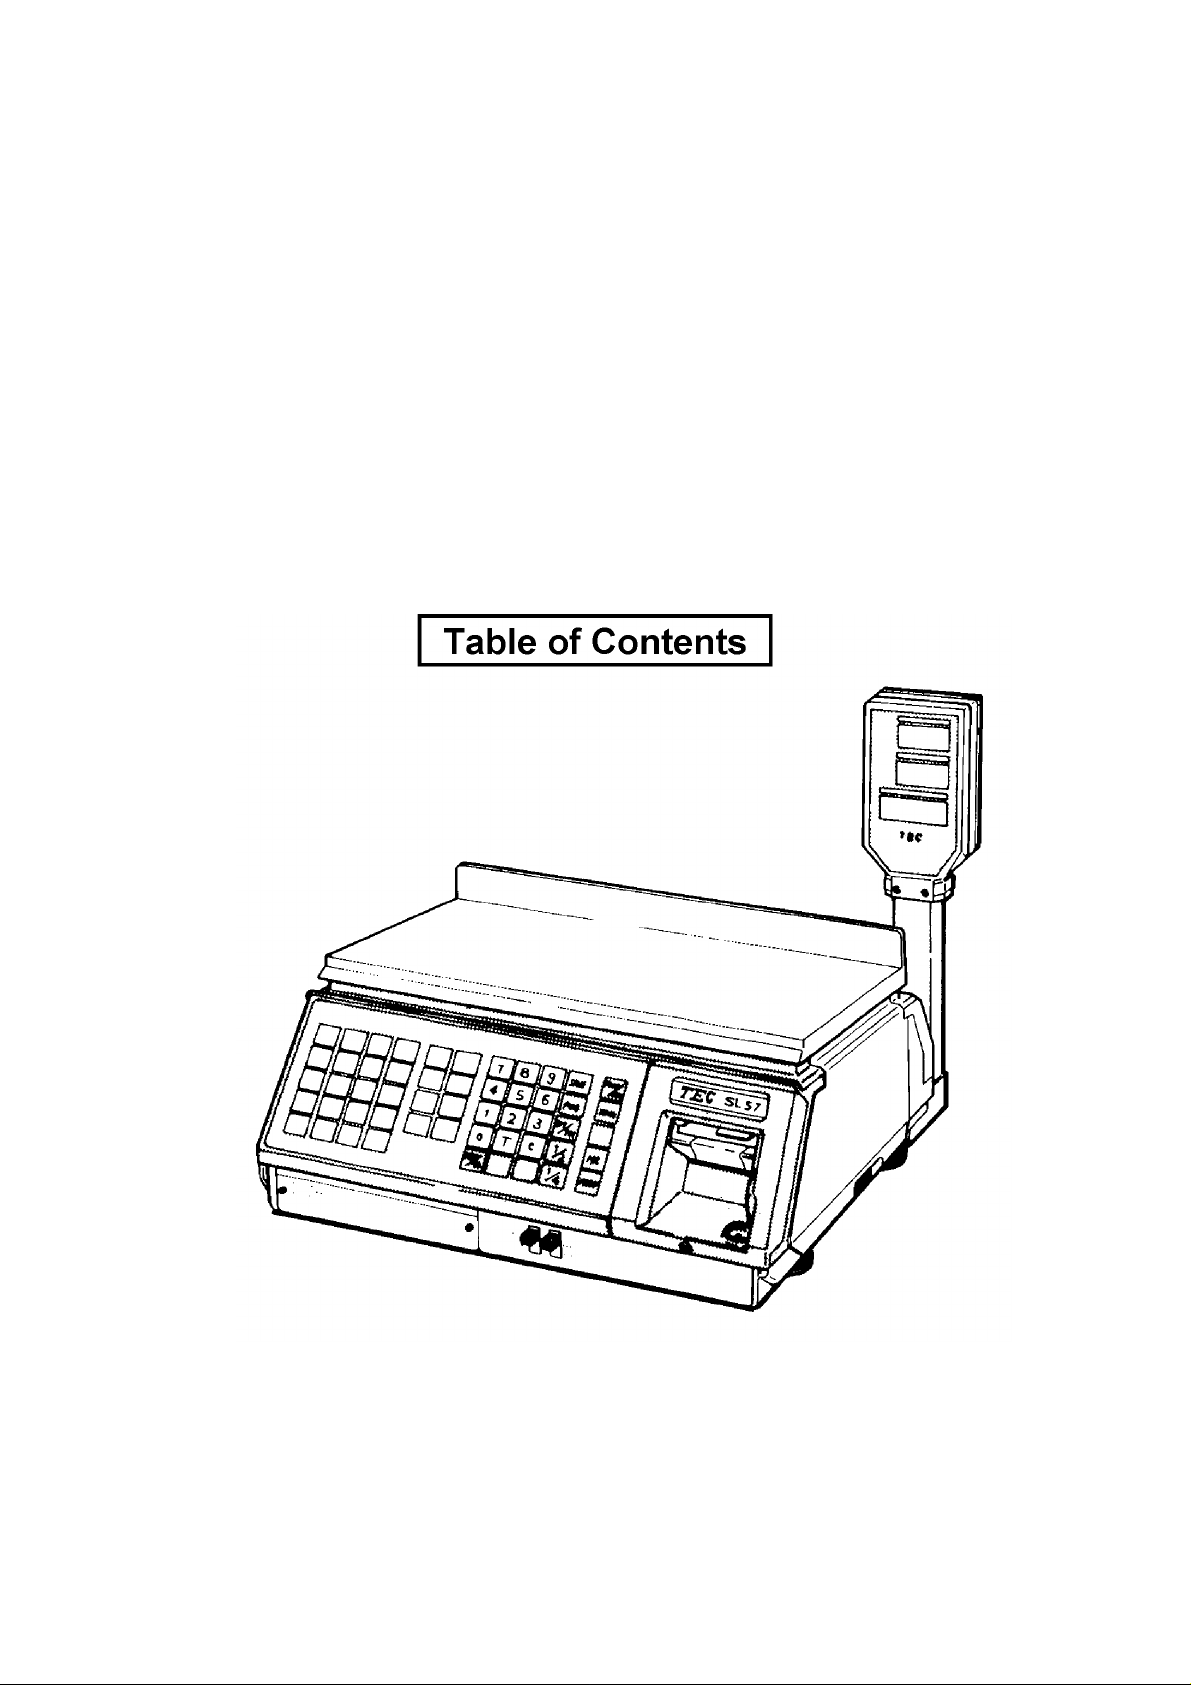
TABLE OF CONTENTS
Page
INTRODUCTION.................................................................................................................................. 1
PRECAUTIONS.................................................................................................................................... 1
1. SPECIFICATIONS........................................................................................................................ 2
2. OVERVIEW................................................................................................................................... 3
3. REMOTE DISPLAY....................................................................................................................... 3
4. KEY ARRANGEMENT.................................................................................................................. 4
5. KEY AND LAMP FUNCTIONS..................................................................................................... 4
6. LEVEL ADJUSTMENT.................................................................................................................. 7
7. CLEANING THE PRINT HEAD..................................................................................................... 7
8. REMOVAL AND REPLACEMENT OF LABEL ROLL................................................................... 8
9. NOTES BEFORE STARTING OPERATION................................................................................ 9
10. OPERATION PROCEDURES
10-1. Weighed Article Registration............................................................................................. 10
10-2. Fix Price Registration....................................................................................................... 1 1
10-3. By Count Registration....................................................................................................... 12
10-4. Tare Function Procedures................................................................................................. 14
10-5. Save Function Procedures................................................................................................ 16
10-6. Unit Price per 1/2, 1/4 lbs................................................................................................. 18
10-7. Date Change..................................................................................................................... 19
10-8. Shelf Life Date Setting..................................................................................................... 20
10- 9. Print Test Label............................................................................................................ 20
1 1. TOTAL OPERATION PROCEDURES
11- 1. Individual Department Read......................................................................................... 21
1 1-2. Grand Total Read............................................................................................................ 21
11- 3. Individual Department Reset......................................................................................... 22
1 1-4. Grand Total Reset............................................................................................................ 22
12. PROGRAMMING PROCEDURES
12- 1. Date and Time Setting................................................................................................... 23
1 2-2. Unit Price Presetting or Changing................................................................................... 23
12-3. Name or Message Programming...................................................................................... 23
12-4. Address or Message Programming (Bottom of label)...................................................... 24
12-5. Print Item ON/OFF Setting or Changing.......................................................................... 24
13. ERROR MESSAGE TABLE........................................................................................................ 26
14. BEFORE YOU CALL FOR SERVICE......................................................................................... 26
Copyright ^ 1995
by T€C Corporation
All Rights Rasarvad
1-14-10 Uchikanda, Chiyoda-ku, Tokyo, JAPAN
Page 4

INTRODUCTION
We thank you very much for purchasing our TEC Electronic SL57 Series Scale.
This series has been designed with TEC reliability and offer a cost efficient system for a modest
investment.
And the SL57 (with thermal printer) takes advantage of the latest technology in microprocessors.
Because of this, the decreased cabinet size permits the system to be placed virtually anywhere in your
store.
Your deli, and specialty departments can enjoy these high quality reliable TEC products. Improve your
operating effectiveness and watch the increased utilization of your front end scanning investment. This
electronic Load Cell scale eliminates all moving parts and furnishes an accurate digital display of all
information.
We believe that your needs will now be fully satisfied, and you will have total reliability in price
calculation. This manual will help to acquaint you with the proper operation and care of the SL57 series
scale. Please keep it handy for future reference.
PRECAUTIONS
1. DON'T SUBJECT the weighing
platter to SUDDEN SHOCKS.
4. NEVERUSETHINNEROROTHER
VOLATILE SOLVENT for clean
ing.
DON'T PRESS THE KEYS TOO
HARD.
Keys will operate correctly if
they are merely touched lightly.
5. DON'T POUR WATER directly on
scale.
3. Clean the cover and platter by
wiping with a dry cloth or a cloth
soaked with detergent and
wring out thoroughly.
6. To insure scale is operating cor
rectly, place a known weight on
platter and check for correct
computing.
7. When in use, avoid locations subject to vibration and direct sunlight.
1 -
8. After the end of daily work, turn
the power OFF, clean and in
spect the exterion of the scale to
allow you to use the scale at its
Page 5

1. SPECIFICATIONS
Items SL57-30L-US
Maximum Capacity
Minimum Scale Division 0.01 lbs
Using Weight Range 0.20 ~ 30 lbs
Display Range 0 ~ 30.05 lbs
Tare
Unit Price Presettable
Minimum Price Display $ 0.01
Power Requirement
Current Consumption
Temperature Limits 23° ~ 104°F
Relative Humidity
Weight
Remote Display;
Weight
Unit Price 4 digits
Total Price
Display Designations
Remote Display Mode
Print Head
Label
30 lbs
0.01 ~ 30 lbs
$ 0.01 ~ 99.99
AC 120V ±10%, 60 Hz
120V • 1A. 60 Hz
35% ~ 85% RH (No condensation)
26.5 lbs
4 digits
5 digits
NET, PREPACK, ERROR
Dual sides
Thermal Print Head
RICOH 120LA or equivalent
Dimensions (approximate)
6.
- 2 -
Page 6
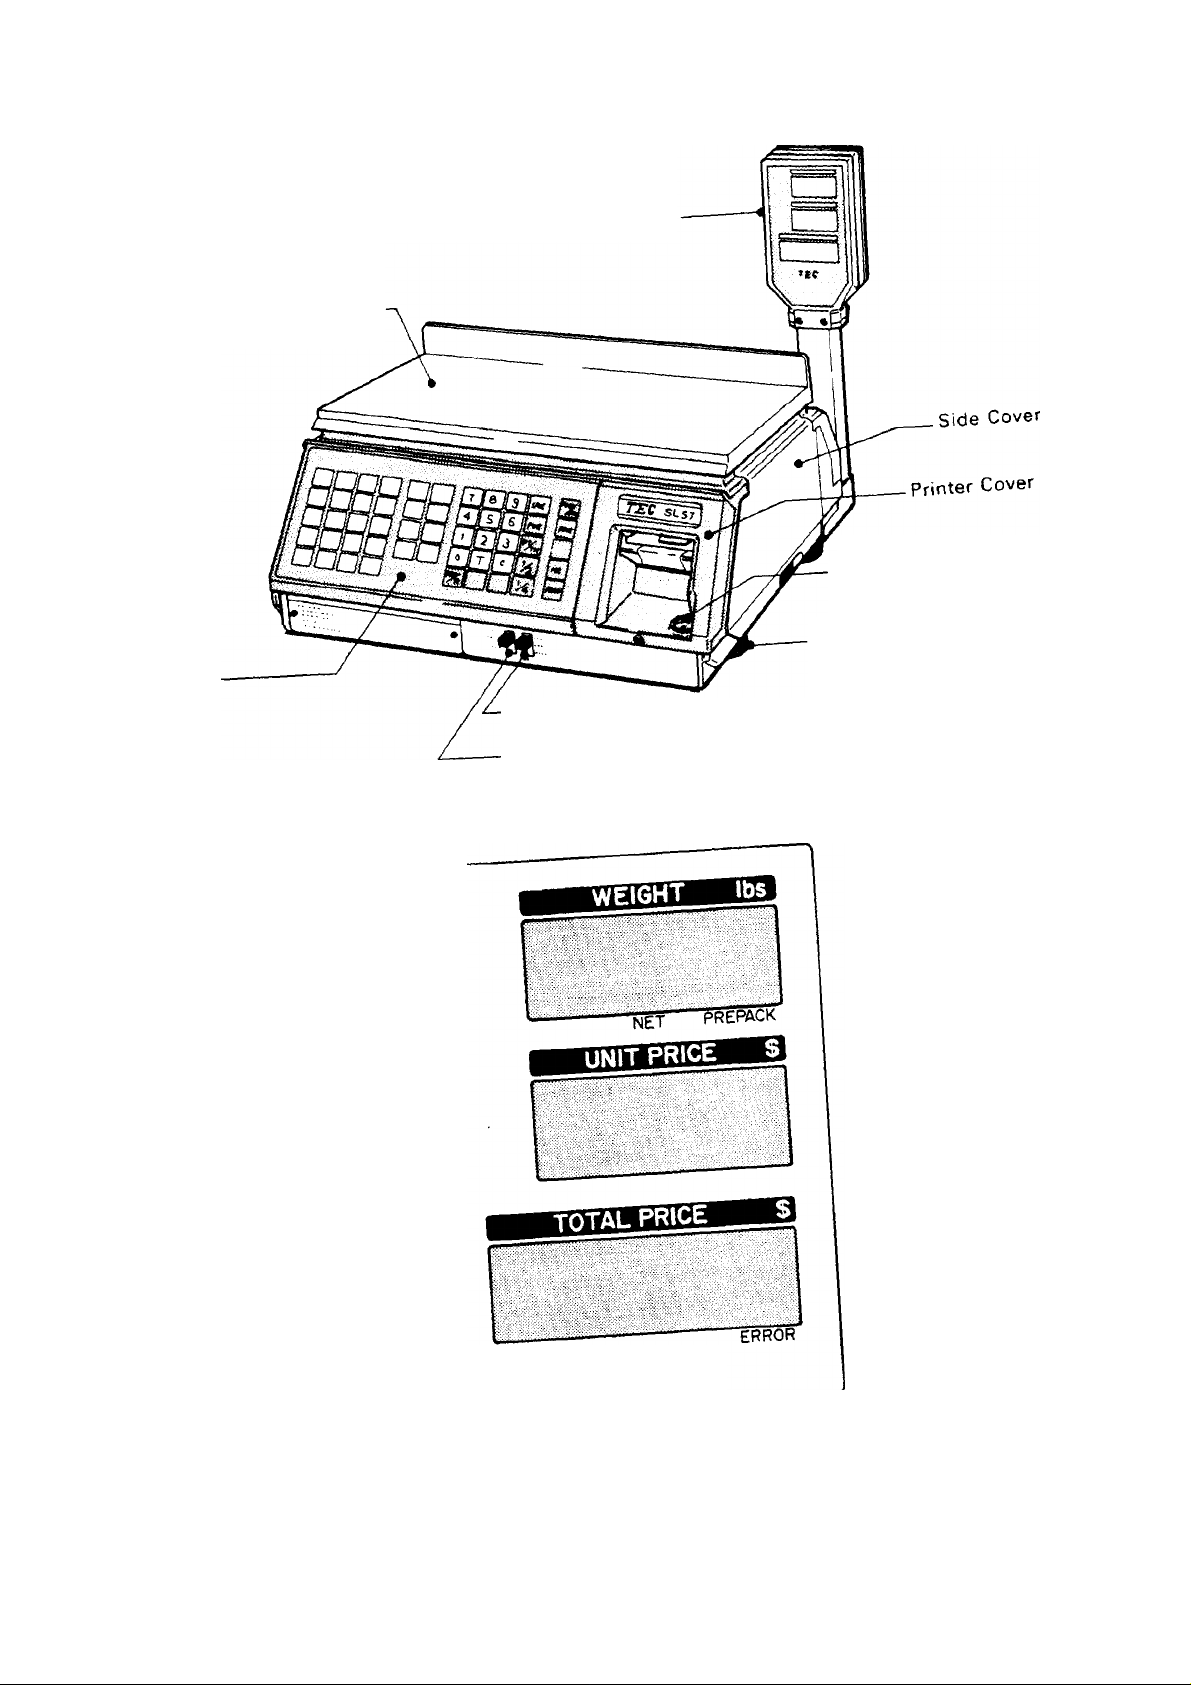
2. OVERVIEW
Keyboard
Remote Display
Platter
Level Gauge
Adjusting Leg
•Mode Switch (1)
3. REMOTE DISPLAY
• Mode Switch (2)
TEC
CAPACITY 30X0.01 lbs
- 3 -
Page 7
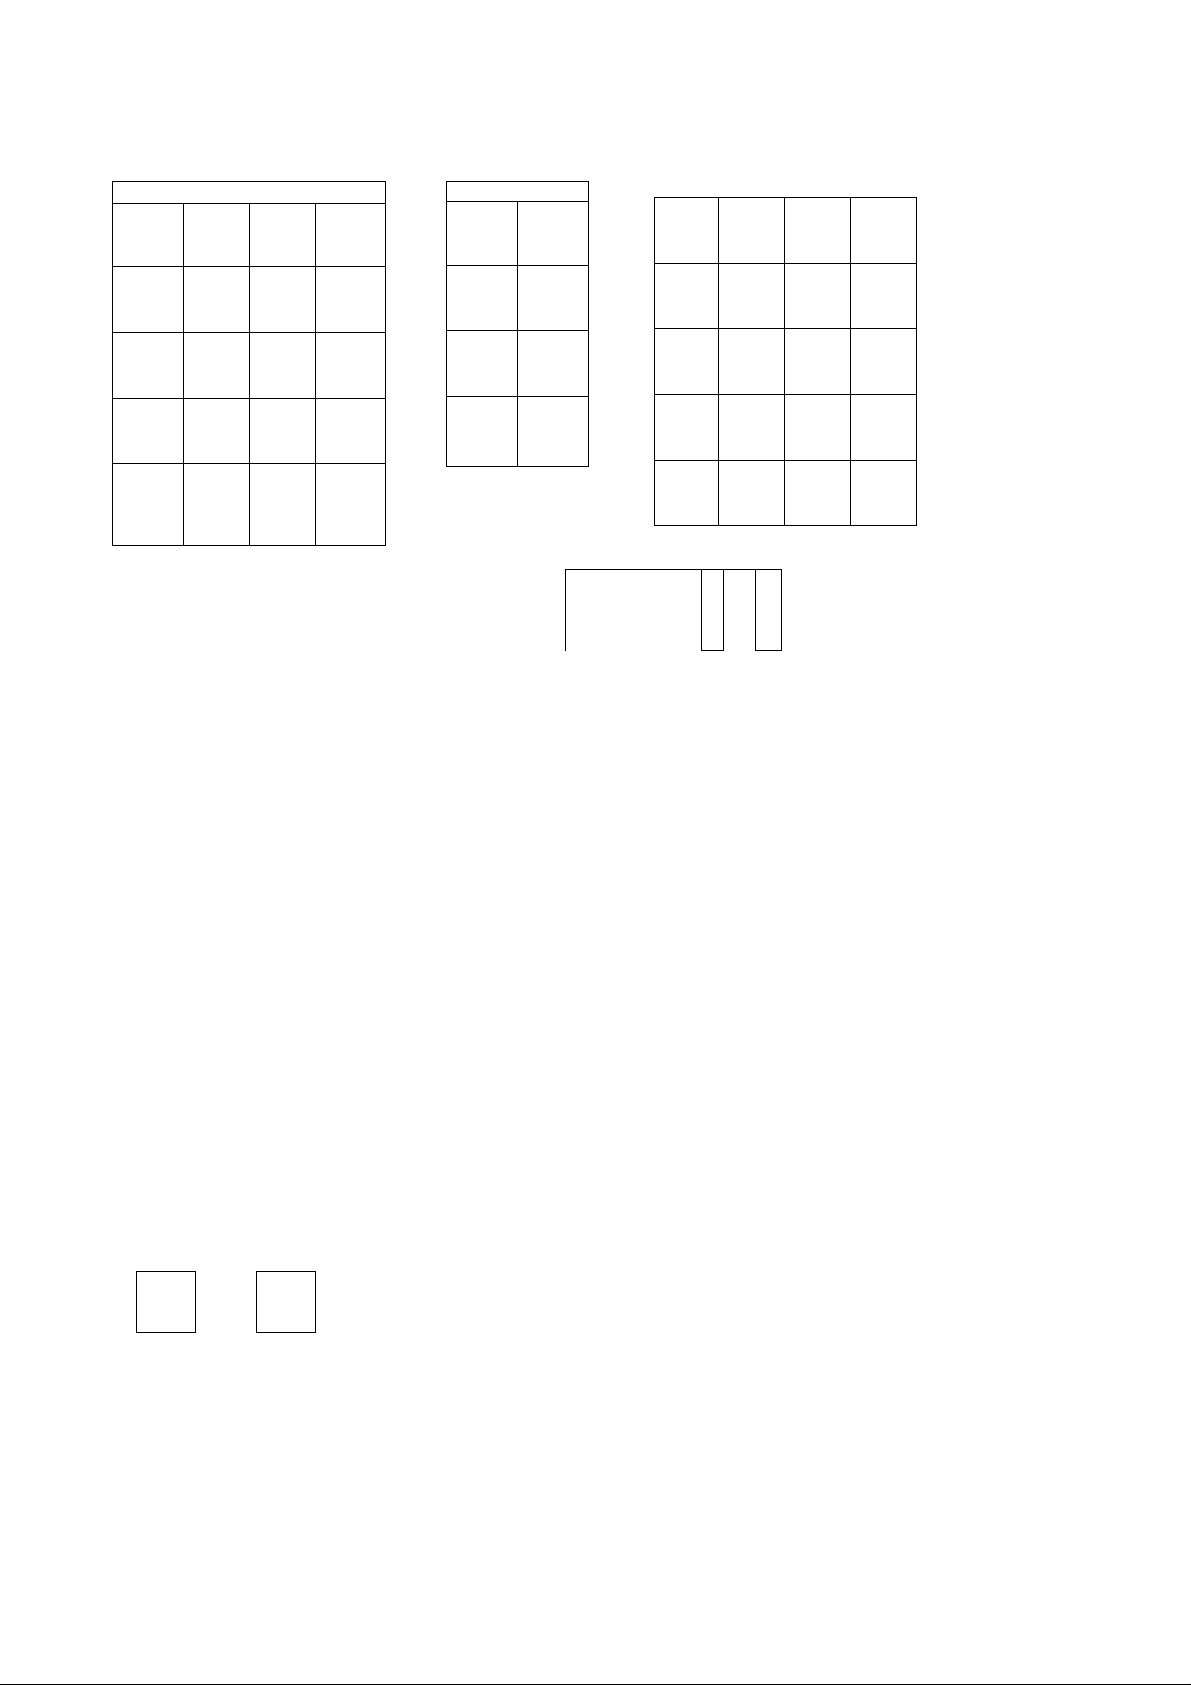
4. KEY ARRANGEMENT
POWER
ZERO
PROG
MR
FEED
1
5
9
13
17
Unit Price Preset Keys
NOTE: The characters indicated on the Unit Price Preset keys and the Department keys are shown for
the convenience of explanation in this manual. The indications on the actual unit are not as
shown in this illustration.
2
6
10
14
18
3
7 8
1 1 12
15 16
19 20
4
Department Keys -
I I
I
V
u
ly
in
11
MANUAL
X/Z PROG.
7
4 5
1
0
PRT
AUTO
L-1
8
2
T
3
WEIGH (X)
FIX(Z)
>-•
BY COUNKPROGJ
9
6
3
c
SAVE
FOR
7m
7
7
5. KEY AND LAMP FUNCTIONS
Name of Key or Lamp
CLEAR Key
DATE & TIME Key
TM
DEPARTMENT Keys
8 keys
1 VIII
FEED Key
FEED
1. This key is used for enter-clear of numeric key.
2. Thist^ey is used to release the scale from the save or error mode.
1. This key is used to indicate the date on remote display.
2. This key is used for temporary date change.
1. These keys are used to program the department name.
2. These keys are used to register the sale items. At this time, the
Department keys are also used as the Label Issue keys.
3. In "X/Z" mode switch (2) position,these keys are used to generate
the Department Total Reports.
This key is used to feed labels.
Function
Page 8

Name of Key or Lamp
Function
FOR Key
FOR
Mode Switch (1)
WEIGH (X)
FIX(Z)
BY COUNT(PROGJ
Mode Switch (2)
AUTO
MANUAL
X/Z PROG.
1. This key is used to issue the "BY COUNT" label with split price.
2. In "X/Z" mode switch (2) position, this key is used to issue the TEST
label.
"WEIGH (X)" position:
1. This position is used in weighing function of SL57.
2. This position is used to read (X) all the accumlated sales totals stored
in the unit when mode switch (2) is set to "X/Z PROG." position.
"FIX (Zr position:
1. The unit price enters directly to total price, and that total price
cannot be changed by any weighing after that.
2. This position is used to reset (Z) all the accumlated sales totals
stored in the unit when mode switch (2) is set to "X/Z PROG."
position.
"BY COUNT (PROG.)" position:
1. It is possible to produce labels which contain information of quantity
pricing, instead of weight.
2. This position is used to set the various programs when mode switch
(2) is set to "X/Z PROG." position.
"AUTO" position:
1. This position is used to issue weighing label when mode switch (1)
is set to "WEIGH" or "FIX" position.
2. This position is used to issue By Count label when mode switch (1)
is set to "BY COUNT" position.
The label is issued in succession after peeling it.
"MANUAL" position:
This position is used to issue a label by depressing the PRINT key or
DEPARTMENT key.
"X/Z PROG." position:
1. This position is used to read (X) or reset (Z) all the accumulated sales
totals in the unit when mode switch (1) is set to "WEIGH (X)" or "FIX
(Z)" position.
2. This position is used to set the various programs when mode switch
(1) is set to "BY COUNT (PROG.)" position.
MR Key
MR
Numeric Keys
Per 1/2, 1/4 lbs Keys
V,
Va
1. In "X/Z" mode switch (2) position, this key is used to generate the
Grand Total Read Report.
2. This key is used to select the items in programming.
These keys are used to enter the numeric data (Unit Price, Tare
weight,etc.).
These keys are used to calculate the unit price by 1/2 lbs or 1/4 lbs.
NOTE:
When the 1/2(1/4) key is depressed, the unit price is multipled by 2(4).
- 5 -
Page 9

Name of Key or Lamp
Function
POWER/ZERO Key
POWER
/ZERO
PRINT/VERIFY Key
PRT/*
PROGRAM Key
PROG.
SAVE Key
SAVE
TARE Key
This key is used to supply power to the main circuit and to adjust
"ZERO" point.
1. This key has the function of label issue.
2. During programming, data is input to the SL57 by using this key.
This key is not used in SL57 system.
This key is used to save tare and unit price after taking off the
commodity from the platter.
1. This key is used to subtract or clear the tare weight.
2. This key is used to preset tare weight beforehand through the
numeric keys.
UNIT PRICE PRESET Keys
1
20
NET Lamp
PREPACK Lamp
ERROR Lamp
These keys are used to set and call the unit price of frequently used
commodities.
Lights when tare is subtracted.
■T
Lights when SAVE key is pressed.
\ I /
Lights when this scale is improperly operated or has caused a function
error.
\ I /
6 -
Page 10

6. LEVEL ADJUSTMENT
Set the scale on a stable and level surface.
Level the scale by turning the adjusting legs so that the air bubble comes to
the center circle. For example, in the case of the condition shown in the left
figure, turn the adjusting legs (1) and (2) in the direction shown so that the
Correct Incorrect
bubble comes to the center of the circle.
7. CLEANING THE PRINT HEAD
•(2)
)
If the print head is dirty, clear printing is not performed. It is recommended to clean the head with thermal
head cleaner everyday, before starting operation by following procedure:
1. Remove the printer cover and side cover. Then
pull the head-up lever to arrow direction.
2. Wipe off the dirt on the [■ portion] with the
thermal head cleaner.
Then set the label, and push down the print
head.
NOTE: Do not damage the print head when
cleaning.
- 7 -
Page 11

8. REMOVAL AND REPLACEMENT OF LABEL ROLL
1. Remove the printer cover and side cover.
Then pull the head-up lever to arrow direction.
2. Remove the core of the label roll and the label
backing paper.
NOTE: To remove the label backing paper,
loosen the paper by turning the paper
clockwise and remove the paper
stopper.
Be careful to never turn the paper
winding shaft clockwise.
Head-up Lever
Label End Sensors
Referring to the figure on the right, set the label
roll on the unit.
3. Push down the printer head, and close the
covers.
NOTE: When the label roll is replaced, press
the feed key to confirm that the label
is issued correctly.
- 8 -
Page 12

9. NOTES BEFORE STARTING OPERATION
(1) Be sure to insert the power plug into AC outlet.
(2) When the power key is turned on, the scale goes through the test scanning sequence, such as
0000,0000,00000, then 1111,1111,11111
key is turned on over about 1 6 seconds after the power plug is connected to the AC outlet, all "8"s
appear on all displays for a moment, then zeros are displayed and the scale is ready for use.
(3) While scale is in the test sequence, do not put anything on the platter.
(4) Do not move the unit while it is in operation. Should it become necessary to move it at any time,
turn the power switch to OFF position and be sure to readjust the level indicator after relocating
the scale.
(5) Should a power failure occur during operation, remove the commodity from the platter and insert
the power plug into AC outlet again when power is restored.
(6) If scale is used with an unrated power source, inaccurate scaling or other errors may occur,
(7) If Zero Point has shifted during scaling, and no tare is displayed, adjust Zero Point by depressing
Zero key twice.
....................
and zeros appear on the displays. When the power
- 9
Page 13

10. OPERATION PROCEDURES
10-1. Weighed Article Registration [Mode SW. (1): WEIGH position]
★ Auto Mode [Mode SW. (2); AUTO position]
(1) Press unit price preset key or enter
the unit price.
ex.) Unit price of $ 2.50/lb,
WEIGHT U. PRICE
n nn
U.kMJ
3 c n
w ,3u
T. PRICE
n nn
u.uu
(2) Place an article on the platter.
(3) The label is issued automatically.
pitmiN
«T WT, iIPIS PRICE/li S3 1 TOTAL PRICE 631
149 Mi lto n S t.
★ Manual Mode [Mode SW. (2); MANUAL position]
(1) Press unit price preset key or enter
the unit price.
ex.) Unit price of $ 2.50/lb is set
in preset key [3.
JUL 25
2,00 2.50
SOI
itAUG 04
$5 . 0 0
3$ nn
4. .UU
(Sample label)
n nn
u.uu
C n
C,DU
3r cn nr
C nn
b.UU
(2) Place an article on the platter.
(3) Press I PRT/* I or department key
for the article.
PRT !
or 1 I~H
(4) The label is issued.
imoionJIIL 25 saL№rAUG04
2.00 2.50
NETWtiga PHtCE/li £jj
$5 . 0 D
TOTAL PRICE 69
149 Mi I ton St.
I^Q-pg. (Sample labels)
nn
C.UU C,3u
Po r k
11
^«JUL25 »i»ftüG04
2.00
NET WT.ilSn
2.50
PXICE/li
149 Mi I ton St.
sen
TOTAL PRICE 63
r nn
J.UU
When the Mode SW. (2) is set to AUTO position, the character(s) registered in the department key is
(are) printed in the department name area of the label.
When thefPRT/* | key is pressed with the Mode SW, (2) set to MANUAL position, the character(s) printed
in the department name area of the label is (are) also that (those) registered in advance in the department
key. The data (Weight data. Item data, and Total Price data) of the issued label is added to the department
No. 8 memory,
- 10 -
Page 14

10-2. Fix Price Registration [Mode SW. (1): FIX position]
★ Auto Mode [Mode SW. (2): AUTO position]
(1) Press unit price preset key or enter
the unit price.
ex.) Unit price of $ 3.00/lb is set
in preset key [7].
(2) Place an article on the platter.
(3) The label is issued automatically.
.«i.JUL 25
Knurrig piMCt/tia
ld9 Hilton St.
* Manual Mode [Mode SW. (2): MANUAL position]
(1) Press unit price preset key or enter
the unit price.
1.50
1.S lbs
sii nAU6 04
$3 . 0 0
TOTAL PRICE
WEIGHT U. PRICE T. PRICE
n nn D n n
u.u u
*.
(Sample label)
3.U U
nit
3
.uu
ex.) Unit price of $ 3.00/lb.
(2) Place an article on the platter.
(3) Press [ PRT/* I or department key
for the article.
(4) The label is issued.
0 0
1.S lbs
TT
PRT
or
I-i
MBuJUL 25 sai nAU6 04
1.50
«T *T. 'IS Piac£/»
M9 Milton St.
TOTAL PRICE
(Sample labels)
n
nn
u.u u
1
cri
Ch i c ke n # 1
».JUL25 sun AUG 04
1.50
KTHIT.'JS ««/»iä
1d9 Hilton St
j nn
J.U U
3
J.U U
TOTAL PRICE 63
nn
- 1 1 -
Page 15

10-3. By Count Registration [Mode SW. (1): BY COUNT position]
★ General Operation
(1) Enter the quantity of sale.
(Max. 2 digits)
(2) Press I FOR|.
(3) Enter the total price or press the
preset key.
(4) Press I PRT/ * I or department key
for the article.
(5) When Mode SW.(2) is set to
MANUAL position, single la
bel is issued.
(6) When Mode SW.(2) is set to
AUTO position, the label is
issued in succession after
peeling it.
5
FOR
1
PRT
5
2
or
I'1I
PMBB JUL 25 su.itA116 04
5Pitcis $1.25
iofT.-E3 tm/nii
1(19 Milton St.
lOIAl PRICE gg
IBWT.'JS P1WCt/t;3
149 Milton St.
(Sample labels)
WEIGHT
.
U. PRICE
n
ne
.OS
|.гs
.05
Fr u i ts
MB.JUL25 ai.TAUG04
BPifcfs $1.25
TOTAL PRICE
T .PRICE
n nn
u.uw
n nn
u.uo
n nn
★ Single Item Registration
(1) Enter the total price or press the
preset key.
(2) Press I PRT/* I or department key
for the article.
(3) The label is issued.
PRT
iMaaJUL 25
SOI IT
mm $1.25
KTwt.Ea nact/iij}
149 Milton St.
I-tl
AUG 04
TOTAL PRICE gg
.'.?S
!.?5
Ve g e ta bl e s
«..JUL25 sun AUG 04
iplfcis $1.25
icTWTus mcuti'A ^jiWjm-iriBki
149 Milton St.
(Sample labels)
- 12 -
Page 16

★ Split Price Operation
(1) Enter the quantity of sale.
(Max. 2 digits)
WEIGHT U. PRICE T. PRICE
n in
0
U, r -
n nn
u.wu
(2) Press I FOR |.
(3) Enter the quantity for that total
price. (Max. 2 digits)
(4) Press ! FOR |.
(5) Enter the total price or press the
preset key.
(6) Press [PRT/* ! or department key
for the article.
(7) The label is issued.
3 0 0
PRT
JUL 25 «uitAUG 04
MBK
10TOS
HTWT.gg fm/tii
U9 Milton St.
FOR
5
F(3R
or
1-1
TOTAL PRICE R
o
r
o *c
^ J
o «n
r . lU
in
. tu
n IC
u. O
nn
i
.uw
Ve g e ta bl e s
■ •JUL 25 •uitAU6 04
KTWT.G? (HI(I/llEa
M9 Milton St.
10TOS
TOTAL PRICE ga
n nn
u.u u
n nn
u.uu
n nn
u.uu
n nn
u.uu
5 nn
C.uu
{Sample labels)
- 13 -
Page 17

10-4. Tare Function Procedures
There are two kinds of tare subtraction procedures, one is "Direct tare", another is "Preset tare
Mode SW. (1): WEIGH or FIX 1
Mode SW. (2): MANUAL J
[
(1) Place tare weight on the platter.
(2) Press [T].
(3) Start the weighing or fix price
operation.
(4) The label is issued.
(5) Remove the article together with
tare.
NOTE; Tare weight subtraction is available with up to 30 lbs. When tare weight subtraction is in
operation, however, the scalable range for net weight becomes less by the amount of the tare.
(Net weight = Gross weight - Tare weight)
NOTE: When the tare weight exceeds 0.20 lbs with the Mode SW.(2) set to AUTO position, one tare
label will be issued automatically. To prevent this, set the Mode SW. (2) to MANUAL position.
- 14
Page 18

★ Preset Tare Subtraction #1
Mode SW. (1): WEIGH I
Mode SW. (2): MANUAL
J
(1) Enter the tare weight.
ex.)Tare weight of 0.50 lbs.
(2) Press .
(3) Place the tare of 0.50 lbs on the
platter.
(4) Start the weighing operation.
★ Preset Tare Subtraction #2 «iiamiiai
„ r Mode SW. (1); FIX I
L Mode SW. (2): MANUAL J
WEIGHT □ .PRICE
n nn
u.uu
n c n
U.JU
i<- NET
n nn
u.uu
NET
n
u.uu
n nn
u.uu
n nn
u.uu
T. PRICE
n nn
u.uu
n nn
u.uu
(1) Enter the tare weight.
ex.)Tare weight of 0.50 lbs.
(2) Press [T] ■
(3) Place the tare of 0.50 lbs on the
platter.
(4) Start the fix price operation.
-)tC- net
->K- NET
ft nn
u.uu
n
U.JU
n nn
u.uu
-I
cn
J,JU
n nn
u.uu
15 -
Page 19

10-5. Save Function Procedures
Save key is used to save tare weight and unit price (or total price) after taking off the article from the
platter.
★ Weighed Article Mode Saving [Mode SW. (1): WEIGH]
(1) Place tare weight on the platter. •
(2) Press key.
(3) Enter the unit price.
(4) Press I SAVE j key. Tare and Unit
Price are saved.
(5) Place an article on.
ex.) Weight of 2 lbs.
(6) When Mode SW. (2) is set to
MANUAL position, pressf^T/* |
or department key.
2
PRT
The label
is issued.
0.50 Ibl
X—7.^
I I
5
SAVE
ZI
I'TI
WEIGHT U. PRICE T. PRICE
n
n
Ci
U.JK
n nn
u.uu
NET
0
n nn
u.uu
1 y . . —
NET
n nn
u.uu
NET
n nn
C.uu
NET PREPACK
nn
u.uu
n nn
U.u u
5 cn
C.3u
^ C H
C.3u
PREPACK
г.so
n nn
u.uu
n nn
u.uu
n
nn
u.uu
n nn
u.uu
r nn
^.uu
(7) Remove the article together with
tare.
(8) Press [§ key.
Clear the save mode and unit
price.
(9) Press key.
(10) Press [T] key.
The scale is ready for use.
- n C n
»(- NET
. n
U. JU
TC- net
U.JU
n
nn
u.uu
PREPACK
/l\
?. s c
n nn
u.uu
n nn
u.uu
n nn
u.uu
16 -
Page 20

★ Fix Price Mode Saving [Mode SW. (1): FIX]
(1) Enter the tare weight.
(2) Press ¡2 key.
(3) Enter the total price.
(4) Press I SAVE | key. Tare weight and
Total Price are saved.
ex.) Aticle of 5 lbs and tare of
0.50 lbs.
(6) When Mode SW. (2) is set to MAN
UAL position, Press IPRT/* | or
department key.
0
SAVE
PRT
The label
is issued.
w
0
I~1
WEIGHT
n nn
u.uu
. n
i(- NET
0
• oc«
TC- net
. n C«
tC- net
C nn
J.uu
u.^u
U. PRICE
PREPACK
T. PRICE
O C O
u.^u
n no
u.uu
3 nn
3m
3 nn
3m u
3 nn
5.UU
-)|f NET PREPACK
(7) Press key.
Clear the save mode and total
price.
(8) Remove the article together with
tare.
TT
Tare weight
is cleared
automatically.
c nn
3mu
NET
n nn n no
u.uu
n nn
u«uu
u.uu
- 17
Page 21

10-6. Unit Price per 172,1/4 lbs [Mode SW. (1); WEIGH]
★ Per 1/2 lbs
(1) Enter the unit price.
WEIGHT U. PRICE T. PRICE
n nn
0
u.uu
?. s c
n nn
u.uu
(2) Press key.
(3) Place an article on the platter.
(4) When Mode SW. (2) is set to AUTO
position, the label is issued
automatically.
★ Per 1/4 lbs
(1) Press unit price preset key.
ex.) Unit price of $ 0.75/lb is set
in preset key Q].
(2) Press 1^ key.
Z lbs
XT
iMBaJUL 25 sBiirAUG 04
2.00 5.00
KTwt.igg Fwct/iiga
149 Hilton St.
$1 0 . 00
TOTAL PRICE g?
n nn
u.uu
^ nn c nn
u.uu u.uu
(Sample label)
WEIGHT
n nn
u.uu u.uu
C nn
u.uu
U. PRICE T. PRICE
J. o
D nn n nn
n nn
u.uu
in nn
lU.UU
n no
u.uu
u.uu
(3) Place an article on the platter.
(4) When Mode SW. (2) is set to AUTO
position, the label is issued
automatically.
NOTE: The SL57 will check details of unit price, if unit price after calculation (1/2 lbs; 2 times, 1/4
lbs: 4 times) is exceeded 4 digits then unit price will be cleared.
NOTE: i3] or key should be depressed after key-in unit price.
maJUL 25 aunAUG 04
2.00 3.00
m m. 'is rm/t
149 Hi I ton St.
$6 . 0 0
TO T AL PR i C F
^
5 nn
C.uu u.uu o.uu
(Sample label)
5 nn c nn
18 -
Page 22

10-7. Date Change [Mode SW.(2): AUTO or MANUAL]
The date can be changed temporarily.
(1) Press I DT/TM I key.
(2) Enter the new date,
ex.) Aug. 10th. '87
T. PRICE
Current setting
date
nnnnno
uuuu.uO
nnno tn
UUUO. fw
no #n on
uO lu.O «
(3) Press
I
PHI/* I key.
★ When original date is desired.
(1) Press I DT/TM I key.
(2) Press key.
(3) Press I PRT/* I key.
aM
PRT
(Finish)
no <o o n
uO lU.O I
- 19
Page 23

10-8. Shelf Life Date Setting [Mode SW.(2): AUTO or MANUAL]
With the SL57 system, the shelf life date can be set for the article(s).
^^ U. PRICE T. PRICE
¡1) Press IDT/TM I key.
(2) Press I SAVE | key.
(3) Enter new shelf life date.
(Max. 3 digits)
(4) Press I PRT/* I key.
10-9. Print Test Label [Mode SW. (2): X/Z PROG.]
At the "X/Z PROG." position, depression of \ FOR | key will issue a label indicating the area which is
within the print matrix.
Please, check the condition of thermal head with this label everyday before starting operation.
20 -
Page 24

11. TOTAL OPERATION PROCEDURES [Mode SW.{2): X/Z PROG.]
The READ (X) reports allow to read the totals but not clear memories, while the RESET (Z) reports allow
to read the totals and at the same time all the resettable memories will be cleared when the reports
have been issued.
11-1. Individual Department Read [Mode SW. (1): WEIGH (X)]
(1) Press the required department
key.
(2) The report is issued.
11-2. Grand Total Read [Mode SW. (1): WEIGH (X)]
(1) Press I MR I key.
(2) The report is issued.
NOTES;
1. Read or Reset mark
DPT-n O
DPT-n *
GRAND O
GRAND *
Department Read mark (n = 1 ~ 8)
Department Reset mark (n = 1 ~ 8)
Grand Total Read mark
Grand Total Reset mark
2. Tatal Memory clear
CO
Total operation
Individual Department
“O
0)
QC
Grand Total
■ 4-»
Individual Department
O
0)
tr
Grand Total
Dept. Total Memory
Grand Total Memory
Not cleared Not cleared
Not cleared
Cleared
Cleared
21 -
Not cleared
Not cleared
Cleared
Page 25

11-3. Individual Department Reset [Mode SW. (1): FIX (Z)]
(1) Press the required department
key.
(2) The reset report is issued.
11-4. Grand Total Reset [Mode SW. (1): FIX (Z)]
(1) Press I MR I key.
(2) The reset report is issued. Then all
the resettable memories will be
cleared.
- 22 -
Page 26

12. PROGRAMMING PROCEDURES
[Mode SW.(1): BY COUNT (PROG.)]
[Mode SW.(2): X/Z PROG.]
In this chapter are described operations to add to or change the data already programmed in the
"PROG"mode. To enable the programming operations in the "BY COUNT (PROG.)" position of the Mode
SW.(1) and the "X/Z PROG." position of the Mode SW. (2).
12-1. Date and Time Setting
ex.) To set the date "July 25th. '87" and time "21:09":
Mode SW. (1): BY COUNT (PROG.).
Mode SW. (2): X/Z PROG.
(01'12) (01-31)
1 0 9
2
Hour '-Minute
(00-23) (00-59)
PRT/*
—
NOTE: The SL57 will check details of date (time) input, any wrong date (time) will result in error mode,
and correct date (time) should be entered again.
12-2. Unit Price Presetting or Changing
ex.) To set $ 2.50 to Preset key Q, and $ 3.00 to Preset key Q:
Mode SW. (1): BY COUNT (PROG.)
Mode SW. (2): X/Z PROG.
(Max. 4 dig.)
PRT/-X-
PRT/*
(Max. 4 dig.)
12-3. Name or Message Programming
(Department Name, Clerk Name, Article Name, or Commercial Message etc.)
ex.) To program "Beef #1"for Department key Q .
Mode SW. (1): BY COUNT (PROG.)
Mode SW. (2): X/Z PROG.
0
0
2
(Space) (#) (1)
2 0 3
—
0
1
3
—
PRT/*
PRT/* —► The label is issued.
(B) (e) (e)
Character code: 3 digits
(See Table 1)
(f)
NOTE: Up to 20 regular-sized characters (including spaces) can be programmed on one line.
- 23
Page 27

12-4. Address or Message Programming (Bottom of label)
(Store Address, Telephone No., Special Message etc.)
ex.) To program the address "149 Milton St.".
Mode SW. (1): BY COUNT (PROG.).
Mode SW (2): X/Z PROG,
2
0
0
(Space) (M)
5 0
(S)
4 1
—
3
704
—
(t)
3
6
0 9
—
2
4
1
*□
6
—
—
1
PRT/*
—
2
MR 3 0
7
0
4
1
—
(1) (4)
Character code. 3 digits
(See Table 1)
—
1
5 —
6
(t) (0) (n)
3 0
4
—
614
309
(9)
—
2
0
(Space)
0
NOTE: Up to 26 small-sized characters (including spaces) can be programmed on one line.
12-5 Print Item ON/OFF Setting or Changing
This operation specifies whether each print item on the issued in registration labels is to be printed
or not.
ex.) To non-print the "PACKED ON date", "SELL BY date", and "Total Price".
Mode SW. (1): BY COUNT (PROG.)
Mode SW. (2): X/Z PROG.
[1]
PRT/*
-0-
MR
-a-
PRT/*
NOTE: [?]-
0-
MR
MR
T. PRICE
nnnn
uuuu
T. PRICE
nonnn
Packed on date (Switching by |_1J key)
(0: Print, 1: Non-print)
Sell by date (Switching by 2^ key)
(0: Print, 1. Non-print)
Name or Message (Switching by [Ti key)
(0: Print, 1: Non-print)
Address or Message (Switching by key)
(0: Print, 1: Non-print)
Unit Price (Switching by Qj key)
(0: Print. V. Non-print)
Weight (Switching by [|] key)
(0: Print, 1: Non-print)
Total Price (Switching by '¿i key)
(0: Print, 1; Non-print)
S symbol (Switching by key)
(0: Pirnt, 1: Non-print)
Quantity (Switching by key)
(0: Print, 1: Non-print)
- 24 -
Page 28

Table 1: Character Code Table
Column Code
Row
Code
\Col
00 SP
01
02
0 3
04
05
06
07
08
09
3 4 5 6
2
0
!
1
“
2 B
3
4
$
5 E u e
%
6
&
'
7
8
(
9 I
)
1 0 J
+
1 1
1 2
1 3
1 4
<
— =
>
@ P
A Q a
R b
C S c
T
D
F V f
w
G
H X h
Y i
z
K
c
\
L
M
]
/s
N
▼
d
9
j z
k
1
m
n
7
P
q
r/sA
s
t
u
/€
V
w
X
• •
y
CE
1
1
1
1
/3
8 9
E
E
/s
E
0
0
A
• •
A
U
N
f
—¥
4—
a
A
r
A
n
I
n
£
O
i
1 5
ex.)
COL
A 0
4 0 1
First enter the Column code and then the Row code for the required character. For example, to access
"A", enter 401.
ROW
7
/
0
0
_
4>
0
t
- 25
Page 29

13. ERROR MESSAGE TABLE
Take the following action if an error message has appeared on the total price display with the buzzer
sounding.
Message
H
L
P
Cause
Print head is not properly set.
The label has run out.
The label is not placed over the label
end sensors.
The label interrupts the label issued
sensors.
Press key, and set the print head.
Press key, and set a new label roll.
Press[^key, and setthe label correctly.
(Refer to Section 8.)
Press key and FEED| key. Then
remove the label.
Solution
14. BEFORE YOU CALL FOR SERVICE
It is our primary concern to give you full satisfaction and better service. If, however, any problem arises
in connection with the operation of this scale, please check the following points once more before
calling for service:
A) Is the power plug fully inserted into AC outlet?
B) Is the power switch turned ON?
C) Is AC power being properly supplied to outlet? (Check it using other electric appliance.)
D) Check circuit breaker.
E) Has there been a power failure of any sort?
F) Has the operation been carried out in the correct order?
This scale has been manufactured under strict quality control. If you have trouble, however, DO NOT
TRY TO FIX IT BY YOURSELF. Pull the power plug out of the AC outlet, and contact your TEC
representative.
CAUTION:
The specifications are subject to change without notice.
- 26
Page 30

printed in japan
E1-04316A 9509100(D)
 Loading...