

Page 1

Owner’s Manual
Hard Disk Camera
GSC-K80HE/GSC-K40HE
computers.toshiba-europe.com
Page 2

Hard Disk Camera GSC-K80HE/GSC-K40HE
ii Owner’s Manual
Page 3

Table of Contents
Preface
Before Using Your Camera . . . . . . . . . . . . . . . . . . . . . . . . . . . . . . . . . viii
Check the components . . . . . . . . . . . . . . . . . . . . . . . . . . . . . . . . . . . . . . x
Specifications. . . . . . . . . . . . . . . . . . . . . . . . . . . . . . . . . . . . . . . . . . . . . xi
Safety Precautions. . . . . . . . . . . . . . . . . . . . . . . . . . . . . . . . . . . . . . . . xiii
Handling Your Camera . . . . . . . . . . . . . . . . . . . . . . . . . . . . . . . . . . . . xviii
Handling the AC Adapter. . . . . . . . . . . . . . . . . . . . . . . . . . . . . . . . . . . . xx
Handling the Battery . . . . . . . . . . . . . . . . . . . . . . . . . . . . . . . . . . . . . . xxi
About the Built-in Hard Disk Drive . . . . . . . . . . . . . . . . . . . . . . . . . . xxiii
About SD Memory Cards . . . . . . . . . . . . . . . . . . . . . . . . . . . . . . . . . . xxiv
Chapter 1 Preparation
Component Names. . . . . . . . . . . . . . . . . . . . . . . . . . . . . . . . . . . . . . . . . . 2
Loading and Removing the Battery . . . . . . . . . . . . . . . . . . . . . . . . . . . . 5
Charging . . . . . . . . . . . . . . . . . . . . . . . . . . . . . . . . . . . . . . . . . . . . . . . . . . 6
Inserting and Removing SD Cards . . . . . . . . . . . . . . . . . . . . . . . . . . . . . 8
Turning the Camera On and Off . . . . . . . . . . . . . . . . . . . . . . . . . . . . . . . 9
Setting the Date and Time . . . . . . . . . . . . . . . . . . . . . . . . . . . . . . . . . . . 11
Creating Albums. . . . . . . . . . . . . . . . . . . . . . . . . . . . . . . . . . . . . . . . . . . 12
Using the LCD Monitor. . . . . . . . . . . . . . . . . . . . . . . . . . . . . . . . . . . . . . 14
About the Remote Control. . . . . . . . . . . . . . . . . . . . . . . . . . . . . . . . . . .15
Using the Conversion Lens or Lens Hood. . . . . . . . . . . . . . . . . . . . . . 17
Chapter 2 Shooting Video
Before You Shoot . . . . . . . . . . . . . . . . . . . . . . . . . . . . . . . . . . . . . . . . . . 20
Shooting Video. . . . . . . . . . . . . . . . . . . . . . . . . . . . . . . . . . . . . . . . . . . . 22
Taking Still Images . . . . . . . . . . . . . . . . . . . . . . . . . . . . . . . . . . . . . . . . .25
Shooting with the Zoom. . . . . . . . . . . . . . . . . . . . . . . . . . . . . . . . . . . . . 27
Playback . . . . . . . . . . . . . . . . . . . . . . . . . . . . . . . . . . . . . . . . . . . . . . . . . 28
Erasing Images (Erase one Image). . . . . . . . . . . . . . . . . . . . . . . . . . . . 32
Chapter 3 Advanced Photography
Setting the Scene . . . . . . . . . . . . . . . . . . . . . . . . . . . . . . . . . . . . . . . . . 34
Setting the Focus . . . . . . . . . . . . . . . . . . . . . . . . . . . . . . . . . . . . . . . . . 36
Changing the Brightness . . . . . . . . . . . . . . . . . . . . . . . . . . . . . . . . . . . 38
Using the Backlight Compensation Function . . . . . . . . . . . . . . . . . . . 39
Using Auto Mode Function . . . . . . . . . . . . . . . . . . . . . . . . . . . . . . . . . . 40
Photography Using the Assist Light . . . . . . . . . . . . . . . . . . . . . . . . . . 41
Changing the Recording Menu Settings . . . . . . . . . . . . . . . . . . . . . . . 42
Creating and Selecting Albums . . . . . . . . . . . . . . . . . . . . . . . . . . . . . . 45
Continuous Recording . . . . . . . . . . . . . . . . . . . . . . . . . . . . . . . . . . . . . 48
Setting the Video Quality . . . . . . . . . . . . . . . . . . . . . . . . . . . . . . . . . . . 49
Hard Disk Camera GSC-K80HE/GSC-K40HE
Owner’s Manual iii
Page 4

Hard Disk Camera GSC-K80HE/GSC-K40HE
Shooting with Natural Color Tones (White Balance) . . . . . . . . . . . . . 50
Shooting with Image Stabilization . . . . . . . . . . . . . . . . . . . . . . . . . . . . 52
Wind Noise Reduction . . . . . . . . . . . . . . . . . . . . . . . . . . . . . . . . . . . . . 53
Changing the Microphone Sensitivity . . . . . . . . . . . . . . . . . . . . . . . . . 54
Digital Zooming . . . . . . . . . . . . . . . . . . . . . . . . . . . . . . . . . . . . . . . . . . . 55
Selecting the Metering Mode . . . . . . . . . . . . . . . . . . . . . . . . . . . . . . . . 56
Selecting the Focus Area (AF Mode) . . . . . . . . . . . . . . . . . . . . . . . . . . 57
Shooting with AF Assist Light . . . . . . . . . . . . . . . . . . . . . . . . . . . . . . . 58
Changing Image Colors . . . . . . . . . . . . . . . . . . . . . . . . . . . . . . . . . . . . 59
Changing the Image Contrast . . . . . . . . . . . . . . . . . . . . . . . . . . . . . . . 60
Changing the Image Sharpness . . . . . . . . . . . . . . . . . . . . . . . . . . . . . . 61
Changing the LCD Brightness . . . . . . . . . . . . . . . . . . . . . . . . . . . . . . . 62
Chapter 4 Advanced Playback
Changing Levels. . . . . . . . . . . . . . . . . . . . . . . . . . . . . . . . . . . . . . . . . . . 66
Selecting the Video Playback Method . . . . . . . . . . . . . . . . . . . . . . . . . 67
Capturing Single Video Frames as Still Images . . . . . . . . . . . . . . . . . 68
Using Zoomed Playback . . . . . . . . . . . . . . . . . . . . . . . . . . . . . . . . . . . . 69
Switching the Playback Display . . . . . . . . . . . . . . . . . . . . . . . . . . . . . 70
Changing Playback Settings. . . . . . . . . . . . . . . . . . . . . . . . . . . . . . . . . 71
Setting up and Running Auto Play . . . . . . . . . . . . . . . . . . . . . . . . . . . 73
Protecting Images . . . . . . . . . . . . . . . . . . . . . . . . . . . . . . . . . . . . . . . . . 75
Copying Images . . . . . . . . . . . . . . . . . . . . . . . . . . . . . . . . . . . . . . . . . . . 78
Printing Directly from the Camera Using PictBridge . . . . . . . . . . . . . 80
Editing Videos . . . . . . . . . . . . . . . . . . . . . . . . . . . . . . . . . . . . . . . . . . . . 82
Chapter 5 Advanced Deletion
Erasing Selected Images. . . . . . . . . . . . . . . . . . . . . . . . . . . . . . . . . . . . 86
Erasing Albums . . . . . . . . . . . . . . . . . . . . . . . . . . . . . . . . . . . . . . . . . . . 88
Erasing all the Files on a Drive. . . . . . . . . . . . . . . . . . . . . . . . . . . . . . . 89
Chapter 6 Basic Camera Settings
Changing the Basic Camera Settings . . . . . . . . . . . . . . . . . . . . . . . . . 92
Sound . . . . . . . . . . . . . . . . . . . . . . . . . . . . . . . . . . . . . . . . . . . . . . . . . . . 94
Auto Power Off. . . . . . . . . . . . . . . . . . . . . . . . . . . . . . . . . . . . . . . . . . . . 95
LCD-linked Power. . . . . . . . . . . . . . . . . . . . . . . . . . . . . . . . . . . . . . . . . . 96
Quick Start . . . . . . . . . . . . . . . . . . . . . . . . . . . . . . . . . . . . . . . . . . . . . . . 97
Output TV . . . . . . . . . . . . . . . . . . . . . . . . . . . . . . . . . . . . . . . . . . . . . . . . 98
LANGUAGE. . . . . . . . . . . . . . . . . . . . . . . . . . . . . . . . . . . . . . . . . . . . . . . 99
System. . . . . . . . . . . . . . . . . . . . . . . . . . . . . . . . . . . . . . . . . . . . . . . . . . 100
Chapter 7 Connecting to a TV
Connecting with HDMI Cable . . . . . . . . . . . . . . . . . . . . . . . . . . . . . . . 106
Connecting with Component Cable . . . . . . . . . . . . . . . . . . . . . . . . . . 107
Connecting with AV Cable. . . . . . . . . . . . . . . . . . . . . . . . . . . . . . . . . . 108
iv Owner’s Manual
Page 5

Hard Disk Camera GSC-K80HE/GSC-K40HE
Chapter 8
Connecting to a PC
About the Software. . . . . . . . . . . . . . . . . . . . . . . . . . . . . . . . . . . . . . . . 110
Supported PCs . . . . . . . . . . . . . . . . . . . . . . . . . . . . . . . . . . . . . . . . . . . 111
Installing the Software . . . . . . . . . . . . . . . . . . . . . . . . . . . . . . . . . . . . . 112
Backing up Camera Images to a PC. . . . . . . . . . . . . . . . . . . . . . . . . . 115
Appendix Troubleshooting . . . . . . . . . . . . . . . . . . . . . . . . . . . . . . . . . . . . . . . . . . 120
Error Messages. . . . . . . . . . . . . . . . . . . . . . . . . . . . . . . . . . . . . . . . . . . 130
Glossary . . . . . . . . . . . . . . . . . . . . . . . . . . . . . . . . . . . . . . . . . . . . . . . . 131
Index . . . . . . . . . . . . . . . . . . . . . . . . . . . . . . . . . . . . . . . . . . . . . . . . . . . 133
Toshiba Support . . . . . . . . . . . . . . . . . . . . . . . . . . . . . . . . . . . . . . . . . . 135
Regulatory information . . . . . . . . . . . . . . . . . . . . . . . . . . . . . . . . . . . . 135
Trademarks. . . . . . . . . . . . . . . . . . . . . . . . . . . . . . . . . . . . . . . . . . . . . . 137
Owner’s Manual v
Page 6

Hard Disk Camera GSC-K80HE/GSC-K40HE
vi Owner’s Manual
Page 7

Preface
Before Using Your Camera
Check the components
Specifications
Safety Precautions
Handling Your Camera
Handling the AC Adapter
Handling the Battery
About the Built-in Hard Disk Drive
About SD Memory Cards
Hard Disk Camera GSC-K80HE/GSC-K40HE
Owner’s Manual vii
Page 8

Hard Disk Camera GSC-K80HE/GSC-K40HE
Before Using Your Camera
Thank you for buying this Toshiba HARD DISK CAMERA.
To ensure correct use of your hard disk camera, be sure to thoroughly read
this Owner’s Manual before you start using the camera.
Always keep this Owner’s Manual close by after you have finished
reading it.
The exterior, specifications, software and content of this Owner’s Manual
are subject to change without notice in the interest of product improvement.
The illustrations and screen displays in this manual are exaggerated and
simplified for ease of viewing, so there can be slight differences between
them and the actual product.
In this manual, the icon indicates functions and settings that apply to
video recording, while the icon is used to indicate functions and
settings that apply to still image photography. Both still images and videos
are referred to as “images”.
Software and Owner’s Manual
Neither the entirety nor a portion of the accompanying Software or
Owner’s Manual can be transferred or reproduced without permission.
The accompanying Software and Owner’s Manual can be used with a
single apparatus.
Please note that we cannot be held liable for damages incurred by you
or a third party as a result of using an apparatus with this Software and
Owner’s Manual.
Computer screens in the Owner’s Manual are given as an example.
These may differ from your actual screen. We cannot be held liable for
compensation for errors in description.
Notice Regarding Data Erasure W hen Discarding or Transferring
Rights to Your Camera
When formatting or deleting data from the camera or PC, only the file
management information is changed. The data may still be present and
could be recovered using commercially available data recovery software.
This could allow for data which was erased to fall into the hands of an
unintended party.
As a prevention, it is recommended to physically destroy the built-in hard
disk drive or SD Memory Card, or to transfer rights or dispose of the
camera or SD Memory Card after having completely erased any data on
the built-in hard disk drive or SD Memory Card using commercially
available data erasing software.
Please responsibly manage data on the built-in hard disk drive and SD
Memory Card.
viii Owner’s Manual
Page 9

Hard Disk Camera GSC-K80HE/GSC-K40HE
Do not use the PC to format the camera built-in hard disk drive or SD
Memory Card with PC connection. Format the hard disk drive or SD
Memory Card on the camera ( p.102).
CAUTION
RISK OF EXPLOTION IF BATTERY IS REPLACED BY AN INCORRECT
TYPE. DISPOSE OF USED BATTERIES ACCORDING TO LOCAL
ORDINANCES OR REGULATIONS.
This hard disk camera supports Exif Print.
This product supports PRINT Image Matching III. A faithful
reflection of shooting conditions and shooting intentions are
possible when printing with a PRINT Image Matchingsupported printer and processing images with compatible
software. Some features are not available with printers
supporting versions earlier than PRINT Image Matching III.
Owner’s Manual ix
Page 10

Hard Disk Camera GSC-K80HE/GSC-K40HE
Check the components
Make sure that you have all of the items below. If any item is missing,
damaged or mismatched, please contact the Toshib a Support.
Rechargeable
battery (GSC-BT6)
Remote control USB cable AV cable
Battery for
remote control
Component cable CD-ROM
AC adapter
(SQPH20W10P-02)
Power cord
Application software (1)
Owner’s Manual (1)
Lens cap
Owner's Manual (this document)
Quick Start Guide
Warranty Leaflet
x Owner’s Manual
Page 11

Specifications
Image sensor 1/3-inch CMOS sensor
Lens Optical 10X zoom lens, f/3.5
Shooting range Standard: Approx. 0.1 m to infinity (wide-angle),
LCD monitor
Focus control
method
Exposure control
mode
Metering mode TTL zoned metering
Brightness -2.0EV to +2.0EV (in 1/3-EV/Step increments)
Still photography
sensitivity
Shutter speeds Videos: 1/15 to 1/4800 sec.
Image
Stabilization
White balance Auto, Sunlight, Cloud, Fluorescent light H, Fluorescent
Digital zoom 3X
I/O terminals DC IN 10 V terminal, USB terminal, A/V OUT terminal,
Power supply Dedicated rechargeable lithium-ion battery (GSC-BT6)
Recording media
Hard Disk Camera GSC-K80HE/GSC-K40HE
Total pixels: 1.35 million
Effective pixels: Still image approx. 920K, video
approx. 920K
Focal length: f = 6.0-60.0 mm (with 35 mm camera:
46.2-503.6 mm)
Filter diameter: 43 mm
approx. 1.0 m to infinity (telephoto)
*1
3.0-inch diagonal TFT color LCD
Pixels: 230,000 (960 X 240)
TTL contrast-detection AF
Program AE
Metering modes: Center-weighted, Spot
Auto: ISO100-200 equivalents
Still images: 1 to 1/1000 sec. (combination electronic
and mechanical shutter)
Electronic
light L, Incandescent lamp, Preset
Component terminal, HDMI output terminal (type C)
/ AC adapter (SQPH20W10P-02)
*
2
Hard disk drive: 80GB
*
2
40GB
(GSC-K40HE)
(GSC-K80HE) or
SD Memory Cards: up to 8GB SDHC/SD supported
Owner’s Manual xi
Page 12

Hard Disk Camera GSC-K80HE/GSC-K40HE
Videos Recording format: MPEG-4 AVC/H.264 (60fps)
Recorded pixels: 1280 X 720
Audio: AAC, 48kHz, 16-bit, stereo, 128kbps
Still images Recording format: JPEG (Exif 2.21, DCF 2.0-compliant)
Recorded pixels: 920,000 (1280 X 720)
Operating
environment
Dimensions
(W
× H × D)
Weight GSC-K80HE: Approx. 18.2 oz (515 g) (camera body
*1: The LCD monitor contained in th is ca mera is manufactured using an
extremely high level of precision technology; however, there may be an
occasional pixel (dot of light) that does not operate properly (e.g., does
not light, remains constantly lit, etc.). This is a structural property of
LCD technology, is not a sign of malfunction, does not affect continued
operation of the LCD monitor, and is not covered under your warranty.
*2: 1GB = 1 billion bytes. Actual formatted capacity may be less.
Temperature: +41°F (+ 5°C) to +104°F (+40°C)
(running), -4°F
(-20°C) to +140°F (+60°C) (stored)
Humidity: 30% to 80% RH (running, no condensation)
3.4 inches
(86.8 mm
(including extruding part, battery unloaded)
3.4 inches × 3.1 inches × 5.8 inches
(86.8 mm
(including extruding part, battery loaded)
only)
Approx. 20.6 oz (585 g) (including battery, SD card
and lens cover)
GSC-K40HE: Approx. 17.6 oz (500 g) (camera body
only)
Approx. 20.1 oz (570 g) (including battery, SD card and
lens cover)
× 3.1 inches × 5.3 inches
× 80.0 mm × 135.5 mm)
× 80.0 mm × 146.8 mm)
This model complies with the above specifications.
Designs and specifications are subject to change without notice.
This model may not be compatible with features and/or specifications
that may be added in the future.
xii Owner’s Manual
Page 13

Safety Precautions
Read these safety precautions carefully before using this product.
These precautions provide valuable safety instructions that you must
observe.
The indications used for the precautions have the following meanings:
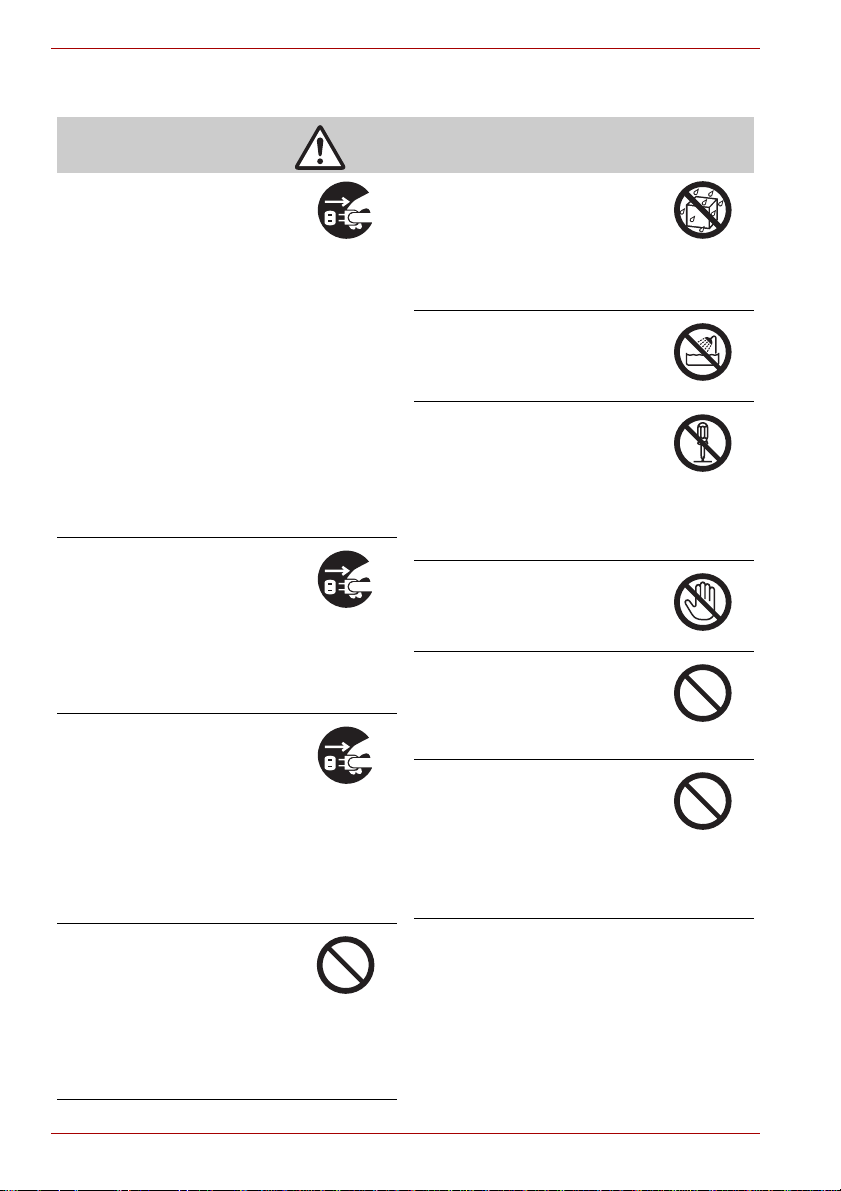
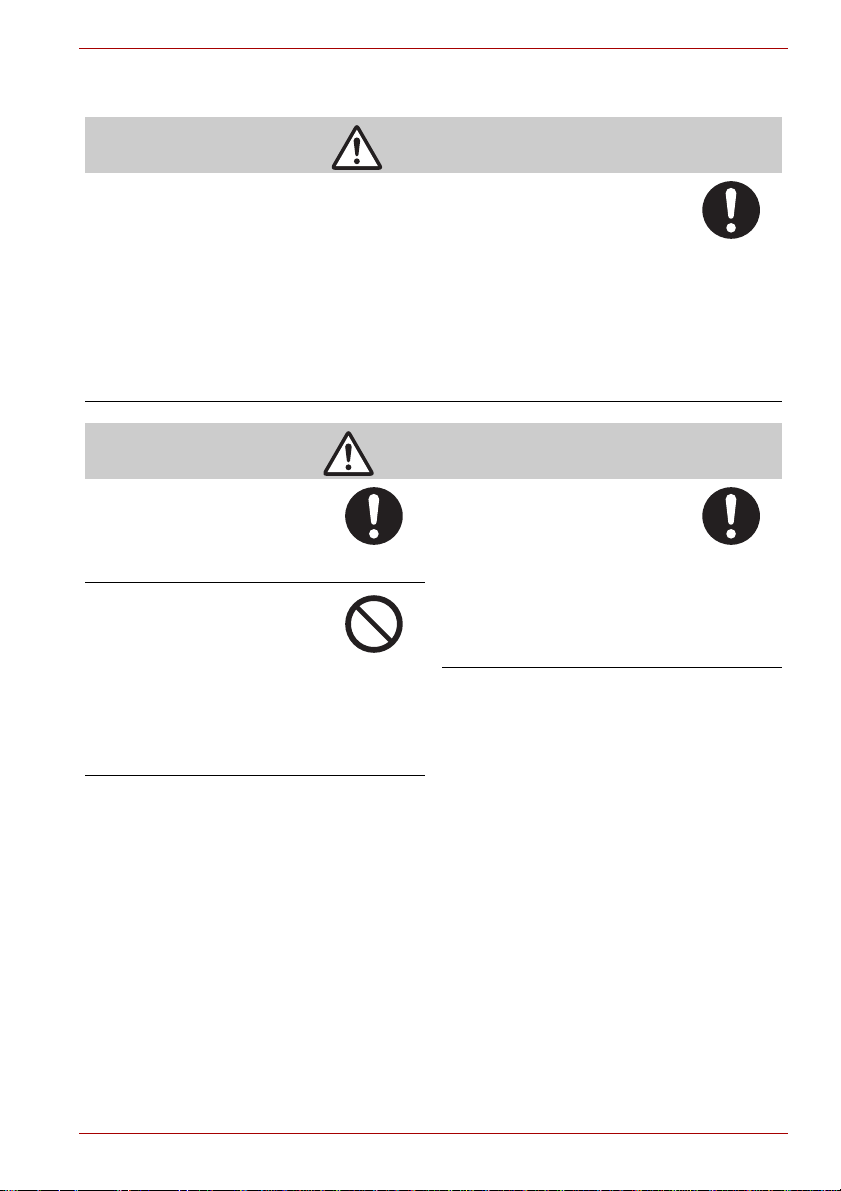
Graphic symbol definitions
Graphic Symbol Meaning
Hard Disk Camera GSC-K80HE/GSC-K40HE
Indicates a prohibited action that must not be
carried out. The actual prohibited action is
indicated in the symbol or nearby graphically, or
described in text.
Indicates a necessary action that must be carried
out. The actual necessary action is indicated in the
symbol or nearby graphically, or described in text.
Owner’s Manual xiii
Page 14
Hard Disk Camera GSC-K80HE/GSC-K40HE
When using the product
WARNING
Should you ever notice a
strange odor, smoke, or
excessive heat coming from
the camera, remove the battery
and AC adapter.
Continued use in this state might
cause fire, electric shock, or
burns. Take care not to burn
yourself if the battery gets hot.
For details on repair, consult the
Toshiba Customer Service
Department or Toshiba Customer
Support Department.
In case of continuous usage for a longer period
the surface of your camera may reach a higher
temperature which may possibly cause damage
to your skin. If temperature of your camera is
getting higher turn it off and let it cool down for
some time. Please protect your skin from hot
surface.
If foreign objects or water have
entered the camera, turn the
power OFF and remove the
battery and AC adapter.
Continued use in this state might
cause fire or electric shock.
Consult the Toshiba Customer
Service Department or Toshiba
Customer Support Department.
If the camera has fallen or its
case has been damaged, turn
the power OFF and remove the
battery and AC adapter.
Continued use in this state might
cause fire or electric shock. Injury
may occur from handling the
damaged case.
Consult the Toshiba Customer
Service Department or Toshiba
Customer Support Department.
Do not allow metallic objects or
flammable foreign matter
inside the camera.
This might cause fire or electric
shock.
Do not insert or drop foreign
objects in the SD card slot,
terminals, or other holes or
openings.
Do not use the camera in areas
near water.
This might cause fire or electric
shock.
Take special care during rain,
snow, on the beach, or near the
shore.
Do not use the camera in the
bath or shower.
This might cause fire or electric
shock.
Do not disassemble, modify, or
repair the camera.
This might cause fire or electric
shock.
For repair or internal inspection,
ask the Toshiba Customer
Service Department or Toshiba
Customer Support Department.
Do not touch power cables, TV
cables, or USB cables during a
thunderstorm.
This might cause electric shock.
Do not use the camera while
walking, driving, or riding a
motorcycle.
This might cause you to fall over
or result in a traffic accident.
Do not use the product or carry
it close to your body outdoors
in the rain, during a
thunderstorm or when a
thunderstorm is near.
This might cause fire, electric
shock and/or serious lightning
injuries.
xiv Owner’s Manual
Page 15

Hard Disk Camera GSC-K80HE/GSC-K40HE
CAUTION
Turn off power and do not use
the camera where its use is
restricted, such as in an
airplane or hospital.
This might affect flight or medical
equipment resulting in accident.
Use during airplane take-off/
landing is prohibited by law.
For use in a hospital, consult
hospital staff.
Do not use the camera in
humid, steamy, smoky, or
dusty places.
This might cause fire or electric
shock.
Do not leave the camera in
places where the temperature
may rise significantly, such as
inside a car.
This might adversely affect the
case or the internal parts,
resulting in fire.
Do not play the supplied CDROM with a music CD player or
a similar device.
This might damage the
headphone or speaker, and/or
may damage your ears.
Do not drop or subject the
camera to strong impact.
This might cause fire, electric
shock, or malfunction.
Before moving the camera,
disconnect the cables.
Neglecting this might damage the
cables, resulting in fire or electric
shock.
Do not place the camera on
inclined or unstable surfaces.
This might cause the camera to
fall or tilt over, causing injury or
malfunction.
Do not wrap or place the
camera in cloth or blankets.
This might cause heat to build up
and deform the case, resulting in
fire. Use the camera in a wellventilated place.
Do not swing the camera while
walking.
If you hold the grip belt and swing
the camera, the camera might
come into contact to other people
or any object, resulting in injury or
malfunction.
Before cleaning the camera,
remove the battery and AC
adapter.
Neglecting this might cause
electric shock.
Do not subject the LCD
monitor to impact.
This might damage the glass on
the screen or cause the internal
fluid to leak. If the internal fluid
enters your eyes or comes into
contact with your body or clothes,
rinse with fresh water.
If the internal fluid has entered
your eyes, consult a physician to
receive treatment.
Owner’s Manual xv
Page 16

Hard Disk Camera GSC-K80HE/GSC-K40HE
About the AC adapter
WARNING
Use the AC adapter only with
the indicated power supply
voltage.
Use with any other power supply
voltage might cause fire or
electric shock.
Do not disassemble, modify, or
repair the AC adapter.
This might cause fire or electric
shock.
Occasionally remove the plug
from the outlet and clean the
prongs and the surface where
the prongs are connected if
dust or dirt has adhered.
A loss of plug insulation might
cause fire.
Do not bring metal into contact
with the connection points of
the AC adapter when its plug is
in an outlet.
This might cause fire or electric
shock.
Do not connect or disconnect
the AC adapter plug with a wet
hand.
This might cause electric shock.
Do not remove the AC adapter
plug from a wall outlet by
pulling the actual cable.
This might damage the cable or
plug, resulting in fire or electric
shock. Make sure to hold the plug
when removing it.
Use only the specified AC
adapter (SQPH20W10P-02) and
power cable.
Use of an AC adapter other than
specified might cause fire or
malfunction.
Do not place blankets over the
AC adapter connected with the
power source or place the
adapter near a heater or on an
electric (warm) carpet.
This might cause fire or
malfunction.
Observe the following when
handling the AC adapter cord.
• Do not damage, modify (e.g.,
to extend), or heat the AC
adapter cable.
• Do not pull the AC adapter
cable, place something heavy
on it, or pinch it.
• Do not bend, twist, or bundle
the AC adapter cable with an
excessive force.
These might cause fire or electric
shock.
CAUTION
If you plan not to use the
camera for a long period of
time, remove the AC adapter
plug from a wall outlet for
safety.
Malfunction of the camera, if it
happens, might result in fire.
Do not use the AC adapter for
any use other than with this
camera.
This might cause fire or
malfunction.
Firmly insert the AC adapter
plug into a wall outlet.
Neglecting this might cause fire
or electric shock.
xvi Owner’s Manual
Page 17
Hard Disk Camera GSC-K80HE/GSC-K40HE
About the camera battery and remote controller’s battery
DANGER
Observe the following when handling the camera battery and the remote
controller’s coin-shaped battery
• Do not disassemble/modify
• Do not heat
• Do not throw in fire or water
• Do not hammer, step on, drop, or subject to strong impact
• Do not use in applications other than specified
• Do not recharge in any manner other than specified
• Do not connect the battery electrodes (+ and - terminals) with wire or other
metallic objects
• Do not carry or store together with metallic necklaces or pins
This might cause the battery to rupture, ignite or heat up, resulting in fire or serious injury.
WARNING
Use only the specified battery
(GSC-BT6/BT7).
Use of a battery other than
specified might cause fire,
damage, or malfunction.
Do not leave the remote
controller’s lithium battery
within the reach of small
children.
Swallowing the remote
controller’s coin-sized lithium
battery might cause poisoning. If
you accidentally swallow the
battery, contact a doctor
immediately.
If fluid leaks from the camera
battery or the remote
controller’s coin-shaped
battery and comes into contact
with your eyes, immediately
wash your eyes with clean,
running water, and ask a
physician for treatment.
Leaving your eyes in this
condition might cause eye damage.
Owner’s Manual xvii
Page 18

Hard Disk Camera GSC-K80HE/GSC-K40HE
CAUTION
Do not remove the battery
immediately after the camera
has been used for a long time.
The battery becomes hot during
use.
Touching a hot battery might
cause burns.
Do not use unusable battery or
discharged battery.
Otherwise, the battery may
rupture, ignite or heat up,
resulting in fire, burns, or injury.
Before storing the battery, attach
insulating tape to both the plus (+)
and (-) electrodes.
Storing battery as it is might cause
the battery to leak fluid, heat up or
rupture, resulting in burns or injury.
Insert the coin-shaped battery
carefully making sure that its
polarities (marked by + and -) are
facing the correct way.
Inserting the battery with its polarities
facing the wrong way might cause fire
or injury, or damage to the
surrounding area due to the battery
rupturing or leaking.
Handling Your Camera
Before using the camera, carefully read and observe the “Safety
Precautions” ( p.xiii) and the notes described below:
Avoid Using or Storing the Camera in the Following Places
Places subject to humidity, dust, and dirt
Places subject to direct sunlight
Places subject to high or low temperature
Places filled with highly flammable gas
Places near gasoline, benzene, or paint thinner
Places subject to strong vibration
Places subject to smoke or steam
Places subject to strong magnetic fields (near electric motors,
transformers, magnets, etc.)
Places contacting chemicals (such as pesticides), rubber or vinyl
products for a long period of time
Avoid Subjecting the Camera to Vibrations or Impacts
If the camera is subjected to strong vibrations, not only will the camera
become damaged, there might also be a loss of hard disk drive data.
xviii Owner’s Manual
Page 19

Hard Disk Camera GSC-K80HE/GSC-K40HE
Prevent the Hard Disk Camera from C o ming into Contact with Sand
If the camera comes into contact with sand, not only will the camera
become damaged, it will also no longer be repairable.
Take special care when using the hard disk camera near seaside, sandy
areas or places where sand dust is likely to occur.
Pay Attention to Condensation
Sudden changes in temperature, such as when you move the camera from
a cold location to a warm one, water droplets (condensation) may form on
the inside of the camera or on the lens.
When this occurs, turn the power OFF, and wait an hour before using the
camera. If condensation forms on the SD Memory Card, remove the SD
Memory Card, wipe off any condensation and wait a short time before using
it again.
When Cleaning the Camera
To prevent the lens and the surface of the LCD monitor from being
scratched, blow off any dust from them with a blower brush and lightly
wipe with a soft dry cloth.
Clean the body of the camera with a soft dry cloth. Do not use volatile
liquids such as paint thinner, benzene, or other harsh chemicals
because these may cause deformation or remove the coating.
Be Careful of Magnetic Fields
Please do not allow items that are easily affected by magnetic fields to
come close to the speaker of the camera; these include credit and cash
cards, magnetic passes, computer diskettes, etc. Doing so could result
in data loss and render the item unusable.
Do not allow objects such as magnets or speakers which produce
magnetic fields to come close to the camera. This might cause damage,
malfunctioning, or loss of memory contents.
Be Careful of Electromagnetic Waves
Do not use the camera near towers or high-voltage lines. This might cause
poor video or audio quality.
Owner’s Manual xix
Page 20

Hard Disk Camera GSC-K80HE/GSC-K40HE
Handling the AC Adapter
Be sure to use only the specified AC adapter (SQPH20W10P-02). Using a
different AC adapter might cause the camera to malfunction.
Before using the AC adapter, carefully read and observe the “Safety
Precautions” ( p.xiii) and the notes described below:
Do not allow the connectors on the AC adapter to come into contact
with any other metal object because this might cause a short circuit.
To connect the AC adapter, fully insert the DC plug on the AC adapter
into the DC IN 10V terminal on the camera.
When disconnecting the AC adapter cable or DC plug, turn the power
OFF, then disconnect while holding its plug. Do not disconnect by
pulling the actual cable.
Do not drop the AC adapter or subject it to strong impact.
Do not use the AC adapter in very hot and humid places.
Do not insert the DC plug on the AC adapter while the battery is being
used. Turn the power OFF first.
The AC adapter is for indoor use only.
Do not connect the supplied AC adapter to a device other than this
camera.
The AC adapter may sometimes become warm during use. This is
normal.
Buzzing noises may come from inside the camera. This is normal.
Do not use the AC adapter near a radio because it could interfere with
the radio.
If you remove the battery or AC adapter while the camera is in operation,
the date may be lost from the memory. If this happens, reset the date.
Specifications
AC adapter (SQPH20W10P-02)
Input: 100 V to 240 V AC, 50/60 Hz
Rated output: 10 V DC, 2.0 A
Operating temperature: 32°F (0°C) to +104°F (+40°C)
Storage temperature: -40°F (-40°C) to +140°F (+60°C)
Dimensions:
Weight: Approx. 7.1 oz (200 g)
MEMO
Use the power supply indicated on the supplied AC cable. When using
power supply other than the displayed voltage in other countries/region,
please purchase the AC cable that applies to the standard of the
country/region.
xx Owner’s Manual
1.9 inches
(49.5 mm
× 1.0 inches × 3.9 inches
× 25.5 mm × 99.5 mm) (W × H × D)
Page 21

Handling the Battery
This camera uses a special rechargeable lithium-ion battery. It is referred to
simply as “battery” in this manual.
When you use the battery, carefully read and observe the “Safety
Precautions” ( p.xiii) and the notes described below.
The battery included with the camera does not come fully charged. Be sure
to fully charge the battery before using the camera for the first time.
About Battery Use
The battery gradually discharges even when not used. Charge the
battery one or two days before use.
To maximize the battery life, switch the camera OFF as often as
possible when it is not being used.
In cold locations, the length of time the camera is operable decreases
even with a fully charged battery.
Take along a spare fully charged battery.
Always keep the terminals clean.
If the battery is used for a long time, the battery itself will become warm.
This is normal and not a malfunction.
The battery has a limited service life. The length of service life varies
depending on product use and user settings. At normal temperatures
(77°F (25°C)), the battery can be recharged approximately 300 times.
If you use the battery beyond its service life, you may notice that battery
life becomes remarkably shorter, even if the battery is fully charged. If
you notice that battery life has become remarkably shorter, even when
the battery pack is fully charged, it is recommended that you replace the
battery pack with battery model number GSC-BT6/BT7.
Hard Disk Camera GSC-K80HE/GSC-K40HE
When not Using the Battery for a Long Time
When the battery is not in use for a lengthy period of time, be sure to
remove it from the camera body. If the battery is left attached to the
camera body or battery charger, a minute current will flow even if the
power is turned OFF. This will result in over discharge and th e battery
may no longer be useable.
Store the battery in a cool place. We recommend a dry place with a
surrounding temperature of 59°F (15°C) to 77°F (25°C). Avoid storing
the battery in extremely hot or cold places.
Owner’s Manual xxi
Page 22

Hard Disk Camera GSC-K80HE/GSC-K40HE
Charging the Battery
Charging is done with the camera body or the separately sold charger.
You must not charge the battery with any other charger.
When you use the battery for the first time or when the battery has not
been used for a long time, be sure to charge the battery before use.
Use only the specified AC adapter (SQPH20W10P-02).
This battery does not need to be fully discharged or exhausted before
being charged.
The battery may feel warm after it has been charged or immediately
after being used. This is normal and not a malfunction.
The battery can be charged at temperatures between about +50°F
(+10°C) and +86°F (+30°C) to obtain maximum battery performance.
Do not recharge a fully charged battery.
Getting the Most Out of Your Battery
Even when the camera is turned off, a very small current continues to
flow. If you do not intend to use the camera for a long period, you
should take the battery out of the camera. If the battery is left out of the
camera for approximately 48 hours, th e da te , ti me an d ot he r camera
settings may revert to the default values. Reset these settings before
using the camera.
Battery performance that has been impa ire d b y low temperatures will
recover when the camera is returned to room temperature (77°F (25°C)).
Specifications
Lithium-ion battery (GSC-BT6)
Nominal voltage: 7.2 V
Nominal capacity: 1200 mAh
Operating temperature: +32°F (0°C) to +104°F (+40°C)
Dimensions:
Weight: 2.2 oz (63 g)
xxii Owner’s Manual
1.5 inches × 1.6 inches × 1.0 inches
(37 mm
× 40 mm × 25 mm) (W × H × D)
Page 23

Hard Disk Camera GSC-K80HE/GSC-K40HE
About the Built-in Hard Disk Drive
This camera has its own built-in hard disk drive. Hard disk drive will also be
referred to as “HDD” throughout this Owner's Manual. The hard disk drive
is a precision component that is easily affected by impacts, vibration and
environmental variations such as changes in temperature. Note the
following when using the camera:
Avoid striking, dropping, vibrating or waving the camera around while it
is operating or while it is idle. Doing so could result in camera damage,
malfunctions or loss of stored data.
Do not turn the camera off while it is writing data to or reading data from
the hard disk drive. Doing so could result in camera damage,
malfunctions or loss of stored data.
Before formatting the hard disk drive, check the data stored on the hard
disk drive carefully.
Formatting the hard disk drive completely erases all the data saved on
the hard disk drive. Data erased during formatting cannot be recovered.
You should back up the data saved on the hard disk drive frequently in
case of damage to the hard disk drive or any modification or erasing of
the data.
T oshiba accepts no liability what soever for any loss or corruption of data
stored on the hard disk drive.
It is recommended that you make a trial recording before recording
content that is important to you. Play back the trial recording to ensure
that the video and audio were recorded properly.
Using the Hard Disk Drive
It is recommended that you periodically save the files on the hard disk
drive to a PC, CD or DVD and format the hard disk drive.
The hard disk drive is a high precision component and there is always a
risk of partial damage to the disk depending on how it is used. At worst,
it may become impossible to read or write data to the hard disk drive.
Accordingly, the hard disk drive should not be regarded as a permanent
storage location for recorded files, but rather as a temporary storage
location for viewing images before they are to be erased or copied for
permanent storage onto a PC, CD or DVD, etc.
When files are repeatedly recorded onto the hard disk drive and erased,
file distribution on the hard disk drive becomes fragmented and the
amount of continuous free space decreases.
When this occurs, files that cannot be saved into a single block of free
space are split into 2 or more parts during saving.
Increasing numbers of split files will slow down normal camera
operation and may in some cases prevent the allocation of sufficient
free space to save new files even after stored images are erased.
In this situation, copy the files on the hard disk drive onto a PC, CD or
DVD, etc. and then format the built-in hard disk drive.
If you cannot record or playback images on the hard disk drive, please
format the hard disk drive.
After formatted, the hard disk drive reverts to default and all the stored
data are erased.
Owner’s Manual xxiii
Page 24

Hard Disk Camera GSC-K80HE/GSC-K40HE
About SD Memory Cards
SDHC/SD Memory Cards (sold separately) are referred to
in this manual as “SD cards”.
Note the information given below on handling SD cards.
Notes on Using SD Cards
SD cards contain built-in nonvolatile semiconductor memory. Recorded
data is not generally corrupted (or erased) during normal use, but
misuse can result in data corruption (loss). Toshiba accepts no liability
whatsoever for any damages or loss arising from the corruption (loss) of
data stored on SD cards, regardless of the details or cause.
Because part of the memory on an SD card is used as the system area,
the actual available memory capacity is smaller than stated card
capacity.
Always format SD cards in the camera. Formatting an SD card on
another device (such as a PC) can cause problems that may prevent
data from being written to or read from the card.
You should always make backup copies of important data.
SD cards have a limited operating life. If you are no longer able to
record or erase images on an SD card that has been used for a long
period, you should purchase a new SD card.
Take care that young children do not accidentally swallow an SD card
as this could cause choking.
This camera conforms to SD standard version 1.01.
Write-protection
To prevent important data from being accidentally erased, you can lock
(write-protect) an SD card by moving the write-protect tab on the side of the
card to the LOCK position. To record, edit or erase data on the card, return
the tab to the unlocked position.
LOCK LOCK
Write-protect tab
IMPORTANT
The use of Class 4 or Class 6 SD cards is recommended. However,
recording might discontinue because of different situations.
Not all third-party SD cards are guaranteed to work with this camera.
xxiv Owner’s Manual
Locked
Page 25

Preparation
Component Names
Loading and Removing the Battery
Charging
Inserting and Removing SD Cards
Turning the Camera On and Off
Setting the Date and Time
Creating Albums
Using the LCD Monitor
About the Remote Control
Using the Conversion Lens or Lens Hood
Hard Disk Camera GSC-K80HE/GSC-K40HE
Chapter 1
Owner’s Manual 1
Page 26

Hard Disk Camera GSC-K80HE/GSC-K40HE
Component Names
Camera
Lens
Assist light
Front LED
Remote control sensor
(embedded)
Tripod screw socket
LCD monitor
(assist light)
button
AUTO mode
button
(backlight
compensation)
button
Grip belt
Terminal cover
• HDMI terminal
• Component terminal
• A / V OUT terminal
• USB terminal
SD card cover
Speaker
Battery lock lever
Reset switch
Microphone
Mode LED
Zoom lever
REC button
STATUS LED
MEDIA LED
Jog dial
OK button
REC button
MENU button
Mode button
POWER switch
Terminal cover
• DC IN 10V terminal
2 Owner’s Manual
Page 27

Using the OK Button
Camera LEDs
Hard Disk Camera GSC-K80HE/GSC-K40HE
Pressing directly down on the OK button
confirms the selected item, but you can also
move it up , down , left and right .
Use the OK button in recording mode to adjust
the focus, select the scene, set the brightness,
and to select items from menus.
In this manual, the “ , , , ” symbols are
used to indicate the direction in which the OK
button should be moved.
Mode
Color Green Red Orange
Status Lit Lit Blinking Lit Blinking Lit Blinking Lit Lit
At power
OFF
Standby - - On
During
shooting
During
playback
In USB
mode
LED
-Charging
completed
Recording
mode
Playback
mode
- Mounted - - Hardware
- - - Hardware
- - - Hardware
- Charging - charging
standby
STATUS LED MEDIA
error
--- ---
fault
fault
fault
- - Media
- - Media
- Cable not
---
connected
LED
access
access
Media
access
Front LED
Recording
-
-
Owner’s Manual 3
Page 28

Hard Disk Camera GSC-K80HE/GSC-K40HE
Remote Control
T button
W button
button
button
button
button
button
REC button
REC button
OK button
button
MENU button
MODE REC button
MODE PLAY button
Buttons/levers
Camera Remote control
POWER -
Mode button MODE REC
MODE PLAY
REC REC
REC half-pressed -
REC fully pressed REC
Zoom lever T direction T
Zoom lever W direction W
MENU MENU
OK OK
OK button
OK button
OK button
OK button
Jog dial left
Jog dial right
4 Owner’s Manual
Page 29

Hard Disk Camera GSC-K80HE/GSC-K40HE
Loading and Removing the Battery
Check that the camera is turned off.
Loading the Battery
1. Use the battery to push the battery lock lever in the direction of the
arrow as you slide the battery in .
Load the battery firmly as far as it will go,
and check that the battery is secured by
the battery lock lever.
IMPORTANT
If you load the battery when the camera has not been correctly shut
down, the camera may not operate correctly. In this event, turn the
camera off and on again.
Removing the Battery
1. Slide the battery lock lever in the direction of the arrow and then
remove the battery in .
Hold the battery lock lever in the direction
of the arrow to release the battery an d
then remove it.
2
1
IMPORTANT
Always turn the camera off before removing the battery. Removing the
battery while the camera is still turned on may damage the camera or
corrupt important data. It may also cause the camera settings to revert
to the defaults that were set whe n you pu rchased the camera. If this
occurs, specify your preferred settings agai n.
When removing the battery, take care not to drop the camera or battery.
If you slide the battery lock lever when an AC adapter is not connected,
the power will automatically go off.
Owner’s Manual 5
Page 30

Hard Disk Camera GSC-K80HE/GSC-K40HE
Charging
You should charge the battery the first time you use the camera and
whenever the battery is low. Charging the battery fully takes around
2.5 hours. Time needed for recharging increases or decreases depending
on factors including the surrounding temperature.
Check that the battery is loaded in the camera and that the camera is
turned off.
Charging in the Camera
1. Open the terminal cover on the camera.
2. Connect the power cord and AC adapter and then plug the power cord
into the mains power socket.
3. Plug the DC plug on the AC adapter into the DC IN 10V socket on the
camera.
When battery charging begins, the STATUS LED on the camera lights
red. When charging is completed, the STATUS LED on the camera
turns green.
Terminal cover
IMPORTANT
The battery is charged while in the camera. Never attempt to charge
the battery with any other charger.
If a problem arises during charging, unplug the power cord from the
mains power outlet, remove the battery from the camera and contact
Toshiba Customer Service Department or Toshiba Customer Support
Department. Be careful when removing the battery as it can become
hot.
If the camera is charged in conditions where it becomes hot (in direct
sunlight, etc.), the heat in the camera may trigger a sensor in the
camera that prevents charging from beginning immediately. If this
occurs, allow the camera to cool fully before charging.
MEMO
To get the best possible performance from your battery, charge it when
the ambient temperature is between 50°F (10°C) and 86°F (30°C).
6 Owner’s Manual
Page 31

Hard Disk Camera GSC-K80HE/GSC-K40HE
Battery Level Display
When you turn the camera on, the level of charge in the battery appears on
the LCD monitor.
Display
Meaning Fully
charged
Low charge Almost out
of charge
Out of
charge
Camera Operation Time Using the Battery
The length of time for which the camera will operate on battery power
varies considerably depending on a number of factors, including the
battery's storage time, the temperature of the battery and camera, and the
shooting conditions (whether the zoom is used, etc.). Dirt and/or other
debris on the positive (+) and/or negative (-) battery terminals, or on the
corresponding terminals in the camera, can obstruct current flow and the
camera to incorrectly indicate that the battery is not charged. When loading
and removing the battery, take care not to touch the battery or camera
terminals. If the battery and/or camera terminals are dirty, clean them with a
clean, dry cloth.
The available video recording time when a new battery is fully charged is
shown below.
Continuous video recording
Conditions: Recording a video continuously without using the
zoom at a temperature of 73°F (23°C)
Shooting time: Approx. 90 min.
Actual time video recording
Conditions: Recording a video using the zoom and
power ON/OFF at a temperature of 73°F (23°C)
Shooting time: Approx. 60 min.
* The figures above relating to video recording time are for reference
purposes only and are not guaranteed.
Running on
the AC
adapter
Owner’s Manual 7
Page 32

Hard Disk Camera GSC-K80HE/GSC-K40HE
Inserting and Removing SD Cards
Turn the camera off before inserting or removing an SD card (sold
separately).
Inserting an SD Card
1. Open the SD card cover.
2. Insert the SD card into the SD slot, ensuring that the card is facing in
the right direction (as shown below).
With the notch facing to the left (towards
the lens), push the card firmly all the way
into the slot.
Check that the SD card is pushed fully and
securely into the slot and then close the
SD card cover.
To have images you shoot recorded on an
SD card, you should insert an SD card for
that purpose before taking images.
See “Selecting an SD Card as the Save
Location and Creating Albums” p.47.
Removing an SD Card
1. Push the card into the slot once so that it springs out slightly. Then
slowly pull it out of the slot.
Close the SD card cover after removing the SD card.
IMPORTANT
Never remove the SD card while the MEDIA LED is lit. Doing so could
corrupt the data on the SD card or damage the SD card itself.
The first time you use an SD card, or when using an SD card that has
been used on another device, always format the card in the camera
before recording.
This camera does not support the MultiMediaCard™ format.
8 Owner’s Manual
Page 33

Hard Disk Camera GSC-K80HE/GSC-K40HE
Turning the Camera On and Off
Load the battery or connect the AC adapter.
See “Loading and Removing the Battery” p.5.
See “Charging” p.6.
Turning the Camera On and Off by Opening and Closing the LCD
Monitor
Opening the LCD monitor turns the
camera on and closing the LCD monitor
turns the camera off.
The first time you use the camera, or
when the battery has been left out of the
camera for a long period, the screen for
setting the date and time appears.
Set the date and time.
See “Setting the Date and Time” p.11.
MEMO
If [LCD-LINKED POWER] is set to [OFF], closing the LCD monitor does
not turn the camera off. Slide the POWER switch to turn the camera off.
Use the mode LED to check whether the camera is turned on when the
LCD monitor is closed.
See “LCD-linked Power” p.96.
See “Camera LEDs” p.3.
Owner’s Manual 9
Page 34

Hard Disk Camera GSC-K80HE/GSC-K40HE
Turning the Camera On and Off by Sliding the POWER Switch
Sliding the POWER switch turns the
camera on and off.
MEMO
If the camera is not used for a set period of time, it automatically
turns off to avoid wasting battery power. This is called the Auto power
off ( p.95).
If you load the battery or connect the AC adapter without correctly
shutting down the camera first, the camera may not operate correctly.
If this occurs, turn the camera off and on again.
To forcibly turn off the camera when there is a problem such as a
system error, push the reset switch on the bottom of the camera. Note
that this may result in the loss of any files that are being created.
Settings such as the date and time may also revert to their default
values. In this event, reset the settings before using the camera again.
IMPORTANT
If you slide the battery lock lever when an AC adapter is not connected,
the power will automatically go off.
10 Owner’s Manual
Page 35
Setting the Date and Time
The first time you use the camera, or when the battery has been left out of
the camera for a long period, the screen for setting the date and time
automatically appears. Use this screen to set the date and time. Note that
you cannot set seconds.
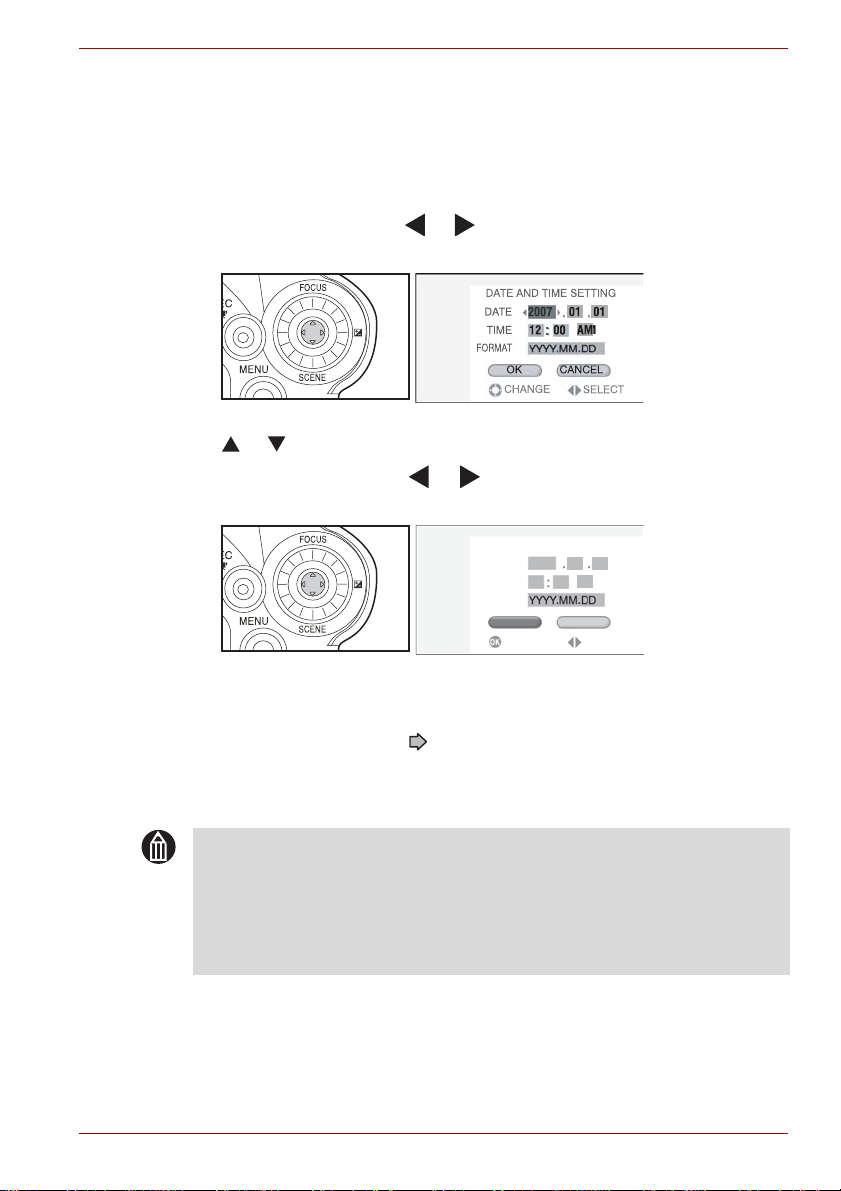
1. Move the OK button to or to select a setting and then use the jog
dial to select a value.
After selecting the desired setting, you can also move the OK button to
or to set the value.
2. Move the OK button to or to select [OK] and then press the OK
button.
This sets the date and time.
The first time you use the camera, the display switches to the create
album screen. Use this screen to create your albums.
See “Creating Albums” p.12.
If you have already created albums, the camera switches to recording
mode. To cancel out of date and time setting, select [CANCEL] and
press the OK button.
Hard Disk Camera GSC-K80HE/GSC-K40HE
AM
DATE AND TIME SETTING
DATE
TIME
FORMAT
OK
2007
09 28
07 25
AM
CANCELOK
SELECT
MEMO
The order in which the date appears depends on the selected format.
The available formats are [MM/DD/YYYY], [YYYY.MM.DD] and
[DD/MM/YYYY].
When you finish setting the date and time after selecting [DATE AND
TIME SETTING] in the setup menu, the setup menu reappears.
Owner’s Manual 11
Page 36
Hard Disk Camera GSC-K80HE/GSC-K40HE
GI FT
Creating Albums
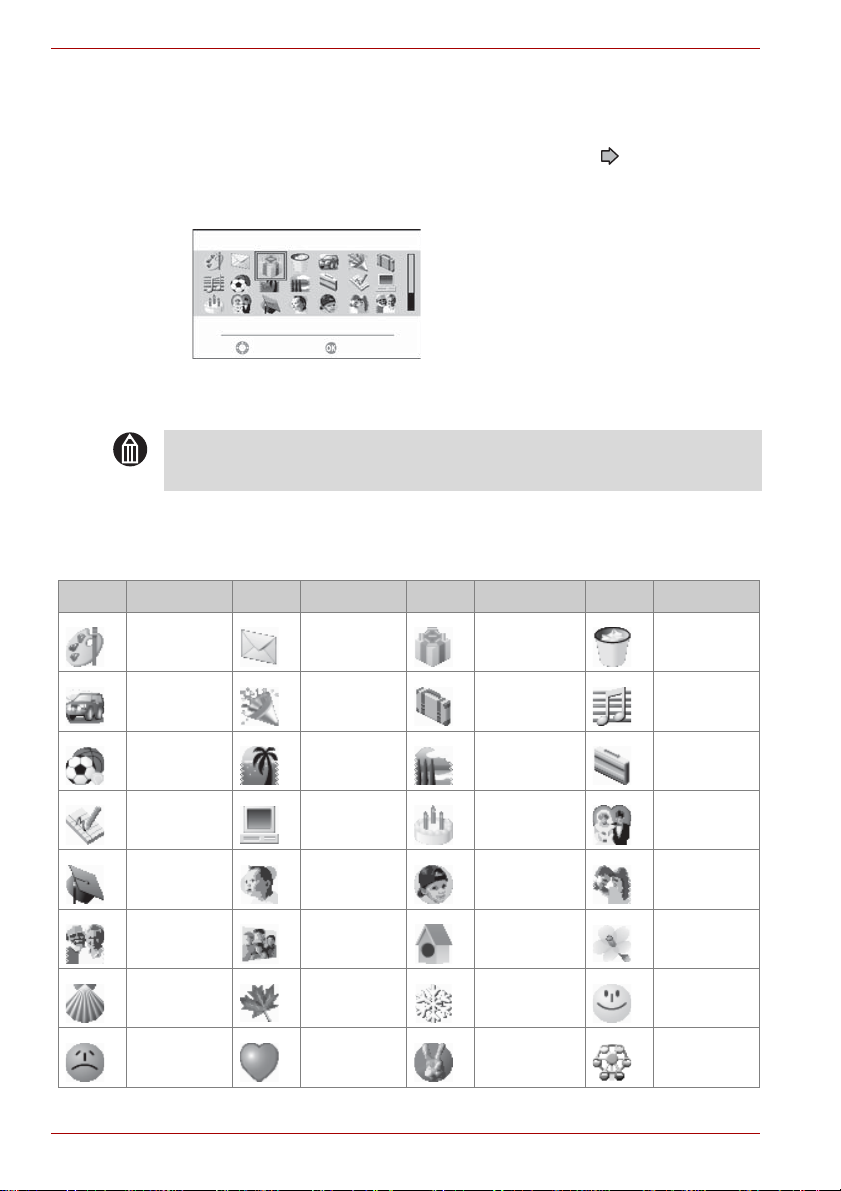
When there are no created albums on the hard disk drive (the first time you
use the camera or after you format the hard disk drive ( p.102), etc.), the
create album screen is automatically displayed.
1. Use the jog dial to select an album type.
GIFT
OKSELECT
2. Press the OK button.
An album is created and the camera switches to recording mode.
MEMO
You cannot select album types on an SD card.
Album Types*
The available album types are shown below.
Icon Name Icon Name Icon Name Icon Name
ART MAIL GIFT TRASH
DRIVE PARTY TRAVEL MUSIC
SPORTS BEACH LANDSCAPE BUSINESS
MEMO PC BIRTHDAY WEDDING
CEREMONY BABY KIDS FAMILY1
FAMILY2 FAMILY3 PET SPRING
SUMMER AUTUMN WINTER HAPPY
SAD LOVE LUCKY PARK
* Toshiba reserves the right to add or delete album types without prior notice.
12 Owner’s Manual
Page 37

Hard Disk Camera GSC-K80HE/GSC-K40HE
Albums and Drives
To save your recorded images, you must have albums. Y ou can choose the
type of album based on the recording date or on the type of shot (travel,
pets, etc.).
Drives are where your albums are kept.
On this camera, albums are kept on the hard disk drive and on SD cards.
Album
Drive
SD card
Drive
hard disk drive
Still images
Still Videos
Owner’s Manual 13
Page 38

Hard Disk Camera GSC-K80HE/GSC-K40HE
Using the LCD Monitor
The LCD monitor can be adjusted to a variety of positions.
Off position
Normal position
When the camera is turned off
When the camera is on standby for
photography
When you are charging the camera
For photography or playback
Backward-facing position
*
T o look at the monitor when recording
images of yourself
* In the backward-facing position, the
image on the LCD monitor is
reversed left to right, like the image
in a mirror, but the recorded image
is the same as the actual subject.
Viewer position
For playback
14 Owner’s Manual
Page 39

About the Remote Control
The remote control allows you to photograph or play images and videos
from a distance.
Effective Range
4m
20°
20°
The above applies to indoor use. When the remote control is used outdoors
or when a bright light is shining on the remote control sensor, you may be
unable to operate the camera from the remote control even within the
effective range as shown above.
IMPORTANT
Do not drop the remote control or subject it to severe vibration.
Do not spill water on the remote control.
Do not attempt to disassemble the remote control.
Do not leave the remote control in hot or humid locations.
Hard Disk Camera GSC-K80HE/GSC-K40HE
The following limitations apply to the range
of the remote control:
Distance: Up to roughly 12 feet
(4 meters) from the camera
Angle: Within an angle of 20° up,
down, left or right relative to
the remote control sensor
on the camera
Loading the Battery
Use the bundled coin-shaped CR2025 lithium
battery.
Slide open the battery cover in the lower section
of the rear side of the remote control. Insert the
battery with the plus symbol (+) facing upwards
and then close the battery cover.
Owner’s Manual 15
Page 40

Hard Disk Camera GSC-K80HE/GSC-K40HE
MEMO
Replace the battery if the remote control response becomes sluggish or
there is no response at all.
Do not use a battery that has passed its use-by date.
The remote control battery cannot be recharged.
If fluid leaks from the battery, use a dry cloth to thoroughly clean off any
fluid on the remote control before inserting a new battery.
IMPORTANT
Only use the designated type of battery.
Take care not to reverse the (+) and (-) sides of the battery.
Do not attempt to charge, disassemble or short-circuit the battery and
do not throw it into a fire.
Do not leave a fully depleted battery in the remote control.
Keep the battery out of the reach of infants and small children.
16 Owner’s Manual
Page 41

Hard Disk Camera GSC-K80HE/GSC-K40HE
Using the Conversion Lens or Lens Hood
The conversion lens (sold separately) is mounted in front of the lens to
change the shooting angle. Use the conversion lens for more distant, wideangle shooting.
The lens hood is a cover designed to prevent sunlight shining directly into
the lines. Use the lens hood when shooting backlit subjects.
Use a commercially available conversion lens or lens hood.
1. Attach a commercially available conversion lens or lens hoo d to the
lens as shown in the figure.
MEMO
To mount a conversion lens or lens hood directly onto the lens, use a
lens or hood with a threaded mount diameter of 43 mm.
If the conversion lens or lens hood is attached, the lens or hood will
obstruct the assist light.
When a conversion lens or lens hood is mounted, the remote control
may not function correctly.
When a conversion lens is mounted, set image stabilization to [OFF].
When a conversion lens is mounted, the camera may have difficulty
auto focusing or the distance displayed for shooting range ( p.36)
and manual focus may be incorrect.
When a conversion lens or lens hood is mounted, the corners of the
image may be dark depending on the zoom setting or the lens hood
may appear in the image.
Owner’s Manual 17
Page 42

Hard Disk Camera GSC-K80HE/GSC-K40HE
18 Owner’s Manual
Page 43

Shooting Video
Before You Shoot
Shooting Video
Taking Still Images
Shooting with the Zoom
Playback
Erasing Images (Erase one Image)
Hard Disk Camera GSC-K80HE/GSC-K40HE
Chapter 2
Owner’s Manual 19
Page 44

Hard Disk Camera GSC-K80HE/GSC-K40HE
Before You Shoot
Holding the Camera
When shooting, hold the camera firmly, taking care not to block the lens
with your fingers.
When moving the camera while shooting a video, avoid sudden or extreme
movements.
For example, when you are panning the camera left or right, lock your
wrists so that camera does not move up and down and slowly turn your
body as you shoot.
Correct (one-handed) Correct (two-handed)
When holding the camera one-handed, brace your elbow firmly against the
side of your body.
For a more stable grip, hold the LCD monitor with your left hand.
Adjusting the Grip Belt
You can adjust the grip belt to ensure that
you maintain a firm grip on the camera.
Before adjusting the belt length, make sure
that you can press the REC button with
your thumb and move the zoom lever with
your index finger.
Release the Velcro tape on the grip belt and
adjust the belt length. After adjusting the
length, refasten the Velcro tape firmly.
20 Owner’s Manual
Page 45

Hard Disk Camera GSC-K80HE/GSC-K40HE
0158
08:17:26
1.0
DISPLAY
0158
08:17:26
102
2007.05.27 10:03 AM
LCD Display When in Recording Mode (Normal Disp lay)
No. of available shots
Battery level
0158
1.0
Brightness*
Continuous
recording*
Focus*
Scene*
White balance*
Backlight
compensation*
Video icon
Zoom bar*
Assist light*
Operation guide
Available video
recording time
08:17:26
DISPLAY
Still image icon
LCD Display When in Recording Mode (Information Display)
Use the OK button to switch between normal display and information
display.
Image stabilization*
Video quality
Wind noise reduction*
Metering mode
Assist light*
When an SD card is
selected, is displayed.
Drive
08:17:26
102
Album type and
number
Date and time
0158
2007.05.27 10:03 AM
* Icons displayed when the camera settings are not Auto (Scene and White
balance), Auto Focus (Focus), ±0 (Brightness), Off (Wind noise reduction,
Image stabilization, Assist light and Backlight compensation) and 1 shot
(Continuous recording) or are adjusted (zoom bar).
MEMO
In normal display, the zoom bar icon will disappear after adjusted.
Owner’s Manual 21
Page 46

Hard Disk Camera GSC-K80HE/GSC-K40HE
0158
08:17:26
DISPLAY
Shooting Video
This section describes how to shoot a video. Sound is also recorded in the
video.
Check that the battery is loaded in the camera and that you have removed
the lens cap. Then open the LCD monitor to turn the camera on.
Use the grip belt to avoid dropping the camera.
1. Press the mode button to select recording mode .
The icon appears on the top-left corner of the screen during video
recording.
If the LCD monitor is too bright or too dark, adjust the monitor
brightness.
See “Changing the LCD Brightness” p.62.
2. Press the REC button.
08:17:26
DISPL
0158
The camera starts shooting the video. Press
the REC button again to end video
recording.
The front LED lights during video recording.
IMPORTANT
Do not disconnect the AC adaptor, slide the battery lock lever, or
remove the battery or SD card while the camera is in operation. Doing
so may damage the camera, hard disk drive and/or SD card, and may
corrupt the data stored on the hard disk drive or SD card.
Avoid low temperature-burns when using the camera for long periods of
time. The camera can get hot, especially when used in hot
environments. For long periods of shooting, the use of a tripod is
recommended.
22 Owner’s Manual
Page 47

Hard Disk Camera GSC-K80HE/GSC-K40HE
MEMO
If you set the LCD monitor in the backward-facing position, the image is
displayed reversed left to right, like the image in a mirror. However,
using any of the camera buttons or keys temporarily changes the image
back to normal.
Video recording uses up battery charge more quickly than still image
photography.
When you focus the lens either automatically or manually while
shooting a video, the lens operation noise as it focuses may also be
recorded in the video.
See “Setting the Focus” p.36.
The lens operation noise emitted while you are using the zoom lever
may also be recorded in the video.
Button Operations during Video Recording
Status
Button/lever During recording
REC Ends recording
OK OK button Manual focus
OK button OK button OK button Sets the brightness
Zoom lever T direction Zooms in
Zoom lever W direction Zooms out
MENU Turns change LCD brightness on/off*
Assist light on/off
AUTO -
Backlight compensation on/off
* For information on changing the LCD brightness during video recording,
see “Changing the LCD Brightness during Video Recording” ( p.63).
Owner’s Manual 23
Page 48

Hard Disk Camera GSC-K80HE/GSC-K40HE
00:00:12
08:17:26
STOP
LCD Monitor Display during Video Recording
The text, numbers and icons displayed differ depending on the selected
camera settings.
Available video
recording time
Video icon
Zoom bar*
08:17:26
00:00:12
Battery level
Elapsed
shooting time
Video
recording icon
Operation guide
STOP
* Icon displayed when zoom setting is adjusted and will disappear after the
zooming is set.
24 Owner’s Manual
Page 49

Taking Still Images
The camera automatically controls the exposure (the combination of
shutter speed and aperture size) to suit the photography conditions.
1. Press the mode button to select recording mode.
2. Looking at the LCD monitor, compose the shot.
If the LCD monitor is too bright or too dark, adjust the monitor
brightness.
See “Changing the LCD Brightness” p.62.
3. Press the REC button down halfway and then press it down
fully .
Hard Disk Camera GSC-K80HE/GSC-K40HE
Pressing the button down halfway
automatically sets the focus and exposure.
The shutter speed and aperture are
displayed at that point. Continue to press the
button down fully to take the picture.
Note that camera movement when you press
the shutter button down fully will cause
blurring in the photographed image.
After shooting, the front LED lights.
MEMO
In the interval between the REC button being pressed down halfway
and the focus being set, the LCD monitor image may turn dark.
When the subject is dark, you can fire the assist light for focusing by
pressing the REC button down halfway.
See “Shooting with AF Assist Light” p.58.
The assist light can be kept normally on by pressing the assist light
button.
See “Photography Using the Assist Light” p.41.
Owner’s Manual 25
Page 50

Hard Disk Camera GSC-K80HE/GSC-K40HE
F3.3
1/80s
3158
F3.3
1/80s
3158
Focusing
Y ou can determine whether an image is focused from the color of the focus
area frame that appears when you press the REC button down halfway.
The frame is green if the image is focused and red if it is not.
If the exposure is incorrect, the shutter speed and aperture are displayed in
red.
When the Camera Will not Focus...
Set the [AF MODE] to [CENTER] ( p.57).
Next, move the camera so that the subject you want to photograph is in
the center of the shot. Then, holding down halfway the REC button
so that the focus is set, recompose the shot as desired and press the
REC button down fully.
3158
3158
1/80s
F3.3
1/80s
This camera may have difficulty auto focusing and be unable to focus
due to the following conditions.
Where there are also objects behind or in front of the subject (as
with an animal behind bars or a person standing in front of a tree)
Very glossy subjects such as a mirror or car body
Objects with little or no reflectivity, such as fur or hair
Subjects with very low contrast (such as a person wearing clothing
of the same color as the background)
Subjects moving at high speed
Subjects with no substance, such as flames or smoke
Subjects photographed through glass
Subjects that are small and far away
Extremely bright subjects (such as lights, etc.)
In a dark location
F3.3
26 Owner’s Manual
Page 51

Shooting with the Zoom
0158
08:17:26
DISPLAY
Depending on the distance to your subject, you can use the 10X optical
zoom and the 3X digital zoom to magnify the image by up to 30X.
POINT
You can also defocus the background by using the optical zoom to
enlarge your subject.
ATTENTION
The more you zoom in, the more susceptible the image is to camera
shake.
1. Set the mode button to recording mode.
2. Use the zoom lever to adjust the zoom setting and compose the shot.
Then take the picture.
Sliding the zoom lever towards T zooms in and enlarges distant
subjects.
Sliding it towards W lets you include a wider area in your shot.
Hard Disk Camera GSC-K80HE/GSC-K40HE
08:17:26
0158
Reservation
DISPL
Zoom Bar Display
You can use the zoom bar on the LCD monitor to check the zoom setting.
Optical
zoom
area
<Digital zooming enabled> <Digital zooming disabled>
Digital
zoom
area
Slider
MEMO
The digital zoom can be set to 30X or OFF.
See “Digital Zooming” p.55.
When the camera is turned off or the Auto power off function is
activated, the zoom setting reverts to wide-angle (W).
Owner’s Manual 27
Optical
zoom
area
Page 52

Hard Disk Camera GSC-K80HE/GSC-K40HE
101-0159
DISPL AY
2007.08.15 09:21 AM
Playback
Open the LCD monitor to turn the camera on.
Playing back Still Imag es
1. Press the mode button to select playback mode.
The last image shot appears on the LCD
monitor.
If the LCD monitor is too bright or too dark,
adjust the monitor brightness.
See “Changing the LCD Brightness” p.62.
2. Use the jog dial to select the still image you want to play back.
LCD Monitor Display during Still I mage Playback
The text, numbers and icons displayed differ depending on the selected
camera settings.
Album icon
Playback drive
Playback icon
101-0159
Album number
File number
Battery level
Protect icon*
Previous
image
Operation
guide
DISPL
2007.08.15 09:21 AM
Next image
Shooting date
and time
* Displayed for protected images ( p.75).
28 Owner’s Manual
Page 53

Hard Disk Camera GSC-K80HE/GSC-K40HE
101-0105
DISPLAY
PLAY
2007.10.21 09:11 AM
00:00:07
Playing Back Video
1. Press the mode button to select playback mode.
The last image shot appears on the LCD
monitor.
If the LCD monitor is too bright or too
dark, adjust the monitor brightness.
See “Changing the LCD Brightness”
p.62.
2. Use the jog dial to select the video you want to play.
101-0105
The video icon is displayed in the video,
with film icons also being shown at the
top and bottom of the LCD monitor.
PLAY
DISPLAY
00:00:07
2007.10.21 09:11 AM
3. Move the OK button to .
Video icon
The selected video is played.
To stop video playback, move the OK
button to .
To pause the video, move the OK button
to .
To adjust the speaker volume, use the
zoom lever.
T: Increases the volume.
W: Decreases the volume.
Owner’s Manual 29
Page 54

Hard Disk Camera GSC-K80HE/GSC-K40HE
Button Operations during Video Playback
Status
Button/lever
OK Switches the display
OK button Plays the
OK button Selects the
OK button Previous
OK button Next image One-touch skip Jog dial left Previous
Jog dial right Next image Fast forward Single-
Zoom lever
T direction
Zoom lever
W direction
Stopped Playing Paused
video
playback
method
image
image
- Volume up
Displays
thumbnails
Pauses the
video
Stops the video
One-touch replay -
Rewind Single-
frame
rewind
frame feed
Volume down
Fast-
forwarding
Plays the video
Playback Faster
Faster fast
forward
Rewinding
rewinding
Playback
One-touch Skip/Replay
This allows you to use skip playback during a video playback. The duration
of the skip differs depending on the length of the video.
1. While a video is playing or paused, move the OK button to or .
Use for one-touch skip (backward skip by a determined time interval)
or for one-touch replay (forward skip by a determined time interval).
30 Owner’s Manual
Page 55

Hard Disk Camera GSC-K80HE/GSC-K40HE
101-0105
DISPL AY
00:00:03
LCD Monitor Display during Video Playback
The text, numbers and icons displayed differ depending on the selected
camera settings.
Album number
Playback icon
Volume bar*
Album icon
Reservation
Playback drive
File number
101-0105
Video playback
method icon
Battery level
Direction key
operation guide
DISPL
Operation guide
Video status bar
00:00:03
Video playback
time
Video status icon
Changes to
when the video is
paused.
* Displayed when the volume is changed.
MEMO
The volume bar icon will disappear after adjusted.
Even when you have multiple albums, you can play back the images on
all the albums using and on the OK button or the jog dial.
If you move the OK button to or turn the jog dial to the right when the
final image is displayed, the first image appears. Similarly, if you move
the OK button to or turn the jog dial to the left when the first image is
displayed, the final image appears.
Owner’s Manual 31
Page 56

Hard Disk Camera GSC-K80HE/GSC-K40HE
102-0100
ERASE THIS IMAGE.
Erasing Images (Erase one Image)
This section describes how to erase images one at a time. Note that you
cannot use this method to erase protected images ( p.75), or images
stored on a locked SD card ( p.xxiv).
ATTENTION
Erased images cannot be recovered.
1. Press the MENU button.
In Auto mode, the MENU button cannot
operate.
Exit Auto mode or select playback mode
to display menu.
2. Use the jog dial to select [ERASE] and press the OK button.
RECORDING MENU
DRIVE & ALBUM
ERASE
CONTINUOUS RECORDING
EXIT
VIDEO QUALITY
3. Select [ERASE ONE IMAGE] and press the OK button.
ERASE
ERASE ONE IMAGE
CANCEL
CANCEL
4. Use the jog dial to select the image to be erased.
5. Move the OK button to to select [YES] and press the OK button.
ERASE
102-0100
ERASE THIS IMAGE.
The image is erased and the next image
appears.
If you do not want to erase the selected
image or if you want to cancel image
YES
NO
erasing, select [NO] and press the OK
button.
You cannot erase a protected image.
32 Owner’s Manual
Select [NO] and press the OK button.
Page 57

Hard Disk Camera GSC-K80HE/GSC-K40HE
Advanced Photography
Setting the Scene
Setting the Focus
Changing the Brightness
Using the Backlight Compensation Function
Using Auto Mode Function
Photography Using the Assist Light
Changing the Recording Menu Settings
Creating and Selecting Albums
Continuous Recording
Setting the Video Quality
Shooting with Natural Color Tones (White Balance)
Shooting with Image Stabilization
Wind Noise Reduction
Changing the Microphone Sensitivity
Digital Zooming
Selecting the Metering Mode
Selecting the Focus Area (AF Mode)
Shooting with AF Assist Light
Changing Image Colors
Changing the Image Contrast
Changing the Image Sharpness
Changing the LCD Brightness
Chapter 3
Owner’s Manual 33
Page 58

Hard Disk Camera GSC-K80HE/GSC-K40HE
OK
CANCEL
Setting the Scene
This camera can automatically adjusts the shutter speed and aperture to
suit the scene you are shooting or the purpose of the shot.
Your scene setting is retained even when you turn the camera off or the
Auto power off function is activated.
1. Set the camera to recording mode and move the OK button to .
A list of scene icons appears.
2. Use the jog dial to select the desired scene icon and press the OK button.
If you select [STAGE], proceed to “Locking the Zoom at Wide-Angle”.
If you select other scenes, the camera reverts to recording mode.
Scene Settings
Scene Type of shot
AUTO PORTRAIT For shots where the foreground
LANDSCAPE Distant scenery, landscapes, etc.
SPORTS For situations involving fast-moving
NIGHT SCENE For situations where the background
SNOW & BEACH For very bright situations such as at
ST AGE For shots within a specific range such
SUNSET For evening or sunset shots.
AUTO
OK
CANCEL
subject stands out clearly against a
blurred background.
subjects such as sporting events.
is dark, such as fireworks and night
time scenery.
snowfields or at the beach.
as stage activities.
MEMO
The scene setting in Auto mode is [AUTO].
You cannot specify scene settings when shooting video.
The explanations for the different scenes are only intended as a
general guide. Select the scene setting that works best for you.
34 Owner’s Manual
Page 59

Hard Disk Camera GSC-K80HE/GSC-K40HE
0158
10:17:26
0158
10:17:26
DI SP LAY
DI SP LAY
OK
CA NC EL
NE W SE TT ING
US E EX IS TI NG DA TA
ST AG E
0158
10:17:26
DISPLAY
OK
CA NC EL
ST AG E
Locking the Zoom at Wide-Angle
When you set the scene setting to [STAGE], you can lock the zoom at
wide-angle. This can prevent the zoom from moving away from the
wide-angle.
This is convenient for recording stage activities, such as children’s
performances, from the auditorium.
10:17:26
DISPLAY
DISPLAY DISPLAY
Shooting with telephoto Locked at the set angle
0158
Set the zoom to
wide-angle
10:17:26
DISPLAY
1. Select [STAGE] from the scene settings.
2. Select [NEW SETTING].
Move the OK button to select [NEW
SETTING] and then press the OK
button.
Select [USE EXISTING DATA] to load
the existing data.
USE EXISTING DATA
USE EXISTING DATA
NEW SETTING
NEW SETTING
CANCEL
CANCEL
OK
OK
STAGE
3. Lock the zoom at wide-angle.
STAGE
Watch the LCD monitor and adjust the
zoom at wide-angle by moving the
zoom lever and then press the OK
button.
The icon appears at the lock
OK
OK CANCEL
CANCEL
position.
0158
10:17:26
0158
Lock icon
DISPLAY
MEMO
You can only lock the wide-angle at optical range, not digital range
Owner’s Manual 35
( p.27).
Page 60

Hard Disk Camera GSC-K80HE/GSC-K40HE
0158
08:17:26
DISPLAY
Setting the Focus
This section describes how to set the focus to match the distance to the
subject you are photographing or filming.
Your focus setting is retained even when you turn the camera off or the
Auto power off function is activated.
1. Set the camera to recording mode and move the OK button to .
Each time you move the OK button to , the focus mode toggles
between [AF] and [MF].
Shooting Range Imposed by Focus Settings
Focus Type of shot
AUTO FOCUS Zoom W : Approx. 10 cm. to infinity
MANUAL FOCUS Zoom W : Approx. 10 cm. to infinity
08:17:26
DISPL
0158
Zoom T : Approx. 1.0 m. to infinity
Zoom T : Approx. 1.0 m. to infinity
MEMO
The focus setting in Auto mode is [AF].
Manual Focus
You can also focus the camera manually.
POINT
Manual focus allows you to fix the focus at a set location, so it can be
very useful for shots of moving subjects and for dark or strongly backlit
situations where the camera has difficulty focusing.
1. In the focus settings ( p.36), select [ ].
The approximate distance is displayed on the screen.
36 Owner’s Manual
Page 61

Hard Disk Camera GSC-K80HE/GSC-K40HE
0158
08:17:26
DISPLAY
2. Use the jog dial to focus the shot.
08:17:26
0158
The focus is locked. To re-focus the
shot, use the jog dial.
DISPL
MEMO
If the distance to the subject is 0.1 meters or less with the zoom set to
W, the distance shown on the screen changes to . The distance at
which appears differs depending on the zoom setting.
Owner’s Manual 37
Page 62

Hard Disk Camera GSC-K80HE/GSC-K40HE
0158
08:17:26
DISPLAY
1.0
Changing the Brightness
When there is a large difference (contrast) between the brightness of the
subject and the background, or when the subject makes up only a very
small part of the image, you can change brightness to get the correct image
brightness (exposure). The brightness values range from -6 to +6 and can
be set in 1/3-EV increments.
1. Set the camera to recording mode and move the OK button to .
2. Use the jog dial to set the brightness and press the OK button.
The brightness icon and current
brightness value appear.
08:17:26
0158
Higher settings brighten the image while
smaller values darken the image.
Brightness icon
DISPL
1.0
Brightness value
Subjects for Which Brightness Works
+ (positive) compensation
Printed materials comprising black text on a white page
Backlit subjects
Very bright situations such as snowfields and very reflective
subjects
Shots where most of the image consists of sky
- (negative) compensation
People illuminated by a spotlight, particularly when the background
is dark
Printed materials comprising white text on a dark or black page
Subject with very low reflectivity, such as dark foliage or evergreen
trees (pines, etc.).
MEMO
You cannot set brightness in Auto mode.
You can set brightness while recording video.
38 Owner’s Manual
Page 63

Hard Disk Camera GSC-K80HE/GSC-K40HE
0158
08:17:26
DISPLAY
Using the Backlight Compensation Function
In shots where a lot of light enters the camera, such as shots taken facing
towards the light source, the subject may appear too dark. Backlight
compensation is a type of brightness that adjusts the exposure so that the
subject appears brighter in the shot.
The backlight compensation setting reverts to off when you turn the camera
off or the Auto power off function is activated.
1. Set the camera to recording mode and press the button.
08:17:26
DISPL
Backlight compensation is enabled and the backlight compensation
icon is displayed.
MEMO
You cannot set backlight compensation in Auto mode.
You can set backlight compensation while shooting a video.
When backlight compensation is set, you can still switch to brightness
by moving the OK button to .
If you press the button when brightness is set, both “brightness” and
“backlight compensation” are enabled.
0158
Owner’s Manual 39
Page 64

Hard Disk Camera GSC-K80HE/GSC-K40HE
0158
03:17:26
Using Auto Mode Function
Use this feature to allow easy shooting with the settings adjusted
automatically. Besides, some buttons are disabled to prevent wrong
operation.
1. Set the camera to recording mode and press the AUTO button.
Auto mode is enabled and the Auto mode icon is displayed.
MEMO
When the Auto mode function is enabled, you have to press the AUTO
button again to return to normal recording mode. Pressing the mode
button cannot return to normal recording mode.
When the Auto mode function is enabled, only the video quality and file
save location that you have set are retained. Other settings are
automatically adjusted.
In Auto mode, only AUTO button, REC button, REC button,
zoom lever, power switch, and mode button are operable. Other
buttons are disabled and a [CANNOT OPERATE IN AUTO MODE]
message will appear when pressed.
In Auto mode, the AUTO button, REC button and zoom lever LEDs
are lit (blue).
03:17:26
0158
40 Owner’s Manual
Page 65

Hard Disk Camera GSC-K80HE/GSC-K40HE
0158
08:17:26
DISPLAY
Photography Using the Assist Light
Use this feature to make focusing on your subject easier when you are
shooting in a dark location.
This setting reverts to off when you change the mode, turn the camera off
or the Auto power off function is activated.
1. Set the camera to recording mode and press the button.
08:17:26
DISPL
MEMO
The assist light cannot function in Auto mode.
Pressing the button alternately turns the assist light on and off.
If you set the [AF ASSIST LIGHT] to [ON] in the recording menu, the
assist light can be turned on to help focusing by half-pressing the
REC button when the location is dark.
0158
Owner’s Manual 41
Page 66

Hard Disk Camera GSC-K80HE/GSC-K40HE
Changing the Recording Menu Settings
The recording menu allows you to change the camera settings.
Your recording menu settings are retained even when you turn the camera
off or the Auto power off function is activated.
1. In recording mode, press the MENU button.
RECORDING MENU
CONTINUOUS RECORDING
VIDEO QUALITY
WHITE BALANCE
IMAGE STABILIZATION
EXIT
The recording menu appears.
2. Use the jog dial to select a menu and press the OK button.
RECORDING MENU
EXIT
The settings for the selected menu appear.
3. Use the jog dial to select the desired setting and press the OK button.
AF ASSIST LIGHT
CONTRAST
LCD BRIGHTNESS
ERASE
HQ
COLOR
STANDARD
SHARPNESS
The selected setting is set and the
CONTRAST
SOFT
CANCEL
recording menu reappears.
To cancel the setting, press the MENU
button.
4. To return to shooting, press the MENU button.
The camera is now ready to shoot.
MEMO
The MENU button cannot operate in Auto mode.
42 Owner’s Manual
Page 67

Hard Disk Camera GSC-K80HE/GSC-K40HE
Button Operations during Recording Menu Setting
Screen
Button/lever Menu displayed Setting displayed
OK Confirms the selected setting
OK button Selects a menu setting Selects a setting
OK button Selects a menu setting Selects a setting
OK button Confirms the selected
setting
OK button - Returns to the previous
Jog dial right Sel ects a menu setting Selects a setting
Jog dial left Selects a menu setting Selects a setting
MENU Returns to recording
Returns to the menu
mode
Mode button Returns to recording mode
-
screen
Owner’s Manual 43
Page 68

Hard Disk Camera GSC-K80HE/GSC-K40HE
Recording Menu
Menu item Description Recording
Ref.
mode
DRIVE &
ALBUM
Selects the drive and selects or
creates albums.
45
ERASE Erases images. - 85
CONTINUOUS
Sets continuous photography. 48
RECORDING
VIDEO
Sets the image quality for videos. 49
QUALITY
WHITE
Sets the white balance. 50
BALANCE
IMAGE
STABILIZATION
WIND NOISE
REDUCTION
MIC.
Turns image stabilization on
52
and off.
Turns wind noise reduction on
53
and off.
Sets the microphone sensitivity. 54
SENSITIVITY
DIGITAL ZOOM Turns digital zooming on and off. 55
METERING
MODE
AF MODE Sets the area used for setting the
Sets the metering mode used to
calculate the exposure.
56
57
focus.
AF ASSIST
LIGHT
Turns the AF assist light on and
off when shooting still images in
58
dark places.
COLOR Sets the image colors. 59
CONTRAST Sets the dark-light contrast for
60
images.
SHARPNESS Sets the image sharpness. 61
LCD
BRIGHTNESS
Sets the brightness of the LCD
monitor.
-62
SETUP Displays the setup menu. - 91
44 Owner’s Manual
Page 69

Creating and Selecting Albums
101
CHANGE ALBUM
ALBUM SELECTION
CREA
TE NEW
2007_01_08_101
GI FT
Albums provide a way for you to save and organize your images into
categories according to date, location, etc.
Creating Albums on the Hard Disk Drive
1. From the recording menu, use the jog dial to select [DRIVE & ALBUM]
and press the OK button.
RECORDING MENU
DRIVE & ALBUM
CONTINUOUS RECORDING
EXIT
2. Use the jog dial to select [HDD] and press the OK button.
3. Move the OK button to to select [CREATE NEW] and press the OK
button.
ALBUM SELECTION
SETUP
HDD
ERASE
DRIVE & ALBUM
HDD
CANCEL
101
Hard Disk Camera GSC-K80HE/GSC-K40HE
2007_01_08_101
CHANGE ALBUM
CRE
TE NEW
4. Use the jog dial to select an album type and press the OK button.
The newly created album is set as the
save location for images and the
camera is ready to shoot.
Album types include [ART], [KIDS], etc.
GIFT
OKSELECT
Owner’s Manual 45
See “Creating Albums” p.12.
Page 70

Hard Disk Camera GSC-K80HE/GSC-K40HE
2007_01_08_101
101
CHANGE ALBUM
CREA
TE NEW
ALBUM SELECTION
101
ALBUM SELECTION
CREA
TE NEW
CHANGE ALBUM
2007_01_08_101
GI FT
Changing the Type of an Album on the Hard Disk Drive
1. From the recording menu, use the jog dial to select [DRIVE & ALBUM]
and press the OK button.
2. Use the jog dial to select [HDD] and press the OK button.
3. Use the jog dial to select the album you want to change.
ALBUM SELECTION
2007_01_08_101
CHANGE ALBUM
CRE
4. Move the OK button to to select [CHANGE ALBUM] and press the
OK button.
ALBUM SELECTION
2007_01_08_101
CHANGE ALBUM
CRE
5. Use the jog dial to select the album type and press the OK button.
101
TE NEW
101
TE NEW
The changed album is set as the save
location for images and the camera is
ready to shoot.
GIFT
OKSELECT
46 Owner’s Manual
Page 71

Hard Disk Camera GSC-K80HE/GSC-K40HE
2007_01_08_101
101
CHANGE ALBUM
CREA
TE NEW
ALBUM SELECTION
Selecting an Album on the Hard Disk Drive as the Save Location
1. From the recording menu, use the jog dial to select [DRIVE & ALBUM]
and press the OK button.
2. Use the jog dial to select [HDD] and press the OK button.
3. Use the jog dial to select the desired album and press the OK button.
ALBUM SELECTION
101
The selected album is set as the save
location for images and the camera is
ready to shoot.
2007_01_08_101
CHANGE ALBUM
CRE
TE NEW
Selecting an SD Card as the Save Location and Creating Albums
1. From the recording menu, use the jog dial to select [DRIVE & ALBUM]
and press the OK button.
2. Use the jog dial to select [SD] and press the OK button.
A message is displayed.
3. Use the jog dial to select [YES] or [NO] and press the OK button.
CREATE ALBUM
CREATE A NEW ALBUM?
YES NO
MEMO
You cannot select album types on an SD card.
Selecting [YES] sets the newly created
album as the save location for images
and the camera is then ready to shoot.
Selecting [NO] sets the most recent
album on the SD card as the save
location for images and the camera is
then ready to shoot.
Owner’s Manual 47
Page 72

Hard Disk Camera GSC-K80HE/GSC-K40HE
Continuous Recording
POINT
Continuous recording is ideal for subjects where photo opportunities
are easily missed, such as with children and pets.
1. From the recording menu, use the jog dial to select [CONTINUOUS
RECORDING] and press the OK button.
RECORDING MENU
CONTINUOUS RECORDING
EXIT
2. Use the jog dial to select [CONTINUOUS RECORDING] and press the
OK button.
DRIVE & ALBUM
ERASE
1 SHOT
VIDEO QUALITY
WHITE BALANCE
CONTINUOUS RECORDING
1 SHOT
CANCEL
To cancel the setting, press the MENU
button.
1 SHOT : Images are shot one
at a time.
CONTINUOUS
RECORDING
: The camera records
images continuously.
3. Press the MENU button to exit the recording menu and return to
recording mode.
4. Compose the shot, press the REC button down halfway to set the
focus, and then press the button down fully.
The camera starts recording in continuous recording mode.
If you release the REC button during continuous recording, the
camera stops recording.
MEMO
The interval between shots varies depending on the recording
conditions.
48 Owner’s Manual
Page 73

Setting the Video Quality
1. From the recording menu, use the jog dial to select [VIDEO QUALITY]
and press the OK button.
Hard Disk Camera GSC-K80HE/GSC-K40HE
Video quality
Approx.
SHQ
15 Mb/
sec.
Approx.
HQ
12 Mb/
sec.
Approx.
SP
9 Mb/sec.
RECORDING MENU
CONTINUOUS RECORDING
VIDEO QUALITY
WHITE BALANCE
IMAGE STABILIZATION
EXIT
ERASE
HQ
The video quality settings are displayed
along with the available recording time
at each setting.
2. Use the jog dial to select the video quality and press the OK button.
The selected video quality is set and
VIDEO Q UALIT Y
SP
10 : 43 : 58
CANCEL
the recording menu reappears.
To cancel the setting, press the MENU
button.
SHQ : Super high quality
HQ : High quality
SP : Standard play
Approximate Video Recording Times
The table below shows the approximate recording time for videos recorded
on to the camera's hard disk drive and SD cards. Because the amount of
data used varies depending on the subject being recorded, the recording
durations listed below are approximate and may vary.
Hard disk drive SD card
80GB*
(GSC-
K80HE)
Approx.
11hr30min
Approx.
14hr20min
Approx.
19hr10min
* 1GB = 1 billion bytes. The actual formatted capacity may be lower than th e
figure shown here.
40GB
(GSC-
K40HE)
Approx.
5hr40min
Approx.
7hr10min
Approx.
9hr30min
8GB 4GB 2GB 1GB 512MB
Approx.
65min
Approx.
85min
Approx.
110min
Approx.
30min
Approx.
40min
Approx.
55min
Approx.
16min
Approx.
20min
Approx.
27min
Approx.
8min
Approx.
10min
Approx.
14min
Approx.
4min
Approx.
5min
Approx.
6min
MEMO
The available recording time actually displayed will vary depending on
the image quality and the amount of space available on the drive.
Owner’s Manual 49
Page 74

Hard Disk Camera GSC-K80HE/GSC-K40HE
OK
CANCEL
Shooting with Natural Color Tones (White Balance)
When you take pictures under a range of different light sources, you can
use the white balance (see “Glossary” p.131) setting to obtain more
natural-looking colors.
POINT
If the stored white balance setting is unsuitable, you can use presets to
manually set the white balance.
ATTENTION
If you use a setting other than [AUTO] and the selected setting does not
match the light source, the color tones may appear unnatural.
1. From the recording menu, use the jog dial to select [WHITE BALANCE]
and press the OK button.
RECORDING MENU
CONTINUOUS RECORDING
VIDEO QUALITY
WHITE BALANCE
IMAGE STABILIZATION
WIND NOISE REDUCTION
EXIT
2. Use the jog dial to select the white balance and press the OK button.
AUTO
If you selected [PRESET], proceed to
“Overwriting preset data” or “Using
preset data”. If you selected another
setting, the camera reverts to recording
AUTO
OK
CANCEL
mode.
To cancel the setting, press the MENU
button.
AUTO : Automatic adjustment
SUNLIGHT : For recording in sunlight
CLOUD : For recording under cloudy skies
FLUORESCENT
LIGHT H
FLUORESCENT
LIGHT L
INCANDESCENT
: For recording under daylight fluorescent lights
(fluorescent lights with a bluish cast)
: For recording under neutral fluorescent lights
(fluorescent lights with a reddish cast)
: For recording under incandescent lights
LAMP
PRESET : Presets (using data stored by the user)
50 Owner’s Manual
Page 75

Hard Disk Camera GSC-K80HE/GSC-K40HE
OVERWRITE DATA
USE DATA
OK
DISPLAY A WHITE OBJECT IN
THE CENTER, THEN PRESS THE OK BUTTON.
OVERWRITE DATA
USE DATA
OK
Overwriting Preset Data
This procedure stores new preset data for the current light source.
1. Select [PRESET] and use the jog dial to select [OVERWRITE DATA]
from the menu that appears. Then press the OK button.
WHITE BALANCE
OVERWRITE DATA
USE DATA
OK
A message is displayed.
2. Position a white subject (a white dish or piece of paper) so that it fills the
displayed frame and press the OK button.
WHITE BALANCE
DISPLAY A WHITE OBJECT IN
THE CENTER, THEN PRESS THE OK BUTTON.
A message is displayed and the
camera is then ready to shoot.
MEMO
When you are setting the white balance, ensure that the subject
(the white dish or piece of paper) completely fills the displayed frame.
Using Preset Data
This section explains how to use existing preset data.
3. Select [PRESET] and use the jog dial to select [USE DATA] from the
menu that appears. Then press the OK button.
Owner’s Manual 51
OK
WHITE BALANCE
OVERWRITE DATA
USE DATA
The camera reverts to recording mode.
Page 76
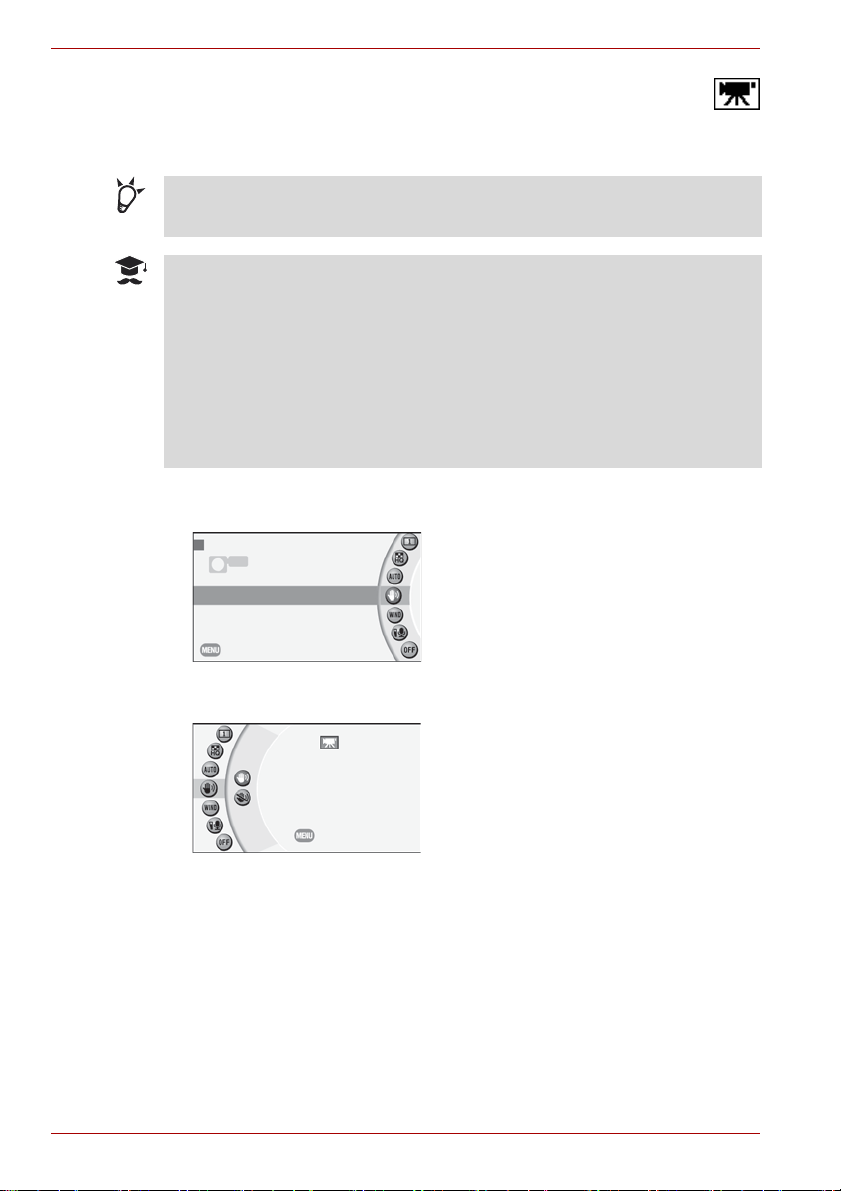
Hard Disk Camera GSC-K80HE/GSC-K40HE
Shooting with Image Stabilization
Image stabilization reduces the problem of camera shake when you are
shooting video.
POINT
Image stabilization is particularly useful when you are using the zoom.
ATTENTION
Image stabilization may be ineffective with excessive camera shake or
when you are tracking a moving subject.
The effects gained from Image stabilization differ depending on scene
settings and surrounding brightness. Maximum effects cannot be
gained in dark locations.
The Image stabilization function is designed to correct camera shake
during video recording and does not function when you are shooting
still images.
1. From the recording menu, use the jog dial to select [IMAGE
STABILIZATION] and press the OK button.
RECORDING MENU
WIND NOISE REDUCTION
EXIT
VIDEO QUALITY
WHITE BALANCE
IMAGE STABILIZATION
MIC. SENSITIVITY
ON
2. Use the jog dial to select the setting and press the OK button.
The selected setting is set and the
IMAGE STABILIZATION
ON
CANCEL
recording menu reappears.
To cancel the setting, press the MENU
button.
ON : The Image stabilization
function is used.
OFF : The Image stabilization
function is not used.
52 Owner’s Manual
Page 77

Wind Noise Reduction
This function reduces wind noise in the recorded sound when you are
shooting video.
ATTENTION
This function is not effective if you shoot with the microphone subjected
directly to wind.
1. From the recording menu, use the jog dial to select [WIND NOISE
REDUCTION] and press the OK button.
Hard Disk Camera GSC-K80HE/GSC-K40HE
RECORDING MENU
WIND NOISE REDUCTION
EXIT
WHITE BALANCE
IMAGE STABILIZATION
MIC. SENSITIVITY
ON
DIGITAL ZOOM
2. Use the jog dial to select the setting and press the OK button.
Wind noise reduction is set and the
WIND NOISE REDUCTION
ON
CANCEL
recording menu reappears.
To cancel the setting, press the MENU
button.
ON : The Wind noise reduction
function is used.
OFF : The Wind noise reduction
function is not used.
Owner’s Manual 53
Page 78

Hard Disk Camera GSC-K80HE/GSC-K40HE
Changing the Microphone Sensitivity
Use this procedure to set the microphone sensitivity during video recording.
1. From the recording menu, use the jog dial to select [MIC.
SENSITIVITY] and press the OK button.
RECORDING MENU
IMAGE STABILIZATION
WIND NOISE REDUCTION
MIC. SENSITIVITY
STANDARD
DIGITAL ZOOM
EXIT
2. Use the jog dial to select the sensitivity and press the OK button.
METERING MODE
MIC. SENSITIVITY
MORE
CANCEL
The selected sensitivity is set and the
recording menu reappears.
To cancel the setting, press the MENU
button.
STANDARD : Sets the normal
MORE : Sets a higher microphone
LESS : Sets a lower microphone
microphone sensitivity.
sensitivity.
Select this setting to
record low sounds that
are difficult to hear.
sensitivity.
Select this setting to
reduce ambient noise.
54 Owner’s Manual
Page 79

Digital Zooming
Digital zooming using digital processing to further enlarge the central
portion of the screen.
Pixel interpolation technology ensures that the specified number of image
pixels are still recorded when digital zooming is used.
ATTENTION
Using the digital zoom lowers the image quality.
1. From the recording menu, use the jog dial to select [DIGITAL ZOOM]
and press the OK button.
RECORDING MENU
EXIT
2. Use the jog dial to select the magnification and press the OK button.
WIND NOISE REDUCTION
MIC. SENSITIVITY
DIGITAL ZOOM
METERING MODE
DIGITAL ZOOM
OFF
AF MODE
30X
CANCEL
Hard Disk Camera GSC-K80HE/GSC-K40HE
The digital zoom is set and the
recording menu reappears.
To cancel the setting, press the MENU
button.
30X : The 3X digital zoom is used.
(max. 30X together with 10X
optical zoom)
OFF : The digital zoom is not used.
Owner’s Manual 55
Page 80

Hard Disk Camera GSC-K80HE/GSC-K40HE
Selecting the Metering Mode
Use this procedure to specify the metering mode used for exposure
calculation.
POINT
Using the [SPOT] setting for backlit subjects enables you to match the
exposure for a specific subject.
ATTENTION
If the metering point is too bright, the photographed image will be dark.
If the metering point is too dark, the photographed image will be
washed out.
1. From the recording menu, use the jog dial to select [METERING
MODE] and press the OK button.
RECORDING MENU
METERING MODE
EXIT
MIC. SENSITIVITY
DIGITAL ZOOM
SPOT
AF MODE
AF ASSIST LIGHT
2. Use the jog dial to select [CENTER WEIGHTED] or [SPOT] and press
the OK button.
The selected metering mode is set and
METERING MODE
SPOT
CANCEL
the recording menu reappears.
To cancel the setting, press the MENU
button.
CENTER
WEIGHTED
: The camera sets the
exposure by metering the
entire image but with
particular emphasis on
the central part of the
image.
SPOT : The camera sets the
exposure by metering
just a very small area at
the center of the image.
56 Owner’s Manual
Page 81

Hard Disk Camera GSC-K80HE/GSC-K40HE
Selecting the Focus Area (AF Mode)
Use this procedure to specify the area used to set the focus.
POINT
In shots such as group photos where there are many subjects, or where
the subject is not in the center of the shot, use the [MULTI] setting to
reduce the likelihood of the shot being incorrectly focused.
1. From the recording menu, use the jog dial to select [AF MODE] and
press the OK button.
RECORDING MENU
EXIT
DIGITAL ZOOM
METERING MODE
AF MODE
MULTI
AF ASSIST LIGHT
COLOR
2. Use the jog dial to select [CENTER] or [MULTI] and press the OK
button.
The selected AF mode is set and the
AF MODE
CENTER
CANCEL
recording menu reappears.
To cancel the setting, press the MENU
button.
CENTER : The camera sets the focus
by measuring the distance
to subject in the center of
the shot.
The area used for focusing
is always displayed in the
center of the LCD monitor
screen.
MULTI : The camera determines
which of a number of
points should be used for
measuring the focal
distance.
The focus area is
displayed in the part of the
image used for focusing.
Owner’s Manual 57
Page 82

Hard Disk Camera GSC-K80HE/GSC-K40HE
Shooting with AF Assist Light
Use this procedure to enable the assist light to fire when shooting still
photography of subjects in dark places.
1. From the recording menu, use the jog dial to select [AF ASSIST LIGHT]
and press the OK button.
RECORDING MENU
AF ASSIST LIGHT
EXIT
METERING MODE
AF MODE
ON
COLOR
CONTRAST
2. Use the jog dial to select [ON] or [OFF] and press the OK button.
The AF assist light is set and the
AF ASSIST LIGHT
ON
CANCEL
recording menu reappears.
To cancel the setting, press the MENU
button.
ON : The AF assist light fires to help
focus still photography of
subjects in dark places.
OFF : The AF assist light does not
fire.
58 Owner’s Manual
Page 83

Changing Image Colors
Use this procedure to select the colors used in images you shoot.
This also allows you to shoot images in black and white or in sepia tone.
1. From the recording menu, use the jog dial to select [COLOR] and press
the OK button.
Hard Disk Camera GSC-K80HE/GSC-K40HE
RECORDING MENU
EXIT
AF MODE
AF ASSIST LIGHT
COLOR
STANDARD
CONTRAST
SHARPNESS
2. Use the jog dial to select the colors and press the OK button.
The selected colors are set and the
COLOR
STANDARD
CANCEL
recording menu reappears.
To cancel the setting, press the MENU
button.
STANDARD : Color
VIVID : Vivid color
MONOCHROME : Black and white
SEPIA : Sepia
Owner’s Manual 59
Page 84

Hard Disk Camera GSC-K80HE/GSC-K40HE
Changing the Image Contrast
Use this procedure to set the degree of difference between light and dark in
images you shoot. You can use this function to heighten or soften the
contrast and change the tone of your images.
1. From the recording menu, use the jog dial to select [CONTRAST] and
press the OK button.
RECORDING MENU
EXIT
AF ASSIST LIGHT
COLOR
CONTRAST
STANDARD
SHARPNESS
LCD BRIGHTNESS
2. Use the jog dial to select the contrast setting and press the OK button.
The selected contrast is set and the
CONTRAST
SOFT
CANCEL
recording menu reappears.
To cancel the setting, press the MENU
button.
ST ANDARD : Sets the contrast
automatically.
HARD : Heightens the contrast.
SOFT : Softens the contrast.
60 Owner’s Manual
Page 85

Changing the Image Sharpness
Use this procedure to sharpen or soften the image outlines. You can use
this function to make the outlines of objects crisper or make them less
clearly defined, altering the tone of the image.
1. From the recording menu, use the jog dial to select [SHARPNESS] and
press the OK button.
Hard Disk Camera GSC-K80HE/GSC-K40HE
RECORDING MENU
SHARPNESS
EXIT
COLOR
CONTRAST
STANDARD
LCD BRIGHTNESS
SETUP
2. Use the jog dial to select the sharpness setting and press the OK
button.
The selected sharpness is set and the
SHARPNESS
HARD
CANCEL
recording menu reappears.
To cancel the setting, press the MENU
button.
STANDARD : Normal edge sharpness
HARD : Sharper edges
SOFT : Softer edges
Owner’s Manual 61
Page 86

Hard Disk Camera GSC-K80HE/GSC-K40HE
OK
CANCEL
Changing the LCD Brightness
POINT
Making the LCD brighter makes it easier to see when you are outdoors
or in other bright conditions.
ATTENTION
If you reduce the LCD brightness and then move to a bright location,
there may appear to be no image on the LCD monitor.
Changing the LCD Brightness from the Recording (or Play) Menu
1. From the recording (or play) menu, use the jog dial to select [LCD
BRIGHTNESS] and press the OK button.
RECORDING MENU
LCD BRIGHTNESS
EXIT
CONTRAST
SHARPNESS
SETUP
2. Use the jog dial to adjust the brightness and press the OK button.
LCD BRIGHTNESS
The LCD brightness is set and the
recording menu reappears.
To cancel the setting, press the MENU
button.
OK
CANCEL
MEMO
You can also set the LCD brightness from the play menu.
Changing the LCD brightness does not change the brightness of
recorded images.
62 Owner’s Manual
Page 87

Hard Disk Camera GSC-K80HE/GSC-K40HE
08:17:26
STOP
00:00:12
08:17:26
STOP
00:00:12
Changing the LCD Brightness during Video Recording
1. While recording video, press the MENU button.
08:17:26
00:00:12
The LCD brightness icon appears on
the screen.
STOP
2. Use the jog dial to adjust the brightness and press the OK button.
08:17:26
STOP
00:00:12
The LCD brightness is set.
MEMO
Changing the LCD brightness does not change the brightness of
recorded images.
Owner’s Manual 63
Page 88

Hard Disk Camera GSC-K80HE/GSC-K40HE
64 Owner’s Manual
Page 89

Advanced Playback
Changing Levels
Selecting the Video Playback Method
Capturing Single Video Frames as Still Images
Using Zoomed Playback
Switching the Playback Display
Changing Playback Settings
Setting up and Running Auto Play
Protecting Images
Copying Images
Printing Directly from the Camera Using PictBridge
Editing Videos
Hard Disk Camera GSC-K80HE/GSC-K40HE
Chapter 4
Owner’s Manual 65
Page 90

Hard Disk Camera GSC-K80HE/GSC-K40HE
101-0007
101
L
OVE
12 FILES / 11.5 MB
2007 01 08 101
1 5 G B
6 2 G B
101-0105
2007.07.25 11:03 AM
DISPLAY
101-0007
Changing Levels
When you are searching for a particular image, you can use the zoom lever
to select “list view”, “album” or “drive”.
Single-image display Thumbnail display
101-0105
Towards W
THUMBNAIL
101-0007
DISPL
DRIVE
MEMORY USED
MEMORY REMAINING
2007.07.25 11:03 AM
15 GB
6 2 GB
Drive display Album display
Towards T
Towards T
Towards W
Displaying Images as a List (Thumbnail Disp lay)
This feature allows you to view a collection of your images at a smaller
(thumbnail) size. In this manual, this way of viewing reduced images is
called “thumbnail display”. Thumbnail display allows you to view 6 images
at once.
1. Select playback mode and then slide the zoom lever towards W.
THUMBNAIL
101-0007
The images are displayed as
thumbnails.
If there are 7 or more images, use the
jog dial to scroll the screen.
To view a selected thumbnail image at
the normal size, slide the zoom lever
towards T.
To Move to Another Album
There are 2 ways to do this:
Use the jog dial to scroll the screen and position the cursor on “next
album” (or “previous album”). Then press the OK button.
Move to another level to display the albums and then select the album
to be played back.
See “Selecting Albums and Drives for Playback” p.67.
ALBUM
2006_04_03_101
FAM ILY 1
12 FILES / 11.5 MB
4
FILES /
2007 01 08 101
OVE
14.0
MB
Towards WTowards T
101
66 Owner’s Manual
Page 91

Hard Disk Camera GSC-K80HE/GSC-K40HE
101
L
OVE
12 FILES / 11.5 MB
2007 01 08 101
1 5 G B
6 2 G B
OK
CANCEL
Selecting Albums and Drives for Playback
1. Select thumbnail display.
2. Slide the zoom lever towards W.
ALBUM
101
The screen changes to album display.
Use the jog dial to select the album to be
played back.
2007 01 08 101
OVE
12 FILES / 11.5 MB
Slide the zoom lever towards T to
display the thumbnails for the images in
the selected album.
3. In the album display, slide the zoom lever towards W.
DRIVE
The screen changes to drive display.
Use the jog dial to select the drive to be
played back.
MEMORY USED
MEMORY REMAINING
15 GB
6 2 GB
Slide the zoom lever towards T to
display the albums on the selected drive.
MEMO
The drive selected here is the playback drive. Selecting a drive that is
not the drive currently selected for saving images does not change the
image save location.
See “Creating and Selecting Albums” p.45.
Selecting the Video Playback Method
You can choose from 2 video playback methods:
CONTINUOUS PLAY : Plays through to the end of the videos in the
album in order.
1 FILE : Plays just the selected video.
1. Select playback mode.
2. Use the jog dial to select the video you want to play.
3. Move the OK button to .
The video playback icon appears.
4. Use the jog dial to select either [CONTINUOUS PLAY] or [1 FILE] and
press the OK button.
VIDEO PLAYBACK
Owner’s Manual 67
CONTINUOUS PLAY
OK
CANCEL
Page 92

Hard Disk Camera GSC-K80HE/GSC-K40HE
101-0105
DISPLAY
00:00:03
101-0105
DISPLAY
00:00:05
Capturing Single Video Frames as Still Images
You can capture one frame from a video as a still image.
1. Select playback mode.
2. Use the jog dial to select the video you want to play.
3. Move the OK button to .
Video playback begins.
DISPL
101-0105
00:00:03
4. In the scene containing the image you want to capture, move the OK
button to to pause the video.
101-0105
Using the jog dial, you can use
single-frame feed (or rewind) to
precisely locate the scene you want to
capture as a still image.
DISPL
00:00:05
5. Press the REC button down fully.
The selected scene is captured as a still image.
68 Owner’s Manual
Page 93

Using Zoomed Playback
X 1.3
101-0105
2007.07.25 11:03 AM
DISPLAY
X 1.3
Use zoomed playback for detailed image checking.
Zoomed Still Image Playback
1. Select playback mode and use the jog dial to select the still image you
want to view zoomed.
2. Slide the zoom lever towards T.
X 1.3
Hard Disk Camera GSC-K80HE/GSC-K40HE
The image is enlarged.
Slide the zoom lever towards W to
zoom back out.
You can move the enlarged area
around using , , and on the
OK button.
To exit zoomed playback and return to
the normal-size display, press the OK
button.
DISPL
101-0105
2007.07.25 11:03 AM
Slide towards T
Slide towards W
MEMO
Video playback cannot be zoomed.
X 1.3
Owner’s Manual 69
Page 94

Hard Disk Camera GSC-K80HE/GSC-K40HE
101-0107
2007.07.25 11:03 AM
DISPLAY
101-0107
IMAGE SIZE
QU
ALITY
SHUT
TER SPEED
APERTURE
EXPOSURE BIAS
ISO SENSITIVITY
FLASH
FILE SIZE
1280x720
FINE
1/45s
F1.8
0.0EV
ISO100
OFF
574 KB
:
:
:
:
:
:
:
:
Switching the Playback Display
Use this procedure to change the display mode for playback images.
1. Select playback mode and use the jog dial to select the image.
2. Press the OK button.
Each time you press the OK button, the
information display mode changes as shown
below.
Normal playback mode (still image).
<Standard>
101-0107
DISPL
DISPLAY
2007.07.25 11:03 AM
IMAGE SIZE
ALITY
SHU
TER SPEED
APERTURE
EXPOSURE BIAS
ISO SENSITIVITY
FLASH
FILE SIZE
Detailed image information displayed.
101-0107
1280x720
FINE
1/45s
F1.8
0.0EV
ISO100
OFF
574 KB
<Information display>
Image information not shown.
<Hidden>
70 Owner’s Manual
Page 95

Changing Playback Settings
As well as changing settings for playback, you can also use this procedure
to specify settings for image protection and printing.
1. In playback mode, press the MENU button.
The play menu appears.
2. Use the jog dial to select a menu and press the OK button.
Hard Disk Camera GSC-K80HE/GSC-K40HE
PLAY MENU
ERASE
AUTO PLAY
PROTECT
EXIT
COPY
PLAY MENU
VIDEO EDITING
LCD BRIGHTNESS
EXIT
COPY
PictBridge
SETUP
3. Specify the desired options in the settings screen.
Exiting settings returns to the play menu.
4. To exit the play menu, press the MENU button.
The camera reverts to playback mode.
Owner’s Manual 71
Page 96

Hard Disk Camera GSC-K80HE/GSC-K40HE
Button Operations during Play Menu Setting
Button/lever Menu displayed Setting displayed
OK Confirms the selected setting
OK button Selects a menu setting Selects a setting
OK button Selects a menu setting Selects a setting
OK button Confirms the selected setting
OK button - Returns to the previous
Jog dial right Selects a menu setting Selects a setting
Jog dial left Selects a menu setting Selects a setting
MENU Returns to playback
Mode button Returns to playback mode
Play Menu
Menu item Description Ref.
ERASE Erases images. 85
AUTO PLAY Sets the types of images played back by
Auto play and also runs Auto play.
PROTECT Applies protection or read-only status to
images.
COPY Copies images. 78
PictBridge Prints images by connecting the camera
directly to the printer.
VIDEO EDITING Deletes unwanted sections of videos. 82
LCD BRIGHTNESS Sets the LCD monitor brightness. 62
SETUP Moves to the setup menu. 91
Screen
screen
Returns to the play menu
mode
73
75
80
72 Owner’s Manual
Page 97

Hard Disk Camera GSC-K80HE/GSC-K40HE
Setting up and Running Auto Play
Auto play automatically plays back images sequentiall y.
Setting up Auto Play
1. From the play menu, use the jog dial to select [AUTO PLAY] and then
press the OK button.
PLAY MENU
ERASE
AUTO PLAY
PROTECT
EXIT
COPY
2. Use the jog dial to select a setting and press the OK button.
TARGET IMAGES
STILL IMAGE
VIDEO.
STILL & VIDEO
CANCEL
3. Use the jog dial to select the desired setting and press the OK button.
The selected setting is set and the Auto play menu screen reappears.
TARGET IMAGES
STILL IMAGE : Plays only still images.
VIDEO : Plays only videos.
STILL & VIDEO : Plays both videos and still images.
ALBUM
CURRENT ALBUM : Plays only the currently selected album.
ALL ALBUMS : Plays all the albums.
The Auto play menu screen appears.
EXECUTE :Runs Auto play.
TA RGET IMAGES:Selects the types of
ALBUM :Selects the album
images shown by
Auto play.
to be shown by
Auto play.
MEMO
Auto power off does not operate during Auto play.
The still image switch interval is 3 seconds during Auto play.
Owner’s Manual 73
Page 98

Hard Disk Camera GSC-K80HE/GSC-K40HE
Running Auto Play
1. From the play menu, use the jog dial to select [AUTO PLAY] and then
press the OK button.
The Auto play menu screen appears.
2. Use the jog dial to select [EXECUTE] and press the OK button.
AUTO PLAY
EXECUTE
CANCEL
Auto play begins.
While Auto play is running, you can
pause or restart playback by moving the
OK button to .
Auto play repeats until you move the
OK button to to end Auto play.
74 Owner’s Manual
Page 99

Protecting Images
PROTECT
103-0009
SELECT ALL
CLEAR ALL
NEXT ALBUM
CANCEL
OK
To prevent images from being inadvertently erased, you can make them
read-only files. Images with this status are referred to as “protected”
images.
ATTENTION
Formatting erases all your images, including protected images.
Erased images cannot be restored.
Selecting and Protecting Images
1. From the play menu, use the jog dial to select [PROTECT] and press
the OK button.
Hard Disk Camera GSC-K80HE/GSC-K40HE
PLAY MENU
EXIT
AUTO PLAY
PROTECT
PictBridge
ERASE
COPY
2. Use the jog dial to select the image to be protected and press the OK
button.
PROTECT
103-0009
The [ ] icon appears below the
protected image.
To remove the protection, press the OK
button again.
To protect multiple images, repeat this
procedure. To move to the previous or
SELECT
SELECT ALL
OK
NEXT ALBUM
CLEAR ALL
CANCEL
next album, move the OK button to
or respectively.
3. Move the OK button to to select [OK] and press the OK button.
The images are protected and the play menu reappears.
If you do not want to protect the images, select [CANCEL] and press
the OK button.
Confirming Images in Enlarged View
In step 2, slide the zoom lever towards T.
Sliding towards W in enlarged view will return to the protection settings
screen.
Owner’s Manual 75
Page 100

Hard Disk Camera GSC-K80HE/GSC-K40HE
PROTECT
103
SELECT ALL
CLEAR ALL
CANCEL
OK
Protecting all Images in an Album
In step 2, move the OK button to to select [SELECT ALL], then press the
OK button.
MEMO
The [ ] icon is displayed for protected images on the playback screen
and when protection is set.
To protect an entire SD card, see “Write-protection” ( p.xxiv).
Several hours may be required if you are setting protection for a large
volume of images together.
Protecting Albums
You can use this procedure to protect all the images in an album.
1. From the play menu, select [PROTECT] and press the OK button.
2. Slide the zoom lever towards W.
3. Use the jog dial to select the album to be protected and press the OK
button.
PROTECT
103
The [ ] icon (black) appears below the
protected album.
To remove the protection, press the OK
button again.
To protect multiple albums, repeat this
procedure.
SELECT
SELECT ALL
OK
CLEAR ALL
CANCEL
The [ ] icon (gray) is displayed be l ow
albums that contain both protected and
unprotected images.
4. Move the OK button to to select [OK] and press the OK button.
The albums are protected and the play menu reappears.
If you do not want to protect the albums, select [CANCEL] and press
the OK button.
To Protect all the Albums
In step 3, move the OK button to to select [SELECT ALL] and then press
the OK button.
76 Owner’s Manual
 Loading...