

Page 1

MULTIFUNCTIONAL DIGITAL SYSTEMS
User’s Guide
Page 2

©2013 TOSHIBA TEC CORPORATION All rights reserved
Under the copyright laws, this manual cannot be reproduced in any form without prior written permission of TTEC.
Page 3

Preface
Loaded in a portrait direction: A4/LT Loaded in a landscape direction: A4-R/LT-R
How to read this manual
Thank you for purchasing the TOSHIBA multifunctional digital systems. This manual describes how to use, perform
maintenance, and fix problems for this equipment. Be sure to read this manual before using this equipment. Keep this
manual handy and retain it for future reference.
Symbols in this manual
To ensure correct and safe use of this equipment, this manual describes safety precautions according to the three levels
shown below.
You should fully understand the meaning and importance of these items before reading this manual.
Indicates a potentially hazardous situation which, if not avoided, could result in death, serious injury, or
serious damage, or fire in the equipment or surrounding assets.
Indicates a potentially hazardous situation which, if not avoided, may result in minor or moderate
injury, partial damage of the equipment or surrounding assets, or loss of data.
Indicates information to which you should pay attention when operating the equipment.
Other than the above, this manual also describes information that may be useful for the operation of this equipment with
the following signage:
Describes handy information that is useful to know when operating the equipment.
Pages describing items related to what you are currently doing. See these pages as required.
Description of original/paper direction
Paper or originals of A4 or B5/LT size can be loaded either in a portrait direction or in a landscape direction. In this manual,
“-R” is added to this paper size when this size of paper or original is loaded in a landscape direction.
e.g.) A4/L T size paper on the bypass tray
Paper or originals of A3 or B4/LD or LG size can only be loaded in a landscape direction, therefore “-R” is not added to
these sizes.
Preface 1
Page 4

Screens
In this manual, the screens and the operation procedures in Windows are described for Windows 7.
The details on the screens may differ depending on how the equipment is used, such as the status of the installed
options, the OS version and the applications.
The illustration screens used in this manual are for paper in the A/B format. If you use paper in the LT format, the
display or the order of buttons in the illustrations may differ from that of your equipment.
Trademarks
The official name of Windows XP is Microsoft Windows XP Operating System.
The official name of Windows Vista is Microsoft Windows Vista Operating System.
The official name of Windows 7 is Microsoft Windows 7 Operating System.
The official name of Windows 8 is Microsoft Windows 8 Operating System.
The official name of Windows Server 2003 is Microsoft Windows Server 20 03 Operating System.
The official name of Windows Server 2003 R2 is Microsoft Windows Server 20 03 R2 Operating System.
The official name of Windows Server 2008 is Microsoft Windows Server 20 08 Operating System.
The official name of Windows Server 2008 R2 is Microsoft Windows Server 20 08 R2 Operating System.
The official name of Windows Server 2012 is Microsoft Windows Server 20 12 Operating System.
Microsoft, Windows, Windows NT, and the brand names and product names of other Microsoft products are
trademarks of Microsoft Corporation in the US and other countries.
Adobe, Acrobat, and Reader are either registered trademarks or trademarks of Adobe Systems Incorporated in the
United States and/or other countries.
TopAccess is a trademark of Toshiba Tec Corporation.
Other company and product names given in this manual or displayed in this software may be the trademarks of their
respective companies.
Lineup of our manuals
These manuals are provided for the operation of the e-STUDIO2505H/e-STUDIO2505F. Select and read the manual best
suited to your needs. This manual is the User’s Guide.
Safety Information (Printouts)
This manual describes the necessary precautions for use. For your added security, be sure to read this manual first.
Quick Guide (Printouts)
This manual describes the components, preparations, basic operations, and troubleshooting for the equipment.
User’s Guide (PDF file, this manual)
This manual describes preparations for using the e-STUDIO2505H/e-STUDIO2505F, and how to use functions such as
copying, printing, and scanning. It also describes maintenance and troubleshooting for the problems that could occur while
you are using the equipment.
Software Installation Guide (PDF file)
This manual describes how to install and uninstall printer and scanner drivers.
TopAccess Guide (PDF file)
This manual describes how to use the co-packed utility “T opAccess”. The settings and management of the equipment can
be done using a Web browser.
Fax Guide (PDF file)
Only for e-STUDIO2505F.
This manual describes how to use the Fax functions. Various functions both basic and advanced regarding Fax
transmission/reception are available.
Help menu for client software
To run the following client software, refer to the Help menu of each:
Printer driver
Scanner driver
N/W-Fax driver (Only for e-STUDIO2505F)
2 Preface
Page 5

To read manuals in the PDF file format
This manual in the PDF (Portable Document Format) can be displayed/printed using Adobe Reader or Adobe Acroba t
Reader. If neither is installed in your computer, download one of them. This can be done via the website of Adobe Systems
Incorporated.
Recommended toner cartridges
To assure optimal printing performance, we recommend that you use only genuine TOSHIBA toner cartridges. If you use a
TOSHIBA-recommended toner cartridge, you can utilize the following three functions of this equipment:
Cartridge detecting function: This function checks if the toner cartridge is correctly installed and notifies you if it is
not.
Toner remaining check function: This function notifies you when there is little toner remaining in the cartridge, as
well as notifying your authorized service representative automatically by remote service.
Image quality optimization function: This function controls image quality according to the characteristics of the toner
to be used and enables you to print images of an optimal quality.
If you are using a toner cartridge other than the one we recommend, the equipment may not be able to detect whether it is
installed or not. Therefore, even if the toner cartridge is correctly installed, the error message “ERROR: TONER” appears
on the LCD screen and printing may not be performed. You may also not be able to utilize the image quality optimization
function, the toner remaining check function, and the remote service function which notifies your service representative
automatically.
If you are using a toner cartridge other than the one we recommend, toner is not recognized. If this is a problem for you,
please contact your service representative. Remember you will not be able to utilize the Toner remaining check function
and Image quality optimization function as we mentioned.
Preface 3
Page 6

Page 7

CONTENTS
Preface....................................................................................................................................... 1
Chapter 1 PREPARATION
Components............................................................................................................................ 10
Front/Right/Inner side..........................................................................................................10
Left side............................................................................................................................... 11
Configuration of options....................................................................................................... 12
Control panel....................................................................................................................... 12
Main screen (Copy)............................................................................................................. 15
Preparation 1 - Turning Power ON........................................................................................ 16
Turning on ........................................................................................................................... 16
Saving energy when not in use - Energy saving mode -..................................................... 17
Preparation 2 - Loading Paper .............................................................................................. 18
Acceptable paper types....................................................................................................... 18
Recommended paper........... ... .......................................... ... ... ... .... ... ... ... .... ........................ 19
Loading paper in the drawer................................................................................................ 20
Loading paper on the bypass tray....................................................................................... 22
Loading an envelope on the bypass tray............................................................................. 24
Preparation 3 - Registering Paper Size and Type................................................................ 27
Chapter 2 COPY FUNCTIONS
Basic Copy Procedure........................................................................................................... 30
Acceptable originals ............................................................................................................30
Copying originals................................................................................................................. 31
Copy Settings ...................................... .... ... ... ... .... ... ... .......................................... .................. 36
Adjusting the exposure............... .......................................... ... ... .... ..................................... 36
Selecting the original mode..................................... ... .... ... ... ... ... .... ... ... ... .... ... ... ... ... .... ........ 37
Selecting the paper .......................... .... ... ... .......................................... ... .... ... .....................38
Enlarging or reducing the copy size .................................................................................... 40
Sorting pages ...................................................................................................................... 44
Copying two or four pages on each sheet........................................................................... 45
Copying both sides of a card on a sheet............................................................................. 47
Erasing the shadow on edges............................................................................................. 48
Shifting the pages to the right or left.................................................................................... 49
Copying on both sides......................................................................................................... 50
Adding a page number and date/time on the copied paper................................................. 51
Removing blank pages........................................................................................................ 51
Image direction.................................................................................................................... 52
Confirming the current function settings.............................................................................. 52
Using Templates (Copy) ........................................................................................................ 53
Registering the templates. .... ............................................................................................... 53
Recalling a template............................................................................................................54
Chapter 3 PRINT FUNCTIONS
Before Using the Printer Driver............................................................................................. 56
Configuring the options........................................................................................................ 56
Setting the department code ......... ... .... ... ... ... .... ... ... ... .... ... ... ... ... .... ... ... ... .... ... ... .................. 60
Printing From Application ..................................................................................................... 62
CONTENTS 5
Page 8

Considerations and limitations............................................................................................. 62
How to print ...... ... .... ...................................... .... ... ... ... .... ... ... ....................................... ........ 62
Status Monitor ........................................................................................................................ 64
Monitoring the print status and reporting print errors........................................................... 64
Setting Up Print Options........................................................................................................65
How to set up ................................ ... .... .......................................... ..................................... 65
Print options ........................................................................................................................ 68
Printing With Best Functions for Your Needs ..................................................................... 82
Layout and finishing options in [Basic] tab menu ................................................................ 82
Layout and finishing options in [Finishing] tab menu........................................................... 83
Finishing options in [Effect] tab menu.................................................................................. 88
Chapter 4 SCAN FUNCTIONS
Scanning From Application................................................................................................... 92
How to scan...... ... .... ...................................... .... ... ... ... .... ... ... ....................................... ........ 92
Setting Up Scan Options ....................................................................................................... 94
Scan options........................................................................................................................ 94
Scanning from the equipment on the network..................................................................... 96
Scanning from the equipment connected by USB cable..................................................... 96
Using the Easy Set feature.................................................................................................. 97
Scan to E-Mail......................................................................................................................... 98
Procedure for Scan to E-Mail .............................................................................................. 98
Scan to File ........................................................................................................................... 101
Procedure for Scan to File .... ... ... ... ... .... ... .......................................... ... ... .......................... 101
Scan to USB Memory ........................................................................................................... 103
Procedure for Scan to USB Memory................................................................................. 103
Scan Settings........................................................................................................................ 106
Selecting the color mode............ ... ... .... ... ... ... .......................................... .... ... ... ... ... .... ... ... 106
Selecting the resolution................................. .... ... ... ... .... ... ... .......................................... ... 106
Selecting the original size. .... ... ... ... ... .......................................... .... ... ... ... .... ... ... ... ............. 107
Selecting the original mode..................................... ... .... ... ... ... ... .... ... ... ... .... ... ... ... ... .... ...... 107
Selecting the orientation................ ... .... .......................................... ... ... ... .... ... ................... 108
Selecting the compression ratio ........................................................................................ 108
Removing blank pages...................................................................................................... 109
Adjusting the exposure............... ... ... .... .......................................... ... ... ... .... ... ... ... ... .......... 109
Specifying E-mail Addresses............................................................................................. 110
Character entry........................................... ....................................................................... 113
Scan speed ....................................................................................................................... 114
Using Templates (Scan)....................................................................................................... 115
Registering the templates. .... ............................................................................................. 115
Recalling a template.......................................................................................................... 116
Chapter 5 VARIOUS FUNCTIONS
Copy Menu List.............................. ... ... .... ... .......................................... ... ... .... ...................... 118
Copy menu items............................................................................................................... 118
Scan Menu List ..................................................................................................................... 119
Scan menu items............................................................................................................... 119
Network Menu List................................................................................................................ 121
6 CONTENTS
Page 9

Setting the Ethernet speed................... ...... ....................................................................... 121
Setting the TCP/IP protocol............................................................................................... 121
Setting the HTTP network service..................................................................................... 122
User Functions Menu List.................................................................................................... 123
User functions menu items................................................................................................ 124
Department Management..................................................................................................... 131
Chapter 6 TROUBLESHOOTING
When This Message Appears.............................................................................................. 134
Paper Misfeed ....................................................................................................................... 135
Find the position of paper misfeeds................................................................................... 135
When paper misfeeds occur frequently............. ... ... ... .... ... ... ... ... .... ... ... ... .... ... ... ... ... .... ... ... 135
When removing misfed paper..................................... .... ... ... ... ... .... ... ... ... .... ...................... 135
Paper misfeeds on the Automatic Document Feeder (ADF)............................................. 136
Paper misfeeds on the bypass tray................................................................................... 137
Paper misfeeds inside of the side cover............................................................................ 138
Replacing Toner Cartridge .................................................................................................. 140
When a message for replacement appears....................................................................... 140
Before Calling Service Technician...................................................................................... 143
General operation.............................................................................................................. 143
Toner-related items ........................................................................................................... 143
Original/Paper-related items . ... ... ... ... .... ... ... .......................................... ... .... ... ... ... ... .... ... ... 144
Image trouble .................................................................................................................... 144
Chapter 7 MAINTENANCE AND INSPECTION
Regular Cleaning.................................................................................................................. 146
Cleaning charger .............. ... .... .......................................... ................................................... 147
Chapter 8 SPECIFICATIONS
e-STUDIO2505H/e-STUDIO2505F Specifications............................................................... 150
Continuous copying speed................................................................................................ 151
Specifications of Options.................................................................................................... 152
Packing List .......................................................................................................................... 153
Copying Function Combination Matrix .............................................................................. 154
Combination matrix............................................................................................................ 154
INDEX ................................................................................................................................................................... 155
CONTENTS 7
Page 10

8 CONTENTS
Page 11

1.PREPARATION
Components ...........................................................................................................................10
Front/Right/Inner side...........................................................................................................................................10
Left side................................................................................................................................................................11
Configuration of options .......................................................................................................................................12
Control panel........................................................................................................................................................12
Main screen (Copy)..................................................... ... ................................. ... ..................................................15
Preparation 1 - Turning Power ON........................................................................................16
Turning on............................................................................................................................................................16
Saving energy when not in use - Energy saving mode -......................................................................................17
Preparation 2 - Loading Paper..............................................................................................18
Acceptable paper types........................................................................................................................................18
Recommended paper...........................................................................................................................................19
Loading paper in the drawer.................................................................................................................................20
Loading paper on the bypass tray........................................................................................................................22
Loading an envelope on the bypass tray..............................................................................................................24
Preparation 3 - Registering Paper Size and Type................................................................27
Page 12

1 PREPARATION
Components
Front/Right/Inner side
8
7
1
2
3
6
5
1. Automatic Document Feeder (ADF)
Load up to 50 originals (80 g/m
may vary depending on the type of original.)
P.135 “Paper Misfeed”
2. Side cover
3. Automatic Duplexing Unit
Install this to make it possible to print on both sides of paper.
4. Bypass tray
Place special paper such as thick paper, overhead transparencies, or tracing paper.
P.22 “Loading paper on the bypass tray”
P.24 “Loading an envelope on the bypass tray”
5. USB port
Connect a USB device to store scanned data.
6. Drawer
Place up to 250 sheets of plain paper (80 g/m
P.20 “Loading paper in the drawer”
2
or 20 lb. Bond) to scan one sheet after another . (The maximum number you can load
2
or 20 lb. Bond).
4
7. Front cover
Open this when you replace the toner cartridge.
P.140 “Replacing Toner Cartridge”
8. Toner cartridge
For the recommended toner cartridges, refer to the Safety Information.
P.140 “Replacing Toner Cartridge”
10 Components
Page 13

1.PREPARATION
7
8
6
9
10
12
5
3
1
2
4
11
Left side
1 PREPARATION
1. Original glass
Place the book-type originals and special paper such as overhead transparencies or tracing paper, as well as plain
paper.
2. Control panel
Make settings to use the various functions on this equipment.
P.12 “Control panel”
3. Power switch
Turns the power ON or OFF.
P.16 “Preparation 1 - Turning Power ON”
4. Paper exit stopper
Stops large paper from sliding out of the receiving tray.
When you use the stopper, pull out it until you hear a click sound.
5. AC-IN terminal (rear)
Connect the power cable supplied with the equipment.
6. FAX port (Only for e-STUDIO2505F)
Connect to a phone line to use the FAX functions.
For details on how to use the Fax functions, see the following manual.
Fax Guide
7. Network interface connector
Use this connector when connecting this equipment to a network.
8. USB terminal (4-pin)
Connect to your PC using a commercially available USB cable.
9. Receiving tray
Use a USB2.0 Hi-Speed certified cable: USB cable supporting the USB2.0 Hi-Speed mode (480 Mbps of
transfer speed) certified by the USB Implementers Forum.
Connect the equipment with a PC directly by the USB cable. When it is connected with a PC via a USB hub, the
equipment may not be recognized.
Components 11
Page 14

1 PREPARATION
Main body
Wireless LAN Module
(GN-1080)
96 7 82
3
17
1
21 192326
15
16
14
2425
20
10
22
124
5
11
18
13
10.Scanning area
The data of originals transported from Automatic Document Feeder are scanned here.
P.146 “Regular Cleaning”
11. Original scale
Confirm the size of an original placed on the original glass.
12.Platen sheet
P.146 “Regular Cleaning”
Configuration of options
The available options are listed below. Contact your service technician or service representative for details.
Control panel
The functions and indications of the button vary depending on the region. The illustrations show the control panel for
Europe and the Americas unless they are specified.
For Europe and the Americas
12 Components
Page 15

1.PREPARATION
96 7 82
3
17
1
21 192326
15
16
14
2425
20
10
22
12
4
5
11
18
13
For regions other than Europe and the Americas
1. One Touch button (Only for e-STUDIO2505F)
Speed button for sending a fax.
2. [PAUSE] button (Only for e-STUDIO2505F)
Use this to sustain sending a fax.
1 PREPARATION
3. [RESOLUTION] button (Only for e-STUDIO2505F)
Use this to select the resolution for sending a fax.
4. [MULTI.] button (Only for e-STUDIO2505F)
Use this to send a fax to multiple destinations.
5. [ADDRESS BOOK] button (Only for e-STUDIO2505F)
Use this to display the Address book.
6. [COPY] button
Press this button to use the copy functions.
7. [SCAN] button
Press this button to use the scan functions.
8. [FAX] button (Only for e-STUDIO2505F )
Press this button to use the Fax functions. Available only when the Fax Unit is installed.
For details on how to use the Fax functions, see the following manual.
Fax Guide
9. [USER FUNCTIONS] button
Changes the equipment’s default settings.
P.123 “User Functions Menu List”
10. button
Press this button on menu screens to move to the item above. If you press this button when the top menu item is
highlighted, the bottom menu item is displayed.
11.[JOB STATUS] button
Displays the processing status of print, scan, or fax, as well as allowing you to view the performance history and delete
the job.
For details on how to use the Fax functions, see the following manual.
Fax Guide
12.[SETTINGS] button
Displays the current settings.
13.[TEMPLATE] button
Creates and recalls template settings.
P.53 “Using Templates (Copy)”
P.115 “Using Templates (Scan)”
Components 13
Page 16

1 PREPARATION
14.[ENERGY SAVER] button
Enters into the energy saving mode.
15.[FUNCTION CLEAR] button
Restores all the selected functions to the defaults.
16.[CLEAR/STOP] button
Clears the number entered with the digital keys such as the number of copies, as well as cancels scanning or copying
the original.
17.[START] button
Starts the copying, scanning, or faxing operation.
18.Digital keys
Enter numbers such as the number of copies, password or fax number.
19. button
Press this button once on the main screen (Copy) to show the “EXPOSURE” screen for Europe and the Americas, or
the “ID CARD” screen for regions other than Europe and the Americas. Press it on menu screens to move to an item
on the right or increase the setting.
P.34 “Using the “EXPOSURE” or “ID CARD” function quickly”
20.[OK] button
Determines the items or operations selected in each menu.
21. button
Press this button on menu screens to move to the item below. If you press this button when the bottom menu item is
highlighted, the top menu item is displayed.
22.[CANCEL] button
Cancels the current settings and returns to the previous item.
23. button
Press this button once on the main screen (Copy) to show the “ORIGINAL MODE” screen. Press it on menu screens to
move to an item on the left or decrease the setting.
P.35 “Selecting “ORIGINAL MODE” quickly”
24.Alert lamp
Blinks or lights in case of an error.
25.[DATA] lamp
This lamp blinks while print data is being received, or fax data is being sent and received.
26.LCD screen
LCD screen
Confirms each menu and error messages.
P.15 “Main screen (Copy)”
14 Components
Page 17

1.PREPARATION
A4
1
READY
100%
AUTO EXPOSURE
TEXT/PHOTO
2
5
6
1
3
7
4
Main screen (Copy)
Appears after the power of the equipment is turned ON and the warm-up is finished. This screen is called “main screen
(Copy)”. This screen also appears when the AUTO CLEAR function has worked.
1. Message
Displays the current status or error messages.
2. Paper size
Displays the paper size specified for the drawer or the bypass tray.
1 PREPARATION
3. Copy quantity
Displays the number of copies.
4. Scroll icon
Displays or that you can press on the current screen or menu.
5. Original mode
Displays the mode to copy the original.
6. Exposure
Displays the copy density.
7. Reprod uc tion ratio
Displays the reproduction or zoom ratio to copy.
This function returns all settings to default without the need to press [FUNCTION CLEAR] on the control panel. It works
when a specified period of time has passed since the last paper exit or the last entry of any button.
P.125 “GENERAL”
Components 15
Page 18

1 PREPARATION
A4
1
READY
100%
AUTO EXPOSURE
TEXT/PHOTO
Preparation 1 - Turning Power ON
Turning on
Press the power switch to “ ” (on).
1
Starts warming up, which takes approx. 20 seconds. When the warm-up has finished, the equipment is ready.
If you press [START] during the warm-up, copying automatically starts after it has finished. When the job is
reserved, “COPYING” appears on the LCD screen to show you the current status.
This function cannot be accessed while “PLEASE WAIT” is being displayed.
The LCD screen below is shown if the equipment is managed under the department
2
code function.
DEPARTMENT CODE
_
:12
Key in a 5-digit department code, and then press [OK].
If the department code function is enabled, press [FUNCTION CLEAR] after any operation to prevent
unauthorized use of the equipment.
For the details of the department code, see the following page:
P.131 “Department Management”
Turning off
Press the power switch to “ ” (off).
16 Preparation 1 - Turning Power ON
Page 19

1 PREPARATION
1.PREPARATION
Saving energy when not in use - Energy saving mode -
To reduce power consumption, the equipment automatically enters into the energy saving mode when a specified period
of time has passed since its last use.
Types of energy saving mode
Low power mode: “SAVING ENERGY” appears on the LCD screen.
The equipment automatically enters into low power mode when a specified period of time elapses.
Sleep mode: The LCD screen is turned off and only [ENERGY SAVER] is lit.
The equipment enters into sleep mode when a specified period of time elapses or the [ENERGY
SAVER] button is pressed.
When “Status Monitor” is running, the equipment does not enter into the sleep mode. If you want to enable the
sleep mode, exit it out.
P.64 “Status Monitor”
This equipment does not enter sleep mode when the Wireless LAN Module is installed.
The timers for “AUTO POWER SAVE” and “SLEEP MODE” have been set respectively as the factory default settings.
You can change them in the “USER FUNCTIONS” menu.
P.123 “User Functions Menu List”
To turn the equipment into the energy saving mode (Sleep mode) manually
Press [ENERGY SAVER].
Canceling conditions for energy saving mode
The energy saving mode is canceled under the following conditions.
When [ENERGY SAVER], [START], [COPY], [SCAN], or [FAX] on the control panel is pressed
- For the low power mode: Press [ENERGY SAVER], [START], [COPY], [SCAN], or [FAX]
- For the sleep mode: Press [ENERGY SAVER]
When printing or scanning is performed from a PC connected with this equipment
When fax data is received.
Preparation 1 - Turning Power ON 17
Page 20

1 PREPARATION
Preparation 2 - Loading Paper
Load an appropriate type of paper.
Acceptable paper types
Acceptable paper types differ depending on its paper source. See the table below for more details.
Paper source Paper type Paper size
Drawer Plain paper
(64 - 80 g/m
2
, 17 - 20 lb. Bond)
A/B format: A4
LT format: LT
K format: 16K
Bypass tray Plain paper
(64 - 80 g/m
Thin
(52 - 63 g/m
Thick paper 1
(81 - 105 g/m
2
, 17 - 20 lb. Bond)
2
, 14 - 16 lb. Bond)
2
, 21 - 28 lb. Bond)
A/B format:
A3, A4, A4-R, A5-R, B4, B5, B5-R, FOLIO
LT format:
LD, LG, LT, LT-R, ST-R, COMP, 13"LG,
8.5"SQ
K format:
8K, 16K, 16K-R
Thick paper 2
(106 - 163 g/m
2
, 29 lb. Bond - 90
lb. Index)
Tracing paper
2
(75 g/m
, 20 lb. Bond)
Sticker labels 1 sheet
Transparencies
Envelope
*3
*2
A4/LT only
DL (110 mm x 220 mm), COM10 (4 1/8" x
9 1/2"), Monarch (3 7/8" x 7 1/2"), CHO-3
(120 mm x 235 mm), YOU-4 (105 mm x
235 mm)
*1 “Maximum sheet capacity” refers to the maximum number of sheets when recommended paper is used. See the following page for the
recommended paper:
P.19 “Recommended paper”
*2 Be sure to use the recommended overhead transparencies. Using other transparencies could cause an equipment malfunction.
*3 Envelope can be used when printing from your PC.
Maximum sheet capacity
250 sheets
(80 g/m2, 20 lb. Bond)
50 sheets
2
(80 g/m
, 20 lb. Bond)
1 sheet
(52 - 63 g/m2, 14 - 16 lb. Bond)
1 sheet
(81 - 105 g/m2, 21 - 28 lb. Bond)
1 sheet
(106 - 163 g/m2, 29 lb. Bond - 90
lb. Index)
1 sheet
1 sheet
1 sheet
*1
Do not mix various paper sizes in one drawer.
“LT format” is the standard size for only use in North America.
“K format” is a Chinese standard size.
Abbreviations for LT format sizes:
LT: Letter, LD: Ledger, LG: Legal, ST: Statement, COMP: Computer
18 Preparation 2 - Loading Paper
Page 21

1 PREPARATION
1.PREPARATION
Recommended paper
To ensure the best copy performance, the paper types listed below are recommended. If you want to use paper other than
that we recommend, contact your service technician.
Paper type Product name
Plain paper A/B format: TGIS Paper/Mondi
LT format: TIDAL/Hammermill
K format: Classic Jetset COPY PAPER/UPM
Thick paper 1 A/B format: Color Copy/Mondi
LT format: Laser/Hammermill
A/B format: Color Copy/Mondi
Thick paper 2 A/B format: Color Copy/Mondi
LT format: Laser/Hammermill
A/B format: Color Copy/Mondi
LT format: Exact Index/WAUSAU
Tracing paper Tracing paper/Ostrich International
Sticker labels A/B format: 3478/ZWECH-AVERY
LT format: 5165/AVERY
Transparencies
Envelope COM10/ColumbianCO138/Westvaco,
*1 Be sure to use the recommended overhead transparencies. Using other transparencies could cause an equipment malfunction.
*1
A/B format: PP2500/3M
LT format: X10.0/FOLEX
No.553/Monarch/mailwell
80 g/m
70 g/m
90 g/m
100 g/m
120 g/m
160 g/m
75 g/m
2
, 20 lb. Bond
2
2
, 24 lb. Bond
2
2
, 32 lb. Bond
2
, 90 lb. Index
2
, 20 lb. Bond
Paper types not acceptable
Do not use the types of paper listed below since they may cause paper misfeeds.
Damp paper
Creased paper
Wrinkled paper or paper prone to be curled
Extremely smooth or rough surface paper
Do not use the types of paper listed below since they may cause an equipment malfunction.
Paper whose surface is specially treated
Paper once printed with other copiers or prin te rs
Storing paper
Note the following points when storing paper.
Wrap the paper in its packaging to prevent it from gathering dust.
Do not expose the paper to direct sunlight.
Do not store the paper in a humid location.
Store the paper on a flat surface to prevent it from becoming curled or creased.
Preparation 2 - Loading Paper 19
Page 22

1 PREPARATION
Loading paper in the drawer
For the acceptable paper, see the following page:
P.18 “Acceptable paper types”
Turn the power of the equipment ON.
1
Pull out the drawer carefully, and then press down the paper plate.
2
2
1
Press it down until you hear a click sound and it is no longer lifted up.
Remove the side guides.
3
1
2
2
Attach the side guides according to the paper size.
4
20 Preparation 2 - Loading Paper
Page 23

1.PREPARATION
5
1 PREPARATION
Load paper face up in the drawer.
Up to 250 sheets (80 g/m2 or 20 lb. Bond) can be loaded. Be sure that the height of the stacked paper does
not exceed the line indicated inside of the side guides.
P.18 “Acceptable paper types”
Fan the paper well before loading it in the drawer, otherwise multiple feeding could occur. Be careful not to
cut your fingers.
The printable side may be noted on its packaging.
Move the end guide to the trailing edge of the paper while pushing its lower part in the
6
direction of the arrows.
Widen the gap with both hands.
Push the drawer straight into the equipment slowly until it stops.
7
Do not catch your fingers in the drawer when closing it.
This could cause injury.
Register the paper size into the equipment.
When you load paper in the drawer for the first time, register the paper size. Be sure to register it correctly,
otherwise it could cause a paper misfeed.
For the registration, see the following page:
P.27 “Preparation 3 - Registering Paper Size and Type”
Be sure to register the paper size each time you have changed it.
Preparation 2 - Loading Paper 21
Page 24

1 PREPARATION
Loading paper on the bypass tray
The contents of the original(s) are rotated when copied on paper of the following sizes fed from the bypass tray.
A/B format: A3, A4-R, A5-R, B4, B5-R, FOLIO
L T format: LD, LG, LT-R, ST-R, COMP, 13"LG, 8.5"SQ
K format: 8K, 16K-R
For example, to copy an A5-size original, place the original on the original glass in A5 portrait orientation and paper on
the bypass tray in A5 landscape orientation (A5-R).
To enlarge an A4-siz e original to A3, place the original on the original glass in A4 portrait orientation and A3 paper on
the bypass tray.
The illustrations below are example of loading A4/L T size paper.
For the acceptable paper, see the following page:
P.18 “Acceptable paper types”
Open the bypass tray.
1
Pull the paper holding lever out, and then load paper face down and straight on the
2
bypass tray.
1
2
The printable side may be noted on its packaging.
22 Preparation 2 - Loading Paper
Page 25

1.PREPARATION
1
2
3
1 PREPARATION
Align the side guides with the edges of the paper, and then push back the lever.
1
Up to 50 sheets of plain paper (80 g/m2 or 20 lb. Bond) can be loaded. Be sure that the height of the stacked
paper does not exceed the indicators of the side guides. If paper other than plain is used, set it one sheet at
a time.
Fan the paper well before loading it on the bypass tray, otherwise multiple feeding could occur. Be careful
not to cut your fingers.
Do not push the paper forcibly into the entrance of the bypass feeder, otherwise it could cause a paper
misfeed.
When you use paper longer than the bypass tray size, pull out the paper holder from the tray, and then open it.
2
Preparation 2 - Loading Paper 23
Page 26

1 PREPARATION
2
5 687
3
4
91110
1
Loading an envelope on the bypass tray
For the acceptable envelope sizes, see the following page:
P.18 “Acceptable paper types”
Notes for using envelopes
Do not use the following envelopes, otherwise they may cause a paper misfeed or damage to the equipment.
1. Badly curled, wrinkled or folded envelopes
2. Extremely thick or thin envelopes
3. Wet or damp envelopes
4. Torn envelopes
5. Envelopes which include the contents
6. Non-standard size envelopes (ones with a special shape)
7. Envelopes with eyelets or windows
8. Envelopes sealed with adhesive paste or tape
9. Partly-opened or perforated envelopes
10.Envelopes with special coating on the surface
11. Envelopes with glue or double-sided adhesive tape
Store envelopes at room temperature and away from heat and moisture.
24 Preparation 2 - Loading Paper
Page 27

1.PREPARATION
1
1 PREPARATION
Place an envelope on a flat clean surface and press it with your hands in the arrow
directions as shown below to expel air from the inside.
Press it well to prevent the flap from rolling upward.
Correct bent corners of the envelope.
Open the bypass tray.
2
Pull the paper holding lever out, and then load the envelope face down on the bypass
3
tray.
Place the envelope with its flap side at the front as shown below.
1
2
Do not copy or print on the back of envelopes, otherwise it may cause a paper misfeed or soil them or the inside
of the equipment.
Preparation 2 - Loading Paper 25
Page 28

1 PREPARATION
Align the side guides to the edges of the envelope, and then push back the lever.
4
1
2
26 Preparation 2 - Loading Paper
Page 29

Preparation 3 - Registering Paper Size and Type
When you load or change paper, a pop-up window appears. Follow the instructions to register the items below in the
equipment.
For the drawer: the paper size
For the bypass tray: the paper size and type
You can also register the paper size for the drawer in the “USER FUNCTIONS” menu.
P.123 “User Functions Menu List”
1 PREPARATION
Preparation 3 - Registering Paper Size and Type 27
Page 30

Page 31

2.COPY FUNCTIONS
Basic Copy Procedure...........................................................................................................30
Acceptable originals.............................................................................................................................................30
Copying originals..................................................................................................................................................31
Copy Settings.........................................................................................................................36
Adjusting the exposure.........................................................................................................................................36
Selecting the original mode..................................................................................................................................37
Selecting the paper...............................................................................................................................................38
Enlarging or reducing the copy size.....................................................................................................................40
Sorting pages .......................................................................................................................................................44
Copying two or four pages on each sheet............................................................................................................45
Copying both sides of a card on a sheet......................................... ................................. ....................................47
Erasing the shadow on edges..............................................................................................................................48
Shifting the pages to the right or left.....................................................................................................................49
Copying on both sides..........................................................................................................................................50
Adding a page number and date/time on the copied paper..................................................................................51
Removing blank pages.........................................................................................................................................51
Image direction.....................................................................................................................................................52
Confirming the current function settings ...............................................................................................................52
Using Templates (Copy) ........................................................................................................53
Registering the templates.....................................................................................................................................53
Recalling a template.............................................................................................................................................54
Page 32

2 COPY FUNCTIONS
Basic Copy Procedure
Learn the basic copy procedure in this section. For the other various functions, see the following page:
P.36 “Copy Settings”
Make sure that the equipment is ready to copy.
P.16 “Preparation 1 - Turning Power ON”
P.18 “Preparation 2 - Loading Paper”
P.27 “Preparation 3 - Registering Paper Size and Type”
Acceptable originals
Acceptable originals differ depending on the setting position. See the table below for more details.
If you are using the Automatic Document Feeder, you can automatically scan a stack of plain paper originals at one time.
Setting position Type Maximum size
Original glass Plain paper
Special paper
Booklets
Automatic Document
Feeder
*1 The automatic size detection function is only available when the Automatic Document Feeder is installed.
*2 The maximum number of sheets acceptable varies depending on the type of original.
Plain paper
(50 - 104 g/m
Bond)
2
, 13 - 27 lb.
A4 or LT - -
A3 or LD Other than North America and
Acceptable sizes for
automatic size detection
China:
A3, A4, A4-R, A5-R, B4, B5, B5-R
North America:
LD, LG, LT, LT-R, ST-R, COMP
China:
A3, A4, A4-R, A5-R, 8K, 16K,
16K-R
Maximum number of
*1
50 sheets (80 g/m
Bond)
(or stack height 9.5 mm)
sheets
2
, 20 lb.
*2
Maximum number of originals scanned at one time
You can scan up to 50 original sheets at one time. When the number of sheets to be scanned exceeds 50 or the built-in
memory in the equipment is full, scanning stops and an error message is displayed on the LCD screen. Press any button
on the control panel to delete the scanned data.
Precautions for Automatic Document Feeder
Do not use the following types of original as they may cause a paper misfeed or damage to the equipment:
Originals that are folded or curled
Originals with carbon copies
Originals that have been taped, pasted, or cut-out
Originals that have been clipped or stapled
Originals with holes or tears
Originals that are damp
Overhead transparencies or tracing paper
Coated paper (e.g. coated with wax)
Originals with multiple holes punched (e.g. loose leaf paper)
The following types of originals can be used but need extra care:
Originals that you cannot slide with your fingers or whose surface is specially treated (they may not be able to be
separated from each other at feeding)
Originals that are folded or curled (should be smoothed out before being used)
When black streaks appear
If the scanning area or the guide area is dirty, image problems such as black streaks may occur. W eekly cleaning of these
areas is recommended.
P.146 “Regular Cleaning”
30 Basic Copy Procedure
Page 33

2.COPY FUNCTIONS
Copying originals
Follow the common basic instructions below to make a copy.
Place the original(s).
1
Placing originals on the original glass
1) Raise the platen cover or the Automatic Document Feeder.
2) Place the original face down on the original glass.
3) Align the original with the top-left corner of the original glass.
4) Lower the platen cover or the Automatic Document Feeder carefully.
2 COPY FUNCTIONS
Do not place heavy objects (4 kg/8.8 lb. or over) on the original glass and do not force it down.
It may breaks the glass and could cause injury.
When you copy originals with folds or wrinkles, smooth out the folds and wrinkles first. Then, place the
original on the original glass and close the platen cover or the Automatic Document Feeder to start copying.
If a shadow of the folds or wrinkles appears on copies although you smooth out them, adjust the exposure
or use the “BACKGROUND ERASE” function.
When you place a booklet-type original, strong light may leak out while copying. Do not look directly at the
original glass.
When you place a thick booklet, do not close the Platen Cover or the Automatic Document Feeder
forcefully; you can still make copies without closing the cover or feeder.
If the size of the original is not detected correctly, set the size manually.
P.40 “Enlarging or reducing the copy size”
When you use the transparent original such as overhead transparencies and tracing paper, place a blank plain
sheet of paper - the same size or a larger sheet - over the original, otherwise the copied image could be
stained.
Basic Copy Procedure 31
Page 34

2 COPY FUNCTIONS
Placing originals on the Automatic Document Feeder
1) Align all the originals.
2) Place them face up and align the side guides to the original length.
The top sheet of the originals will be scanned first.
Do not load more than 50 originals (80 g/m2, 20 lb. Bond) at once, and make sure the thickness of the stack
When placing long originals (A3, B4, A4-R, LD, LG, COMP, or 8K), open the original holder so that the size
of originals does not exceed 9.5 mm regardless of their size.
of the original can be detected correctly.
To prevent long originals (A3, B4, A4-R, LD, LG, COMP, or 8K) from sliding out, extend the paper exit
stopper and raise the sub-stopper. When you have finished using the stopper, lift it slightly and slide it back
in.
1
2
To prevent misfeeding, do not leave originals or turn OFF/ON the equipment with originals on the Automatic
Document Feeder.
32 Basic Copy Procedure
Page 35

2.COPY FUNCTIONS
Enter the number of copies with the digital keys.
2
Make the copy settings as required.
3
P.36 “Copy Settings”
2 COPY FUNCTIONS
You may not be able to use some combinations of functions.
P.154 “Copying Function Combination Matrix”
Press [START] to start copying.
4
To stop or resume copying, press [CLEAR/STOP] during copying.
Press [OK] or [CANCEL] according to the message displayed on the LCD screen.
When the copying has finished, press [FUNCTION CLEAR] to clear the set copy functions and return to the main
screen (Copy).
If the paper source runs out of paper, an error message is displayed on the LCD screen and copying stops. Load
paper. The equipment automatically resumes copying after approx. 3 seconds have passed.
The receiving tray can hold up to 100 sheets. If the excessive paper error occurs, the lamp blinks and an error
message is displayed on the LCD screen. Remove the paper from the tray and press [START] to resume copying.
When you use overhead transparencies, remove them one by one every time they are ejected. Otherwise, they
could be curled and not be good for projection.
Basic Copy Procedure 33
Page 36

2 COPY FUNCTIONS
AUTO EXPOSURE
TEXT/PHOTO
A4
1
READY
100%
EXPOSURE
AUTO
AUTO EXPOSURE
TEXT/PHOTO
A4
1
READY
100%
ID CARD
OFF
ON
Shortcut keys
You can access some functions by simply pressing the and button.
P.34 “Using the “EXPOSURE” or “ID CARD” function quickly”
P.35 “Selecting “ORIGINAL MODE” quickly”
Using the “EXPOSURE” or “ID CARD” function quickly
On the first screen of Copy mode, the button function varies depending on the region. It can work as the [EXPOSURE]
button for Europe and the Americas, or the [ID CARD] button for regions other than Europe and the Americas. Just press
the button to access the “EXPOSURE” or “ID CARD” function so that you can change the copy density, or you can copy
the front and back of a card on a sheet of paper.
P.36 “Adjusting the exposure”
P.47 “Copying both sides of a card on a sheet”
For Europe and the Americas
For regions other than Europe and the Americas
34 Basic Copy Procedure
Page 37

2.COPY FUNCTIONS
AUTO EXPOSURE
TEXT/PHOTO
A4
1
READY
100%
ORIGINAL MODE
TEXT/PHOTO
TEXT
PHOTO
AUTO EXPOSURE
TEXT/PHOTO
A4
1
READY
100%
ORIGINAL MODE
TEXT/PHOTO
TEXT
PHOTO
Selecting “ORIGINAL MODE” quickly
On the first screen of Copy mode, the button can work as the [ORIGINAL MODE] button. Just press the button to
access the “ORIGINAL MODE” function so that you can change the original mode.
P.37 “Selecting the original mode”
For Europe and the Americas
2 COPY FUNCTIONS
For regions other than Europe and the Americas
Basic Copy Procedure 35
Page 38

2 COPY FUNCTIONS
Copy Settings
You can make the copy settings on the copy functions menu.
Press [CANCEL] to exit from the setting without making any changes.
Adjusting the exposure
You can adjust the density to make copies lighter or darker in nine levels from -4 to +4. The auto density setting can
represent the copy image in the middle density status.
You can directly access this function by pressing . The button operation varies depending on the region.
For Europe and the Americas:
P.34 “Using the “EXPOSURE” or “ID CARD” function quickly”
READY
100%
AUTO EXPOSURE
TEXT/PHOTO
1
A4
Menu Functions Settings Description
EXPOSURE AUTO Adjusts the density automatically.
Manual Adjusts the density manually.
Press or to select the item displayed on the LCD screen, and then press .
1
Press or to select the setting item.
2
Adjust the density as follows.
3
For “AUTO”:
Press [OK].
For manual:
1) Press or to increase or decrease the density level.
2) Press [OK].
36 Copy Settings
Page 39

2.COPY FUNCTIONS
Selecting the original mode
You can select suitable original image to copy.
You can directly access this function by pressing .
P.35 “Selecting “ORIGINAL MODE” quickly”
Menu Functions Settings Description
ORIGINAL MODE TEXT/PHOTO Text and photographs mixed.
TEXT Text only or text and fine illustration only.
PHOTO Photographs only.
BACKGROUND ERASE Dark background is placed.
READY
100%
AUTO EXPOSURE
TEXT/PHOTO
1
A4
2 COPY FUNCTIONS
Press or to select the item displayed on the LCD screen, and then press .
1
Press or to select the setting item, and then press [OK].
2
Copy Settings 37
Page 40

2 COPY FUNCTIONS
Selecting the paper
You can select the paper source in which the paper of the desired size and type is loaded.
P.18 “Acceptable paper types”
Selecting the paper source
READY
100%
TEXT/PHOTO
1
A4
Menu Functions Settings D escri pti on
DRAWER Drawer 1 XX Uses the drawer as the paper source. The variable “XX” indicates
Bypass XX Uses the bypass tray as the paper source. Available only when
APS Automatic Paper Selection. Detects the size of the original and
1
A4
the paper size.
the paper is loaded on the bypass tray. The variable “XX”
indicates the paper size.
selects paper of the same size automatically . A vailable only when
the original is placed on the Automatic Document Feeder.
This function may not work properly for totally dark originals or originals with dark borders.
When placing long originals (A3, B4, A4-R, LD, LG, COMP, or 8K), open the original holder
so that the size of the original can be detected correctly.
For the detectable original sizes, see the following page:
P.30 “Acceptable originals”
Press or to select the item displayed on the LCD screen, and then press .
1
Press or to select the setting item.
2
To select the paper size:
1) Press .
2) Press or to select the paper size, and then press [OK].
To accept the setting:
Press [OK].
38 Copy Settings
Page 41

2 COPY FUNCTIONS
2.COPY FUNCTIONS
Selecting the bypass tray automatically
When you load paper into the bypass tray, the paper source automatically changes from the drawer to the bypass tray.
The LCD screen automatically changes so that you can easily set the paper size and type for the bypass tray.
Press or to select the paper size, and then press [OK].
1
BYPASS
A3
A4
A4-R
Press or to select the paper type, and then press [OK].
2
BYPASS PAPER TYPE
PLAIN
THICK1
THICK2
Remove the paper from the bypass tray after copying is finished. The paper source automatically changes back to the
drawer.
Copy Settings 39
Page 42

2 COPY FUNCTIONS
Enlarging or reducing the copy size
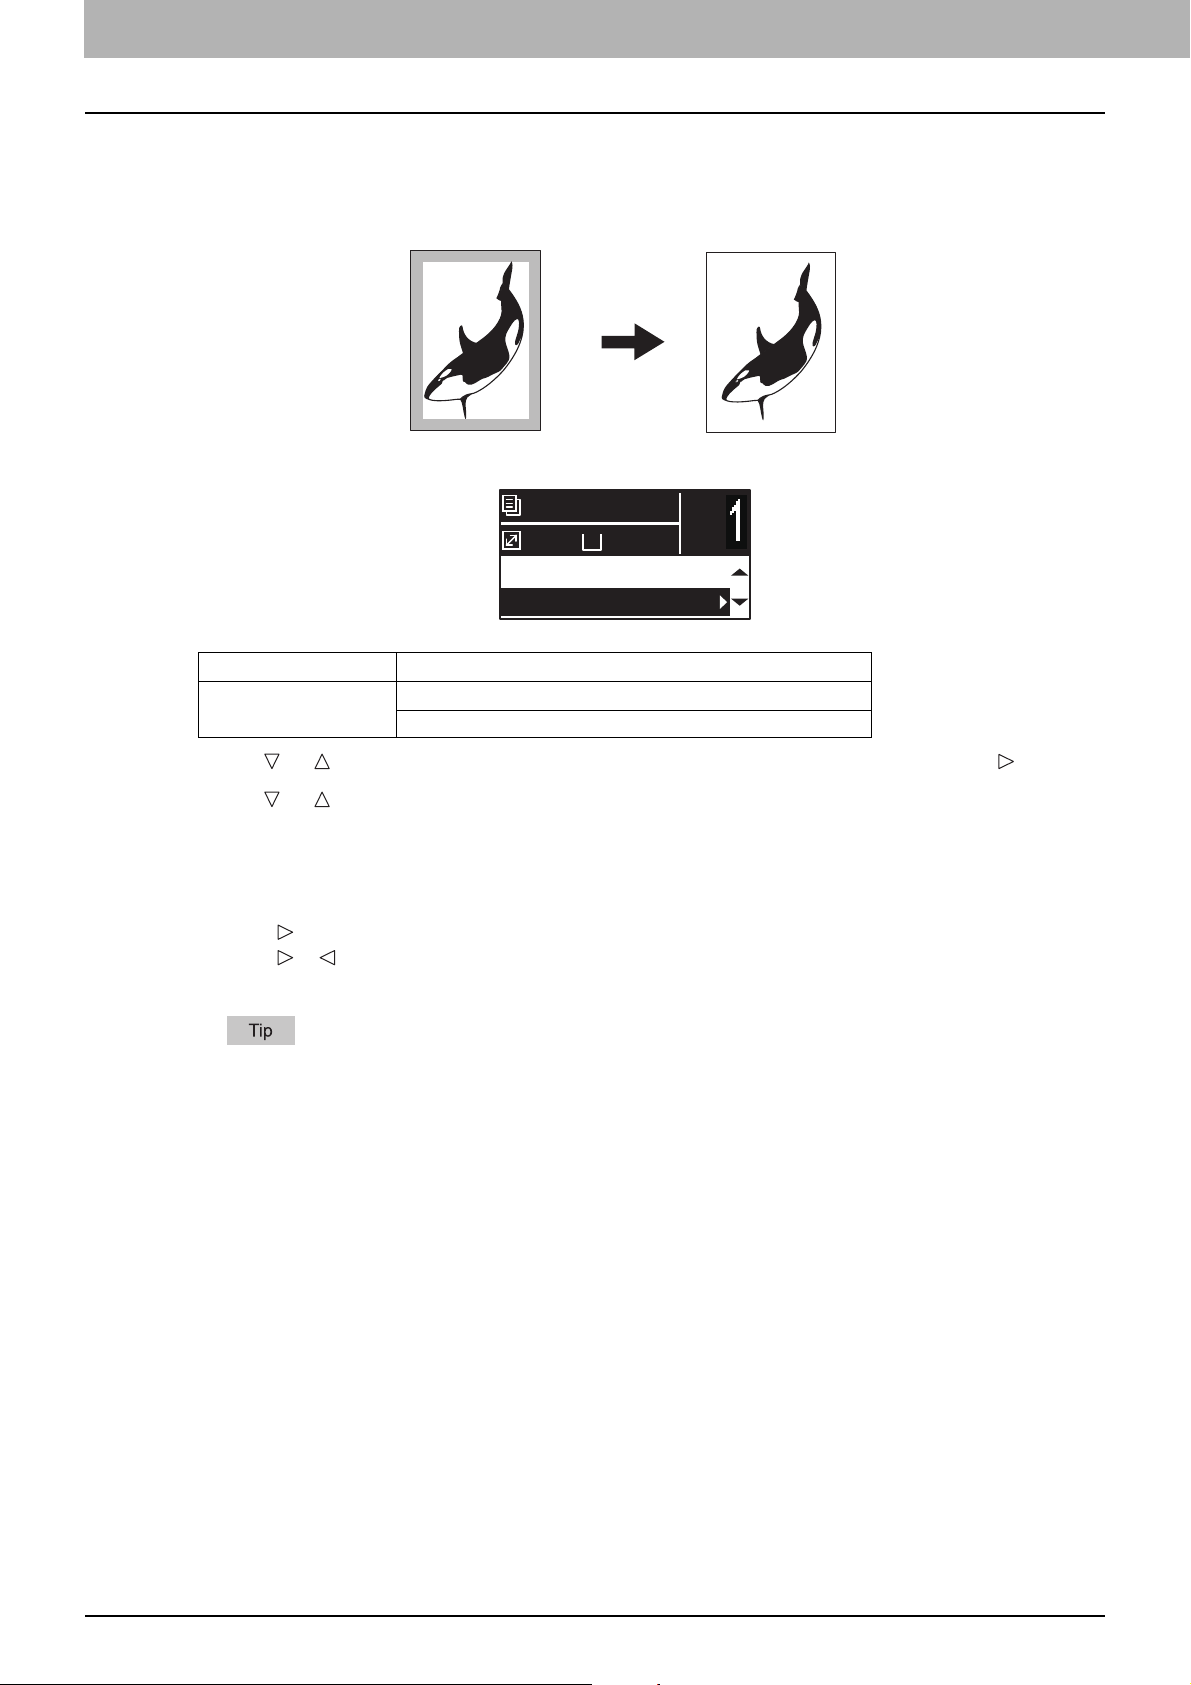
You can enlarge or reduce the size of copies in the following three ways.
Specify the ratio manually ( P.40)
Select a fixed zoom ratio ( P.41)
Automatic Magnification Selection (AMS) ( P.42)
Specifying the ratio manually
READY
100%
1
A4
100%
Menu Functions Settings Description
ZOOM Manual zoom (25 - 100 - 400%) Adjusts the ratio manually.
FIXED ZOOM A/B format:
71% (A4 -> A5), 141% (A4 -> A3 / A5 -> A4),
200% (A5 -> A3), 300%, 400%
LT format:
65% (LT -> ST), 100% (LT -> LG),
129% (LT -> LD / ST-> LT),
154% (ST -> LG), 200% (ST -> LD), 300%,
400%
K format:
71% (A4 -> A5), 76% (16K -> A5),
91% (A4 -> 16K), 108% (16K -> A4),
129% (A4 -> 8K / A5 -> 16K),
138% (16K -> 8K),
141% (A4 -> A3 / A5 -> A4),
152% (16K -> A3), 182% (A5 -> 8K),
200% (A5 -> A3), 300%, 400%
AMS P.42 “Automatic magnification
1
A4
P.41 “Selecting a fixed zoom ratio”
selection (AMS)”
Press or to select the item displayed on the LCD screen, and then press .
1
Press or to select the setting item for manual zoom.
2
When manual zoom is already selected, this step is not necessary.
Press or to increase or decrease the zoom ratio, and then press [OK].
3
You can keep pressing the button to adjust the ratio quickly.
ZOOM
- 100% +
FIXED ZOOM
AMS
AMS
To make an enlarged or reduced copy of an original in portrait direction placed on the original glass onto a paper in
landscape direction, set a fixed zoom ratio.
P.41 “Selecting a fixed zoom ratio”
To make an enlarged or reduced copy of an original in portrait direction placed on the Automatic Document Feeder
onto a paper in landscape direction, select “AMS” for zoom ratio.
P.42 “Automatic magnification selection (AMS)”
40 Copy Settings
Page 43

2.COPY FUNCTIONS
Selecting a fixed zoom ratio
Menu Functions Settings Description
ZOOM Manual zoom (25 - 100 - 400%) P.40 “Specifying the ratio
FIXED ZOOM A/B format:
AMS P.42 “Automatic magnification
READY
1
A4
1
100%
A4
100%
71% (A4 -> A5), 141% (A4 -> A3 / A5 -> A4),
200% (A5 -> A3), 300%, 400%
LT format:
65% (LT -> ST), 100% (LT -> LG),
129% (LT -> LD / ST-> LT),
154% (ST -> LG), 200% (ST -> LD), 300%,
400%
K format:
71% (A4 -> A5), 76% (16K -> A5),
91% (A4 -> 16K), 108% (16K -> A4),
129% (A4 -> 8K / A5 -> 16K),
138% (16K -> 8K),
141% (A4 -> A3 / A5 -> A4),
152% (16K -> A3), 182% (A5 -> 8K),
200% (A5 -> A3), 300%, 400%
2 COPY FUNCTIONS
manually”
Selects a fixed zoom ratio.
selection (AMS)”
Press or to select the item displayed on the LCD screen, and then press .
1
Press or to select “FIXED ZOOM”, and then press .
2
ZOOM
- 100% +
FIXED ZOOM
AMS
AMS
Press or to select a zoom ratio, and then press [OK].
3
To make an enlarged or reduced copy of an original in portrait direction placed on the original glass onto a paper in
landscape direction, set a fixed zoom ratio.
P.41 “Selecting a fixed zoom ratio”
To make an enlarged or reduced copy of an original in portrait direction placed on the Automatic Document Feeder
onto a paper in landscape direction, select “AMS” for zoom ratio.
P.42 “Automatic magnification selection (AMS)”
Copy Settings 41
Page 44

2 COPY FUNCTIONS
Automatic magnification selection (AMS)
READY
100%
1
A4
100%
Menu Functions Settings Description
ZOOM Manual zoom (25 - 100 - 400%) P.40 “Specifying the ratio
FIXED ZOOM A/B format:
71% (A4 -> A5), 141% (A4 -> A3 / A5 -> A4),
200% (A5 -> A3), 300%, 400%
LT format:
65% (LT -> ST), 100% (LT -> LG),
129% (LT -> LD / ST-> LT),
154% (ST -> LG), 200% (ST -> LD), 300%,
400%
K format:
71% (A4 -> A5), 76% (16K -> A5),
91% (A4 -> 16K), 108% (16K -> A4),
129% (A4 -> 8K / A5 -> 16K),
138% (16K -> 8K),
141% (A4 -> A3 / A5 -> A4),
152% (16K -> A3), 182% (A5 -> 8K),
200% (A5 -> A3), 300%, 400%
AMS Detects the size of the original and
1
A4
manually”
P.41 “Selecting a fixed zoom ratio”
automatically sets the optimum zoom
ratio for the paper size. Available only
when the original is placed on the
Automatic Document Feeder.
This function may not work properly for totally dark originals or originals with dark borders.
When placing long originals (A3, B4, A4-R, LD, LG, COMP, or 8K), open the original holder so
that the size of the original can be detected correctly.
For the detectable original sizes, see the following page:
P.30 “Acceptable originals”
Press or to select the item displayed on the LCD screen, and then press .
1
Press or to select “AMS”, and then press [OK].
2
ZOOM
- 100% +
FIXED ZOOM
AMS
AMS
42 Copy Settings
Page 45

2.COPY FUNCTIONS
To make an enlarged or reduced copy of an original in portrait direction placed on the original glass onto a paper in
landscape direction, set a fixed zoom ratio.
P.41 “Selecting a fixed zoom ratio”
To make an enlarged or reduced copy of an original in portrait direction placed on the Automatic Document Feeder
onto a paper in landscape direction, select “AMS” for zoom ratio.
P.42 “Automatic magnification selection (AMS)”
2 COPY FUNCTIONS
Copy Settings 43
Page 46

2 COPY FUNCTIONS
Sorting pages
You can sort a number of copied pages in the same order as the original.
NON SORT: Not to sort the copied pages. All copies of the first page are ejected first and then all copies of
subsequent pages are ejected in sequence.
SORT: Sorts the copied pages in the same order as the original and eject all sets of copies in the same
orientation.
When an original is placed on the Automatic Document Feeder, “SORT” is automatically set.
READY
100%
100%
NON SORT
Menu Functions Settings
FINISHING NON SORT
SORT
Press or to select the item displayed on the LCD screen, and then press .
1
Press or to select the setting item, and then press [OK].
2
Specify the number of copies to “2” or more.
3
P.31 “Copying originals”
When placing the original on the original glass
After the first original is scanned, the LCD screen shows “NEXT ORIGINAL?”.
Make sure that “SCAN NEXT PAGE” is selected, place the next original on the original glass, and then press [OK] or
[START]. When all the originals have been scanned, select “FINISHED”, and then press [OK] or [START].
1
A4
“CANCEL JOB?” is displayed if there is no operation for a certain period.
44 Copy Settings
Page 47

2.COPY FUNCTIONS
Copying two or four pages on each sheet
You can copy two or four original pages on each sheet of paper.
OFF: Disables this function.
2IN1: Copies two pages on a sheet of paper.
4IN1: Copies four pages on a sheet of paper.
2 COPY FUNCTIONS
Be sure the [Paper size], [EXPOSURE] and the like are set before selecting [2IN1/4IN1].
You need to make settings to use the “2IN1/4IN1” function from “USER FUNCTIONS” - “COPY” - “2IN1/4IN1”.
P.124 “User functions menu items”
This function is not available for some paper sizes. If you have set the unavailable sizes, the LCD screen shows the
error message and you cannot use this function.
P.18 “Preparation 2 - Loading Paper”
P.27 “Preparation 3 - Registering Paper Size and Type”
Copying without specifying paper size and direction of the original pages may result in unexpected page allocation
order or image position.
READY
100%
1
A4
NON SORT
2IN1/4IN1:OFF
Menu Functions Settings
2IN1/4IN1 OFF
2IN1
4IN1
Press or to select the item displayed on the LCD screen, and then press .
1
Press or to select the setting item, and then press .
2
Copy Settings 45
Page 48

2 COPY FUNCTIONS
Follow the instructions on the LCD screen to use the “2IN1/4IN1” function. You are
3
instructed to make the following settings.
ORIGINAL SIZE
Press or to select the size of the original.
ORIGINAL ORIENTATION
Press or to select the portrait or landscape orientation of the original.
SET ORIGINAL
Place the originals as shown on the LCD screen. Make sure that you place the original in the same orientation
as the one selected in “ORIG . ORIENTATION”.
NEXT ORIGINAL?
When you place the original on the original glass, this message appears. Press or to select “SCAN NEXT
PAGE”. Select “FINISHED” when you have finished scanning your originals.
When you place the original on the Automatic Document Feeder, the size of the original selected in
For original sizes not supported by the Automatic Document Feeder, specify [ORIGINAL SIZE] and place
“CANCEL JOB?” is displayed if there is no operation for a certain period.
[ORIGINAL SIZE] is disabled as it is detected automatically.
the original on the original glass.
46 Copy Settings
Page 49

2.COPY FUNCTIONS
Front side Back side
Copying both sides of a card on a sheet
You can copy the front and back of a card on a sheet of paper.
You can directly access this function by pressing . The button operation varies depending on the region.
For regions other than Europe and the Americas:
P.34 “Using the “EXPOSURE” or “ID CARD” function quickly”
2 COPY FUNCTIONS
Be sure to set the paper size and density, etc. before selecting [ID CARD].
READY
100%
2IN1/4IN1:OFF
ID CARD:OFF
Menu Functions Settings
ID CARD OFF
ON
Press or to select the item displayed on the LCD screen, and then press .
1
Press or to select the setting item, and then press [OK].
2
Follow the instructions on the LCD screen to use the “ON” function. You are instructed
3
to make the following settings.
SET FRONT OF ID CARD
Place the front of a card face down on the original glass, and then press [START].
Make sure that you place the card in a landscape orientation within the frame of the original scale.
1
A4
SET BACK OF ID CARD
Turn over the card and place the back surface face down on the original glass, and then press [START].
“CANCEL JOB?” is displayed if there is no operation for a certain period.
Copy Settings 47
Page 50
2 COPY FUNCTIONS
Erasing the shadow on edges
You can erase the shadow on the edges of copies. When you copy thick books, you can erase the surrounding shadow
with this function. The area to erase can be changed from 4 mm to 15 mm (0.2" to 0.6") in increments of 1 mm (0.04").
READY
100%
ID CARD:OFF
EDGE ERASE:OFF
1
A4
Menu Functions Settings
EDGE ERASE OFF
ON
Press or to select the item displayed on the LCD screen, and then press .
1
Press or to select the setting item.
2
Set the setting as follows.
3
For “OFF”:
Press [OK].
For “ON”:
1) Press .
2) Press or to increase or decrease the value for the area to erase.
3) Press [OK].
If you just press [OK] for “ON”, the default value (7 mm (0.3")) of this function is used.
48 Copy Settings
Page 51

2.COPY FUNCTIONS
Shifting the pages to the right or left
You can shift pages to the right or left. The shifted area can be used as a margin for punching holes or stapling. The
margin can be changed from 4 mm to 15 mm (0.2" to 0.6") in increments of 1 mm (0.04").
READY
100%
EDGE ERASE:OFF
IMAGE SHIFT:OFF
1
A4
2 COPY FUNCTIONS
Menu Functions Settings
IMAGE SHIFT OFF
LEFT MARGIN
RIGHT MARGIN
Press or to select the item displayed on the LCD screen, and then press .
1
Press or to select the setting item.
2
Set the setting as follows.
3
For “OFF”:
Press [OK].
For “LEFT MARGIN” or “RIGHT MARGIN”:
1) Press .
2) Press or to increase or decrease th e value for the margin.
3) Press [OK].
If you just press [OK] for “ON”, the default value (7 mm (0.3")) of this function is used.
Copy Settings 49
Page 52

2 COPY FUNCTIONS
A4
1
READY
100%
IMAGE SHIFT:OFF
1 > 1 SIMPLEX
Copying on both sides
Y ou can copy 1-sided or 2-sided originals on the both side of p aper. You can make copies of 1-sided originals into the both
sides of paper so that you can save paper.
1 > 2 DUPLEX
For 2-sided printing, use plain paper (64 to 80g/m2, 17 to 20 lb Bond).
Menu Functions Settings Description
2-SIDED 1 > 1 SIMPLEX 1-sided original -> 1-sided copy.
1 > 2 DUPLEX 1-sided original -> 2-sided copy.
Press or to select the item displayed on the LCD screen, and then press .
1
Press or to select the item for copying on both sides, and then press .
2
Press or to select the finishing mode, and then press [OK]. Select “BOOK” for
3
“open to left”, or “TABLET” for “open to top”.
When placing the original on the original glass
After the first original is scanned, the LCD screen shows “NEXT ORIGINAL?”.
Make sure that “SCAN NEXT PAGE” is selected, place the next original on the original glass, and then press [OK] or
[START]. When all the originals have been scanned, select “FINISHED”, and then press [OK] or [START].
“CANCEL JOB?” is displayed if there is no operation for a certain period.
50 Copy Settings
Page 53

2.COPY FUNCTIONS
A4
1
READY
100%
IMAGE SHIFT:OFF
ANNOTATION:OFF
1 3
5 6
1 3
5 6
Adding a page number and date/time on the copied paper
You can add a page number and date/time on the copied paper.
Menu Functions Settings
ANNOTATION OFF
PAGE NO.
PAGE No.+DATE/TIME
2 COPY FUNCTIONS
Press or to select the item displayed on the LCD screen, and then press .
1
Press or to select the setting item, and then press [OK].
2
Removing blank pages
You can skip blank pages in the original when copying.
READY
100%
ANNOTATION:OFF
OMIT BLANK:OFF
1
A4
1
2
Menu Functions Settings
OMIT BLANK PAGE
OFF
ON
Press or to select the item displayed on the LCD screen, and then press .
Press or to select the setting item, and then press [OK].
Copy Settings 51
Page 54

2 COPY FUNCTIONS
No setting“IMAGE DIRECTION” set
A4
1
READY
100%
OMIT BLANK:OFF
IMAGE DIRECTION:ON
Image direction
When you make 1-sided portrait originals to 2-sided copy by placing them in a landscape direction, normally the copied
pages are “open to top”. With this function you can make them “open to left”. This function is called “image direction”.
1-sided portrait original (placed in a landscape direction) -> 2-sided copy
Menu Functions Settings
IMAGE DIRECTION OFF
ON
Press or to select the item displayed on the LCD screen, and then press .
1
Press or to select the setting item, and then press [OK] or .
2
Confirming the current function settings
Press [SETTINGS].
1
Press or to scroll through the menu.
2
For details on the displayed functions and settings, see the pages below.
P.118 “Copy menu items”
When you are finished with confirmation, press [SETTINGS] again.
3
52 Copy Settings
Page 55

2 COPY FUNCTIONS
Using Templates (Copy)
Once you have set the several functions and settings, you can register up to three of them as “templates” and recall one of
them for frequent use.
Registering the templates
Make settings for the functions to register as a template.
1
Press [TEMPLAT E].
2
Press or to select “REGISTRATION”, and then press .
3
TEMPLATE
RECALL
REGISTRATION
Press or to select a template, and then press [OK].
4
You can register three templates for copying.
The settings are overwritten if you select an existing template.
You can also register and edit templates with TopAccess. For details, refer to theTopAccess Guide.
You can specify the following items in copy templates.
No. Item Name Settings
1 Copy Quantity 1-999
2 Exposure AUTO, MANUAL(±4)
3 Original Mode TEXT/PHOTO, TEXT, PHOTO, BACKGROUND ERASE
4 Paper Source Drawer 1, Bypass, APS
5 Zoom 25~400%, AMS
6 Finishing NON SORT, SORT
7 Nin1 OFF, 2IN1, 4IN1
8 Nin1-Original size
9 Nin1-Original orientation PORT., LAND.
10 ID Card OFF, ON
11 Edge Erase OFF, ON
12 Edge Erase Adjustment 4~15
13 Image Shift OFF, LEFT, RIGHT
14 Image Shift Adjustment 4~15
15 2-Sided 1>1 SIMPLEX, 1>2 DUPLEX
16 2-Sided BOOK, TABLET
17 Annotation OFF, PAGE NO., PAGENO.+DATE/TIME
18 Omit Blank Page OFF, ON
19 Image Direction OFF, ON
Using Templates (Copy) 53
Page 56

2 COPY FUNCTIONS
Recalling a template
Press [TEMPLAT E].
1
Press or to select “RECALL”, and then press .
2
TEMPLATE
RECALL
REGISTRATION
Press or to select a template, and then press [OK].
3
54 Using Templates (Copy)
Page 57

3.PRINT FUNCTIONS
Before Using the Printer Driver.............................................................................................56
Configuring the options ........................................................................................................................................56
Printing From Application.....................................................................................................62
Considerations and limitations..............................................................................................................................62
How to print ............................................. .................................. .................................. .........................................62
Status Monitor........................................................................................................................64
Monitoring the print status and reporting print errors............................................................................................64
Setting Up Print Options........................................................................................................65
How to set up ....................... ... .. .................................. .................................. .. .....................................................65
Print options .........................................................................................................................................................68
Printing With Best Functions for Your Needs .....................................................................82
Layout and finishing options in [Basic] tab menu.................................................................................................82
Layout and finishing options in [Finishing] tab menu............................................................................................83
Finishing options in [Effect] tab menu...................................................................................................................88
Page 58

3 PRINT FUNCTIONS
Before Using the Printer Driver
Before printing, you have to configure the following options:
Configuration Settings
To use devices installed in this equipment, you must first configure their options on the [Configuration] tab of the printer
driver.
P.56 “Configuring the options”
Department Code
This system can manage jobs by department codes. This feature allows you to manage job counters for each
department code. For example, a network administrator can check the number of copies printed by a specific
department.
If the department code function is enabled, enter your department code provided by your administrator.
Configuring the options
To use this equipment properly, you need to save the configuration of the options installed on the [Configuration] tab menu
after you installed the p r in te r drivers. In the default setting, you can obtain the configuration data of options installed
automatically by opening the [Configuration] tab menu. If SNMP communication between this equipment and your
computer is not available, or you want to configure options manually, see the following page:
P.56 “Configuring options manually”
When SNMP communication between this equipment and your computer is enabled, you can retrieve the option
configuration information by clicking [Update Now].
Configuring options manually
If SNMP communication between this equipment and your computer is not available:
Setting the [Configuration] tab manually
You need to log in to Windows with the “Administrator” privilege.
Click [Start] and select [Devices and Printers].
1
The Printers folder appears.
For Windows Vista or Windows Server 2008
Click [Start], [Control Panel], [Hardware and Sound] and select [Printers].
For Windows XP or Windows Server 2003
Click [Start] and select [Printers and Faxes].
For Windows 8 or Windows Server 2012, see the procedures in the following section.
P.59 “Accessing the printers folder on Windows 8 / Windows Server 2012”
56 Before Using the Printer Driver
Page 59

3.PRINT FUNCTIONS
Select your printer, and then click [Printer properties] in the [File] menu.
2
The printer driver properties dialog box appears.
3 PRINT FUNCTIONS
For Windows XP / Windows Vista / Windows Server 2003 / Windows Server 2008, click [Properties] in the [File]
menu and select your printer.
If the [File] menu is not displayed, press [Alt].
If the dialog box displayed does not allow the printer driver properties to be changed, follow the procedure
below.
- For Windows Vista, click [Run as administrator] and [Properties] in the [File] menu.
If the password entry screen appears, enter the administrator password.
The [User Account Control] dialog box appears. Click [Continue].
- For Windows 7, some tab menus have a button in the printer driver properties. To change the
properties, click on it. If the properties cannot be changed, ask your system administrator.
Display the [Configuration] tab menu, and set the following options.
3
Model Selection — Select the model name.
Option - Automatic Duplexing Unit — Select this check box when the optional Automatic Duplexing Unit is
installed in the equipment.
Option - Drawers — Select the drawer configuration.
For more information about each item, see the descriptions about the Configuration tab.
P.80 “[Configuration] tab”
Before Using the Printer Driver 57
Page 60

3 PRINT FUNCTIONS
Click [Drawer Settings].
4
The [Drawer Settings] dialog box appears.
Set the following options and click [OK].
5
Drawer 1 — Select the size of paper that is loaded in the Drawer. The paper type for the drawer is fixed to “Plain”.
Bypass Tray — Select the size and type of paper that is loaded in the Bypass Tray.
Setup items differ depending on the model and the option configuration.
For more information about each item, see the descriptions about the Drawer Settings.
P.81 “Drawer Settings”
Click [Apply] or [OK] to save settings.
6
58 Before Using the Printer Driver
Page 61

3.PRINT FUNCTIONS
Accessing the printers folder on Windows 8 / Windows Server 2012
Follow the steps below to access the printers folder on Windows 8 / Windows Server 2012.
Move the cursor to the upper right corner or lower right corner of the computer screen,
1
and then select [Start] in the menu that appears.
3 PRINT FUNCTIONS
The [Start] screen appears.
Right-click in the blank area in the [St art] screen , and then click [All a pps] that appears.
2
The [Apps] screen appears.
Before Using the Printer Driver 59
Page 62

3 PRINT FUNCTIONS
Click [Control Panel].
3
The [All Control Panel Items] screen appears.
Click [Devices and Printers].
4
The [Devices and Printers] folder appears.
Setting the department code
When the department code function is enabled on this equipment, you have to enter your department code to the printer
driver.
This allows a network administrator to check the number of copies printed by specific department.
Ask your administrator whether you should enter the department code. If you should, obtain the department code you
need to enter.
If the department code is required, you can enter the department code into the [Department Code] box of the printer as
described below to save you having to enter the department code each time you print.
If printing is performed with an incorrect department code, a dialog box indicating that it is incorrect appears. In this
case, enter the correct one or stop transmitting. If this dialog box does not appear, the job becomes invalid and is
deleted. An error report is then printed out from this equipment.
A department code needs to be entered every time you begin printing. If you have to use a different department code
for each print job, enter it when you begin printing.
60 Before Using the Printer Driver
Page 63

3.PRINT FUNCTIONS
Entering department code
Click [Start] and select [Devices and Printers].
1
The Printers folder appears.
For Windows Vista or Windows Server 2008
Click [Start] menu, [Control Panel], [Hardware and Sound] and select [Printers].
For Windows XP or Windows Server 2003
Click [Start] menu and select [Printers and Faxes].
For Windows 8 or Windows Server 2012, see the procedures in the following section.
P.59 “Accessing the printers folder on Windows 8 / Windows Server 2012”
Select your printer, and then click [File] menu and select [Printing Preferences].
2
3 PRINT FUNCTIONS
If the [File] menu is not displayed, press [Alt].
The printing preferences dialog box appears.
Display the [Others] tab menu and enter your department code in the [Department
3
Code] box.
The department code is a 5-digit number.
Click [Apply] or [OK] to save the settings.
4
Before Using the Printer Driver 61
Page 64

3 PRINT FUNCTIONS
Printing From Application
This section describes how to print a document from application.
P.62 “Considerations and limitations”
P.62 “How to print”
Considerations and limitations
Some print options can be set from both the application and the printer driver, such as collation. If the collation is set
from the application, documents may not be properly printed. If that happens, use the printer driver to set the collation.
Depending on the application, some print options such as the orientation need to be set from the application. For print
options that can be set from both the application and the driver, refer to the manual of the application.
When you print from your PC while another user uses the equipment for copying, the printing starts after approx. 30
seconds have passed since another user finishes the operation for copying.
How to print
Once you have installed the printer driver and configured it properly, you can print directly from most Windows
applications. Simply choose the Print command from your application.
You can print using the various functions by setting print options on the printer driver.
Printing from Windows applications
The following describes an example for printing from Notepad on Windows 7.
Open a file and select [Print] from the application’s [File] menu.
1
The [Print] dialog box appears.
Select your printer, and then click [Preferences].
2
The printing preferences dialog box appears.
The procedures for displaying the properties dialog for the printer driver may be different depending on the application
that you are using. See your application’s manual about displaying the printer properties dialog box.
62 Printing From Application
Page 65

3.PRINT FUNCTIONS
Setting the print options on each tab according to how you want to print.
3
3 PRINT FUNCTIONS
Setting the print options varies depending on how you want to print a document.
P.68 “Print options”
Click [OK] to save the settings.
4
Click [Print] to print a document.
5
Printing From Application 63
Page 66

3 PRINT FUNCTIONS
Status Monitor
The status monitor is utility software that is installed with the printer driver. It can monitor the current print job and the
current status of the equipment.
P.64 “Monitoring the print status and reporting print errors”
Monitoring the print status and reporting print errors
You can start the status monitor from the [Status Monitor] button on the printer driver screen. When started, the status
monitor icon appears in the notification area of the Windows taskbar.
The icon changes according to the status of the equipment.
is a “Ready” icon that indicates the equipment is ready to print.
is a “Warning” icon that prompts you to take action as soon as possible.
is an “Error” icon that prompts you to take a troubleshooting action soon.
If any error occurs, the LCD screen also shows the error message.
You can double-click the icon, or right-click it and select “Start” to open the status monitor dialog and see the detailed
information.
If you right-click the “Status Notify” icon and select “Exit”, the status monitor terminates the operation.
64 Status Monitor
Page 67

3 PRINT FUNCTIONS
Setting Up Print Options
Print Options are the attributes you set to define the way a print job is processed.
P.65 “How to set up”
P.68 “Print options”
To find the printing instructions for your specific needs, see the procedures in the following section.
P.82 “Printing With Best Functions for Your Needs”
How to set up
There are several ways to set print options. How the settings affect printing varies depending on the way you set the
options. The tabs displayed also vary depending on how you display the printer properties.
P.65 “Setting initial values of print options”
P.65 “Setting print options for each print job”
P.66 “Setting print options using profiles”
Setting initial values of print options
Setting the print options by displaying the printer properties from the Printers folder within the Windows Start menu will
establish the initial values of the options. For example, the paper size setting you most commonly use, etc., are settings
you will not want to change every time you print. It is convenient to set these options as initial values.
How to display:
Click [Start] and select [Devices and Printers].
1
For Windows Vista or Windows Server 2008
Click [Start], [Control Panel], [Hardware and Sound] and select [Printers].
For Windows XP or Windows Server 2003
Click [Start] and select [Printers and Faxes].
For Windows 8 or Windows Server 2012, see the procedures in the following section.
P.59 “Accessing the printers folder on Windows 8 / Windows Server 2012”
Select your printer, and then click [Printing preferences] in the [File] menu.
2
Setting print options for each print job
The print options that are set in properties dialog box, which can be accessed from the [Print] dialog box of the application,
are only applied to the current print job, so once yo u close the application, the options will be invalid.
How to display:
Click the [File] menu and select [Print] on application.
1
Select your printer, and then click [Preferences].
2
Setting Up Print Options 65
Page 68

3 PRINT FUNCTIONS
Setting print options using profiles
Using profiles, you can save the print settings or apply the saved settings to a print job.
In order to print a document using profiles, you must first create the saved profile.
P.66 “Saving profile”
Once you save a profile, you can apply its settings to a print job.
P.67 “Loading profile”
You can also delete unnecessary profiles.
P.67 “Deleting profile”
Saving profile
You can register up to 20 profiles for each printer driver.
Configure the print options on each tab.
1
Setting the print options varies depending on how you want to print a document.
P.68 “Print options”
Click [Save Profile] in the Profile group.
2
The [Profile Name] dialog box appears.
Enter the profile name and click [OK].
3
The file name must be up to 63 characters long.
If you enter an existing profile name, you are prompted to confirm whethe r you wa nt to overwrite it. If you
want, click [OK].
If you try to save more than 20 profiles, a dialog box notifying you that no more can be saved appears, then
the 21st profile is saved as a temporary profile. If you want to register this temporary profile, delete
unnecessary profiles first, and then select [Temporary Profile] to recall this profile and click [Save Profile] to
save it.
You cannot specify [None] for the profile name.
The profile is saved.
4
66 Setting Up Print Options
Page 69

3.PRINT FUNCTIONS
Loading profile
Select a profile in the [Profile] box.
1
3 PRINT FUNCTIONS
The setting options in the profile are reflected on each tab.
To restore the default settings after you select the profile, click [Restore Defaults] on each tab. Selecting [None]
on the [Profile] box will not restore them.
Deleting profile
Select the profile that you want to delete in the [Profile] box, and click [Delete].
1
The [Confirm Delete] dialog box appears.
Click [Yes] to delete the selected profile.
2
Setting Up Print Options 67
Page 70

3 PRINT FUNCTIONS
1
4
3
2
5
67 8
Print options
This section describes print options in each tab of the printer driver. This section will help you to find the description of
specific print options, or understand their individual functions.
P.70 “[Basic] tab”
P.72 “[Finishing] tab”
P.76 “[Image Quality] tab”
P.77 “[Effect] tab”
P.79 “[Others] tab”
P.80 “[Configuration] tab”
The following tabs are the setting items which depend on the OS. For their setting procedures and details, refer to the
Operator's Manual or the Help of the OS to be used.
- [General] tab
- [Sharing] tab
- [Ports] tab
- [Advanced] tab
- [Color Management] tab
- [Security] tab
How to display:
Click [Start] and select [Devices and Printers].
1
The Printers folder appears.
For Windows Vista or Windows Server 2008
Click [Start], [Control Panel], [Hardware and Sound] and select [Printers].
For Windows XP or Windows Server 2003
Click [Start] and select [Printers and Faxes].
Select your printer, and then click [Printing preferences] in the [File] menu.
2
If the [File] menu is not displayed, press [Alt].
The printing preferences dialog box appears.
1) Printer Name
Displays the name given to the printer driver when it was installed, or the name it displays on the icon in the Printer
folder.
68 Setting Up Print Options
Page 71

3.PRINT FUNCTIONS
2) Menu Tabs
The menu items of the printer driver are displayed as tabs. Clicking on a tab will display the contents of the selected
tab. The tabs displayed vary depending on the way the print properties are displayed.
- [Basic] tab
Contains basic print operation settings, such as original paper size, print paper size, paper source, paper type,
orientation, and so on.
P.70 “[Basic] tab”
- [Finishing] tab
Allows you to enable sort printing and N-up printing, and so on.
P.72 “[Finishing] tab”
- [Image Quality] tab
Allows you to select how images are printed.
P.76 “[Image Quality] tab”
- [Effect] tab
Contains print options that add the effects to your print jobs such as Watermarks, and so on.
P.77 “[Effect] tab”
-[Others] tab
Contains special features such as toner save, and so on.
P.79 “[Others] tab”
- [Configuration] tab
Allows you to configure the device options of the equipment. This tab is only displayed when the printer properties
are accessed from the Printers folder.
P.80 “[Configuration] tab”
3) Preview window
In the Preview window, you can preview how a document will be printed under the current settings of the printer driver.
The image of a page to which the set print options are applied is displayed.
4) Profile
Print option settings can be saved on your memory. You can save print option settings by clicking [Save Profile] and
easily load a setting file by selecting a profile name in the box.
P.66 “Setting print options using profiles”
5) [OK]
Enters the input settings and complete the print option settings.
6) [Cancel]
Cancels the input settings and exit the print option settings.
7) [Apply]
Enters the input settings without closing the print option settings. This button is only displayed when th e printer
properties are accessed from the Printers folder. This button remains grayed out until a setting is changed.
8) [Help]
Opens the Help for the printer driver.
3 PRINT FUNCTIONS
Setting Up Print Options 69
Page 72

3 PRINT FUNCTIONS
1
2
3
5
4
6
7
[Basic] tab
The [Basic] tab contains basic print operation settings, such as the original paper size, print paper size, paper source,
paper type, orientation, and so on.
1) Original Paper Size
Selects the size of a document to be printed.
Available original paper sizes are listed below:
A4 (210 x 297 mm)
A5 (148 x 210 mm)
A3 (297 x 420 mm)
B4 (257 x 364 mm)
B5 (182 x 257 mm)
Folio (210 x 330 mm)
Letter (8 1/2 x 11")
Legal (8 1/2 x 14")
Ledger (11 x 17")
Stat ement (5 1/2 x 8 1/2")
Computer (10 1/8 x 14")
13"LG (8 1/2 x 13")
The default paper size will be [A4] or [Letter] according to the regional setting in the Windows.
Setup items differ depending on the model.
2) Print Paper Size
Enlarges or reduces a page image to fit exactly in the selected paper size. If you do not wish to enable enlarge or
reduce printing, select [Same as Original Size].
3) Manual Scale
Enter the scale manually to enlarge or reduce an image. The ratio can be set at between 25 and 400%.
If originals which include thin lines are printed when the zoom ratio is set, the line width may vary.
8.5"SQ (8 1/2 x 8 1/2")
16K (195 x 270 mm)
8K (270 x 390 mm)
Env-Com10 (4 1/8 x 9 1/2")
Env-Monarch (3 7/8 x 7 1/2")
Envelope DL (110 x 220 mm)
Envelope Cho-3 (120 x 235 mm)
Envelope You-4 (105 x 235 mm)
Env-C4 (9.02 x 12.76")
Env-C5 (6.38 x 9.02")
For detailed instructions on how to print with the [Manual Scale] setting, see the following page:
P.82 “Fitting images within paper size”
70 Setting Up Print Options
Page 73

3.PRINT FUNCTIONS
4) Paper Source
Selects a paper source to print a job in the most suitable paper size. The figure on the right indicates the paper size set
for each paper source. When you select a paper source, the chosen one is indicated with a green square in the figure.
- Auto
- Drawer 1 — Paper is fed from the Drawer.
- Bypass Tray — Paper is fed from the Bypass Tray.
The selectable values vary depending on the devices installed in this equipment and their configuration on the
[Configuration] tab.
5) Paper Type
Sets the paper type.
- Plain — Printing on plain paper.
- Thick1 — Printing on thick 1 paper.
- Thick2 — Printing on thick 2 pape r.
- Transparency — Printing on transparent sheets.
- Thin — Printing on the back side of thin paper.
3 PRINT FUNCTIONS
— Automatically selects the paper set in this equipment according to the printed document size.
When [Drawer 1] is selected in the [Paper Source] box, only [Plain] can be chosen in the [Paper Type] box.
When [Envelope] is selected in the [Print Paper Size] box, [Envelope] will be displayed and you cannot change
the paper type.
6) Number of Copies
Sets the number of printed copies. This can be set at between 1 and 999.
7) Orientation
Sets the paper printing direction.
- Portrait
— The document is printed in the portrait direction.
- Landscape — The document is printed in the landscape direction.
Setting Up Print Options 71
Page 74

3 PRINT FUNCTIONS
1
2
3
4
Portrait Landscape
1
2
1
2
Portrait Landscape
1
2
2
1
[Finishing] tab
The [Finishing] tab allows you to enable sort printing and N-up printing.
1) Copy Handling
Sets how to sort the printed sheets when numerous copies are made for printing.
- Sort Copies
— Select this for sort-printing (1, 2, 3... 1, 2, 3...).
- Group Copies — Select this for group-printing (1, 1, 1... 2, 2, 2... 3, 3, 3...).
[Group Copies] can be selected only when more than 1 copy is entered at the Number of Copies option.
For the detailed instructions on how to print with the [Copy Handling] setting, see the following page:
P.83 “Sort printing”
2) 2-Sided Printing
This sets printing on both sides of paper. Select this check box and then the position of the margin for 2-sided printing.
- Long Edge — Select this to print on both sides of the paper with a margin on the long edge.
72 Setting Up Print Options
- Short Edge — Select this to print on both sides of the paper with a margin on the short edge.
Page 75

3.PRINT FUNCTIONS
- Booklet — Select this to print a properly paginated booklet or magazine-style publication. When this is selected,
click [Details] to specify the details of the Booklet printing.
P.75 “Booklet Details”
Be sure to select the following settings on the [Basic] tab to use this print option:
- Any paper size other than envelopes from the [Print Paper Size] list. You cannot use envelopes.
- [Plain] from the [Paper Type] list. You cannot use other paper types.
For detailed instructions on how to print with the [2-Sided Printing] setting, see the following page:
P.84 “Printing on both sides of a paper”
3) Number of pages per Sheet
Sets the printing of multiple pages on one sheet. The pages are reduced to fit the selected paper size automatically
and printed.
- 2 pages — Prints images from 2 pages arranged on one sheet.
- 4 pages — Prints images from 4 pages arranged on one sheet.
- 6 pages — Prints images from 6 pages arranged on one sheet.
- 8 pages — Prints images from 8 pages arranged on one sheet.
- 9 pages — Prints images from 9 pages arranged on one sheet.
- 16 pages — Prints images from 16 pages arranged on one sheet.
Direction of Print
Sets how the pages are arranged on one sheet.
- Left to Right — Arranges pages horizontally from the left and printed top to bottom on one sheet.
- Right to Left — Arranges pages horizontally from the right and printed top to bottom on one sheet.
- Left to Right by column — Arranges pages vertically from the top and printed left to right on one sheet.
- Right to Left by column — Arranges pages vertically from the top and printed right to left on one sheet.
Draw Borders Around Pages
Prints borders around each page.
3 PRINT FUNCTIONS
For the detailed instructions on how to print with the [Number of pages per Sheet] setting, see the following page:
P.87 “Printing several pages on one sheet”
Setting Up Print Options 73
Page 76

3 PRINT FUNCTIONS
4) Use Custom Margin
This option enables you to set the custom margins. You usually set margins in your application. If you cannot set them
in the application, use this option. Select the check box and click “Details” to open the dialog box. Select “Units”, set
the left, right, top, and bottom margins, and then click [OK] to enable them.
- Margin — Enter the value from 4.2 mm to 100 mm/ 0.17 inches to 3.94 inches.
- Units — Select the unit, “inch” or “mm”, for values.
- Restore Defaults — Click this button to restore the margins to the default settings.
If the application has the function to set margins, be sure to set them in the application.
74 Setting Up Print Options
Page 77

3.PRINT FUNCTIONS
1
2
3
4
Booklet Details
In the [Booklet Details] dialog box, you can specify how Booklet printing is performed.
1) Output Document Layout
Select the booklet size to be made.
- A5 on A4 — Select this to print an A5 size booklet. Every 2 pages are printed on A4 paper to fit on half a sheet
(A5).
- A4 on A3 — Select this to print an A4 size booklet. Every 2 pages are printed on A3 paper to fit on half a sheet
(A4).
- B5 on B4 — Select this to print a B5 size booklet. Every 2 pages are printed on B4 paper to fit on half a sheet (B5).
- B6 on B5 — Select this to print a B6 size booklet. Every 2 pages are printed on B5 paper to fit on half a sheet (B6).
- 1/2 Folio on Folio — Select this to print a 1/2 Folio size booklet. Every 2 pages are printed on Folio paper to fit on
half a sheet.
- A6 on A5 — Select this to print an A6 size booklet. Every 2 pages are printed on A5 paper to fit on half a sheet
(A6).
- Letter-Half on Letter — Select this to print a 1/2 Letter size booklet. Every 2 pages are printed on Letter paper to
fit on half a sheet.
- LT on LD — Select this to print a Letter size booklet. Every 2 pages are printed on Ledger paper to fit on half a
sheet (Letter).
- 1/2 LG on LG — Select this to print a 1/2 Legal size booklet. Every 2 pages are printed on Legal paper to fit on half
a sheet.
- 1/2 Stateme nt on Statement — Select this to print a 1/2 Statement size booklet. Every 2 pages are printed on
Statement paper to fit on half a sheet.
- 1/2 Comp on Comp — Select this to print a 1/2 Computer size booklet. Every 2 pages are printed on Computer
paper to fit on half a sheet.
- 1/2 13LG on 13LG — Select this to print a 1/2 13 inch LG size booklet. Every 2 pages are printed on 13 inch LG
paper to fit on half a sheet.
- 1/2 8.5SQ on 8.5SQ — Select this to print a 1/2 8.5 inch SQ size booklet. Every 2 pages are printed on 8.5 inch SQ
paper to fit on half a sheet.
- 32K on 16K — Select this to print a 32K size booklet. Every 2 pages are printed on 16K paper to fit on half a sheet.
- 16K on 8K — Select this to print a 16K size booklet. Every 2 pages are printed on 8K paper to fit on half a sheet.
2) Margin - Center
This sets the gutter in the center of a two-sided page. You can enter the value between 0.00 and 12.70 mm (0.00 and
0.50 inches). The printed images will be reduced according to the margin setting.
3) Margin - Outer
This sets the gutter on the right side and left side on the paper . You can enter the value between 0.00 and 25.40 mm
(0.00 and 1.00 inches). The printed images will be reduced according to the margin setting.
4) Margin - Units
Select the unit for the Center Margin and Outer Margin option. The default unit varies depending on the regional
setting in the Windows.
3 PRINT FUNCTIONS
For detailed instructions on how to print with the [Booklet] setting, see the following page:
P.85 “Making a booklet”
Setting Up Print Options 75
Page 78

3 PRINT FUNCTIONS
1
2
3
4
[Image Quality] tab
The [Image Quality] tab allows you to select how images are printed.
1) Halftone
This sets how halftones are printed.
- Detail — Select this to print halftone in detail.
- Smooth — Select this to print halftone smoothly.
2) Smoothing
Prints texts and graphics smoothly.
3) Distinguish Thin Lines
Select this check box to print thin lines clearly.
4) Use Black for All Text
Prints all texts in 100% black except white texts.
76 Setting Up Print Options
Page 79

3.PRINT FUNCTIONS
1
2
[Effect] tab
The [Effect] tab contains print options that add effects to your print jobs such as Watermarks and Rotate printing.
3 PRINT FUNCTIONS
1) Watermark
Selects the watermark to be used or edited. The following values except [None] are the default watermarks that have
been registered in the printer driver. Up to 15 new watermarks can be added in this box.
- None
The following default watermarks are also displayed in the box:
- TOP SECRET
- CONFIDENTIAL
-DRAFT
- ORIGINAL
-COPY
[Add]
Creates a new watermark. The [Watermark] dialog box appears when you click on this.
P.78 “Add/Edit Watermark”
[Edit]
Select a watermark from the [Watermark] box and click it to edit the watermark. The [Watermark] dialog box appears
when you click on this.
P.78 “Add/Edit Watermark”
[Delete]
Select a watermark from the [Watermark] box and click it to delete a watermark.
P.90 “Deleting a watermark”
— Select this if no watermark is desired.
For the detailed instructions on how to print with the [Watermark] setting, see the following page:
P.88 “Printing with watermarks”
The default watermarks can be deleted . H owe ver, once del eted, they cannot be restored.
[None] cannot be deleted.
Print on First Page Only
Prints a watermark on the first page only. This setting will become available when any watermark is selected from the
[Watermark] box.
2) Rotate 180 Degrees
Performs rotation printing of an image.
Setting Up Print Options 77
Page 80

3 PRINT FUNCTIONS
1
2
3
4
5
6
7
8
9
10
12
13
11
Add/Edit Watermark
When you click [Add] or [Edit], the [Watermark] dialog box appears and you can create new watermark or edit selected
watermarks.
1) X Position
The horizontal position of the watermark is displayed. You can change the position using the horizontal scroll bar.
2) Y Position
The vertical position of the watermark is displayed. You can change the position using the vertical scroll bar.
3) Units
Select the unit for the “X Position” and “Y Position” field.
4) [Center Watermark]
Click this to automatically move the watermark position to the center.
5) Caption
Enter the text of a watermark. You can enter up to 63 characters.
When you are editing a watermark, the selected watermark text is displayed in the box.
The entered text is displayed as the sample image on the left.
6) Font Name
Select the font to be used for the watermark text.
7) Style
Select the font style for the watermark text.
- Regular
- Bold — Sets the bold style to the text.
- Italic — Sets the italic style to the text.
- Bold Italic — Sets the bold and italic style to the text.
8) Font Size
Enter the font size for the watermark text. The font size can be set from 6 to 300 pt in units of 1 pt.
9) Angle
Enter the degree of angle for rotating the watermark text. The angle can be set from -90 to 90 degrees in units of 1
degree. You can also set the degree of the angle by moving the scroll bar.
10)Solid
Prints a solid type of watermark.
11)Dr aw as Outline
Prints a outline type of watermark.
12)Transparency
Prints a transparent watermark. When you select this, set the brightness from 0 (darker) to 100% (lighter) in units of
1%. You can also set the brightness using the scroll bar.
13)[Restore Defaults]
Restores the settings displayed in the [Watermark] dialog box to the original factory defaults.
— Sets the regular style to the text.
78 Setting Up Print Options
Page 81

3.PRINT FUNCTIONS
1
2
3
5
6
4
[Others] tab
The [Others] tab contains print options such as toner saving, and so on.
3 PRINT FUNCTIONS
1) Default Menu Setting
Select the default tab that is displayed when you open the printing preferences of the printer driver. Set frequently used
functions as a default menu setting for your convenience.
If you made settings on the [Others] tab menu from the print setting page of the application, they are restored to the
defaults when you close the printer driver.
If you want to resume the settings, set the printer driver from the [Devices and Printers] folder.
P.65 “Setting initial values of print options”
2) Toner Save
Prints in the toner save mode.
When the toner save mode is enabled, printing may become lighter.
3) Do not Print Blank Pages
Select this check box to ignore blank pages for printing.
If the watermark option is enabled, all pages are printed even when the content is blank.
If the blank pages have a header or footer, they are printed.
4) Department Code
Enter the user’s department code if the system is managed with department codes. Please ask your administrator for
your department code.
The department code is a 5-digit number.
5) Version Information
Click this button to show the version of the printer driver.
6) Restore All Defaults
Click this button to restore all print options to the default settings.
Click [OK] on the confirmation dialog box to start restoring or [Cancel] to stop it.
Setting Up Print Options 79
Page 82

3 PRINT FUNCTIONS
1
2
3
4
5
6
[Configuration] tab
The [Configuration] tab allows you to configure options. When any optional unit is installed in this equipment, set the
configuration of the machine on this tab. The [Configuration] tab can be displayed only from the Printers folder (and not
when displaying the properties from the application’s print dialog box).
In order to set the [Configuration] tab, you must access the printer driver properties from the [Devices and Printers]
folder (Windows Vista / Windows Server 2008: [Printer], Windows XP / Windows Server 2003: [Printers and Faxes]).
For detailed instructions on how to set the [Configuration] tab, see the following page:
P.56 “Configuring options manually”
1) Model Selection
This sets the model type.
2) Option
This option sets whether the following optional devices are installed.
Automatic Duplexing Unit
Select this check box when the Automatic Duplexing Unit is installed.
This setting is selectable only when the model below is specified in the [Model Selection] box.
Drawers
This sets the installation of drawers according to the configuration.
- Drawer 1 — Select this when only Drawer 1 is installed.
3) [Drawer Setting]
Sets the paper size and paper type of each drawer. The [Drawer Settings] dialog box appears by clicking this.
P.81 “Drawer S ettings”
4) [Version Information]
Displays the [Version Information] dialog box.
5) [SNMP Settings]
Click this button when you need to verify or change the SNMP settings.
P.81 “SNMP Settings”
In order to set [SNMP Settings], you must access the printer driver properties from the [Devices and Printers] folder
(Windows Vista / Windows Server 2008: [Printer], Windows XP / Windows Server 2003: [Printers and Faxes]), but
not from the [Print] dialog box in the application.
80 Setting Up Print Options
Page 83

3.PRINT FUNCTIONS
1
2
3
1
2
6) [Enable SNMP Communication]
This enables SNMP communication between this equipment and your computer to retrieve the option co nfiguration
information.
Update Automatically/Manual
Select whether to update option configuration information automatically each time the [Configuration] tab of the printer
driver is accessed or to update manually.
[Update Now]
This is available only when [Manual] is selected. Click this to obtain the configuration information from this equipment
immediately.
Drawer Settings
3 PRINT FUNCTIONS
1) Paper Size
Select the paper size set in each drawer.
2) Paper Type
Select the paper type set in each drawer.
3) [Restore Defaults]
Restores the configuration of this equipment displayed in the [Configuration] tab menu to the original factory defaults.
SNMP Settings
1) SNMP V1/V2
Community Name — If a community name other than “private” (default) is set for the SNMP community name for your
TOSHIBA MFP, enter its community name.
To find your TOSHIBA MFP under the SNMP V1/V2 environment, the community names set for the target
TOSHIBA MFP must be specified correctly. For help, consult your administrator.
To change the community name, the administrator privilege is necessary. You must log in with the
“Administrator” privilege and open the printer driver properties.
Up to 31 characters including the following symbols can be entered for the Community Name.
! " # $ % & ' ( ) * + , - / : ; < = > ? @ [ \ ] ^ _ ` { | } ~
2) [Restore Defaults]
Click this button when you want to reset all the settings back to the defaults.
Setting Up Print Options 81
Page 84

3 PRINT FUNCTIONS
Printing With Best Functions for Your Needs
In this section, procedures are given to print various types of print jobs, using the layout and finishing options. Read this
section before starting printing and select the procedure best suited for your needs.
P.82 “Layout and finishing options in [Bas ic] tab menu”
P.83 “Layout and finishing options in [Finishing] tab menu”
P.88 “Finishing options in [Effect] tab menu”
Layout and finishing options in [Basic] tab menu
Using the printer driver, you can set various layout options to suit your preferences. In this section various printing
functions enabled with the [Basic] tab menu are explained.
P.82 “Fitting images within paper size”
Fitting images within paper size
Automatically enlarges or reduces an image to fit into a specified paper size, or manually set the scale to enlarge or
reduce it.
Printing enlarged or reduced image to fit the specified paper size
Display the [Basic] tab menu.
1
Select the document size on the [Original Paper Size] box. Then select the paper size
2
that you want to print at the [Print Paper Size] box.
The document image is automatically enlarged or reduced depending on the original paper size and print paper
size.
Set any other print options and click [OK].
3
Click [OK] or [Print] to send the print job.
4
Printing an enlarged or reduced image by specifying the scale manually
Display the [Basic] tab menu.
1
Check the [Manual Scale] box. Then enter the scale.
2
The scale can be set from 25% to 400% in units of 1%.
Set any other print options and click [OK].
3
Click [OK] or [Print] to send the print job.
4
82 Printing With Best Functions for Your Needs
Page 85

3.PRINT FUNCTIONS
Layout and finishing options in [Finishing] tab menu
Using the printer driver, you can set various layout options to suit your preferences. In this section various printing
functions enabled with the [Finishing] tab menu are explained.
P.83 “Sort printing”
P.84 “Printing on both sides of a paper”
P.85 “Making a booklet”
P.87 “Printing several pages on one sheet”
Sort printing
Selects how multiple copies of a document to be output, such as separately for each copy and grouping each page.
Sorting printed documents according to the copies
Display the [Basic] tab menu.
1
Enter the number of copies to be printed at the [Number of Copies] box.
2
3 PRINT FUNCTIONS
Display the [Finishing] tab menu.
3
Select [Sort Copies] icon at [Copy Handling].
4
Set any other print options and click [OK].
5
Click [OK] or [Print] to send the print job.
6
Sorting printed documents according to the pages
For example, assume that you have a three-page job (A, B, C) and you want three copies of each page in this order (AAA,
BBB, CCC).
Display the [Basic] tab menu.
1
Enter the number of copies to be printed at the [Number of Copies] box.
2
Display the [Finishing] tab menu.
3
Select [Group Copies] icon at [Copy Handling].
4
Set any other print options and click [OK].
5
Click [OK] or [Print] to send the print job.
6
Printing With Best Functions for Your Needs 83
Page 86

3 PRINT FUNCTIONS
Printing on both sides of a paper
You can print on both sides of the paper.
Open the [Basic] tab to select the following settings.
1
Any paper size other than envelopes from the [Print Paper Size] list. Yo u cannot use envelopes.
[Plain] from the [Paper Type] list. You cannot use other paper sizes.
Open the [Finishing] tab, select the [2-Sided Pri nting] check box, and select the binding
2
position icon.
Long Edge — Select this to print on both sides of the paper with a margin on the long edge.
Short Edge — Select this to print on both sides of the paper with a margin on the short edge.
Booklet — Select this to print a properly paginated booklet or magazine-style publication.
Y ou can also set booklet printing at the [2-Sided Printing] option by selecting the [Booklet] icon. For instructions
on how to perform booklet printing, see the following section.
P.85 “Making a booklet”
Set any other print options you require and click [OK].
3
Click [OK] or [Print] to start the print job.
4
The print job is printed on both sides of paper in the specified direction.
84 Printing With Best Functions for Your Needs
Page 87

3.PRINT FUNCTIONS
Making a booklet
You can create a document in a book- or magazine-style publication by selecting the Booklet option.
Creating a booklet
Display the [Finishing] tab menu.
1
Select the [2-Sided Printing] check box and select the [Booklet] icon.
2
Click [Details].
3
The [Booklet Details] dialog box appears.
Select the booklet size at the [Output Document Layout] box.
4
3 PRINT FUNCTIONS
A5 on A4 — Select this to print an A5 size booklet. Every 2 pages are printed on A4 paper to fit on half a sheet
(A5).
A4 on A3 — Select this to print an A4 size booklet. Every 2 pages are printed on A3 paper to fit on half a sheet
(A4).
B5 on B4 — Select this to print a B5 size booklet. Every 2 pages are printed on B4 paper to fit on half a sheet (B5).
B6 on B5 — Select this to print a B6 size booklet. Every 2 pages are printed on B5 paper to fit on half a sheet (B6).
1/2 Folio on Folio — Select this to print a 1/2 Folio size booklet. Every 2 pages are printed on Folio paper to fit on
half a sheet.
A6 on A5 — Select this to print an A6 size booklet. Every 2 pages are printed on A5 paper to fit on half a sheet
(A6).
Letter-Half on Letter — Select this to print a 1/2 Letter size booklet. Every 2 pages are printed on Letter paper to
fit on half a sheet.
LT on LD — Select this to print a Letter size booklet. Every 2 pages are printed on Ledger paper to fit on half a
sheet (Letter).
1/2 LG on LG — Select this to print a 1/2 Legal size booklet. Every 2 pages are printed on Legal paper to fit on half
a sheet.
1/2 Stateme nt on Statemen t — Select this to print a 1/2 Statement size booklet. Every 2 pages are printed on
Statement paper to fit on half a sheet.
1/2 Comp on Comp — Select this to print a 1/2 Computer size booklet. Every 2 pages are printed on Computer
paper to fit on half a sheet.
1/2 13LG on 13LG — Select this to print a 1/2 13 inch LG size booklet. Every 2 pages are printed on 13 inch LG
paper to fit on half a sheet.
1/2 8.5SQ on 8.5SQ — Select this to print a 1/2 8.5 inch SQ size booklet. Every 2 pages are printed on 8.5 inch SQ
paper to fit on half a sheet.
32K on 16K — Select this to print a 32K size booklet. Every 2 pages are printed on 16K paper to fit on half a sheet.
16K on 8K — Select this to print a 16K size booklet. Every 2 pages are printed on 8K paper to fit on half a sheet.
Printing With Best Functions for Your Needs 85
Page 88

3 PRINT FUNCTIONS
If you want to add a margin space between facing pages, enter a width in the [Center]
5
box, and if you want to add a margin on the outside edge, enter a width in the [Outer]
box.
You can change the unit of the margin at the [Units].
The center margin can be set from 0.00 mm to 12.70 mm in units of 0.10 mm when the unit is mm, and from
0.00 inch to 0.50 inches in units of 0.01 inch when the unit is inches.
The printed images will be reduced according to the margin setting.
The outer margin can be set from 0.00 mm to 25.40 mm in units of 0.10 mm when the unit is mm, and from 0.00
inch to 1.00 inches in units of 0.01 inch when the unit is inches.
The printed images will be reduced according to the margin setting.
Click [OK] to close the [Booklet Details] dialog box.
6
Set any other print options you require and click [OK].
7
Click [OK] or [Print] to send the print job.
8
The print job is printed as a booklet.
86 Printing With Best Functions for Your Needs
Page 89

3 PRINT FUNCTIONS
3.PRINT FUNCTIONS
Printing several pages on one sheet
Prints several pages of a document on one sheet of paper (N-up feature). This feature is very useful for browsing a large
number of pages for appearance or page order.
For example, to check the navigation path of a number of web pages or review the narrative of a slide presentation, using
N-up is not only convenient but conserves paper as well.
Printing multiple pages per sheet
Display the [Finishing] tab menu.
1
Select how many pages you want to print on a singl e sheet at the [Number of p ages per
2
Sheet] box.
2 pages — Prints images from 2 pages arranged on one sheet.
4 pages — Prints images from 4 pages arranged on one sheet.
6 pages — Prints images from 6 pages arranged on one sheet.
8 pages — Prints images from 8 pages arranged on one sheet.
9 pages — Prints images from 9 pages arranged on one sheet.
16 pages — Prints images from 16 pages arranged on one sheet.
Select how the pages are arranged on one sheet in the [Direction of Print] option.
3
Left to Right — Arranges pages horizontally from the left and printed top to bottom on one sheet.
Right to Left — Arranges pages horizontally from the right and printed top to bottom on one sheet.
Left to Right by column — Arranges pages vertically from the top and printed left to right on one sheet.
Right to Left by column — Arranges pages vertically from the top and printed right to left on one sheet.
Items that can be selected in [Direction of Print] may vary depending on the number of pages selected at the
[Number of pages per Sheet] box.
If you want to draw a line around each page, select the [Draw Borders Around Pages]
4
check box.
Set any other print options and click [OK].
5
Click [OK] or [Print] to send the print job.
6
Printing With Best Functions for Your Needs 87
Page 90

3 PRINT FUNCTIONS
Finishing options in [Effect] tab menu
Using the printer driver, you can set various layout options to suit your preferences. In this section various printing
functions enabled with the [Effect] tab menu are explained.
P.88 “Printing with watermarks”
Printing with watermarks
Watermarks overprint your document with useful information, such as [TOP SECRET], [CONFIDENTIAL], [DRAFT],
[ORIGINAL], or [COPY]. You can choose from several predefined watermarks or you can create and save your own
custom watermarks.
Watermarks are text onl y.
Printing a watermark
Display the [Effect] tab menu.
1
Select the watermark to be printed at the [Watermark] box.
2
You can create a new watermark if there is none you want to apply on the box.
P.89 “Creating or editing a watermark”
If you want to print the watermark on only the first page, select the [Print on First Page
3
Only] check box.
Set any other print options and click [OK].
4
Click [OK] or [Print] to send the print job.
5
88 Printing With Best Functions for Your Needs
Page 91

3.PRINT FUNCTIONS
Creating or editing a watermark
Click [Add] to create a new watermark, or select one that you want to edit and click
1
[Edit] to edit a watermark.
The [Watermark] dialog box appears.
3 PRINT FUNCTIONS
Enter the watermark text in the [Caption] box.
2
You can enter up to 63 characters for the [Caption] box. However, if too ma ny ch ara ct ers a re en tered, the
watermark may not be printed correctly.
Select a font for the watermark at the [Font Name] box.
3
Select a font style for the watermark at the [Style] box.
4
Enter the font size in the [Font Size] box.
5
You can enter any integer between 6 and 300pt in units of 1pt.
To rotate the watermark, enter the number of degrees in the [Angle] box.
6
You can enter from -90 degrees to 90 degrees in units of 1 degree in the [Angle] box.
You can also set the angle using the scroll bar.
Select how the watermark text is printed from [Solid], [Draw as Outline], and
7
[Transparency].
Solid — Prints a solid type of watermark.
Draw as Outline — Prints an outline type of watermark.
Transparency — Prints a transp arent watermark. Set the transparent ratio from 0 to 100% in units of 1%. You can
also set the transparent ratio using the scroll bar.
Enter the X and Y values or move the scroll bar to adjust the watermark position.
8
You can adjust the position horizontally with “X” and vertically with “Y”.
You can select the unit, [inch] or [mm].
Click [Center Watermark] to locate the watermark text to the middle horizontally and vertically.
Click [OK] to save the watermark settings.
9
Printing With Best Functions for Your Needs 89
Page 92

3 PRINT FUNCTIONS
Deleting a watermark
You can delete the default watermarks. However, they cannot be restored by clicking [Restore Defaults].
Select the watermark that you want to delete at the [Watermark] box.
1
Click [Delete].
2
The [Confirm Delete] dialog box appears.
Click [Yes].
3
90 Printing With Best Functions for Your Needs
Page 93

4.SCAN FUNCTIONS
Scanning From Application...................................................................................................92
How to scan...................................................... ... ................................. ... ....................... ......................................92
Setting Up Scan Options.......................................................................................................94
Scan options.................................................. ... ................................. ...................................................................94
Scanning from the equipment on the network......................................................................................................96
Scanning from the equipment connected by USB cable ......................................................................................96
Using the Easy Set feature...................................................................................................................................97
Scan to E-Mail.........................................................................................................................98
Procedure for Scan to E-Mail ............................................ .. ... ..............................................................................98
Scan to File................................................................................................................... ........101
Procedure for Scan to File...................................................... ... .........................................................................101
Scan to USB Memory...........................................................................................................103
Procedure for Scan to USB Memory................... ...............................................................................................103
Scan Settings........................................................................................................................106
Selecting the color mode....................................................................................................................................106
Selecting the resolution......................................................................................................................................106
Selecting the original size...................................................................................................................................107
Selecting the original mode................................................................................................................................107
Selecting the orientation.....................................................................................................................................108
Selecting the compression ratio.........................................................................................................................108
Removing blank pages.......................................................................................................................................109
Adjusting the exposure.......................................................................................................................................109
Specifying E-mail Addresses..............................................................................................................................110
Character entry.............................................. ... ... ................................. ..............................................................113
Scan speed ................................................................. .................................. .....................................................114
Using Templates (Scan).......................................................................................................115
Registering the templates...................................................................................................................................115
Recalling a template...........................................................................................................................................116
Page 94

4 SCAN FUNCTIONS
Scanning From Application
This equipment supports scanning from TWAIN-compatible applications. TWAIN is the standard that links applications and
scanners that acquire images. For TWAIN support, see your application’s manual.
Before you start scanning with this equipment, make sure that you have installed the scanner driver. For details, refer to
the Software Installation Guide.
Scanning cannot be performed from a computer immediately after the power is turned ON, the buttons are pressed
or the covers are opened/closed in the equipment. Do it 30 seconds after “Ready” has appeared on the LCD
screen on the control panel.
The default original size depends on the measurement system on Windows: A4 for Metric or LT for the North
America. Y ou can change the default only before the first execution after inst allation. For the measurement system,
see the Windows Help.
How to scan
Follow the steps below to scan the original.
Place the original(s).
1
P.31 “Placing originals on the original glass”
P.32 “Placing originals on the Automatic Document Feeder”
Run your TWAIN-compatible application and execute the image acquisition command.
2
You can usually execute the scan or image acquisition command on the [File] menu to select this equipment. The
location of the command and the method to select the scanner vary depending on the application. See your
application’s manual.
Set the scan settings.
3
You can make various options to scan the original image.
P.94 “Scan options”
You can also make the scan settings using the Easy Set feature.
P.97 “Using the Easy Set feature”
Click [Pre-Scan] to preview the original.
4
If you are not satisfied with the preview image, change the scan settings and preview the image again.
Click [Scan] to scan the original.
5
While scanning, you can stop scanning by clicking [CANCEL].
When the authentication screen appears, enter the department code that is required to log in to this equipment.
For details, ask your administrator.
92 Scanning From Application
Page 95

4.SCAN FUNCTIONS
Save the scanned image in your application.
6
The saving command varies depending on the application. You usually execute the Save or Save as command on
the File menu. If necessary, modify the scanned image, using the various graphic commands in your application.
4 SCAN FUNCTIONS
Scanning From Application 93
Page 96

4 SCAN FUNCTIONS
1
2
5
4
6
7 8 9
3
10
11
Setting Up Scan Options
Y ou can make various options to affect the scanning st atus. You can save different sets of options in files and recall one of
them for frequent use.
Scan options
The basic and advanced dialogs are available for the scan operation.
Basic scan dialog
When you execute the image acquisition command, the following ba sic scan dialog appears.
1) Easy Set
The scan options can be saved.
P.97 “Using the Easy Set feature”
2)
Clears the preview image.
3) Preview screen
The pre-scanned image appears. The dotted boundary shows the scanning area or the original size. The image
information appears under the preview screen.
4)
Opens the IO Type dialog to set the destination.
P.96 “Scanning from the equipment on the network”
P.96 “Scanning from the equipment connected by USB cable”
5)
Shows the version information of the scanner driver.
6)
Shows the Help information about this scanner driver.
7) [Close]
Quits the scanning operation.
8) [Pre-Scan]
Pre-scans the original.
9) [Scan]
Scans the original.
10)Measurement unit
Select [Inch], [mm], or [Pixel] to change the measurement unit.
94 Setting Up Scan Options
Page 97

4 SCAN FUNCTIONS
1
2
3
5
7
6
8
4
4.SCAN FUNCTIONS
11)
Opens the advanced scan dialog.
P.95 “Advanced scan dialog”
Advanced scan dialog
You can click the triangle that faces right on the right-hand side of the basic scan dialog box to make scanning settings.
The default settings are underlined.
1) Resolution
Sets the horizontal and vertical resolution as dots per inch: 150 x 150 dpi
2) Original Mode
Sets the original mode to fit the original image such as text only or the mixture of text and photos: Text
Gray, or Color.
3) Original Size
Sets the original document size or the scanning area.
Select the original size from the pull-down list.
The displayed items differ depending on the installed options and destinations.
When [600 x 600 dpi] is selected in [Resolution] and [Color] is selected in [Original Mode], only [A5-R] or [ST-R] can
be selected.
4) ADF/Platen
Selects the equipment on which the originals are placed: Platen Scan
The displayed items differ depending on the installed options and destinations.
5) Rotation
Rotates the imaged clockwise by 90 degrees, counterclockwise by 90 degrees, or by 180 degrees. This option takes
effect on the image to scan but not on the preview image: OFF
6)
Closes the advanced scan dialog and return to the basic scan dialog.
P.94 “Basic scan dialog”
7) [Enhanced Settings] tab
, Right 90, Left 90, or 180.
, 300 x 300 dpi, or 600 x 600 dpi.
, Text/Photo,
, ADF Scan, or Duplex Scan.
- Exposure/Contrast
Adjusts the exposure and contrast of the image using the scroll bar or editing the field: -100 (lighter) to 100%
(darker).
[Contrast] is only available when [Gray] or [Color] is selected in [Original Mode].
Setting Up Scan Options 95
Page 98

4 SCAN FUNCTIONS
- Sharp
Adjusts the sharpness of the image using the scroll bar or editing the field: -2 (softer) to 3% (sharper).
[Sharp] is only available when [Gray] or [Color] is selected in [Original Mode].
- RGB Adjustment
Adjusts the RGB values of the image using the scroll bar or editing the field: -100 to 100%.
[RGB Adjustment] is only available when [Color] is selected in [Original Mode].
- Saturation
Adjusts the saturation of the image using the scroll bar or editing the field: -100 to 100%.
[Saturation] is only available when [Color] is selected in [Original Mode].
8) Default
Resets all the settings back to the defaults.
Scanning from the equipment on the network
Click on the basic scan dialog box.
1
The [IO Type] dialog box appears, select [IPv4] or [IPv6].
2
Click [Search], and then confirm the displayed IP address and device name.
3
If you set the IP address manually, input the address in the text box.
Click [OK].
4
Scanning from the equipment connected by USB cable
Click on the basic scan dialog box.
1
The [IO Type] dialog box appears, select [USB].
2
96 Setting Up Scan Options
Page 99

4 SCAN FUNCTIONS
4.SCAN FUNCTIONS
Click [OK].
3
Using the Easy Set feature
When you have made scan settings, you can save them as an Easy Set file. This allows you to load a specific batch of
settings without changing the scan settings each time.
Saving the Easy Set file
You can save multiple Easy Set files.
Open the advanced scan dialog from within your application.
1
P.92 “How to scan”
Set the scan options as you like.
2
P.94 “Scan options”
Click next to the Easy Set menu.
3
Enter a file name, select a folder where you save the file, and then click [Save].
4
Using the Easy Set file
Select the pre-defined Easy Set file, or click next to the Easy Set menu to select your
1
Easy Set file.
The following two pre-defined files are available.
Pre-defined File Resolution Original Mode Other Scan Options
Picture 150 x 150 dpi Text/Photo Default settings
Text 600 x 600 dpi Text
When the Open dialog box appears, select the folder, select the target Easy Set file, and then click [Open].
Click [Pre-Scan].
2
Deleting the Easy Set files
You can delete the Easy Set files in the same way as for normal files. Locate the folder where you have saved the Easy
Set file, right-click the file, and then click [Delete] from the menu. Click [Yes] to delete the file. When you are working in the
preview window, click the folder icon next to the Easy Set menu so that you can delete the file in the same way. After
deleting the file, click [CANCEL] to close the dialog box.
Setting Up Scan Options 97
Page 100

4 SCAN FUNCTIONS
Scan to E-mail
Internet
Send E-mail to the Internet
via SMTP server
SMTP server
SELECT SCAN TYPE
E-MAIL
FILE
USB
E-MAIL
(ADDRESS)
DocYYMMDD
PDF
Scan to E-Mail
Scan to E-mail allows you to send your scans to specified e-mail addresses. The scanned image is converted to a PDF,
TIFF, or JPEG file and sent as an e-mail attachment.
Procedure for Scan to E-Mail
Place the original(s).
1
For placing the originals, see th e pages below.
P.31 “Copying originals”
A4, A3, A5-R, B5, B5-R, B4, A4-R and FOLIO (LT, LD, LT-R, LG, ST-R and COMP) sized originals can be
scanned.
Press [SCAN].
2
Press or to select “E-MAIL”, and then press .
3
98 Scan to E-Mail
Press or to select “ADDRESS”, and then press .
4
 Loading...