

Page 1
Leading innovation _;>>
IntegratedHighDefinition
LEDTV/DVDCombination
User'sGuide:
24V4210U
24V4260U
If you need assistance:
Toshiba's Support Web site support.toshiba.com
Call Toshiba Customer Support Center:
Within the United States at (800) 631-3811
Outside the United States at (949) 583-3050
For more information, see "Troubleshooting" on page 147 in this guide.
Owner's Record
The model number and serial number are on the back and side of your TV.
Record these numbers in the spaces below. Refer to these numbers whenever you
communicate with your Toshiba dealer about this LED TV/DVD combination.
Model number:
Serial number:
I Note:To display a High Definition I
picture, the TV must bereceiving a I
High Definitionsignal (such as an over-I
the-air High Definition TV broadcast, a I
High Definition digitalcable program,or I
a High Definition digital satellite I
program), For details, contact yourTV I
antenna installer, cable provider, or I 4/1GMA3000120013
Page 2
0 UsingtheTV'sfeatures
Using closed captions
DigitalCCsettings
You can customize the closed caption display characteristics by
changing the background color, opacity, text size, type, edge, and
color.
NOTE .:.Thesesettings areavailablefor digital channelsonly.
¢ Youcannot setCaptionTextand Backgroundasthe samecolor.
To customize closed captions:
1 Press the MENU button to open the Preferences menu.
2 Highlight Digital CC Settings, and then press the OK button.
3 Press the (&/y arrow) buttons to highlight the characteristic
you wish to change, and then press the (_11/_ arrow) buttons to
select the format for that characteristic.
4 To save the new settings, highlight Done, and then press the
OK button.
g To revert to the factory defaults, highlight Reset, and then
press the OK button.
Mode. Description
Captionsize Auto,Small,Standard,Large
Captiontexttype Auto,Default,Mono(withSerif),Prop.(withSerif),Mono
(withoutSerif),Prop.(withoutSerif),Casual,Cursive,Small
Capitals
Captiontextedge Auto,None,Raised,Depressed,Uniform,LeftDropShadow,
RightDropshadow
Captiontextcolor Auto,Black,White,Red,Green,Blue,Yellow,Magenta,Cyan
Textforegroundopacity Auto,Transparent,Translucent,Flashing,Solid
Backgroundcolor Auto,Black,White,Red,Green,Blue,Yellow,Magenta,Cyan
Textbackgroundopacity Auto,Transparent,Translucent,Flashing,Solid
Captiontextedgecolor Auto,Black,White,Red,Green,Blue,Yellow,Magenta,Cyan
CCSelector
You can use the CC Selector to temporarily override the default
analog caption mode (set in Base CC Mode) for a particular
channel. However, once you change to another channel, the closed
Page 3
UsingtheTV'sfeatures _1
Adjusting the audio
caption setting will automatically change back to the current Base
CC Mode setting.
You can also use the CC Selector to select digital closed caption
services, if available. When such services are not available, the CC
Selector presents a default list of services. If the selected service is
not available, the next best service will be used.
To select closed captions:
1 Press the MENU button to open the Preferences menu.
2 Highlight CC Selector, and then press the OK button.
3 Press the (A/V arrow) buttons to select the Closed Caption,
and then press the (_/_ arrow) buttons to select the desired
service.
4
5
To save the new settings, highlight Done, and then press the
OK button.
Press the EXIT button.
NOTE YoucanalsopresstheSUBTITLEbuttontoopenCCSelectorand
followtheinstructions.
Adjustingtheaudio
Mutingthesound
Press the MUTE button to partially reduce (1/2 Mute) or turn off
(Mute) the sound. Each time you press the MUTE button, the mute
mode changes in the following order: 1/2 Mute, Mute, Volume, 1/2
Mute, etc.
112Mu_e --_ Mute _ Volume _
(Sanlple In,age) Le_,eL_"qf n_ute
If closed caption mode is set to Off when selecting MUTE mode,
the closed caption feature becomes active if the TV program is
closed captioned. To mute the audio without activating the closed
captioning, press the VOL (-) button to set the volume to 0.
For more information, see "Using closed captions" on page 78.
NOTE IfyoumodifyitemsintheSOUNDmenuwhileMuteisactive,Mute
iscancelled.
Page 4
2 UsingtheTV'sfeatures
Adjusting the audio
Usingthedigitalaudioselector
You can use the Digital Audio Selector to conveniently switch
between audio tracks on a digital channel (for those channels that
have multiple audio tracks). This temporarily overrides tile audio
track chosen by tile language option under Audio Setup, see
"Selecting stereo/SAP broadcasts" on page 82.
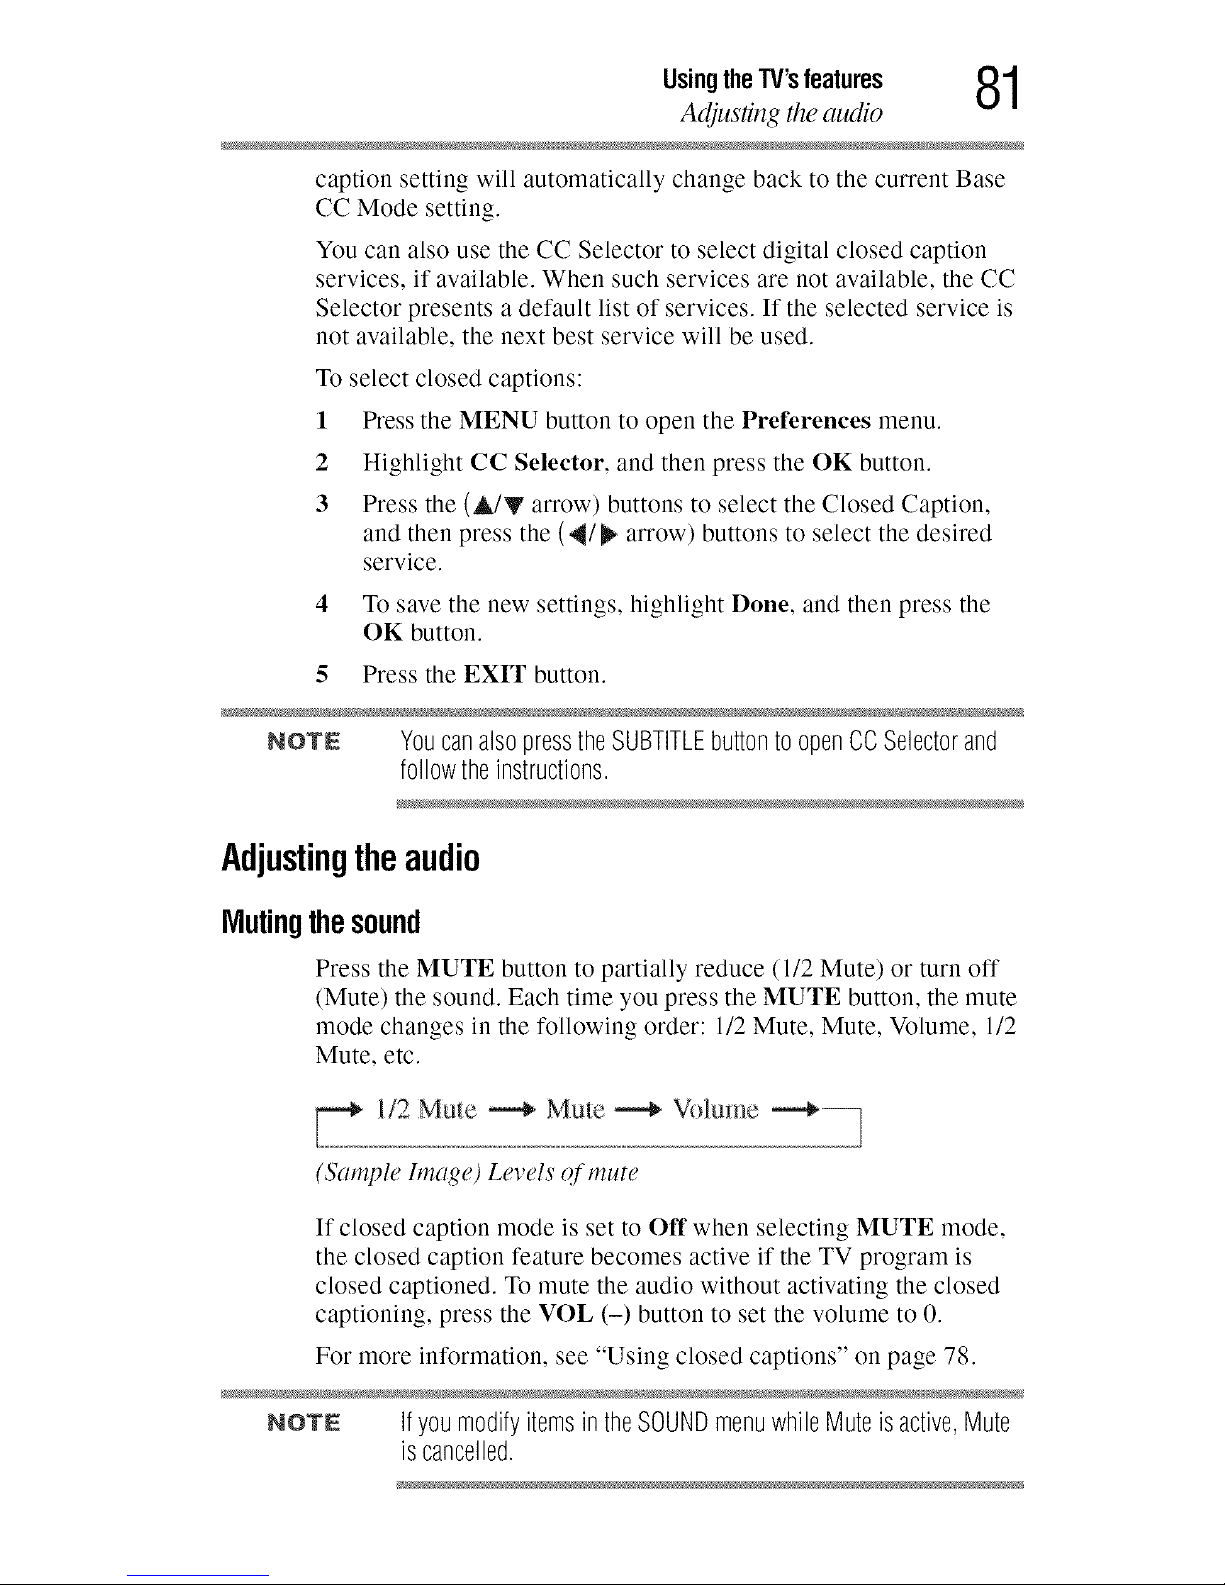
1 Press tile MENU button to open tile Sound menu.
2 Highlight Digital Audio Selector, and then press tile OK
button.
(Sample Image) Digital Audio Selector sc_en
3 Press the (_1 _ arrow) buttons to select the desired service.
4 Press the EXIT button.
Selectingstereo/SAPbroadcasts
The multi-channel TV sound (MTS) feature allows you to output
high-fidelity stereo sound. MTS also can transmit a second audio
program (SAP) containing a second language, music or other audio
information (when provided by individual stations).
When the TV receives a stereo or SAP broadcast, the stereo mark or
word "SAP" appears when the DISPLAY button is pressed. The
MTS feature is only available for analog signals on the
ANT/CABLE input.
To listen in stereo sound:
1
2
3
4
Press the MENU button to open the Sound menu.
Highlight Audio Setup, and then press the OK button.
In the MTS field, select Stereo.
To save the new settings, highlight Done, and then press the
OK button.
To reset the settings to the factory defaults, highlight Reset,
and then press the OK button.
Page 5
UsingtheTV'sfeatures _
Adjusting the audio
_,t !,,J
NOTE o}oYoucantypicallyleavetheTVinStereomodebecauseitoutputs
thetypeof soundbeingbroadcast(stereoormonaural).
¢ If the sound is noisy, select Mono to reducethe noise,
To listen to an alternate language on an ATSC digital station (if
available), highlight the Language field in step 3 above, and then
press the (4/_ arrow) buttons to select the language you prefer.
To listen to a second audio program on an analog station, if
available, select SAP in step 3 above.
1 Press the MENU button. Select Settings, SOUND, MTS.
2 Press the (,_/_ arrow) buttons to select SAP. Press the EXIT
button.
NOTE o:oA secondaudioprogram(SAP)canbeheardonlyonthoseTV
stationsthatofferit. Forexample,astationmightbroadcast
anotherlanguageasasecondaudioprogram.IfyouhaveSAP
on,youwillseethecurrentprogramonthescreenbuthearthe
otherlanguageinsteadoftheprogram'snormalaudio.
¢ IfyouhaveSAPonandthestationyouarewatchingisnot
broadcastingasecondaudioprogram,thestation'snormal
audiowill beoutput.However,occasionallythereisnosoundat
all in SAPmode.Ifthis happens,settheMTSfeaturetoStereo
mode.
UsingtheIVlTSbutton
If you press the AUDIO button when an analog channel is tuned,
the Analog Audio bar appears and displays Stereo, SAE Mono as
the options.
If you press the AUDIO button when a digital channel is tuned, the
Digital Audio bar will appear and offer different audio choices for
the digital channel.
If you press the AUDIO button when an external input is selected,
no Audio bar appears.
Adjustingtheaudioquality
You can adjust the audio quality by adjusting the bass, treble and
balance.
Page 6

4 UsingtheW's features
Adjusting the audio
To adjust the audio quality:
1 Press tile MENU button to open tile Sound menu.
2 Highlight Audio Setup, and then press tile OK button.
3 Press tile (A/Y arrow) buttons to highlight tile item you wish
to adjust (Bass, Treble, or Balance).
4 Press tile (4/_ arrow) buttons to adjust tile level.
°:° 4 makes tile bass or treble weaker or increases tile balance
in tile left channel (depending on tile item selected).
•:* _ makes tile bass or treble stronger or increases tile
balance in tile right channel (depending on tile item
selected).
5 To save tile new settings, highlight Done, and then press tile
OK button.
6 To reset tile settings to tile factory defaults, highlight Reset,
and then press tile OK button.
AudysseyPremium TelevisionTM
These televisions use a suite of technologies for better sound
including:
•",o Audyssey EQ% provides clear, accurate and natural sound
right out of the box. This technology ensures you enjoy your
audio experience as much as your video.
•",o Audyssey ABX TM-technology uses sophisticated driver
analysis and low frequency monitoring to extend the range and
bass of small speakers .This enables the system to produce
lower frequencies than otherwise would be possible.
•",o Audyssey _'_Dynamic Volume- automatically adjusts volume to
provide a consistent sound level between television programs,
commercials, and between the loud and soft passages of
movies.
AudysseyABXrM
Audyssey ABX rMtechnology uses sophisticated driver analysis and
low frequency monitoring to extend tile range and bass of small
speakers.
To turn on Audyssey ABXrM:
1 Press tile MENU button and open tile Sound menu.
2 Highlight Audio Settings, and tile press tile OK button.
Page 7
UsingtheTV'sfeatures _
Adjusting the audio
3 Press the (A/Y arrow) buttons to highlight the Audyssey
ABX TM field.
4 Press the (_/_ arrow) buttons to select On.
UsingAudysseyDynamicVolume®
This feature provides a consistent sound volume between television
programs, commercials, and between the loud and soft passages of
movies.
1 Press the MENU button. Select Settings, SOUND, Audyssey
Premium Television, Dynamic Volume.
2 Press the (_/_ arrow) buttons to select ON or Off.
NOTE .:. If DynamicRangeControl is set to On,this featureis
automatically setto Off.
•:. This featuredoes not affectthe audio signal outputfrom the
DIGITALAUDIOOUTterminal.
Selectingtheopticalaudiooutputformat
You can select the optical audio output format when you connect a
Dolby _>Digital decoder or other digital audio systems to the TV's
Digital Audio Out terminal.
To select the optical audio output format:
1 Press the MENU button to open the Sound menu.
2 Highlight Audio Setup, and then press the OK button.
3 In the Digital Output Format field, select either Dolby
Digital or PCM, depending on your device.
4 To save the new settings, highlight Done, and then press the
OK button.
5 To reset the settings to the factory defaults, highlight Reset,
and then press the OK button.
UsingtheDolby_ DigitalDynamicRangeControlfeature
You can further compress Dolby ®Digital dynamic range, allowing
you to switch from digital to analog broadcasts at the same dynamic
range.
To use the Dolby ®Digital Dynamic Range Control:
1 Press the MENU button to open the Sound menu.
Page 8

6 UsingtheTV'sfeatures
Using &e Locksmenu
2 Highlight Audio Setup, and then press tile OK button.
3 In tile Dolby _ Digital Dynamic Range Control field, select
either Compressed. When Standard is selected, tile audio
outputs with minimal compression.
4 To save tile new settings, highlight Done, and then press tile
OK button.
5 To reset the settings to the factory defaults, highlight Reset,
and then press tile OK button.
NOTE .:.Thisfeatureisavailablewhentunedtoa digitalRFchannelwith
theDolby_'_Digitalsignal.
¢ TheDolby_ DigitalDynamicRangeControlwillfunctionin
relationtoDigitalOutputFormat(PCMmode).
UsingtheLocksmenu
Tile Locks menu includes tile Enable Rating Blocking, Edit Rating
Limits, Input Lock, Panel Lock, GameTimer and New PIN Code
features. You can use these features after entering the correct PIN
code.
EnteringthePINcode
1 Press tile MENU button to open tile Locks menu.
(Sample Image) Lock menu screen (fbr USA region)
Page 9

UsingtheTV'sfeatures _'7
Using the I_cks menu
2 Press the (y arrow) button to display the PIN code entry
screen.
Tile Lock System screen appears if a PIN code has not been
stored.
(Sample Image) Lock menu - store PIN screen
3 Press tile Channel Number buttons to enter a new four-digit
code, enter tile code a second time to confirm, and then press
tile OK button.
Tile Locks/Active screen appears if tile PIN code is already
stored.
4 Use tile Number buttons to enter your four-digit code, and then
press tile OK button.
NOTE IfthewrongPINcodeisentered,themessage"IncorrectPINcode,
pleasetryagain!"appears.
5 Highlight Retry, and then press the OK button.
6 Enter tile code again, and then press tile OK button.
When tile correct PIN code is entered, tile Locks menu opens.
ForgottenPINcode
While tile PIN code entering screen is displayed, press tile INFO
button four times within five seconds. Tile PIN code will be cleared
and you can enter a new PIN code.
ChangingyourPINcode
1 Press tile MENU button to open tile Locks menu.
2 Press tile (y arrow) button to display tile PIN code entering
screen.
3 Enter your four-digit PIN code, and then press tile OK button.
Page 10
8 UsingtheTV's features
Using parental contivls qbr USA region)
4 Press the (y arrow) button to highlight New PIN Code, and
then press the OK button.
5 Press the Number buttons to enter a new four-digit code.
Reenter the PIN code to confirm it.
6 Press the OK button.
The new PIN code is now active.
NOTE The PiNcode cannot besetto "0000."
Usingparentalcontrols(forUSAregion)
BlockingTVprogramsandmoviesbyrating(V-Chip)
Some TV programs and movies include signals that classify the
content of the program (as unsuitable for younger viewers). The
V-Chip feature in this TV detects the signals and blocks the
programs according to the ratings you select.
1 Press the MENU button to open the Locks menu.
2 Press the (y arrow) button to display the PIN code entering
screen.
3 Enter your four-digit PIN code, and then press the OK button.
4 Press the (y arrow) button to highlight Enable Rating
Blocking, and then press the OK button.
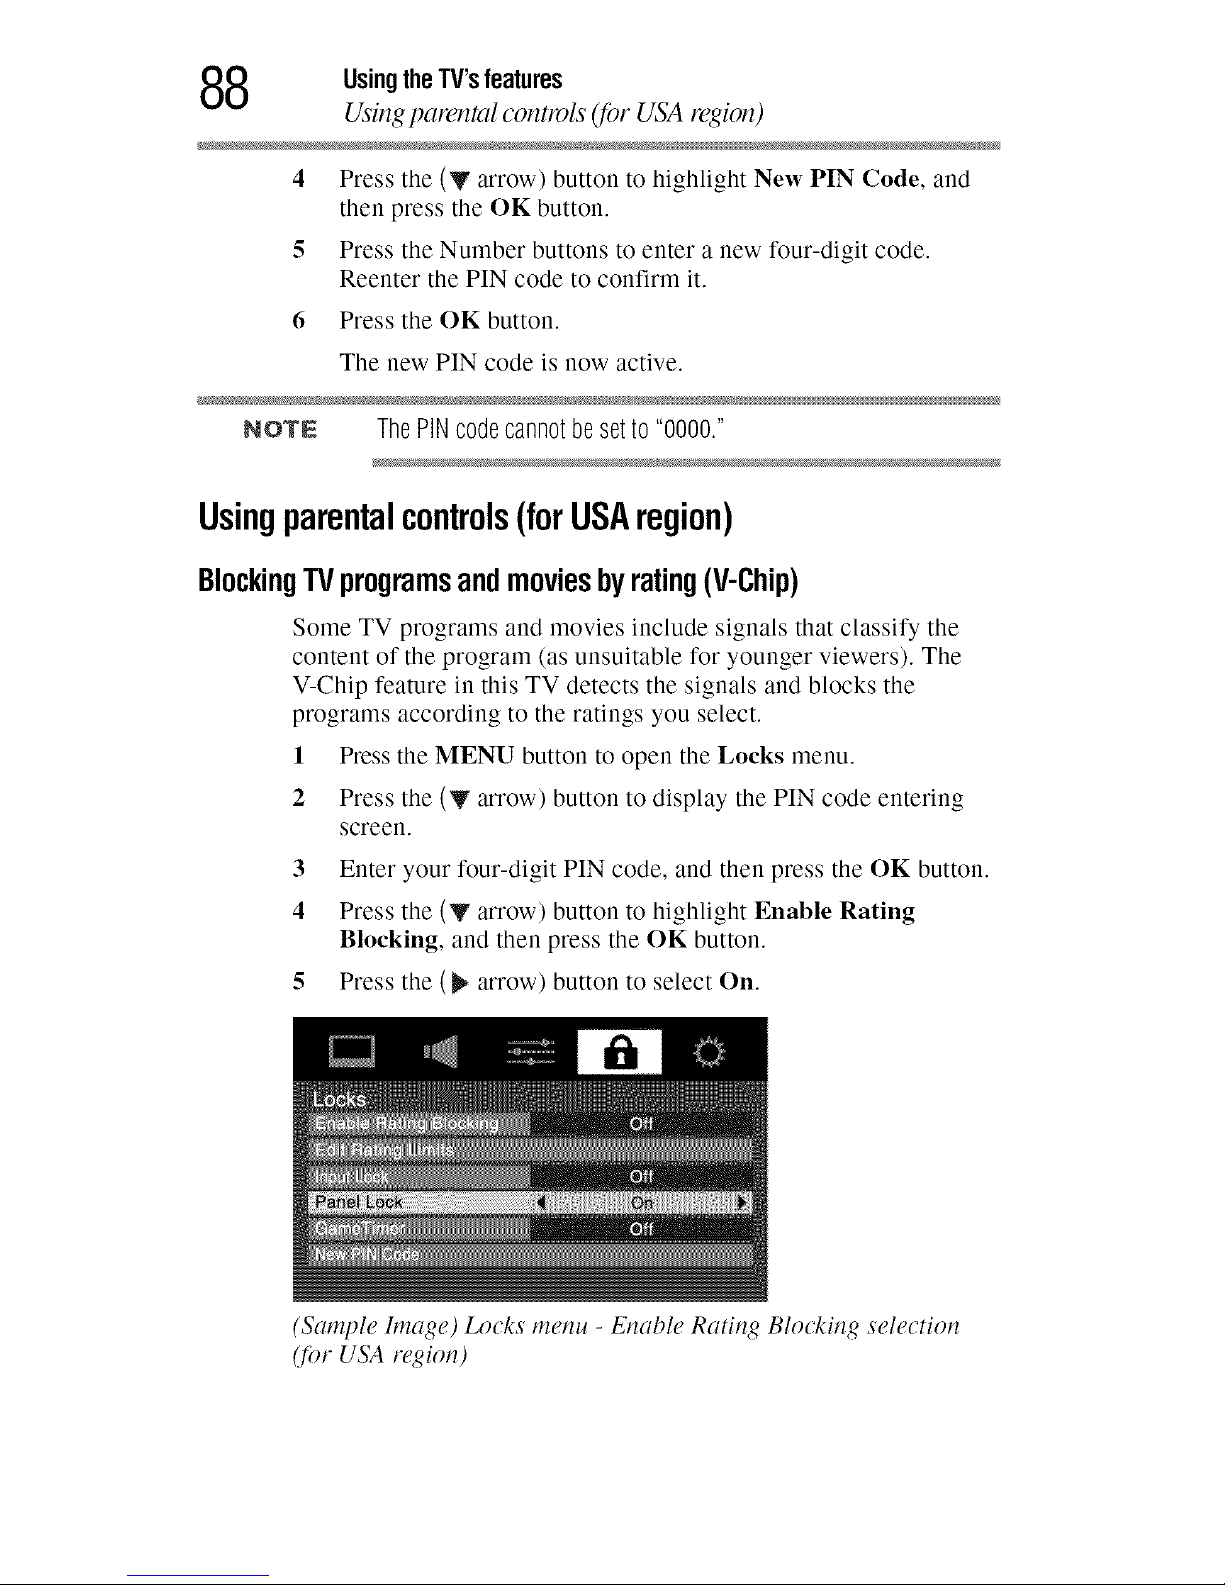
5 Press the (_ arrow) button to select On.
(Sample h_zage) Locks menu - Enable Rating Blocking selection
(tbr USA region)
Page 11

UsingtheTV'sfeatures _Q
Using parental controls _Or USA region)
(Sample Image) Locks menu screen fro" other regions
6 Press the (y arrow) button to highlight Edit Rating Limits,
and then press tile OK button.
7 Press tile (A/Y/4/_ arrow) buttons, and then press tile OK
button.
A box with an "X" is a rating that will be blocked. As you
highlight a rating, a definition for the rating appears at the
bottom of the screen.
To save the new settings, highlight Done, and then press the
OK button.
NOTE AboveselectionofblockinglevelisforU.SV-Chipsystem.For
Canadarating,youcanhighlight"CanadaRS,"andthenpressthe
OKbutton.Another"CanadianRatingMenu"screenappears.
Downloadinganadditionalratingsystem
In tile future, an additional rating system may become available for
use in selectively blocking TV programs and movies.
NOTE Thecurrentlytunedstationmustbereceivingadigitalsignalbefore
anadditionalratingsystemcanbedownloaded.
To download the additional rating system, if available:
1 Press the MENU button to open the Locks menu.
2 Press the (y arrow) button to display the PIN code entering
screen.
3 Enter your four-digit PIN code, and then press the OK button.
4 Press the (y arrow) button to highlight Enable Rating
Blocking, and then press the OK button.
Page 12

0 UsingtheTV'sfeatures
Using parental cont/vls (for USA region)
5 Press the (j_ arrow) button to select On.
6 Press the (y arrow) button to highlight Edit Rating Limits,
and then press the OK button.
The Edit Rating Limits screen appears.
Highlight Alt RS, and then press the OK button.
The Edit Alternate Ratings screen appears.
NOTE o',oTheAItRSbuttonwill onlybeavailableif anadditionalrating
systemiscurrentlyavailable.
¢ ItmaytakeseveralminutesfortheTVtodownloadtheadditional
ratingsystem.
¢ TheinformationdisplayedintheAlternateRatingsscreenwill
dependontheconfigurationoftheadditionalratingsystem
availableatthetimeofdownload.
8 Press the (AIyI_I_ arrow) buttons, and then press the OK
button.
A box with an "X" is a rating that will be blocked.
9 To save the new settings, highlight Done, and then press the
OK button.
10 In the Edit Rating Limits screen, highlight Done, and then
press the OK button.
NOTE o',oTheadditionalratingsystemcanonlybedownloadedonetime.
Youwill notbeabletodownloadanyupdatestotherating
systemshouldsuchupdatesbecomeavailable.
¢ Theadditionalratingsystemis notdesigned,transmittedor
controlledbytheTVorToshiba,noris theavailabilityofan
additionalratingsystemdeterminedor controlledbyToshiba.
Similarly,theratingof programsinanadditionalratingsystemis
notdetermined,transmittedor controlledbytheTVorToshiba.
¢ Theadditionalratingsystemisanevolvingtechnology;
therefore,availability,contentandformatmayvary.
Page 13
UsingtheTV'sfeatures (31
Using parental contlvls _br USA region)
v_.Jl
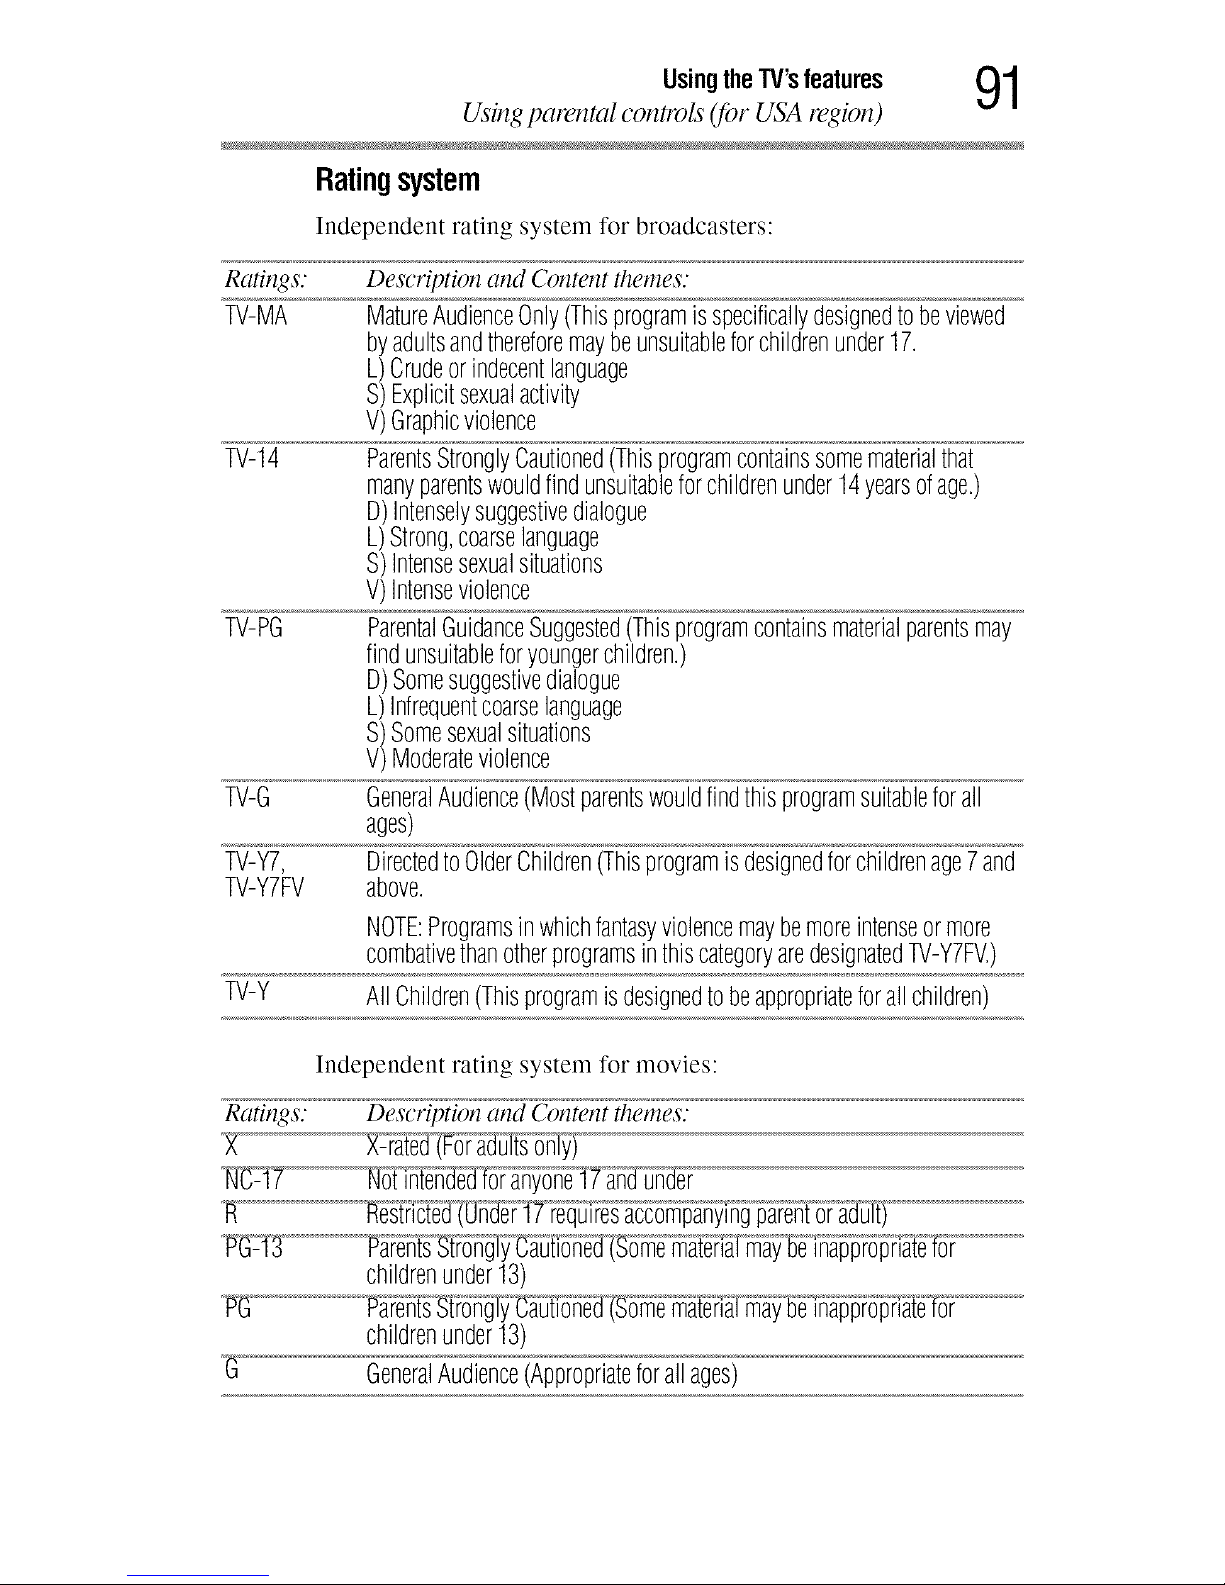
Ratingsystem
Independent rating system for broadcasters:
Ratings.
TV-MA
TV-14
TV-PG
Description and Content themes.
MatureAudienceOnly(Thisprogramisspecificallydesignedtobeviewed
byadultsandthereforemaybeunsuitableforchildrenunder17.
L)Crudeorindecentlanguage
S)Explicitsexualactivity
V)Graphicviolence
ParentsStronglyCautioned(Thisprogramcontainssomematerialthat
manyparentswouldfindunsuitableforchildrenunder14yearsofage.)
D)Intenselysuggestivedialogue
L)Strong,coarselanguage
S)Intensesexualsituations
V)Intenseviolence
ParentalGuidanceSuggested(Thisprogramcontainsmaterialparentsmay
findunsuitableforyoungerchildren.)
D)Somesuggestivedialogue
L)Infrequentcoarselanguage
S)Somesexualsituations
V)Moderateviolence
TV-G GeneralAudience(Mostparentswouldfindthisprogramsuitableforall
ages)
TV-Y7, DirectedtoOlderChildren(Thisprogramisdesignedforchildrenage7and
TV-Y7FV above.
NOTE:Programsinwhichfantasyviolencemaybemoreintenseormore
combativethanotherprogramsinthiscategoryaredesignatedTV-Y7FV.)
TV-Y AllChildren(Thisprogramisdesignedtobeappropriateforallchildren)
Independent rating system for movies:
Ratings: Description and Content themes:
_ _fii}°g__7'_l-oires accompanyingparentor_/i)
°'S_d_'_l_C_[j_f6°_i'___gi_b'_ 'inappro_f6_f
childrenunder13)
childrenunder13)
"G GeneralAudience(Appropriateforallages)
Page 14
2 UsingtheTV'sfeatures
Using parental cont/vls (for USA region)
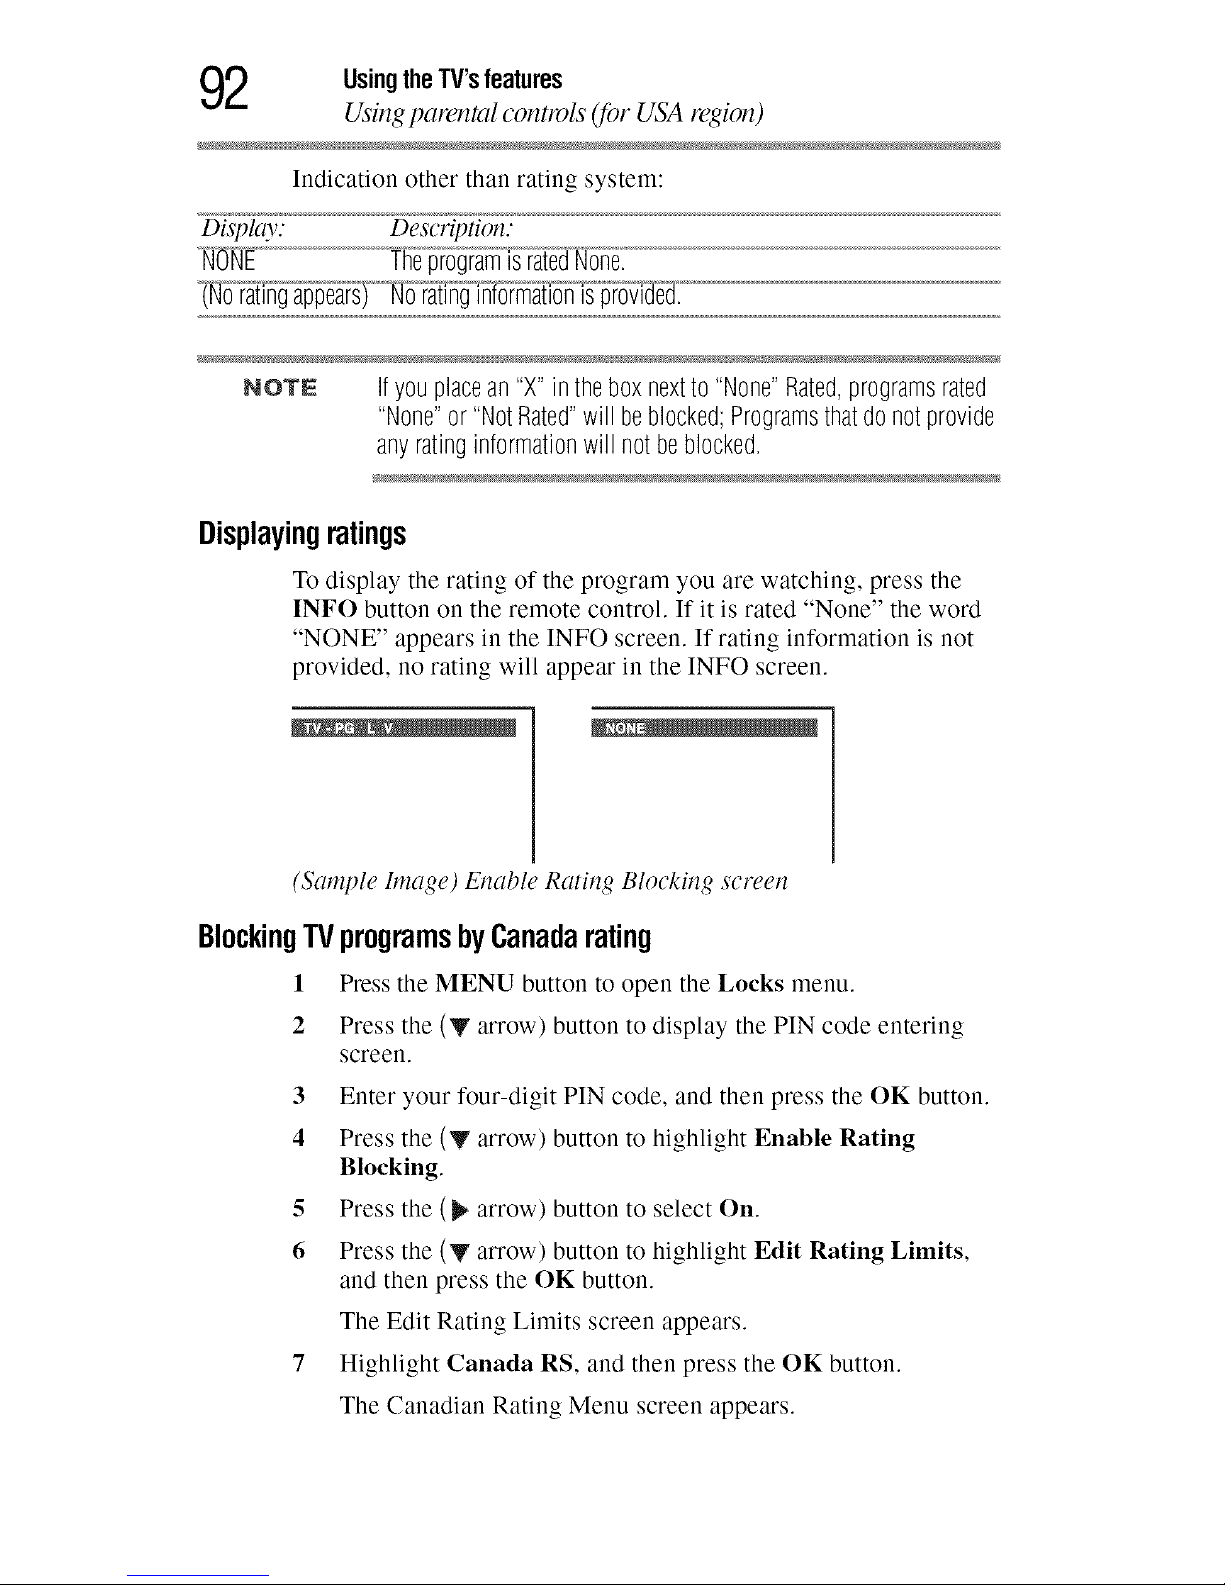
Indication other than rating system:
Display. Description:
_N_ONE TheprogramisratedNone,
NOTE Ifyouplacean"X"in theboxnextto"None"Rated,programsrated
"None"or"NotRated"will beblocked;Programsthatdonotprovide
anyratinginformationwill notbeblocked,
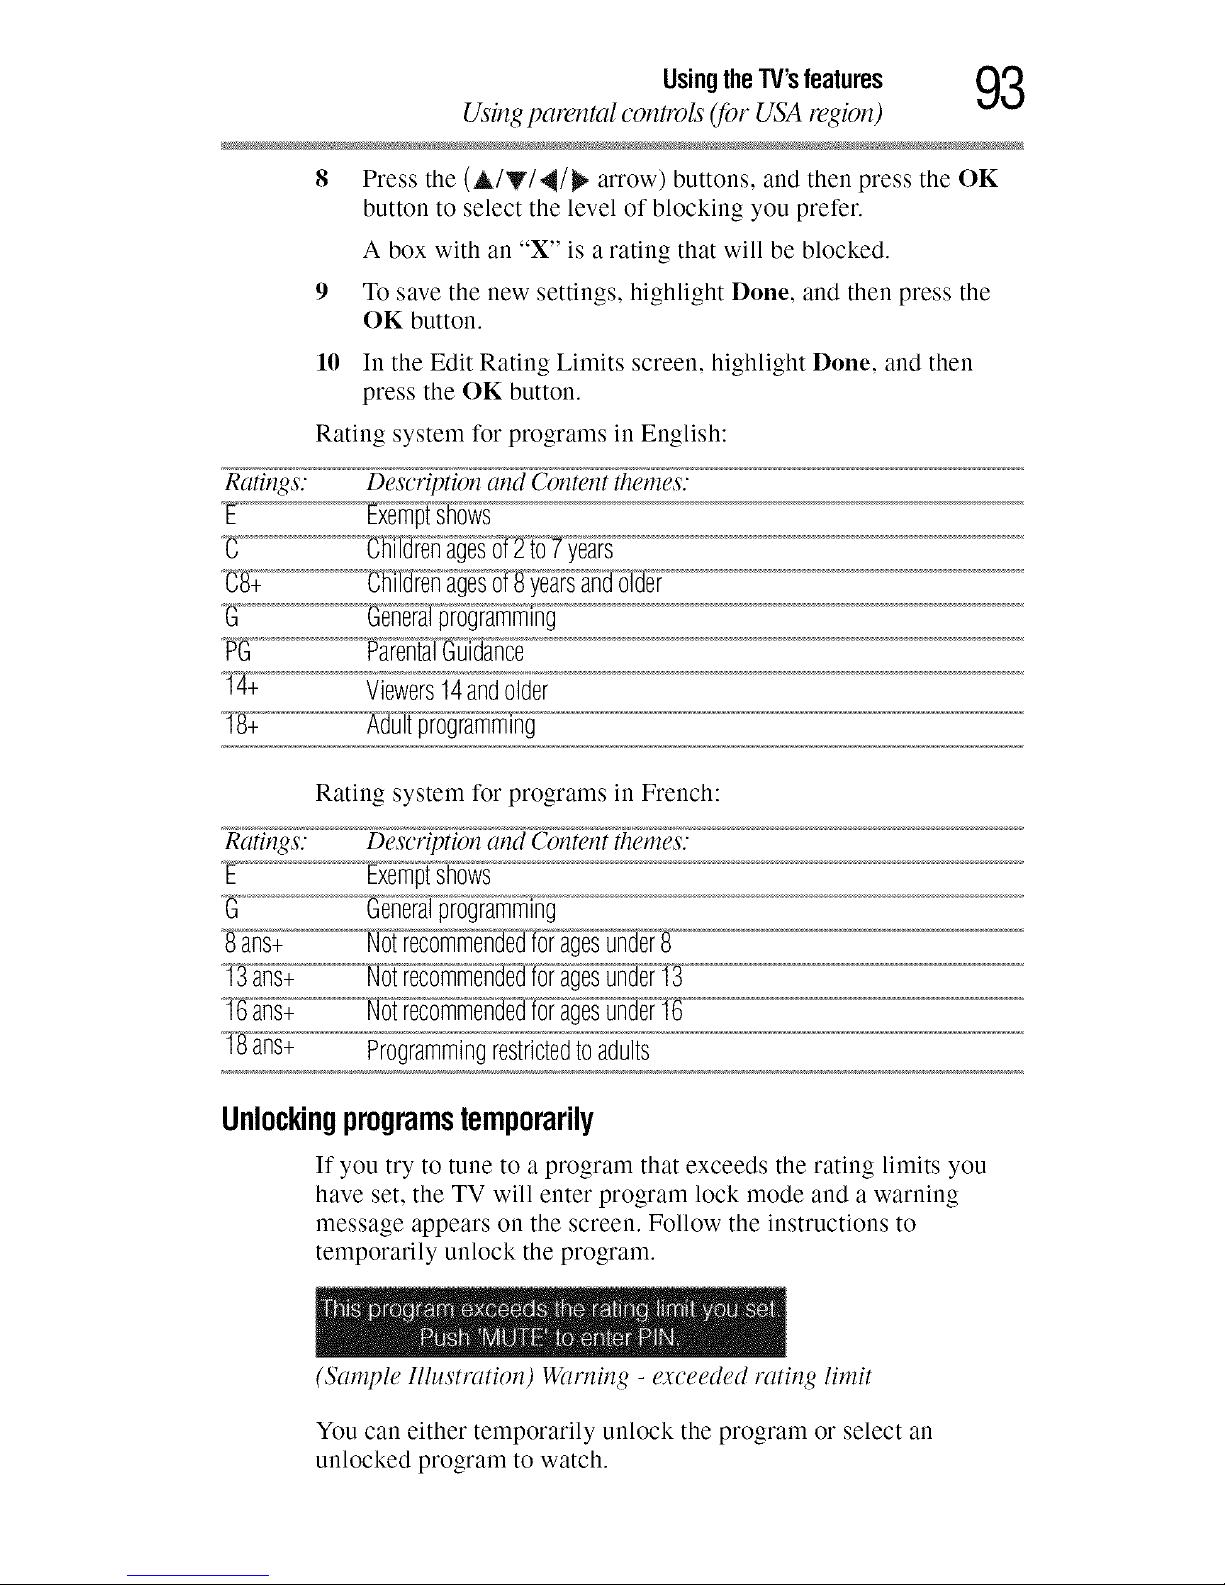
Displayingratings
To display the rating of the program you are watching, press the
INFO button on tile remote control. If it is rated "None" tile word
"NONE" appears in tile INFO screen. If rating information is not
provided, no rating will appear in tile INFO screen.
BlockingTV
!
2
(Sample Image) Enable Rating Blocking screen
programsbyCanadarating
Press tile MENU button to open tile Locks menu.
Press the (y arrow) button to display the PIN code entering
screen.
3 Enter your four-digit PIN code, and then press the OK button.
4 Press the (y arrow) button to highlight Enable Rating
Blocking.
5 Press tile (_ arrow) button to select On.
6 Press tile (V arrow) button to highlight Edit Rating Limits,
and then press tile OK button.
Tile Edit Rating Limits screen appears.
7 Highlight Canada RS, and then press tile OK button.
Tile Canadian Rating Menu screen appears.
Page 15
UsingtheTV'sfeatures (_
Using parental controls (for USA region)
8 Press the (A/Y/4/_ arrow) buttons, and then press the OK
button to select the level of blocking you prefer.
A box with an "X" is a rating that will be blocked.
9 To save the new settings, highlight Done, and then press the
OK button.
10 In the Edit Rating Limits screen, highlight Done, and then
press the OK button.
Rating system for programs in English:
Ratings. Description and Content themes.
'G _G_e_lprogrammlng
P_ Parental_i]@n_c_6_
T_ Viewers14andolder
_1_8_ _d[i]iprogrammlng
Rating system for programs in French:
Ratings.
E
Description and Content themes.
Exemptshows
_G_6n_]°programming
Programmingrestrictedtoadults
Unlockingprogramstemporarily
If you try to tune to a program that exceeds the rating limits you
have set, the TV will enter program lock mode and a warning
message appears on the screen. Follow the instructions to
temporarily unlock the program.
(Sample Illustration) Wan_ing - exceeded rating limit
You can either temporarily unlock the program or select an
unlocked program to watch.
Page 16

4 UsingtheTV'sfeatures
Using tlTeinput lockJeamw
To temporarily unlock tile program:
1 Press the MUTE button.
2 Enter your four-digit PIN code, and then press the OK button.
If the correct code is entered, the program lock mode is
released and the normal picture appears. All locking will be
enabled again when you change the channel.
Usingtheinputlockfeature
You can use the Input Lock feature to lock the video inputs (Video,
ColorStream ®HD, HDMI 1, HDMI 2, and PC) and channels 3 and
4. You will not be able to view the input sources or channels until
you unlock the inputs.
To lock/unlock the video inputs:
1 From the Locks menu, press the (y arrow) button to display
the PIN code entering screen.
2 Enter your four-digit PIN code, and then press the OK button.
3 Press the (y arrow) button to highlight Input Lock, and then
press the (_ arrow) button to select the level of video input
locking you prefer.
Mode.
Video+
N
Description."
LocksVideo,d_"oTS'[Pe'am'_jHD,HDMI]_N'_d channelsS'_dn_ci'
4.SelectVideo+if youplayvideotapesviaanANT/CABLEinput.
4 Press the EXIT button.
Lockingchannels
With the Lock feature, you can lock specific channels. Locked
channels can only be accessed by entering the PIN code, see
"Entering the PIN code" on page 86.
To lock channels:
1 From the Setup menu, highlight Installation, and then press
the OK button.
2 Press the OK button to select Terrestrial.
Page 17
UsingtheTV'sfeatures (_
I_)cking channels
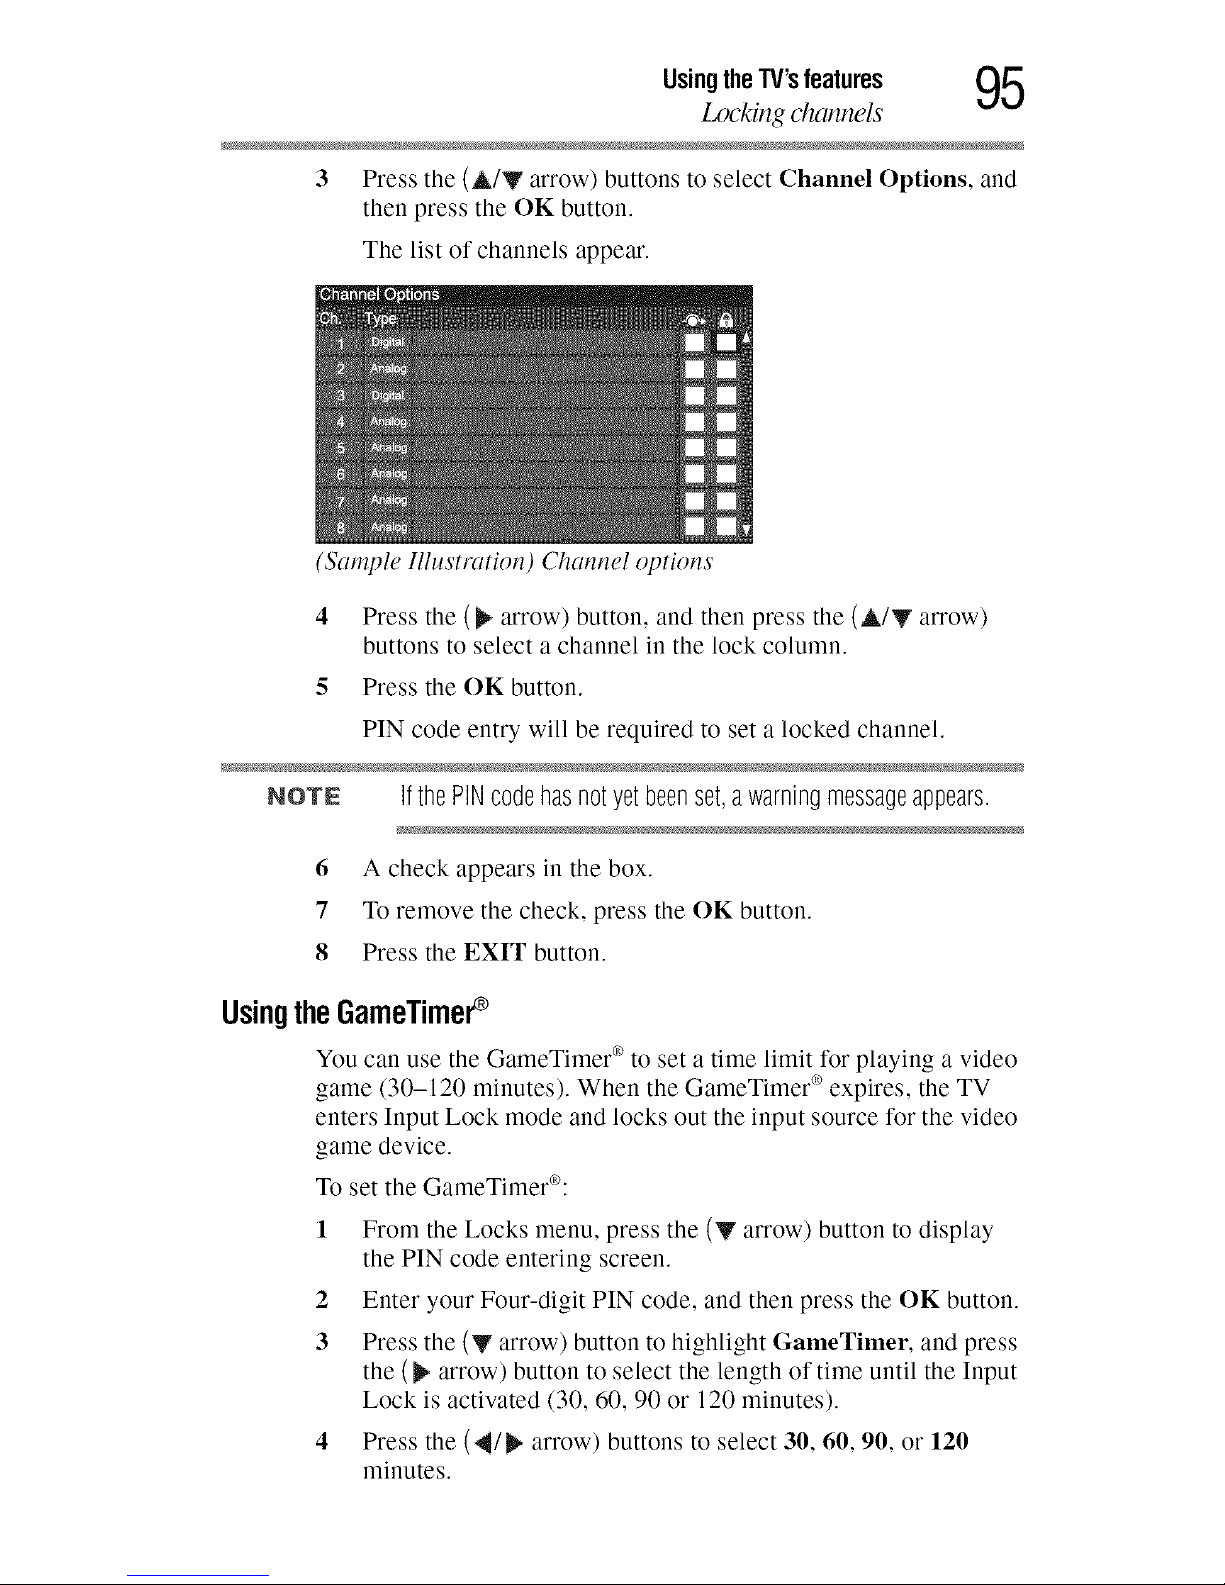
3 Press the (A/Y arrow) buttons to select Channel Options, and
then press the OK button.
The list of channels appear.
(Sample Illustration) Channel options
4 Press the ( _ arrow) button, and then press the (A/Y arrow)
buttons to select a channel in the lock column.
5 Press the ON button.
PIN code entry will be required to set a locked channel.
NOTE Ifthe PIN code hasnot yetbeenset,awarningmessageappears.
6 A check appears in the box.
7 To remove the check, press the ON button.
8 Press the EXIT button.
UsingtheGameTimer
You can use the GameTimer _'_to set a time limit for playing a video
game (30-120 minutes). When the GameTimer _'_expires, the TV
enters Input Lock mode and locks out the input source for the video
game device.
To set the GameTimer('_):
1 From the Locks menu, press the (y arrow) button to display
the PIN code entering screen.
2 Enter your Four-digit PIN code, and then press the OK button.
3 Press the (V arrow) button to highlight GameTimer, and press
the (_ arrow) button to select the length of time until the Input
Lock is activated (30, 60, 90 or 120 minutes).
4 Press the (_/_ arrow) buttons to select 30, 60, 90, or 120
minutes.
Page 18

6 UsingtheTV'sfeatures
I_)cking channels
To cancel the GameTimer _, select Off in step 3 above.
To deactivate the Input Lock once the GameTimer _`_has activated it:
4° Set the Input Lock to Off, see "Using the GameTimer®" on
page 95.
NOTE 4* Amessageappearswhen10minutes,3minutes,andI minute
areremaining.
¢ IftheTVlosespowerwithtimeremaining,theTVwill enterInput
Lockmodewhenpoweris restored(asiftheGameTimerhad
beenactivated).YoumustdeactivatetheInputLock,see"Using
the GameTimer®" on page 95.
Usingthepanel lockfeature
You can lock the control panel to prevent your settings from being
changed accidentally (by children, for example). When Panel Lock
is set to On, none of the controls on the control panel operate
except POWER.
To lock the control panel:
1 Press the MENU button to highlight the Locks menu.
2 Press the (y arrow) button to display the
3 Enter your four-digit PIN code, and then press the OK button.
4 Press the (y arrow) button to highlight Panel Lock.
5 Press the (_ arrow) button to select On.
When the control panel is locked and any button on the control
panel (except POWER) is pressed, the message "NOT
AVAILABLE" appears.
(Sample Illustration) Panel Lock screen
Page 19

UsingtheTV'sfeatures Q7
Using the PC setfings jeature
To unlock tile control panel, select Off in Step 5 above or press and
hold tile VOLUME (-) button on tile TV control panel for a few
seconds until tile volume icon appears.
UsingthePCsettingsfeature
You can view an image from a PC on tile TV screen. When a PC is
connected to the TV's PC IN terminal, you can use the PC Settings
feature to make adjustments to the image. If the edges of the picture
are cut off, readjust the Horizontal Position and Vertical Position. If
the picture is affected by interference, readjust the Clock Phase and
Sampling Clock.
To adjust the PC settings:
1 Repeatedly press the INPUT button to select PC Input mode,
see "Adjusting the picture" on page 76.
2 Press the MENU button to open the Setup menu.
3 Press the (A/Y arrow) buttons to select PC Settings, and then
press the OK button.
(Sample Image) PC Settings screen
NOTE Ifacomputerisnotconnectedor thereisnoPCinputsignal,this
featurewillbegrayedoutintheSetupmenu.
4 Press the (A/V arrow) buttons to select an item.
5 Press the ('_l/_ arrow) buttons to make the appropriate
adjustments.
(Sample Image) PC Setti_gs - adjustmems scree_
Page 20
8 UsingtheTV'sfeatures
Using the PC settings jeature
NOTE ThescreenisdisruptedmomentarilywhileadjustingthePCsettings.
Thisisnotasignofmalfunction.
Mode. Description:
HorizontalPosition Movesthepictureleft!right.Theadjustmentrangeiswithin+10from
center.*
VerticalPosition Movesthepictureup/down.Theadjustmentrangeiswithin+10from
center.*
ClockPhase Helpstoreducenoiseandsharpenthepicture.Theadjustmentrangeis
within+16fromcenter.*
SamplingClocks Helpstoreducenoiseandminimizeperiodicverticalstripesonthe
screen.Theadjustmentrangeiswithin+10fromcenter.*
Reset Highlightthisitem,andthenpresstheOKbuttontogetanoptimum
adjustmentautomatically.
_:The default settings and/or adjustment ranges may vary depending on the
input signal format.
SettingthePCAudio
You can output or mute sound from your computer when
connecting it to your TV, using the AUDIO IN terminal and PC
audio cable.
To set the PC Audio:
1 Press the MENU button to open the Sound menu.
2 Highlight Audio Setup, and then press the OK button.
3 Press the (A/V arrow) buttons to select PC Audio, and then
press the (4/_ arrow) buttons to select No or Yes.
o*,o Yes: When viewing the PC input, the audio from the PC
Audio input can be heard.
o_o No: When viewing the PC input, there will be no audio.
NOTE BecausethePCandHDMI1 inputssharethesamesetofanalog
audioinputs,thePCAudiomenusettinginfluencestheHDMI1
Audiomenusetting.IfPCAudiois setto"No"theHDMI1Audio
settingchangesto"Auto"If PCAudioissetto "Yes"theHDMI1
Audiosettingissetto"Digital"andisgrayedoutinthemenu.
Page 21

UsingtheTV'sfeatures QQ
Using the Media Player
,.J ,_J
UsingtheMediaPlayer
UsingMediaPlayerwitha USBdevice
You can enjoy photos or music contents stored on a USB storage
device.
Photo Viewer specifications:
olo Data type: JPEG EXIF ver 2.1
olo File format: JPEG
o:o Maximum photo size: 6 MB
o:o Maximum number of files: 500/folder
o:o Maximum photo resolution: 4096 x 4096 pixels
o:o Best photo resolution:
1920 x 1080 pixels
Music Player specifications:
o:o File format: MP3
olo Sampling frequency: 16 kHz, 22.05 kHz, 24 kHz,
olo 32 kHz, 44.1 kHz, 48 kHz
o1. Bit rate: from 8 to 320 kbps
o1. Maximum number of files: 500/folder
Supported file system: FAT16 and FAT32
Page 22

1 O0 UsingtheTV'sfeatures
Using the Media Pko_er
NOTE o',.Gently insertthe USBdeviceinto the portanddo not remove
while viewing Media Player.
•".. USB device:USBMass StorageClassdevice (MSC)
•".. Connectivity is not guaranteedfor all devices.
•".. Connectthe USBdeviceto the TV directly.
•".. Do not usea USB Hub.
•".. Youmust obtainany required permissionfrom copyright owners
to usecopyright content. Toshibacannotand doesnot grant
such permission.
•".. Dependingonthe file sizeand amountin your USB storage
device,it maytakesometimefor loadingto view.A messagewill
display on-screen when loading files from the USBstorage
device.
•".. Only limited typesof U3 USBdevicearesupported.Therefore,it
is suggestednot to use U3USBfor playing Media Player.
•".. Non-supportedcharacterswill be replacedwith a square.
AutoStartfunction
When Auto Start is enabled, you will be asked if you want to start
the Media Player when a USB device is inserted. If Auto Start is
disabled, you must manually start the Media Player from the menu.
To change the Auto Start setting:
1 Press the MENU button to open the Setup menu.
2 Press the (y arrow) button, and then press the OK button.
3 Press the (A/Y arrow) buttons to highlight Auto Start.
4 Press the (,_/_ arrow) buttons to select On/Off.
ToopentheMediaPlayer
Auto Start:
1 Gently insert a supported USB storage device to the USB port
on the rear side of the TV. A prompt will appear.
NOTE IfyourepeatedlyinsertandremovetheUSBconnector,theprompt
maynotappear.
Page 23

UsingtheTV'sfeatures 101
Using the Media Player
2 Press the (4/_ arrow) buttons to select Yes, and then press the
OK button.
The Media Player menu will appear. When you select No,
nothing happens.
(Sample Image) Media Player - open screen
NOTE .:o Thepromptwilldisappearafterabout10sec.
¢ IfAutoStartis settooff,youcanstarttheMediaPlayer
manually.
Manual Start:
1 Press the MENU button to open the Setup menu.
2 Press the (y arrow) button to select Media Player, and then
press the OK button.
3 Press the (A/Y arrow) buttons to highlight Photo or Music,
and then press the OK button.
(Sample Image) Media Play screen
NOTE .:o Theviewerwillalsoopeneveniftherearenophotoormusic
files.
¢ WhiletheMediaPlayerisactive,themainmenuscannotbe
displayed.
Viewingphotofiles
There are three types of view modes.
Multi View:
Page 24
1 02 UsingtheTV'sfeatures
Using the Media Pl(o'er
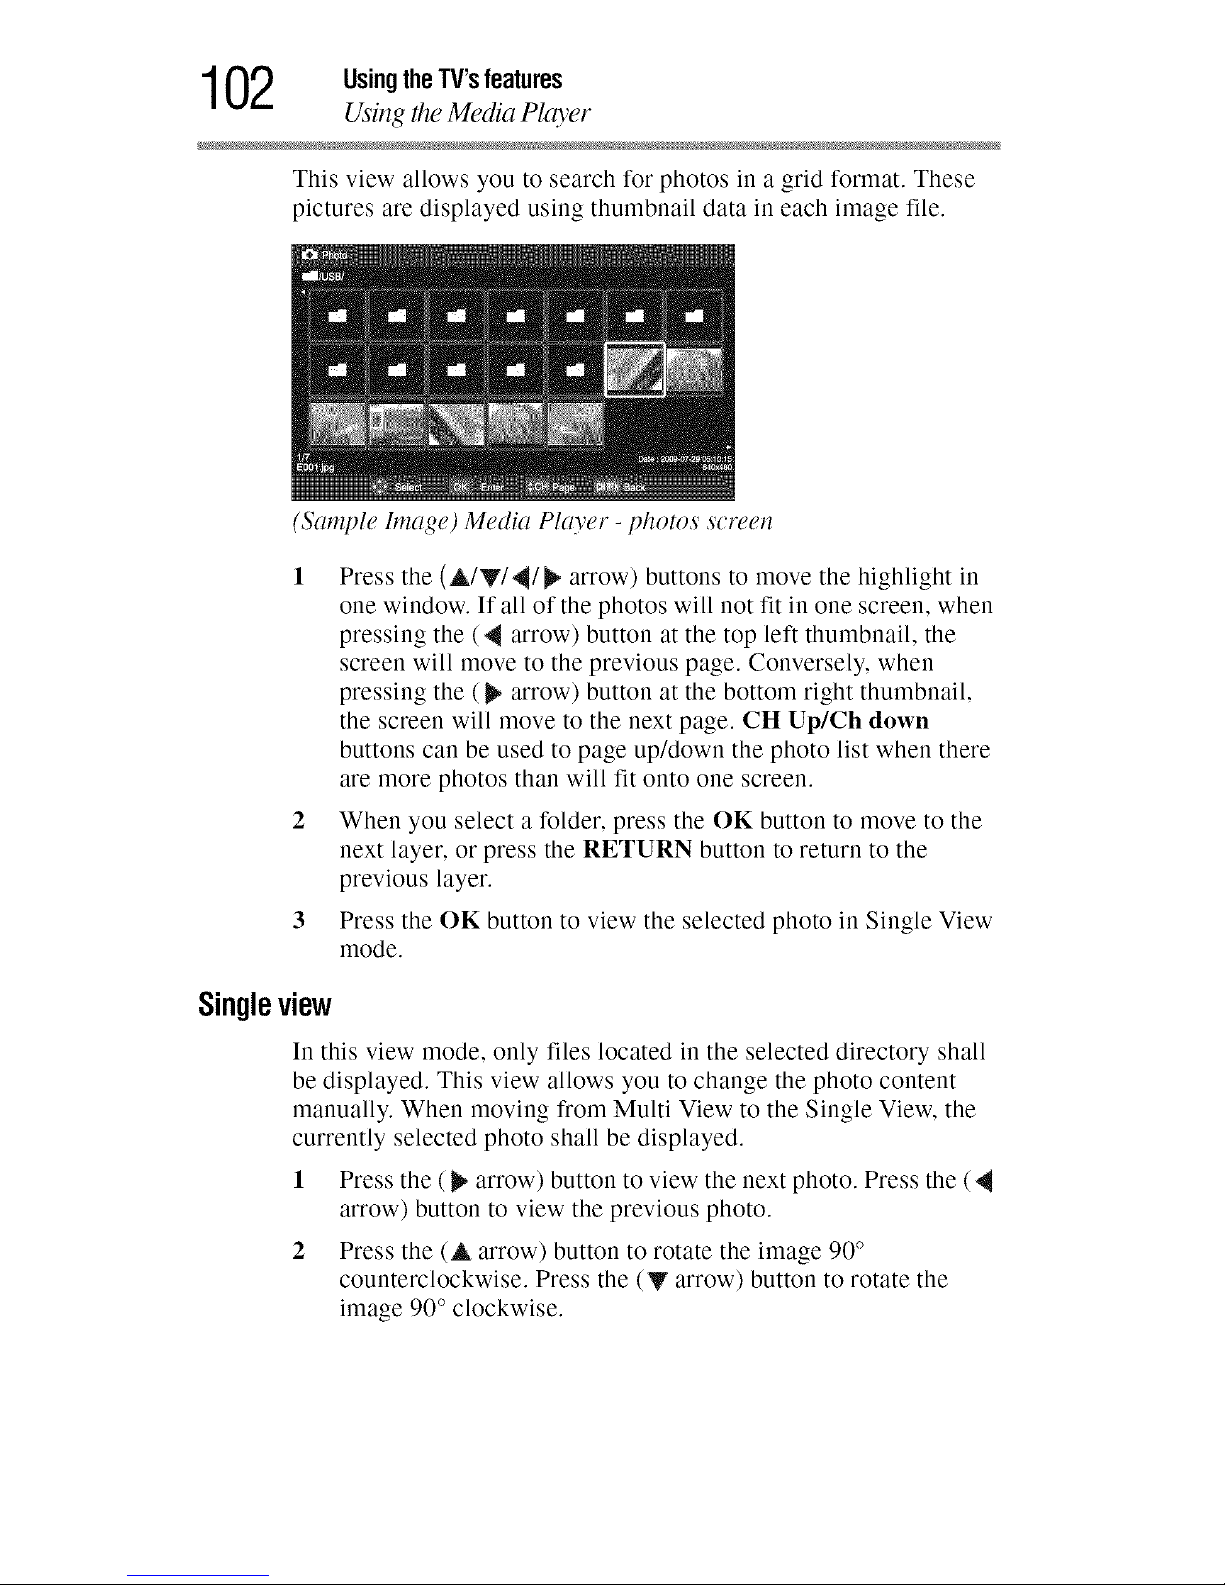
This view allows you to search for photos in a grid format. These
pictures are displayed using thumbnail data in each image file.
(Sample Image) Media Player - photos screen
1 Press the (AITI_I_ arrow) buttons to move the highlight in
one window. If all of the photos will not fit in one screen, when
pressing the (4 arrow) button at the top left thumbnail, the
screen will move to the previous page. Conversely, when
pressing the (_ arrow) button at the bottom right thumbnail,
the screen will move to the next page. CH Up/Ch down
buttons can be used to page up/down the photo list when there
are more photos than will fit onto one screen.
2 When you select a folder, press the OK button to move to the
next layer, or press the RETURN button to return to the
previous layer.
3 Press the OK button to view the selected photo in Single View
mode.
Singleview
In this view mode, only files located in the selected directory shall
be displayed. This view allows you to change the photo content
manually. When moving from Multi View to the Single View, the
currently selected photo shall be displayed.
1 Press the (_ arrow) button to view the next photo. Press the (
arrow) button to view the previous photo.
2 Press the (A arrow) button to rotate the image 90 °
counterclockwise. Press the (y arrow) button to rotate the
image 90 ° clockwise.
Page 25
UsingtheTV'sfeatures 103
Using the Media Player
Slideshow
This view allows you to watch a slide show of the photos. In this
mode, only files located in the selected directory will be played.
1 To start slide show, press the OK button to select Single View
mode.
2 Press the (4/_ arrow) buttons to view the previous or next
photo.
To set Interval Time and Repeat settings:
1 Press the MENU button to open the Quick Menu.
2 Press the (A/Y arrow) buttons to select either Interval Time
or Repeat.
3 Press the (@/_ arrow) buttons to adjust the setting, and then
press the RETURN button.
NOTE ZoomandPicturesizefunctionsaredisable.
To close the Photo Viewer, press the EXIT button. The television
will return to the last viewed channel or external input.
Playing
musicfiles
You
1
2
3
4
can listen to music from a list of available files.
Press the MENU button to open the Setup menu.
Highlight Media Player, and then press the OK button.
Press the (V arrow) button to select Music.
Press the (A/Y arrow) buttons to select a file or folder. The
CH Up/CH Down buttons can be used to page up/down the
music list when there are more files than will fit onto one
screen.
5 When you select a folder, press the OK button to move to the
next layer. Press the RETURN button to move back to the
previous layer.
6 With the desired file selected, press the OK or PLAY button to
begin playback.
7 Press the STOP button to stop playback
Page 26
1 04 UsingtheTV'sfeatures
Using the Media Pko_er
NOTE o*,oIf playbackfinishesbeforetheSTOPbuttonispressed,thenext
file automatically startsto play from the beginning.
¢ Dependingonthe file size,it maytakesometime for playbackto
begin.
To pause playback:
o*.o Press the PAUSE button to pause playback.
o:* To resume normal playback, press the PLAY or PAUSE
button.
•:. To locate a specific file, press the SKIP Reverse or SKIP
Forward button repeatedly.
•:. To adjust volume, press VOLUME (+ -) buttons.
NOTE During playback,you can adjustthe SOUNDmenu functions from
the Quick Menu.
To set the repeat mode:
1 Press the MENU button to open the Quick Menu.
2 Highlight Repeat, and press the (A/Y arrow) buttons to select
Off, All or 1.
3 Press the CH RTN button to close the Music Player, and then
press the EXIT button.
Viewingphotofilesandplayingmusicfilesatthesametime
While viewing photo files, this allows you to listen to music from a
list of available files.
1 While viewing photos in Single View or Slide Show mode,
press the MENU button to open the Quick Menu.
2 Highlight Background Music, and then press the OK button.
The music list appears.
3 Select a music file and press the OK button to start playback.
4 Press the RETURN button twice to return to photo view mode.
The music is now playing in the background.
Page 27

UsingtheTV'sfeatures 105
Using the Media Player
Contents Description Description
Photo Photolist(Multi View) Seepage137
Sorting
Tosortthefoldersandfiles:
1 PresstheMENUbuttonto opentheQuickMenu
fromMultiViewmode.
2 Pressthe(A/T arrow)buttonstoselectSod.
3 Pressthe(411/1_,arrow)buttonstoselectTille,
New,orOldtosetthesortingrule.
Tille-File sortingrules:
1 Unicodepriority
2 (0,1-9),capitalalphabet
(A,B-Z),smallalphabet
(a,b-z),Chinese
3 Increasingorder
New-Fromnewtoold (accordingtothedateand
timethepicturewastaken).
Old-Fromoldtonew(accordingtothedateandtime
thepicturewastaken).
SingleViewmode
SlideShowmode
Skipto previous/nextphoto
SlideShowRepeatplay
SlideShowIntervalTimeselection
Page 28
1 06 UsingtheTV'sfeatures
Setting the sleep timer
Description Description
Music list (Multi View) Seepage 136
Sorting
Tosort thefolders and files:
1 PresstheMENU button to open the Quick Menu.
2 Pressthe(A/T arrow)buttonsto select Sort.
3 Pressthe(4/_ arrow)buttonsto selectTitle,
New,or 01d to set the sortingrule.
Playback
Pause
Stop
Skip
Repeatplay
SoundSettings
(Adjusting the audio quality)
NOTE Duringplayback,youcanadjusttheSOUNDmenufunctionsfrom
theQuickMenu.
Settingthesleeptimer
You can set the sleep timer to turn oft" the TV after a set length of
time (maximum of 12 hours).
1
2
To set the sleep timer using the remote control:
Press the SLEEP button on the remote control to set the length
of time until the TV turns off.
Repeatedly press the SLEEP button to increase the time in
10-minute increments, or press the (A/Y arrow) buttons to
increase or decrease the time in 10-minute increments,
(maximum of 12 hours).
To set the sleep timer using the on-screen menus:
1 Press the MENU button to open the Setup menu.
2 Highlight Sleep Timer.
Page 29
UsingtheTV'sfeatures 107
Automatic Power Down
3 Press the Number buttons to enter the length of time
(maximum of 12 hours) and then press the OK button.
Or press the (,_/_ arrow) buttons to increase or decrease in
10-minute increments, (maximum of 12 hours).
NOTE Ifapowerfailureoccurs,thesleeptimersettingmaybecleared.
To display the time remaining until the TV turns off, press the
SLEEP button.
NOTE A messagedisplayson-screenwhenoneminuteis remainingonthe
sleeptimer.
To cancel the sleep timer, Repeatedly press the SLEEP button until
it is set to 0 minutes.
AutomaticPowerDown
The TV can be configured to automatically turn itself off after 4
hours if you do not operate the TV either from the remote control or
the TV control panel.
1 From the Preferences menu, highlight Energy Saving
Settings, and then press the OK button.
2 Press the (A/Y arrow) buttons to select Automatic Power
Down.
3
Press the (4/_ arrow) buttons to select On/Off, and then press
the EXIT button.
NOTE Whenthefollowingfeaturesareset,thefeaturethatissetforthe
nearesttimewill function.
¢ AutomaticPowerDown
¢ SleepTimer
¢ Wallpaper/AutoPowerOff
¢ AutoshutdownafterI hourofinactivity(afterpoweringonbyOn
Timer)
¢ Nosignalautopoweroff(after14minutesofnosignal)
Page 30

1 08 UsingtheTV'sfeatures
No Signal Power Down
NoSignalPowerDown
The TV will automatically turn itself oft"after 15 minutes when no
signal is detected.
olo You can change the setting to Oft"for the following functions:
o}o Low signal strength of an analog channel (no signal detection)
*}o Only Audio L/R is connected to external input to listen to
music through the TV speakers.
1 From the Preferences menu, highlight Energy Saving
Settings, and then press the OK button.
2 Press the (A/Y arrow) buttons to select No Signal Power
Down, and then press the OK button.
3 Press the (A/Y arrow) buttons to highlight the item you wish
to change, and then press the (41_ arrow) buttons to select
On/Off.
NOTE o:o DefaultsettingforeachinputisOn,
¢ AwarningmessageappearsapproximatelyI minutebeforethe
TVturnsOff.
UsingHDIVII@CEC
This is a new feature that uses CEC technology and allows you to
control Toshiba HDMI® CEC compatible devices from the TV
remote control via an HDMI + connection.
When the Enable HDMI® CEC in the HDMI® CEC Setup menu is
set to On, the following HDMI® CEC functions are enabled.
HDIVII®CECplaybackdevice(DVDplayer,etc.)control
With your TV's remote control, or using the HDMI® CEC Player
Control menu, you can control the connected HDMI® CEC
playback device you are watching.
Available remote control key functions:
Button. Description."
PLAY Beginplayback
STOP Stopplayback
PAUSE Pausethepictureduringplayorrecordmode
SKIPForward SkipForward
Page 31

UsingtheTV'sfeatures 109
Using HDMI® CEC
Button. Description."
SKIPReverse Skipbackward
FF Fastforward
REV Rewind/reverse
A/T/4/_ Navigatesmenuoptions
OK Entersmenuoptions
CANCEL Returntothepreviousmenu
NOTE Thesefunctionsdependonthedevicesconnected.
HDMI® CEC Player Control menu functions:
1 Press the MENU button, and then open the Preferences menu.
2 Highlight HDMI® CEC Player Control, and then press the
OK button.
(Sample Image) HDMI@ CEC Player Control screen
3 Press the (A/V arrow) buttons to select the item you wish to
control, and then press the OK button.
Item: Description:
Power TurnstheselecteddeviceOn/Off
RootMenu Accessesthetop menuoftheselecteddevice
ContentsMenu AccessesthecontentslistwhenyoupresstheOKbutton.Atthistime,
theHDMI®CECPlayerControlmenudisappears.
SetupMenu AccessestheSetupmenuofaDVDplayer
TopMenu AccessesthetopmenuofaUVU
Menu AccessesthemenuofaUVU
Page 32

1 1 0 UsingtheTV'sfeatures
Using HDMI@ CEC
NOTE Thesefunctionsdependonthedevicesthatareconnected.
TheHDMI@CECPlayerControlitemwill begrayedoutinthe
followingconditions:
¢ Anon-HUMPinputiscurrentlyselected.
¢ TheEnableHDMI@CECitemissettoOff.
¢ TheconnectedCECdeviceisnotaplaybackorrecordingdevice.
HDMI®CECinputsourceselection
If a HDMI@ CEC device with HDMI _ switching capability
(e.g. Audio Receiver) is connected to the HDMI _ input, you can
select another HDMI@ CEC device that is connected to the master
HDMI _ device using the TV's INPUT button, see "Selecting the
video input source" on page 59.
VOLUMEandMUTEcontrolsof AudioReceiver
With your TV's remote control, you can adjust or mute the sound
volume of the Audio Receiver.
•*.o VOL (+ -) buttons adjust the volume level.
o*.o MUTE button turns off the sound.
To use this function:
o*.. Set Speaker Preference to Audio Receiver in the
HDMI® CEC Setup menu.
°_o Confirm that a connected HDMI@ CEC device (such as DVD
player, etc.) is selected for the Audio Receiver input source.
NOTE Thesefunctionsdependonthedeviceconnected.
Page 33

UsingtheTV'sfeatures 1 1 1
Using HDMI® CEC
OtherHDIVlI®CECfunctions
When the Enable HDMI® CEC and each item in the
HDMI® CEC Setup menu are set to On, tile following functions
will be enabled.
Item. Description."
TVAutoInput _'_il_e*UH_O_M]_#devicestartsplayingvideooraudio,theTVwill
Switch automaticallyswitchtotheappropriateHDMI_'*input.
TVAutoPowerIfaHDMI®CECdeviceisturnedon,theTVturnsonautomatically.
DeviceAuto IftheTVisturnedofftheTVwillsendamessagetoturnoffallofthe
Standby HDMI®CECdevicesconnectedtotheTV.
Speaker Fromthisitem,youcansetyouraudiooutputpreferencetotheTVspeakers
Preference ortheaudioreceiverspeakers.WhenthisitemissettoAudioReceiver,the
TVremotecanbeusedtoadjustormutethevolumeoftheaudio.Thisitem
willbegrayedoutunlessa HDMI®CECcompatibleaudioreceiveris
connected.
NOTE WhenyouturnontheAudioReceiver,changeitsinputsourceor
adjustthesoundvolume,thesoundwill beoutputfromtheaudio
receiver'sspeakersevenifTVSpeakershasbeenselected.Turnthe
TVoffandonagaintooutputthesoundfromtheTVspeakers.
To set the HDMI® CEC Setup:
1 From the Setup menu, highlight HDMI® CEC Setup and
press tile OK button.
2 Press tile (A/Y arrow) buttons to highlight Enable
HDMI® CEC.
3 Press the (4/_ arrow) buttons to select On.
NOTE IfyouselectEnableHDMI@CECOff,theotheritemswill begrayed
out.
Press the (A/Y arrow) buttons to highlight the HDMI® CEC
Setup item you wish to use, and press then press tile (4/_
arrow) buttons to select On or tile desired mode.
olo TV Auto Input Switch: On/Off
olo T¥ Auto Power: On/Off
o:° Device Auto Standby: On/Off
olo Speaker Preference: TV Speakers/Audio Receiver
Page 34

1 1 2 UsingtheTV'sfeatures
Displaying 71/status infi>m_ation
5 To save the new settings, highlight Done and press the OK
button. To revert to tile factory defaults, highlight Reset and
press tile OK button.
DisplayingTVstatusinformation
To display TV status information:
€* Press tile INFO button on tile remote control.
Tile following information will be displayed (if applicable):
o*,o Current input (ANT/CABLE, Video, etc.)
o**oIf ANT/CABLE is tile current input, either "CABLE" (for
cable TV) or "ANT" (for over-the-air broadcasts).
€* Channel number (if in ANT/CABLE mode)
o*.. Channel label, if applicable
o*.o Digital signal strength indicator (bar graph in lower right
corner of box; for ATSC signals only)
o*.o Stereo, Mono, or SAP audio status (when in HDMI _9input
mode, PCM)
o*.o Video resolution
**.o Aspect ratio of incoming video signal (4:3 or 16:9)
**.o V-Chip rating status
€* GameTimer (if set)
To close the screen (except ANT/CABLE input), press the INFO
button again.
The following additional information will display for ANT/CABLE
input, if applicable:
o**oTitle
.**. Duration
.**. Detailed description
To display the next program's information for digital channels,
press tile INFO button again. Pressing tile INFO button a third time
will remove the entire banner.
(Sample IIlusttvltion) Banner
Page 35

UsingtheTV'sfeatures 1 1 3
Understanding the auto power c_Jeature
NOTE Thelocationofthebannercanbemovedtothetopor bottomofthe
screenbypressingA or T whiletheINF0displayison-screen.
Understandingtheautopowerofffeature
The TV will automatically turn itself oft after approximately 15
minutes if it is tuned to a vacant channel or a station that completes
its broadcast for the day.
NOTE .:o IfyouwanttosetthisfeaturetoOff,see"NoSignalPowerDown"
onpage108.
¢ Ifit ispossiblethatyouwillbeawayfromtheTVforanextended
periodoftime,youshouldunplugthepowercord.
Understandingthelastmodememoryfeature
If the power is cut oft"while you are viewing the TV, the Last Mode
Memory feature automatically turns on the TV when the power is
resupplied.
NOTE Ifit'spossible,andyouwill beawayfromtheTVforanextended
periodoftimeyoushouldunplugthepowercord.
Page 36

Chapter7
UsingtheTV'sAdvanced
Features
Usingtheadvancedpicturesettings
DynamicContrast
Dynamic Contrast detects changes in picture quality that affect the
appearance of your contrast settings and then automatically adjusts
the video.
To select Dynamic Contrast preference:
1 From the Picture menu, highlight Picture Settings and press
the OK button.
114
(Sample Image) Dynamic Contrast screen
2 Highlight Advanced Picture Settings, and then press the OK
button.
3 Press the (A/Y arrow) buttons to select Dynamic Contrast.
Page 37

UsingtheTV'sAdvancedFeatures 1 1 5
Using the advanced picture settings
4 Press the (4/_ arrow) buttons to select High, Middle, Low or
Off.
StaticGamma
The static gamma feature lets you adjust the levels of black in the
picture.
To adjust the static gamma settings:
1 Press the MENU button to open the Picture menu.
2 Highlight Picture Settings, and then press the OK button.
3 Highlight Advanced Picture Settings, and then press the OK
button.
4
5
In the Static Gamma field, press the (4/_ arrow) buttons
to adjust the Static Gamma.)The adjustment range is
within +5 from center).
If the setting is decreased, the detail of black colors is
decreased.
o*,o If the setting is increased, the detail of black colors is
increased.
To save the new settings, highlight Done, and then press the
OK button.
To revert the factory defaults, highlight Reset, and then press
the OK button.
NOTE Note:Ifyouselectoneofthefactory-setpicturemodes(Dynamic,
Standard,MovieorPC)andthenchangetheStaticGammasetting,
thepicturemodeautomaticallychangestoPreference.
Colortemperature
You can change the quality of the picture by selecting from three
preset Color Temperatures (Cool, Medium, and Warm), as
described below.
Mode:
Cool
Medium
Warm
Picture QualiO;."
blueish
neutral
reddish
Press the MENU button to open the Picture menu.
Page 38

1 1 6 UsingtheTV'sAdvancedFeatures
Using the advanced picture settings
2 Highlight Picture Settings, and then press tile OK button.
Highlight Advanced Picture Settings, and then press tile OK
button.
3
4
5
Highlight Color Temperature, and then press the OK button.
In the Color Temperature field, press the (@/_ arrow)
buttons to select the mode you prefer (Cool, Medium, or
Warm).
Press the (&/Y arrow) buttons to select either B Drive or G
Drive, and then press the (_/_ arrow) buttons to adjust the
settings:
o:o B Drive: press the ( _ arrow) button to make the picture
blueish.
°:o G Drive: press the (_, arrow) button to make the picture
greenish.
NOTE TheBDriveandGDrivesettingsareconnectedtotheColor
Temperaturesettingsandwill changebasedonwhichsettingis
selectedin step5above.
7 To save your new settings, highlight Done, and then press the
OK button.
8 To revert to your original settings, highlight Reset, and then
press the OK button.
NOTE Ifyouselectoneofthefactorysetpicturemodes(Dynamic,
Standard,Movie,or PC)andthenchangetheColorTemperature
mode,thepicturemodeautomaticallychangestoPreference.
CableClear_ digitalNoiseReduction
The CableClear _'_digital Noise Reduction feature allows you to
reduce visible interference in your TV picture. This may be useful
when receiving a broadcast with a weak signal (especially a Cable
channel) or playing a noisy video cassette or disc.
To change the CableClear settings:
1 Press the MENU button to open the Picture menu.
2 Highlight Noise Reduction, and then press the OK button.
3 In the CableClear field, select your desired setting.
Page 39

UsingtheTV'sAdvancedFeatures 1 1 7
Using the advanz'ed picture settings
NOTE o',oIfthecurrentinputisANT/CABLEorVIDEO,themenuwill
displaythetext"CableClear'.TheavailableselectionsareOff,
Low,Middle,andHigh.
o:oIfthecurrentinputisColorStream®HD,HDMI1or HDMI2,the
menuwill displaythetext"DNR'.Theavailableselectionsare
Off,Low,Middle,andHigh.Low,Middle,andHighwill reduce
thenoiseinvaryingdegrees,fromlowestto highest,
respectively.
4
5
To save your new settings, highlight Done, and then press the
OK button.
To revert to your original settings, highlight Reset, and then
press the OK button.
IVlPEGNoiseReduction
The MPEG Noise Reduction feature allows you to reduce visible
interference caused by MPEG compression. Choices for MPEG
Noise Reduction are Off, Low, Middle, and High. Off is
automatically selected when this feature is disabled ("grayed out").
To select the MPEG Noise Reduction level:
1
2
3
4
5
Press the MENU button to open the Picture menu.
Highlight Noise Reduction, and then press the OK button.
Press the (A/V arrow) buttons to highlight the MPEG Noise
Reduction field G Drive, and then press the (4/_ arrow)
buttons to select either Off, Low, Middle, or High.
To save your new settings, highlight Done, and then press the
OK button.
To revert to your original settings, highlight Reset, and then
press the OK button.
UsingtheGameModefeature
You can use tile Game Mode feature for shorter frame delays when
playing a video game requiring split-second timing between the
on-screen display and input from the controller (such as music
creation and high-action games).
This feature is more effective for 480i and 1080i input signals.
Page 40

1 1 8 UsingtheTV'sAdvancedFeatures
Using the advanced picture settings
NOTE TousetheGameModefeature,thecurrentvideoinputmustbe
Video,ColorStream_'*HD,HDMI1or HDMI2.TheGameMode
cannotbeturnedonwhenanyothervideoinput,otherthanthe
abovementionedisselected.
To turn on Game Mode:
1 Press tile MENU button to open tile Picture menu.
2 Press tile (A/Y arrow) buttons to select Game Mode.
3 Press tile OK button to toggle Game Mode On/Off.
To turn off Game Mode, toggle to Off in step 3 above, change tile
video input, or turn tile TV off and then on again.
NOTE YoucanchangethevideoinputbypressingINPUTontheremote
control.
Page 41

Chapter8
BasicDiscPlayback
Discplayback
This section shows you the basics on how to play a disc.
Basicplayback(DVDNCD/CD)
1 Press the POWER button on the TV control panel or on the
remote control.
The Power LED on the front of the LED TV/DVD combination
changes to green. It may take approximately 10 seconds for a
picture to appear on-screen. When using an amplifier, switch
on the amplifier.
119
Page 42

120 BasicDiscPlayback
Discplay/_ack
2 Press the TV/DVD button on the remote control to switch to
DVD mode.
The DVD start-up screen appears.
(Sample Image) DVD starbup screen
3 Hold the disc by its edges and load it in the disc slot with the
label side facing forward. The prompt "Close" changes to
"Loading" and then playback begins.
NOTE DONOTtouchthesurfaceofthedisc.Thismayleaveasmudgethat
cancauseplaybackerrors.
If the disc has its own menu, it will be displayed on-screen.
Press the (A/Y/@/_ arrow) buttons on the remote control to
navigate the disc menu, then press the OK button to implement
the selected menu option.
To adjust playback volume, press the VOL (+ -) buttons.
To temporarily suspend disc playback (still mode), press the
PAUSE button.
To continue playback from still mode, press the PLAY button.
To stop playback, press the STOP button.
Playback resume function:
Your LED TV/DVD combination supports playback resume
function.
If you stopped the disc playback before it is completed, the LED
TV/DVD combination records the stop point.
Press the PLAY button to resume playback on the stop point. If you
press the STOP button twice in quick succession or unload the disc,
the LED TV/DVD combination will clear the stop point.
Page 43

BasicDiscPlayback 121
Disc playback
Higher quality picture:
High resolution pictures on some discs may occasionally cause
noise on the picture display. If this is the case, reduce the
Sharpness setting under the Picture Settings menu.
NOTE .:.Keepyourfingerswellclearofthediscslotwhenadiscis
loadingorunloading.Failuretodoso maycauseserious
personalinjury.
¢ DonotmovetheTVduringplayback.Doingsomaydamagethe
disc.
o:oWhenadiscisinsertedwhentheTVisnotinDVDmode,theTV
will automaticallyswitchtoDVDmode.
This indicates the kind of disc that can employ the function
described under that heading.
o:o DYD: You can use this function with DVDs.
o:o VCD: You can use this function with Video CDs.
o:o CD: You can use this function with Audio CDs and CD-R/RW
discs.
Removingadisc
1 Press tile EJECT button on tile TV control panel or on tile
remote control.
2 Wait for the disc to be ejected and then remove the disc from
the slot.
Discplaybackreminders
o:o If the LED TV/DVD combination does not operate properly,
static electricity build-up may be the cause. Turn off the LED
TV/DVD combination, then disconnect the power cord from
the AC outlet. Reconnect the power cord, then press the
POWER button to turn on the LED TV/DVD combination
again.
o:o If an incompatible disc is loaded, one of the following error
messages appears on-screen: "Incorrect Disc," "Wrong
Region," or "Please Enter Pws." If this is the case, check your
disc again.
o}o In some instances the LED TV/DVD combination may take a
few minutes to start disc playback.
Page 44

122 BasicDiscPlayback
Playbacknavigation
When you load a disc with the playback side facing backward,
the message, "Loading" appears on the screen. It will be
replaced by the message, "Incorrect Disc." Eject the disc and
load it again making sure the playback side is now facing
forward.
o;, The playback resume function may not work on some discs.
o;, Some DVDs may have fixed playback operations designed by
the DVD manufacturer. Your LED TV/DVD combination
follows this fixed playback design. In such cases, some
playback features may not be available. You may refer to the
instructions accompanying the DVD.
o;, Do not put any objects other than compatible discs in the disc
slot. Doing so may cause damage to the LED TV/DVD
combination.
There may be a few seconds between the action of pressing a
button and the function it activates.
Do not use 8cm DVD or CD Discs. These formats are not
supported.
Playbacknavigation
Playinginfastreverseorfastforwarddirection(DVDNCD/CD)
Press the REV button or the FF button during playback.
o*.o REV: Fast reverse playback
o*.o FF: Fast forward playback
Each time you press the I/EV button or the FF button, the playback
speed changes.
To resume normal playback, press the PLAY button.
NOTE o**oThesoundismutedduringreverseandforwardscan.
¢ Theplaybackspeedmay differ depending on thedisc.
¢ Youcan usefast reverse/fastforwardplaybackfor MP3 and
WMAdiscs,
Page 45

BasicDiscPlayback 123
Playback navigation
Playingframebyframe(DVDNCD)
Press tile PAUSE button during playback. Each time you press tile
PAUSE button, the picture advances one frame.
To resume normal playback, press the PLAY button.
NOTE Thesound is mutedduring frame byframeplayback.
Playinginslowmotion(DVDNCD)
Press tile SLOW button during playback. Each time you press tile
SLOW button, the slow motion speed changes.
To resume normal playback, press the PLAY button.
NOTE Thesound is mutedduring slow motion playback.
Locatingachapterortrack(DVDNCD/CD)
Press the SKIP Forward button or the SKIP Reverse button
repeatedly to locate the next or previous chapter or track you want
to play.
•}. SKIP Forward: To locate succeeding chapters or tracks.
Playback starts from the beginning of the selected chapter or
track.
•}. SKIP Reverse: Playback starts from the beginning of the
current chapter or track.
When you press the SKIP Reverse button twice in quick
succession, or one time within 3 seconds from the beginning of the
current chapter or track, playback starts from the beginning of the
preceding chapter or track.
Page 46

Chapter9
AdvancedDiscPlayback
Zoomfunction/Scenenavigation
You can change the viewing scale of a picture by using the Zoom
function. Once the image has been rescaled, use the (A/T/4/_
arrow) buttons to pan the image.
Scene navigation options differ depending on the kind of disc.
DVDs use the title, chapter or record time to locate the start point
for playback. Audio CDs and Video CDs use the record time or
track number.
UsingZoom(DVD/VCD)
1 Press the ZOOM button during playback. The view will zoom
into the center of the image. Each time you press the ZOOM
button, the scale increases by the following values: x2, x3, x4.
(Sample Image) Disc zoom
2 Press the (A/Y/4/_ arrow) buttons to pan the scene and view
different sections of the picture.
3 To return to normal view, in Zoom mode, press the ZOOM
button repeatedly until picture size returns to normal viewing.
124
Page 47

AdvancedDiscPlayback 125
Zoom fitn_'fion/Scene navigation
NOTE • You can usethe Pause Slow and Searchplaybackfunctions in
Zoom mode
•:. Zoom function may not apply to somediscs
Locatingaspecificscene
l Press tile .lUMP button during playback, still or stop mode.
(Sample Image) Disc Jump - Title
2 Press the (4/_ arrow) buttons to select a navigation option.
(Sample Image) Disc Jump - Chapter
Use the Channel Number buttons (0-9) to enter a value for the
chapter number of the DVD option you selected.
Number entries must be entered in a two digit format, such as
08 or 09 instead of 8 or 9, while using this feature.
(Sample Image) Disc Jump - Chapter 12
If you input a wrong number, wait approximately 8 seconds for the
screen to disappear and then press the JUMP button again. Refer to
the disc package to check the correct number.
4 The DVD will change to the selected chapter after the chapter
numbers are entered. For VCD, you must press the PLAY
button or the OK button to start playback.
For Audio CDs and Video CDs, you can locate a scene by track
number or record time.
Page 48

126 AdvancedDiscPlayback
Scene bookmark
VCD mode:
(Sample h_zage) Disc Jul_lp - VCD mode
CD mode:
(Sample Image) Disc Jump - CD mode
NOTE o:o Whenyouusetitlenavigation,playbackstartsfromthefirst
chapteroftheselectedtitle,
¢ ForPBC-enabledVCDs,turnoffthePBCfunctionfirst before
usingtheJumpfunction.
¢ Scenenavigationmaynotapplytosomediscs,
Scenebookmark
Scene bookmarks refer to specific points in the playback range that
have been marked for later access. You can create up to twelve
markers per disc.
NOTE Thesavedscenebookmarksareonlyaccessibleduringthecurrent
session,OnceyouejectthediscorturnofftheLEDTV/DVD
combination,all bookmarkswill becleared,
Page 49

AdvancedDiscPlayback 127
Scene bookmark
Bookmarkingascene(DVDNCD)
l During playback, press the MARKER button at the scene you
would like to place the bookmark.
(Sample Image) Disc scene bookmarkil_g
2 Press the (,_/_ arrow) buttons to select a blank marker, and
then press the PLAY button. Repeat these steps to save twelve
more bookmarks.
(Sample Image) Disc scene bookmarkil_g
3 Press the MARKER button to exit and close the bookmark
window. Select Cancel to cancel the bookmark and exit the
screen.
NOTE .:o Insomecasessubtitlesfor themarkedscenemaynotdisplay
¢ Bookmarkingascenemaynotapplytosomediscs
Page 50

128 AdvancedDiscPlayback
Scene bookmark
Viewingascenebookmark(DVDNCD)
1 Press the MARKER button to open the bookmark window.
2 Press the (_/_ arrow) buttons to select the saved marker.
(Sample Image) Disc scene bookmarking
3 Press the PLAY button to start playback on the scene saved in
the selected bookmark.
To delete a scene bookmark, perform steps 1 and 2 above, and then
press the EXIT button.
Repeatplayback/P,-Brepeat
You can choose to repeat DVD playback by title or chapter. For
Audio CDs and Video CDs, you can repeat a single track or the
entire disc.
The A-B repeat function lets you repeat a specific section between
two set points. This section will be played repeatedly until you turn
off the A-B repeat mode.
The repeat playback mode is not applicable to PBC-enabled Video
CDs.
Enablingrepeatplayback(DVDNCD)
o*.. DVD:
€. Press the PLAY MODE button repeatedly to select a
repeat mode. It can either be by Chapter, Title, or All.
Page 51

AdvancedDiscPlayback 129
Scene bookmark
The LED TV/DVD combination automatically starts
repeat playback after finishing the current title or chapter.
(Sample Image) Dis(: enabling repeat playback
VCD:
o:. Press the PLAY MODE button repeatedly to select a
repeat mode. The modes are listed by Track, All, or Off.
(Sample Image) Disc enabling repeat playback
NOTE Ifyousettherepeatmodeduringstopmode,pressthePLAYbutton
tostartRepeatplayback.
To resume normal playback, select Off in the step above.
NOTE TheRepeatplaybackfunctionmaynotapplytosomediscs.
EnablingA-Brepeatmode(DVDNCD/CD)
1 During playback, press the REPEAT A-B button at the point
where you would like the playback loop to begin. This sets
your "A" point.
(Sample Image) Disc A-B repeat mode
2 When the playback reaches the point where you would like the
playback loop to stop, press the REPEAT A-B button again.
This sets your "B" point.
(Sample Image) Disc A-B repeat mode
The section between points A and B will be played repeatedly in a
loop until you turn off the Repeat A-B mode.
Page 52

130 AdvancedDiscPlayback
Scene angle/Title selectiordDVD menu
To resume normal playback, press the REPEAT A-B button until
"A-B repeat" disappears on tile screen.
NOTE olo Insomecases,subtitlesfortherepeatedscenemaynotdisplay.
¢ TheA-B repeatmodemaynotapplytosomeDVDscenes.
¢ TheA-B repeatmodeis notapplicableto interactiveUVUsand
JPEGCUs.
Sceneangle/Titleselection/DVDmenu
Changingthesceneangle(DVD)
1 Press tile ANGLE button during playback.
2 Press tile ANGLE button repeatedly until tile preferred scene
angle is displayed.
NOTE DependingontheDVD,youmaynot beabletochangethescene
angleevenifmulti-angledataarerecordedonthedisc.
Selectinga DVDtitle(DVD)
Some DVDs contain two or more titles. If this is tile case, you can
select a particular title for playback.
1 Press tile TOPMENU button during playback to display tile
title menu.
2 Press tile (A/Y/4t/_ arrow) buttons to select tile preferred
title.
3 Press tile PLAY button or tile OK button to start playback.
NOTE o:o TitleselectionmaynotapplytosomeDVDs.
¢ Thetitle menumaysimplybereferredtoa"menu"or "title"in
theinstructionssuppliedwiththe DVD.
DVDmenu(DVD)
Some DVDs have an encoded menu that allows users to select a
specific disc content, enable a particular DVD feature (e.g. subtitle
or sound track language), or choose a particular title (for multi-title
DVDs).
1 Press the DVD MENU button during playback.
Page 53

AdvancedDiscPlayback 131
Sound trc_'klanguage/Audio channel/Subtitle
2 Press the (A/Y/4/_ arrow) buttons to select a DVD menu
item, and then press the OK or PLAY button to access it. Use
the same buttons to enable an option for the selected item.
Repeat this step to configure other menu options.
3 Press the DVD MENU button again to resume playback on the
scene that was playing when you pressed the DVD MENU
button.
NOTE DependingontheDVD,youmaynotbeableto resumeplayback
fromthesamescenethatwasplayingwhenyoupressedtheDVD
MENUbutton.
Soundtracklanguage/Audiochannel/Subtitle
Selectingasoundtracklanguage(DVD)
You can select the sound track language when you play a
multilingual DVD.
During playback, press the AUDIO button repeatedly until the
preferred language track is selected.
Selectingtheaudiochannel(VCD)
During playback, press tile AUDIO button repeatedly until the
preferred audio channel is heard. The available options are Stereo,
Left, Right, and Mix.
NOTE o:o Ifthepreferredlanguageoptionisnotheardafterselectingitfor
severaltimes,thatlanguageisnotrecordedonthedisc.
¢ Thesoundtracklanguageselectedis onlyapplicableforthe
currentsession.Whenyoustopplaybackandtrytoplaythedisc
again,thedefaultlanguagetrackwill beused.
Viewingsubtitles(DVD)
When playing back a disc recorded with subtitles, you can select
the subtitle language or turn the subtitle off.
To view subtitles:
Press the SUBTITLE button repeatedly during playback until the
preferred language is selected.
The Subtitle prompt disappears after a few seconds.
Page 54

132 AdvancedDiscPlayback
Playback injormalion/VCD pl_Lvback control
To disable subtitles:
Press the SUBTITLE button until Off appears.
NOTE o:.Notall DVDshaveencodedsubtitles
•:o Thesubtitle selectionmay revertto the default languagewhen
you stopplaybackandtry toplaythe DVDagain
•:o In some cases the selectedsubtitle maynot display
immediately
PlaybackinformationNCDplaybackcontrol
Viewingtheplaybackinfo(DVDNCD)
Press tile DISPLAY button during playback.
DVD mode:
(Sample h_tage) Viewing the playback i4fi_ - DVD mode
(Sample h_zage) Viewing the playback inft_ - DVD mode
VCD mode:
(Sample h_zage) Viewing the playback injt_- VCD mode
To close the information display, press the DISPLAY button until
"Display Off' appears.
NOTE Dependingonthedisc thisoperationmaynotbeavailable
EnablingthePlaybackControl(PBC)function(VCD)
I In the stop mode, press the DYD MENU button to select the
PBC ON/OFE
Page 55

AdvancedDiscPlayback 133
MP3, WMA, JPEG, and Audio CD operation
(Sample Image) Enabling the PBC function
When enabled, PBC allows interactive Video CD playback using
the remote control.
IVIP3,WIVIA,JPEG,andAudioCDoperation
This LED TV/DVD combination can play MP3, WMA, and JPEG
files recorded on a DVD/CD-R or DVD/CD-RW disc. To create the
MP3/WMA/JPEG disc, you need a Windows PC with a
DVD/CD-RW drive and file encoding software. You must use a
Windows _'_computer to create the MP3/WMA/JPEG disc.
This LED TV/DVD combination requires discs/recordings that
meet certain technical standards in order to achieve optimal
playback quality. There are many different types of recordable disc
formats (including CD-R discs containing MP3 or WMA files). Not
all recordable discs will produce optimal playback quality. The
technical criteria set forth in this User's Guide are meant only as a
guide. Use of DVD/CD-RW discs for recording MP3 files is not
recommended.
You must obtain any required permission from copyright owners to
download or use copyrighted content. Toshiba can not and does not
grant such permission.
IVlP3/WlVlA/JPEG/AudioCDinformation
MP3/WMA/JPEG CD playback reminders
olo Make sure the file name of the MP3, WMA, and JPEG files in
the CD includes the 3-character file extension ("mp3", "wma",
"jpg") to make it compliant with the ISO 9660 standard.
olo This LED TV/DVD combination can read 2000 files per disc.
If a disc has more than 2000 files, it reads the first 2000 files,
while the remaining files will be omitted.
To play the files in sequence based on the recorded order:
o:o Use an encoding software that records data alphabetically
or numerically.
o:o Include a two- or three-digit number prefix on the file
name (ex. "01 .... 02" or"001 .... 002").
Page 56

1 34 AdvancedDiscPlayback
MP3, WMA, JPEG, and Audio CI) operation
.t. Refrain from making too many sub-folders.
.t. It may take more than one minute for this LED TV/DVD
combination to read MP3, WMA, and JPEG files depending on
the disc structure.
Audio files recorded using the Joliet Recording Specification
can be played back in this LED TV/DVD combination. The file
name is displayed (up to 20 characters). Longer file names will
be condensed.
o*,o Music recorded based on the Joliet Recording Specification
can be played back, the file name is displayed (within 20
letters) on the screen. Long file names will be condensed.
o*,o This LED TV/DVD combination does not support data disc
burned using the Apple Mac OS (Hierarchical File System,
HFS format).
File
MP3/WMA/JPEG CDs cannot be used for recording purpose.
name display reminders
The maximum number of characters for file name display is
20.
o*,o Only the following characters will be displayed: A through Z
(both upper and lower case), 0 through 9, and the underscore
symbol (_).
o*,o Non-supported characters will be replaced with a hyphen.
MP3/WMA/JPEG CD limitations
o*,o Depending on the recording conditions, some
MP3/WMA/JPEG CDs cannot be played back in your LED
TV/DVD combination.
o*,o Only MP3, WMA, and JPEG files recorded in tile CD-R/RW
disc will be played. Other files will not be read nor displayed.
MP3/WMA file encoding information
•:. MP3:
o*,o File format: MPEG-1 Audio
o*,o Sampling frequency: 32 kHz, 44.1 kHz, 48 kHz
o*,o Bit rate: 32 to 320 kbps (constant bit rate or variable bit
rate)
The recommended recording setting for high-quality sound is
44.1 kHz sampling frequency and 128 kbps constant bit rate.
Page 57

AdvancedDiscPlayback 135
MP3, WMA, JPEG, and Audio CD operation
•:. WMA:
o:o File format: WMA version 7 or 8
Sampling frequency: 32 kHz/48 kbps, 44.1 kHz/48 to 92
kbps, 48 kHz/128 to 192 kbps A file recorded in mono
(48 kHz/48 kbps) is not supported by this LED TV/DVD
combination.
Aboutthefilebrowser
(Sample Image) File blvwser (CD)
File icons:
(Sample Image) File blvwser (CD)
If a CD contains a mixture of MP3, WMA and JPEG files, and the
PLAY button is pressed without selecting a file, playback
automatically begins starting from the first file in the list.
Setting the file type listing:
You can choose the type of files listed in the file browser.
1 Press the (_ arrow) button to highlight to the Option panel.
2 Press the (A/Y arrow) buttons to highlight Select files, and
then press the OK button.
3 Press the (A/Y arrow) buttons to select a file type from the list
Audio or Photo.
4
Press the OK button to add or remove the check mark next to
each file type. The checked file type is displayed in the file
browser.
Press the (_ arrow) button twice to move the selection
highlight back to the file list.
Page 58

136 AdvancedDiscPlayback
MP3, WMA, JPEG, and Audio CD operation
Viewing image files in thumbnail mode:
You can change the browsers view mode from list mode to
thumbnail mode. This is convenient when browsing for JPEG files.
1 Press the DVD MENU button during JPEG playback.
2 Press the (A/V/4/iP, arrow) buttons to select an image file.
3 Press the OK button to play the image file.
To return the browser to list mode, press the STOP button.
To view the previous or next thumbnail page, press SKIP
REVERSE or SKIP BACKWARD.
Playinganaudiofile
Load an MP3/WMA/Audio CD in the disc slot. The file
browser appears on-screen. Press the (A/Y arrow) buttons to
select the audio file you wish to play. Press the PLAY button or
the OK button to start playback.
(Sample h_zage) Playing an audio file
2 Press the (A/V arrow) buttons to select another audio file for
playback.
(Sample h_zage) Playing an audio file
Page 59

AdvancedDiscPlayback 137
MP3, WMA, JPEG, and Audio CD operation
3 Press the PLAY button or the OK button to start playback.
To stop playback, press the STOP button.
NOTE o',.Ifthecurrentdirectoryhasmorethaneightfiles,pressthe
(A/T arrow)buttonstoscrollthefile list.
o:oToseefoldercontents,selectafolderandthenpresstheOK
button.
o:oToreturntotherootdirectory,presstheRETURNbuttonor
select"GoUp"iconandthenpresstheOKbutton.
o:o Inthumbnailmode,pressthePICSIZEbuttonrepeatedlyto
changethethumbnailsize.
o:oTheRepeat/Programmedplaybackmodescanbeenabledduring
AudioCD,MP3,orWMAplayback.
ViewingaJPEGfile
1 Load a disc containing JPEG files in the disc slot. The file
browser appears on the screen.
2 Press the (A/V arrow) buttons to select an image file to view.
A preview of the selected file is displayed in the Preview panel.
3 Press the OK button or the PLAY button.
The selected image is displayed in full-screen mode. The Slide
Show mode is enabled automatically. If you wish stop the Slide
Show mode, press the PAUSE button.
4 Press the SKIP Reverse or SKIP Forward button to view the
previous or next image file in the current directory.
To rotate an image:
Press the ANGLE button repeatedly until the preferred angle is
obtained. The image angle is adjusted in 90° increments.
The current angle setting is shown on the screen: 90 °, 180°, 270° or
No rotation.
To magnify an image, press the ZOOM button repeatedly until the
image is displayed in the preferred scale.
The current zoom setting is indicated by the following: 100%,
125%, 150%, 200%, 50%, 75%.
To return to normal view, press the ZOOM button repeatedly until
ZOOM disappears.
Page 60

138 AdvancedDiscPlayback
MP3, WMA, JPEG, and Audio CI) operation
Viewingaslideshow
If there are multiple JPEG files in the selected directory, you can
view them in a slide show. The instructions on how to enable the
slide show feature and set the interval period between pictures are
listed below.
1 Open the file folder containing the JPEG files you want to
include in the slide show.
2 Press the (A/Y arrow) buttons to select the file you want to be
the starting image for the slide show.
A preview of the selected file is displayed in the Preview panel.
(Sample Image) Viewil_g a slide show
3 Press the OK button or the PLAY button.
The selected image is displayed in full-screen mode.
When the slide show is completed, the file browser appears.
To view the previous or next image in the slide show, press the
SKIP Reverse or SKIP Forward button.
To temporarily stop the slide show, press the SKIP Reverse or
SKIP Forward button.
To stop the slide show, press the STOP button. The file browser
appears.
Page 61

AdvancedDiscPlayback 139
MP3, WMA, JPEG, and Audio CD plc(vback modes
NOTE .:o TheRotatemodeisavailablein regularJPEGviewingandslide
showmodes.
¢ TheA-BrepeatmodeisnotavailablewhenviewingJPEG
images.
¢ Duringaslideshow,theintervaltimebetweenimagesmay
increaseifthefilesizeistoobig.
¢ Whenanimageexceeds5760x3840pixels,theimagedisplay
canappearcropped.Thisapplieswhenviewingtheimageinthe
Previewpanelofthefilebrowser;orwheninthethumbnail,
full-screenor slideshowmodes.
IVIP3,WIVIA,JPEG,andAudioCDplaybackmodes
You can choose to repeat CD playback by track or the entire disc.
NOTE Theseplaybackmodesareonlyapplicableduringthecurrent
session.OnceyouejectthediscorturnofftheLEDTV/DVD
combination,thesemodeswill bedisabled.
Enablingrepeatplayback
1 During stop mode, press the PLAY MODE button repeatedly
to select a repeat mode. The modes are Single, Repeat One,
Repeat Folder, Folder.
(Sample Image) Enabling repeat playback
2 Press the PLAY button.
The LED TV/DVD combination automatically starts repeat
playback from the current track.
To resume normal playback, select Folder in step 1 above.
Page 62

140 AdvancedDiscPlayback
MP3, WMA, JPEG, and Audio CI) pl_Lvbackmodes
Programmingtheplaybacksequence
1 In the file browser, press the MARKER button to open the file
list
(Sample Image) Plvgramming the playback sequence
NOTE Youcannotselectthesamefiletwiceormore.AJPEGfilecannotbe
addedtoa playlist.
Press the (A/Y arrow) buttons to select a file, and then press
the OK button to add it for inclusion in the programmed
playlist.
Repeat step 1 to remove any other files you wish to add in the
programmed playlist.
(Sample Image) Programming the playback sequence
Page 63

AdvancedDiscPlayback 141
(Ststomijng disc pl_Lvback
3 Press the MARKER button,
The programmed files appear in the Playlist.
(Sample Image) hvgramming the playback sequence
4 In the programmed file list, press the (A/Y arrow) buttons to
select a file, and then press the PLAY button to start playback.
To remove a file from the programmed list:
1 In the Playlist, press the (A/Y arrow) buttons to select the file
you wish to remove, and then press the CANCEL button.
2 Repeat step 4 to mark any other files you wish to remove from
the list.
Customizingdiscplayback
You can customize the disc playback settings to suit your
preferences.
Configuringthediscplaybacksettings(DVDNCD/CD)
1 In DVD mode, press the SETUP button during stop mode.
(Sample Image) Configuring disc playback settings
Page 64

1 42 AdvancedDiscPlayback
(_tstomijng disc playback
2 Press the (_/_ arrow) buttons to select a setup tab, and then
press the (y arrow) button.
The first setup option is highlight.
(Sample Image) Configuring disc playback settings
3
4
5
6
7
Press the (A/y arrow) buttons to select the setup option you
wish to customize.
Press the (_ arrow) or the OK button to display a list of
available option settings.
Press the (A/Y arrow) buttons to select an option setting, and
then press the OK button to apply and save the setting.
To configure another option on the same setup tab, repeat steps
3-5.
To configure an option on another tab, press the (_ arrow)
button, and then use the (_/_ arrow) buttons to select a setup
tab.
8 Repeat steps 3-5 to configure the preferred option.
9 To close the Setup screen, press the SETUP button.
Page 65

AdvancedDiscPlayback 143
(._tstomizing disc playback
Discplaybacksetup
Language
Preference
Option Description Page
"_]i'J"e S'eJ"e_ctsthe subtitle language.
Default Resetsto default.
content.
control setting.
_Spd]_l_"[J'i°'--S'el_sthe sound format ofthe digital output.
NOTE ThesesetupsettingsareretainedintheLEDTV/DVDcombination's
memory.It remainsactiveevenifthepoweristurnedoff.
(Sample Image) Playback settings
OSD Language
Select the language for the DVD and Setup menu display. The
available options are English, French, or Spanish.
Subtitle/Audio
Select the language you wish to display the Audio, Disc Menu, and
Subtitle settings in during disc playback. The available options are
English, French, Spanish, Italian or German.
Page 66

144 AdvancedDiscPlayback
(_tstomijng disc pl_Lvback
The selected language will be heard or seen.
(Sample h_zage) Playback settings
(Sample h_zage) Playback settings
Parental
A DVD is usually encoded with a rating level to indicate the
recommended audience age. You have the option to select the
content rating level allowed for playback in your LED TV/DVD
combination.
Press the (A/Y arrow) buttons to select the allowable rating level,
and then press the OK button. You will then need to type in the
system password to save the setting.
o:* Level 1-5: Discs of varied non-adult ratings will be played
back. The higher the number, the more severe the content is.
o:o Level 6-8: Discs of varied adult only ratings can be played
back.
Page 67

AdvancedDiscPlayback 145
Qtstomizing disc pl_(vback
NOTE o:. The Parentalrating levelscorrespond to the US movieratings.
Level]-z"_T_s-_'_T6 Level5 - _P_G-R
r_@'F_"zXdO_[i
o:° Somediscsmaynothavetheirratinglevelencodedonthedisc
thoughit'sindicatedonthediscjacket.Playbackrestrictionwill
notapplytothesediscssomakesureto restrictaccesstoit
manually.
To temporarily cancel the parental restriction:
1 Load the restricted content DVD that you want to play.
2 Use the Channel Number buttons (0-9) to input the system
password after the "Enter Password" message, and then press
the OK button.
This suspension of the parental restriction setting applies until
the disc is ejected.
(Sample Image) Playback settings
Password
Select this option to change the access password for the parental
control setting.
1 Press the (A/V arrow) buttons to select Password, and then
press the OK button.
2 Highlight Change, and then press the OK button.
Page 68

146 AdvancedDiscPlayback
(_lstomidng disc playback
3 Use the Channel Number buttons (0-9) to input the current
password.
If the password has not been set yet, key in "0000." This is the
factory default password.
4 Use the Channel Number buttons (0-9) to input the new
password.
You will be prompted to confirm the new password.
5 Use the Channel Number buttons (0-9) to input the new
password again.
6 Note this new password for future reference.
If you forget the system password:
1 Make sure there is no disc in the disc slot.
2 Press and hold down the VOLUME (-) button on the TV
control panel, and then press the number 4 button on the
remote control for a few seconds.
The "Initializing" message appears on-screen to indicate that
the password has been reset to its default factory setting
"0000." All DVD Setup related settings will also be reset to
their default factory values.
Spdif Output (Digital Out)
Select tile sound format of tile digital output depending on tile
enabled signal connection.
o:o SpdiffRaw: Select this option to output the signal in its native
format.
°:o Spdif/Pcm: Changes Dolby <'_Digital output to PCM. Select
this option when using a two-channel digital stereo amplifier.
NOTE MPEGaudiowill alwaysbein PCMformatregardlessoftheDigital
Outputsetting.
Page 69

ChapterlO
Troubleshooting
Generaltroubleshooting
Before calling a service technician, review this chapter or visit the Toshiba
technical support Web site at support.toshiba.corn for possible
causes/solutions for the problem you are experiencing.
Before you begin to troubleshoot any problem, first unplug the TV
from the AC wall outlet, wait approximately one minute, and then
plug the TV back into the AC wall outlet. If the problem still exists
attempt to troubleshoot the problem.
Black box on-screen.
TV
The closed caption feature is set to one of the Text modes (TI, T2,
T3, or T4). Set the closed caption feature to Off, see "Using closed
captions" on page 78.
stops responding to controls.
If the TV stops responding to the buttons on the remote control or
TV control panel and you cannot turn off the TV, press and hold the
POWER button on the TV control panel for several seconds to
reset the TV. If the TV does not power off using this method,
unplug the TV from the AC wall outlet and plug it back in.
If you cause a static discharge when touching the TV and the TV
fails to function, simply unplug the TV from the AC outlet and plug
it back in. The TV should return to normal operation.
147
Page 70

148 Troubleshooting
Picture problems
Other problems.
If your TV's problem is not addressed in this Troubleshooting
chapter or the recommended solution has not worked, use the Reset
Factory Defaults procedure, see "Reset Factory Defaults" on
page 58.
TV will not turn on.
Ensure the power cord is plugged in properly, and then press the
POWER button.
Replace the batteries in the remote control, see "Installing
batteries" on page 40.
Try the control panel buttons on the TV.
Pictureproblems
General picture problems.
Check the antenna/cable connections, see "Connecting Your TV"
on page 24.
Press the INPUT button on the remote control or on the TV and
select a valid video input source, see "Selecting the video input
source" on page 59. If no device is connected to an input on the TV,
no picture appears when you select that particular input source. For
device connection details, see "Connecting Your TV" on page 24.
Antenna reception may be poor. Use a highly directional outdoor
antenna (if applicable).
The station may be having broadcast difficulties. Try another
channel.
Adjust the picture quality, see "Using the advanced picture settings"
on page 114.
Cannot view external signals or channel 3 or 4.
If you cannot view signals from external devices connected to
VIDEO, ColorStream ®HD1, ColorStream ®HD, HDMI 1, HDMI 2,
PC, or from channel 3 or 4, ensure that the Input Lock is set to Off,
see "Using the Locks menu" on page 86.
Noisy picture.
If you are watching an analog channel (off-air broadcast or cable
TV), you can set the CableClear _'>feature to reduce visible
interference in the TV picture, see "CableClear® digital Noise
Reduction" on page 116.
Page 71

Troubleshooting 149
Sound problems
Video Input Selection problems.
If the Input Selection window does not appear when you press
INPUT on the remote control or TV, press INPUT a second time.
This will cause a change to the next video input source and display
the Input Selection window.
Poor display color or no colon
The station may be having broadcast difficulties. Try another
channel.
Adjust the Tint and/or Color, see."Adjusting the picture quality" on
page 77
Poor composite picture.
If the TV is connected to an external A/V device (e.g. DVD player,
video game system, set-top box, etc.) try using a ColorStream _'_)or
HDMF _ video connection instead.
Picture and sound are out of sync.
As with all products that contain a digital display, this may occur in
rare instances, when viewing certain content (e.g. television
broadcasts, video games, DVDs). The cause may include, without
limitation, video processing within the TV, video processing in an
attached gaming system, and video processing or different
compression rates used by broadcasters in their programming.
Try the following:
o*.. If the TV is connected to an A/V receiver that has a
programmable audio delay feature, use this feature to help
synchronize the sound to the picture.
o*.. If the problem occurs only on certain TV channels, inform
your local broadcast, cable, or satellite provider.
o*.. Digital audio settings may not be correct. Check the
connections, see "Connecting a digital audio system" on
page 35.
o*.. Turn off and unplug the TV from the AC wall outlet for a few
seconds and plug it back in.
Sound
problems
Check the antenna/cable connections, see "Connecting a VCR,
antenna, or cable TV" on page 27.
The station may be having broadcast difficulties. Try another
channel.
The sound may be muted. Press the VOL (+) button.
Page 72

150 Troubleshooting
Remote contlvl problems
If you hear no sound, try setting the MTS feature to Stereo mode,
see "Using the MTS button" on page 83.
If you are not receiving a second audio program from a known SAP
source, make sure the MTS feature is set to SAP mode, see
"Selecting stereo/SAP broadcasts" on page 82.
If you hear audio that seems incorrect for the program you are
watching (such as music or a foreign language), the SAP mode may
be on. Set the MTS feature to Stereo mode, see "Selecting
stereo/SAP broadcasts" on page 82.
If you connect a computer using either the PC IN terminal or an
HDMI ®terminal, make sure that the audio setting is properly set,
see."Setting the HDMI® audio mode" on page 55
Remotecontrolproblems
Remove all obstructions between the remote control and the TV.
Replace the remote control's batteries, see "Installing batteries" on
page 40.
Your TV's remote control may not operate certain features on your
external device. Refer to the User's Guide for your other device to
determine its available features. If your TV remote control does not
operate a specific feature on another device, use the remote control
that came with the device, see "Learning about the remote control"
on page 42.
If the TV still does not act as expected, perform the Reset Factory
Defaults procedure, see "Reset Factory Defaults" on page 58.
Channeltuningproblems
Ensure that the remote control is set to the correct device mode, see
"Learning about the remote control" on page 42.
The Auto Tuning feature may have erased the channel from
memory. Add the channel to the channel memory, see "Storing
channels in memory (optional)" on page 52.
The Lock feature may have blocked the channel. Unblock the
channel, see "Locking channels" on page 94.
If you cannot tune digital channels, check the antenna
configuration. If the problem persists, clear all channels from the
channel list and reprogram channels into the memory, see "Storing
channels in memory (optional)" on page 52. For additional
information, see "TV stops responding to controls." on page 147. If
the problem persists, use the Reset Factory Defaults procedure, see
"Reset Factory Defaults" on page 58.
Page 73

Troubleshooting 151
Closed caption problems
Closedcaptionproblems
If the program or video you have selected is not closed captioned,
no captions appear on the screen.
If text is not available, a black rectangle may appear. If this
happens, turn off the closed caption feature, see "Using closed
captions" on page 78.
A closed caption signal may not display correctly under the
following circumstances:
o*,o The recording is dubbed
o*,o The signal reception is weak
o*,o The signal reception is non-standard
For additional information, see "Using closed captions" on page 78.
Ratingblocking(V-Chip)problems
Forgotten PIN code.
When the PIN code screen appears, press the INFO button 4 times
within approximately 5 seconds. The old PIN code is cleared, see
"Forgotten PIN code" on page 87.
The V-Chip feature is available for U.S. V-Chip systems only, see
"Using parental controls (for USA region)" on page 88.
NoHDIVII(E)CECoperation
The HDMI® CEC feature is available for Toshiba HDMI® CEC
compatible devices.
Ensure that HDMF _cables with the (H_3m| °) Logo are used.
When the connected HDMI® CEC device does not work correctly
after you have changed device's settings, turn off your TV and
unplug the power cord, then plug it in and turn on again.
If several devices are connected, the HDMI® CEC feature may not
operate properly.
Read the instruction manual provided with the connected HDMI®
CEC device.
HDIVII®problems
HDMI ®cables.
Ensure that HDMF _cables with the (HDm| °) Logo are used, see
"Connecting an HDMI® or DVI device to the HDMI® input" on
page 31.
Page 74

152 Troubleshooting
Media Player problems
Legacy HDMI ® sources.
Some legacy HDMI _ sources may not work properly with the latest
HDMI _ TV products, due to new standard adoption.
MediaPlayerproblems
Incorrect functionality may occur when using a USB HUB
connection.
Photo files that were processed and edited using the computer's
application software may not be viewable.
The TV may select one format automatically and play it when
contents that support two or more formats are played.
Confirm that the contents of the USB storage device are in formats
that are supported by this TV, see "Using the Media Player" on
page 99.
Discplaybackproblems
Playback does not start.
No disc is loaded.
The disc may be dirty. Clean the disc.
The disc format is not supported, see "Disc playback" on page 119.
No picture.
The TV is not in DVD mode.
No sound.
The TV is in the special playback mode, see "Disc playback" on
page 119.
If an external speaker is connected, check its volume control.
Picture distortion during fast reverse/forward playback.
The picture will be distorted occasionally. This is normal.
Playback features failure.
The playback features such as stopping, searching, slow motion
play, repeat play or programmed play, etc. are not applicable to all
discs.
Playback does not start when the title is selected.
The disc may not be compliant with the "Parental" setting, see
"Customizing disc playback" on page 141.
Page 75

Troubleshooting 153
light indicator
The audio sound track and/or subtitle language cannot be
changed.
The disc has no multi-language option encoded on it, see "Sound
track language/Audio channel/Subtitle" on page 131.
No subtitle.
The disc has no subtitle encoded on it.
Subtitles are disabled. Press the SUB TITLE button, see "Viewing
subtitles (DVD)" on page 131.
Scene angle cannot be changed.
The disc has no multi-angle scenes, see "Sound track
language/Audio channel/Subtitle" on page 131. An "X" appears on
the screen.
The function is not applicable to the disc or to the current mode.
lightindicator
The Power light on the front of the TV indicates the TV's status, as
described below.
Powerindicator
The Power indicator glows green when the TV power is On.
Iftheproblempersistsaftertryingthesolutions
Contact Toshiba at:
Toshiba's Support Web site: support.toshiba.com.
For technical support, call the Toshiba Customer Support Center:
Within the United States, at 800-631-3811
Outside the United States, at 949-583-3050
Page 76

AppendixA
Specifications
NOTE o:oThesemodelscomplywiththespecificationslistedbelow.
•:o Designsandspecificationsaresubjecttochangewithoutnotice.
•:o Thesemodelsmaynotbecompatiblewithfeaturesand/or
specificationsthatmaybeaddedin thefuture.
Televisionsystem
NTSC standard
ATSC standard 8VSB
Digital Cable 64 QAM, 256 QAM; in-the-clear, unencrypted
Channelcoverage
VHF 2 through 13
UHF 14through 69
Cable TV Mid band (A-8 through A- 1,A through I)
Super band (J through W)
Hyper band (AA through ZZ, AAA, BBB)
Ultra band (65 through 94, 100through 135)
154
Page 77

155
Power sowve
Powersource
120 V AC, 60 Hz
Powermaximumcurrent
24V4210U 0.65 A
24V4260U 0.65 A
Powerconsumption
24V4210U
24V4260U
Audiopower
0.65 A (maximum current)
0.2W (Standby mode)
0.65 A (maximum current)
0.2W (Standby mode)
24V4210U
24V4260U
Speakertype
5W + 5W
5W + 5W
24V4210U
24V4260U
Two 3 5/8 x 1 x 7/8 inches
(91 x 25 x 23mm)
Two 3 5/8 x I x 7/8 inches
(91 x 25 x 23mm)
Video/audioterminals
Video/audioinput
Video
Audio
1V (p-p), 75 ohm, negative sync.
200 mV(rms) (-20dBFS, 47K ohm or greater)
Page 78

156 Specifications
½ teo/_u._tiotern_ ds
ColorStream®(componentvideo)HDinput
Video Y: IV(p-p), 75 ohm, negative sync.
Y: IV(p-p), 75 ohm, negative sync.
PB: 0.7 V(p-p), 75 ohm
Suggested formats: 1080i,720p, 480p, 480i
Audio 200 mV(rms) (-20dBFS, 47K ohm or greater)
Page 79

Specifications 157
HDIVll®input
HDMP9compliant
HDCP compliant
2-channel Linear-PCM; 32/44.1/48 kHz sampling
HDMP9Audio
frequency; 16/20/24 bits per sample
Digitalaudiooutput
Optical type
PCinput
15-Pin D-sub Analog RGB
DVD/CDplayer
Signal system NTSC
Supported disc size 12 cm
Pickup mechanism l-lens, 2-beams
Dimensions
Width 22.94" (583. lmm)
24V4210U Height 16.17" (410.9mm)
Depth 9.18" (233.2mm)
Width 22.94" (583.1mm)
24V4260U Height 16.17" (410.9mm)
Depth 9.18" (233.2mm)
Mlass(weight)
24V4210U 13.2 lbs (6.0 kg)
24V4260U 13.2 lbs (6.0 kg)
Operatingconditions
20- o 3 °
Temperature 32 - 95 F (0 -. 5 C)
Humidity 80% (no moisture condensation)
Page 80

158 Specifications
SuppF_edcu:cessories
Suppliedaccessories
o**oRemote control with two size "AAA" batteries
o**oResource Guide
o**oQuick Start Guide
o**oPedestal stand
o**oWarranty
Acceptablesignalformatsfor PCIN, HDIVII®
PCIN signalformats
NOTE DependingontheconnectedPC,thefollowingstatusmayoccur;
incorrectdisplay,falseformatdetection,picturepositionfailure,blur,
or judder.ButthisisnotamalfunctionofyourTV.
Format Resolution V.Frequency H. Frequency Pixel Clock
Frequency
VGA 640x 480 59.940/60Hz 31.469kHz 25.175MHz
SVGA 800x600 60.317Hz 37.879kHz 40.000MHz
XGA 1024x768 60.004Hz 48.363kHz 65.000MHz
WXGA 1280x768 59.870Hz 47.776kHz 79.500MHz
1360x768 60.015Hz 47.712kHz 85.500MHz
SXGA 1280x1024 60.020Hz 63.981kHz 108.000MHz
HDMI ®signal formats
Format Resolution V.Frequency H. Frequency Pixel Clock
Frequency
VGA 640x 480 59.940Hz 31.469kHz 25.175MHz
SVGA 800x600 60.317Hz 37.879kHz 40.000MHz
XGA 1024x768 60.004Hz 48.363kHz 65.000MHz
1280x768 59.870Hz 47.776kHz 79.500MHz
WXGA
1360x768 60.015Hz 47.712kHz 85.500MHz
SXGA 1280x1024 60.020Hz 63.981kHz 108.000MHz
Page 81

Specifications 159
Acceptable signaljom_atsjor PC IN,,HDMI®
Format Resolution V.Frequency H. Frequency Pixel Clock
Frequency
480i 720x480i 59.940Hz 15.734kHz 27.000MHz
48% 720x48% 59.940Hz 31.469kHz 27.000MHz
720p 1280x 720p 60.000Hz 45.000kHz 74.250MHz
1080i 1920x1080i 60.000Hz 33.750kHz 74.250MHz
24.000Hz 27.000kHz 74.250MHz
108%
60.000Hz 67.500kHz 148.500MHz
1920x1080p
NOTE ,:o Someillustrationsin thisUser'sGuideareforexplanation
purposesandmaydifferfromtheactualunit.
•",, Designsandspecificationsaresubjecttochangewithoutnotice.
•:, Thesemodelsmaynotbecompatiblewithfeaturesand/or
specificationsthatmaybeaddedin thefuture.
Page 82

AppendixB
LicenseAgreement
License Information on the software used in the
TOSHIBADigital TV
The software pre-installed in the TOSHIBA Digital Televisions consists of multiple,
independent software components. Each software comlxment is copyrighted by TOSHIBA
or athird party.
The TOSHIBA Digital Televisions uses software components that are distributed as
freeware under athird-party end-user license agreement or copyright notice (hereinafter
referred to as a "EULA"). Some ELiAs require that the source code of the applicable
component be disclosed as the condition for distributing the software comlxment in
executable format.
In addition, some of the software comlxments which are used in Toshiba Digital Televisions
include the software that are made or developed originally by TOSHIBA. These software
and accompanied documents are copyrighted by TOSHIBA, and protected by Copyright
Act, an international treaty's articles and other governing laws. The software components
which are made or developed originally by TOSHIBA and not subject to ELiAs are not a
target of source code offering.
The Toshiba warranty provided in respect ofthe Digital TV is the only warranty provided
and no additional warranties are provided in respect of the software comlxments subject to
EULAs.
Some of the software components distributed under EULAs are made available for use by
the user on the premise that they are not copyrighted or warranted by TOSHIBA or any third
party. These software components are licensed to the user tree of charge and therefore not
covered by any warranty within the scope of the applicable laws. These software
components are provided in "as is" condition without any warranty, whether express or
implied. "Warranty" here includes, but not limited to, an implied warranty for marketability
160
Page 83

LicenseAgreement 161
or fitness for specific uses. All risks associated with the quality or performance of these
software components are assumed by the user. TOSHIBA shall not be liable whatsoever for
any cost of repair or correction or other incidental expense incurred in connection with a
def_t found in any of these software components. Unless specified under the applicable
laws or in a written agreement, a party who changes or redistributes the software with
consent from the copyright holders orbased on the aforementioned licenses shall not be held
liable whatsoever for any loss arising from the use of or inability,to use such software
components. The same applies even when the copyright holders or relevant third parties
have been informed of the possibility of such loss. "Loss" here includes normal, special,
incidental and indirect loss (including, but not limited to, the loss of data or its accuracy; loss
incurred by the user or any third party'; and interface incompatibility, with other software).
Please read each EL_A for details on the use conditions and items that must be observed
regarding these software comlxments.
The table below liststhe software comlxments pre-installed in the TOSHIBA Digital
Televisions, which are subject to ELiAs. The user should read the applicable EULAs
carefully before using these software comlxments. The EULAs are exhibited in their
original text (English) as exactly written by the respective parties other than TOSHIBA.
For at least three (3) years from the date of distribution of the this product, Toshiba will give
to anyone who contacts Toshiba Consumer Solutions at (800) 631-3811, for a charge of no
more than our cost of physically performing source code distribution, acomplete machine-
readable copy of the complete correslxmding GPL and LGPL source code for the version of
the GPL and LGPL code that we distributed to you in this product.
Pre-lnstalled Software - EULA
jpeglib.h - Exhibit A
FreeType 2.2.0 - Exhibit B
scalt:act.c- Exhibit C
ExhibitA
The authors make NO WARRANTY or representation, either express or implied, with
respect to this software, its quality, accuracy, merchantability, or fitness for a particular
purlx_se.This software is provided "AS IS", and you, its user, assume the entire risk as to its
quality and accuracy.
This software is copyright (C) 1991-2011, Thomas G. Lane, Guido Vollbeding.
All Rights Reserved except as specified below.
Permission is hereby granted to use, copy, modify, and distribute this software (or portions
thereol) for any purpose, without tee, subject to these conditions:
(1)It any part of the source code for this software is distributed, then this README file
must be included, with this copyright and no-warranty notice unaltered; and any additions,
deletions, or changes to the original files must be clearly indicated in accompanying
documentation.
(2) It only executable code is distributed, then the accompanying documentation must state
that "this software is based in part on the work of the Independent JPEG Group".
Page 84

1 62 LicenseAgreement
(3) Permission for use of this software is granted only if the user accepts lull responsibility
for any undesirable consequences; the authors accept NO LIABILITY for damages of any
kind.
These conditions apply to any software derived from or based on the IJG code, not just to the
unmodified library. It you use our work, you ought to acknowledge us.
Permission is NOT granted for the use of any IJG author's name or company name in
advertising or publicity relating to this software or products derived from it. This software
may be referred to only as "the Independent JPEG Group's software".
We specifically permit and encourage the use of this software as the basis of commercial
products, provided that all warranty or liability claims are assumed by the product vendor.
ansi2knr.c is included in this distribution by permission of L. Peter Deutsch, sole proprietor
of its copyright holder, Aladdin Enterprises of Menlo Park, CA. ansi2knr.c is NOT covered
by the above copyright and conditions, but instead by the usual distribution terms of the Free
Software Foundation; principally, that you must include source code if you redistribute it.
(See the file ansi2knr.c for lull details.) However, since ansi2knr.c is not needed as part of
any program generated from the IJG code, this does not limit you more than the foregoing
paragraphs do.
The Unix configuration script "configure" was produced with GNU Autoconf. It is
copyright by the Free Software Foundation but is freely distributable. The same holds for its
supporting scripts (config.guess, config.sub, ltmain.sh). Another support script, install-sh, is
copyright by X Consortium but is also freely distributable.
The IJG distribution formerly included code to read and write GIF files. To avoid
entanglement with the Unisys LZW patent, GIF reading suplx_rt has been removed
altogether, and the GIF writer has been simplified to produce "uncompressed GIFs." This
technique does not use the LZW algorithm; the resulting GIF tiles are larger than usual, but
are readable by all standard GIF decoders.
We are required to state that
"The Graphics Interchange Format(c) is the Copyright property of CompuServe
Incorporated. GIF(sm) is a Service Mark property of CompuServe Incorlxwated. ''
ExhibitB
The FreeType Project LICENSE
2002-Apr-I 1
Copyright 1996-2002 by
David Turner, Robert Wilhelm, and Wemer Lemberg
Introduction
The FreeType Project is distributed in several archive packages; some of them may contain,
in addition to the FreeType font engine, various tools and contributions which rely on, or
relate to, the FreeType Project.
This license applies to all tiles found in such packages, and which do not fall under their own
explicit license. The license affects thus the FreeType font engine, the test programs,
documentation and maketiles, at the very least.
Page 85

LicenseAgreement 163
This license was inspired by the BSD, Artistic, and IJG (Independent JPEG Group) licenses,
which all encourage inclusion and use of tree software in commercial and freeware products
alike. As a consequence, itsmain points are that:
o**oWe don't promise that this software works. However, we willbe interested in any kind
of bug relx_rts.('as is'distribution)
Youcan use this software for whatever you want, in parts or lull form, without having
to pay us. ('royalty-tree' usage)
Youmay not pretend that you wrote this software. It you use it, or only parts of it, in a
program, you must acknowledge somewhere in your documentation that you have
used the FreeType code. ('credits')
We specifically permit and encourage the inclusion of this software, with or without
modifications, in commercial products. We disclaim all warranties covering The FreeType
Project and assume no liability related to The FreeType Project.
Finally, many people asked us for a preferred form for a credit/disclaimer to use in
compliance withthis license. We thus encourage you to use the following text:
Portions of this software are copyright O 1996-2002 The FreeType
Project (www.freetype.org). All rights reserved.
ExhibitC
scalfact.c Scalefactors for layer I and II This program istree software; you can redistribute it
and/or modify itunder the terms of the GNU General Public License as published by the
Free Software Foundation; either version 2of the License, or (at your option) any later
version. This program is distributed in the hope that it will be useful, but WITHOUT ANY
WARRANTY; without even the implied warranty of MERCHANTABILITY or FITNESS
FOR A PARTICULAR PURPOSE. See the GNU General Public License for more details.
Youshould have received a copy of the GNU General Public License along with this
program; ifnot, write to the Free Software Foundation, Inc., 675 Mass Ave, Cambridge,
MA 02139, USA.
Page 86

Index
A
advanced picture settings
CableClear® digital Noise
Reduction 116
Color temperature 115
Dynamic Contrast 114
Game Mode feature 117
MPEG Noise Reduction 117
Static Gamma 115
using 114
audio
adjusting quality 83
Audyssey ABXTM84
Dolby® Digital Dynamic Range
Control 85
MTS button 83
muting sound 81
optical audio output format 85
stereo/SAP broadcasts 82
Auto Aspect
using 74
auto power clown
set 107
auto power off feature 113
Auto Start function
Media Player 100
B
blocking programs
Canada rating 92
g
cables
3.5mm to RCA Y-cable 26
analog RGB (15-pin) 26
coaxial (F-type) 24
component video (red/white/
yellow) 25
HDMI® 25
optical audio 26
overview of cables 24
standard A/V (red/white/yellow)
25
channel
switching between two channels
68
tuning channels 67
tuning to a specific channel 68
Channel Browser
elements 65
164
Page 87

,.,.,. 165
tuning channels 63
Channel Return
switching between two channels
68
channels
auto tuning 52
locking channels 94
skipping 54
specific channel 67
storing in memory 52
cinema mode
selecting 75
closed captions
CC selector 80
Digital CC settings 80
using 78
computer
setting the audio 98
using with the TV 97
connecting
a computer 37
audio system 35
cable TV 27
camcorder 28
computer to TV's PC IN 37
DVD player with ColorStream®
29
DVI device to HDMI@ input 31
HDMI@ device to HDMI@ input
31
HDMI@-CEC 34
satellite receiver 30
TV's HDMI® 39
VCR and antenna 27
D
digital audio selector
using 82
Digital Signal Meter
viewing 57
Disc
audio channel 131
DVD menu 130
playback information 132
scene angle 130
scene bookmark 126
sound track language 131
subtitle 131
title selection 130
VCD playback control 132
disc
/A-B repeat mode (DVD/VCD/
CD) 129
audio channel (VCD) 131
DVD menu 130
DVD title 130
enable repeat playback 128
enabling PBC function 132
enabling repeat playback 139
file browser 135
locating a scene 125
playback info (DVD/VCD) 132
playback options 143
playback sequence 140
playback setting 141
playback/A-B repeat 128
playing audio file 136
scene 124
scene angle DVD 130
scene bookmark (DVD/VCD)
127
sound track language (DVD) 131
viewing JPEG file 137
viewing scene bookmark 128
viewing slide show 138
viewing subtitles (DVD) 131
zoom 124
zoom DVD/VCD 124
disc playback 119
customizing 141
DVD/VCD/CD 119
playback reminders 121
removing a disc 121
disc playback navigation 122
Page 88

166 ,.,ex
chapter or track 123 M
fast reverse, fast forward 122 Media Player
frame by frame 123 open 100
slow motion 123 photo files 101
E playing music files 103
Elements 65 using 99
F menu
layout 47
factory defaults navigation 48
reset 58 setup 47
favorites browser 64
features 18 N
Freeze no signal power down
feature 75 set 108
6 0
GameTimer@ operation
using 95 MP3/WMA/JPEG/Audio CD
133
H overview
HDMI@ audio mode installation 19
setting 55 setup 19
HDMI®-CEC use 19
additional functions 111
using 108 P
volume/mute controls 110 panel lock feature
History List using 96
addin_clearing channels 67 parental controls
addin_clearing inputs 67 blocking programs/movies by
rating (V-Chip) 88
] using 88
information PC Audio
MP3/WMAJJPEG/Audio 133 setting 98
Initial setup 50 PC settings feature
initial setup using 97
main menu layout 46 picture
input lock feature adjusting 76
using 94 adjusting quality 77
L picture mode
last mode memory feature 113 selecting 76
Locks menu picture size
setting pin code 86 4
3 72
Page 89

,.,.x 167
Dot by Dot 73
Full 70
Native 72
Normal 73
selecting 69
TheaterWide 1 71
TheaterWide 2 71
TheaterWide 3 71
pin code
changing 87
entering PIN code 86
foNotten 87
playback modes
MP3/WMA/JPEG/Audio CD
139
program ratings
displaying 92
unlocking programs 93
Q
quick setup
ANT/CABLE IN 51
menu language 51
R
rating system 91
downloading additional 89
s
screen angle
adjusting 22
scrolling
TheaterWide® picture 73
specifications
acceptable signal formats 158
audio power 155
channel coverage 154
ColorStream® HD input 156
Digital audio output 157
dimensions 157
DVD/CD player 157
HDMI® input 157
HDMI® signal formats 158
mass (weight) 157
operating conditions 157
PC IN signal formats 158
PC input 157
power consumption 155
power maximum current 155
power source 155
speaker type 155
supplied accessories 158
TV system 154
video/audio terminals 155
Surf Lock TM
switching between two channels
68
system status
viewing 58
T
time zone
setting 57
timer
sleep timer 106
troubleshooting 147
channel tuning problems 150
closed caption problems 151
contact Toshiba 153
disc playback problems 152
HDMI® 151
light indicator 153
media player problems 152
No HDMI®-CEC operation 151
picture problems 148
power indicator functions 153
Rating blocking problems 151
remote control problems 150
sound problems 149
Tuning 63
TV connections
front 20
side 20
TV panel connections
back 22
Page 90

168 ,.,ex
TV panel controls
front 20
left side 20
side 20
TV remote
functionality 42
install batteries 40
TV remote control
using 40
TV status information
show 112
v
video input source
selecting 59
video input sources
labeling 61
Page 91

Leading innovation _;>>
IntegratedHighDefinition
LEDTV/DVDCombination
User'sGuide:
24V4210U
24V4260U
If you need assistance:
Toshiba's Support Web site support.toshiba.com
Call Toshiba Customer Support Center:
Within the United States at (800) 631-3811
Outside the United States at (949) 583-3050
For more information, see "Troubleshooting" on page 147 in this guide.
Owner's Record
The model number and serial number are on the back and side of your TV.
Record these numbers in the spaces below. Refer to these numbers whenever you
communicate with your Toshiba dealer about this LED TV/DVD combination.
Model number:
Serial number:
I Note: To display a High Definition I
picture, the TV must bereceiving a I
High Definitionsignal (such as an over-I
the-air High Definition TV broadcast, a I
High Definition digitalcable program,or I
a High Definition digital satellite I
program), For details, contact yourTV I
antenna installer, cable provider, or I 4/1GMA3000120013
Page 92

0 UsingtheTV'sfeatures
Using closed captions
DigitalCCsettings
You can customize the closed caption display characteristics by
changing the background color, opacity, text size, type, edge, and
color.
NOTE .:.Thesesettings areavailablefor digital channelsonly.
¢ Youcannot set CaptionTextandBackgroundasthe samecolor.
To customize closed captions:
1 Press the MENU button to open the Preferences menu.
2 Highlight Digital CC Settings, and then press the OK button.
3 Press the (&/y arrow) buttons to highlight the characteristic
you wish to change, and then press the (_11/_ arrow) buttons to
select the format for that characteristic.
4 To save the new settings, highlight Done, and then press the
OK button.
g To revert to the factory defaults, highlight Reset, and then
press the OK button.
Mode. Description
Captionsize Auto,Small,Standard,Large
Captiontexttype Auto,Default,Mono(withSerif),Prop.(withSerif),Mono
(withoutSerif),Prop.(withoutSerif),Casual,Cursive,Small
Capitals
Captiontextedge Auto,None,Raised,Depressed,Uniform,LeftDropShadow,
RightDropshadow
Captiontextcolor Auto,Black,White,Red,Green,Blue,Yellow,Magenta,Cyan
Textforegroundopacity Auto,Transparent,Translucent,Flashing,Solid
Backgroundcolor Auto,Black,White,Red,Green,Blue,Yellow,Magenta,Cyan
Textbackgroundopacity Auto,Transparent,Translucent,Flashing,Solid
Captiontextedgecolor Auto,Black,White,Red,Green,Blue,Yellow,Magenta,Cyan
CCSelector
You can use the CC Selector to temporarily override the default
analog caption mode (set in Base CC Mode) for a particular
channel. However, once you change to another channel, the closed
Page 93

UsingtheTV'sfeatures _1
Adjusting the audio
caption setting will automatically change back to the current Base
CC Mode setting.
You can also use the CC Selector to select digital closed caption
services, if available. When such services are not available, the CC
Selector presents a default list of services. If the selected service is
not available, the next best service will be used.
To select closed captions:
1 Press the MENU button to open the Preferences menu.
2 Highlight CC Selector, and then press the OK button.
3 Press the (A/V arrow) buttons to select the Closed Caption,
and then press the (_/_ arrow) buttons to select the desired
service.
4
5
To save the new settings, highlight Done, and then press the
OK button.
Press the EXIT button.
NOTE YoucanalsopresstheSUBTITLEbuttontoopenCCSelectorand
followtheinstructions.
Adjustingtheaudio
Mutingthesound
Press the MUTE button to partially reduce (1/2 Mute) or turn off
(Mute) the sound. Each time you press the MUTE button, the mute
mode changes in the following order: 1/2 Mute, Mute, Volume, 1/2
Mute, etc.
112Mu_e --_ Mute _ Volume _
(Sanlple In,age) Le_,eL_"qf n_ute
If closed caption mode is set to Off when selecting MUTE mode,
the closed caption feature becomes active if the TV program is
closed captioned. To mute the audio without activating the closed
captioning, press the VOL (-) button to set the volume to 0.
For more information, see "Using closed captions" on page 78.
NOTE IfyoumodifyitemsintheSOUNDmenuwhileMuteisactive,Mute
iscancelled.
Page 94

2 UsingtheTV'sfeatures
Adjusting the audio
Usingthedigitalaudioselector
You can use the Digital Audio Selector to conveniently switch
between audio tracks on a digital channel (for those channels that
have multiple audio tracks). This temporarily overrides tile audio
track chosen by tile language option under Audio Setup, see
"Selecting stereo/SAP broadcasts" on page 82.
1 Press tile MENU button to open tile Sound menu.
2 Highlight Digital Audio Selector, and then press tile OK
button.
(Sample Image) Digital Audio Selector sc_en
3 Press the (_1 _ arrow) buttons to select the desired service.
4 Press the EXIT button.
Selectingstereo/SAPbroadcasts
The multi-channel TV sound (MTS) feature allows you to output
high-fidelity stereo sound. MTS also can transmit a second audio
program (SAP) containing a second language, music or other audio
information (when provided by individual stations).
When the TV receives a stereo or SAP broadcast, the stereo mark or
word "SAP" appears when the DISPLAY button is pressed. The
MTS feature is only available for analog signals on the
ANT/CABLE input.
To listen in stereo sound:
1
2
3
4
Press the MENU button to open the Sound menu.
Highlight Audio Setup, and then press the OK button.
In the MTS field, select Stereo.
To save the new settings, highlight Done, and then press the
OK button.
To reset the settings to the factory defaults, highlight Reset,
and then press the OK button.
Page 95

UsingtheTV'sfeatures _
Adjusting the audio
_,t !,,J
NOTE o}oYoucantypicallyleavetheTVinStereomodebecauseit outputs
thetypeof soundbeingbroadcast(stereoormonaural).
¢ If the sound is noisy, select Mono to reducethe noise,
To listen to an alternate language on an ATSC digital station (if
available), highlight the Language field in step 3 above, and then
press the (4/_ arrow) buttons to select the language you prefer.
To listen to a second audio program on an analog station, if
available, select SAP in step 3 above.
1 Press the MENU button. Select Settings, SOUND, MTS.
2 Press the (,_/_ arrow) buttons to select SAP. Press the EXIT
button.
NOTE o:oA secondaudioprogram(SAP)canbeheardonlyonthoseTV
stationsthatofferit. Forexample,astationmightbroadcast
anotherlanguageasasecondaudioprogram.IfyouhaveSAP
on,youwillseethecurrentprogramonthescreenbuthearthe
otherlanguageinsteadoftheprogram'snormalaudio.
¢ IfyouhaveSAPonandthestationyouarewatchingisnot
broadcastingasecondaudioprogram,thestation'snormal
audiowill beoutput.However,occasionallythereisnosoundat
all in SAPmode.Ifthis happens,settheMTSfeaturetoStereo
mode.
UsingtheIVlTSbutton
If you press the AUDIO button when an analog channel is tuned,
the Analog Audio bar appears and displays Stereo, SAE Mono as
the options.
If you press the AUDIO button when a digital channel is tuned, the
Digital Audio bar will appear and offer different audio choices for
the digital channel.
If you press the AUDIO button when an external input is selected,
no Audio bar appears.
Adjustingtheaudioquality
You can adjust the audio quality by adjusting the bass, treble and
balance.
Page 96

4 UsingtheW's features
Adjusting the audio
To adjust the audio quality:
1 Press tile MENU button to open tile Sound menu.
2 Highlight Audio Setup, and then press tile OK button.
3 Press tile (A/Y arrow) buttons to highlight tile item you wish
to adjust (Bass, Treble, or Balance).
4 Press tile (4/_ arrow) buttons to adjust tile level.
°:° 4 makes tile bass or treble weaker or increases tile balance
in tile left channel (depending on tile item selected).
•:* _ makes tile bass or treble stronger or increases tile
balance in tile right channel (depending on tile item
selected).
5 To save tile new settings, highlight Done, and then press tile
OK button.
6 To reset tile settings to tile factory defaults, highlight Reset,
and then press tile OK button.
AudysseyPremium TelevisionTM
These televisions use a suite of technologies for better sound
including:
•",o Audyssey EQ% provides clear, accurate and natural sound
right out of the box. This technology ensures you enjoy your
audio experience as much as your video.
•",o Audyssey ABX TM-technology uses sophisticated driver
analysis and low frequency monitoring to extend the range and
bass of small speakers .This enables the system to produce
lower frequencies than otherwise would be possible.
•",o Audyssey _'_Dynamic Volume- automatically adjusts volume to
provide a consistent sound level between television programs,
commercials, and between the loud and soft passages of
movies.
AudysseyABXrM
Audyssey ABX rMtechnology uses sophisticated driver analysis and
low frequency monitoring to extend tile range and bass of small
speakers.
To turn on Audyssey ABXrM:
1 Press tile MENU button and open tile Sound menu.
2 Highlight Audio Settings, and tile press tile OK button.
Page 97

UsingtheTV'sfeatures _
Adjusting the audio
3 Press the (A/Y arrow) buttons to highlight the Audyssey
ABX TM field.
4 Press the (_/_ arrow) buttons to select On.
UsingAudysseyDynamicVolume®
This feature provides a consistent sound volume between television
programs, commercials, and between the loud and soft passages of
movies.
1 Press the MENU button. Select Settings, SOUND, Audyssey
Premium Television, Dynamic Volume.
2 Press the (_/_ arrow) buttons to select ON or Off.
NOTE .:. If DynamicRangeControl is set to On,this featureis
automatically setto Off.
•:. This featuredoes not affectthe audio signal outputfrom the
DIGITALAUDIOOUTterminal.
Selectingtheopticalaudiooutputformat
You can select the optical audio output format when you connect a
Dolby _>Digital decoder or other digital audio systems to the TV's
Digital Audio Out terminal.
To select the optical audio output format:
1 Press the MENU button to open the Sound menu.
2 Highlight Audio Setup, and then press the OK button.
3 In the Digital Output Format field, select either Dolby
Digital or PCM, depending on your device.
4 To save the new settings, highlight Done, and then press the
OK button.
5 To reset the settings to the factory defaults, highlight Reset,
and then press the OK button.
UsingtheDolby_ DigitalDynamicRangeControlfeature
You can further compress Dolby ®Digital dynamic range, allowing
you to switch from digital to analog broadcasts at the same dynamic
range.
To use the Dolby ®Digital Dynamic Range Control:
1 Press the MENU button to open the Sound menu.
Page 98

6 UsingtheTV'sfeatures
Using &e Locksmenu
2 Highlight Audio Setup, and then press tile OK button.
3 In tile Dolby _ Digital Dynamic Range Control field, select
either Compressed. When Standard is selected, tile audio
outputs with minimal compression.
4 To save tile new settings, highlight Done, and then press tile
OK button.
5 To reset the settings to the factory defaults, highlight Reset,
and then press tile OK button.
NOTE .:.Thisfeatureisavailablewhentunedtoa digitalRFchannelwith
theDolby_'_Digitalsignal.
¢ TheDolby_ DigitalDynamicRangeControlwillfunctionin
relationtoDigitalOutputFormat(PCMmode).
UsingtheLocksmenu
Tile Locks menu includes tile Enable Rating Blocking, Edit Rating
Limits, Input Lock, Panel Lock, GameTimer and New PIN Code
features. You can use these features after entering the correct PIN
code.
EnteringthePINcode
1 Press tile MENU button to open tile Locks menu.
(Sample Image) Lock menu screen (fbr USA region)
Page 99

UsingtheTV'sfeatures _'7
Using the I_cks menu
2 Press the (y arrow) button to display the PIN code entry
screen.
Tile Lock System screen appears if a PIN code has not been
stored.
(Sample Image) Lock menu - store PIN screen
3 Press tile Channel Number buttons to enter a new four-digit
code, enter tile code a second time to confirm, and then press
tile OK button.
Tile Locks/Active screen appears if tile PIN code is already
stored.
4 Use tile Number buttons to enter your four-digit code, and then
press tile OK button.
NOTE IfthewrongPINcodeisentered,themessage"IncorrectPINcode,
pleasetryagain!"appears.
5 Highlight Retry, and then press the OK button.
6 Enter tile code again, and then press tile OK button.
When tile correct PIN code is entered, tile Locks menu opens.
ForgottenPINcode
While tile PIN code entering screen is displayed, press tile INFO
button four times within five seconds. Tile PIN code will be cleared
and you can enter a new PIN code.
ChangingyourPINcode
1 Press tile MENU button to open tile Locks menu.
2 Press tile (y arrow) button to display tile PIN code entering
screen.
3 Enter your four-digit PIN code, and then press tile OK button.
Page 100

8 UsingtheTV's features
Using parental contivls qbr USA region)
4 Press the (y arrow) button to highlight New PIN Code, and
then press the OK button.
5 Press the Number buttons to enter a new four-digit code.
Reenter the PIN code to confirm it.
6 Press the OK button.
The new PIN code is now active.
NOTE The PiNcode cannot besetto "0000."
Usingparentalcontrols(forUSAregion)
BlockingTVprogramsandmoviesbyrating(V-Chip)
Some TV programs and movies include signals that classify the
content of the program (as unsuitable for younger viewers). The
V-Chip feature in this TV detects the signals and blocks the
programs according to the ratings you select.
1 Press the MENU button to open the Locks menu.
2 Press the (y arrow) button to display the PIN code entering
screen.
3 Enter your four-digit PIN code, and then press the OK button.
4 Press the (y arrow) button to highlight Enable Rating
Blocking, and then press the OK button.
5 Press the (_ arrow) button to select On.
(Sample h_zage) Locks menu - Enable Rating Blocking selection
(tbr USA region)
 Loading...