

Page 1
20A45C
Page 2
Dear Customer,
Thank you for purchasing this Toshiba TV. This manual will
help you use the many exciting features of your new TV.
Before operating the TV, please read this manual
completely, and keep it nearby for future reference.
Safety Precautions
WARNING
TO REDUCE THE RISK OF FIRE OR ELECTRIC
SHOCK, DO NOT EXPOSE THIS APPLIANCE TO
RAIN OR MOISTURE.
WARNING: TO REDUCE THE RISK OF
ELECTRIC SHOCK, DO NOT REMOVE COVER
(OR BACK). NO USER-SERVICEABLE PARTS
INSIDE. REFER SERVICING TO QUALIFIED
SERVICE PERSONNEL.
The lightning symbol in the triangle tells you that the
voltage inside this product may be strong enough to
cause an electric shock. DO NOT TRY TO SERVICE
THIS PRODUCT YOURSELF.
The exclamation mark in the triangle tells you that
important operating and maintenance instructions
follow this symbol.
CAUTION: To reduce the risk of electric shock,
do not use the polarized plug with an extension
cord, receptacle, or other outlet unless the
blades can be inserted completely to prevent
blade exposure.
NOTE TO CATV INSTALLERS
This is a reminder to call the CATV system installer’s
attention to Article 820-40 of the NEC, which
provides guidelines for proper grounding and, in
particular, specifies that the cable ground shall be
connected to the grounding system of the building,
as close to the point of cable entry as practical. For
additional antenna grounding information, see
items 25 and 26 on page 4.
NOTICE OF POSSIBLE ADVERSE EFFECTS
ON TV PICTURE TUBE
If a fixed (non-moving) pattern remains on the TV
screen for long periods of time, the image can
become permanently ingrained in the picture
tube. This type of damage is NOT COVERED
BY YOUR WARRANTY. See item 33 on page 4.
2
0303
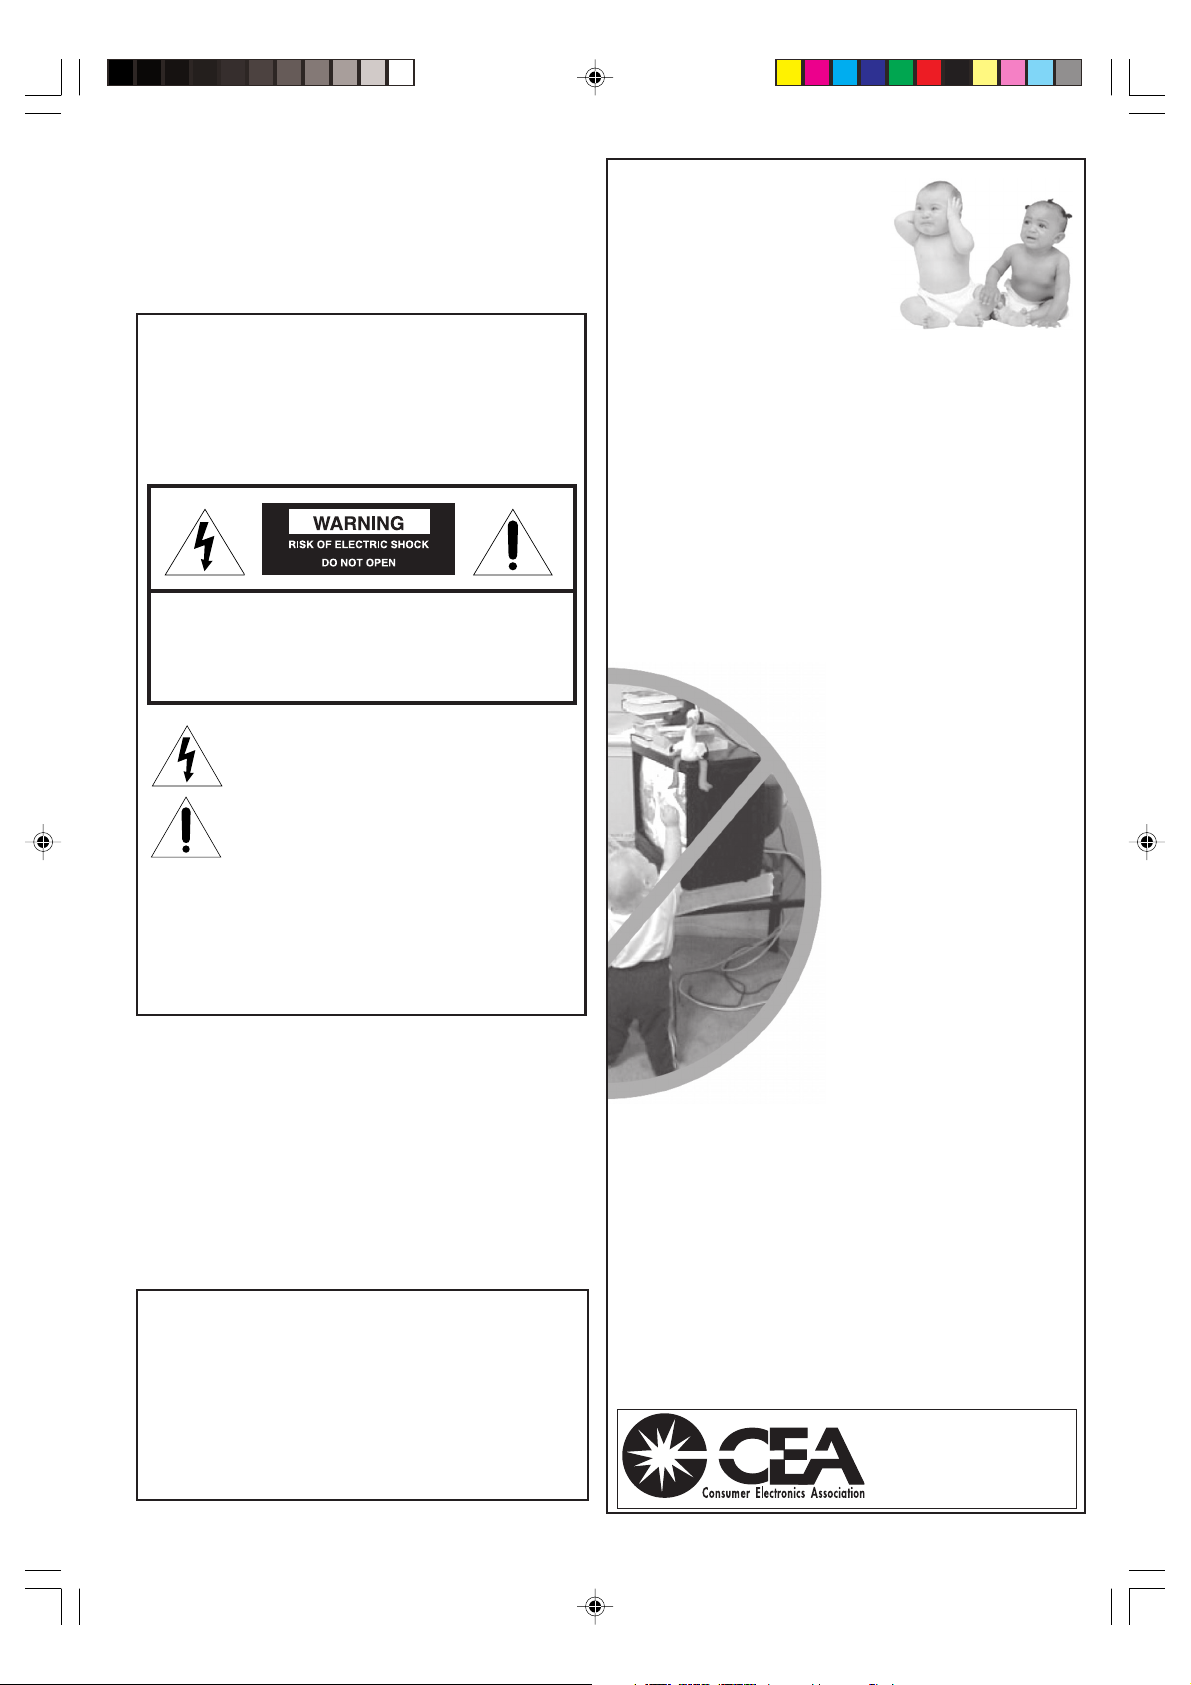
Child Safety
It Makes A Difference
Where Your TV Stands
Congratulations on your purchase! As you enjoy
your new TV, keep these safety tips in mind:
The Issue
If you are like most consumers, you have a TV in your home.
Many homes, in fact, have more than one TV.
The home theater entertainment experience is a growing
trend, and larger TVs are popular purchases; however, they
are not always supported on the proper TV stands.
Sometimes TVs are improperly secured or inappropriately
situated on dressers, bookcases, shelves, desks, audio
speakers, chests, or carts. As a result, TVs may fall over,
causing unnecessary injury.
Toshiba Cares!
The consumer electronics industry
is committed to making home
entertainment enjoyable and safe.
The Consumer Electronics
Association formed the Home
Entertainment Support Safety
Committee, comprised of TV and
consumer electronics furniture
manufacturers, to advocate
children’s safety and educate
consumers and their families about
television safety.
Tune Into Safety
One size does NOT fit all! Use
appropriate furniture large enough to
support the weight of your TV (and other
electronic components).
Use appropriate angle braces, straps, and anchors to
secure your furniture to the wall (but never screw anything
directly into the TV).
Carefully read and understand the other enclosed
instructions for proper use of this product.
Do not allow children to climb on or play with furniture
and TVs.
Avoid placing any item on top of your TV (such as a VCR,
remote control, or toy) that a curious child may reach for.
Remember that children can become excited while watching
a program and can potentially push or pull a TV over.
Share our safety message about this hidden hazard of
home with your family and friends. Thank you!
2500 Wilson Blvd.
Arlington, VA 22201 U.S.A.
Tel. 703-907-7600 Fax 703-907-7690
www.CE.org
CEA is the Sponsor, Producer and
Manager of the International CES
the
®
J3M91421A(E)_P02-07 11/03/2005, 3:34 PM2
Page 3
Important Safety Instructions
1) Read these instructions.
2) Keep these instructions.
3) Heed all warnings.
4) Follow all instructions.
5) Do not use this apparatus near
water.
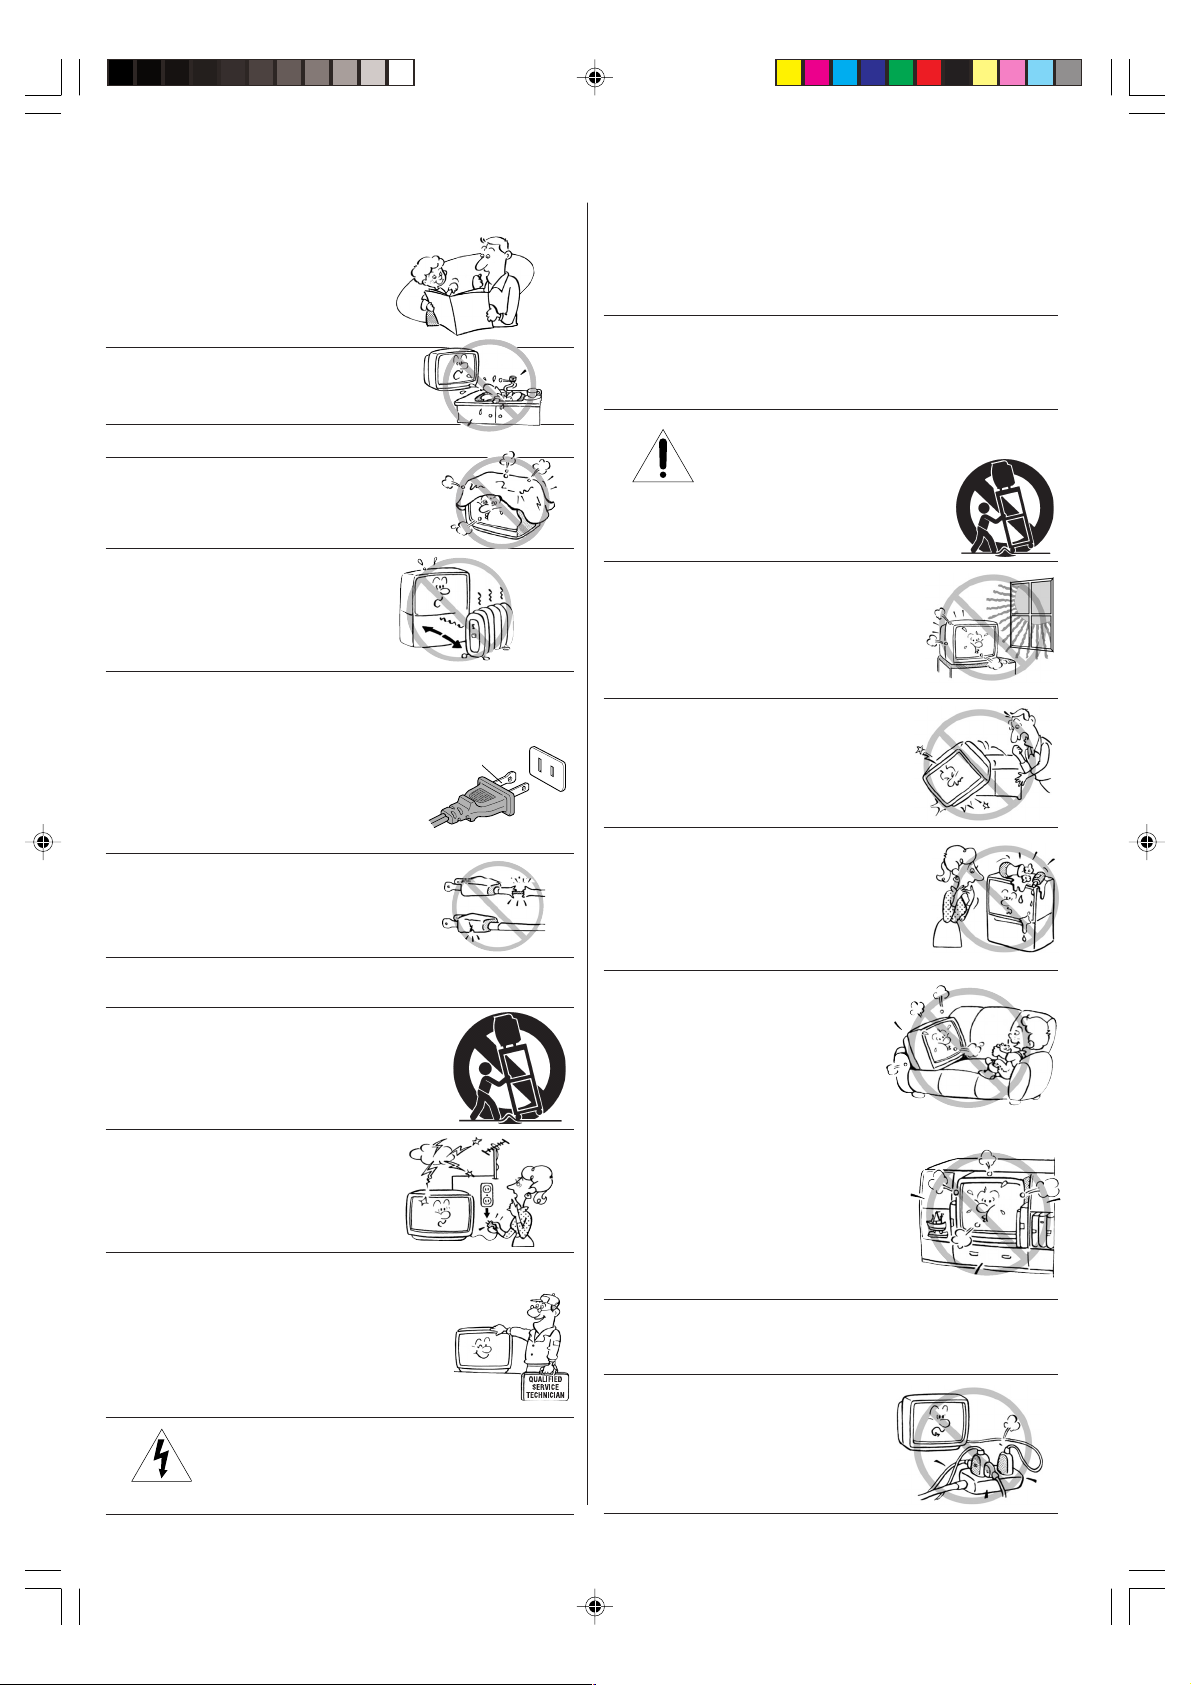
Installation, Care, and Service
Installation
Follow these recommendations and precautions and heed
all warnings when installing your TV:
16) Never modify this equipment. Changes or modifications
may void: a) the warranty, and b) the user’s authority to
operate this equipment under the rules of the Federal
Communications Commission.
6) Clean only with a dry cloth.
7) Do not block any ventilation
openings. Install in accordance with
the manufacturer’s instructions.
8) Do not install near any heat
sources such as radiators,
heat registers, stoves, or other
apparatus (including amplifiers)
that produce heat.
9) Do not defeat the safety purpose of the polarized or
grounding type plug. A polarized plug has two blades
with one wider than the other. A grounding type plug has
two blades and a third grounding
prong. The wide blade or the third
prong are provided for your safety.
If the provided plug does not fit into
your outlet, consult an electrician
for replacement of the obsolete outlet.
10) Protect the power cord from being
walked on or pinched, particularly at
plugs, convenience receptacles, and
the point where it exits the apparatus.
11) Only use attachments/accessories specified by the
manufacturer.
12) Use only with the cart, stand, tripod,
bracket, or table specified by the
manufacturer, or sold with the
apparatus. When a cart is used, use
caution when moving the cart/apparatus
combination to avoid injury from tip-over.
13) Unplug this apparatus during
lightning storms or when
unused for long periods
of time.
14) Refer all servicing to qualified service personnel.
Servicing is required when the apparatus has been
damaged in any way, such as power supply
cord or plug is damaged, liquid has
been spilled or objects have fallen into
the apparatus, the apparatus has been
exposed to rain or moisture, does not
operate normally, or has been dropped.
Wide plug
17) DANGER: RISK OF SERIOUS PERSONAL
INJURY, DEATH, OR EQUIPMENT
DAMAGE! Never place the TV on
an unstable cart, stand, or table. The TV
may fall, causing serious personal injury,
death, or serious damage to the TV.
18) Never place or store the TV in direct
sunlight; hot, humid areas; areas
subject to excessive dust or vibration;
or locations with temperatures at or
below 41°F (5°C).
19) Always place the TV on the floor
or a sturdy, level, stable surface that
can support the weight of the unit.
20) Never place items such as vases,
aquariums, or candles on top of the TV.
21) Never block or cover the slots or
openings in the TV cabinet back,
bottom, and sides. Never place
the TV:
• on a bed, sofa, rug, or similar
surface;
• too close to drapes, curtains,
or walls; or
• in a confined space such as a
bookcase, built-in cabinet, or any
other place with poor ventilation.
The slots and openings are provided
to protect the TV from overheating
and to help maintain reliable
operation of the TV.
22) Never allow anything to rest on or roll over the power
cord, and never place the TV where the power cord is
subject to wear or abuse.
15)
inserted completely to prevent blade exposure.
J3M91421A(E)_P02-07 11/03/2005, 3:34 PM3
CAUTION: To reduce the risk of electric shock, do
not use the polarized plug with an extension cord,
receptacle, or other outlet unless the blades can be
23) Never overload wall outlets and
extension cords.
0303
3
3
Page 4

24) Always operate this equipment from
a 120V AC, 60 Hz power source only.
25) Always make sure the antenna system is properly
grounded to provide adequate protection against
voltage surges and built-up static charges (see Section
810 of the National Electric Code).
26) DANGER: RISK OF SERIOUS PERSONAL
in a position where your body (or any item you are in
contact with, such as a ladder or screwdriver) can
accidentally touch overhead power lines. Never locate
the antenna near overhead power lines or other
electrical circuits.
• Never attempt to install any of the following during
lightning activity:
a) an antenna system; or b) cables, wires, or any home
theater component connected to an antenna or phone
system.
INJURY OR DEATH!
• Use extreme care to make sure you are never
Care
For better performance and safer operation of your
TOSringTatic 0 j 0.48 gs1 m291.57 371.53 -128BT/F8 1 Tf -128B510.64 Tm/GS4 gs1.53TJ980 Tw(26))Tj/F1ET4.02 w[tece2(s.)]Tu(T)4(:01 Tw371.-2 Tc/F9 1 Tf0.ponent comak)ion7F259(ate th466(antenna1(b apJ0ximteder 10–0 Tfeeb aten533 T)]TJT0.0004(V) Tw[(g4Tw(lightning actintenna sytiorivdomecter our33 ten(O)(b as-271si.8(.T030)-2TJpictr)]T2(s.)on)Tw[(accid(theater c syppne)-dung iO)-18a1(b too fe)-e)T]TJleft3 TDrT*ing)]TJT0.0001(V)5,w[(cont)-19.3(act with, TDiO)sunlT*inTDro T)lT*ations reft
0303
4
Page 5
FEATURES
• 181 Channel Tuner - The tuning system is capable of receiving all 68 VHF/UHF standard broadcast channels that
are available in your area. When operating on a cable system, it can tune to the standard VHF channel frequencies
plus up to 113 cable channel frequencies. The actual number of channels received depends upon channel
reception in your area or your cable system.
• On-screen 3 Language Display - This TV can display the on-screen language in English, Spanish or French.
• Sleep Timer - Operable from the remote control, the TV can be programmed to turn off automatically (from 10 to
120 minutes, in 10-minute increments).
• Memory Back Up - This system prevents loss of memorized channel selections in case a power interruption to the
TV should occur.
• Picture Control Adjustments - The on-screen display allows precise remote control adjustment of BRIGHTNESS,
CONTRAST, COLOR, TINT and SHARPNESS.
• Closed Captioned Decoder - Displays closed captions or text on-screen (when available).
• Stereo/SAP Reception - This TV is designed to receive stereo and second audio program (SAP) broadcasts
where available.
• Lock feature - This feature has three functions, LOCKING CHANNELS, LOCKING VIDEO INPUT and SETTING
THE GameTimer
• Programmable ON Timer - Allows you to program the TV to automatically turn on at a set time.
TM
.
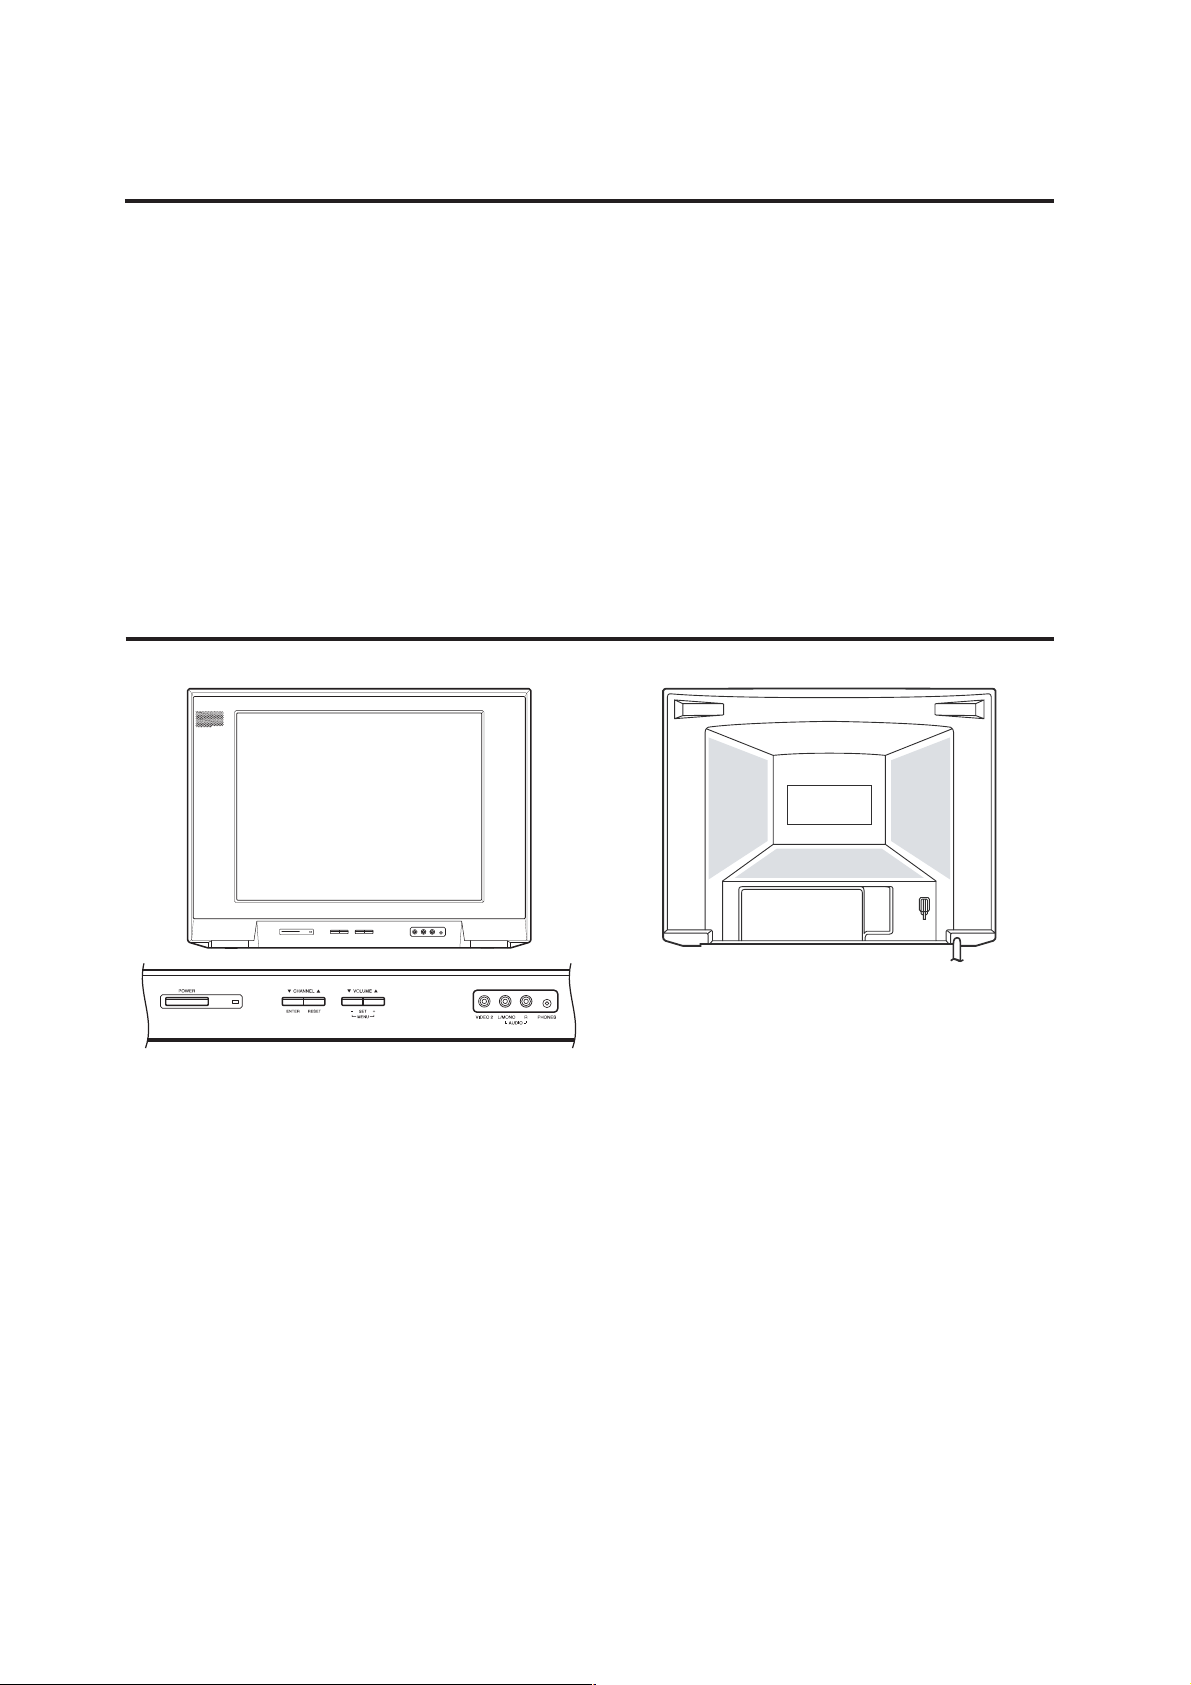
LOCATION OF CONTROLS
FRONT BACK
1. POWER Button - Press to turn the TV on or off.
2. Remote Sensor - Signals from the Remote Control
unit are received here.
3. POWER indicator - Lights up when the power is
turned on.
4. CHANNEL ▲/▼ Buttons - Press to select a higher or
lower numbered channel set into memory.
(ENTER Button) - Press to enter or select information
for on-Screen operations.
(RESET Button) - Press, while in the on-screen menu
mode, to reset the on-screen picture adjustments to
their factory preset positions.
5. VOLUME ▲/▼ Buttons - Press to raise or lower the
level of the sound.
(MENU Buttons) - Press both VOLUME ▲/▼ buttons
at the same time to display the on-screen menu
functions.
(SET + / – Buttons) - Press to select the desired
setting during on-screen operations.
6. AUDIO/VIDEO IN (VIDEO 2) Jacks - Audio and video
signal cables from an external source can be
connected here.
7. PHONES (Earphone) Jack - Plug an earphone or
monaural headphones with a 1/8" miniplug into this
jack for private listening.
8. VHF/UHF IN (ANT) Jack - Connect a VHF/UHF
antenna or CATV cable to this jack.
9. AUDIO/VIDEO IN (VIDEO 1) Jacks - Audio and
video signal cables from an external source can be
connected here.
10. AC Power Cord - Plug into an outlet with 120V,
60 Hz AC power only.
5
Page 6

REMOTE CONTROL
1
2
3
4
5
6
7
8
9
1. POWER Button - Press to turn on the TV. Press again
to turn off the TV.
2. Direct Channel Selection Buttons (0–9) - Allows direct
tuning of any channel.
3. CH RTN Button - Repeatedly press CH RTN to toggle
back and forth between the last two channels you tuned.
POWER
123
456
7
89
CH RTN RECALL
0
SLEEP
VOL
–
MENU
–
RESET MTS
TV/VIDEO
CH +
CH –
SET
CAP/TEXT
CT-837
MUTE
VOL
ENTER
+
1/2
10
11
+
12
13
14
15
16
4. SLEEP Button - To set the TV to turn off after a preset
amount of time, press the SLEEP button on the remote
control. The clock will count down 10 minutes each time
the button is pressed in the order of 120, 110, 100, ······ 20,
10, 0. After the sleep time is programmed, the display will
disappear then reappear momentarily every ten minutes to
remind you the sleep timer function is operating. To
confirm the sleep time setting, press the SLEEP button
once and the remaining time will be momentarily displayed.
To cancel the sleep timer, press the SLEEP button
repeatedly until the display turns to 0.
5. VOL (VOLUME) + / – Buttons - Press the + button to
increase or the – button to decrease the volume level.
6. MENU Button - Press to display the on-screen menu function.
7. SET + / – Buttons - Press to select the desired setting
during on-screen operations.
8. RESET Button - Press to reset the on-screen picture
adjustments to their factory preset positions.
9. TV/VIDEO Button - Switches between the TV and external
device inputs.
10. RECALL Button - When you press this button, the channel
number will appear in the upper right corner of the screen.
Press the button again to remove it from the screen.
11. MUTE Button - To turn off the sound, press this button
once. The TV will be silenced and the word “MUTE” will
appear on the screen. The muting feature can be released
by pressing the MUTE button again or one of the VOL + or
– buttons.
12. CH (CHANNEL) + / – Buttons - Press the CH + button to
change to a higher numbered channel set into memory.
Press the CH – button to change to a lower numbered
channel set into memory.
13. ENTER Button - Press to enter or select information for
on-screen operations.
14. MTS Button - Switches sound between mono, stereo, and
SAP when receiving broadcasts in stereo or SAP.
15. 1/2 Button - Switches between captions channel 1 and
captions channel 2 in the closed caption mode.
16. CAP/TEXT Button - Press to switch between normal TV
and the two closed caption modes (captions or text), when
available.
Before using the remote control, batteries must first be
installed.
HOW TO INSTALL BATTERIES
1. Open the battery compartment cover.
2. Install two “AAA” (penlight size) batteries.
3. Replace the battery compartment cover.
6
J3M91421A(E)_P02-07 11/03/2005, 3:34 PM6
Use two “AAA” size penlight batteries (supplied) for the
remote control. The batteries may last approximately one
year depending on how much the remote control is used.
For best performance, it is recommended that you replace
the batteries on a yearly basis or when the remote operation
becomes erratic.
Caution:
• Never throw batteries into a fire.
Notes :
• Be sure to use AAA size batteries.
• Dispose of batteries in a designated disposal area.
• Batteries should always be disposed of with the
environment in mind. Always dispose of batteries in
accordance with applicable laws and regulations.
• If the remote control does not operate correctly, or if the
operating range becomes reduced, replace batteries with
new ones.
• When necessary to replace batteries in the remote
control, always replace both batteries with new ones.
Never mix battery types or use new and used batteries in
combination.
• Always remove batteries from remote control if they are
dead or if the remote control is not to be used for an
extended period of time. This will prevent battery acid
from leaking into the battery compartment.
Page 7

ANTENNA/CABLE TV CONNECTIONS
Choose one of the following seven connections, based on your
equipment and service:
Combination VHF/UHF antenna
Single 75 ohm cable
(or)
Single 300 ohm twin-lead wire*
For best performance, if you have a splitter connected, remove
*
the splitter and connect the single wire to the transformer,
and then to the TV’s antenna input (as illustrated here).
TRANSFORMER
(not supplied)
To ANT input
on back of TV
To ANT input
on back of TV
Separate VHF and UHF antennas or
Combination VHF/UHF antenna with separate cables/wires
UHF Antenna
VHF Antenna
300 ohm twin-lead wire
75 ohm cable
(not supplied)
COMBINER
To ANT input
on back of TV
(or)
UHF Antenna
300 ohm twin-lead wire
VHF Antenna
300 ohm twin-lead wire*
Cable TV service
From cable
TV service
(or)
From cable
TV service
(or)
From cable
TV service
TRANSFORMER
(not supplied)
CONVERTER/ DESCRAMBLER
CONVERTER/ DESCRAMBLER
SPLITTER
A / B SWITCH
COMBINER
(not supplied)
A
B
To ANT input
on back of TV
To ANT input
on back of TV
To ANT input
on back of TV
To ANT input
on back of TV
Combination VHF/UHF antenna (Single 75 ohm cable or 300 ohm
twin-lead wire)
Connect the 75 ohm cable from a combination VHF/UHF antenna to the
antenna jack.
If your combination antenna has a 300 ohm twin-lead wire, use the 30075 ohm matching transformer (not supplied).
Combination VHF/UHF antenna (Separate VHF and UHF 300 ohm
twin-leads)
Connect the UHF twin-lead wire to a combiner (not supplied). Connect
the VHF twin-lead to the 300-75 ohm matching transformer (not
supplied). Attach the transformer to the combiner. Attach the combiner
to the antenna jack.
Separate VHF/UHF antennas
Connect the 75 ohm cable from the VHF antenna and the UHF antenna
twin-lead to a combiner (not supplied). Attach the combiner to the
antenna jack.
NOTE: If your VHF antenna has a twin-lead wire, use the 300-75 ohm
matching transformer (not supplied), then connect the transformer to the
combiner.
For subscribers to basic cable TV service
For basic cable service not requiring a converter/descrambler box, connect the Cable TV 75 ohm coaxial cable directly to the antenna jack on
the back of the television.
For subscribers to scrambled cable TV service
If you subscribe to a cable service that requires the use of a converter/
descrambler box, connect the incoming cable to the converter/
descrambler box and connect the output of the box to the antenna jack on
the back of the television. Follow the connections shown at left. Set the
television to the output of the converter/descrambler box (usually channel
3 or 4) and use the converter/descrambler box to select channels.
For subscribers to unscrambled basic cable with scrambled
premium channels
If you subscribe to a cable service in which basic cable channels are
unscrambled and premium channels require the use of a converter/
descrambler box, you may wish to use a two-set signal splitter
(sometimes called a “two-set coupler”) and an A/B switch box from the
cable installer or an electronics supply store. Follow the connections
shown at left. With the switch in the “B” position, you can directly tune
any nonscrambled channels on your TV. With the switch in the “A”
position, tune your TV to the output of the converter/descrambler box
(usually channel 3 or 4) and use the box to tune scrambled channels.
This television has an extended tuning range and can tune most cable
channels without using a cable company supplied converter box.
Some cable companies offer “premium pay channels” in which the
signal is scrambled. Descrambling these signals for normal viewing
requires the use of a descrambler device, which is generally provided
by the cable company.
CONNECTION TO OTHER EQUIPMENT
The exact arrangement you use to interconnect various video and audio components to the TV is dependent on the model and features
of each component. Check the owner’s manual provided with each component for the location of video and audio inputs and outputs.
The following connection diagrams are offered as suggestions. You may need to modify them to accommodate your particular
assortment of components.
TV/VIDEO SELECTION
To view the picture from a VCR, camcorder, or VIDEO game,
you must put the TV in VIDEO mode first. Press TV/VIDEO to
select VIDEO mode. The word “VIDEO1” or “VIDEO2” displays
briefly on-screen. Press TV/VIDEO again to return to TV mode.
TV VIDEO 1 VIDEO 2
VCR
To Audio/
Video OUT
(not supplied)
Rear of TV
AUDIO (R)
VIDEO 1
VIDEO Game
VIDEO
Front of TV
AUDIO (L)
To AV OUT jack
7
Page 8

SETTING THE LANGUAGE
This TV can display the on-screen displays and adjustment menus in English, Spanish, or French.
The on-screen language selection (step 3, below) will automatically appear on the screen when you press the MENU button
initially. Select the language you prefer first, then proceed with the other menu options.
Press MENU.
1
Press SET + or – to select the
2
LANGUAGE mode, then press
ENTER.
MENU
CH SETUP
PICTURE
LANGUAGE
LOCK
ON TIMER
+
〈
/Ð/ ENTER / MENU
Press SET + or – until the
3
indicator points to the desired
language: English (ENGLISH),
Spanish (ESPAÑOL) or French
(FRANCAIS), then press ENTER.
〉
Press MENU repeatedly until the
4
“ ”
LANGUAGE / IDIOMA / LANGUE
ENGLISH
ESPAÑOL
FRANCAIS
+
〈
/
– / ENTER / MENU
menu screen is cleared.
NOTE:
If Spanish or French is chosen, the closed caption indicators will be in the selected language, but the closed caption text
will not be affected by the language selection.
TV OPERATION
To turn on the TV, press POWER.
1
The VOLUME can be adjusted to a desired level by
2
pressing VOL (VOLUME) + or –.
The sound level will be indicated on the TV screen by
GREEN BARS AND A NUMBER. As the sound level
increases, so do the number of BARS AND THE
NUMBER on the screen. The same is true for decreasing the level.
Set the TV/CABLE menu option to the appropriate
3
position. When shipped from the factory, this menu
“
option is in the CABLE setting. See
CHANNELS
” on page 9.
TO MEMORIZE
TV - VHF/UHF channels
CABLE - CABLE TV channels
CH (CHANNEL) + and – buttons
4
Press and release CH (CHANNEL) + or –. The
channel automatically stops at the next channel
programmed into the TV’s memory. Press and hold the
button down to change channels more quickly.
For proper operation, make sure you program
channels into the TV’s memory before tuning
channels. See “TO MEMORIZE CHANNELS
” on page 9.
DIRECT CHANNEL SELECTION buttons (0–9) - Press
these buttons to select a channel. The channel number will
appear on the upper right corner of the TV screen. If an
invalid channel number is selected, the display will revert to
the previous channel.
TV MODE DIRECT CHANNEL SELECTION - When the
TV/CABLE menu option is in
the TV position, all channels
can be instantly selected by using two buttons (For example,
to select channel 2, press “0,” then “2.” If you press only “2,”
channel selection will be delayed for a few seconds). For
channels 10 and above, press the two digits in order.
CABLE mode direct channel selection
When the TV/CABLE menu option is in the CABLE position,
channels can be selected as follows:
1-9
Press “0” twice, then 1-9 as needed.
Example, to select channel 2, press
“002.”
10-12
Press “0”, then the remaining 2 digits.
Example, to select channel 12, press
“012.”
13-99
Press the 2 digits in order.
Example, to select channel 36, press
“36.”
100-125
Press the 3 digits in order.
Example, to select channel 120, press
“120.”
〉
8
J3M91421A(E)_P08-12 11/03/2005, 3:34 PM8
NOTE: If the station being viewed stops broadcasting, the TV
will automatically shut off after 15 minutes.
Page 9

TO MEMORIZE CHANNELS
This TV is equipped with a channel memory feature that allows the
TV to skip up or down to the next channel set into memory, skipping over unwanted channels.
Before selecting channels, they must be programmed into the TV’s
memory. In addition to normal VHF and UHF channels, this TV can
receive up to 113 Cable TV channels. To use this TV with an
antenna, set the TV/CABLE menu option to the TV setting. When
shipped from the factory, this menu option is in the CABLE setting.
TV/CABLE SELECTION
Press MENU.
1
Press SET + or – until the indicator next to
2
“CH SETUP” begins to flash, then press
ENTER.
Press SET + or – until the indicator next
3
to “TV/CABLE” begins to flash.
Press ENTER to select the TV or CABLE
4
mode. The arrow indicates the selected
mode.
Press MENU repeatedly until the menu
5
screen is cleared.
NOTE:
Contact your cable company to determine the type of cable
system used in your area.
AUTOMATIC CHANNEL MEMORY
Press MENU.
1
Press SET + or – until the indicator next to
2
“CH SETUP” begins to flash, then press
ENTER.
Press SET + or – until the indicator next
3
to “AUTO CH MEMORY” begins to flash,
then press ENTER. The TV will begin
memorizing all the channels available in
your area. Channel numbers will remain
red until auto memorizing is complete.
MENU
CH SETUP
PICTURE
LANGUAGE
LOCK
ON TIMER
+
〈
/Ð/ ENTER / MENU
CABLE
TV
AUTO CH MEMORY
ADD / DELETE
+
〈
/ – / ENTER / MENU
MENU
CH SETUP
PICTURE
LANGUAGE
LOCK
ON TIMER
+
〈
/Ð/ ENTER / MENU
TV
CABLE
AUTO CH MEMORY
ADD / DELETE
+
〈
/ – / ENTER / MENU
〉
〉
〉
〉
TO ADD/DELETE CHANNELS
Press MENU.
1
MENU
Press SET + or – until the indicator next to
2
“CH SETUP” begins to flash, then press
ENTER.
Press SET + or – until the indicator
3
next to “ADD/DELETE” begins to
flash, then press ENTER.
Select the desired channels to be
4
added or deleted using the Direct
Channel Selection buttons (0–9), CH +
or –, SET + or –.
Press ENTER to select ADD or DELETE.
5
If an unmemorized channel was selected (step 4), the
channel indication will be red. Press ENTER if you wish
to ADD the unmemorized channel. The channel indicator will change from red to green when a channel is
added and the channel will be memorized.
If a memorized channel was selected (step 4), the channel indication will be green. To delete the channel from
memory, press ENTER repeatedly until
“DEL” appears on-screen. The channel
indicator will change from green to red
when a channel is deleted. Repeat
steps 4 and 5 for each channel to be
added or deleted.
Press MENU repeatedly until the menu screen is
6
cleared.
CH SETUP
PICTURE
LANGUAGE
LOCK
ON TIMER
+
〈
/Ð/ ENTER / MENU
TV
AUTO CH MEMORY
ADD / DELETE
+
〈
/ – / ENTER / MENU
ADD CH 012
〈
0 – 9 / + / – / ENTER / MENU
〉
CABLE
〉
〉
Press MENU repeatedly until the menu screen is
4
cleared.
ADJUSTING THE PICTURE
You can adjust the settings for brightness, contrast, color,
tint and sharpness.
Press MENU.
1
Press SET + or – until the indicator next to “PICTURE”
2
begins to flash, then press ENTER.
Press ENTER repeatedly to select the item you want to
3
adjust.
CONTRAST COLORBRIGHTNESS TINT SHARPNESS
J3M91421A(E)_P08-12 11/03/2005, 3:34 PM9
Press SET + or – to adjust the setting.
4
BRIGHTNESS
CONTRAST
COLOR
TINT
SHARPNESS
higher
lighter
deeper
greenish
sharper
+
lower
darker
paler
reddish
softer
–
TO RETURN TO INITIAL SETTING:
Press RESET while the picture adjusting mode appears
on-screen.
9
Page 10

CLOSED CAPTION
WHAT IS CLOSED CAPTIONING?
This television has the capability to decode and display closed
captioned television programs. When available, closed captioning will
display text on the screen for hearing impaired viewers or it will
translate and display text in another language.
TO VIEW CLOSED CAPTIONS
Press CAP/TEXT on the remote control to switch between normal TV
and the two closed caption modes (captions and half-screen Text).
Captions: This closed caption mode will display text on the screen in
English or another language (depending on the setting of Closed
Captions 1/2). Generally, closed captions in English are transmitted
on captions channel 1 and closed captions in other languages are
transmitted on captions channel 2.
The captions will appear in places on the screen where they will least
interfere with the picture, usually on the bottom of the screen. News
programs will usually show three-line closed captions that scroll onto
the screen. Most other shows provide two- or three-line captions
placed near the character who is speaking so the viewer can follow the
dialogue. Words in italics or underlined describe titles, words in foreign
languages or words requiring emphasis. Words that are sung usually
appear enclosed by musical notes.
• When activating the closed captioned decoder, there will be a short delay before the closed captioned text appears on the screen.
• Closed captioned text is only displayed in locations where it is available.
• If no caption signal is received, no captions will appear, but the television will remain in the caption mode.
• Misspellings or unusual characters may occasionally appear during closed captioning. This is normal with closed captioning, especially with live
programs. This is because during live programs, captions are also entered live. These transmissions do not allow time for editing.
• When captions are being displayed, on-screen displays such as volume and mute may not be seen or may interfere with closed captions.
• Some cable systems and copy protection systems may interfere with the closed captioned signal.
• If using an indoor antenna or if TV reception is very poor, the closed caption decoder may not appear or may appear with strange characters or
misspelled words. In this case, adjust the antenna for better reception or use an outdoor antenna.
Text: When available, the Text mode will fill part of the screen with a
programming schedule or other information.
After selecting a closed caption mode, it will stay in effect until it is
changed, even if the channel is changed. If the captions signal is lost
due to a commercial or a break in the signal, the captions will reappear
when the signal is received again. If the channels are changed, the
captions will be delayed approximately 10 seconds.
For television programs broadcasting with closed captions, look in your
TV guide for the closed captions symbol (CC).
NOTICE OF POSSIBLE ADVERSE EFFECTS ON TV PICTURE TUBE
Avoid displaying stationary images on your TV screen for extended
periods of time. Fixed (non-moving) images (such as closed captions)
can become permanently ingrained in the picture tube. This type of
damage is NOT COVERED BY YOUR WARRANTY.
SELECTING STEREO/SAP BROADCASTS
You can listen to high-fidelity stereo sound with the Multi-channel
TV Sound (MTS) feature. MTS can also transmit a second audio
program (SAP) containing a second language or other audio
information.
When the TV receives a stereo or SAP broadcast, the word
STEREO or SAP appears on-screen every time the TV is turned
on, the channel is changed, or RECALL is pressed.
The MTS feature is not available in the VIDEO mode.
You can leave your TV in STEREO mode because it will
automatically output stereo or monaural sound, depending on
the broadcast type. If the stereo sound is noisy, select MONO to
reduce the noise. The word STEREO or SAP is displayed in
light blue when the TV receives the signal.
TO SELECT THE DESIRED MTS SETTING:
Repeatedly press MTS to select either STEREO, SAP,
MONO+SAP, or MONO. If the current program is not available
in stereo or SAP, the setting will not be available when you
press MTS.
STEREO
MONO
If the current program is not broadcasting either stereo or SAP,
those settings will not be available when you press MTS.
TO SET THE ON TIMER
This feature allows you to program the TV to turn on automatically at a set time and channel.
NOTE: After a power failure or disconnection of the power, the timer setting will be lost.
Press MENU, then press SET + or – until
1
the indicator next to “ON TIMER” begins
to flash. Then press ENTER.
The ON TIMER menu appears.
Press SET + or – to set the desired hour (0–12), then
2
press ENTER.
3
Press SET + or – to set the desired minute
(00, 05, 10, ...55), then press ENTER.
ON TIMER
HOUR
00h
MINUTE
00m
CH 002
CANCEL
+
〈
/ — / ENTER / MENU
4
Press SET + or – to set the desired
channel, then press ENTER.
〉
Press SET + or – to select the SET mode, then press ENTER.
5
Press MENU repeatedly until the menu screen is cleared.
6
NOTE:
To cancel the ON TIMER, select CANCEL in step 5 above. Press
MENU repeatedly until the menu screen is cleared.
SAP
MONO + SAP
ON TIMER
HOUR
08h
MINUTE
15m
CH 125
SET
+
〈
/ — / ENTER / MENU
〉
10
J3M91421A(E)_P08-12 11/03/2005, 3:34 PM10
Page 11

USING THE LOCK MENU
The LOCK menu includes the CH LOCK, VIDEO LOCK, GAMETIMER and CHANGE PASSWORD functions.
You can use these functions after entering the correct PASSWORD.
TO REGISTER PASSWORD
Press MENU and then SET + or – until the indicator next
1
to “LOCK” begins to flash, then press ENTER.
Enter your password (4 digits) using the Direct channel
2
selection buttons (0–9).
In the event of entering an incorrect password press
RESET. Then press ENTER.
Enter the password again, and then press ENTER.
3
The password is now registered and the LOCK menu
appears.
LOCKING CHANNELS
With the CH LOCK feature, you can lock specific channels. You will not be able to tune locked channels unless you clear the setting.
You can choose to lock up to nine TV channels and nine cable channels.
Use the Channel Number buttons (0–9) to display the
1
television channel you wish to lock.
Press MENU, then press SET + or – until the indicator
2
next to “LOCK” begins to flash. Then press ENTER.
Use the Channel Number buttons (0–9) to enter your
3
password, then press ENTER.
The LOCK menu appears.
Press SET + or – until the indicator next
4
to “CH LOCK” begins to flash, then
press ENTER.
Press SET + or – to select:
5
• INPUT to select the channel as one to
be locked. Then press ENTER.
• ALL CLEAR to clear all channels from
the list of locked channels. Then press
ENTER.
LOCK
CH LOCK
VIDEO LOCK
GAME TIMER
CHANGE PASSWORD
+
〈
/ – / ENTER / MENU
CH LOCK
CABLE
INPUT
--- --- ---
--- --- ---
--- --- ---
ALL CLEAR
+
〈
/ – / ENTER / MENU
NOTES:
• If you want to change your password, follow steps 1 and 2 and
select “CHANGE PASSWORD” option. Then enter your new
password.
• If you forget or lose your password, you can reset it using the
following procedure:
- While holding down the VOLUME 4 button on the TV, press
“0” on the remote control for a few seconds.
Repeat steps 1 through 5 to lock other channels. When you
6
are finished locking channels, press MENU repeatedly until
the menu screen is cleared.
If you try to tune a locked channel, the TV will not display it, but
will display the nearest unlocked channel.
NOTES:
• If you are accessing the LOCK menus for the first time,
choose a four-digit number to be your password.
• After programming CH LOCK, change channels before
〉
turning off the television.
• If you want to unlock channels, select ALL CLEAR in step 5,
then press ENTER.
〉
LOCKING VIDEO INPUT
With the VIDEO LOCK feature, you can lock out the input
source (VIDEO) and channels 3 and 4. You will not be able to
select the input sources with the TV/VIDEO button or Channel
buttons unless you clear the setting.
Press MENU, then press SET + or – until the indicator
1
next to “LOCK” begins to flash, then press ENTER.
Use the Channel Number buttons (0–9) to enter your
2
password, then press ENTER. The LOCK menu appears.
Press SET + or – until the indicator
3
next to “VIDEO LOCK” begins to flash,
then press ENTER.
Press SET + or – to select:
4
• OFF: Unlocks all video input sources.
• VIDEO: Locks VIDEO.
• VIDEO +: Locks VIDEO, channel 3 and channel 4.
This option should be used if you use the antenna
to play a video tape.
Press MENU repeatedly until the menu screen is cleared.
5
NOTE:
After programming VIDEO LOCK, change channels or press the
TV/VIDEO key before turning off the television.
VIDEO LOCK
OFF
VIDEO
VIDEO+
+
〈
/ – / ENTER / MENU
〉
SETTING THE GameTimer™
With the GameTimer™ feature, you can automatically activate
the VIDEO LOCK feature (VIDEO setting) to set a time limit for
playing a TV game (30, 60, 90, or 120 minutes).
Press MENU, then press SET + or – until the indicator next to
1
“LOCK” begins to flash, then press ENTER.
Use the Channel Number buttons (0–9) to enter your pass-
2
word, then press ENTER. The LOCK menu appears.
Press SET + or – until the indicator next
3
to “GAMETIMER” begins to flash, then
press ENTER.
Press SET + or – to select a time limit
4
(30 minutes, 60 minutes, 90 minutes,
120 minutes or OFF).
Press MENU repeatedly until the menu screen is cleared.
5
After the GameTimer is programmed, the display will
appear briefly every ten minutes to remind you that the
GameTimer is operating. When the programmed end time
is reached, the display will change the channel
automatically.
NOTE:
When the programmed end time is reached, the TV will change
channels automatically and the VIDEO LOCK feature will be
activated. To turn off the VIDEO LOCK, see “LOCKING VIDEO
INPUT,” at left.
GAME TIMER
OFF
30
60
90
120
+
〈
/Ð/ ENTER / MENU
〉
J3M91421A(E)_P08-12 11/03/2005, 3:34 PM11
11
Page 12

TROUBLESHOOTING GUIDE
Before requesting service, please refer to the following chart for the symptom and possible solution.
SYMPTOMS POSSIBLE SOLUTIONS
TV does not
operate.
Poor sound
or no sound.
Poor picture
or no picture.
Poor
reception on
some
channels.
Poor color or
no color.
Picture
wobbles or
drifts.
• Make sure the power cord is plugged in.
• Try another AC outlet.
• Power is off; check fuse or circuit breaker.
• Unplug unit for an hour, then plug it back in.
• Station or Cable TV experiencing problems;
tune to another station or call your Cable company.
• Check sound adjustments (VOLUME and
MUTE).
• Check for sources of possible interference.
• Station or Cable TV experiencing problems;
tune to another station or call your Cable company.
• Make sure channels are set into memory.
• Check antenna or Cable TV connections;
adjust antenna.
• Check for sources of possible interference.
• Check picture control adjustments.
• Press CAP/TEXT to turn off the closed
caption mode.
• Station or Cable TV experiencing problems;
tune to another station or call your Cable company.
• Make sure channels are set into memory.
• Station is weak; adjust antenna to receive
desired station.
• Check for sources of possible interference.
• Station or Cable TV experiencing problems;
tune to another station or call your Cable company.
• Make sure channels are set into memory.
• Check picture control adjustments.
• Check antenna or Cable TV connection.
Adjust antenna.
• Station or Cable TV experiencing problems;
tune to another station or call your Cable company.
• Make sure channels are set into memory.
• Cable TV company is scrambling signal.
• Adjust antenna.
SYMPTOMS
No Cable TV
reception.
Horizontal or
diagonal bars
on screen.
No reception
above
channel 13.
No Remote
operation.
TV shuts off.
Closed
captions are
not
activated.
Black box on
screen.
Display is not
shown in
your language.
• Check all Cable TV connections.
• Set TV/CABLE menu option to the CABLE
mode.
• Station or Cable TV system problems; try
another station or call your Cable company.
• Check antenna connections; reorient antenna.
• Check for sources of possible interference.
• Make sure TV/CABLE menu option is in the
appropriate mode.
• If using antenna, check UHF antenna
connections.
• Batteries are weak, dead or inserted
incorrectly.
• Remote is out of range; move closer to TV
(within 15 feet).
• Make sure Remote is aimed at sensor.
• Confirm there are no obstructions between
the Remote and the TV.
• Make sure the power cord is plugged in.
• Tuned station is not broadcasting.
• Sleep Timer is set.
• Power interrupted.
• TV station experiencing problems or tuned
program is not closed captioned. Try another
channel.
• Check Cable TV connection or VHF/UHF
antenna. Reposition or rotate antenna.
• Press CAP/TEXT to turn on the closed caption
decoder.
• Press CAP/TEXT to turn off the closed
caption mode.
• Select the language in the menu options.
POSSIBLE SOLUTIONS
SPECIFICATIONS
• This model complies with the specifications below.
• Design and specifications are subject to change without notice.
• This model may not be compatible with features and/or specifications that may be added in the future.
AC Power Input:
AC Power Consumption:
Picture Tube:
Audio Power Output Rating:
Speaker:
Tuner Type:
Remote Control:
Receiving Channels:
Antenna Input Impedance:
Input:
Dimensions:
Weight:
120V, 60Hz
90 Watts
20 Inch (508mm diagonal) (Screen size is approximate.)
2.5+2.5 Watts
2 inches (51mm) x 4-11/16 inches (119 mm) Full Range, 8 ohm x2
181 Channel, Quartz PLL Frequency Synthesized
Infrared, Direct Access, two AAA batteries (supplied)
VHF 2-13
UHF 14-69
Cable TV 01-97 (5A)-(A-3)
98-99 (A-2)-(A-1)
14-22 (A)-(I)
23-36 (J)-(W)
37-65 (AA)-(FFF)
66-125 (GGG)-(125)
75 Ohm (VHF/UHF) Coaxial Input
Video: 1.0 Vp-p 75 ohm
Audio: 300 mV, 47k ohm
Width: 23-1/4 inches (590mm)
Height: 17-9/16 inches (446.5mm)
Depth: 19-3/8 inches (492mm)
46.3 Ibs (21 kg)
ACCESSORY
Remote Control with two size “AAA” batteries
12
J3M91421A(E)_P08-12 11/03/2005, 3:34 PM12
Page 13

Limited Canada Warranty
for 27'' and All Smaller Television Models
Toshiba of Canada Limited (“TCL”) makes the following limited
warranties to original consumers in Canada. THESE LIMITED
WARRANTIES EXTEND TO THE ORIGINAL CONSUMER
PURCHASER OR ANY PERSON RECEIVING THIS TELEVISION AS A
GIFT FROM THE ORIGINAL CONSUMER PURCHASER AND TO NO
OTHER PURCHASER OR TRANSFEREE.
PRODUCTS PURCHASED IN CANADA AND USED ANYWHERE
OUTSIDE OF CANADA, INCLUDING, WITHOUT LIMITATION, THE
U.S.A. AND MEXICO, ARE NOT COVERED BY THESE WARRANTIES.
PRODUCTS PURCHASED ANYWHERE OUTSIDE OF CANADA,
INCLUDING, WITHOUT LIMITATION, THE U.S.A. AND MEXICO,
AND USED IN CANADA, ARE NOT COVERED BY THESE WARRANTIES.
Limited One (1) Year Warranty on Parts and Labor*
TCL warrants this television and its parts against defects in materials
or workmanship for a period of one (1) year after the date of original
retail purchase.
OPTION, REPAIR OR REPLACE A DEFECTIVE PART WITH A NEW
OR REFURBISHED PART WITHOUT CHARGE TO YOU FOR PARTS
OR LABOR. YOU MUST DELIVER TH E ENTIRE TELEVISION TO
AN AUTHORIZED TCL SERVICE DEPOT. YOU MUST PAY FOR ALL
TRANSPORTATION AND INSURANCE CHARGES FOR THE
TELEVISION TO AND FROM THE SERVICE DEPOT.
Limited Two (2) Year Warranty on Picture Tube*
TCL further warrants the picture tube in this television against defects
in materials or workmanship for a period of two (2) years after the
date of original retail purchase.
AT TCL’S OPTION, REPAIR OR REPLACE A DEFECTIVE PICTURE
TUBE WITH A NEW OR REFURBISHED PICTURE TUBE WITHOUT
CHARGE TO YOU, EXCEPT THAT, IF A DE FECTIVE PICTURE TUBE
IS REPAIRED OR RE PLACE D AFTER ONE (1) YEAR FROM THE
DATE OF THE ORIGINAL RETAIL PURCHASE, YOU MUST PAY
ALL LABOR CHARGES I NVOLVED IN THE REPAIR OR
REPLACEMENT. YOU MUST DELIVER THE ENTIRE TE LEVISION
TO AN AUTHORIZED TCL SERVICE DEPOT. YOU MUST PAY FOR
ALL TRAN SPORTATION AND INSURANCE CHARGES FOR THE
TELEVISION TO AND FROM THE SERVICE DEPOT.
Rental Units
The warranty for rental units begins with the first rental or thirty (30)
days from the date of shipment to the rental firm, whichever comes first.
*Limited Warranty for Commercial Units
TCL warrants televisions sold and used for commercial purposes as
follows: all parts are warranted against defects in materials or
workmanship for a period of ninety (90) days after the date of original
purchase.
REPAIR OR REPLACE A DEFECTIVE PART WITH A NEW OR
REFURBISHED PART WITHOUT CHARGE TO YOU FOR PARTS
OR LABOR. YOU MUST DELIVER THE ENTIRE TELEVISION TO
AN AUTHORIZED TCL SERVICE DEPOT. YOU MUST PAY FOR
ALL TRANSPORTATION AND INSURANCE CHARGES FOR THE
TELEVISION TO AND FROM THE SERVICE DEPOT.
Owner’s Manual and Product Registration
Read this owner’s manual thoroughly before operating this television.
Register your product online at www.toshiba.ca as soon as possible.
By registering your product, you will enable TCL to bring you new
products specifically designed to meet your needs and help us to
contact you in the unlikely event a safety notification is required
under the U.S. Consumer Product Safety Act. Failure to register your
product does not diminish your warranty rights.
DURING THIS PERIOD, TCL WILL, AT TCL’S
DURING THIS PERIOD, TCL WILL,
DURING THIS PERIOD, TCL WILL, AT TCL’S OPTION,
Your Responsibility
THE ABOVE WARRANTIES ARE SUBJECT TO THE FOLLOWING
CONDITIONS:
(1) You must provide your bill of sale or other proof of purchase.
(2) All warranty servicing of this television must be performed by an
Authorized TCL Service Depot.
(3) These warranties from TCL are effective only if the television is
purchased in Canada from an authorized TCL dealer and
operated in Canada.
(4) Labor charges for installation, setup, adjustment of customer
controls, and installation or repair of antenna systems are not
covered by these warranties. Reception problems caused by
inadequate antenna systems are your responsibility.
(5) Warranties extend only to defects in materials or workmanship
as limited above and do not extend to any television or parts that
have been lost or discarded by you or to damage to television or
parts caused by fires, misuse, accident, Acts of God (such as
lightning or fluctuations in electric power), improper installation,
improper maintenance, or use in violation of instructions
furnished by TCL; or to units that have been modified or had the
serial number removed, altered, defaced, or rendered illegible.
How to Obtain Warranty Services
If, after following all of the operating instructions in this manual and
checking the “Troubleshooting” section, you find that service is needed:
(1) To find the nearest TCL Authorized Service Depot, visit TCL’s web site
at www.toshiba.ca.
(2) Present your bill of sale or other proof of purchase to the Authorized
Service Depot. You must deliver the entire television to an Authorized
TCL Service Depot. You must pay for all transportation and insurance
charges for the television to and from the Service Depot.
For additional information,
visit TCL’s web site: www.toshiba.ca
ALL WARRANTIES I MPLIED BY THE LAW OF ANY PROVINCE OF
CANADA, INCLUDING THE IMPLIED WARRANTIES OF
MERCHANTABILITY AND FITN ESS FOR A PARTICULAR PURPOSE,
ARE EXPRESSLY LIMITED TO THE DURATION OF THE LI MITED
WARRANTIES SET FORTH ABOVE. WITH THE EXCEPTION OF ANY
WARRANTIES IMPLIED BY THE LAW OF ANY PROVINCE OF
CANADA AS H EREBY LIMITED, THE FOREGOING WARRANTY IS
EXCLUSIVE AND IN LIEU OF ALL OTHER WARRANTIES,
GUARANTEES, AG REEMENTS, AND SIMILAR OBLIGATIONS OF
TCL WITH RESPECT TO THE REPAIR OR REPLACEMENT OF ANY
PARTS. IN NO EVENT SHALL TCL BE LIABLE FOR
CONSEQUENTIAL OR INCIDENTAL DAMAGES (INCLUDING, BUT
NOT LIMITE D TO, LOST PROFITS, BU SINESS INTERRUPTION, OR
MODIFICATION OR ERASURE OF RECORDED DATA CAUSED BY
USE, MISUSE, OR INABILITY TO USE THIS PRODUCT).
No person, agent, distributor, dealer, or company is authorized to
change, modify, or extend the terms of these warranties in any manner
whatsoever. The time within which action must be commenced to
enforce any obligation of TCL arising under this warranty or under any
law of Canada or of any province thereof is hereby limited to 90 days
from the date you discover, or should have discovered, the defect. This
limitation does not apply to implied warranties arising under the law of
any province of Canada.
THIS WARRANTY GIVES YOU SPECIFIC LEGAL RIGHTS, AN D
YOU MAY ALSO HAVE OTHER RIGHTS, WHICH MAY VARY
FROM PROVINCE TO PROVINCE IN CANADA. SOME
PROVINCES OF CANADA DO NOT ALLOW LIMITATIONS ON
HOW LONG AN IMPLIED WARRANTY LASTS, WHEN AN
ACTION MAY BE BROUGHT, OR THE EXCLUSION OR
LIMITATION OF INCIDENTAL OR CONSEQUENTIAL DAMAGES,
SO THE ABOVE LIMITATIONS OR EXCLUSIONS MAY NOT
APPLY TO YOU UNDER SUCH CIRCUMSTANCES.
[011005]
J3M91421A(E)_P13-BACK 11/03/2005, 3:34 PM13
13
Page 14

TEL.: (905) 470-5400
Service Centers:
TORONTO: 191 McNABB STREET,
MARKHAM, ONTARIO, L3R 8H2, CANADA
TEL.: (905) 470-5400
MONTREAL: 18050 TRANS CANADA, KIRKLAND,
QUEBEC, H9J-4A1, CANADA
TEL.: (514) 390-7766
VANCOUVER: 22171 FRASERWOOD WAY,
RICHMOND, B.C., V62 1J5, CANADA
TEL.: (604) 303-2500
GameTimer is a trademark of Toshiba America Consumer Products, L.L.C.
PRINTED IN THAILAND
J3M91421A(E)_P13-BACK 11/03/2005, 3:34 PM14
 Loading...