

Toro Power Clear 418 38272, Power Clear 418 38282, Power Clear 418 ZR, Power Clear 418 ZE Operator's Manual
Page 1
FormNo.3369-487RevB
PowerClear418ZR/ZESnowthrower
ModelNo.38272—SerialNo.312000001andUp
ModelNo.38282—SerialNo.312000001andUp
Operator'sManual
Introduction
Thismachineisintendedtobeusedbyresidential
homeowners.Itisdesignedprimarilyforremoving
snowfrompavedsurfaces,suchasdriveways
andsidewalks,andothersurfacesfortrafcon
residentialorcommercialproperties.Itisnot
designedforremovingmaterialsotherthansnow,
norisitdesignedforclearingoffgravelsurfaces.
Readthisinformationcarefullytolearnhowtooperate
andmaintainyourproductproperlyandtoavoidinjury
andproductdamage.Youareresponsibleforoperating
theproductproperlyandsafely.
YoumaycontactTorodirectlyatwww .T oro.comfor
productandaccessoryinformation,helpndingadealer,
ortoregisteryourproduct.
Wheneveryouneedservice,genuineToroparts,
oradditionalinformation,contactanAuthorized
ServiceDealerorToroCustomerServiceandhave
themodelandserialnumbersofyourproductready.
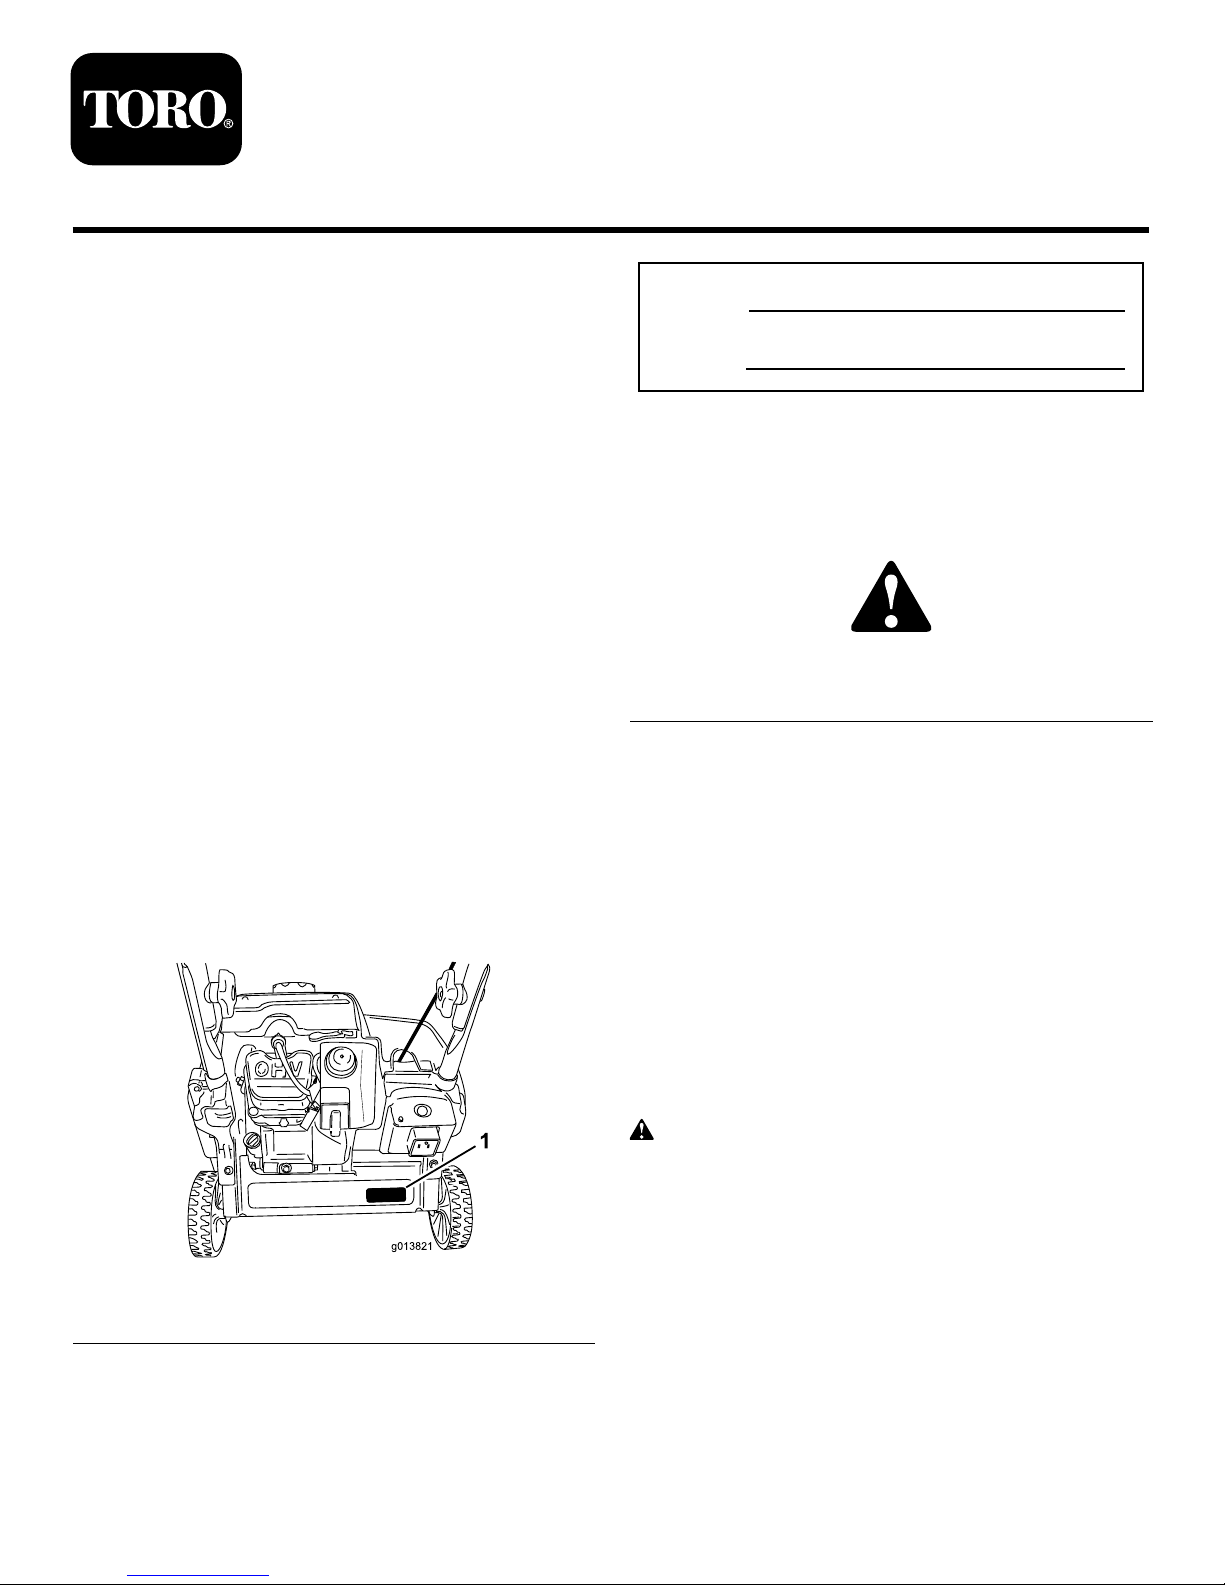
Figure1identiesthelocationofthemodelandserial
numbersontheproduct.Writethenumbersinthe
spaceprovided.
Figure1
1.Modelandserialnumberlocation
ModelNo.
SerialNo.
Thismanualidentiespotentialhazardsandhassafety
messagesidentiedbythesafetyalertsymbol(Figure2),
whichsignalsahazardthatmaycauseseriousinjury
ordeathifyoudonotfollowtherecommended
precautions.
Figure2
1.Safetyalertsymbol
Thismanualuses2wordstohighlightinformation.
Importantcallsattentiontospecialmechanical
informationandNoteemphasizesgeneralinformation
worthyofspecialattention.
Safety
ThismachinemeetsorexceedstheB71.3
specicationsoftheAmericanNationalStandards
Instituteineffectatthetimeofproduction.
Readandunderstandthecontentsofthismanual
beforeyoustarttheengine.
Thisisthesafetyalertsymbol.Itisusedtoalert
youtopotentialpersonalinjuryhazards.Obeyall
safetymessagesthatfollowthissymboltoavoid
possibleinjuryordeath.
Improperlyusingormaintainingthismachine
couldresultininjuryordeath.Toreducethis
potential,complywiththefollowingsafety
instructions.
Thismachineiscapableofinjuringhandsandfeet
andofthrowingobjects.Failuretoobservethe
followingsafetyinstructionscouldresultinserious
injury.
©2011—TheToro®Company
8111LyndaleAvenueSouth
Bloomington,MN55420
Registeratwww.Toro.com.
OriginalInstructions(EN)
PrintedintheUSA
AllRightsReserved
Page 2

Training
•Read,understand,andfollowallinstructionsonthe
machineandinthemanual(s)beforeoperatingthis
machine.Bethoroughlyfamiliarwiththecontrols
andtheproperuseofthemachine.Knowhowto
stopthemachineanddisengagethecontrolsquickly.
•Neverallowchildrentooperatethemachine.Never
allowadultstooperatethemachinewithoutproper
instruction.
•Keeptheareaofoperationclearofallpersons,
particularlysmallchildren.
•Exercisecautiontoavoidslippingorfalling.
Preparation
•Thoroughlyinspecttheareawherethemachineis
tobeusedandremovealldoormats,sleds,boards,
wires,andotherforeignobjects.
•Donotoperatethemachinewithoutwearing
adequatewintergarments.Avoidloosetting
clothingthatcangetcaughtinmovingparts.Wear
footwearthatwillimprovefootingonslippery
surfaces.
•Handlefuelwithcare;itishighlyammable.
–Useanapprovedfuelcontainer.
–Neveraddfueltoarunningengineorhotengine.
–Fillfueltankoutdoorswithextremecare.Never
llfueltankindoors.
–Neverllcontainersinsideavehicleorona
truckortrailerbedwithaplasticliner.Always
placecontainersontheground,awayfromyour
vehicle,beforelling.
–Whenpractical,removegas-poweredmachinery
fromthetruckortrailerandrefuelitonthe
ground.Ifthisisnotpossible,thenrefuelsuch
machineryonatrailerwithaportablecontainer,
ratherthanfromagasolinedispensernozzle.
–Keepthenozzleincontactwiththerimofthe
fueltankorcontaineropeningatalltimes,until
refuelingiscomplete.Donotuseanozzle
lock-opendevice.
–Replacegasolinecapsecurelyandwipeupspilled
fuel.
–Iffuelisspilledonclothing,changeclothing
immediately.
•Useextensioncordsandreceptaclesasspecied
bythemanufacturerforallmachineswithelectric
startingmotors.
•Donotattempttoclearsnowfromagravelor
crushedrocksurface.Thisproductisintendedfor
useonlyonpavedsurfaces.
•Neverattempttomakeanyadjustmentswhile
theengineisrunning(exceptwhenspecically
recommendedbymanufacturer).
•Alwayswearsafetyglassesoreyeshieldsduring
operationorwhileperforminganadjustmentor
repairtoprotecteyesfromforeignobjectsthatmay
bethrownfromthemachine.
Operation
•Donotputhandsorfeetnearorunderrotatingparts.
Keepclearofthedischargeopeningatalltimes.
•Exerciseextremecautionwhenoperatingonor
crossinggraveldrives,walks,orroads.Stayalertfor
hiddenhazardsortrafc.
•Afterstrikingaforeignobject,stoptheengine,
removetheignitionkey,thoroughlyinspectthe
machineforanydamage,andrepairthedamage
beforerestartingandoperatingthemachine.
•Ifthemachineshouldstarttovibrateabnormally,
stoptheengineandcheckimmediatelyforthecause.
Vibrationisgenerallyawarningoftrouble.
•Stoptheenginewheneveryouleavetheoperating
position,beforeuncloggingtherotorbladehousing
ordischargechute,andwhenmakinganyrepairs,
adjustmentsorinspections.
•Whencleaning,repairing,orinspectingthemachine,
stoptheengineandmakecertainthattherotor
bladesandallmovingpartshavestopped.
•Donotruntheengineindoors,exceptwhenstarting
theengineandfortransportingthemachineinor
outofthebuilding.Opentheoutsidedoors;exhaust
fumesaredangerous.
•Exerciseextremecautionwhenoperatingonslopes.
•Neveroperatethemachinewithoutproperguards
andothersafetyprotectivedevicesinplaceand
working.
•Neverdirectthedischargetowardpeopleorareas
wherepropertydamagecanoccur.Keepchildren
andothersaway.
•Donotoverloadthemachinecapacitybyattempting
toclearsnowattoofastarate.
•Lookbehindandusecarewhenbackingupwiththe
machine.
2
Page 3

•Disengagepowertotherotorbladeswhenmachine
istransportedornotinuse.
•Neveroperatethemachinewithoutgoodvisibility
orlight.Alwaysbesureofyourfooting,andkeepa
rmholdonthehandles.Walk;neverrun.
•Nevertouchahotengineormufer.
ClearingaCloggedDischarge
Chute
Handcontactwiththerotatingrotorbladesinsidethe
dischargechuteisthemostcommoncauseofinjury
associatedwithsnowthrowers.Neveruseyourhandto
cleanoutthedischargechute.
Toclearthechute:
•Shuttheengineoff!
•Wait10secondstobesuretherotorbladeshave
stoppedrotating.
•Alwaysuseaclean-outtool,notyourhands.
MaintenanceandStorage
•Checkallfastenersatfrequentintervalsforproper
tightnesstobesurethemachineisinsafeworking
condition.
•Neverstorethemachinewithfuelinthefueltank
insideabuildingwhereignitionsourcesarepresent,
suchashotwaterheaters,spaceheaters,orclothes
dryers.Allowtheenginetocoolbeforestoringin
anyenclosure.
•AlwaysrefertotheOperator’sManualforimportant
detailsifthemachineistobestoredforanextended
period.
•Maintainorreplacesafetyandinstructionlabels,as
necessary.
•Runthemachineafewminutesafterthrowingsnow
topreventfreeze-upoftherotorblades.
ToroSnowthrowerSafety
Thefollowinglistcontainssafetyinformationspecic
toToroproductsorothersafetyinformationthatyou
mustknow.
•Rotatingrotorbladescaninjurengersor
hands.Staybehindthehandlesandawayfrom
thedischargeopeningwhileoperatingthemachine.
Keepyourface,hands,feet,andanyotherpart
ofyourbodyorclothingawayfrommovingor
rotatingparts.
•Beforeadjusting,cleaning,repairing,andinspecting
themachine,andbeforeuncloggingthedischarge
chute,stoptheengine,removethekey,andwait
forallmovingpartstostop.
•Beforeleavingtheoperatingposition,stopthe
engine,removetheignitionkey,andwaitforall
movingpartstostop.
•Ifashield,safetydevice,ordecalisdamaged,
illegible,orlost,repairorreplaceitbeforebeginning
operation.Also,tightenanyloosefasteners.
•Donotsmokewhilehandlinggasoline.
•Donotusethemachineonaroof.
•Donottouchtheenginewhileitisrunningorsoon
afterithasstoppedbecausetheenginemaybehot
enoughtocauseaburn.
•Performonlythosemaintenanceinstructions
describedinthismanual.Beforeperformingany
maintenance,service,oradjustment,stoptheengine
andremovethekey.Ifmajorrepairsareeverneeded,
contactanAuthorizedServiceDealer.
•Donotchangethegovernorsettingsontheengine.
•Whenstoringthemachineformorethan30days,
drainthefuelfromthefueltanktopreventa
potentialhazard.Storefuelinanapprovedfuel
container.Removethekeyfromtheignitionswitch
beforestoringthemachine.
•PurchaseonlygenuineTororeplacementpartsand
accessories.
3
Page 4
SafetyandInstructionalDecals
Important:Safetyandinstructiondecalsarelocatednearareasofpotentialdanger.Replacedamaged
decals.
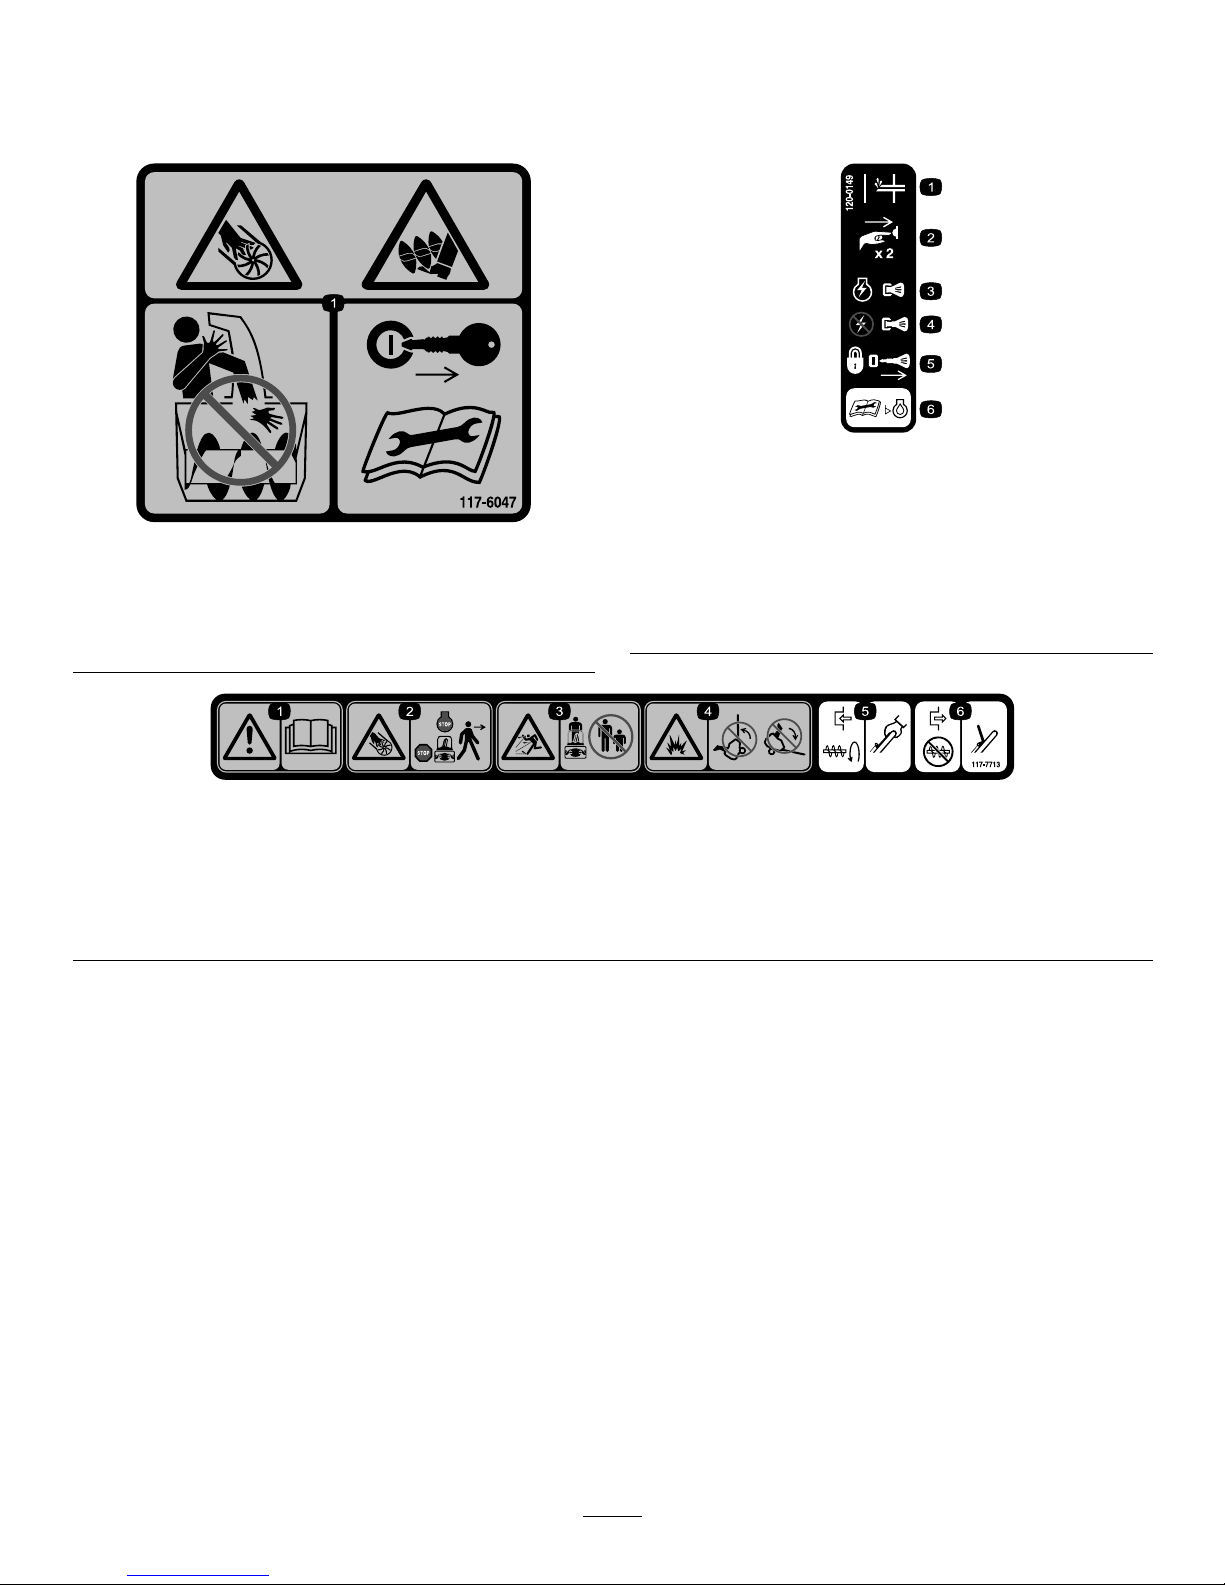
117-6047
1.Cuttingdismemberment,impellerandcutting
dismemberment,augerhazards—donotplaceyourhandin
thechute;removetheignitionkeyandreadtheinstructions
beforeservicingorperformingmaintenance.
120-0149
1.Primer4.Pullkeytoswitchengine
switchOff.
2.Pushtheprimertwotimes
toprimetheengine.
5.Removekeytolock
machine.
3.Pushkeyintoswitch
engineOn.
6.ReadtheOperator’s
Manualbeforechecking
engineoillevel.
117-7713
1.Warning—readtheOperator'sManual.4.Fuelspillhazard—donottipmachineforwardorbackward.
2.Cutting/dismembermenthazard,impeller—stoptheengine
beforeleavingthemachine.
5.Toengagetheauger,squeezethecontrolbar.
3.Thrownobjecthazard—keepbystandersasafedistancefrom
themachine.
6.Releasethecontrolbartodisengagetheauger.
4
Page 5
Setup
LooseParts
Usethechartbelowtoverifythatallpartshavebeenshipped.
ProcedureDescription
Qty.
Use
Oval-headbolts
2
Curvedwashers
2
1
Handleknobs2
Installthehandle.
2
Nopartsrequired
–
Installtherecoilstarterhandle.
Dischargechuteassembly1
Screws
2
Washers2
Locknuts2
3
Knob1
Installthedischargechuteassembly.
4
Bottleofengineoil
1Filltheenginewithoil.
5
Nopartsrequired
–
Adjustthecontrolcable.
1
InstallingtheHandle
Partsneededforthisprocedure:
2
Oval-headbolts
2
Curvedwashers
2Handleknobs
Procedure
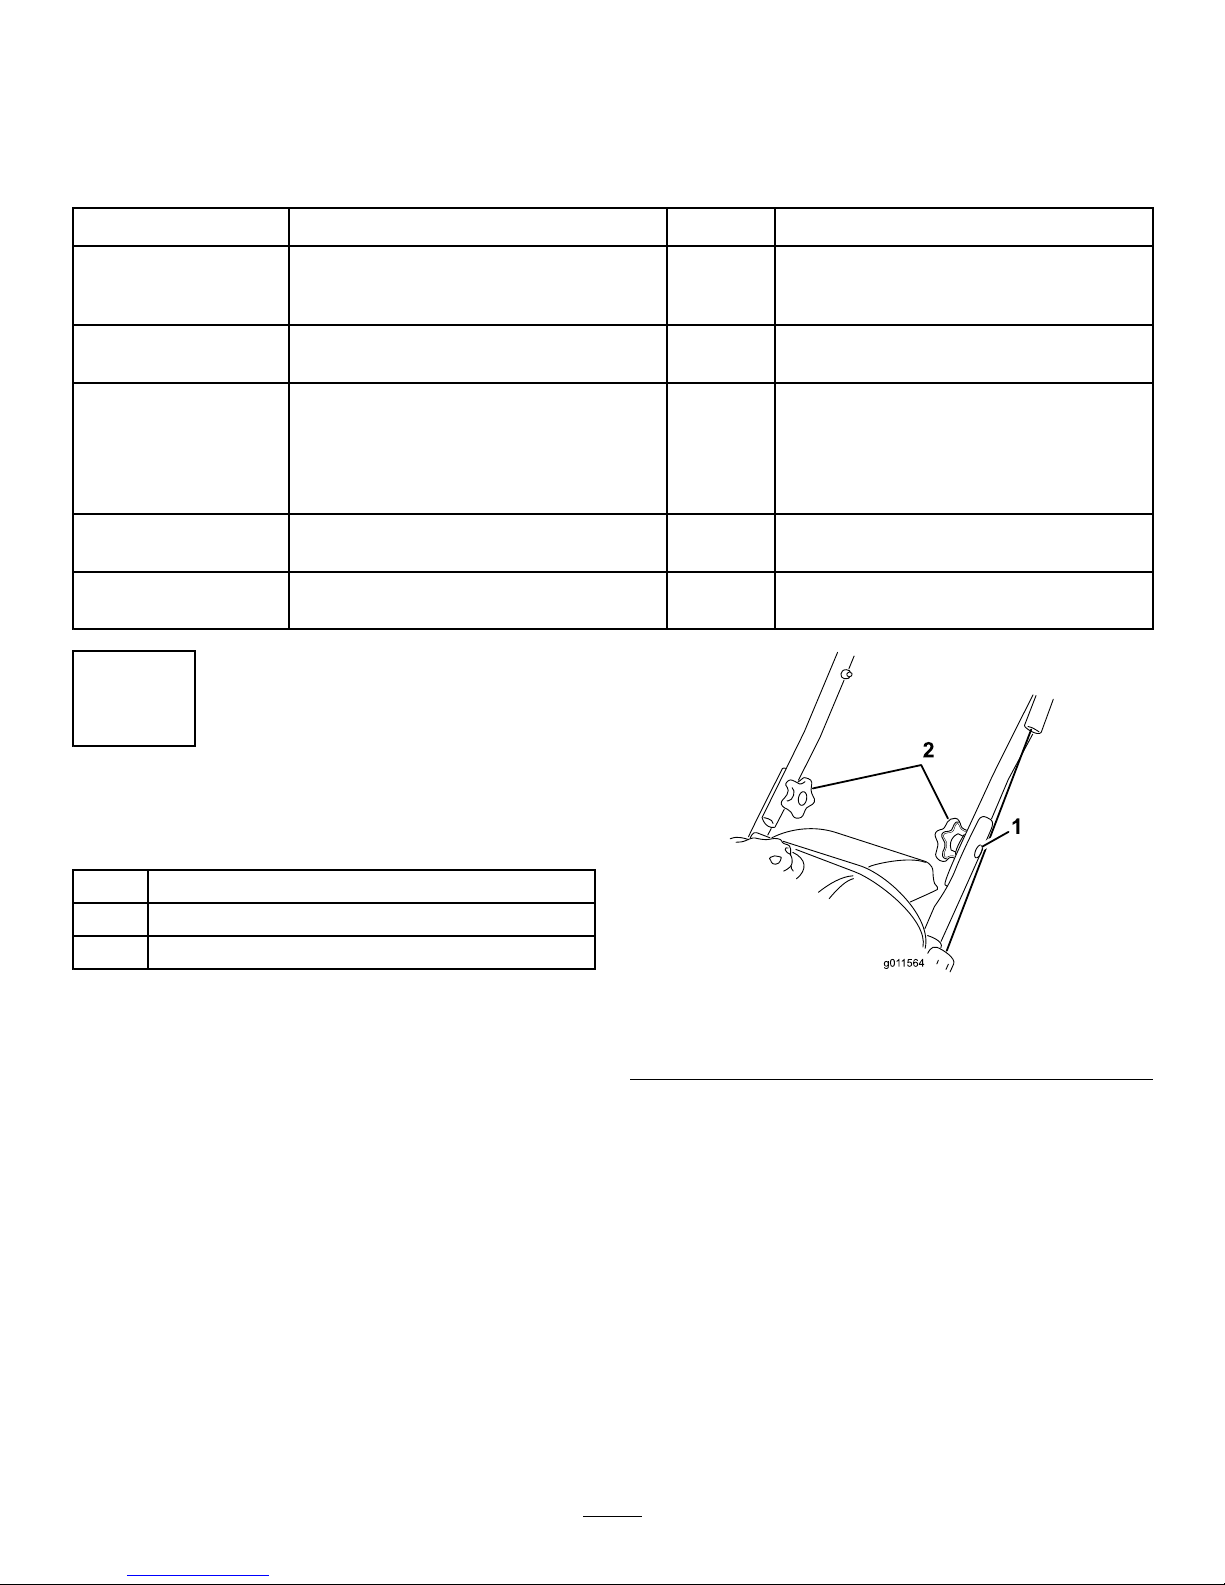
1.Positiontheendsoftheupperhandleontheinside
ofthelowerhandleandaligntheholes.
2.Inserttheoval-headboltsintothealignedholes,with
theboltheadsontheoutsideofthehandle(
Figure3).
Figure3
1.Oval-headbolt(2)2.Curvedwashersand
handleknobs
3.Installthecurvedwashersandthehandleknobs
ontheoval-headboltsontheinsideofthehandle
(
Figure3)andtightentheknobssecurely.
Important:Ensurethatthecableisroutedto
theoutsideofthehandle.
5
Page 6
2
InstallingtheRecoilStarter
Handle
NoPartsRequired
Procedure
Installtherecoilstarterhandleintheropeguideas
showninFigure4.
Figure4
1.Ropeguide
3
InstallingtheDischargeChute
Assembly
Partsneededforthisprocedure:
1Dischargechuteassembly
2
Screws
2Washers
2Locknuts
1Knob
Procedure
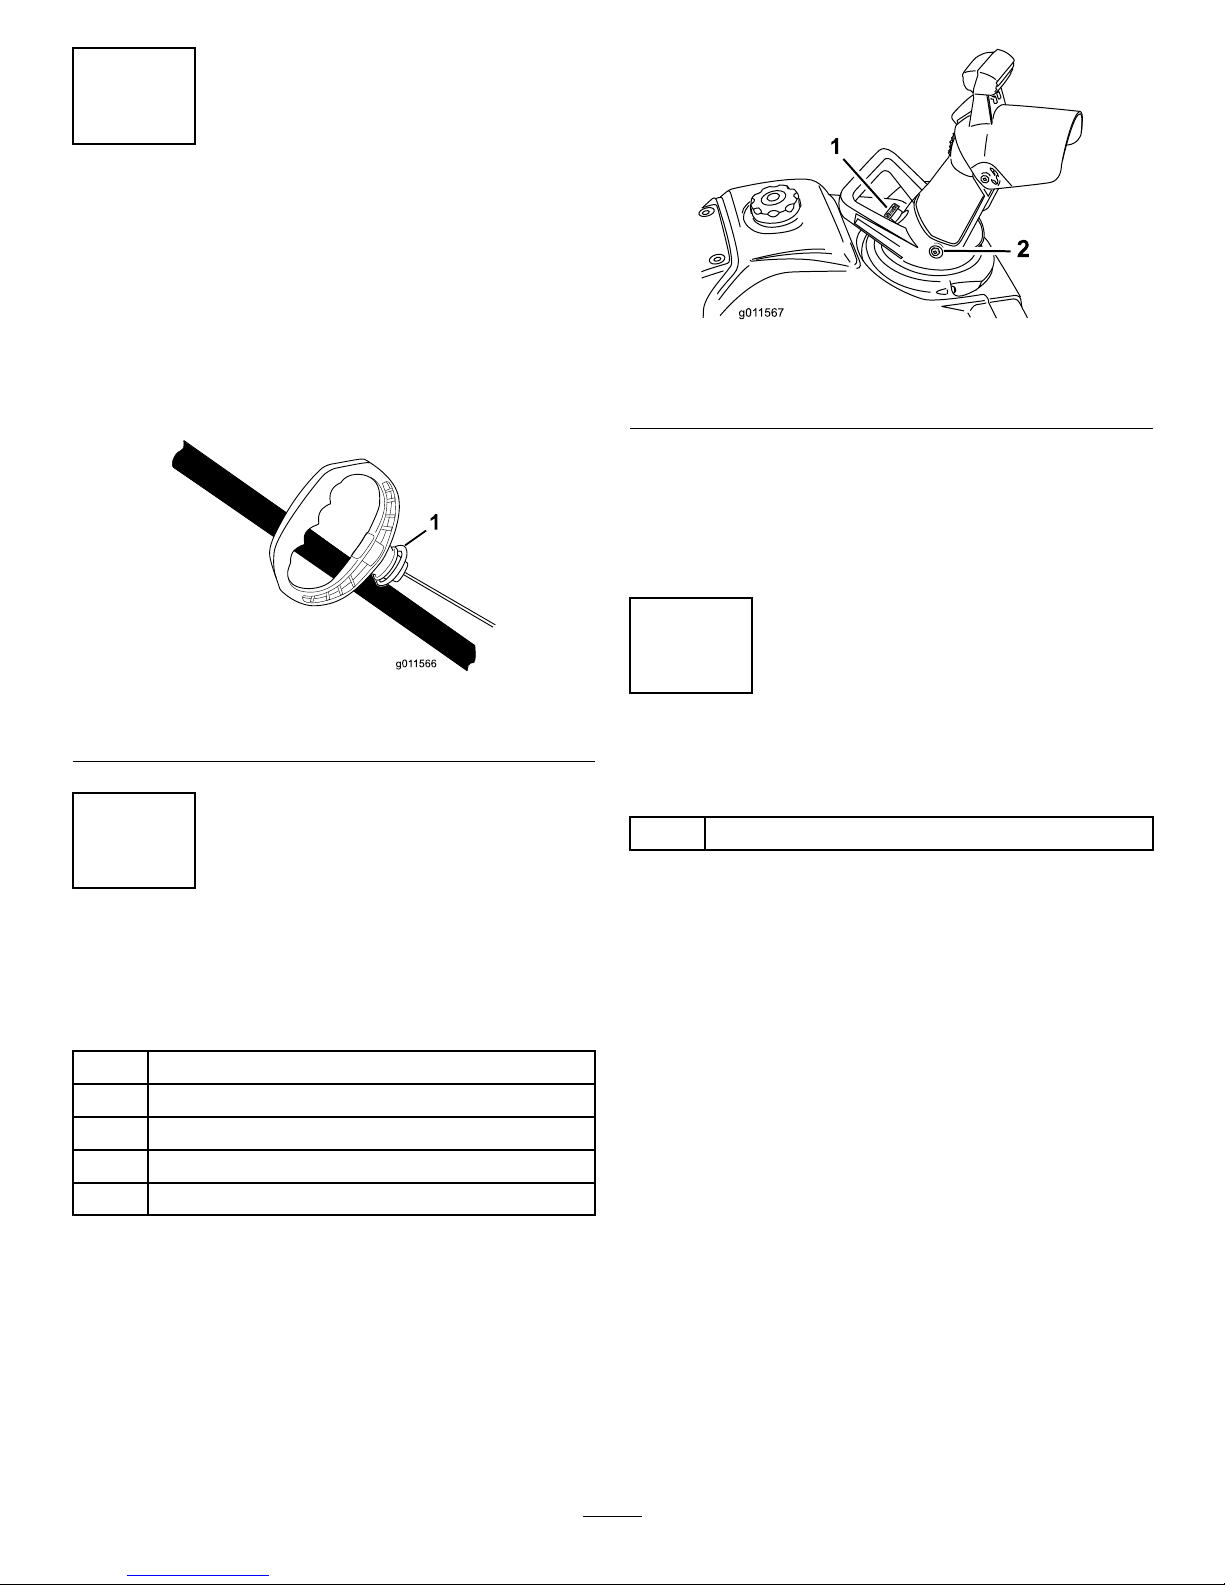
InstallthedischargechuteassemblyasshowninFigure5.
Figure5
1.Knob
2.Bolt(2),washer(2),and
locknut(2)
Note:Installtheboltsfromtheinsideofdischarge
chuteassemblysothatthewashersandlocknutsareon
theoutsideofthechute.
Important:Donotovertightenthelocknuts.
4
FillingtheEnginewithOil
Partsneededforthisprocedure:
1
Bottleofengineoil
Procedure
Yourmachinedoesnotcomewithoilintheengine,but
itdoescomewithabottleofoil.
Important:Beforestartingtheengine,llthe
enginewithoil.
Maxll:12oz.(0.35l),type:automotivedetergentoil
withanAPIserviceclassicationofSJ,SL,orhigher.
Use
Figure6toselectthebestoilviscosityforthe
outdoortemperaturerangeexpected:
6
Page 7

Figure6
1.Movethemachinetoalevelsurface.
2.Cleanaroundtheoilllcap(Figure11).
3.Unscrewtheoilllcapandremoveit.
4.Slowlypouroilintotheoilllhole.W ait3minutes,
thenchecktheoillevelonthedipstickbywipingthe
dipstickcleanandtheninserting,butnotscrewing
in,theoilllcapintothehole.
Note:Todeterminetheproperoillevelonthe
dipstick,referto
Figure7.
Figure7
1.Theoillevelisatits
maximum.
3.Theoillevelistoo
low—addoiltothe
crankcase.
2.Theoillevelistoo
high—removeoilfrom
thecrankcase.
Note:Filltheenginecrankcasewithoiluntilthe
dipstickindicatesthattheengineoilleveliscorrect
asshowninFigure7.Ifyouoverlltheenginewith
oil,removetheexcessoilasdirectedinChanging
theEngineOil.
Note:Youmaytipthemachineforward(handle
up)alittletomakeaddingoileasier.Rememberto
returnthemachinetotheoperatingpositionbefore
checkingtheoillevel.
Important:Donottipthemachinealltheway
forwardontoitsnose,orfuelmayleakoutof
themachine.
5.Screwtheoilllcapintotheoilllholeandhand
tightenitsecurely.
5
AdjustingtheControlCable
NoPartsRequired
CheckingtheControlCable
ServiceInterval:Afterthersthour—Check
thecontrolcableandadjustitif
necessary.
Yearly—Checkthecontrolcableand
adjustitifnecessary.
Important:Youmustcheckandmayneedto
adjustthecontrolcablebeforeyouoperatethe
machineforthersttime.
Movethecontrolbarbacktowardthehandletoremove
theslackinthecontrolcable(
Figure8).
Figure8
1.Controlbar2.1/16to1/8inch(2to3
mm)
7
Page 8

Note:Ensurethatagapof1/16to1/8inch(2to
3mm)existsbetweenthecontrolbarandthehandle
(Figure8).
Important:Thecontrolcablemustcontainsome
slackwhenyoudisengagethecontrolbarforthe
rotorbladestostopproperly.
AdjustingtheControlCable
1.Slideupthespringcoverandunhookthespring
fromtheadjusterlink(
Figure9).
Figure9
1.Adjusterlink
3.Springcover
2.Z-tting
4.Unhookthespringhere.
Note:Youcanpulluptheadjusterlinkandcableto
makeunhookingthespringeasier.
2.MovetheZ-ttingtoahigherorlowerholeonthe
adjusterlinkasneededtoobtainthe1/16-inchto
1/8-inch(2mmto3mm)gapbetweenthecontrol
barandthehandle(
Figure9).
Note:MovingtheZ-ttinghigherdecreasesthe
gapbetweenthecontrolbarandthehandle;moving
itlowerincreasesthegap.
3.Hookthespringtotheadjusterlinkandslidethe
springcoverovertheadjusterlink.
4.Checktheadjustment;refertoCheckingtheControl
Cable.
Note:Thebeltmayslip(squeal)inwetconditions;
todryoutthedrivesystem,starttherotorandrun
itwithoutaloadfor30seconds.
ProductOverview
Figure10
1.Controlbar6.Chutedeectortrigger
2.Recoilstarthandle
7.Chutedeector
3.Springcover
8.Dischargechute
4.Fueltankcap9.Rotorblades
5.Chutehandle
Figure11
1.Sparkplug
5.Primer
2.Oilllcap
6.Ignitionkey
3.Oildrainplug
7.Electric-startbutton
(model38282only)
4.Chokelever8.Plug-inforelectricstart
(model38282only)
8
Page 9

Operation
Note:Determinetheleftandrightsidesofthemachine
fromthenormaloperatingposition.
DANGER
Gasolineisextremelyammableandexplosive.A
reorexplosionfromgasolinecanburnyouand
others.
•Topreventastaticchargefromignitingthe
gasoline,placethecontainerand/ormachine
onthegroundbeforelling,notinavehicleor
onanobject.
•Fillthetankoutdoorswhentheengineiscold.
Wipeupspills.
•Donothandlegasolinewhensmokingoraround
anopenameorsparks.
•Storegasolineinanapprovedfuelcontainer,out
ofthereachofchildren.
•Donottipthemachineeitherforwardor
backwardwithfuelinthefueltank;otherwise,
fuelmayleakoutofthemachine.
FillingtheFuelTank
Fillthefueltankwithfreshunleadedgasolinehavingan
octaneratingatornear87fromamajorname-brand
servicestation(Figure12).
Figure12
1.1/2inch(13mm)
Important:Donotaddoiltothegasoline.
Important:DonotuseE85orE20fuel.Alternative
fuelswithhighalcoholcontentcancausehard
starting,poorengineperformance,andmaycause
internalenginedamage.
Note:Forbestresults,purchaseonlythequantityof
gasolinethatyouexpecttousein30days.Otherwise,
youmayaddfuelstabilizertonewlypurchasedgasoline
tokeepitfreshforupto6months.
CheckingtheEngineOilLevel
ServiceInterval:Beforeeachuseordaily—Check
theengineoillevelandaddoilif
necessary.
1.Ensurethatthefueltankisnotoverlled(referto
Figure12)andthatthefuelcapissecurelyinplace.
2.Movethemachinetoalevelsurface.
3.Cleanaroundtheoilllcap(
Figure11).
4.Unscrewtheoilllcapandremoveit.
5.Wipethedipstickontheoilllcapwithacleancloth.
6.Insert,butdonotscrewin,theoilllcapintothe
oilllhole.
7.Removetheoilllcapandcheckthedipstick.
8.Todeterminetheproperoillevelonthedipstick,
referto
Figure13.
Figure13
1.Theoillevelisatits
maximum.
3.Theoillevelistoo
low—addoiltothe
crankcase.
2.Theoillevelistoo
high—removeoilfrom
thecrankcase.
9.Iftheoillevelislow ,slowlypouroilintotheoilll
hole.Wait3minutes,thenchecktheoillevelon
thedipstickbywipingthedipstickcleanandthen
inserting,butnotscrewingin,theoilllcapinto
thehole.
Note:Youmaytipthemachineforward(handle
up)alittletomakeaddingoileasier.Rememberto
returnthemachinetotheoperatingpositionbefore
checkingtheoillevel.
9
Page 10

Important:Donottipthemachinealltheway
forwardontoitsnose,orfuelmayleakoutof
themachine.
Maxll:12oz.(0.35l),type:automotivedetergent
oilwithanAPIserviceclassicationofSJ,SL,or
higher.
Use
Figure14toselectthebestoilviscosityforthe
outdoortemperaturerangeexpected:
Figure14
Note:Filltheenginecrankcasewithoiluntilthe
dipstickindicatesthattheengineoilleveliscorrect
asshownin
Figure13.Ifyouoverlltheenginewith
oil,removetheexcessoilasdirectedinChanging
theEngineOil.
10.Screwtheoilllcapintotheoilllholeandhand
tightenitsecurely.
StartingtheEngine
1.PushtheignitionkeyfullyinwardtotheOnposition
(Figure15).
Figure15
1.Ignitionkey
2.Movethechokeleverfullytotheright(Figure16).
Figure16
1.Chokelever
3.Firmlypushintheprimer2timeswithyourthumb,
holdingtheprimerinforasecondbeforereleasing
iteachtime(
Figure17).
10
Page 11

Figure17
Note:Removeyourglovewhenyoupushinthe
primersothataircannotescapefromtheprimer
hole.
Important:Donotusetheprimerorthechoke
iftheenginehasbeenrunningandishot.
Excessiveprimingmayoodtheengineand
preventitfromstarting.
4.Connectanextensioncordtoapowersourceand
themachine,andpushtheelectric-startbutton
(model38282only)(
Figure18),orpulltherecoil
starthandle(Figure19).
Figure18
1.Electric-startbutton
Note:UseonlyaUL-listed,16-gaugeextension
cordrecommendedforoutdoorusethatisnot
longerthan50feet(15m).
WARNING
Theelectricalcordcanbecomedamaged,
causingashockorre.
Thoroughlyinspecttheelectricalcordbefore
pluggingitintoapowersource.Ifthe
cordisdamaged,donotuseittostartthe
machine.Replaceorrepairthedamagedcord
immediately.ContactanAuthorizedService
Dealerforassistance.
Figure19
Important:Runtheelectricstarternomore
than10timesatintervalsof5secondson,then
5secondsoff.Runningtheelectricstarter
extensivelycanoverheatanddamageit.Ifthe
enginedoesnotstartafterthisseriesofattempts,
waitatleast40minutestoallowthestarterto
coolbeforeattemptingtostartitagain.Ifthe
enginedoesnotstartafterthesecondseriesof
attempts,takethemachinetoanAuthorized
ServiceDealerforservice(model38282only).
Note:Iftherecoilstarterdoesnotoperateproperly,
itmaybefrozen.Thawoutthestarterbefore
attemptingtostartthemachine.
5.Whiletheengineisrunning,movethechokelever
graduallytotheleft.
6.Unplugtheextensioncordfromthepowersource
andthemachine(model38282only).
CAUTION
Ifyouleavethemachinepluggedintoapower
source,someonecaninadvertentlystartthe
machineandinjurepeopleordamageproperty
(model38282only).
Unplugthepowercordwheneveryouarenot
startingthemachine.
11
Page 12

EngagingtheRotorBlades
Toengagetherotorblades,holdthecontrolbaragainst
thehandle(Figure20).
Figure20
1.Controlbar
DisengagingtheRotorBlades
Todisengagetherotorblades,releasethecontrolbar
(Figure21).
Figure21
StoppingtheEngine
Tostoptheengine,pulltheignitionkeyoutwarduntil
itclicksintotheOffposition(Figure22)ormovethe
chokeleverfullytotheright(Figure16).
Figure22
1.Ignitionkey
AdjustingtheDischargeChute
andChuteDeector
Toadjustthedischargechute,movethechutehandleas
showninFigure23.
Figure23
1.Chutehandle
Toraiseorlowertheangleofthechutedeector,press
thetriggeronthechutedeectorandmovethechute
deectorupordown(Figure24).Releasethetriggerto
lockthechutedeectorinplace.
12
Page 13

Figure24
1.Trigger
2.Chutedeector
ClearingaCloggedDischarge
Chute
Important:Handcontactwiththerotatingrotor
bladesinsidethedischargechuteisthemost
commoncauseofinjuryassociatedwithmachine.
Neveruseyourhandtocleanoutthedischarge
chute.
Toclearthechute:
•Shuttheengineoff!
•Wait10secondstobesuretherotorbladeshave
stoppedrotating.
•Alwaysuseaclean-outtool,notyourhands.
Self-propellingthe
Snowthrower
Liftthemachinehandleuntilthewheelsarejustoff
thegroundandthescraperandrotorbladestouchthe
ground,Themachinewillpropelforward(
Figure25).
Figure25
1.Wheelsofftheground2.Scraperandrotorblades
incontractwiththeground
Note:Byslightlyvaryingliftingforceonthehandle,you
cancontroltheforwardspeedofthemachine.Inheavy
snow,pushforwardonthehandle,ifnecessary,butlet
themachineworkatitsownpace.Donotliftthehandle
anymorethannecessary,becausethescraperwillliftoff
thegroundandsnowwillescapebehindthemachine.
PreventingFreeze-upafterUse
•Lettheenginerunforafewminutestoprevent
movingpartsfromfreezing.Stoptheengine,wait
forallmovingpartstostop,andremoveiceand
snowfromthemachine.
•Cleanoffanysnowandicefromthebaseofthe
chute.
•Rotatethedischargechuteleftandrighttofreeit
fromanyicebuildup.
•WiththeignitionkeyintheOffposition,pullthe
recoilstarterhandleseveraltimesorconnectthe
electricalcordtoapowersourceandthemachine
andpushtheelectricstartbuttononce(model38282
only)topreventtherecoilstarterand/ortheelectric
starterfromfreezingup.
•Insnowyandcoldconditions,somecontrolsand
movingpartsmayfreeze.Donotuseexcessiveforce
whentryingtooperatefrozencontrols.Ifyouhave
difcultyoperatinganycontrolorpart,startthe
engineandletitrunforafewminutes.
OperatingTips
WARNING
Therotorbladescanthrowstones,toys,andother
foreignobjectsandcauseseriouspersonalinjuryto
theoperatorortobystanders.
•Keeptheareatobeclearedfreeofallobjects
thattherotorbladescouldpickupandthrow.
•Keepallchildrenandpetsawayfromthearea
ofoperation.
•Removethesnowassoonaspossibleafteritfalls.
•Overlapeachswathtoensurecompletesnow
removal.
•Dischargethesnowdownwindwheneverpossible.
13
Page 14

Maintenance
Note:Determinetheleftandrightsidesofthemachinefromthenormaloperatingposition.
RecommendedMaintenanceSchedule(s)
MaintenanceService
Interval
MaintenanceProcedure
Afterthersthour
•Checkthecontrolcableandadjustitifnecessary.
•Checkforloosefastenersandtightenthemifnecessary.
Aftertherst2hours
•Changetheengineoil.
Beforeeachuseordaily
•Checktheengineoillevelandaddoilifnecessary.
Yearly
•Checkthecontrolcableandadjustitifnecessary.
•InspecttherotorbladesandhaveanAuthorizedServiceDealerreplacetherotor
bladesandscraperifnecessary.
•Changetheengineoil.
•Servicethesparkplugandreplaceitifnecessary.
•Checkforloosefastenersandtightenthemifnecessary.
•HaveanAuthorizedServiceDealerinspectthedrivebeltandreplaceitifnecessary .
Yearlyorbeforestorage
•Preparethemachineforstorage.
AdjustingtheControlCable
RefertoAdjustingtheControlCableinSetup.
InspectingtheRotorBlades
ServiceInterval:Yearly—Inspecttherotorbladesand
haveanAuthorizedServiceDealer
replacetherotorbladesandscraperif
necessary.
Beforeeachsession,inspecttherotorbladesforwear.
Whenarotorbladeedgehasworndowntothewear
indicatorhole,haveanAuthorizedServiceDealer
replacetherotorbladesandthescraper(
Figure26).
Figure26
1.Thewearindicatorholeis
intact;youdonotneedto
replacetherotorblades.
3.Scraper
2.Thewearindicatorholeis
exposed;replacetherotor
bladesandscraper.
ChangingtheEngineOil
ServiceInterval:Aftertherst2hours
Yearly
Runtheengineafewminutesbeforechangingtheoil
towarmit.Warmoilowsbetterandcarriesmore
contaminants.
1.Ensurethatthefueltankisnotoverlled(referto
Figure12)andthatthefuelcapissecurelyinplace.
2.Movethemachinetoalevelsurface.
14
Page 15

3.Placeanoildrainpanundertheoildrainplug
(Figure11),removetheoildrainplug,andtipthe
machinebackward(handledown)halfwaytothe
groundtodraintheusedoilintotheoildrainpan.
Important:Donottipthemachinealltheway
backtotheground,orfuelmayleakoutofthe
machine.
4.Afterdrainingtheusedoil,returnthemachinetothe
operatingposition.
5.Installtheoildrainplugandtightenitsecurely.
6.Cleanaroundtheoilllcap(
Figure11).
7.Unscrewtheoilllcapandremoveit.
8.Slowlypouroilintotheoilllhole.W ait3minutes,
thenchecktheoillevelonthedipstickbywipingthe
dipstickcleanandtheninserting,butnotscrewing
in,theoilllcapintothehole.
Note:Todeterminetheproperoillevelonthe
dipstick,referto
Figure27.
Figure27
1.Theoillevelisatits
maximum.
3.Theoillevelistoo
low—addoiltothe
crankcase.
2.Theoillevelistoo
high—removeoilfrom
thecrankcase.
Note:Youmaytipthemachineforward(handle
up)alittletomakeaddingoileasier.Rememberto
returnthemachinetotheoperatingpositionbefore
checkingtheoillevel.
Important:Donottipthemachinealltheway
forwardontoitsnose,orfuelmayleakoutof
themachine.
Maxll:12oz.(0.35l),type:automotivedetergent
oilwithanAPIserviceclassicationofSJ,SL,or
higher.
Use
Figure28toselectthebestoilviscosityforthe
outdoortemperaturerangeexpected:
Figure28
Note:Filltheenginecrankcasewithoiluntilthe
dipstickindicatesthattheengineoilleveliscorrect
asshowninFigure27.Ifyouoverlltheengine
withoil,removetheexcessoilfromthedrainplug
intoanoildrainpan.
9.Screwtheoilllcapintotheoilllhole,andhand
tightenitsecurely.
10.Wipeupanyspilledoil.
11.Disposeoftheusedoilproperlyatalocalrecycling
center.
ServicingtheSparkPlug
ServiceInterval:Yearly—Servicethesparkplugand
replaceitifnecessary.
UseaTorosparkplug(PartNo.119-1961).
1.Stoptheengineandwaitforallmovingpartstostop.
2.Disconnectthewirefromthesparkplug(
Figure11).
3.Cleanaroundthesparkplug.
4.Removethesparkplugfromthecylinderhead.
Important:Replaceacracked,fouled,or
dirtysparkplug.Donotcleantheelectrodes
becausegritenteringthecylindercandamage
theengine.
5.Setthegapontheplugto0.030inch(0.76mm)
(
Figure29).
15
Page 16

Figure29
1.Centerelectrodeinsulator3.Airgap(nottoscale)
2.Sideelectrode
6.Installthesparkplugandtorqueitto20–22ft-lb
(27–30N-m).
7.Connectthewiretothesparkplug.
ReplacingtheDriveBelt
Ifdrivebeltbecomesworn,oil-soaked,excessively
cracked,frayed,orotherwisedamaged,replacethebelt.
1.Removethe4boltsthatholdthedrivebeltcover
(Figure30)inplace.
Figure30
1.Drivebeltcover
Note:Thelowerfrontcornerofthedrivebelt
coverisfasteneddownwithasmallerbolt,awasher,
andalocknut.
2.Removethebeltfromtherotorpulley.
Figure31
1.Rotorpulley5.Idlerpulley
2.Idlerarmbrake6.Enginepulley
3.Drivebelt7.Tabsontheidlerarm
4.Idlerarm
3.Pressdownontheidlerarmandremovethebelt
frombetweenthetabontheidlerarmbrakeandthe
rotorpulley.
Note:Theenginepulleybeltguideisverycloseto
thepulley,andthebeltmaynottthroughthegap.
4.Twistthebeltoutinfrontofthebeltguidesothat
thebeltiswedgedbetweenthebeltguideandthe
enginepulley.
5.Insertascrewdriverintotheholeinthebeltguideas
shownin
Figure32,andexthebeltguidetoward
therotorpulleyenoughtopullthebeltthroughthe
gap.
Figure32
1.Beltguide2.Enginepulley
Note:Takecarenottodistortordamagethebelt
guide.
6.Toinstallthenewdrivebelt,reversethestepsabove.
16
Page 17

Important:Ensurethatyouinstallthedrivebelt
sothatitsitsabovethetwotabsontheidlerarm
andbelowtheidlerarmbrake(Figure31).
7.Installthedrivebeltcoverwiththefastenersthatyou
removedinstep
1.
Storage
StoringtheMachine
WARNING
•Gasolinefumesarehighlyammable,explosive,
anddangerousifinhaled.Ifyoustorethe
productinanareawithanopename,the
gasolinefumesmayigniteandcausean
explosion.
•Donotstorethemachineinahouse(living
area),basement,oranyotherareawhereignition
sourcesmaybepresent,suchashotwaterand
spaceheaters,clothesdryers,furnaces,and
otherlikeappliances.
•Donottipthemachineeitherforwardor
backwardwithfuelinthefueltank;otherwise,
fuelmayleakoutofthemachine.
•Donotstorethemachinewithitshandletipped
downontotheground,becauseoilwillleakinto
theenginecylinderandontotheground,and
themachinewillnotstartorrun.
1.Onthelastrefuelingoftheseason,addfuelstabilizer
tofreshfuelasdirectedbytheenginemanufacturer.
2.Runtheenginefor10minutestodistributethe
conditionedfuelthroughthefuelsystem.
3.Whiletheengineisstillwarm,changetheengineoil.
RefertoChangingtheEngineOil.
4.Drainthefuelfromthetankandcarburetorby
performingthefollowingsteps:
A.Loosenthefueltankcap.
B.Unscrew,butdonotremove,thesmallscrewon
thesideofthecarburetorfuelbowl(
Figure33)
untilthefuelbeginstodrainfromthecarburetor.
Drainthefuelintoanapprovedfuelcontainer.
Important:Donotremovethecarburetor
bowlboltonthebottomofthecarburetor.
Figure33
1.Carburetorbowlbolt—do
notremove
2.Smallscrewoncarburetor
C.Waitforafewminutesuntilthefuelhasdrained,
theninstallthefuelcapandtightenthesmall
screwonthecarburetor.
5.Disposeofunusedfuelproperly.Recycleitaccording
tolocalcodes,oruseitinyourautomobile.
6.Removethesparkplug.
7.Squirt2teaspoonsofoilintothesparkplughole.
8.Installthesparkplugbyhandandthentorqueitto
20–22ft-lb(27–30N-m).
9.WiththeignitionkeyintheOffposition,pullthe
recoilstarterslowlytodistributetheoilontheinside
ofthecylinder.
10.Disconnecttheignitionkeyfromthelanyardand
storetheignitionkeyinasafeplace.
11.Cleanthemachine.
12.Touchupchippedsurfaceswithpaintavailable
fromanAuthorizedServiceDealer.Sandaffected
areasbeforepainting,andusearustpreventativeto
preventthemetalpartsfromrusting.
13.Tightenanyloosefasteners.Repairorreplaceany
damagedparts.
14.Coverthemachineandstoreitinaclean,dryplace
outofthereachofchildren.Allowtheengineto
coolbeforestoringitinanyenclosure.
17
Page 18

Notes:
18
Page 19

FederalEmissionControlWarrantyStatement
ATwo-YearLimitedWarranty
YourWarrantyRightsandObligations
TheU.S.EnvironmentalProtectionAgency(EP A),TheT oroCompany ,and
itsafliate,ToroWarrantyCompany ,arepleasedtoexplaintheemission
controlsystemwarrantyonyour2009andlaterutility/lawn/garden
equipmentengine.2009andlatermodelyearutility/lawn/garden
equipmentenginesmustbedesigned,builtandequipped,atthetime
ofsale,tomeettheU.S.EPAregulationsforsmallnon-roadengines.
Theequipmentenginemustbefreefromdefectsinmaterialsand
workmanship,whichcauseittofailtoconformwithU.S.EPAstandards,
forthersttwoyearsofengineusefromthedateofsaletotheultimate
purchaser.TheToroCompanyanditsafliate,ToroWarrantyCompany ,
warranttheemissioncontrolsystemonyourutility/lawn/gardenequipment
enginefortheperiodoftimelistedabove,providedtherehasbeenno
abuse,neglect,orimpropermaintenanceofyourutility/lawn/garden
equipmentengine.
Youremissioncontrolsystemmayincludepartssuchasthecarburetor
orfuelinjectionsystem,theignitionsystem,andcatalyticconverter.Also
includedmaybefuellines,fuellinefasteners,connectors,andother
emission-relatedassemblies.
Whereawarrantableconditionexists,TheT oroCompanyanditsafliate,
ToroWarrantyCompany ,promisetorepairyourengineatnocosttoyou,
includingdiagnosis,parts,andlabor.
Manufacturer’sWarrantyCoverage
TheT oroCompanyanditsafliate,ToroWarrantyCompany,pursuant
toanagreementbetweenthem,jointlywarrantthe2009andlater
utility/lawn/gardenequipmentenginesfortwoyearsfromthedateof
delivery.Ifanyemission-relatedpartonyourengineisdefectivein
materialsorworkmanship,wewillrepairorreplacethepart,freeofcharge.
OwnerResponsibilities
Astheengineowner,youareresponsiblefortheperformanceofthe
requiredmaintenancelistedinyourOperator'sManual.Werecommend
thatyouretainallreceiptscoveringmaintenanceonyourequipment,but
wecannotdenywarrantysolelyforthelackofreceiptsorforyourfailureto
ensuretheperformanceofallscheduledmaintenance.
Anyreplacementpartorservicethatisequivalentinperformanceand
durabilitymaybeusedinnon-warrantymaintenanceorrepairs,andshall
notreduceourwarrantyobligation.
Astheengineowner,youshouldbeawarethatwemaydenyyouwarranty
coverageifyourengineoraparthasfailedduetoabuse,neglect,
impropermaintenance,orunapprovedmodicationsorparts.
YouareresponsibleforpresentingyourequipmentenginetoanAuthorized
ServiceDealerassoonasaproblemexists.Thewarrantyrepairsshould
becompletedinareasonableamountoftime,nottoexceedthirty(30)
days.
Ifyouhaveanyquestionsregardingyourwarrantyrightsand
responsibilities,contactusat:
CustomerCareDepartment,ConsumerDivision
ToroWarrantyCompany
811 1LyndaleAvenueSouth
Bloomington,MN55420-1196
Tollfreeat800–348–2424(U.S.customers)
Tollfreeat800–544–5364(Canadiancustomers)
WarrantedParts
Thewarrantyperiodbeginsonthedatetheengineorequipmentis
deliveredtoaretailpurchaser.TheToroCompanyanditsafliate,
ToroWarrantyCompany,jointlywarranttotheinitialownerandeach
subsequentpurchaserthattheengineisfreefromdefectsinmaterialsand
workmanship,whichcausetheenginetofailtoconformwithapplicable
regulations,foraperiodoftwoyears.
Failurescausedbyabuse,neglect,orimpropermaintenancearenot
covered.Theuseofadd-onormodiedpartscanbegroundsfor
disallowingawarrantyclaim.Wearenotliabletocoverfailuresof
warrantedpartscausedbytheuseofadd-onormodiedparts.Weare
liablefordamagestootherenginecomponentscausedbythefailureof
awarrantedpartstillunderwarranty.Theownerisresponsibleforthe
performanceoftherequiredmaintenance,asdenedintheOperator's
Manual.
Anywarrantedpartwhichisnotscheduledforreplacementasrequired
maintenance,orwhichisscheduledonlyforregularinspectiontotheeffect
of“repairorreplaceasnecessary”shallbewarrantedforthewarranty
period.Anywarrantedpartwhichisscheduledforreplacementasrequired
maintenanceshallbewarrantedfortheperiodoftimeuptotherst
scheduledreplacementpointforthatpart.Coverageunderthiswarranty
extendsonlytothepartslistedbelow(theemissionssystemparts)tothe
extentthatthesepartswerepresentontheenginewhenpurchased.
•FuelMeteringSystem
—Coldstartenrichmentsystemincludingthechokemechanismor
primingsystem
—Fuelpump
—Carburetorandinternalparts
•AirInductionSystem
—Aircleaner
—Intakemanifold
—Controlledhotairintakesystem
•IgnitionSystem
—Sparkplug(s)
—Ignitioncoilsandelectronics
—Advance/retardmechanisms
•Mufer
•MiscellaneousItemsUsedintheAboveSystems
—Vacuum,temperature,andtime-sensitivevalvesandswitches
—Hoses,connectors,andassembliesofsame
InstructionsforObtainingWarrantyService
IfyouthinkthatyourT oroProductcontainsadefectinmaterialsor
workmanship,followthisprocedure:
1.ContactanyAuthorizedT oroServiceDealertoarrangeserviceat
theirdealership.T olocateadealerconvenienttoyou,refertothe
YellowPagesofyourtelephonedirectory(lookunder“LawnMowers”)
oraccessourwebsiteatwww .Toro.com.Youmayalsocallthe
numberslistedabovetousethe24-hourT oroDealerlocatorsystem.
2.Bringtheproductandyourproofofpurchase(salesreceipt)tothe
ServiceDealer.
Theownershallnotbechargedfordiagnosticlaborwhichleadstothe
determinationthatawarrantedpartisdefective,ifthediagnosticwork
isperformedatawarrantystation.
GeneralConditions
NeitherTheT oroCompanynorT oroWarrantyCompanyisliablefor
indirect,incidental,orconsequentialdamagesinconnectionwiththe
useoftheT oroProductscoveredbythesewarranties,includingany
costorexpenseofprovidingsubstituteequipmentorserviceduring
reasonableperiodsofmalfunctionornon-usependingcompletionof
repairsunderthesewarranties.
Allimpliedwarrantiesofmerchantability(thattheproductistforordinary
use)andtnessforuse(thattheproductistforaparticularpurpose)are
limitedtothedurationoftheexpresswarranty.
Somestatesdonotallowexclusionsofincidentalorconsequential
damages,sotheaboveexclusionsmaynotapplytoyou.
Thiswarrantygivesyouspeciclegalrights,andyoumayalsohaveother
rightswhichvaryfromstatetostate.
374-0267RevA
Page 20

PowerClear180
Single-StageSnowthrowers
TheToroTotalCoverageGuarantee
AT wo-YearFullWarranty(45DayLimitedWarrantyforCommercialUse)
ConditionsandProductsCovered
TheToroCompanyanditsafliate,ToroWarrantyCompany ,pursuantto
anagreementbetweenthem,jointlypromisetorepairtheT oroProduct
listedbelowifusedforresidentialpurposes*,ifdefectiveinmaterialsor
workmanshiporifitstopsfunctioningduetothefailureofacomponent
fortheperiodlistedbelow.
Thiswarrantycoversthecostofpartsandlabor,butyoumustpay
transportationcosts.
Thefollowingtimeperiodsapplyfromthedateofpurchase:
ProductsWarrantyPeriod
Powerclear180SnowthrowersandAttachments
2years
LimitedWarrantyforCommercialUse
Gas-poweredT oroProductsusedforcommercial,institutional,or
rentaluse,arewarrantedfor45daysagainstdefectsinmaterialsor
workmanship.Componentsfailingduetonormalweararenotcovered
bythiswarranty.
InstructionsforObtainingWarrantyService
IfyouthinkthatyourT oroProductcontainsadefectinmaterialsor
workmanship,followthisprocedure:
1.ContactanyAuthorizedT oroServiceDealertoarrangeserviceattheir
dealership.Tolocateadealerconvenienttoyou,refertotheYellow
Pagesofyourtelephonedirectory(lookunder“LawnMowers”)or
accessourwebsiteatwww .Toro.com.Youmayalsocallthenumbers
listedinitem#3tousethe24-hourToroDealerlocatorsystem.
2.Bringtheproductandyourproofofpurchase(salesreceipt)tothe
ServiceDealer.Thedealerwilldiagnosetheproblemanddetermine
ifitiscoveredunderwarranty.
3.IfforanyreasonyouaredissatisedwiththeServiceDealer’s
analysisorwiththeassistanceprovided,contactusat:
CustomerCareDepartment,ConsumerDivision
TheT oroCompany
811 1LyndaleAvenueSouth
Bloomington,MN55420-1196
Tollfreeat866-336-5205(U.S.customers)
Tollfreeat866-854–9033(Canadiancustomers)
OwnerResponsibilities
YoumustmaintainyourT oroProductbyfollowingthemaintenance
proceduresdescribedintheOperator'sManual.Suchroutine
maintenance,whetherperformedbyadealerorbyyou,isatyourexpense.
ItemsandConditionsNotCovered
Thereisnootherexpresswarrantyexceptforspecialemissionsystem
coverageandenginewarrantycoverageonsomeproducts.Thisexpress
warrantydoesnotcoverthefollowing:
•Costofregularmaintenanceorwearparts,suchasrotorblades
(paddles),scraperblades,belts,fuel,lubricants,oilchanges,spark
plugs,cable/linkageorbrakeadjustments
•Anyproductorpartwhichhasbeenalteredormisusedandrequires
replacementorrepairduetoaccidentsorlackofpropermaintenance
•Repairsnecessaryduetofailuretousefreshfuel(lessthanone
monthold),orfailuretoproperlypreparetheunitpriortoanyperiod
ofnon-useoveronemonth
•Pickupanddeliverycharges
•Operationalmisuse,neglect,oraccidents
•RepairsorattemptedrepairsbyanyoneotherthananAuthorized
ToroServiceDealer
•Repairsoradjustmentstocorrectstartingdifcultiesduetothe
following:
–failuretofollowpropermaintenanceprocedures
–snowthrowerauger/paddlesstrikinganobject
–contaminantsinthefuelsystem
–improperfuelorfuel/oilmixture(consultyourOperator'sManual
ifindoubt)
–failuretodrainthefuelsystempriortoanyperiodofnon-use
overonemonth
Ifyouarehavingdifcultystartingyourunit,pleasechecktheOperator's
Manualtoensurethatyouareusingthecorrectstartingprocedures.This
cansaveanunnecessaryvisittoaServiceDealer.
GeneralConditions
Allrepairscoveredbythesewarrantiesmustbeperformedbyan
AuthorizedToroServiceDealerusingToroapprovedreplacementparts.
RepairbyanAuthorizedT oroServiceDealerisyoursoleremedyunder
thiswarranty .
NeitherTheT oroCompanynorT oroWarrantyCompanyisliablefor
indirect,incidental,orconsequentialdamagesinconnectionwiththe
useoftheT oroProductscoveredbythesewarranties,includingany
costorexpenseofprovidingsubstituteequipmentorserviceduring
reasonableperiodsofmalfunctionornon-usependingcompletionof
repairsunderthesewarranties.
Somestatesdonotallowexclusionsofincidentalorconsequential
damages,sotheaboveexclusionsmaynotapplytoyou.
Thiswarrantygivesyouspeciclegalrights,andyoumayalsohaveother
rightswhichvaryfromstatetostate.
CountriesOtherthantheUnitedStatesorCanada
CustomerswhohavepurchasedToroproductsexportedfromtheUnitedStatesorCanadashouldcontacttheirToroDistributor(Dealer)toobtain
guaranteepoliciesforyourcountry,province,orstate.IfforanyreasonyouaredissatisedwithyourDistributor'sserviceorhavedifcultyobtaining
guaranteeinformation,contacttheT oroimporter.Ifallotherremediesfail,youmaycontactusatT oroWarrantyCompany.
*Residentialpurposesmeansuseoftheproductonthesamelotasyourhome.Useatmorethanonelocation,orinstitutionalorrentaluse,isconsidered
commercialuse,andthecommercialusewarrantywouldapply.
374-0263RevB
 Loading...