

Page 1
Recycler Kit
.
52in Mowers
Model No. 79186
Installation Instructions
Loose Parts
Note: Use the chart below to identify parts used for
assembly.
DESCRIPTION QTY. USE
Form No. 3350-535
Kicker
Bolt, 5/16 x 1 inch
Spacer
Lock nut, 5/16 inch
Recycler blade 3 Replace the standard blades on the mower
Baffle left side
Baffle right side
Bolt, 5/16 x 5/8 inch
Bolt, 5/16 x 1 inch
Lock nut, 5/16 inch
Decal 1 Install the decal onto the mower
3
3
3
3
1
1
8
1
9
Install the kickers
Install theRecycler baffles
Installing the Kickers
1. Remove the mower deck from the mower; refer to
Removing the Mower, in mower Operator’s Manual.
2. Thoroughly clean the mower. All debris must be
removed to ensure the baffle will fit properly against the
cutting chamber.
3
5
3. Tip the mower upside down and block up the ends to
ease installation of the kickers.
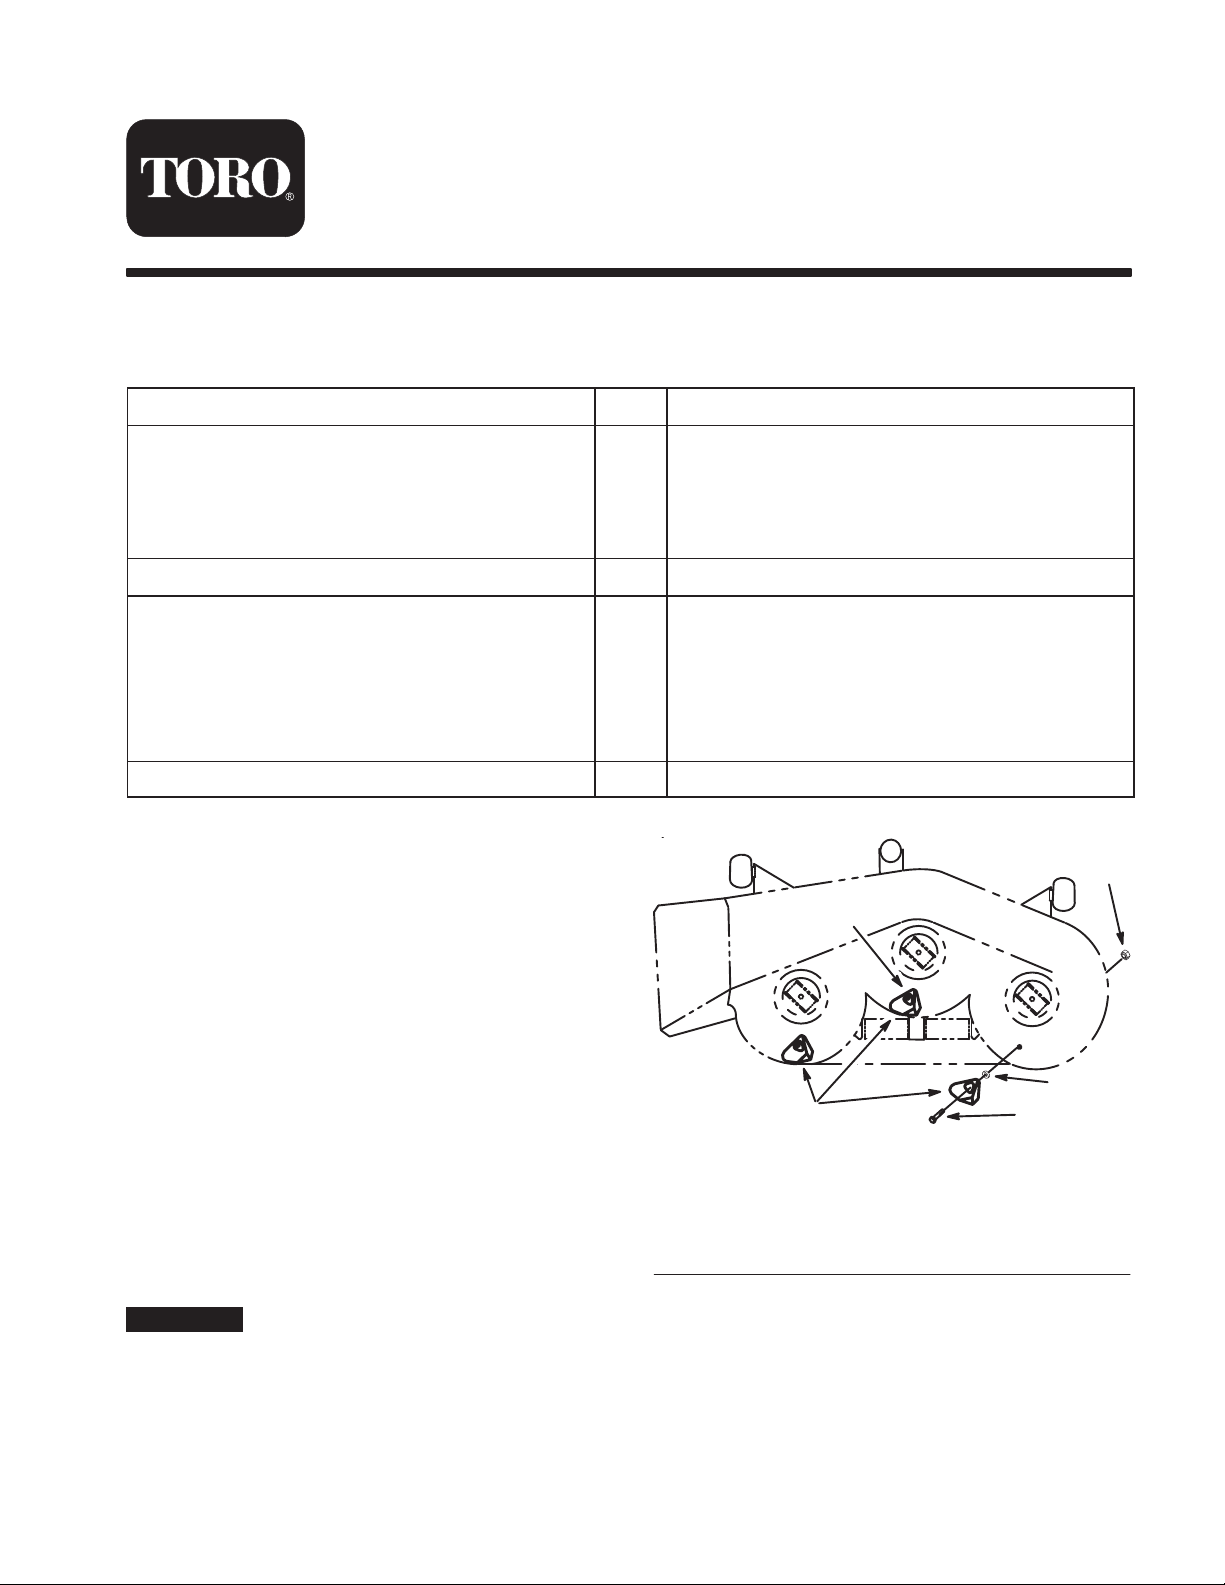
4. Place the spacers and kickers inside mower, over the
holes provided (Fig. 1).
5. Secure the two outside kickers with 2 bolts
(5/16 x 1 inch), with the bolt heads inside the mower,
and 3 lock nuts (5/16 inch) (Fig. 1).
6. Secure the middle kicker with 1 bolt (5/16 x 1 inch),
with the bolt head on the outside of the mower, and
1 lock nut (5/16 inch) (Fig. 1).
Important The bolt for the center kicker must be
installed with the head on the outside of the mower.
2003 by The Toro Company
8111 Lyndale Avenue South
Bloomington, MN 55420-1196
1. Kicker
2. Spacer
3. Head on outside of
mower
1
Figure 1
4. Bolt, 5/16 x 1 inch
5. Lock nut, 5/16 inch
Contact us at www.Toro.com
All Rights Reserved
Printed in the USA
2
m–2423
4
Page 2
Installing the Recycler Baffle
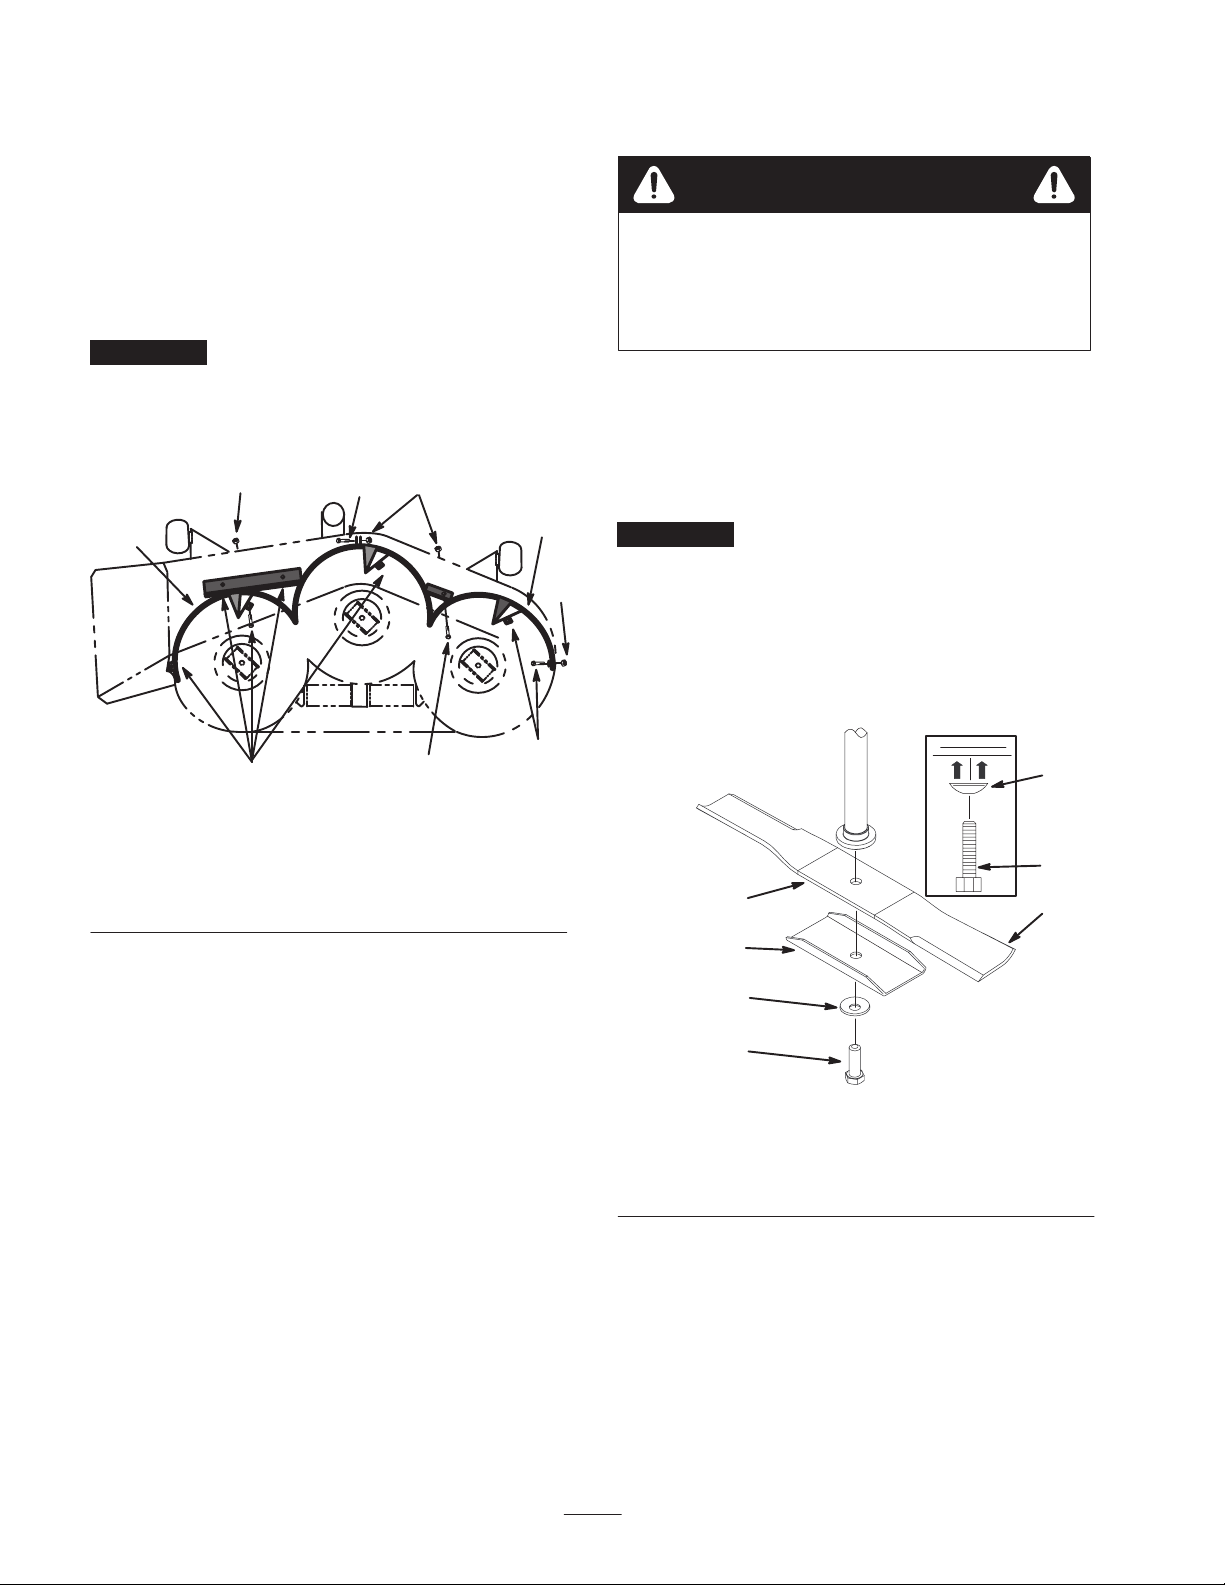
1. Place the left and right sides of the baffle together with
a center pin inserted into flange. Secure the flanges with
1 bolt (5/16 x 5/8 inch) and 1 locknut (5/16 inch)
(Fig. 2).
2. Place the baffle assembly inside the cutting chamber
(Fig. 2). Secure it with 7 bolts (5/16 x 5/8 inch), 1 bolt
(5/16 x 1 inch) and 8 lock nuts (5/16 inch).
Important The bolts must be installed with the head on
the inside of the mower.
Installing the Recycler Blades
Warning
A blade is sharp. Contact with sharp blade can
cause serious personal injury.
• Wear gloves or wrap sharp edges of the blade
with a rag.
1. Hold the blade end using a rag or thickly-padded glove.
3. Tighten all mounting hardware securely.
5
5
3
2
3
4
Figure 2
1. Baffle left side
2. Baffle right side
3. Bolt, 5/16 x 5/8 inch
4. Bolt, 5/6 x 1 inch
5. Lock nut, 5/16 inch
3
m–2424
2. Remove the blade bolt, curved washer, stifener and
standard blade from the spindle shaft (Fig. 3).
3. Install the recycler blade onto the spindle shaft with the
stifener (Fig. 3).
1
Important The curved part of the blade must be
pointing upward toward the inside of the mower to ensure
5
proper cutting.
4. Install the curved washer and blade bolt (Fig. 3). Torque
the blade bolt to 35–60 ft-lb (47–88 N⋅m).
5. Rotate the blades to assure there is at least 1/8 inch
clearance between the blades and baffle.
3
4
2
1
5
1. Sail area of blade
2. Blade
3. Curved washer
2
3
4
m–7222
Figure 3
4. Blade bolt
5. Stifener
Page 3

Warning
A blade that is bent or damaged could break apart
and could seriously injure or kill you or
bystanders.
• Always replace bent or damaged blade with a
new blade.
• Never file or create sharp notches in the edges
or surfaces of blade.
3
2
1
Installing the Recycler Decal
1. Remove the backing paper and apply decal to the
discharge side of the mower (Fig. 4). Smooth it from
the center to the edges to remove any air bubbles.
2
1
2371
Figure 4
1. Mower discharge side 2. Apply decal
2. Install the mower deck onto the mower; refer to
Installing the Mower, in the mower Operator’s Manual.
Removing the RecyclerBaffle
2
3
1. Baffle left side
2. Bolt, 5/16 x 5/8 inch
Figure 5
2
3. Lock nut, 5/16 inch
Warning
Open holes in the mower exposes you and others to
thrown debris. Debris thrown out of holes in the
mower can cause injury.
• Never operate mower without hardware
mounted in all holes in mower.
• Install hardware in mounting holes when a
baffle is removed.
m-2414
1. Thoroughly clean the mower.
2. Remove the lock nuts from the top and center of the
right side baffle (Fig. 5). Lower the baffle and slide it
out the side discharge opening to remove it.
Note: Only the right side baffle needs to be removed for
side discharge mowing.
3. Install the previously removed bolts (5/16 x 5/8 inch)
and lock nuts (5/16 inch) in the open holes of the
mower (Fig. 5).
3
Page 4

4
 Loading...