

Toro 72049, 72050, 72087, 72108 Setup Instructions
FORM NO. 3322–961
LAWN & GARDEN TRACTOR
260 Series
Loose
Note: Use the chart below to identify parts for assembly.
DESCRIPTION QTY. USE
Bolt 1/4–20 x 3/4”
Washer
Locknut 1/4–20
Key 1
Operator’
Parts
s Manual
2
2
2
1
Attach battery cables.
Use in ignition switch.
Read manual before operating tractor
Check Tire Pressure
Check front and rear tire pressure. See Operator’s
Manual for specification.
Pressure: 20 psi (138 kPa) front and rear.
POTENTIAL HAZARD
• Battery electrolyte contains sulfuric acid
which is a deadly poison and it causes
severe burns.
SET UP
INSTRUCTIONS
.
Activate
Bulk electrolyte with 1.260 specific gravity must be
purchased from a local battery supply outlet.
1. Remove the battery from the tractor: refer to
Operator’s Manual, Removing the Battery.
IMPORTANT: Be careful not to damage the
long vent tube when removing the battery
box.
Printed in USA
the Battery
The T
oro Company – 1998
All Rights Reserved
WHAT CAN HAPPEN
• If you carelessly drink electrolyte you could
die or if it gets onto your skin you will be
burned.
HOW TO AV
OID THE HAZARD
• Do not drink electrolyte and avoid contact
with skin, eyes or clothing. Wear safety
glasses to shield your eyes and rubber
gloves to protect your hands.
• Fill the battery where clean water is always
available for flushing the skin.
• Follow all instructions and comply with all
safety messages on the electrolyte container.
Set Up Instructions
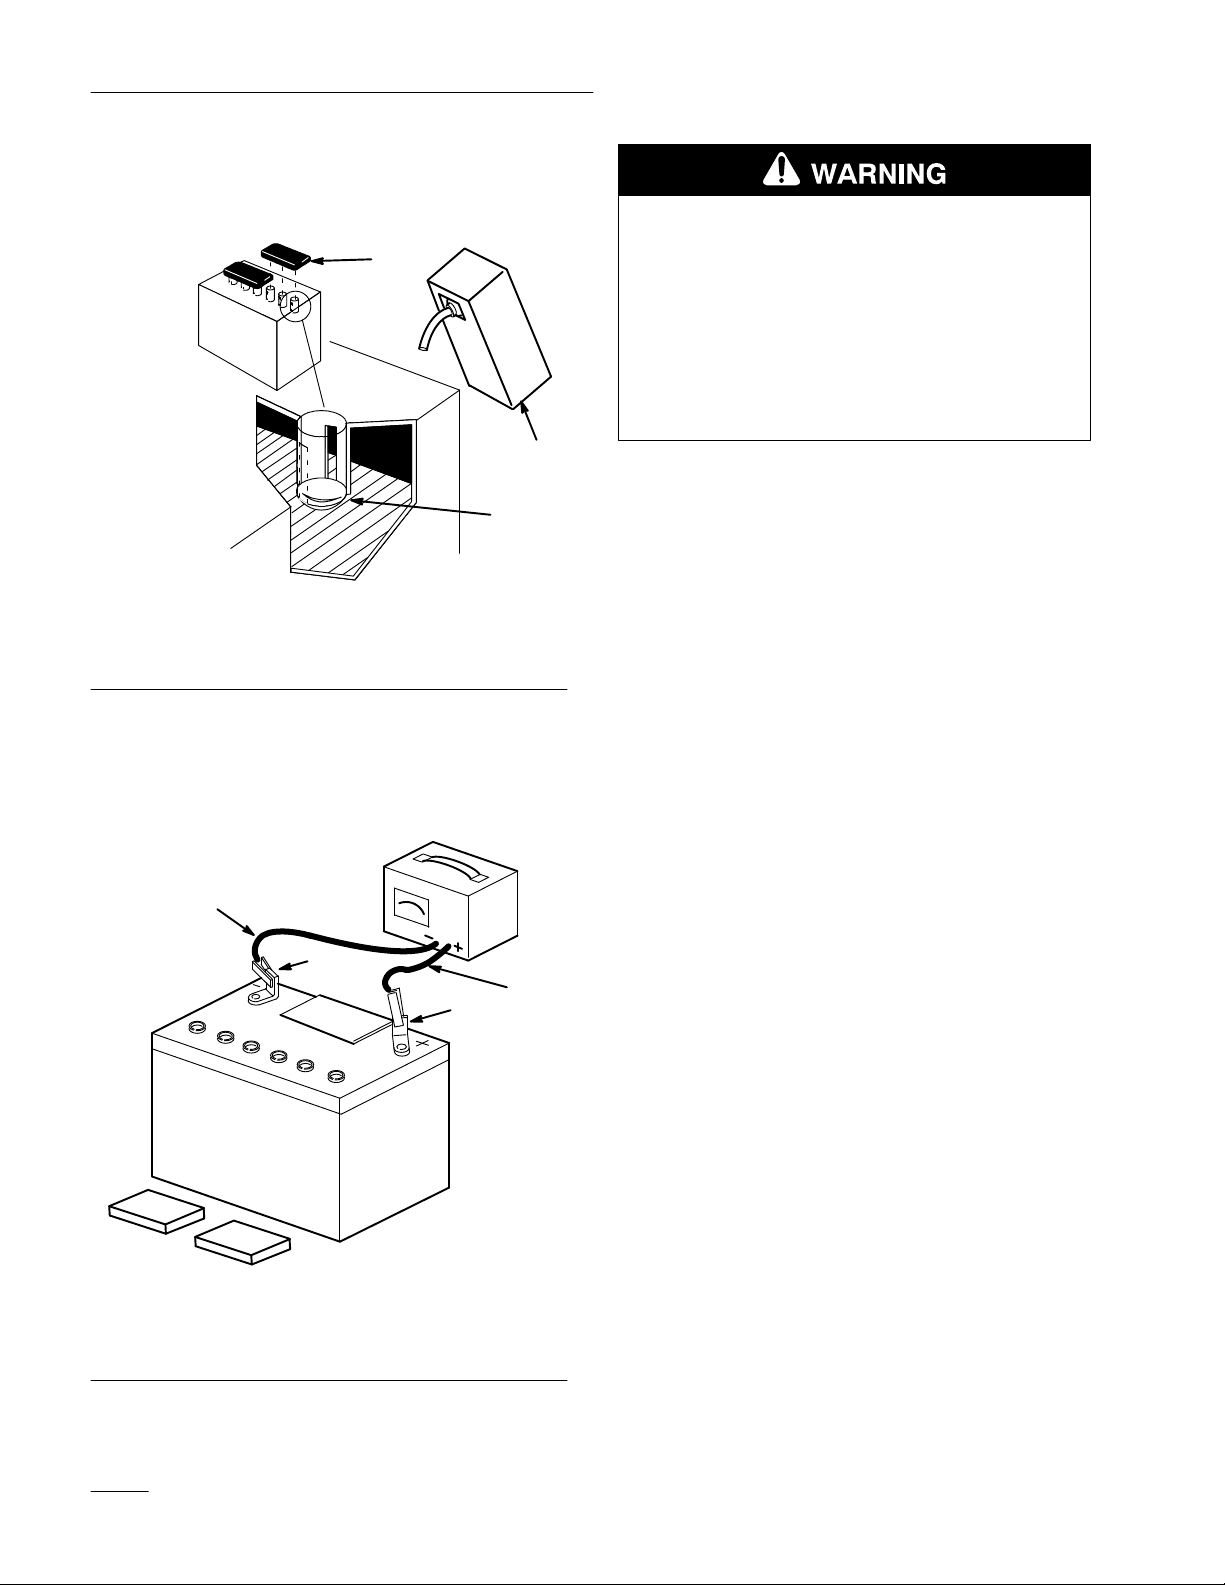
2. Remove filler caps from the battery. Slowly pour
electrolyte into each cell until the electrolyte
level is up to the lower part of the tube (Fig. 1).
1
POTENTIAL
• Charging battery pr
HAZARD
oduces gasses.
WHAT CAN HAPPEN
• Battery gasses can explode.
3
Figure 1
1. Filler
2. Electrolyte
caps
Lower part of the tube
3.
3. Leave the covers off and connect a 3 to 4 amp
battery charger to the battery posts (Fig. 2).
Charge the battery at a rate of 4 amperes or less
for 4 hours (12 volts).
4
1262
HOW TO AV
OID THE HAZARD
• Keep cigarettes, sparks and flames away
from battery.
2
4. When the battery is fully charged, disconnect the
charger from the electrical outlet then from the
negative and positive battery posts (Fig. 2).
5. Slowly pour electrolyte into each cell until the
level is once again up to the “UPPER” line on
the battery case (Fig. 1) and install covers.
6. Install the battery in the tractor and connect
cables with (2) 1/4 x 3/4” bolts, (2) washers and
(2) 1/4–20 locknuts: refer to the Operator’s
Manual, Installing the Battery.
1. Positive
2.
Negative post
2
post
2
Figure 2
1
3.
Charger red (+) wire
4.
Charger black (–) wire
3
1254
 Loading...