

Page 1

FORM NO. 3321–194
Electric Trimmers
Electric Trimmers & Edgers
10-Inch, 11-Inch, 12-Inch, 13-Inch, 14-Inch and
15-Inch Cutting Widths
Model No. 51301, 51302, 51303, 51304, 51305, 51306, 51307, 51308,
51309, 51324, 51332—89000001 & Up
Taille-bordures électriques
Largeur de coupe 25, 28, 30, 33, 36 et 38 cm (10,
11, 12, 13, 14 et 15 po.)
Modèle No. 51301, 51302, 51303, 51304, 51305, 51306, 51307, 51308,
51309, 51324, 51332—89000001 et suivants
Recortadoras electricas
Recortadoras y cortadoras de
césped eléctricas para bordes
Anchos de corte de 25, 28, 30, 33, 36 y 38 cm
(10, 11, 12, 13, 14 y 15 pulg.)
Modelos N. 51301, 51302, 51303, 51304, 51305, 51306, 51307, 51308,
51309, 51324, 51332—89000001 y siguientes
Operator ’s Manual
Manuel de L’Utilisateur
Manual del Operador
Page 2

English
Safety
WARNING—To reduce the risk of fire, electric shock or injury,
follow these safety instructions.
Read All Instructions
It is essential that you or any other operator of the appliance
read and understand the contents of this manual before
operating the appliance. Pay particular attention to the safety
alert symbol
DANGER — “personal safety instruction.” FAILURE TO
COMPLY WITH INSTRUCTION MAY RESULT IN
PERSONAL INJURY, RISK OF FIRE OR ELECTRICAL
SHOCK.
• A void Dangerous Environment–Don’t use appliances in damp
or wet locations.
• Don’t Use In Rain.
• Keep Children A way–All visitors should be kept at a distance
from work area.
• Dress Properly–Do not wear loose clothing or jewelry. They
can be caught in moving parts. Use of rubber gloves and
substantial footwear is recommended when working outdoors.
Wear protective hair covering to contain long hair.
• Use Safety Glasses–Always use face or dust mask if operation
is dusty. Safety glasses are available at most retail stores.
• Use Right Appliance—Do not use the appliance for any job
except that for which it was intended.
• Ground Fault Circuit Interrupter (GFCI) protection should be
provided on the circuit(s) or outlet(s) to be used for the
gardening appliance. Receptacles are available having built-in
GFCI protection and may be used for this measure of safety.
• WARNING—To reduce the risk of electrical shock, use only
an approved UL (CSA in Canada) extension cord suitable for
outdoor use, such as an extension cord of cord type SW-A,
SOW-A, STW-A, STOW-A, SJW-A, SJOW-A, SJTW-A or
SJTOW-A.
• Extension Cord–Make sure your extension cord is in good
condition. When using an extension cord, be sure to use one
heavy enough to carry the current your product will draw. An
undersized extension cord will cause a drop in line voltage
resulting in loss of power and overheating. The Extension
Cord Chart shows the correct size to use depending on cord
length and nameplate ampere rating. If in doubt, use the next
heavier gage. The smaller the gage number, the heavier the
cord. T o reduce the risk of disconnection of appliance from
extension cord during operating, use the cord lock described in
this manual.
which means CAUTION, WARNING OR
polarized extension cord. A polarized extension cord will
require the use of a polarized wall outlet. This plug will fit into
the polarized wall outlet only one way. If the plug does not fit
fully into the wall outlet, reverse the plug. If the plug still does
not fit, contact a qualified electrician to install the proper wall
outlet. Do not change the equipment plug, extension cord
receptacle, or extension cord plug in any way.
• Avoid Unintentional Starting–Do not carry plugged–in
appliance with finger on switch. Be sure switch is off when
plugging in.
• Don’t Abuse Cord–Never carry appliance by cord or yank it to
disconnect from receptacle. Keep cord from heat, oil, and sharp
edges.
• Keep grass shield in place and in working order.
• Keep hands and feet away from cutting area.
• Don’t Force Appliance–It will do the job better and with less
likelihood of a risk of injury at the rate for which it was
designed.
• Don’t Overreach—Keep proper footing and balance at all
times.
• Stay Alert – Watch what you are doing. Use common sense.
Do not operate appliance when you are tired.
• Disconnect Appliance–Disconnect the appliance from the
power supply when not in use or before servicing.
• Store Idle Appliances Indoors–When not in use, appliances
should be stored indoors in dry, and high or locked-up place out of the reach of children.
• Maintain Appliance With Care –Follow instructions for
changing accessories. Inspect appliance periodically, and if
damaged, have it repaired by an Authorized T o ro Service
Dealer. Inspect extension cords periodically and replace if
damaged. Keep handles dry, clean, and free from oil and
grease. Trimmer requires no lubrication.
• Check Damaged Parts – Before further use of the appliance, a
guard or other part that is damaged should be carefully checked
to determine that it will operate properly and perform its
intended function. Check for alignment of moving parts,
binding of moving parts, breakage of parts, mounting, and any
other condition that may affect its operation. A guard or other
part that is damaged should be properly repaired or replaced by
an authorized service center unless indicated elsewhere in this
manual.
• When servicing use only identical TORO replacement parts.
SAVE THESE INSTRUCTIONS
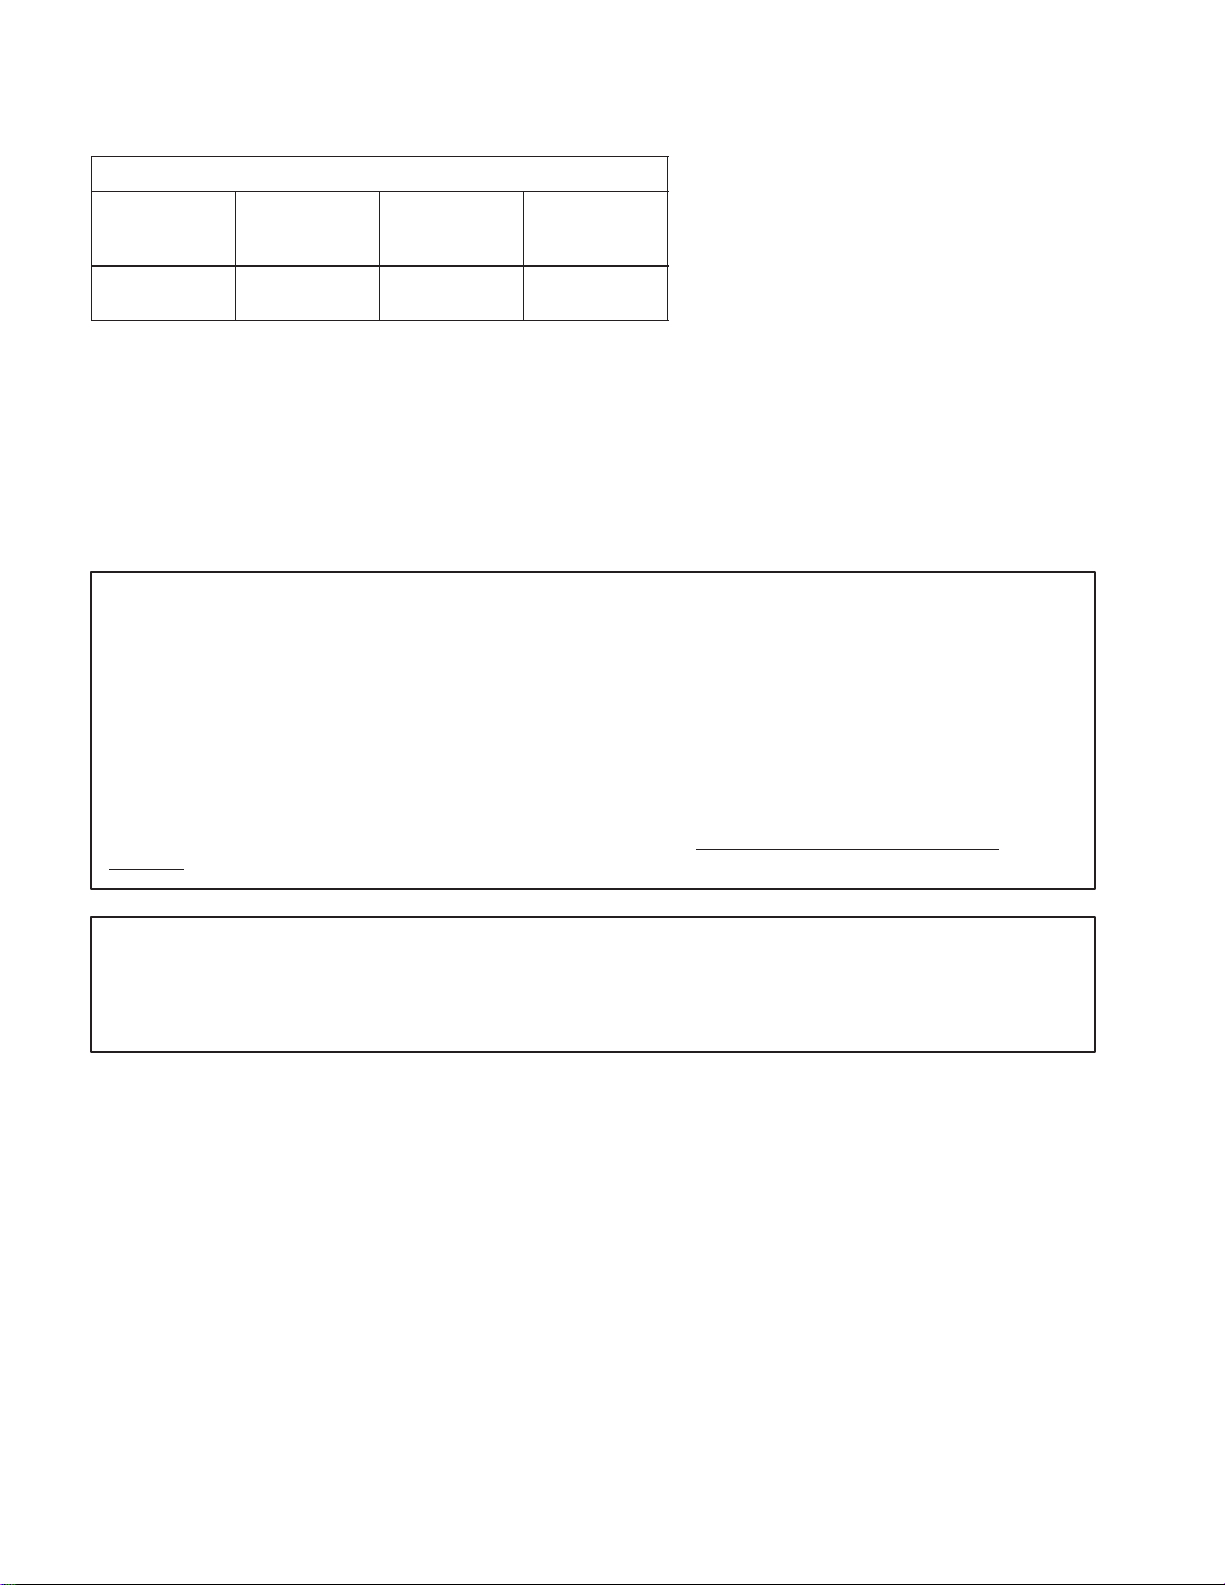
EXTENSION CORD CHART
If length of extension cord is less
than or equal to:
Assure wire size gage (A.W.G.) in
cord is:
Note: Use of an extension cord over 150 feet is not recommended.
• To reduce the risk of electric shock, this appliance has a
polarized plug (one blade is wider than the other) (Fig. 1) and
will require the use of a polarized extension cord. The
appliance plug will fit into a polarized extension cord only one
way. If the plug does not fit fully into the extension cord,
reverse the plug. If the plug still does not fit, obtain a correct
Printed in USA
100 ft. 150 ft.
16 14
1
The Toro Company – 1997
All Rights Reserved
Page 3

Safety and Instruction Decals
Safety decals and instructions are easily visible to the operator and are located near any area of potential
danger. Replace any decal that is damaged or lost.
ON TUBE
(Part No. 98–7184)
Assembly
Note: Your unit may be partially or fully assembled when removed
from carton. The unit may have a snap-on shield or have two
screws to secure shield. Trimmer should appear as shown in
Figure 2 when fully assembled.
Attach Support Handle
1. Press support handle onto tube with smooth side of support
handle facing toward upper handle. Position support handle at
a comfortable operating height and secure with a carriage bolt
and wing nut (Fig. 3).
Attach Grass Shield
POTENTIAL HAZARD
• Cutting knife on grass shield is sharp.
WHAT CAN HAPPEN
• Contact with cutting knife could cause personal
injury.
HOW TO AVOID THE HAZARD
• Be careful when handling shield. Avoid contact with
knife blade.
For Shields Secured With Two Screws
1. Fit grass shield into long, curved slot in motor housing
(Fig. 6). Invert trimmer and secure grass shield to motor
housing with (2) screws provided (Fig. 7).
Before Starting
1. Make sure spool cap is securely snapped in place. If not, align
cap tabs with slots in cutter head, press tabs in and push down
cap and spool to lock cap in place (Fig. 13).
POTENTIAL HAZARD
• Cap may loosen during shipment. A loose or
improperly installed cap or spool could fly off
trimmer.
WHAT CAN HAPPEN
• Contact with a thrown spool or cap could cause injury
to operator or bystanders.
HOW TO AVOID THE HAZARD
• Be sure spool and cap are fully secured before
operating the unit. Replace spool if it is damaged or if
cap does not securely snap onto cutter head.
• Keep bystanders and pets away from trimming area.
Note: The grass shield must always be on the trimmer to protect
the operator.
For Snap-on Shields
1. Spread locking tabs apart while sliding grass shield onto motor
housing (Fig. 4). Push locking tabs into holes until you feel
them snap into place (Fig. 5).
Securing Extension Cord
Note: Use only a UL listed (CSA certified in Canada) extension
cord recommended for outdoor use. Refer to Extension Cord Chart
on page 1.
1. Secure extension cord in cord lock as shown in Figure 8.
2
Page 4

Operation
POTENTIAL HAZARD
• Objects can be thrown by the trimmer while it is in
operation.
WHAT CAN HAPPEN
• Thrown objects could cause injury to the operator or
bystanders.
HOW TO AVOID THE HAZARD
• Always wear safety goggles or other suitable eye
protection, long pants and shoes while operating
trimmer.
• Keep people and pets away from trimming area.
To reduce line wear or breakage, follow these trimming techniques.
• Inspect area to be trimmed for any wire, rope or string-like
matter which could become entangled in the rotating line. Pick
up any objects or debris that could be thrown by the trimmer.
• Trim only when grass and weeds are dry.
• Slowly move unit in and out of area being cut, maintaining
unit at desired cutting height. Use a forward-backward or
side-to-side motion (Fig. 9 & 10).
• Grass in excess of eight inches tall or small weeds should be
cut by cutting from the top to the bottom in small increments.
• DO NOT FORCE THE UNIT. Allow the very tip of the
nylon line to do the cutting (especially along walls).
• The tip of the cutting line will wear during use and reduce the
cutting swath. If the line is not advanced occasionally, it will
wear down to the eyelet. When the trimmer stops, the line
tends to relax and may retract into the cutter head. Should
this occur, remove spool, refeed the line through eyelet, and
reassemble spool to trimmer.
• After each use, feed out some line to prevent line from
retracting into cutting head.
• NEVER drag the trimmer spool on the ground while
trimming.
• Trimmer may be used as a decorative edger by rotating support
handle 180 (Fig. 11).
POTENTIAL HAZARD
• When using trimmer for decorative edging, objects
may be thrown in operator’s or bystander’s direction.
WHAT CAN HAPPEN
• Thrown objects could cause injury to the operator or
bystanders.
HOW TO AVOID THE HAZARD
• Always wear safety goggles or other suitable eye
protection, long pants and shoes while operating
trimmer.
• Keep people and pets away from trimming area.
Lengthening Cutting Line
1. To lengthen line, tap spool on the ground while the motor
continues to run (Fig. 12); do not hold it on the ground. The
cutting knife attached to the shield will cut the line to the
proper length.
Note: To help prevent line tangle, tap only once to lengthen line. If
additional line is required, wait a few seconds before retapping
trimmer head. Do not allow line to wear too short. Keep line length
at full cutting diameter as much as possible.
Replacing Cutting Line
For best performance, use only Toro spools. Prewound
replacement spools can be purchased from your local T oro retailer.
POTENTIAL HAZARD
• Use of line other than proper monofilament cutting
line could cause personal injury.
WHAT CAN HAPPEN
• Metal wire, r ope or other string-like substances could
cut through clothes, skin, etc. and cause personal
injury.
HOW TO AVOID THE HAZARD
• Do not use any type of metal wire, rope or other
string-like substance.
• Use only TORO .065” dia. nylon monofilament
cutting line, 30 feet maximum.
POTENTIAL HAZARD
• When trimmer is in operation, the cutting head is
rotating.
WHAT CAN HAPPEN
• Contact with rotating cutting head could cause
personal injury.
HOW TO AVOID THE HAZARD
• Always be sure cutting head has completely stopped
rotating and trimmer is unplugged before inverting
trimmer.
• Never activate trimmer when it is in an inverted
position.
1. Disconnect trimmer from power source.
2. To remove empty spool, invert trimmer, place hand over spool
and press in tabs on each side of cap (Fig. 13).
3. If there is any line on spool, hold free end of line with one
hand to prevent spool from unraveling and with other hand
grasp spool and lift off spool and cap together (Fig. 14).
Note: If spring falls off cutter head during this procedure, reinstall
spring before reinstalling spool and cap.
4. Thoroughly clean cutter head. Inspect for any damaged or
worn parts.
5. Unwind no more than three inches of line from new spool.
Hold line and spool to prevent unraveling.
3
Page 5

6. Place cap on spool.
7. Insert line into eyelet (Fig. 13) and hold line with one hand
while using your other hand to place spool and cap on spring.
Align cap tabs with slots in cutter head, press in tabs and push
down cap and spool to lock cap in place (Fig. 13).
Note: Spool may need to be rotated slightly to allow it to be fully
installed.
POTENTIAL HAZARD
• An improperly installed cap or spool could fly off
trimmer.
WHAT CAN HAPPEN
• Contact with a thrown spool or cap could cause injury
to operator or bystanders.
HOW TO AVOID THE HAZARD
• Be sure spool and cap are fully secured before
operating the unit. Replace spool if it is damaged or if
cap does not securely snap onto cutter head.
• Keep bystanders and pets away from trimming area.
8. If line should tangle or break at eyelet, unplug trimmer, remove
spool, refeed the line through eyelet, and reassemble spool to
trimmer.
9. The spool may wear during normal use of the line advance
feature and may require occasional replacement. Replacement
spools are available through your TORO retailer. See page 5
for accessories.
Rewinding Empty Spools
Replacement line can be purchased from your local Toro retailer.
1. Hook one end of line into slot on spool, allowing no more
than 1/8” to protrude. Push end of line all the way to the
inner end of slot. Wind line in direction of arrow on spool in
level rows between spool flanges (Fig. 15).
Trimmer will not function properly if:
line is wound in the wrong direction
end of line protrudes more than 1/8” at inner end of
slot
line is wound beyond outer edges of spool
Maintenance
POTENTIAL HAZARD
• There is the possibility that trimmer could be
inadvertently started when the extension cord is
plugged into an electrical socket.
WHAT CAN HAPPEN
• Inadvertent starting could cause personal injury to
operator or bystanders.
HOW TO AVOID THE HAZARD
• Always be sure your trimmer is unplugged and the
cutting head has stopped rotating before attempting
any maintenance or repairs.
• To keep the exterior clean, wipe it with a damp cloth. Never
hose unit down.
• Wipe or scrape clean the cutter head and spool area any time
there is an accumulation of dirt or cuttings.
• Check and tighten all fasteners. If any part is damaged or lost,
repair or replace it.
• Scrape debris away from air intake vents in both sides of motor
housing (Fig. 2).
IMPORTANT: Keeping air intake vents free of grass and
debris prevents motor overheating and possible failure.
IMPORTANT: To avoid damaging shield when storing
trimmer, rest trimmer on cutter head or motor housing or
hang trimmer from handle(s). DO NOT REST TRIMMER ON
GRASS SHIELD AS SHOWN (Fig. 16). THE GRASS
SHIELD MAY WARP AND INTERFERE WITH CUTTING
LINE.
• Any other servicing should be performed by an authorized
Toro Service Dealer.
4
Page 6
Accessories
Prewound
Spool
Model #88175 Part #73–8190 50’ of .065”
Empty Spool
Coil of
Cutting Line
Model #88003
Replacement
Spring and
Cap
Model #88026
Toro Service Support
If your unit requires service or maintenance, your nearest TORO
Master Service Dealer (U.S. only) is the best dealer to assist you.
Refer to the “Yellow Pages” of your local telephone directory in
the section titled “Lawn Mowers.” TORO Master Service Dealers
The Toro Promise
A Full Two Year Residential Use Warranty
For the United States, Canada and Mexico
The Toro Company warrants this TORO Product for two years against defects in material or workmanship. To receive a
replacement or repair, at Toro’s option, just return the complete unit, postage prepaid, to the seller. (U.S. customers ONLY
may return their unit, with proof of purchase, to any TORO Master Service Dealer or the TORO Service Center, 5300
Shoreline Blvd., Mound, MN 55364.) This warranty covers product defects only. It does not cover incidental or
consequential damages. Some states do not allow the exclusion or limitation of incidental or consequential
damages, so the above limitation may not apply to you. This warranty gives you specific rights, and you may have
other rights which vary from state to state. If all other remedies fail, you may contact us at The Toro Company , Customer
Service Department, 8111 Lyndale Ave S, Bloomington, MN, 55420-1196. (Do not return defective product to this
address.)
are listed under the TORO trademark. If you need help locating a
TORO Master Service Dealer near you, call 1-800-421-9684 (U.S.
only) for assistance.
COUNTRIES OTHER THAN THE UNITED STATES, CANADA OR MEXICO
Customers who have purchased TORO products exported from the United States, Canada or Mexico should contact their
TORO Distributor (Dealer) to obtain guarantee policies for your country, province or state. If for any reason you are
dissatisfied with your Distributor’s service or have difficulty obtaining guarantee information, contact the TORO importer.
5
Page 7

Français
Sécurité
AVERTISSEMENT : pour réduire les risques d’incendie, de
choc électrique ou de blessure, respecter les consignes de
sécurité ci-dessous.
Lire attentivement toutes les
instructions.
Il est essentiel que vous ou tout autre utilisateur de
l’aspirateur/souffleur lisiez et compreniez le contenu de ce
manuel avant d’utiliser l’appareil. Prêter une attention
particulière aux textes marqués du symbole de sécurité
indiquant les mises en garde telles que A TTENTION,
AVERTISSEMENT ou DANGER. TOUT MANQUEMENT À
SE CONFORMER À CES INSTRUCTIONS PEUT
ENTRAÎNER DES DOMMAGES CORPORELS, UN
RISQUE D’INCENDIE OU D’ÉLECTROCUTION.
• Eviter les situations dangereuses. Ne pas utiliser l’appareil dans
des endroits humides ou mouillés.
• Ne pas utiliser l’appareil sous la pluie.
• Tenir les enfants à distance. Ne laisser personne approcher de la
zone de travail.
• Porter des vêtements appropriés. Ne pas porter de vêtements
amples ou de bijoux risquant de s’accrocher dans les pièces en
mouvement. Le port de gants de caoutchouc et de bonnes
chaussures est conseillé pour le travail à l’extérieur. Nouer et
couvrir les cheveux longs pour qu’ils ne risquent pas d’être pris
dans l’appareil.
• Porter toujours des lunettes de sécurité. Toujours porter un
masque anti-poussière s’il y a beaucoup de poussière. Porter
des lunettes de protection, en vente chez la plupart des
détaillants.
• Utiliser l’appareil approprié. Ne jamais utiliser un appareil pour
effectuer un travail pour lequel il n’est pas conçu.
• Prévoir un coupe-circuit de mise à la terre accidentelle
(protection GFCI) dans les circuits ou les prises utilisés par
l’appareil de jardinage. Employer par exemple des prises à
protection GFCI intégrée, disponibles dans le commerce.
• ATTENTION: Pour éviter les risques d’électrocution, utiliser
exclusivement un prolongateur convenant pour l’utilisation à
l’extérieur, par exemple de type SW-A, SOW-A, STW-A,
STOW-A, SJW-A, SJOW-A, SJTW-A, ou SJTOW-A.
• Cordon prolongateur - S’assurer que le cordon est en bon état.
Utiliser un prolongateur d’une section suffisante pour le
courant absorbé par l’appareil, afin d’éviter la perte de
puissance et le risque de surchauffe dus à une baisse de tension
excessive dans le cordon. Le tableau des cordons prolongateurs
indique le calibre recommandé en fonction de la longueur du
cordon et de l’ampérage nominal spécifié sur la plaque
signalétique de l’appareil. En cas de doute, utiliser un cordon
plus gros. Plus le cordon est gros, plus le numéro de calibre
américain (A.W.G) correspondant est petit. Pour réduire le
risque d’arrachage du cordon durant le travail, utiliser le
système d’accrochage décrit dans ce manuel.
T ABLEAU DES CORDONS PROLONGATEURS
Si la longueur du prolongateur est
inférieure ou égale à:
S’assurer que le calibre (A.W.G.)
du cordon est de:
Remarque: L’usage d’un cordon prolongateur de plus de 46 m
(150 pi.) est déconseillé.
30,5 m
(100 pi.)
16 14
46 m
(150 pi.)
• Pour réduire les risques d’électrocution, cet appareil est équipé
d’une fiche polarisée (dont une broche est plus large que
l’autre) (Fig. 1), à utiliser avec un cordon prolongateur
polarisé. La fiche de l’appareil ne peut rentrer dans la fiche
femelle d’un prolongateur polarisé que dans un sens. Si elle ne
rentre pas dans un sens, essayer dans l’autre. Si elle ne rentre
pas non plus dans l’autre sens, se procurer un autre
prolongateur polarisé, de type approprié. Le prolongateur
polarisé doit être branché dans une prise de courant polarisée.
La fiche mâle du prolongateur polarisé ne peut s’enficher dans
une prise de courant polarisée que dans un sens. Si elle ne
rentre pas dans un sens, essayer dans l’autre. Si elle ne rentre
toujours pas, s’adresser à un électricien qualifié pour qu’il
place une prise de courant appropriée. La fiche de l’appareil et
les fiches du prolongateur ne peuvent en aucun cas être
modifiées.
• Eviter la mise en marche accidentelle - Ne pas garder le doigt
sur le commutateur lorsqu’on porte l’appareil branché. A vant
de brancher l’appareil, s’assurer que le commutateur est en
position d’arrêt (off).
• Ne pas maltraiter le cordon - Ne pas soulever l’appareil par le
cordon ou le débrancher en tirant sur le cordon. T enir le cordon
à l’abri des températures extrêmes, de l’huile et des angles vifs.
• Le pare–herbe doit toujours être en place et en bon état.
• Ne pas approcher les mains ou les pieds de la zone de coupe.
• Ne pas forcer l’appareil – L ’appareil fonctionne mieux et de
manière plus sûre dans les conditions pour lesquelles il est
construit.
• Ne pas tenter d’atteindre des endroits trop éloignés –T oujours
se tenir bien en équilibre.
• Rester vigilant – Faire attention à ce qu’on fait. User de bon
sens. Ne pas utiliser l’appareil lorsqu’on est fatigué.
• Débrancher l’appareil – Retirer la fiche de l’appareil de la prise
de courant dès qu’on n’utilise plus l’appareil, et avant tout
entretien.
• Ranger l’appareil à l’intérieur - Lorsqu’on n’utilise pas
l’appareil, le ranger à l’intérieur dans un endroit sec, fermé à
clé ou suffisamment haut pour être hors de portée des enfants.
• Entretenir soigneusement l’appareil - Suivre les instructions
lors du changement d’accessoires. Inspecter régulièrement
l’appareil et le faire réparer chez un concessionnaire T oro agréé
s’il est endommagé. Vérifier régulièrement l’état des cordons
prolongateurs, et les remplacer s’ils sont endommagés. Veiller à
ce que les poignées soient toujours propres et sèches, sans trace
d’huile ou de graisse. Le coupe-bordure ne nécessite pas de
lubrification.
• Contrôler les pièces endommagées – A vant d’utiliser à
nouveau l’appareil, inspecter soigneusement les protections ou
autres pièces endommagées pour s’assurer qu’elles sont en état
de fonctionner correctement et de remplir le rôle pour lequel
elles sont destinées. Contrôler le bon alignement des pièces
mobiles, l’absence de grippage, la présence éventuelle de
pièces cassées, l’état des fixations, et tout autre aspect
susceptible d’affecter le fonctionnement. Les pièces de garde et
autres ayant été endommagées doivent être correctement
réparées ou remplacées par un réparateur agréé, sauf indication
contraire dans le mode d’emploi.
• Lors des réparations, utiliser exclusivement des TORO pièces
de rechange d’origine.
CONSERVER CES INSTRUCTIONS.
6
Page 8

Décalcomanies de sécurité et instructions
Les décalcomanies de sécurité et instructions sont facilement visibles par l’opérateur et placées près des
pièces potentiellement dangereuses. Remplacer toute décalcomanie endommagée ou manquante.
SUR LE TUBE
(référence 98–7184)
Assemblage
Remarque: Au sortir du carton d’emballage, l’appareil peut être
partiellement ou entièrement assemblé. Il peut être équipé d’un
pare-herbe encliquetable, ou fixé par deux vis. L’appareil
entièrement assemblé devrait se présenter comme illustré à la
figure 2.
Montage de la poignée de maintien
2. Enfoncer la poignée de maintien sur le tube, côté lisse vers le
haut. Régler la position de la poignée à une hauteur
d’utilisation confortable, et fixer la poignée à l’aide d’un
boulon de carrossier et d’un écrou papillon (Fig. 3).
Montage du pare-herbe
DANGER POTENTIEL
• La lame de coupe sur le pare-herbe est tranchante.
QUELS SONT LES RISQUES?
• Le contact avec cette lame peut entraîner des
dommages corporels.
COMMENT SE PROTÉGER?
• Etre attentif lors de la manipulation du pare-herbe.
Eviter tout contact avec la lame de coupe.
1. Insérer le pare-herbe dans la longue rainure courbe du carter
moteur (Fig. 6). Retourner le coupe-bordure et fixer le
pare-herbe au carter moteur à l’aide des 2 vis fournies (Fig. 7).
Avant le démarrage
1. Vérifier le capuchon pour s’assurer qu’il est correctement
encliqueté en place. Si ce n’est pas le cas, aligner les ergots de
capuchon sur les fentes de la tête de coupe, enfoncer les ergots
et bloquer le capuchon et la bobine en position en appuyant
dessus (Fig. 13).
DANGER POTENTIEL
• Le capuchon peut se desserrer pendant le transport.
Desserrés ou mal installés le capuchon et la bobine
peuvent être projetés.
QUELS SONT LES RISQUES?
• Le capuchon ou la bobine projetés peuvent blesser
l’utilisateur ou des personnes se tenant à proximité.
COMMENT SE PROTÉGER?
• S’assurer que la bobine et le capuchon sont bien
assujettis avant d’utiliser l’appareil. Remplacer la
bobine si elle est endommagée ou si le capuchon ne
s’encliquette pas correctement sur la tête de coupe.
• V eiller à ce que les personnes et animaux domestiques
se tiennent à l’écart de la zone de travail.
Remarque: Pour la sécurité de l’utilisateur, le coupe-bordure doit
toujours être équipé de son pare-herbe.
Pare-herbe encliquetable
1. Ecarter les languettes de verrouillage et glisser le pare-herbe sur
le carter moteur (Fig. 4). Enfoncer les languettes dans les trous
jusqu’à ce qu’elles se mettent en place avec un déclic (Fig. 5).
Pare-herbe fixé par deux vis
Fixation du cordon prolongateur
Remarque: Utiliser exclusivement un cordon prolongateur
homologué UL (certifié ACNOR au Canada) et recommandé pour
l’usage extérieur. Se référer au tableau des cordons prolongateurs à
la page 6.
1. Bloquer le cordon prolongateur comme indiqué à la figure 8.
7
Page 9

Fonctionnement
DANGER POTENTIEL
• Des objets peuvent être projetés par le coupe-bordur e
pendant son utilisation.
QUELS SONT LES RISQUES?
• Les objets projetés peuvent entraîner des dommages
corporels à l’opérateur ou aux personnes se tenant à
proximité.
COMMENT SE PROTÉGER?
Porter toujours des lunettes de sécurité ou un
•
autre dispositif de protection oculaire
approprié, des pantalons longs et des
chaussures lors de l’utilisation du
coupe-bordure.
• Tenir les personnes et les animaux domestiques à
l’écart de la zone de travail.
DANGER POTENTIEL
• Lorsque le coupe-bordure est utilisé pour tailler de
façon décorative, des objets peuvent être projetés dans
la direction de l’opérateur.
QUELS SONT LES RISQUES?
• Les objets projetés peuvent entraîner des dommages
corporels à l’opérateur ou aux personnes se tenant à
proximité.
COMMENT SE PROTÉGER?
• Porter toujours des lunettes de sécurité ou un autre
dispositif de protection oculaire appr oprié, des
pantalons longs et des chaussures lors de l’utilisation
du coupe-bordure.
• Tenir les personnes et les animaux domestiques à
l’écart de la zone de travail.
Pour limiter l’usure et la rupture du fil, suivre les conseils
ci-dessous:
• Inspecter la surface à tailler pour y enlever toute sorte de
câblage, fil ou élément de ce genre qui pourraient s’enrouler
dans le fil en rotation. Ramasser tous les objets ou débris qui
pourraient être projeté par le coupe-bordure.
• Ne couper l’herbe ou les mauvaises herbes que lorsqu’elles
sont sèches.
• Déplacer l’appareil de long en large sur la surface à tailler, en
maintenant l’appareil à la hauteur désirée. Déplacer l’appareil
d’avant en arrière ou latéralement (Fig. 9 et 10).
• L’herbe qui dépasse 20 cm (8 po.) ou les mauvaises herbes de
petite taille doivent être taillées en travaillant de haut en bas en
petits incréments.
• NE PAS FORCER L’APPAREIL. Permettre à la pointe de
l’extrémité du fil de couper (particulièrement le long des murs).
• L’extrémité du fil de coupe va s’user pendant l’utilisation et
provoquer une réduction de la largeur de coupe. Si le fil n’est
pas avancé de temps à autre, il va s’user jusqu’à l’oeillet en
métal. Lors de l’arrêt du coupe-bordure, le fil aura tendance àse
relâcher et peut se rétracter dans la tête de coupe. Si cela se
produit, retirer la bobine, avancer le fil dans l’oeillet et
remonter la bobine dans le coupe-bordure.
• Après chaque utilisation, tirer sur le fil pour éviter qu’il ne se
rétracte dans la tête de coupe.
• Ne jamais traîner la bobine du coupe-bordure sur le sol
pendant la taille.
• Le coupe-bordure peut être utilisé pour tailler de façon
décorative en faisant pivoter le support de la poignée à 180
(Fig. 11).
Avancement du fil de coupe
1. Pour allonger le fil, frapper la bobine sur le sol pendant que le
moteur tourne (Fig. 12), sans la maintenir sur le sol. La lame
du pare-herbe coupera le fil à la longueur voulue.
Remarque: Pour éviter que le fil ne s’emmêle, ne taper qu’une
seule fois pour que le fil avance. Si du fil supplémentaire est requis,
attendre quelques secondes avant de retaper la tête du
coupe-bordure. Empêcher le fil de trop s’user. Dans la mesure du
possible, garder la longueur du fil égale à celle du plein diamètre de
coupe.
Remplacement du fil de
coupe
Pour un bon résultat, utilisez exclusivement des bobines Toro. Des
bobines de rechange avec fil préembobiné peuvent être achetées
chez votre revendeur local T oro.
DANGER POTENTIEL
• L’usage d’un fil de coupe autre que le fil monofilament
approprié peut être danger eux.
QUELS SONT LES RISQUES?
• Le fil métallique, la ficelle et les fils similaires peuvent
couper les vêtements, la peau etc. et occasionner des
blessures.
COMMENT SE PROTÉGER?
• Ne pas utiliser de fil métallique, de ficelle ou de fils
similaires.
• N’utiliser que le monofilament en nylon de 1,65 mm
(0,065 pouces) TORO, 9 mètres maximum (30 pieds).
8
Page 10

DANGER POTENTIEL
• Lorsque le coupe-bordure est en cours d’utilisation, la
tête de coupe est en rotation.
QUELS SONT LES RISQUES?
• Le contact avec la tête de coupe peut entraîner des
dommages corporels.
COMMENT SE PROTÉGER?
• S’assurer que la tête de coupe est à l’arrêt total et que
le coupe-bordure est débranché avant de retourner le
coupe-bordure.
• Ne jamais mettre le coupe-bordure en marche quand il
est retourné.
1. Débrancher le coupe-bordure.
2. Pour retirer la bobine vide, retourner le coupe-bordure, placer
la main sur la bobine et enfoncer les ergots de chaque côté du
capuchon (Fig. 13).
3. S’il y a encore du fil dans la bobine, en tenir l’extrémité avec
une main pour empêcher la bobine de se dérouler et, avec
l’autre main, tenir la bobine et soulever la bobine et le
capuchon en même temps (Fig. 14).
Remarque: Si le ressort tombe de la tête de coupe pendant cette
opération, le réinstaller avant de remettre la bobine et le capuchon.
4. Nettoyer complètement la tête de coupe et s’assurer qu’il
n’existe pas de pièces endommagées ou usées.
5. Ne pas dérouler plus de 8 cm (3 pouces) de fil de la nouvelle
bobine. T enir le fil et la bobine pour éviter tout déroulement.
6. Mettre le capuchon sur la bobine.
7. Insérer le fil dans l’oeillet de la tête de coupe (Fig. 13) et le
tenir d’une main tout en plaçant la bobine et le capuchon sur le
ressort. Aligner les ergots de capuchon sur les fentes de la tête
de coupe, enfoncer les ergots et bloquer le capuchon et la
bobine en position en appuyant dessus (Fig. 13).
Remarque: Il peut être nécessaire de faire pivoter la bobine
légèrement pour bien la loger.
9. La bobine peut s’user pendant une utilisation normale de
l’avancement de fil et peut demander de temps à autre à être
remplacée. Des bobines de rechange sont disponibles chez
votre revendeur TORO. Voir page 10 pour les accessoires.
Garnissage des bobines
vides
Du fil de rechange peut être acheté chez votre revendeur local Toro.
1. Attacher une extrémité du fil dans la fente de la bobine, ne
permettant pas plus de 3 mm (1/8 de pouce) de dépasser .
Pousser complètement l’extrémité du fil à l’intérieur de la
fente. Enrouler le fil dans la direction de la flèche sur la bobine
en couches égales entre les rebords de la bobine (Fig. 15).
Le coupe-bordure ne fonctionnera pas correctement si:
le fil est embobiné dans le mauvais sens;
l’extrémité du fil dépasse de plus 3 mm à l’intérieur de
la fente;
le fil enroulé dépasse des bords de la bobine.
Entretien
DANGER POTENTIEL
• Il est possible que le coupe-bordure démarre
accidentellement si le cordon prolongateur est
branché.
QUELS SONT LES RISQUES?
• Un démarrage accidentel peut entraîner des dommage
corporels à l’opérateur et aux personnes se tenant à
proximité.
COMMENT SE PROTÉGER?
• S’assurer toujours que le coupe-bordure est débranché
et que la tête de coupe est à l’arrêt total avant
d’essayer d’effectuer tout entretien ou toute
réparation.
DANGER POTENTIEL
• Un capuchon ou une bobine incorrectement installés
peuvent être projetés hors du coupe-bordure.
QUELS SONT LES RISQUES?
• Le capuchon ou la bobine projetés peuvent blesser
l’utilisateur ou des personnes se tenant à proximité.
COMMENT SE PROTÉGER?
• S’assurer que la bobine et le capuchon sont bien
assujettis avant d’utiliser l’appareil. Remplacer la
bobine si elle est endommagée ou si le capuchon ne
s’encliquette pas dans la tête de coupe.
• V eiller à ce que les personnes et animaux domestiques
se tiennent à l’écart de la zone de travail.
8. Si le fil devait s’enchevêtrer ou casser à l’oeillet, débrancher le
coupe-bordure, enlever la bobine, repasser le fil à travers
l’oeillet et remettre la bobine sur le coupe-bordure.
• Pour maintenir l’extérieur dans un état de propreté, l’essuyer
avec un chiffon humide. Ne jamais arroser l’unité.
• Nettoyer ou racler la zone de la tête de coupe et la bobine
chaque fois qu’il y a une accumulation de saletés et des débris.
• Vérifier et resserrer tous les dispositifs de fixation. Si l’une des
pièces est endommagée ou égarée, la réparer ou la remplacer.
• Dégager les débris des trous d’admission d’air de chaque côté
du carter moteur (Fig. 2).
IMPORTANT: Le dégagement des trous d’admission d’air de
l’herbe ou des débris permet au moteur de ne pas surchauffer
et de ne pas tomber en panne.
IMPORTANT: Pour éviter d’endommager le pare-herbe lors
du remisage du coupe-bordure, poser le coupe-bordur e sur la
tête de coupe ou le carter moteur ou le pendre par sa(ses)
poignée(s). NE PAS LAISSER LE COUPE-BORDURE
REPOSER SUR LE PARE-HERBE COMME ILLUSTRÉ
(Fig. 16). LE PARE-HERBE PEUT SE VOILER OU
INTERFÉRER AVEC LE FIL DE COUPE.
• Tout autre service d’entretien ne peut être effectué que par un
concessionnaire réparateur T oro.
9
Page 11

Accessoires
Bobine
préembobinée
Modèle #88175 Référence
Bobine vide
#73–8190
Rouleau de fil
de coupe
15 mètres,
1,65 mm
Modèle #88003
Capuchon et
ressort de
rechange
Modèle #88026
Service après-vente Toro
Pour toute réparation ou maintenance, le plus proche revendeur
TORO Master Service sera (aux Etats–Unis seulement) le meilleur
conseiller. Consulter les pages jaunes de l’annuaire local, à la
section “T ondeuses à gazon”. La liste des noms des revendeurs
La promesse Toro
Garantie totale de deux ans pour usage résidentiel
aux Etats–Unis, au Canada et au Mexique
La société Toro garantit ce produit TORO contre tout défaut de fabrication pour une période de deux ans. Pour obtenir le
remplacement ou la réparation, à l’option de Toro, il suffit de retourner l’appareil complet, en port payé, au revendeur (les
clients des Etats-Unis seulement peuvent retourner leur appareil à tout Concessionnaire TORO Master Service ou au
centre de réparations TORO, 5300 Shoreline Blvd., Mound, MN 55364). Cette garantie couvre uniquement les défauts du
produit. Elle ne couvre pas les dommages directs ou indirects. Certains états et provinces ne permettant pas
l’exclusion ou la limitation des dommages directs ou indirects, les limitations mentionnées plus haut peuvent ne
pas s’appliquer à votre cas. Cette garantie vous donne des droits spécifiques. Vous pouvez également bénéficier
d’autres droits qui varient selon les états et provinces. Si toutes vos tentatives de recours échouent, vous pouvez nous
contacter à : The Toro Company, Customer Service Department, 8111 Lyndale Ave S, Bloomington, MN, 55420–1195 (ne
retournez pas les produits défectueux à cette adresse).
TORO Master Service se trouve sous le nom de marque TORO. Si
vous rencontrez des difficultés dans la recherche d’un revendeur
TORO Master Service proche de chez vous, appelez le
1–800–421–9684 (aux Etats-Unis seulement).
PAYS AUTRES QUE LES Etats-Unis, LE CANADA ET LE MEXIQUE
Les consommateurs ayant acheté des produits Toro exportés des Etats-Unis, du Canada ou du Mexique devront se
mettre en rapport avec leur distributeur (concessionnaire) Toro afin d’obtenir les polices de garantie pour leur pays,
province ou état. Si, pour une raison quelconque, vous n’étiez pas satisfait du service de votre distributeur ou aviez des
difficultés à obtenir des informations sur la garantie, contactez l’importateur TORO.
10
Page 12

Español
Advertencia
ADVERTENCIA - Para reducir el riesgo de incendio, descarga
eléctrica o lesiones, respete estas instrucciones de seguridad.
Lea todas las instrucciones
Es esencial que usted y todos los demás operadores del aparato
lean y comprendan el contenido de este manual antes de
utilizar el aparato. Preste atención especial al símbolo de alerta
de seguridad que significa PRECAUCIÓN,
ADVERTENCIA O PELIGRO— “instrucción para la
seguridad personal”. EL HECHO DE NO OBEDECER LA
INSTRUCCIÓN PUEDE RESULTAR EN LESIÓN
CORPORAL, RIESGO DE INCENDIO O DESCARGA
ELÉCTRICA.
• Evitar los ambientes peligrosos–No utilizar los aparatos en
lugares húmedos o mojados.
• No utilizar cuando llueve.
• Mantener alejados a los niños–T odos los espectadores deben
mantenerse a una distancia prudencial de la zona de trabajo.
• Vestirse adecuadamente–No usar joyas o ropas sueltas, ya que
podrían quedar atrapadas en las piezas móviles. Cuando se
trabaja en el exterior, se recomienda utilizar guantes de goma y
calzado resistente. Utilizar un gorro que recoja el cabello largo.
• Usar siempre gafas de seguridad. Utilizar siempre máscaras
faciales o antipolvo si se trabaja en condiciones polvorientas.
Las gafas de seguridad pueden adquirirse en numerosos locales
comerciales.
• Usar el aparato correcto—No use el aparato para una labor que
no sea aquella para la cual se diseñó.
• El circuito(s) o el enchufe(s) que vaya a ser utilizado con el
aparato de jardinería debe estar equipado con un interruptor de
circuito con toma a tierra (Ground Fault Circuit Interrupter)
(GFCI). Existen disponibles receptáculos con la protección
GFCI incorporada, y deben ser utilizados para respetar esta
medida de seguridad.
• ADVERTENCIA: Para evitar las descargas eléctricas, utilizar
únicamente con un cable de extensión adecuado para ser
utilizado al aire libre, tal como SW-A, SOW-A, STW-A,
STOW -A, SJW-A, SJOW-A, SJTW-A, o SJTOW-A..
• Cable de extensión–Cerciórarse de que su cable de extensión
esté en buenas condiciones. Cuando se utilice un cable de
extensión, asegurarse de que sea lo suficientemente grueso
como para transportar la corriente que requiere su aparato. Un
cable de extensión de menor tamaño causará caídas de tensión
que producirán pérdidas de potencia y sobrecalentamiento. El
cuadro de Cables de Extensión muestra el calibre correcto
dependiendo de la longitud del cable y del amperaje. Si se tiene
alguna duda, utiliár un calibre mayor. Cuanto menor sea el
número del calibre, más grueso será el cable. Para reducir el
riesgo de que el aparato se desconecte del cable de extensión
durante el funcionamiento, utilizar el bloqueo para cables
descrito en este manual.
CUADRO DE CABLES DE EXTENSIÓN
Si la longitud del cable de
extensión es como mínimo:
Cerciórese de que el calibre del
alambre (A.W.G.) sea:
30,5 m
(100
pies)
16 14
46 m
(150
pies)
Nota: no se recomienda el uso de un cable de extensión de más de
46 m (150 pies).
• Para reducir el riesgo de descargas eléctricas, este aparato está
equipado con un enchufe polarizado (una patilla es más ancha
que la otra) (Fig. 1) y requiere el uso de un cable de extensión
polarizado. El enchufe del aparato encajará en el cable de
extensión polarizado sólo de una forma. Si el enchufe no
encaja completamente en el cable de extensión, invierta el
enchufe. Si todavía no encaja, obtenga un cable de extensión
polarizado adecuado. Un cable de extensión polarizado
requiere el uso de una toma de corriente mural polarizada. Este
enchufe encajará en la toma de corriente mural polarizada sólo
de una forma. Si el enchufe no encaja completamente en la
toma de corriente mural, invierta el enchufe. Si todavía no
encaja, póngase en contacto con un electricista profesional para
que instale una toma de corriente mural adecuada. No altere de
ninguna forma el receptáculo del cable de extensión del
enchufe del aparato, o el enchufe del cable de extensión.
• Evite los arranques accidentales–No transporte un aparato
enchufado con el dedo en el interruptor. Al enchufarlo,
cerciórese de que el interruptor esté apagado.
• No tire del cable–No transporte nunca el aparato tirando del
cable ni tire de éste para desenchufarlo del zócalo. Mantenga el
cable alejado del calor, el aceite y los bordes afilados.
• Mantenga el guardahierbas colocado y en perfecto estado de
funcionamiento.
• Mantenga las manos y los pies fuera de la zona de corte.
• No fuerce el aparato–El aparato funcionará mejor y será menos
probable que se sufran lesiones si lo hace funcionar a la
velocidad para la que fue diseñado.
• No se sobreextienda—Mantenga el equilibrio debido en todo
momento.
• Manténgase alerta – Preste atención a lo que está haciendo.
Utilice el sentido común. No trabaje con la cortadora cuando
esté cansado.
• Desconecte el aparato–Desconecte el aparato de la fuente de
energía cuando no lo esté utilizando o antes de efectuar
operaciones de servicio.
• Guarde en el interior los aparatos que no estén siendo
utilizados–Cuando no los utilice, los aparatos deben guardarse
en lugares secos, elevados o cerrados con llave - fuera del
alcance de los niños.
• Mantenga cuidadosamente el aparato –Para cambiar los
accesorios, siga las instrucciones pertinentes. Inspeccione
periódicamente el aparato y, si detecta algún daño, solicite su
reparación al Concesionario de Servicio Toro Autorizado.
Inspeccione periódicamente los cables de extensión y
reemplácelos si estuvieran dañados. Mantenga los manillares
secos, limpios y sin grasa ni aceite. La recortadora no necesita
lubrificante.
• Revise las piezas dañadas – Antes de usar el aparato, revise
cuidadosamente las guardas y protecciones dañadas para
determinar si están en condiciones de operar correctamente y
cumplir la función para la que fueron diseñadas. Compruebe la
alineación y las uniones entre las piezas móviles, las piezas que
puedan romperse, el montaje y cualquier otro estado que
pudiera afectar a su funcionamiento. Una guarda u otra pieza
que esté dañada debería ser reparada o reemplazada en un
centro de servicio autorizado, a menos que el manual indique
otras instrucciones.
• Al prestar servicio, utilice únicamente repuestos originales
TORO.
GUARDE ESTAS INSTRUCCIONES
11
Page 13

Calcomanías de seguridad e instrucción
Las calcomanías de seguridad e instrucción están colocadas a plena vista del operador y se encuentran
cerca de todo lugar donde haya un peligro potencial. Reponga toda calcomanía que se haya estropeado o
perdido.
SOBRE EL TUBO
(Pieza N. 98–7184)
Montaje
Nota: Al retirarla del embalaje, su unidad puede estar parcial o
totalmente montada. La unidad puede tener un guardahierbas que
encaje en la misma o que se instale mediante dos tornillos. Cuando
esté totalmente montada, la recortadora debe presentar el aspecto
mostrado en la Figura 2.
Sujete el manillar de apoyo
2. Empuje el manillar de apoyo sobre el tubo, con el lado liso
dirigido hacia el manillar superior. Coloque el manillar de
apoyo a una altura cómoda y sujételo con un perno y una
tuerca de orejetas (Fig. 3).
Fije el guardahierbas
PELIGRO POTENCIAL
• La cuchilla cortadora del guardahierbas está afilada.
LO QUE PUEDE SUCEDER
• El contacto con la cuchilla cortadora podría causar
lesiones corporales.
COMO EVITAR EL PELIGRO
• T enga cuidado al manejar el guardahierbas. Evite el
contacto con la cuchilla cortadora.
Nota: El guardahierbas debe estar siempre colocado en la
recortadora para proteger al operario.
Para el guardahierbas que encaja en el aparato
1. Separe las lengüetas de bloqueo mientras desliza el
guardahierbas sobre el alojamiento del motor (Fig. 4).
Introduzca las lengüetas de bloqueo en los orificios hasta que
note que encajan en su sitio (Fig. 5).
Para el guardahierbas que se fija con dos tornillos
1. Coloque el guardahierbas en la ranura larga y curvada del
alojamiento del motor (Fig. 6). Invierta la recortadora y sujete
el guaradahierbas al alojamiento del motor mediante los (2)
tornillos suministrados (Fig. 7).
Antes de comenzar
1. Revise la tapa para asegurarse de que esté bien trabada en su
sitio. Si no está, alinee las lengüetas de la tapa con las ranuras
del cabezal cortador, oprima las lengüetas y empuje la tapa y la
bobina hacia abajo para que la tapa se trabe en su sitio
(Fig. 13).
PELIGRO POTENCIAL
• La tapa se puede aflojar durante el envío. Una tapa o
bobina floja o mal instalada podría soltarse de la
recortadora.
LO QUE PUEDE SUCEDER
• l contacto con una tapa o bobina lanzada podría
causar lesiones al operador o a las personas que estén
cerca.
COMO EVITAR EL PELIGRO
• Asegúrese de que la bobina y la tapa estén
perfectamente afianzadas antes de operar la unidad.
Cambie la bobina si está dañada o si la tapa no se
traba bien sobre el cabezal de la recortadora.
• Mantenga a las personas y a los animales domésticos
alejados de la zona de recorte.
Para Fijar El Cable De Extensión
Nota: Use solamente un cable de extensión listado por UL
(certificado por CSA en Canadá) y recomendado para el uso al aire
libre. Consulte la T abla de Cables de Extensión en la página 11.
1. Fije el cable de extensión en la traba del cable como se muestra
en la Figura 8.
12
Page 14

Operación
PELIGRO POTENCIAL
• Cuando la recortadora se usa para recortes
decorativos, se pueden disparar objetos hacia el
operador o las personas que estén cerca.
LO QUE PUEDE SUCEDER
• Los objetos lanzados podrían lesionar al operador o a
las personas que estén cerca.
COMO EVITAR EL PELIGRO
• Al operar la recortadora, utilice siempre gafas de
seguridad o demás protección ocular idónea,
pantalones largos y zapatos.
• Mantenga lejos de la zona de corte a las personas y
animales domésticos.
PELIGRO POTENCIAL
• La recortadora puede lanzarr objetos mientras está
funcionando.
LO QUE PUEDE SUCEDER
• Los objetos lanzados podrían lesionar al operador o a
las personas que estén cerca.
COMO EVITAR EL PELIGRO
• Al operar la recortadora, utilice siempre gafas de
seguridad o demás protección ocular idónea,
pantalones largos y zapatos.
• Mantenga lejos de la zona de corte a las personas y
animales domésticos.
Para reducir el desgaste o la ruptura de la línea, siga las siguientes
instrucciones.
• Inspeccione la zona donde va a cortar por si hay algún alambre,
cable o cuerda que se pueda enredar en la línea rotatoria.
Recoja todos los objetos o escombros que pudieran ser
disparados por la recortadora.
• Corte solamente cuando la hierba y las malas hierbas estén
secas.
• Mueva la unidad lentamente hacia adentro y afuera del lugar
que se corta, manteniendo la unidad a la altura de corte
deseada. Se hace con un movimiento adelante hacia atrás o de
lado a lado (Figs. 9 y 10).
• La hierba de más de 20 cm (ocho pulgadas) y las malas hierbas
pequeñas se deben cortar desde arriba hacia abajo, poco a poco.
• NO FUERCE LA UNIDAD. Deje que sea la punta de la línea
de nylon la que realice el corte (especialmente a lo largo de
muros)
• La punta de línea de corte de desgastará con el uso y causará
una reducción en el corte. Si no se avanza la línea
ocasionalmente, se desgastará hasta el ojal. Cuando la
recortadora se detenga, la línea tenderá a relajarse y podría
retraerse dentro del cabezal cortador. Si esto sucede, retire la
bobina, vuelva a enhebrar la línea por el ojal metálico y vuelva
a colocar la bobina en la recortadora.
• Después de cada uso, saque parte de la línea para impedir que
ésta se retraiga dentro del cabezal cortador.
• Al cortar, nunca arrastre la bobina de la recortadora sobre
el suelo.
• La recortadora puede usarse como recortador decorativo
girando 180 el manillar de apoyo (Fig. 11).
Para Alargar La Línea De
Corte
1. Para alargar la línea, golpee ligeramente la bobina contra el
suelo mientras el motor está funcionando (Fig. 12); no la
mantenga en el suelo. La cuchilla colocada en el guardahierba
cortará la línea a la longitud adecuada.
Nota: para impedir que la línea se enrede, dé solamente un
golpecito para alargar la línea. Si se precisa de línea adicional,
espere unos segundos antes de volver a dar un golpecito al cabezal
de la recortadora. No deje que la línea se desgaste de modo que
quede demasiado corta. En cuanto sea posible, mantenga la
longitud de la línea a pleno diámetro de corte.
Para Reemplazar La Línea
De Corte
Para obtener los mejores resultados, utilice únicamente bobinas
Toro. Puede comprar bobinas de repuesto rebobinadas en su
detallista T oro.
PELIGRO POTENCIAL
• El uso de una línea que no sea la línea de corte de
monofilamento apropiada podría causar lesiones
personales.
LO QUE PUEDE SUCEDER
• Los alambres, cuerdas u otros objetos similar es
podrían cortar la ropa, la piel, etc., y causar lesiones
personales.
COMO EVITAR EL PELIGRO
• No use ningún tipo de alambre, cuerda u otro objeto
similar.Use solamente la línea de corte de
monofilamento de nylon de TORO de 1,65 mm
(0,065 pulg.) de diámetro, con un máximo de 9 metros
(30 pies).
13
Page 15

PELIGRO POTENCIAL
• Cuando la recortadora está funcionando, el cabezal
cortador está rotando.
LO QUE PUEDE SUCEDER
• El contacto con el cabezal cortador cuando rota
podría causar lesiones corporales.
COMO EVITAR EL PELIGRO
• Antes de poner la recortadora en posición invertida,
asegúrese siempre de que el cabezal cortador se haya
detenido completamente y que la recortadora esté
desenchufada.
• Nunca haga funcionar la recortadora cuando esté en
posición invertida.
1. Desenchufe la recortadora de la fuente de alimentación.
2. Para retirar la bobina vacía, coloque la recortadora en posición
invertida, ponga la mano sobre la bobina y oprima sobre las
lengüetas a ambos lados de la tapa (Fig. 13).
3. Si queda línea en la bobina, sujete con una mano la punta libre
de la línea para impedir que se deshaga el embobinado y, con la
otra mano, sujete la bobina y sáquela junto con la tapa
(Fig. 14).
Nota: Si durante este procedimiento se cae el resorte del cabezal
cortador, vuelva a instalar el resorte antes de volver a instalar la
bobina y la tapa.
4. No olvide limpiar completamente el cabezal cortador. Realice
una inspección por si hay piezas dañadas o desgastadas.
5. Desenrolle un máximo de 8 cm (3 pulgadas) de línea de la
bobina nueva. Sujete la línea y la bobina para que no se
deshaga el embobinado.
6. Coloque la tapa sobre la bobina.
7. Pase la línea por el ojal del cabezal cortador (Fig. 13) y sujete
la línea con una mano mientras que coloca la bobina y la tapa
sobre el resorte. Alinee las lengüetas de la tapa con las ranuras
del cabezal cortador, oprima las lengüetas y empuje la tapa y la
bobina hacia abajo para que la tapa se trabe en su sitio
(Fig. 13).
Nota: Es posible que haya que girar la bobina ligeramente para que
quede completamente instalada.
8. Si la línea se enreda o se rompe en el ojal, desenchufe la
recortadora, retire la bobina, vuelva a enhebrar la línea por el
ojal y vuelva a instalar la bobina en la recortadora.
9. Es posible que la bobina se desgaste con el uso normal del
avance de línea y podría precisarse del reemplazo ocasional.
Puede obtener bobinas de repuesto en su detallista de TORO.
Vea los accesorios en la página 15.
Rebobinado De Bobinas
Vacías
Puede comprar línea de repuesto al detallista de Toro de su
localidad.
1. Engarce una punta de la línea dentro de la muesca de la bobina,
dejando que salga un máximo de 3 mm (1/8 de pulg.).
Empuje la punta de línea completamente dentro de la
punta de la muesca. Enrolle la línea en el sentido de la flecha
de la bobina en hileras iguales entre los bordes de la bobina
(Fig. 15).
La recortadora no funcionará bien si:
la línea se enrolla en el sentido contrario
la punta de la línea sale más de 3 mm (1/8 de pulg.) del
extremo interior de la muesca.
la línea se enrolla fuera de los bordes de la bobina
Mantenimiento
PELIGRO POTENCIAL
• Existe la posibilidad de que la recortadora pueda
arrancar accidentalmente cuando el cable de extensión
esté enchufado en un tomacorrientes.
LO QUE PUEDE SUCEDER
• El arranque accidental podría causar lesiones
corporales al operador o a las personas que estén
cerca.
COMO EVITAR EL PELIGRO
• Cerciórese siempre de que la recortadora esté
desenchufada y que el cabezal cortador haya dejado
de rotar antes de intentar efectuar el mantenimiento o
reparaciones.
PELIGRO POTENCIAL
• Una tapa o bobina mal instalada podría salir
disparada de la recortadora.
LO QUE PUEDE SUCEDER
• El contacto con una tapa o bobina lanzada podría
causar lesiones al operador o a las personas que estén
cerca.
COMO EVITAR EL PELIGRO
• Asegúrese de que la bobina y la tapa estén
completamente afianzadas antes de operar la unidad.
• Mantenga a las personas y a los animales domésticos
alejados de la zona de recorte.
• Para mantener limpio el exterior, límpielo con un paño
húmedo. Nunca lo lave con un chorro de agua.
• Limpie o raspe el cabezal cortador y la parte de la bobina
siempre que haya acumulación de mugre o recortes.
• Revise y apriete todos los sujetadores. Si alguna pieza está
dañada o se ha perdido, repárela o cámbiela.
• Raspe los escombros que haya cerca de las tomas de aire a
ambos lados de la caja del motor (Fig. 2).
IMPORTANTE: al mantener las tomas de aire sin hierbas y
escombros se impide que el motor se recaliente y pueda
producirse un fallo.
14
Page 16

IMPORTANTE: para evitar daños al guardahierbas cuando
almacene la recortadora, repose la r ecortadora sobre el cabezal
cortador o la caja del motor o cuelgue la recortadora del(los)
manillar(es). NO REPOSE LA RECORTADORA SOBRE EL
Accesorios
GUARDAHIERBAS COMO SE MUESTRA (Fig. 16). EL
GUARDAHIERBAS PODRÍA COMBARSE E INTERFERIR
CON LA LÍNEA DE CORTE.
• Las demás operaciones de servicio deben ser efectuadas por un
Concesionario de Servicio Toro Autorizado.
Bobina
embobinada
Modelo N.
88175
Bobina
vacía
Pieza N.
73–8190
Carrete de línea de
corte
15 m. de 1,65 mm
Modelo N. 88003
Muelle y tapa
de repuesto
Modelo N.
88026
Asistencia de servicio de Toro
Si su unidad requiere servicio o mantenimiento, el mejor
concesionario para prestar este servicio sería el Concesionario de
TORO Master Service más cercano (sólo en EE.UU.). Busque en
las “Páginas Amarillas” de su directorio telefónico local bajo la
sección titulada “Lawn Mowers” (Cortadoras de Hierba). Los
La promesa de Toro
Garantía total de dos años para uso residencial
Para Estados Unidos, Canadá y México
Toro Company garantiza este producto por dos años contra defectos en material o mano de obra. Para obtener un
reemplazo o la reparación, a opción de Toro, devuelva toda la unidad al vendedor, con correo pagado por anticipado.
(SOLAMENTE los clientes en EE.UU. pueden devolver su unidad, con el comprobante de compra, a cualquier
Concesionario de Servicio Maestro de TORO o a: TORO Service Center, 5300 Shoreline Blvd., Mound, MN 55364). Esta
garantía cubre solamente los defectos del producto. No cubre daños incidentales ni consecuentes. Algunos estados
no permiten la exclusión o limitación de daños incidentales o consecuentes y por ello es posible que la
limitación precedente no le corresponda a usted. Esta garantía le da derechos específicos y es posible que usted
tenga otros derechos que varían de un estado a otro. Si fallan todos los demás recursos, comuníquese con nosotros a:
The Toro Company, Customer Service Department, 8111 Lyndale Ave S, Bloomington, MN 55420–1196. (No envíe a esta
dirección el producto defectuoso).
Concesionarios de TORO Master Service están listados bajo la
marca registrada TORO. Si necesita ayuda para localizar el
Concesionario de TORO Master Service más cercano, llame al
1–800–421–9684 (sólo en EE.UU.).
PAÍSES DISTINTOS A ESTADOS UNIDOS, CANADÁ Y MÉXICO
Los clientes que compraron productos de TORO exportados de Estados Unidos, Canadá o México deben comunicarse
con su Distribuidor (Concesionario) de TORO para pedir información acerca de la política sobre garantía para su país,
provincia, estado o departamento. Si por cualquier motivo no queda satisfecho con el servicio del Distribuidor o tienen
dificultad en obtener la información acerca de la garantía, comuníquese con el importador de TORO.
15
Page 17

Figures–Figuras
1
English
1. Enlarged blade
Français
1. Pointe large
Español
1. Pata alargada
2
English
1. Model/serial
number decal
location
Français
1. Décalcomanie
de numéros de
modèle et de
série
Español
1. Calcomanía con
los números de
modelo y serie
1103
1094
2. Air intake vents
2. Trous
d’admission
d’air
2. T omas de aire
3
English
1. Smooth side
Français
1. Côté lisse de la poignée de soutien
Español
1. Lado liso de la manija de soporte
4
English
1. Grass shield 2. Locking tabs
Français
1. Pare–herbe 2. Languettes de
Español
1. Guardahierbas 2. Lengüetas de
m-3694
verrouillage
bloqueo
5
1096
6
1099
English
1. Grass shield 2. Long , curved
slot
Français
1. Pare–herbe 2. Longue fente
courbée
Español
1. Guardahierbas 2. Muesca larga
curvada
16
Page 18

7
9
12
1105
English
1. Self-tapping screw (2)
Français
1. Vis autotaraudeuse (2)
Español
1. T ornillo autoenroscante (2)
8
English
1. Cord lock
Français
1. Blocage du cordon
1100
1104
10
11
1106
13
English
1. Cap
2. Spool
Français
1. Capuchon
2. Bobine
Español
1. Tapa
2. Bobina
1110
1111
3. Tabs on cap
4. Metal eyelet
3. Ergots sur le
capuchon
4. Oeillet de métal
3. Lengüetas de la
tapa
4. Ojal metálico
Español
1. Traba del cable
1109
17
Page 19

14
English
1. Cap & spool 2. Spring
Français
1. Capuchon et
bobine
Español
1. 2.
2. Ressort
15
1119
English
1. 1/8 inch
maximum
Français
1. 3 mm maximum 2. Embobiner le fil
Español
1. Máximo de 3
mm
2. Wind line
2. Enrosque la
linea
1113
16
1116
18
Page 20

 Loading...