

Page 1
CE Kit
Dingo TX Compact Utility Loader
Model No. 22362
Installation Instructions
Loose Parts
Note: Use the chart below to identify parts for assembly.
Description Qty. Use
Form No. 3327–723
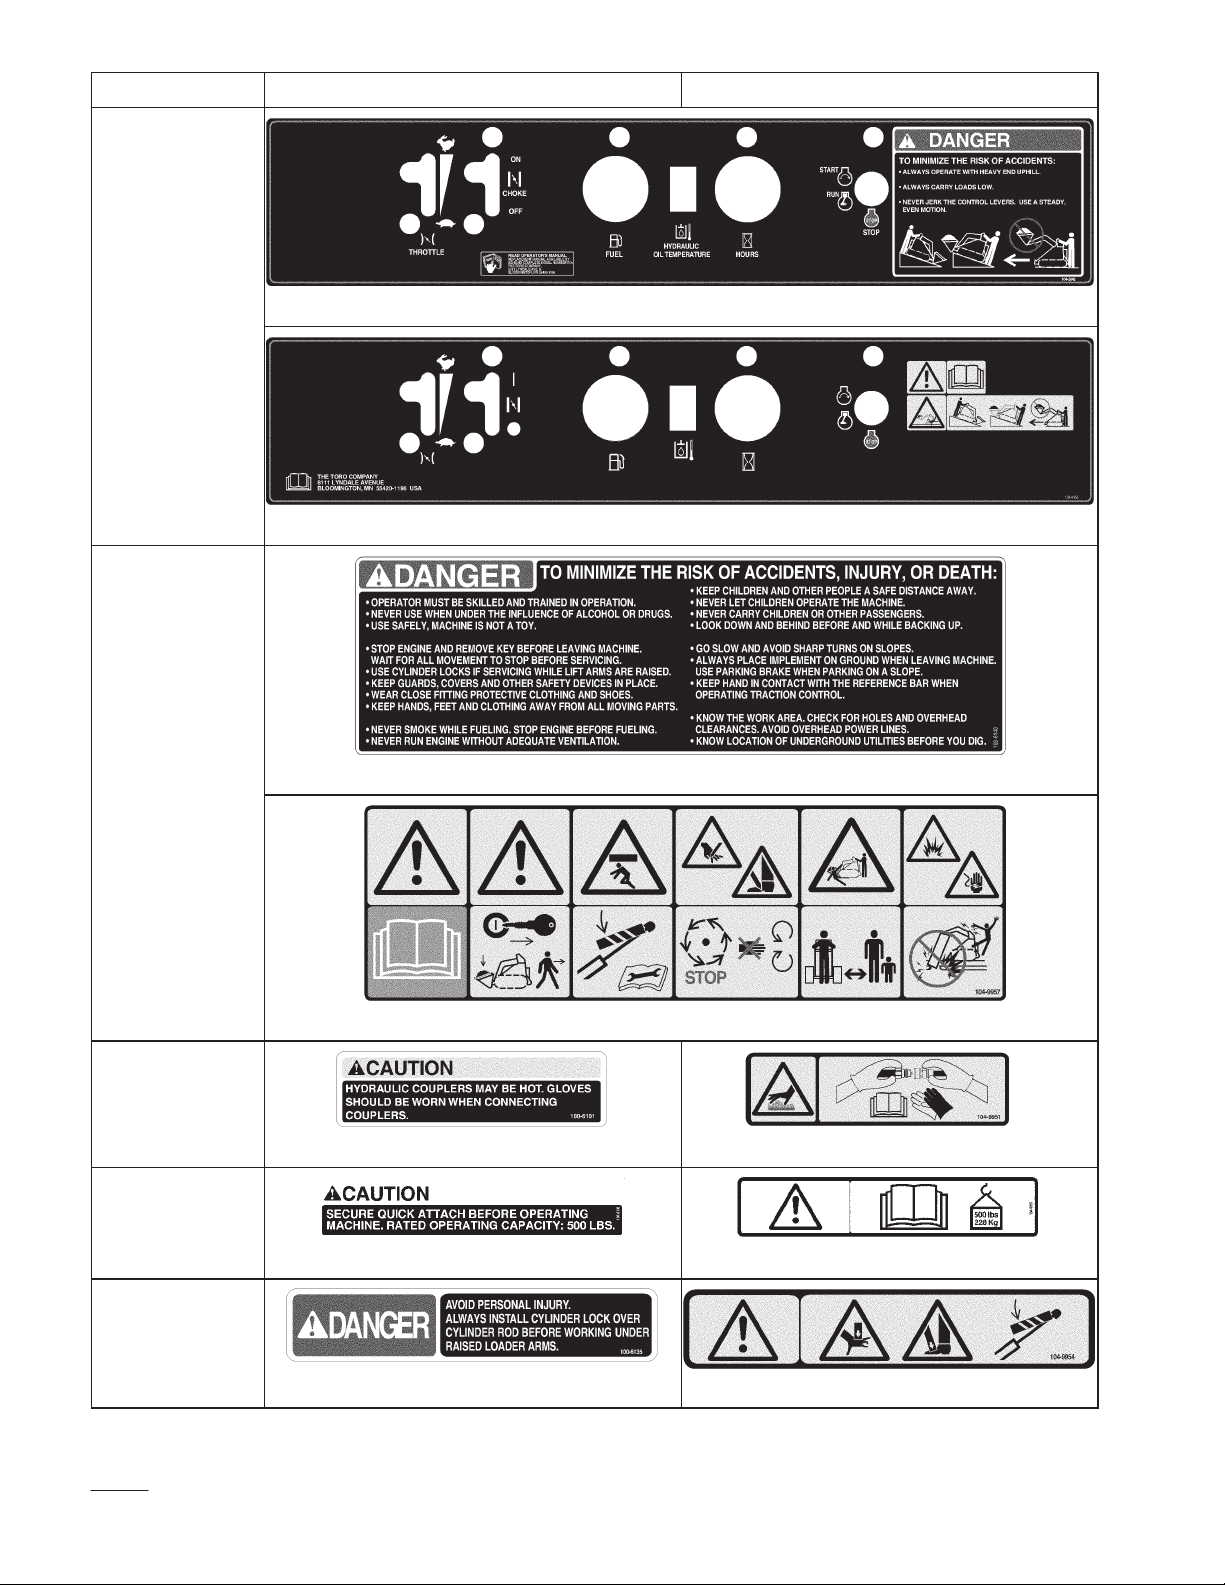
Traction decal, 104-9952
Danger decal, 104-9957
Auxiliary decal, 104-9955
Control panel decal, 104-9956
Danger decal, 93-7814
Pinch decal, 100-8821
No rider decal, 100-8822
Caution decal, 104-9950
Caution decal, 104-9951
Danger decal, 104-9954
LWA decal,105–7895
CE information decal, 22306, 104-9981
CE information decal, 22307, 104-9984
Brake decal, 104-9958
Interlock decal, 104-9977
Loader decal, 104-9953
Fuel cap 1 Replacing the fuel cap
Hot surface plate, 104-9983
Pop rivet
1
1
1
1
1
6
1
1
1
1
1
1
1
1
1
1
1
2
Installing the CE decals
Replacing the hot surface plate
Hood latch cover
Carriage bolt
Locknut
Operator’s Manual
Installing the Decals
Install the CE decals over the English decals on the
traction unit as shown in the tables on the following
pages.
Install each decal as follows:
1. Thoroughly clean the area where you will install the
decal.
2003 by The Toro Company
8111 Lyndale Avenue South
Bloomington, MN 55420-1196
1
2
2
1 Replace the
Installing the hood latch cover
Operator’s Manual
2. Dampen the area with water or mildly soapy water.
3. Peel the decal from the backing and install it in place.
4. Squeegee across the surface of the decal, starting at the
center of the decal and working toward the edges using
overlapping strokes.
All Rights Reserved
Printed in the USA
Page 2
Location US English CE
y
On rear safety
loader arms
On console
On rear safet
plate
100-2842 (US English)
104-9956 (CE)
100-6140 (US English)
On the loader
Between the
loader arms
On the cylinder
2
104-9957 (CE)
arm
100-6101 104-9951
100-6132 104-9950
lock
100-6135 104-9954
Page 3

Location CEUS English
on the frame
decal under the
On the console
100-6136 104-9955
On console
100-6138 104-9952
Under the hood
on the frame
80-8040 93-7814
On console
On console
On console
Model 22306
only: place to the
right of the serial
decal under the
hood.
104-2837 104-9953
104-2838 104-9958
104-2844 104-9977
No equivalent 104-9981
3
Page 4

Location CEUS English
decal under the
Model 22307
only: place to the
right of the serial
decal under the
hood.
Place on the
outside right
frame, under the
pivot pin of the
loader arm.
No equivalent 104-9984
No equivalent 105-7895
Replacing the Hot Surface Plate
Location US English CE
On the front
frame
80-8290 104-9983
1. Using a 1/8 in. (3 mm) drill bit, drill out the centers of
the rivets securing the US English version of the hot
surface plate on the front of the heat shield.
2. Remove the remnants of the rivets and the plate.
3. Install the new plate using the two pop rivets supplied.
Replacing the Fuel cap
Remove and discard the fuel cap and replace it with the
new cap supplied with the kit.
Installing the Hood Latch
Cover
1. Remove the bolt and nut securing the current hood
latch handle, discarding the fasteners and handle.
4
m–5261
1. Hood latch with handle
removed
2. Hood latch cover
1
Figure 1
Replacing the
Manual
3
2
3. Carriage bolt
4. Locknut
Operator’s
2. Install the hood latch cover using 2 carriage bolts and
locknuts (Fig. 1).
4
Discard the English Operator ’s Manual that is included
with the traction unit and replace it with the manual
supplied with the CE kit. Also download and print the
appropriate language Operator ’s Manual, from the Dealer
Extranet or www.Toro.com for model 22362 and place it
with the traction unit.
 Loading...