

Page 1
FormNo.3364-873RevA
21inHeavy-DutyRecycler
BaggerLawnMower
ModelNo.22190—SerialNo.310000001andUp
®
/Rear
ToregisteryourproductordownloadanOperator'sManualorPartsCatalogatnocharge,gotowww.T oro.com.OriginalInstructions(EN)
Page 2
WARNING
CALIFORNIA
Proposition65Warning
Theengineexhaustfromthisproduct
containschemicalsknowntotheStateof
Californiatocausecancer,birthdefects,
orotherreproductiveharm.
Important:Thisengineisnotequippedwitha
sparkarrestermufer.ItisaviolationofCalifornia
PublicResourceCodeSection4442touseoroperate
theengineonanyforest-covered,brush-covered,or
grass-coveredland.Otherstatesorfederalareas
mayhavesimilarlaws.
ThissparkignitionsystemcomplieswithCanadian
ICES-002.
Theenclosed
Engine Owner’ s Man ual
issupplied
forinformationregardingtheUSEnvironmental
ProtectionAgency(EPA)andtheCalifornia
EmissionControlRegulationofemissionsystems,
maintenance,andwarranty.Replacementsmaybe
orderedthroughtheenginemanufacturer.
Introduction
Thisrotary-blade,walk-behindlawnmoweris
intendedtobeusedbyresidentialhomeowners
orprofessional,hiredoperators.Itisdesigned
primarilyforcuttinggrassonwell-maintainedlawns
onresidentialorcommercialproperties.Itisnot
designedforcuttingbrushorforagriculturaluses.
Readthisinformationcarefullytolearnhowtooperate
andmaintainyourproductproperlyandtoavoidinjury
andproductdamage.Youareresponsibleforoperating
theproductproperlyandsafely.
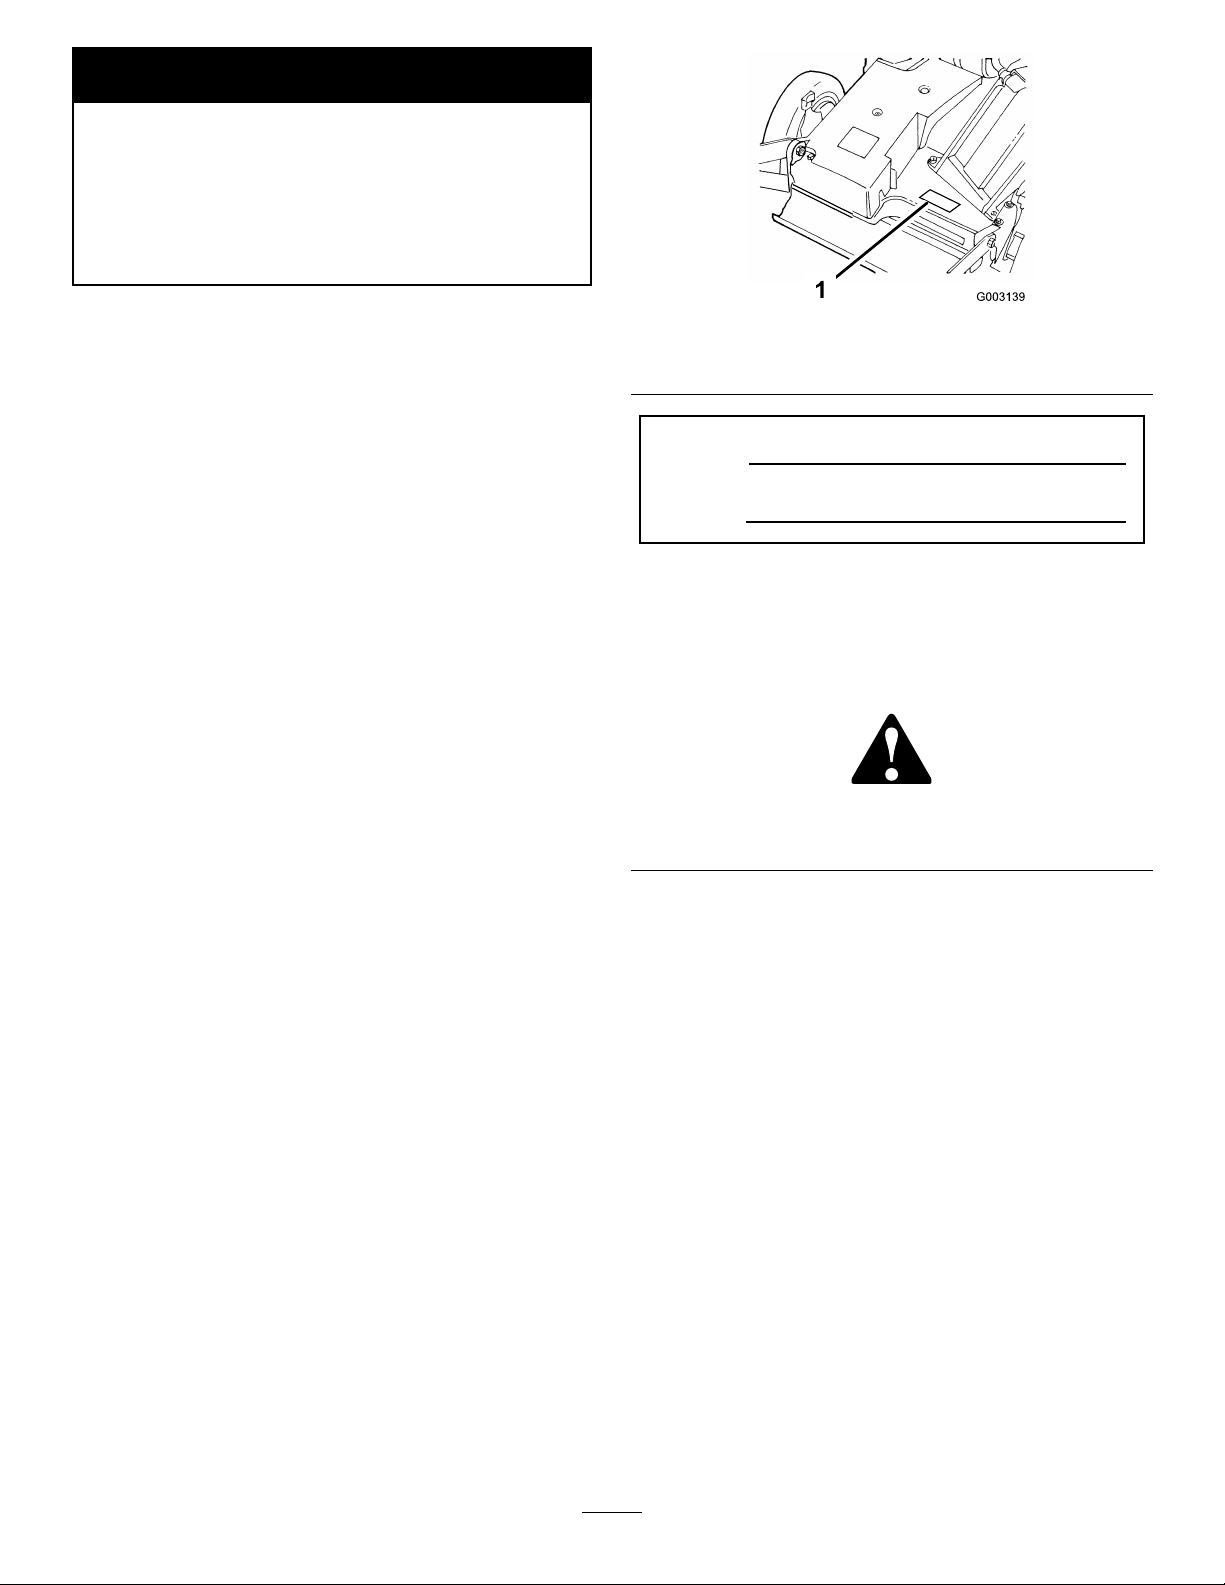
Figure1
1.Modelandserialnumberplate
ModelNo.
SerialNo.
Thismanualidentiespotentialhazardsandhas
safetymessagesidentiedbythesafetyalertsymbol
(Figure2),whichsignalsahazardthatmaycauseserious
injuryordeathifyoudonotfollowtherecommended
precautions.
Figure2
1.Safetyalertsymbol
Thismanualuses2wordstohighlightinformation.
Importantcallsattentiontospecialmechanical
informationandNoteemphasizesgeneralinformation
worthyofspecialattention.
YoumaycontactTorodirectlyatwww .T oro.comfor
productandaccessoryinformation,helpndinga
dealer,ortoregisteryourproduct.
Wheneveryouneedservice,genuineToroparts,or
additionalinformation,contactanAuthorizedService
DealerorToroCustomerServiceandhavethemodel
andserialnumbersofyourproductready .
Figure1
identiesthelocationofthemodelandserialnumbers
ontheproduct.Writethenumbersinthespace
provided.
©2010—TheT oro®Company
8111LyndaleAvenueSouth
Bloomington,MN55420
Contactusatwww.T oro.com.
2
PrintedintheUSA
AllRightsReserved
Page 3

Contents
Introduction.................................................................2
Safety...........................................................................4
GeneralLawnMowerSafety.................................4
Training................................................................4
Preparation..........................................................4
Operation.............................................................5
MaintenanceandStorage......................................5
SafetyandInstructionalDecals.............................6
Setup............................................................................7
1InstallingtheHandle..........................................7
2InstallingtheStarterRope..................................8
3InstallingtheDischargeTunnelPlug...................8
4FillingtheCrankcasewithOil.............................9
ProductOverview......................................................10
Controls.............................................................10
Operation...................................................................10
CheckingtheEngineOilLevel............................10
FillingtheFuelTankwithGasoline.....................11
StartingtheEngine.............................................12
StoppingtheEngine...........................................13
UsingtheSelf-propelDrive................................13
UsingtheDischargeTunnelPlug........................13
AdjustingtheCuttingHeight..............................13
UsingtheGrassBag...........................................14
OperatingTips...................................................15
Maintenance...............................................................17
RecommendedMaintenanceSchedule(s)................17
Lubrication.............................................................18
LubricatingthePivotArms.................................18
LubricatingtheGearCase...................................18
EngineMaintenance...............................................18
ServicingtheAirFilter........................................18
ChangingtheEngineOil....................................19
ChangingtheOilFilter.......................................19
ServicingtheSparkPlug.....................................20
FuelSystemMaintenance.......................................20
EmptyingtheFuelTankandCleaningthe
FuelFilter.......................................................20
DriveSystemMaintenance.....................................21
AdjustingtheSelf-propelDrive...........................21
ControlsSystemMaintenance.................................21
AdjustingtheBladeBrakeCable.........................21
BladeMaintenance.................................................22
MaintainingtheCuttingBlade.............................22
Cleaning.................................................................23
CleaningundertheLawnMowerHousing...........23
CleaningtheDischargeTunneland
Plug................................................................24
CleaningundertheBeltCover.............................24
Storage.......................................................................25
PreparingtheFuelSystem...................................25
PreparingtheEngine..........................................25
GeneralInformation..........................................25
RemovingtheLawnMowerfromStorage............25
Troubleshooting.........................................................26
3
Page 4

Safety
ThislawnmowermeetsorexceedstheCPSC
bladesafetyrequirementsforwalk-behindrotary
lawnmowersandtheB71.4specicationsofthe
AmericanNationalStandardsInstituteineffectat
thetimeofproduction.
Improperlyusingormaintainingthislawnmower
canresultininjury.Toreducethepotentialfor
injury,complywiththesesafetyinstructions.
Torodesignedandtestedthislawnmowerfortooffer
reasonablysafeservice;however,failuretocomply
withthefollowinginstructionsmayresultin
personalinjury.
WARNING
Engineexhaustcontainscarbonmonoxide,an
odorless,deadlypoisonthatcankillyou.
Training
•ReadtheOperator’sManualandothertraining
material.
•Iftheoperator(s)ormechanic(s)cannotreadEnglish
itistheowner’sresponsibilitytoexplainthismaterial
tothem.
•Becomefamiliarwiththesafeoperationofthe
equipment,operatorcontrols,andsafetysigns.
•Alloperatorsandmechanicsshouldbetrained.The
ownerisresponsiblefortrainingtheusers.
•Neverletchildrenoruntrainedpeopleoperateor
servicetheequipment.Localregulationsmayrestrict
theageoftheoperator.
•Theowner/usercanpreventandisresponsiblefor
accidentsorinjuriesoccurringtothemselves,other
peopleorproperty.
Donotruntheengineindoorsorinanenclosed
area.
Toensuremaximumsafety ,bestperformance,and
togainknowledgeoftheproduct,itisessentialthat
youandanyotheroperatorofthelawnmowerread
andunderstandthecontentsofthismanualbefore
theengineiseverstarted.Payparticularattention
tothesafetyalertsymbol(Figure2)whichmeans
Caution,Warning,orDanger—“personalsafety
instruction.”Readandunderstandtheinstruction
becauseithastodowithsafety.Failuretocomply
withtheinstructionmayresultinpersonalinjury.
GeneralLawnMowerSafety
Thislawnmoweriscapableofamputatinghandsand
feetandofthrowingobjects.Failuretoobservethe
followingsafetyinstructionscouldresultinserious
injuryordeath.
ThefollowinginstructionsarefromtheANSI/OPEI
B71.4–2004standard.
Preparation
•Evaluatetheterraintodeterminewhataccessories
andattachmentsareneededtoproperlyandsafely
performthejob.
•Onlyuseaccessoriesandattachmentsapprovedby
themanufacturer.
•Wearappropriateclothing,includingsafetyglasses
andhearingprotection.Longhair,looseclothingor
jewelrymaygettangledinmovingparts.
•Inspecttheareawheretheequipmentistobeused
andremoveallobjectssuchasrocks,toysandwire
whichcanbethrownbythemachine.
•Useextracarewhenhandlinggasolineandother
fuels.
–Theyareammableandvaporsareexplosive.
–Useonlyanapprovedcontainer.
–Neverremovegascaporaddfuelwhenengine
isrunning.
–Donotsmoke.
–Neverrefuelordrainthemachineindoors.
•Checkthatoperator’spresencecontrols,safety
switchesandshieldsareattachedandfunctioning
properly.Donotoperateunlesstheyarefunctioning
properly.
4
Page 5

Operation
MaintenanceandStorage
•Neverrunanengineinanenclosedarea.
•Onlyoperateingoodlight,keepingawayfromholes
andhiddenhazards.
•Besurealldrivesareinneutralandparkingbrakeis
engagedbeforestartingengine.
•Onlystartenginefromtheoperator’sposition.
•Besureofyourfootingwhileusingpedestrian
controlledequipment,especiallywhenbackingup.
•Walk,don’trun.
•Neveroperateonwetgrass.Reducedfootingcould
causeslipping.
•Slowdownanduseextracareonhillsides.Besureto
travelintherecommendeddirectiononhillsides.
•Usecautionwhileoperatingneardrop-offs.
•Slowdownandusecautionwhenmakingturnsand
whenchangingdirectionsonslopes.
•Neverraisedeckwiththebladesrunning.
•Neveroperatewiththedischargedeectorraised,
removedoraltered,unlessusingagrasscatcher.
•Donotchangetheenginegovernorsettingor
overspeedtheengine.
•Waitforallmovementtostopbeforeadjusting,
cleaningorrepairing.
•Cleangrassanddebrisfromcuttingunit,mufer,
andenginetohelppreventres.
•Cleanupoilorfuelspillage.
•Letenginecoolbeforestoringanddonotstorenear
ame.
•Donotstorefuelnearamesordrainindoors.
•Neverallowuntrainedpersonneltoservicemachine.
•Usecarewhencheckingblade.
•Wrapthebladeorweargloves,andusecautionwhen
servicing.
•Onlyreplaceblade.Neverstraightenorweldthem.
•Keephandsandfeetawayfrommovingparts.
•Ifpossible,donotmakeadjustmentswiththeengine
running.
•Keepallpartsingoodworkingconditionandall
hardwaretightened.
•Replaceallwornordamageddecals.
•Stoponlevelgroundandshutoffenginebefore
leavingtheoperator’spositionforanyreason
includingemptyingthecatchersoruncloggingthe
chute.
•Stopequipmentandinspectbladesafterstriking
objectsorifanabnormalvibrationoccurs.Make
necessaryrepairsbeforeresumingoperations.
•Keephandsandfeetawayfromthecuttingunits.
•Lookbehindanddownbeforebackinguptobesure
ofaclearpath.
•Beawareofthemowerdischargedirectionanddo
notpointitatanyone.
•Donotoperatethemowerundertheinuenceof
alcoholordrugs.
•Usecarewhenloadingorunloadingthemachine
intoatrailerortruck.
•Usecarewhenapproachingblindcorners,shrubs,
trees,orotherobjectsthatmayobscurevision.
5
Page 6

SafetyandInstructionalDecals
Safetydecalsandinstructionsareeasilyvisibletotheoperatorandarelocatednearanyareaof
potentialdanger.Replaceanydecalthatisdamagedorlost.
Manufacturer’sMark
1.Indicatesthebladeisidentiedasapartfromtheoriginal
machinemanufacturer.
68-7410
94-8072
74-1970
1.Transmissionspeeds2.Neutral
110-4989
98-4387
1.Warning—wearhearingprotection.
115-1003
6
Page 7

Setup
LooseParts
Usethechartbelowtoverifythatallpartshavebeenshipped.
ProcedureDescription
Handle1
Bolt(5/16x1-1/4inches)
Washer4
Thinnyloninsertlocknut(5/16inch)
Bolt(5/16x1-1/2inches)
1
2
3
4
Carriagebolt
Locknut(5/16inch)
Bagsupportrod1
Bagaligningplate1
Caplocknut
Cabletie
Nopartsrequired
Dischargetunnelplug1Installthedischargetunnelplug.
Nopartsrequired
Note:Determinetheleftandrightsidesofthemachine
fromthenormaloperatingposition.
Qty.
2
2
2
1
2
3
3
–
–
Installthehandle.
Installthestarterrope.
Fillthecrankcasewithoil.
Use
1
InstallingtheHandle
Partsneededforthisprocedure:
1Handle
2
Bolt(5/16x1-1/4inches)
4Washer
2
Thinnyloninsertlocknut(5/16inch)
2
Bolt(5/16x1-1/2inches)
1
Carriagebolt
2
Locknut(5/16inch)
1Bagsupportrod
1Bagaligningplate
3
Caplocknut
3
Cabletie
Procedure
1.Mountthehandletotheoutsideofthemower
housing(usingthebottomhole)withtwobolts
7
Page 8

(5/16x1-1/4inches),washers,andthinlocknuts
(5/16inch)(Figure3).
Figure3
1.Bagsupportrod8.Thinnyloninsertlocknut
2.Carriagebolt
3.Bagaligningplate
4.Caplocknuts(3)11.Locknut(2)
5.Handle
6.Bolt,(5/16x1-1/2inches)
(2)
7.Handlelatch(2)
(2)
9.Bottomholeinhousing
10.Washer(4)
12.Bolt,(5/16x1-1/4inches)
(2)
13.Cabletie(3)
2
InstallingtheStarterRope
NoPartsRequired
Procedure
Pullthestarterropethroughtheropeguideonthe
handle(Figure4).
Figure4
1.Starterrope
2.Ropeguide
2.Securethehandlelatchestothehandlewith2bolts
(5/16x1-1/2inches),washers,andlocknuts(5/16
inch)(Figure3).
Note:Installthewasherswiththecupsidefacing
thehandle.
Note:Youcanadjustthehandleheightfor
comfortableoperation.Standbehindthehandleto
determinetheheight.Toadjustthehandleheight,
positiontheboltsandthelocknutsthatsecurethe
handlelatchestothehandleintotheothermounting
holesinthelatches.
3.Insertthecarriageboltthroughthebagaligning
plateandthesecondholefromthetopontheleft
sideofthehandle,andsecureitwithacaplocknut
Figure3).
(
4.Slidethebagsupportrodthroughthethirdfromthe
topmountingholesinthehandle,andsecureeach
endwithacaplocknut(Figure3).
5.Usecabletiestosecurethecontrolcablestothe
handle(Figure3).
Note:T omaketheropeeasiertoinstall,squeezethe
controlbaronthehandle.
3
InstallingtheDischargeTunnel
Plug
Partsneededforthisprocedure:
1Dischargetunnelplug
Procedure
1.Openthedischargedoorbypullingforwardonthe
handleandmovingitrearward(Figure5).Holdthe
dischargedoorhandletopreventthespring-loaded
doorfromclosingwhileyouinserttheplug.
8
Page 9
4
FillingtheCrankcasewithOil
NoPartsRequired
Procedure
Figure5
1.Dischargedoorhandle2.Plug,rotatedclockwise
2.Sincetheplugisslightlywiderthanthedischarge
tunnelopening,rotatetheplugclockwiseslightly
whileinsertingit(Figure5).
Note:Ensurethatthearrowontheplugdecal
pointsupward.
3.Pushtheplugallthewayinuntilthespringclipon
thebottomoftheplugclicksintoplace,lockingthe
plugsecurelyintothedischargetunnel(
Figure6).
Theenginecrankcaseisshippedwithoutoil.You
mustllitwithapproximately22ounces(0.65l)ofoil
beforestartingtheengine.RefertoCheckingtheEngine
OilLevelinOperation(page10),foroilspecications
andinstructions.
Figure6
1.Springclip
4.Releasethedischargedoorhandletolockthetop
oftheplug.
9
Page 10

ProductOverview
Operation
Note:Determinetheleftandrightsidesofthe
machinefromthenormaloperatingposition.
Eachtimebeforeyoumow ,makesurethatthe
self-propeldriveandthecontrolbaroperateproperly .
Whenyoureleasethecontrolbar,theblade,theengine,
andtheself-propeldriveshouldstop.Iftheydonot,
contactanAuthorizedServiceDealer.
CAUTION
Thismachineproducessoundlevelsinexcessof
85dBAattheoperator’searandcancausehearing
lossthroughextendedperiodsofexposure.
Figure7
1.Handle
2.Throttlecontrollever
3.Grassbag
4.Fueltank
5.Oillter(notshown)11.Starterhandle
6.Airlter12.Controlbar
7.Cuttingheightlever(4)
8.Sparkplug
9.Dischargetunnel
10.Oilll/dipstick
Controls
Figure8
1.Controlbar
2.Throttlecontrollever
3.Recoilstarterhandle
Wearhearingprotectionwhenoperatingthis
machine.
Figure9
1.Warning—wearhearingprotection.
CheckingtheEngineOilLevel
ServiceInterval:Beforeeachuseordaily
Initially,llthecrankcasewith29ounces(0.85liters)
ofoil.Useonlyhigh-qualitySAE30orSAE10W30
weightdetergentoilthathastheAmericanPetroleum
Institute(API)serviceclassicationSF ,SG,SH,orSJ.
OilCapacity
Withoillter29ounces(0.85liters)
Withoutoillter22ounces(0.65liters)
Beforeeachuse,ensurethattheoillevelisbetweenthe
AddandFullmarksonthedipstick(Figure10).
10
Page 11

FillingtheFuelTankwith
Gasoline
Forbestresults,useclean,fresh,lead-freegasolinewith
anoctaneratingof87orhigher.Toensurefreshness,
purchaseonlythequantityofgasolinethatyouexpectto
usein30days.Usingunleadedgasolineresultsinfewer
combustiondepositsandlongerenginelife.Youmay
useleadedgasolineifunleadedgasolineisnotavailable.
Important:Donotaddoiltothegasoline.
Important:Donotusemethanol,gasoline
containingmethanol,gasoholcontainingmore
than10%ethanol,premiumgasoline,orwhitegas.
Usingthesefuelscandamagetheengine’sfuel
system.
Figure10
1.Dipstick3.Add
2.Full
Note:Whenthecrankcaseisempty ,pourabout3/4
ofthecrankcasecapacityofoilinthecrankcase,then
followtheprocedureinthissection.
1.Movethelawnmowertoalevelsurface.
2.Cleanaroundthedipstick(
3.Removethedipstickbyrotatingthecap
counterclockwiseandpullingitout.
4.Wipethedipstickcleanwithacleancloth.
5.Insertthedipstickintothellerneck,thenremove
it.
Note:Toensureanaccurateoillevelreading,you
mustfullyinstallthedipstick.
6.Readtheoillevelonthedipstick(
7.IftheoillevelreadingisbelowtheAddmarkon
thedipstick,slowlypouronlyenoughoilintothe
llerholetoraisetheoilleveltotheFullmarkon
thedipstick.
Figure11).
Figure11).
Important:Donotusegasolinethathasbeen
storedsincethelastmowingseasonorlonger.
DANGER
Incertainconditions,gasolineisextremely
ammableandhighlyexplosive.Areorexplosion
fromgasolinecanburnyouandothersandcan
damageproperty.
•Fillthefueltankoutdoors,inanopenarea,and
whentheengineiscold.Wipeupanygasoline
thatspills.
•Donotllthefueltankcompletelyfull.Add
gasolinetothefueltankuntilthelevelis1/4to
1/2in.(6to13mm)belowthebottomofthe
llerneck.Thisemptyspaceinthetankallows
thegasolinetoexpand.
•Neversmokewhenhandlinggasoline,andstay
awayfromanopenameorwhereasparkmay
ignitethegasolinefumes.
•Storegasolineinanapprovedfuelcontainer
andkeepitoutofthereachofchildren.
•Neverbuymorethana30-daysupplyof
gasoline.
Important:Donotoverllthecrankcasewith
oilandruntheengine;enginedamagewill
result.Draintheexcessoiluntiltheoillevelon
thedipstickreadsFull.
8.Insertthedipstickintothellerneckandrotatethe
capclockwiseuntilitistight.
11
Page 12

DANGER
Whenfueling,undercertaincircumstances,a
staticchargecandevelop,ignitingthegasoline.A
reorexplosionfromgasolinecanburnyouand
othersanddamageproperty.
•Alwaysplacegasolinecontainersontheground
andawayfromyourvehiclebeforelling.
•Donotllgasolinecontainersinsideavehicle
oronatruckortrailerbedbecauseinterior
carpetsorplastictruckbedlinersmayinsulate
thecontainerandslowthelossofanystatic
charge.
•Whenpractical,removegasoline-powered
equipmentfromthetruckortrailerandrefuel
theequipmentwithitswheelsontheround.
•Ifthisisnotpossible,thenrefuelsuch
equipmentonatruckortrailerfromaportable
container,notfromagasolinedispensernozzle.
•Ifyoumustuseagasolinedispensernozzle,
keepthenozzleincontactwiththerimofthe
fueltankorcontaineropeningatalltimesuntil
fuelingiscomplete.
2.Removethecapfromthetank.
3.Fillthefueltankwithunleadedgasolinetowithin
1/4to1/2inch(6to13mm)fromthetopofthe
tank.Donotllintothellerneck.
Important:Donotllthetankmorethan1/4
inch(6mm)fromthetopofthetankbecause
thegasolinemusthaveroomtoexpand.
4.Installthefueltankcapandwipeupanyspilled
gasoline.
StartingtheEngine
1.Connectthewiretothesparkplug(Figure12).
Useafuelstabilizer/conditionerregularlyduring
operationandstorage.Astabilizer/conditionercleans
theengineduringoperationandpreventsgum-like
varnishdepositsfromformingintheengineduring
periodsofstorage.
Important:Donotusefueladditivesotherthan
afuelstabilizer/conditioner.Donotusefuel
stabilizerswithanalcoholbasesuchasethanol,
methanol,orisopropanol.
1.Cleanaroundthefueltankcap(
Figure11).
Figure12
1.Throttlecontrollever
2.Primer
3.Starterhandle
4.Sparkplug
2.MovethethrottlecontroltotheFastposition.
3.MovethegroundspeedcontroltotheNeutral(N)
position(Figure13).
1.Oilll/dipstick
2.Fueltankcap
Figure11
Figure13
1.Groundspeedcontrol
3.Aircleaner
4.Pushintheprimeroncewithyourthumb,holding
itinforasecondbeforereleasingit(Figure12).
5.Liftthecontrolbartothehandleandholdit.
12
Page 13

6.Pullthestarterhandlelightlyuntilyoufeel
resistance,thenpullitsharply.
7.Regulatethethrottleandthegroundspeedcontrol
asdesiredwhentheenginestarts.
Note:Iftheenginefailstostartafter3pulls,repeat
steps2through7.
StoppingtheEngine
1.Releasethecontrolbarandmovethethrottle
controltotheOffposition.
2.Disconnectthewirefromthesparkplugifyoudo
notusethelawnmowerorifyouleaveitunattended.
UsingtheSelf-propelDrive
Thelawnmowerhas3groundspeeds:1isslow,2is
medium,and3isfast.thegroundspeedcontrolis
locatedattherearofthebeltcover(Figure14).
position;thiscandamagethetransmission.Move
thecontrolbartotheRun/Shiftposition(Figure15)
whenyouchangethegroundspeed.
Note:Youcanvarythegroundspeedbyincreasing
ordecreasingthedistancebetweenthecontrolbar
andthehandle.Lowerthecontrolbartoslowthe
lawnmowerwhenmakingaturnorifthelawn
mowerismovingtoofastforyou.Ifyoulower
thecontrolbartoofar,thelawnmowerstops
self-propelling.Squeezethecontrolbarcloserto
thehandletoincreasethegroundspeed.When
youholdthecontrolbartightagainstthehandle,
thelawnmowerself-propelsatthemaximum
groundspeed.Movethegroundspeedcontrolto
theNeutral(N)positionwhenyouusethelawn
mowerfortrimmingandwheneveryouleavethe
lawnmower.
UsingtheDischargeTunnel
Plug
Figure14
1.Groundspeedcontrol
1.MovethegroundspeedcontroltotheNeutral(N)
position.
2.Starttheengine.
3.Squeezethecontrolbaragainstthehandletothe
Run/Driveposition(Figure15).
1.Stoptheengineandwaitforallmovingpartsto
stop.
2.Inserttheplug;refertoInstallingtheDischarge
TunnelPlug.
3.Toremovetheplug,movethedischargedoor
handlerearwardandliftupthespringcliponthe
bottomoftheplug.Whentheplugisunlocked,pull
itoutofthedischargetunnel.
Note:Whengrassisthickandlush,clippingsmay
collectonandaroundthedischargetunnelplug.
Thismaymakeremovingtheplugdifcult.Clean
theplugthoroughlyaftereachuse.
AdjustingtheCuttingHeight
Eachwheelisadjustedindividuallywithawheelheight
adjustmentlever.Cuttingheightsare3/4inch(19mm),
1-1/4inches(32mm),1-3/4inches(44mm),2-1/4
inches(57mm),2-3/4inches(70mm),and3-1/4
inches(83mm).
Figure15
1.Run/Driveposition3.Stop/Offposition
2.Run/Shiftposition
Note:Donotshiftspeedswhileyousqueezethe
controlbaragainstthehandleintheRun/Drive
DANGER
Adjustingthecuttingheightleverscouldbring
yourhandsintocontactwithamovingbladeand
resultinseriousinjury.
•Stoptheengineandwaitforallmovementto
stopbeforeadjustingthecuttingheight.
•Donotputyourngersunderthehousing
whenadjustingthecuttingheight.
13
Page 14

1.Pullthewheelheightadjustmentlevertowardthe
wheel(Figure16)andmoveittothedesiredsetting.
Figure16
1.Wheelheightadjustmentlever
2.Releasethewheelheightadjustmentleverandseat
itsecurelyinthenotch.
3.Adjustallthewheelstothesamecuttingheight
setting.
4.Settherearofthebagframeontothebagsupport
rod.
5.Pullthedischargedoorhandleforwarduntilthepin
clearsthecatch,andmovethehandlerearwarduntil
thepinlocksinthebagnotch(
Figure18
1.Pinlockedinbagnotch
Figure18).
UsingtheGrassBag
Occasionally,youmaywishtousethegrassbagfor
baggingextralonggrass,lushgrass,orleaves.
InstallingtheGrassBag
1.Stoptheengineandwaitforallmovingpartsto
stop.
2.Ensurethatthedischargedoorhandleisfully
forwardandthatthepinisengagedinthecatch
Figure17).
(
Note:Thedischargedoorinthelawnmower
housingisnowopen.
MowingwiththeGrassBag
WARNING
Aworngrassbagcouldallowsmallstones
andothersimilardebristobethrowninthe
operator’sorbystander’sdirectionandresultin
seriouspersonalinjuryordeathtotheoperatoror
bystanders.
Checkthegrassbagfrequently.Ifitisdamaged,
installanewTororeplacementbag.
RemovingtheGrassBag
1.Stoptheengineandwaitforallmovingpartsto
stop.
2.Raisethedischargedoorhandleandmoveitforward
toengagethepinwiththecatch(
Figure17).
Figure17
1.Bagframeonretaining
post
2.Pinengagedincatch
3.Handlefullyforward;
dischargedoorclosed
3.Slidetheholeinthebagframeontotheretaining
postonthedischargetunnel(Figure17).
3.Graspthehandlesatthefrontandtherearofthe
bagandliftthebagoffthelawnmower.
4.Graduallytipthebagforwardtoemptytheclippings.
5.Toinstallthebag,refertoInstallingtheGrassBag.
14
Page 15

DANGER
Ifthedischargedoordoesnotclosecompletely,the
lawnmowercouldthrowobjects,causingserious
personalinjuryordeath.
Ifyoucannotclosethedoorbecausethegrass
clippingsclogthedischargearea,stoptheengine
andgentlymovethedischargedoorhandleback
andforthuntilyoucanclosethedoorcompletely.
Ifyoustillcannotclosethedoor,removethe
obstructionwithastick,notyourhand.
DANGER
Thelawnmowercanthrowgrassclippingsand
otherobjectsthroughanopendischargetunnel.
Objectsthrownwithenoughforcecouldcause
seriouspersonalinjuryordeathtotheoperatoror
bystander.
•Cleantheundersideofthelawnmowerdeckafter
eachmowing.SeeCleaningtheUndersideofthe
LawnMowerHousing.
•Keeptheengineingoodrunningcondition.
•Settheenginespeedtothefastestpositionforthe
bestcuttingresults.
WARNING
Operatingalawnmowerwithitsengine
runningataspeedgreaterthanthefactory
settingcancausethelawnmowertothrowa
partofthebladeorengineintotheoperator’sor
bystander’sareaandresultinseriouspersonal
injuryordeath.
–Donotchangetheenginespeedsetting.
–Ifyoususpecttheenginespeedisfaster
thannormal,contactanAuthorizedService
Dealer.
Neveropenthedooronthedischargetunnelwhen
theengineisrunning.
OperatingTips
GeneralTips
•Reviewthesafetyinstructionsandreadthismanual
carefullybeforeoperatingthelawnmower.
•Cleartheareaofsticks,stones,wire,branches,and
otherdebristhatthebladecouldhitandthrow.
•Keepeveryone,especiallychildrenandpets,away
fromtheareaofoperation.
•Avoidstrikingtrees,walls,curbs,orothersolid
objects.Neverdeliberatelymowoveranyobject.
•Ifthelawnmowerstrikesanobjectorstartsto
vibrate,immediatelystoptheengine,disconnectthe
wirefromthesparkplug,andexaminethelawn
mowerfordamage.
•Maintainasharpbladethroughoutthecutting
season.Periodicallyledownnicksontheblade.
•Replacethebladewhennecessarywithanoriginal
Tororeplacementblade.
•Mowonlydrygrassorleaves.Wetgrassandleaves
tendtoclumpontheyardandcancausethelawn
mowertoplugortheenginetostall.
WARNING
Wetgrassorleavescancauseseriousinjuryif
youslipandcontacttheblade.
Mowonlyindryconditions.
•Cleantheairlterfrequently.Mulchingstirsup
moreclippingsanddustwhichclogstheairlter
andreducesengineperformance.
CuttingGrass
•Grassgrowsatdifferentratesatdifferenttimesof
theyear.Inthesummerheat,itisbesttocutgrass
atthe2-1/4inch(57mm),2-3/4inch(70mm),or
3-1/4inch(83mm)cuttingheightsettings.Cut
onlyaboutathirdofthegrassbladeatatime.Do
notcutbelowthe2-1/4inch(57mm)settingunless
thegrassissparseoritislatefallwhengrassgrowth
beginstoslowdown.
•Whencuttinggrassover6inches(15cm)tall,rst
mowatthehighestcuttingheightsettingandwalk
slower;thenmowagainatalowersettingforthe
bestlawnappearance.Ifthegrassistoolongand
theleavesclumpontopofthelawn,thelawn
mowermayplugandcausetheenginetostall.
•Alternatethemowingdirection.Thishelpsdisperse
theclippingsoverthelawnforevenfertilization.
Ifthenishedlawnappearanceisunsatisfactory,try
oneormoreofthefollowing:
•Sharpentheblade.
•Walkataslowerpacewhilemowing.
•Raisethecuttingheightonyourlawnmower.
•Cutthegrassmorefrequently .
•Overlapcuttingswathsinsteadofcuttingafull
swathwitheachpass.
•Setthecuttingheightonthefrontwheelsone
notchlowerthantherearwheels.Forexample,set
15
Page 16

thefrontwheelsat2inches(51mm)andtherear
wheelsat2-1/2inches(64mm).
CuttingLeaves
•Aftercuttingthelawn,ensurethathalfofthelawn
showsthroughthecutleafcover.Youmayneedto
makemorethanonepassovertheleaves.
•Forlightleafcoverage,setallthewheelsatthesame
cuttingheightsetting.
•Iftherearemorethan5inches(12.7cm)ofleaves
onthelawn,setthefrontcuttingheight1or2
notcheshigherthantherearcuttingheight.This
makesiteasiertofeedtheleavesunderthelawn
mowerdeck.
•Slowdownyourmowingspeedifthelawnmower
doesnotcuttheleavesnelyenough.
16
Page 17

Maintenance
Note:Determinetheleftandrightsidesofthemachinefromthenormaloperatingposition.
RecommendedMaintenanceSchedule(s)
MaintenanceService
Interval
Aftertherst8hours
Beforeeachuseordaily
Every25hours
Every50hours
Every100hours
Every300hours
Yearlyorbeforestorage
MaintenanceProcedure
•Changetheengineoilwithouttheoillter.
•Checktheengineoillevel.
•Ensurethattheenginestopswithin3secondsafterreleasingthecontrolbar.
•Inspectthemowerbladesforwearordamage.
•Cleanunderthelawnmowerhousing.
•Cleanthedischargetunnelandplug.
•Lubricatethepivotarms.
•Cleanthefoampre-cleaner(morefrequentlyindustyconditions).
•Changetheengineoil(moreoftenindustyconditions).
•Checkthefuelhoseandreplaceitifnecessary .
•Cleanunderthebeltcover.
•Lubricatethegearcase.
•Cleantheaircoolingns.
•Changetheengineoilandoillter .
•Checkthesparkplug.
•Cleanthefuellter.
•Adjusttheself-propeldrive.
•Adjustthebladebrakecable.
•Replacethepaperairlter(morefrequentlyindustyconditions).
•Emptythefueltank.
Important:Refertoyour
Engine Operator’ s Man ual
foradditionalmaintenanceprocedures.
CAUTION
Ifyouleavethewireonthesparkplug,someonecouldaccidentlystarttheengineandseriouslyinjure
youorotherbystanders.
Disconnectthewirefromthesparkplugbeforeyoudoanymaintenance.Setthewireasidesothatitdoes
notaccidentlycontactthesparkplug.
17
Page 18

Lubrication
EngineMaintenance
LubricatingthePivotArms
ServiceInterval:Every25hours
1.Movetherearwheelcuttingheightleverstothe
centersetting.
2.Wipethegreasettingswithacleanrag(Figure19).
Figure19
1.Greasetting
3.Installagreasegunontothettingandgentlyapply2
or3pumpsof#2multi-purposelithium-basegrease.
ServicingtheAirFilter
ServiceInterval:Every25hours—Cleanthefoam
pre-cleaner(morefrequentlyindusty
conditions).
Every300hours—Replacethepaper
airlter(morefrequentlyindusty
conditions).
Important:Donotoperatetheenginewithoutthe
airlterassembly;extremeenginedamagewill
occur.
1.Stoptheengineandwaitforallmovingpartstostop.
2.Disconnectthewirefromthesparkplug(
3.Removethecoverandcleanitthoroughly(Figure21).
Figure12).
Important:Excessivegreasepressuremay
damagetheseals.
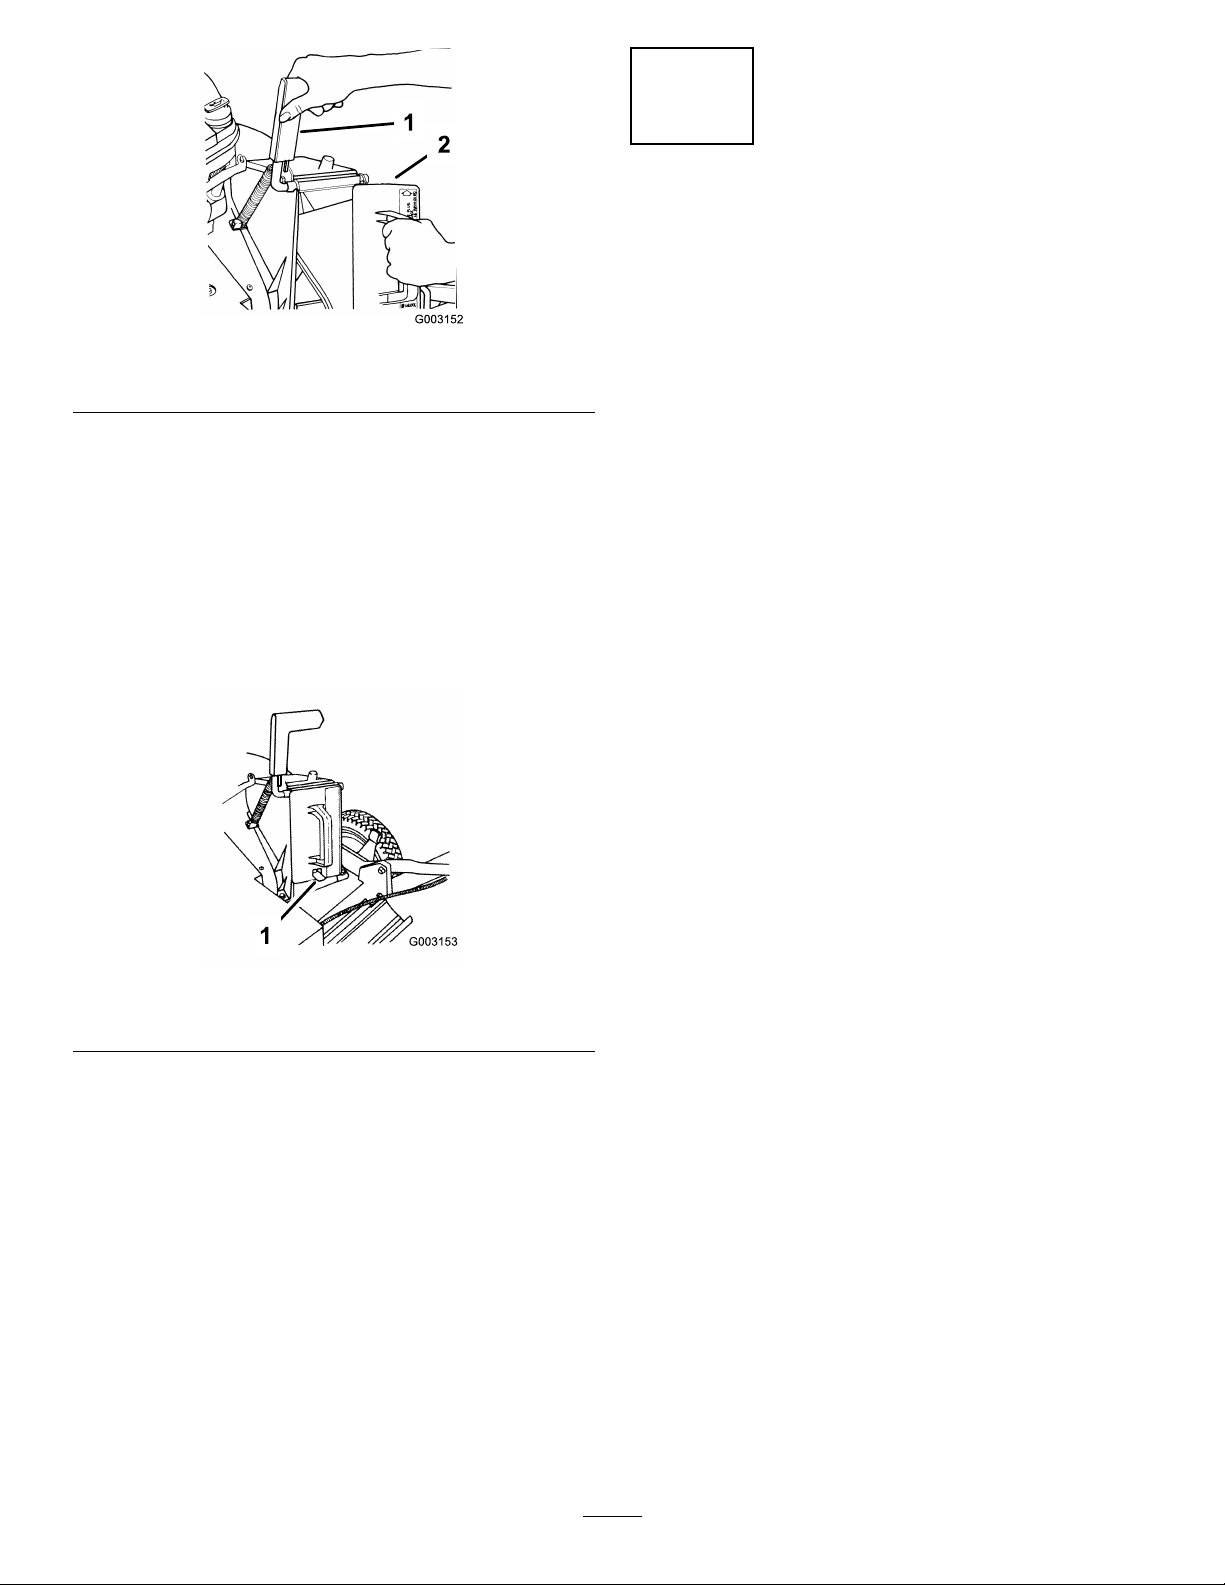
LubricatingtheGearCase
ServiceInterval:Every100hours
1.Removethegrassbag.
2.Installagreasegunontothettingthroughthebelt
coveropening(Figure20).
Figure20
1.Beltcover
2.Greasetting
Figure21
1.Cover3.Airlterbase
2.Paperairlter
4.Removeandinspectthepaperairlter(Figure21),
anddiscarditifitisexcessivelydirty.
Important:Donottrytocleanapaperlter.
5.Removethefoampre-cleanerandwashitwithamild
detergentandwater,thenblotitdry(
6.Installthefoampre-cleanerontothepaperairlter.
7.Installtheairlterassembly.
Figure21).
3.Gentlyapplyoneto2pumpsof#2multi-purpose
lithium-basegrease.
4.Installthegrassbag.
Note:Installanewpaperairlterifyoudiscarded
theoldone.
8.Installthecover.
18
Page 19

ChangingtheEngineOil
ServiceInterval:Aftertherst8hours—Changethe
engineoilwithouttheoillter.
Every50hours—Changetheengine
oil(moreoftenindustyconditions).
1.Runtheenginetowarmtheengineoil.
Note:W armoilowsbetterandcarriesmore
contaminants.
WARNING
Oilmaybehotafterenginehasbeenrun,and
contactwithhotoilcancauseseverepersonal
injury.
Avoidcontactingthehotengineoilwhenyou
drainit.
2.Stoptheengineandwaitforallmovingpartstostop.
3.Disconnectthewirefromthesparkplug(Figure12).
4.Placeasuitabledrainpanundertherightsideofthe
lawnmower.
5.Removethedipstickbyrotatingthecap
counterclockwiseandpullingitout.
6.Raisetheleftsideofthelawnmowertodraintheoil
intothedrainpan.
3.Disconnectthewirefromthesparkplug(Figure12).
4.Draintheengineoil;refertoChangingtheEngine
Oil.
5.Placearagundertheoilltertocatchanyoilthat
mayleakoutasyouremovethelter.
6.Removetheoillter(
1.Oillter
7.Useyourngertocoatthegasketonthenewlter
withoil(Figure23).
Figure22).
Figure22
Note:Youcanalsoremovetheoilfromthe
crankcaseusinganoilextractor.
7.Lowertheleftsideofthelawnmower.
8.Insertthedipstickintothellerneckandrotatethe
capclockwiseuntilitistight.
9.Recycletheusedoilaccordingtolocalcodes.
10.FillthecrankcasetotheFulllineonthedipstickwith
freshoil.RefertotheFillingtheCrankcasewithOil.
11.Wipeupanyspilledoil.
ChangingtheOilFilter
ServiceInterval:Every100hours—Changetheengine
oilandoillter.
1.Runtheenginetowarmtheoil.
WARNING
Oilmaybehotaftertheenginehasbeenrun,
andcontactwithhotoilcancausesevere
personalinjury.
Avoidcontactingthehotengineoilwhenyou
drainit.
Figure23
1.Gasket
8.Installthenewlterandhandtightenit2/3turn
only.
9.FillthecrankcasetotheFulllineonthedipstickwith
freshoilRefertoFillingtheCrankcasewithOil.
10.Connectthewiretothesparkplug.
11.Runtheengineforabout3minutes.
12.Stoptheengine,waitforallmovingpartstostop,
andcheckforoilleakagearoundthelter.
13.Addoiltocompensatefortheoilintheoillter.
RefertoCheckingtheEngineOilLevel.
2.Stoptheengineandwaitforallmovingpartstostop.
14.Recycletheusedoillteraccordingtolocalcodes.
19
Page 20

ServicingtheSparkPlug
FuelSystem
ServiceInterval:Every100hours—Checkthespark
plug.
UseanNGKBPR5ESsparkplugorequivalent.
1.Stoptheengineandwaitforallmovingpartstostop.
2.Disconnectthewirefromthesparkplug(Figure12).
3.Cleanaroundthesparkplug.
4.Removethesparkplugfromthecylinderhead.
Important:Replaceacracked,fouled,or
dirtysparkplug.Donotcleantheelectrodes
becausegritenteringthecylindercandamage
theengine.
5.Setthegapontheplugto0.030in.(0.76mm)
Figure24).
(
Maintenance
EmptyingtheFuelTankand
CleaningtheFuelFilter
ServiceInterval:Every50hours—Checkthefuelhose
andreplaceitifnecessary.
Every100hours—Cleanthefuel
lter.
Yearlyorbeforestorage—Emptythe
fueltank.
Thefuellter(screen)elementislocatedinsidethefuel
tank.
1.Stoptheengineandwaitforittocooldown.
Important:Draingasolinefromacoldengine
only.
2.Disconnectthewirefromthesparkplug(
3.Disconnectthefuellinebylooseningthetubeclamp
atthecarburetor.
Figure12).
Figure24
1.Centerelectrodeinsulator
2.Sideelectrode
3.Airgap(nottoscale)
6.Installthesparkplugandthegasketseal.
7.Torquetheplugto17ft-lb(23N⋅m).
8.Connectthewiretothesparkplug.
4.Drainthegasolinecompletelyfromthetankandfuel
lineintoanapprovedfuelcontainer.
5.Removethefueltankfromthemower.
6.Pourasmallamountoffuelinthefueltank,move
thefuelaroundinthetank,andpouritoutintoan
approvedfuelcontainer.
7.Installthefueltankandfuelline;refertoInstalling
theFuelTankandtheFuelLine.
20
Page 21

DriveSystem
ControlsSystem
Maintenance
AdjustingtheSelf-propelDrive
ServiceInterval:Every100hours
Ifthelawnmowerdoesnotself-propelorhasatendency
tocreepforwardwhenthecontrolbarismorethan
1-1/2inches(3.8cm)fromthehandle,adjustthewheel
drivecontrolknobontherearofthegearbox.
1.Closethedoorinthelawnmowerhousingand
removethegrassbag.
2.Rotatethecontrolknobclockwiseahalfturnif
thelawnmowerdoesnotself-propel.Ifthelawn
mowercreepsforward,rotatetheknobahalfturn
counterclockwisetoloosenthebelt(
Figure25).
Maintenance
AdjustingtheBladeBrake
Cable
ServiceInterval:Every100hours
Wheneveryouinstallanewbladebrakecableassembly,
adjustit.
1.Stoptheengineandwaitforallmovingpartstostop.
2.Disconnectthewirefromthesparkplug.
3.Checktheadjustmentofthecablebymovingthe
controlbartowardthehandleuntilyouremovethe
slackinthecable.
Note:Thegapbetweenthebrakeleverandthe
handlemustbebetween3/16and1/4inch(5and6
mm)toadjustthecable.
4.Loosenthenutonthecablebracket(
Figure27).
Figure25
1.Controlknob
3.Slowlypullthelawnmowerbackwardwhileyou
graduallymovethecontrolbartowardthehandle.
Note:Theadjustmentiscorrectwhentherear
wheelsstopturningandthecontrolbarisaboutone
inch(2.5cm)fromthehandle(Figure26).
Figure26
1.1inch(2.5cm)
Figure27
1.Handle
2.Brakelever
5.Inserta3/16to1/4inch(5to6mm)objectbetween
thebrakeleverandthehandle(
6.Pulldownonthecableconduituntilyouremovethe
slackfromthewire(Figure15).
7.Tightenthenut(Figure15).
3.3/16to1/4inch(5to6
mm)
4.Cablebracket
Figure15).
21
Page 22

BladeMaintenance
MaintainingtheCuttingBlade
Alwaysmowwithasharpblade.Asharpbladecuts
cleanlyandwithouttearingorshreddingthegrassblades.
1.Stoptheengineandwaitforallmovingpartstostop.
2.Disconnectthewirefromthesparkplug(
3.Drainthegasolinefromthefueltank;referto
EmptyingtheFuelTankandCleaningtheFuelFilter.
4.Tipthemowerontoitsrightside(Figure28).
Figure28
1.Blade3.Accelerator
2.Bladeboltandlockwasher
Figure12).
Note:Forthebestperformance,installanewblade
beforethecuttingseasonbegins.Duringtheyear,le
downanysmallnickstomaintainthecuttingedge.
DANGER
Awornordamagedbladecanbreak,andapiece
ofthebladecouldbethrownintotheoperator’s
orbystander’sarea,resultinginseriouspersonal
injuryordeath.
•Inspectthebladeperiodicallyforwearor
damage.
•Replaceawornordamagedblade.
RemovingtheBlade
Grasptheendofthebladeusingaragorathickly
paddedglove.Removethebladebolt,thelockwasher,
theaccelerator,andtheblade(Figure28).
SharpeningtheBlade
Filethetopsideofthebladetomaintainitsoriginal
cuttingangle(Figure30A)andinnercuttingedgeradius
(Figure30B).Thebladewillremainbalancedifyou
removethesameamountofmaterialfrombothcutting
edges.
InspectingtheBlade
ServiceInterval:Beforeeachuseordaily—Inspectthe
mowerbladesforwearordamage.
Carefullyexaminethebladeforsharpnessandwear,
especiallywheretheatandthecurvedpartsmeet
Figure29A).Becausesandandabrasivematerialcan
(
wearawaythemetalthatconnectstheatandcurved
partsoftheblade,checkthebladebeforeusingthe
lawnmower.Ifyounoticeaslotorwear(
andFigure29C),replacetheblade;refertoRemoving
theBlade.
Figure29
1.Sail
2.Flatpartoftheblade4.Slotformed
3.Wear
Figure29B
Figure30
1.Sharpenatthisangleonly .
2.Maintaintheoriginalradius
here.
BalancingtheBlade
1.Checkthebalanceofthebladebyplacingthecenter
holeofthebladeoveranailorscrewdrivershank
clampedhorizontallyinavise(
Figure31
Note:Youcanalsocheckthebalanceusinga
commerciallymanufacturedbladebalancer.
2.Ifeitherendofthebladerotatesdownward,lethat
end(notthecuttingedgeortheendnearthecutting
Figure31).
22
Page 23

edge).Thebladeisproperlybalancedwhenneither
enddrops.
Cleaning
InstallingtheBlade
1.Installasharp,balancedToroblade,theaccelerator,
thelockwasher,andthebladebolt.Thesailofthe
blademustpointtowardthetopofthelawnmower
housingforproperinstallation.Torquetheblade
boltto50ft-lb(68N·m).
WARNING
Operatingthelawnmowerwithoutthe
acceleratorinplacecancausethebladetoex,
bend,orbreak,resultinginseriousinjuryor
deathtotheoperatororbystanders.
Donotoperatethelawnmowerwithoutthe
accelerator.
2.Returnthelawnmowertoitsuprightposition.
3.Connectthewiretothesparkplug.
CleaningundertheLawn
MowerHousing
Toensurethebestperformance,keeptheundersideof
thelawnmowerhousingclean.Beespeciallycarefulto
keepthekickersfreeofdebris(Figure32).
Figure32
1.Kickers
WashingMethod
ServiceInterval:Beforeeachuseordaily
1.Positionthelawnmoweronaatconcreteorasphalt
surfacenearagardenhose.
2.Starttheengine.
3.Holdtherunninggardenhoseathandleleveland
directthewatertoowonthegroundjustinfront
oftherightreartire(
1.Rightrearwheel
Note:Thebladewilldrawinwaterandwashout
clippings.Letthewaterrununtilyounolongersee
clippingsbeingwashedoutfromunderthehousing.
4.Stoptheengineandwaitforallmovingpartstostop.
Figure33).
Figure33
5.Turnoffthewater.
6.Startthelawnmowerandletitrunforafewminutes
todryoutthemoistureonthelawnmowerandits
components.
23
Page 24

ScrapingMethod
Ifwashingdoesnotremovealldebrisfromunderthe
lawnmower,scrapeitclean.
1.Disconnectthewirefromthesparkplug(Figure12).
2.Drainthefuelfromthefueltank.RefertoEmptying
theFuelTankandCleaningtheFuelFilter.
WARNING
Tippingthelawnmowermaycausethefuel
toleakfromthecarburetororthefueltank.
Gasolineisextremelyammable,highly
explosive,and,undercertainconditions,can
causepersonalinjuryorpropertydamage.
Avoidfuelspillsbyrunningtheenginedryorby
removingthegasolinewithahandpump;never
siphon.
3.Tipthelawnmowerontoitsrightside.
4.Removethedirtandgrassclippingswithahardwood
scraper.Avoidburrsandsharpedges.
5.Turnthelawnmowerupright.
6.Fillthefueltank.
7.Connectthewiretothesparkplug.
CleaningundertheBeltCover
ServiceInterval:Every50hours
Keeptheareaunderthebeltcoverfreeofdebris.
1.Stoptheengineandwaitforallmovingpartstostop.
2.Removetheboltsthatsecurethebeltcover
(Figure34)tothelawnmowerhousing.
Figure34
1.Beltcover
3.Liftoffthecoverandbrushoutallthedebrisaround
thebeltarea.
4.Installthebeltcover.
CleaningtheDischargeTunnel
andPlug
ServiceInterval:Beforeeachuseordaily
Removetheplugfromthedischargetunnelandclean
itaftereachuse.
Alwaysbesurethatthedischargetunneldoorcloses
securelywhenyoureleasethehandle.Ifthedebris
preventsthedischargedoorfromclosingsecurely ,
cleantheinsideofthedischargetunnelandthedoor
thoroughly.
WARNING
Grassclippingsandotherobjectscanbethrown
fromanopendischargetunnelandcauseserious
injuryorkilltheoperatororbystanders.
Neverstartoroperatethelawnmowerunlessone
ofthefollowingistrue:
•Thedischargetunnelplugislockedsecurelyin
thedischargetunnel.
•Thegrassbagislockedinplace.
•Theoptionalsidedischargechuteislockedin
place.
•Thedischargetunneldoorislockedinplace.
24
Page 25

Storage
Topreparethelawnmowerforoff-seasonstorage,
performtherecommendedmaintenanceprocedures.
RefertoMaintenance.
3.Removegrassclippings,dirt,andgrimefromthe
externalpartsoftheengine,theshrouding,andthe
topofthelawnmowerhousing.
4.Checktheconditionoftheblade.Referto
MaintainingtheCuttingBlade.
Storethelawnmowerinacool,clean,dryplace.Cover
thelawnmowertokeepitcleanandprotected.
PreparingtheFuelSystem
WARNING
Gasolinecanvaporizeifyoustoreitoverlong
periodsoftimeandexplodeifitcomesintocontact
withanopename.
•Donotstoregasolineoverlongperiodsoftime.
•Donotstorethelawnmowerwithgasolinein
thefueltankorthecarburetorinanenclosure
withanopename.(Forexample,afurnaceor
awaterheaterpilotlight.)
•Allowtheenginetocoolbeforestoringitinany
enclosure.
Emptythefueltankwhenmowingthelasttimebefore
storingthelawnmower.
1.Runthelawnmoweruntiltheenginestopsfrom
runningoutoffuel.
2.Primetheengineandstartitagain.
3.Allowtheenginetorununtilitstops.Whenyoucan
nolongerstarttheengine,itissufcientlydry.
5.Cleanthebladebrakeclutchshield;refertoCleaning
theBladeBrakeClutchShield.
6.Servicetheairlter;refertoServicingtheAirFilter.
7.Lubricatethepivotarms;refertoLubricatingthe
PivotArms.
8.Tightenallnuts,bolts,andscrews.
9.Touchupallrustedorchippedpaintsurfaceswith
paintavailablefromanAuthorizedServiceDealer.
RemovingtheLawnMower
fromStorage
1.Checkandtightenallfasteners.
2.Removethesparkplugandspintheenginerapidly
usingthestartertoblowexcessoilfromthecylinder.
3.Cleanthesparkplugorreplaceitifitiscracked,
broken,oriftheelectrodesareworn.
4.Installthesparkplugandtorqueitto17ft-lb(23
N⋅m).
5.Performanyneededmaintenanceprocedures;refer
toMaintenance.
6.Fillthefuelinthefueltankwithfreshgasoline.
7.Checktheengineoillevel.
PreparingtheEngine
1.Whiletheengineisstillwarm,changetheoilfrom
thecrankcase.RefertoChangingtheEngineOil.
2.Removethesparkplug(Figure12).
3.Usinganoilcan,addaboutonetablespoonofoilto
thecrankcasethroughthesparkplughole.
4.Slowlyrotatetheengineseveraltimes,usingthe
starterrope,todistributetheoil.
5.Installthesparkplugbutdonotconnectthewireto
thesparkplug.
GeneralInformation
1.Cleanthelawnmowerhousing.RefertoCleanunder
theLawnMowerHousing.
2.Cleananydirtandchafffromthecylinder,cylinder
headns,andblowerhousing.
8.Connectthewiretothesparkplug.
25
Page 26

Troubleshooting
Problem
Enginedoesnotstart
Enginestartshardorlosespower
Enginerunsrough
PossibleCauseCorrectiveAction
1.Thefueltankisemptyorthefuel
systemcontainsstalefuel.
2.Theenginehasnotbeenprimed.2.Primetheengine.
3.Thewireisnotconnectedtothespark
plug.
4.Thesparkplugispitted,fouled,orthe
gapisincorrect.
1.Thefueltankcontainsstalefuel.1.Drainandllthefueltankwithfresh
2.Thefuelcapventholeisplugged.2.Cleanthefuelcapventholeorreplace
3.Theairlterelementisdirtyandis
restrictingtheairow .
4.Theundersideofthelawnmowerdeck
containsclippingsanddebris.
5.Thesparkplugispitted,fouled,orthe
gapisincorrect.
6.Theengineoillevelislowortheoilis
dirty.
1.Thewireisnotconnectedtothespark
plug.
2.Thesparkplugispitted,fouled,orthe
gapisincorrect.
3.ThethrottleleverisnotintheFast
position.
4.Theairlterelementisdirtyandis
restrictingtheairow .
1.Drainand/orllthefueltankwith
freshgasoline.Iftheproblempersists,
contactanAuthorizedServiceDealer.
3.Connectthewiretothesparkplug.
4.Checkthesparkplugandadjustthe
gapifnecessary.Replacethespark
plugifitispitted,fouled,orcracked.
gasoline.
thefuelcap.
3.Cleantheairlterpre-cleanerand/or
replacethepaperairlter.
4.Cleantheundersideofthelawnmower
deck.
5.Checkthesparkplugandadjustthe
gapifnecessary.Replacethespark
plugifitispitted,fouled,orcracked.
6.Checktheengineoil.Changetheoilif
itisdirtyoraddoilifitislow.
1.Connectthewiretothesparkplug.
2.Checkthesparkplugandadjustthe
gapifnecessary.Replacethespark
plugifitispitted,fouled,orcracked.
3.MovethethrottlelevertotheFast
position.
4.Cleantheairlterpre-cleanerand/or
replacethepaperairlter.
Lawnmowerorenginevibrates
excessively
Unevencuttingpattern
Dischargechuteplugs
1.Thebladeisbentorisoutofbalance.1.Balancetheblade.Ifthebladeisbent,
2.Theblademountingnutsareloose.2.Tightentheblademountingnuts.
3.Theundersideofthelawnmowerdeck
containsclippingsanddebris.
4.Theenginemountingboltsareloose.4.Tightentheenginemountingbolts.
1.All4wheelsarenotatthesameheight.1.Placeall4wheelsatthesameheight.
2.Thebladeisdull.
3.Y ouaremowinginthesamepattern
repeatedly.
4.Theundersideofthelawnmowerdeck
containsclippingsanddebris.
1.ThethrottleleverisnotintheFast
position.
2.Thecuttingheightistoolow.2.Raisethecuttingheight.
3.Y ouaremowingtoofast.3.Slowdown.
4.Thegrassiswet.
5.Theundersideofthelawnmowerdeck
containsclippingsanddebris.
replaceit.
3.Cleantheundersideofthelawnmower
deck.
2.Sharpenandbalancetheblade.
3.Changethemowingpattern.
4.Cleantheundersideofthelawnmower
deck.
1.MovethethrottlelevertotheFast
position.
4.Allowthegrasstodrybeforemowing.
5.Cleantheundersideofthelawnmower
deck.
26
Page 27

Problem
PossibleCauseCorrectiveAction
Lawnmowerdoesnotself-propel
1.Theself-propeldrivecableisoutof
adjustmentorisdamaged.
2.Thereisdebrisunderthebeltcover.
1.Adjusttheself-propeldrivecable.
Replacethecableifnecessary .
2.Cleanthedebrisfromunderthebelt
cover.
27
Page 28

TheToroTotalCoverageGuarantee
ATwo-YearFullWarranty(LimitedWarrantyforCommercialUse)
LCE
21”Commercial
WalkPowerMowers
ConditionsandProductsCovered
TheToro®Companyanditsafliate,T oroWarrantyCompany,pursuant
toanagreementbetweenthem,jointlypromisetorepairanyToro
Product,usedfornormalresidentialpurposes*ifdefectiveinmaterialsor
workmanship.Thefollowingtimeperiodsapplyfromthedateofpurchase:
ProductsWarrantyPeriod
21”CommercialWalkPower
MowersandAccessories
Thiswarrantyincludesthecostofpartsandlabor,butyoumustpay
transportationcosts.
2yearfullwarranty
LimitedWarrantyforCommercialUse
ToroProductsusedatmorethanonelocation,orusedforinstitutionalor
rentaluse,arewarrantedfromthedateofpurchaseagainstdefectsin
materialsorworkmanshipforthefollowingtimeperiods.
ProductsWarrantyPeriod
21”CommercialWalkPower
MowersandAccessories
•
KawasakiEngines2yearlimitedwarranty
•
HondaGXVEngines
•
HondaGSVEngines
1yearlimitedwarranty
2yearlimitedwarranty
1yearlimitedwarranty
ItemsandConditionsNotCovered
Thereisnootherexpresswarrantyexceptforspecialemissionsystem
coverageandenginewarrantycoverageonsomeproducts.Thisexpress
warrantydoesnotcoverthefollowing:
•Costofregularmaintenanceserviceorparts,suchaslters,fuel,
lubricants,oilchanges,sparkplugs,airlters,bladesharpening/worn
bladeonmowers,cable/linkageadjustments,orbrakeandclutch
adjustments
•Componentsfailingduetonormalweararenotcoveredbythis
warranty
•Anyproductorpartwhichhasbeenalteredormisusedandrequires
replacementorrepairduetoaccidentsorlackofpropermaintenance
•Repairsnecessaryduetoimproperbatterycare,failuretousefresh
fuel(lessthanonemonthold),orfailuretoproperlypreparetheunit
priortoanyperiodofnon-useoveronemonth
•Pickupanddeliverycharges
•Operationalmisuse,neglect,oraccidents
•RepairsorattemptedrepairsbyanyoneotherthananAuthorized
ToroServiceDealer
OwnerResponsibilities
YoumustmaintainyourT oroProductbyfollowingthemaintenance
proceduresdescribedintheOperator’sManual.Suchroutine
maintenance,whetherperformedbyadealerorbyyou,isatyourexpense.
InstructionsforObtainingWarrantyService
IfyouthinkthatyourT oroProductcontainsadefectinmaterialsor
workmanship,followthisprocedure:
1.ContactanyAuthorizedT oroServiceDealertoarrangeserviceattheir
dealership.Tolocateadealerconvenienttoyou,refertotheYellow
Pagesofyourtelephonedirectory(lookunder“LawnMowers”)or
accessourwebsiteatwww.Toro.com.Y oumayalsocallthenumbers
listedinitem#3tousethe24-hourToroDealerlocatorsystem.
2.Bringtheproductandyourproofofpurchase(salesreceipt)tothe
ServiceDealer.Thedealerwilldiagnosetheproblemanddetermine
ifitiscoveredunderwarranty.
3.IfforanyreasonyouaredissatisedwiththeServiceDealer’s
analysisorwiththeassistanceprovided,contactusat:
LCBCustomerCareDepartment
ToroW arrantyCompany
811 1LyndaleAvenueSouth
Bloomington,MN55420-1196
Tollfreeat888-865–5676(U.S.customers)
Tollfreeat888-865–5691(Canadiancustomers)
GeneralConditions
Allrepairscoveredbythesewarrantiesmustbeperformedbyan
AuthorizedToroServiceDealerusingT oroapprovedreplacementparts.
RepairbyanAuthorizedT oroServiceDealerisyoursoleremedyunder
thiswarranty .
NeitherTheToro®CompanynorToroWarrantyCompanyisliablefor
indirect,incidental,orconsequentialdamagesinconnectionwiththe
useoftheToroProductscoveredbythesewarranties,includingany
costorexpenseofprovidingsubstituteequipmentorserviceduring
reasonableperiodsofmalfunctionornon-usependingcompletionof
repairsunderthesewarranties.
Somestatesdonotallowexclusionsofincidentalorconsequential
damages,sotheaboveexclusionsmaynotapplytoyou.
Thiswarrantygivesyouspeciclegalrights,andyoumayalsohaveother
rightswhichvaryfromstatetostate.
CountriesOtherthantheUnitedStatesorCanada
CustomerswhohavepurchasedT oroproductsexportedfromtheUnitedStatesorCanadashouldcontacttheirT oroDistributor(Dealer)toobtain
guaranteepoliciesforyourcountry ,province,orstate.IfforanyreasonyouaredissatisedwithyourDistributor’sserviceorhavedifcultyobtaining
guaranteeinformation,contacttheToroimporter.Ifallotherremediesfail,youmaycontactusatT oroWarrantyCompany .
*Residentialpurposesmeansuseoftheproductonthesamelotasyourhome.Useatmorethanonelocationisconsideredcommercialuse,andthecommercial
usewarrantywouldapply.
374-0260RevA
 Loading...