

Page 1
Emotion43cmLawnMower
ModelNo.21026—SerialNo.290003001andUp
ModelNo.21027—SerialNo.290003001andUp
FormNo.3365-366RevA
Operator'sManual
Introduction
Thisrotary-blade,walk-behindlawnmoweris
intendedtobeusedbyresidentialhomeowners
orprofessional,hiredoperators.Itisdesigned
primarilyforcuttinggrassonwell-maintainedlawns
onresidentialorcommercialproperties.Itisnot
designedforcuttingbrushorforagriculturaluses.
Readthisinformationcarefullytolearnhowtooperate
andmaintainyourproductproperlyandtoavoidinjury
andproductdamage.Youareresponsibleforoperating
theproductproperlyandsafely.
YoumaycontactTorodirectlyatwww.Toro.comfor
productandaccessoryinformation,helpndinga
dealer,ortoregisteryourproduct.
Wheneveryouneedservice,genuineToroparts,or
additionalinformation,contactanAuthorizedService
DealerorToroCustomerServiceandhavethemodel
andserialnumbersofyourproductready.
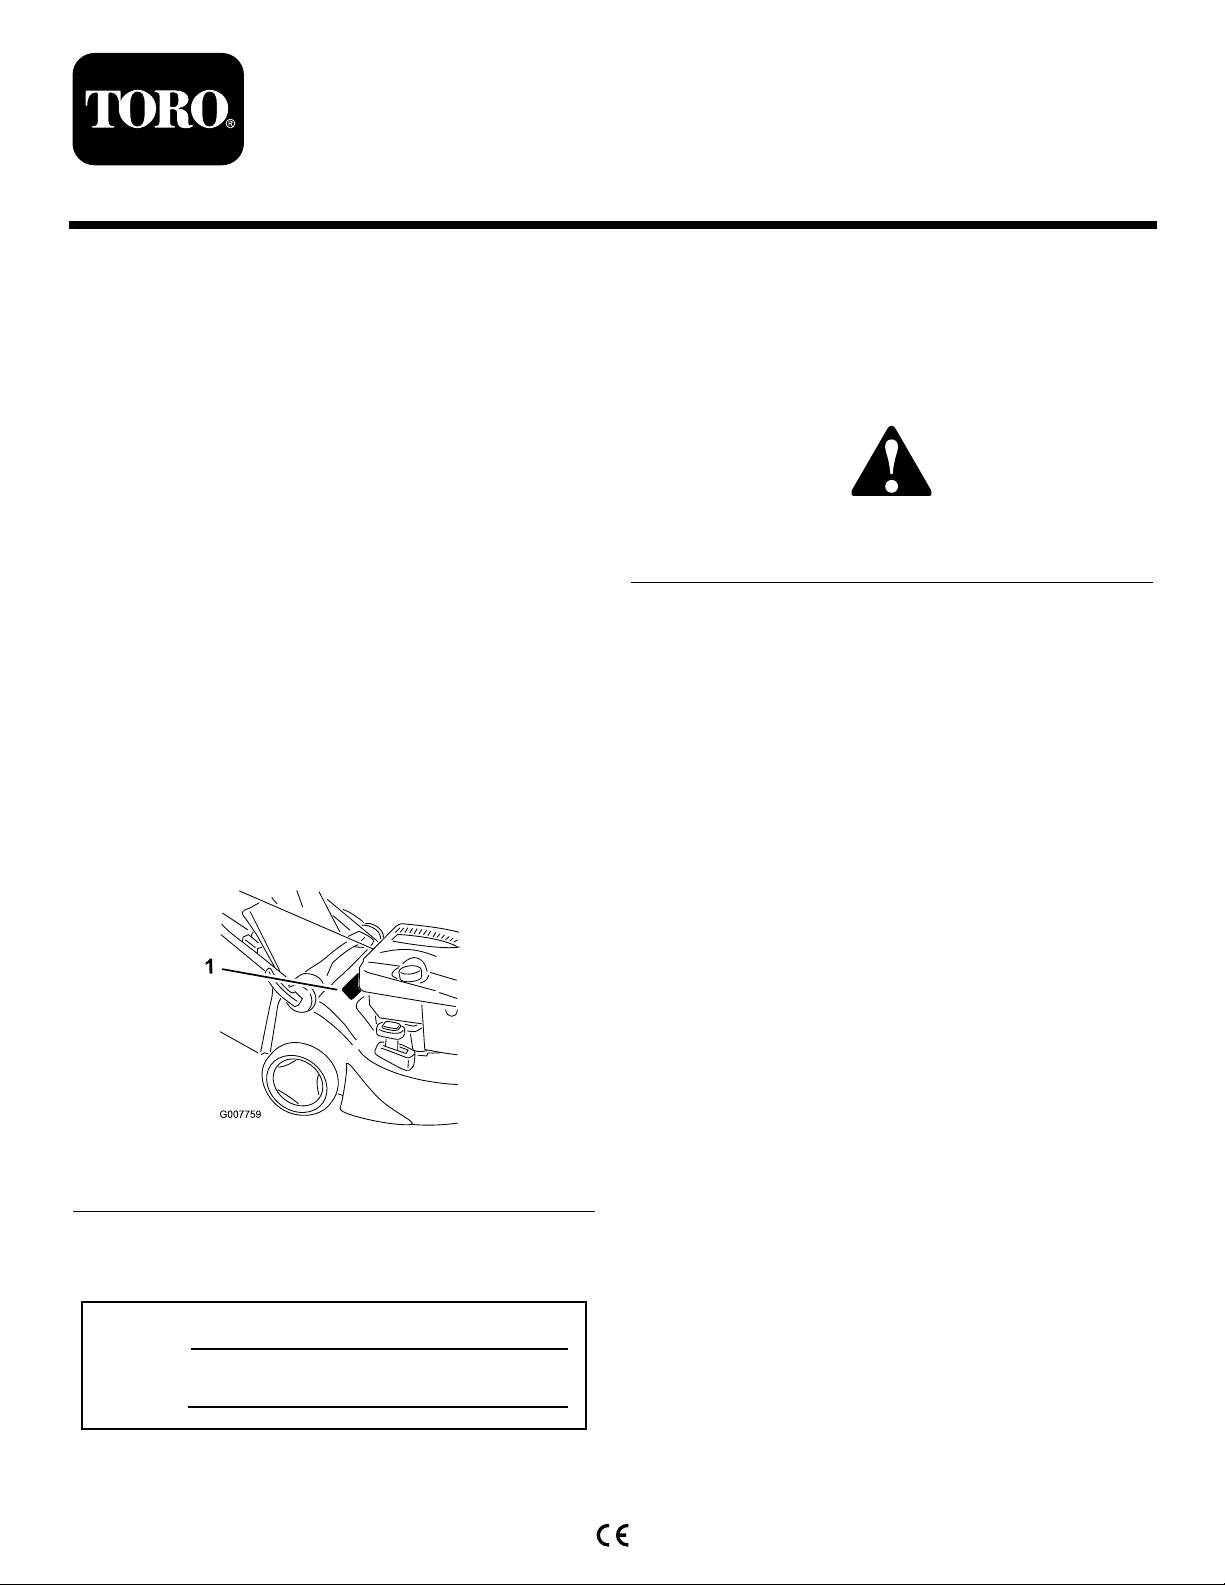
identiesthelocationofthemodelandserialnumbers
ontheproduct.
Figure1
Thismanualidentiespotentialhazardsandhas
safetymessagesidentiedbythesafetyalertsymbol
(Figure2),whichsignalsahazardthatmaycauseserious
injuryordeathifyoudonotfollowtherecommended
precautions.
Figure2
1.Safetyalertsymbol
Thismanualuses2wordstohighlightinformation.
Importantcallsattentiontospecialmechanical
informationandNoteemphasizesgeneralinformation
worthyofspecialattention.
Formodelswithstatedenginehorsepower,thegross
horsepoweroftheenginewaslaboratoryratedbythe
enginemanufacturerinaccordancewithSAEJ1940.
Asconguredtomeetsafety,emission,andoperating
requirements,theactualenginehorsepoweronthisclass
oflawnmowerwillbesignicantlylower.
Figure1
1.Modelandserialnumberplate
Writetheproductmodelandserialnumbersinthespace
below:
ModelNo.
SerialNo.
©2010—TheT oro®Company
8111LyndaleAvenueSouth
Bloomington,MN55420
Registeratwww.Toro.com.
Safety
Improperlyusingormaintainingthismowercan
resultininjury.Toreducethepotentialforinjury,
complywiththesesafetyinstructions.
Torodesignedandtestedthismowerforreasonablysafe
service;however,failuretocomplywiththefollowing
instructionsmayresultinpersonalinjury.
Toensuremaximumsafety,bestperformance,and
togainknowledgeoftheproduct,itisessential
thatyouandanyotheroperatorofthemowerread
andunderstandthecontentsofthismanualbefore
theengineiseverstarted.Payparticularattention
tothesafetyalertsymbol(
Caution,W arning,orDanger—“personalsafety
instruction.”Readandunderstandtheinstruction
becauseithastodowithsafety .Failuretocomply
withtheinstructionmayresultinpersonalinjury.
Figure2)whichmeans
OriginalInstructions(EN)
PrintedinPoland
AllRightsReserved
Page 2

GeneralLawnMowerSafety
ThefollowinginstructionshavebeenadaptedfromEN
836.
Thiscuttingmachineiscapableofamputatinghands
andfeetandthrowingobjects.Failuretoobservethe
followingsafetyinstructionscouldresultinserious
injuryordeath.
Training
•Readtheinstructionscarefully.Befamiliarwiththe
controlsandtheproperuseoftheequipment.
•Neverallowchildrenorpeopleunfamiliarwiththese
instructionstousethemower.Localregulationscan
restricttheageoftheoperator.
•Keepinmindthattheoperatororuserisresponsible
foraccidentsorhazardsoccurringtootherpeopleor
theirproperty.
•Understandexplanationsforallpictogramsusedon
themowerorintheinstructions.
ordamaged.Replacewornordamagedbladesand
boltsinsetstopreservebalance.
Starting
•Disengageallbladeanddriveclutchesandshiftinto
neutralbeforestartingtheengine.
•Donottiltmowerwhenstartingtheengineor
switchingonthemotor,unlessthemowerhastobe
tiltedforstarting.Inthiscase,donottiltitmorethan
absolutelynecessaryandliftonlythepart,whichis
awayfromtheoperator.
•Starttheengineorswitchonthemotorcarefully
accordingtoinstructionsandwithfeetwellaway
fromtheblade(s)andnotinfrontofthedischarge
chute.
Operation
•Nevermowwhilepeople,especiallychildren,orpets
arenearby.
•Mowonlyindaylightoringoodarticiallight.
Gasoline
WARNING-Gasolineishighlyammable.Takethe
followingprecautions.
•Storefuelincontainersspecicallydesignedforthis
purpose.
•Refueloutdoorsonlyanddonotsmokewhile
refueling.
•Addfuelbeforestartingtheengine.Neverremove
thecapofthefueltankoraddgasolinewhilethe
engineisrunningorwhentheengineishot.
•Ifgasolineisspilled,donotattempttostartthe
enginebutmovethemowerawayfromtheareaof
spillageandavoidcreatinganysourceofignition
untilgasolinevaporshavedissipated.
•Replaceallfueltankandcontainercapssecurely.
Preparation
•Whilemowing,alwayswearsubstantialfootwearand
longtrousers.Donotoperatetheequipmentwhen
barefootorwearingopensandals.
•Thoroughlyinspecttheareawheretheequipmentis
tobeusedandremoveallstones,sticks,wires,bones
andotherforeignobjects.
•Beforeusing,alwaysvisuallyinspecttoseethat
guards,andsafetydevices,suchasdeectorsand/or
grasscatchers,areinplaceandworkingcorrectly.
•Beforeusing,alwaysvisuallyinspecttoseethatthe
blades,bladeboltsandcutterassemblyarenotworn
•Stayalertforholesintheterrainandotherhidden
hazards.
•Donotputhandsorfeetnearorunderrotatingparts.
Keepclearofthedischargeopeningatalltimes.
•Neverpickuporcarryalawnmowerwhilethe
engineisrunning.
•Useextremecautionwhenreversingorpullinga
pedestriancontrolledlawnmowertowardsyou.
•Walk,neverrun.
•Slopes:
–Donotmowexcessivelysteepslopes.
–Exerciseextremecautionwhenonslopes.
–Mowacrossthefaceofslopes,neverupand
downandexerciseextremecautionwhen
changingdirectiononslopes.
–Alwaysbesureofyourfootingonslopes.
•Stopthebladeifthelawnmowerhastobetiltedfor
transportationwhencrossingsurfacesotherthan
grassandwhentransportingthelawnmowertoand
fromtheareatobemowed.
•Donotoperatetheengineinaconnedspacewhere
dangerouscarbonmonoxidefumescancollect.
•Stoptheengine
–wheneveryouleavethelawnmower.
–beforerefueling.
–beforeremovingthegrasscatcher.
2
Page 3

–beforemakingheightadjustmentunless
adjustmentcanbemadefromtheoperator’s
position.
andaccessories.Donotuse
accessories;theymaycauseasafetyhazard.
will t
partsand
•Stoptheengineanddisconnectthespark-plugwire.
–beforeclearingblockagesoruncloggingchute.
–beforechecking,cleaningorworkingonthelawn
mower.
–afterstrikingaforeignobject,inspectthelawn
mowerfordamageandmakerepairsbefore
restartingandoperatingthelawnmower.
–iflawnmowerstartstovibrateabnormally(check
immediately).
•Lightningcancausesevereinjuryordeath.Ifyousee
lightningorhearthunderinthearea,donotoperate
themachine;seekshelter.
•Watchoutfortrafcwhencrossingornearroadways.
MaintenanceandStorage
•Keepallnuts,boltsandscrewstighttobesurethe
equipmentisinsafeworkingcondition.
•Donotusepressurecleaningequipmentonmachine.
•Neverstoretheequipmentwithgasolineinthetank
andinsideabuildingwherefumescanreachanopen
ameorspark.
•Allowtheenginetocoolbeforestoringinany
enclosure.
•Toreducetherehazard,keeptheengine,silencer,
batterycompartmentandgasolinestorageareafree
ofgrass,leaves,orexcessivegrease.
•Checkgrasscatchercomponentsandthedischarge
guardfrequentlyandreplacewithmanufacturer’ s
recommendedparts,whennecessary.
•Replacewornordamagedpartsforsafety .
SoundPressure
Thisunithasasoundpressurelevelattheoperator’s
earof86dBA,whichincludesanUncertaintyValue(K)
of1dBA.
Soundpressurelevelwasdeterminedaccordingtothe
proceduresoutlinedinENISO11201.
SoundPower
Thisunithasaguaranteedsoundpowerlevelof96dBA,
whichincludesanUncertaintyValue(K)of1dBA.
Soundpowerlevelwasdeterminedaccordingtothe
proceduresoutlinedinISO11094.
Hand-ArmVibration
Model21080
Measuredvibrationlevelforlefthand=3.1m/s
Measuredvibrationlevelforrighthand=2.2m/s
UncertaintyValue(K)=1.6m/s
Measuredvaluesweredeterminedaccordingtothe
proceduresoutlinedinEN1032.
2
Model21090
Measuredvibrationlevelforlefthand=3.0m/s
Measuredvibrationlevelforrighthand=1.7m/s
UncertaintyValue(K)=1.5m/s
2
2
2
2
2
•Replacefaultysilencers.
•Ifthefueltankhastobedrained,dothisoutdoors.
•Donotchangetheenginegovernorsettingsor
overspeedtheengine.Operatinganengineat
excessivespeedcanincreasethehazardofpersonal
injury.
•Onmultibladedlawnmowers,takecareasrotating
oneblademaycauseotherstorotate.
•Becarefulduringadjustmentofthelawnmowerto
prevententrapmentofthengersbetweenmoving
bladesandxedpartsofthelawnmower.
•Toensurethebestperformanceandsafety,
purchaseonlygenuineTororeplacementparts
Measuredvaluesweredeterminedaccordingtothe
proceduresoutlinedinEN1032.
3
Page 4
SafetyandInstructionalDecals
1.
2.
115-3116
3.
Important:Safetyandinstructiondecalsarelocatednearareasofpotentialdanger.Replacedamaged
decals.
Manufacturer’sMark
1.Indicatesthebladeisidentiedasapartfromtheoriginal
machinemanufacturer.
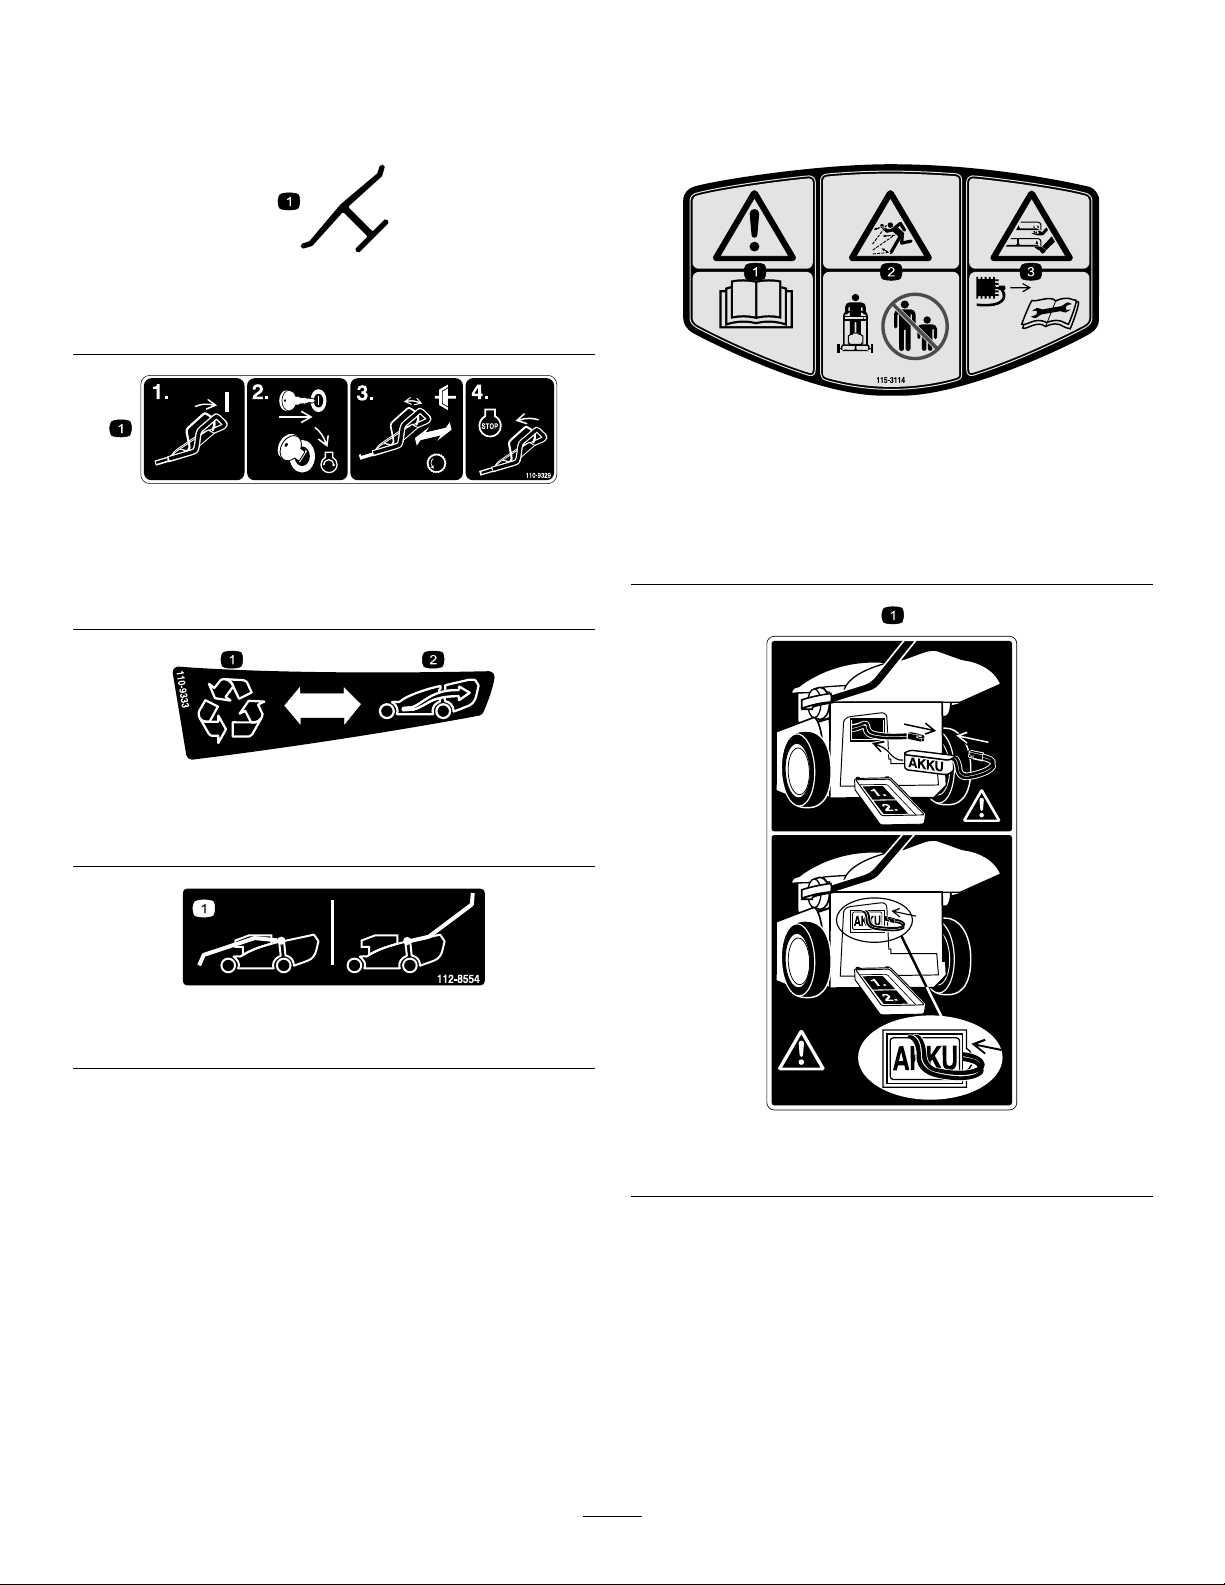
115-3114
1.ReadtheOperator’sManual.
2.Thrownobjecthazard—keepbystandersasafedistance
110-9329
1.Tooperatethemachine,engagethebail,inserttheignition
keyandstarttheengine,operatingthebailengagesthe
clutchandthehandleassemblyengagesthetractiondrive,
releasethebailtostoptheengine.
fromthemachine.
3.Cutting/dismembermentofhandorfoot,mower
blade—removethesparkplugwireandreadthe
instructionsbeforeservicingorperformingmaintenance.
110-9333
1.Recycle
2.Collect
112-8554
1.Handlerelease
115-3116
1.Installingthebattery .
4
Page 5

Setup
1
AssemblingandUnfoldingthe
Handle
NoPartsRequired
Procedure
WARNING
Assemblingandunfoldingthehandleimproperly
candamagethecables,causinganunsafeoperating
condition.
•Donotdamagethecableswhenassemblingand
unfoldingthehandle.
•Ensurethatthecablesareroutedtotheoutside
ofthehandle.
•Ifacableisdamaged,contactanAuthorized
ServiceDealer.
1.Unlockthehandlelocks,movethehandlesections
intotheoperatingposition,attachtheupperhandle
tothelowerhandle,andlockthehandlelocks
Figure3).
(
Figure3
1.Handlelock(4)
2.Toadjustthehandleheight,unlocktheupperhandle
locksandrotatetheupperhandleupwardandlockit
intoapositionthatiscomfortableforyou(
1.Highestposition3.Lowestposition
2.Middleposition
2.Upperhandleend
Figure4
Figure4).
Note:Youcansettheupperhandleto1of3handle
positions.Lineupthemarktooneofthe3markson
theinnersideoftheupperhandlelocks(
5
Figure4).
Page 6
Note:Ifahandleleverisloose,openthelever,
rotateitclockwise1or2turnstotightenit,then
closethelever(Figure5).
Figure5
3
AssemblingtheGrassBag
NoPartsRequired
Procedure
Attachthelipontothefrontofthegrassbagframeas
shownin(Figure7).
2
InstallingtheStarterRope
NoPartsRequired
Procedure
Pullthestarterropethroughtheropeguideonthe
handle(Figure6).
Figure6
1.Starterrope
2.Ropeguide
Figure7
1.Lip
4
FillingtheEnginewithOil
NoPartsRequired
Procedure
Important:Yourmowerdoesnotcomewithoil
intheengine.
1.Removethedipstick(Figure8).
Note:Tomaketheropeeasiertoinstall,squeezethe
controlbaronthehandle.
6
Page 7

5
InstallingtheFuse
NoPartsRequired
Procedure
Model21027only
Figure8
2.Slowlypouroilintotheoillltubeuntiltheoillevel
reachestheFullmarkonthedipstick(Figure8).
Donotoverll.(Max.ll:0.59l,type:SAE30
detergentoilwithanAPIserviceclassicationofSF,
SG,SH,SJ,SL,orhigher.)
3.Installthedipsticksecurely.
Important:
5 operating hour s
RefertoChangingtheEngineOil.
Change the engine oil after the r st
;changeityearlythereafter.
Yourmowercomeswitha40-ampfusethatprotectsthe
electricstarter.
Important:Y oucannotstartthemowerwiththe
electricstarterorchargethebatteryunlessyou
installthefuse.
1.Openthebatterycover(Figure9).
Figure9
1.Batterycover3.Fuse
2.Fuseholder
2.Locatethefuseholderfromtheupperleftcornerof
theopeningtothebatterycompartment(Figure9).
Note:Thewiretothefuseholderisshort;youwill
notbeabletopullthefuseholderfullyoutofthe
batterycompartment.
3.Installthefuseinthefuseholder(
7
Figure10).
Page 8

Figure10
Note:Yourmowercomeswithafuseintheyour
owner’spacket.
4.Installthebatterycover.
6
ProductOverview
ChargingtheBattery
NoPartsRequired
Procedure
Model21027only
RefertoChargingtheBatteryintheMaintenance
section.
Figure11
Model21027shown
1.Lowerhandlelock(2)
2.Grassbag9.Cuttingheightadjustment
3.Upperhandlelock(2)10.Oilll/Dipstick(notshown)
4.Recoilstarthandle11.Fueltankcap
5.Tractionassisthandle
6.Bladecontrolbar
7.Ignitionkey(model21027
only)
8.Reardoor
handle
12.Sparkplug
13.Airlter
14.Recycling/bagginglever
Specications
ModelWeightLengthWidthHeight
2102673lb
(33kg)
2102773lb
(33kg)
65in
(165cm)
65in
(165cm)
19in
(48cm)
19in
(48cm)
43in
(109cm)
43in
(109cm)
8
Page 9

Operation
FillingtheFuelTank
DANGER
Gasolineisextremelyammableandexplosive.A
reorexplosionfromgasolinecanburnyouand
others.
•Topreventastaticchargefromignitingthe
gasoline,placethecontainerand/ormower
directlyonthegroundbeforelling,notina
vehicleoronanobject.
•Fillthetankoutdoorswhentheengineiscold.
Wipeupspills.
•Donothandlegasolinewhensmokingoraround
anopenameorsparks.
•Storegasolineinanapprovedfuelcontainer,out
ofthereachofchildren.
CheckingtheEngineOilLevel
ServiceInterval:Beforeeachuseordaily
1.Removethedipstick,wipeitclean,andfullyinstall
thedipstick(Figure8).
2.Removethedipstickandchecktheoillevel
(Figure8).IftheoillevelisbelowtheAddmarkon
thedipstick,slowlypouroilintotheoillltubeto
raisetheoilleveltotheFullmarkonthedipstick.
Donotoverll.(Max.ll:0.59l,type:SAE30
detergentoilwithanAPIserviceclassicationofSF,
SG,SH,SJ,SL,orhigher.)
3.Installthedipstick.
AdjustingtheCuttingHeight
Youcanadjustthemowertocutgrassatanyheight
from2.2cmto7.6cm.
WARNING
Fillthefueltankwithfreshunleadedregulargasoline
fromamajorname-brandservicestation(Figure12).
Important:Toreducestartingproblems,add
fuelstabilizertothefuelallseason,mixingitwith
gasolinelessthan30daysold.
Figure12
Adjustingthecuttingheightmaybringyouinto
contactwiththemovingblade,causingserious
injury.
•Stoptheengineandwaitforallmovingparts
tostop.
•Donotputyourngersunderthehousingwhen
adjustingthecuttingheight.
CAUTION
Iftheenginehasbeenrunning,themuferwillbe
hotandcanseverelyburnyou.Keepawayfromthe
hotmufer.
•CutthegrassattheC,D,orEsettings.Donot
attempttorecyclethegrassattheAorB
settings.
•DonotcutbelowtheCsettingunlessthegrassis
sparseoritislatefallwhengrassgrowthbeginsto
slowdown.Whenyoucutlonggrass,useahigher
cuttingheightsettingandwalkslower;thencutthe
grassagainatanormalsetting.Mowingthegrass
whenitistoolongcanplugthelawnmowerand
causetheenginetostall.
Note:TheSmartWheel
toensurethatyoucutnomorethanathirdofthegrass
blade(Figure13).
9
®
calculatesthepropersetting
Page 10

StartingtheEngine
1.Holdthebladecontrolbaragainstthehandle
(Figure14).
Figure14
2.Pulltherecoilstarter(Figure15)orturntheignition
keyasshowninFigure16(model21027only).
Figure13
1.Cuttingheightadjustment
handle
2.Cuttingheightadjustment
button
3.Cuttingheightscale
4.Raiseorlowerthemower
5.SmartWheel
1.Stoptheengineandwaitforallmovingpartstostop.
2.Movethemowerintothegrass;stopmovingthe
mowerwhentheSmartWheeldesignisupright
Figure13).
(
3.UsetheSmartWheeldesigntocomparethetipsof
thegrassbladestothelettersonthewheel.The
letterontheSmartWheelthatmatchesthetipsofthe
grassbladesisthepropercuttingheight.
4.Pressdownonthecuttingheightadjustmentbutton
andholdthecuttingheightadjustmenthandleto
movethecuttingheightupordown(Figure13).
5.Liftuporpressdownonthehandle,andusethe
cuttingheightscaletosetthelawnmowertothe
desiredcuttingheight(Figure13).
Figure15
Figure16
Note:Ifthemowerdoesnotstart,contactan
AuthorizedServiceDealer.
10
Page 11

UsingtheSelf-propelDrive
RecyclingtheClippings
Tooperatetheself-propeldrive,simplywalkwithyour
handsontheupperhandleandyourelbowsatyour
sides,andthemowerwillautomaticallykeeppacewith
you(Figure17).
Figure17
StoppingtheEngine
Yourmowercomesfromthefactoryreadytorecyclethe
grassandleafclippingsbackintothelawn.
Note:Thegrassbagmayremainonthemowerwhile
youarerecyclingtheclippings.
1.Stoptheengineandwaitforallmovingpartstostop.
2.PressthebuttonontopoftheRecycling/bagging
leverandmovethelevertotherecyclingmode
Figure19).
(
Figure19
1.Recyclingmode2.Baggingmode
1.Releasethebladecontrolbar(Figure18).
Figure18
2.Whentheenginestops,removetheignitionkey
whenyouleavethemower.
Important:Whenyoureleasethebladecontrol
bar,boththeengineandbladeshouldstop
within3seconds.Iftheydonotstopproperly,
stopusingyourmowerimmediatelyandcontact
anAuthorizedServiceDealer.
BaggingtheClippings
Usethegrassbagwhenyouwanttocollectgrassand
leafclippingsfromthelawn.
WARNING
Aworngrassbagcouldallowsmallstonesand
othersimilardebristobethrownintheoperator’sor
bystander’sdirectionandresultinseriouspersonal
injuryordeathtotheoperatororbystanders.
Checkthegrassbagfrequently.Ifitisdamaged,
installanewTororeplacementbag.
WARNING
Thebladeissharp;contactingthebladecanresult
inseriouspersonalinjury.
Stoptheengineandwaitforallmovingpartstostop
beforeleavingtheoperatingposition.
1.Stoptheengineandwaitforallmovingpartstostop.
2.Tobagthegrassclippings,installthegrassbag(refer
toInstallingtheGrassBag).Pressthebuttonontop
oftheRecycling/baggingleverandmovethelever
tothebaggingmode(Figure19).
11
Page 12

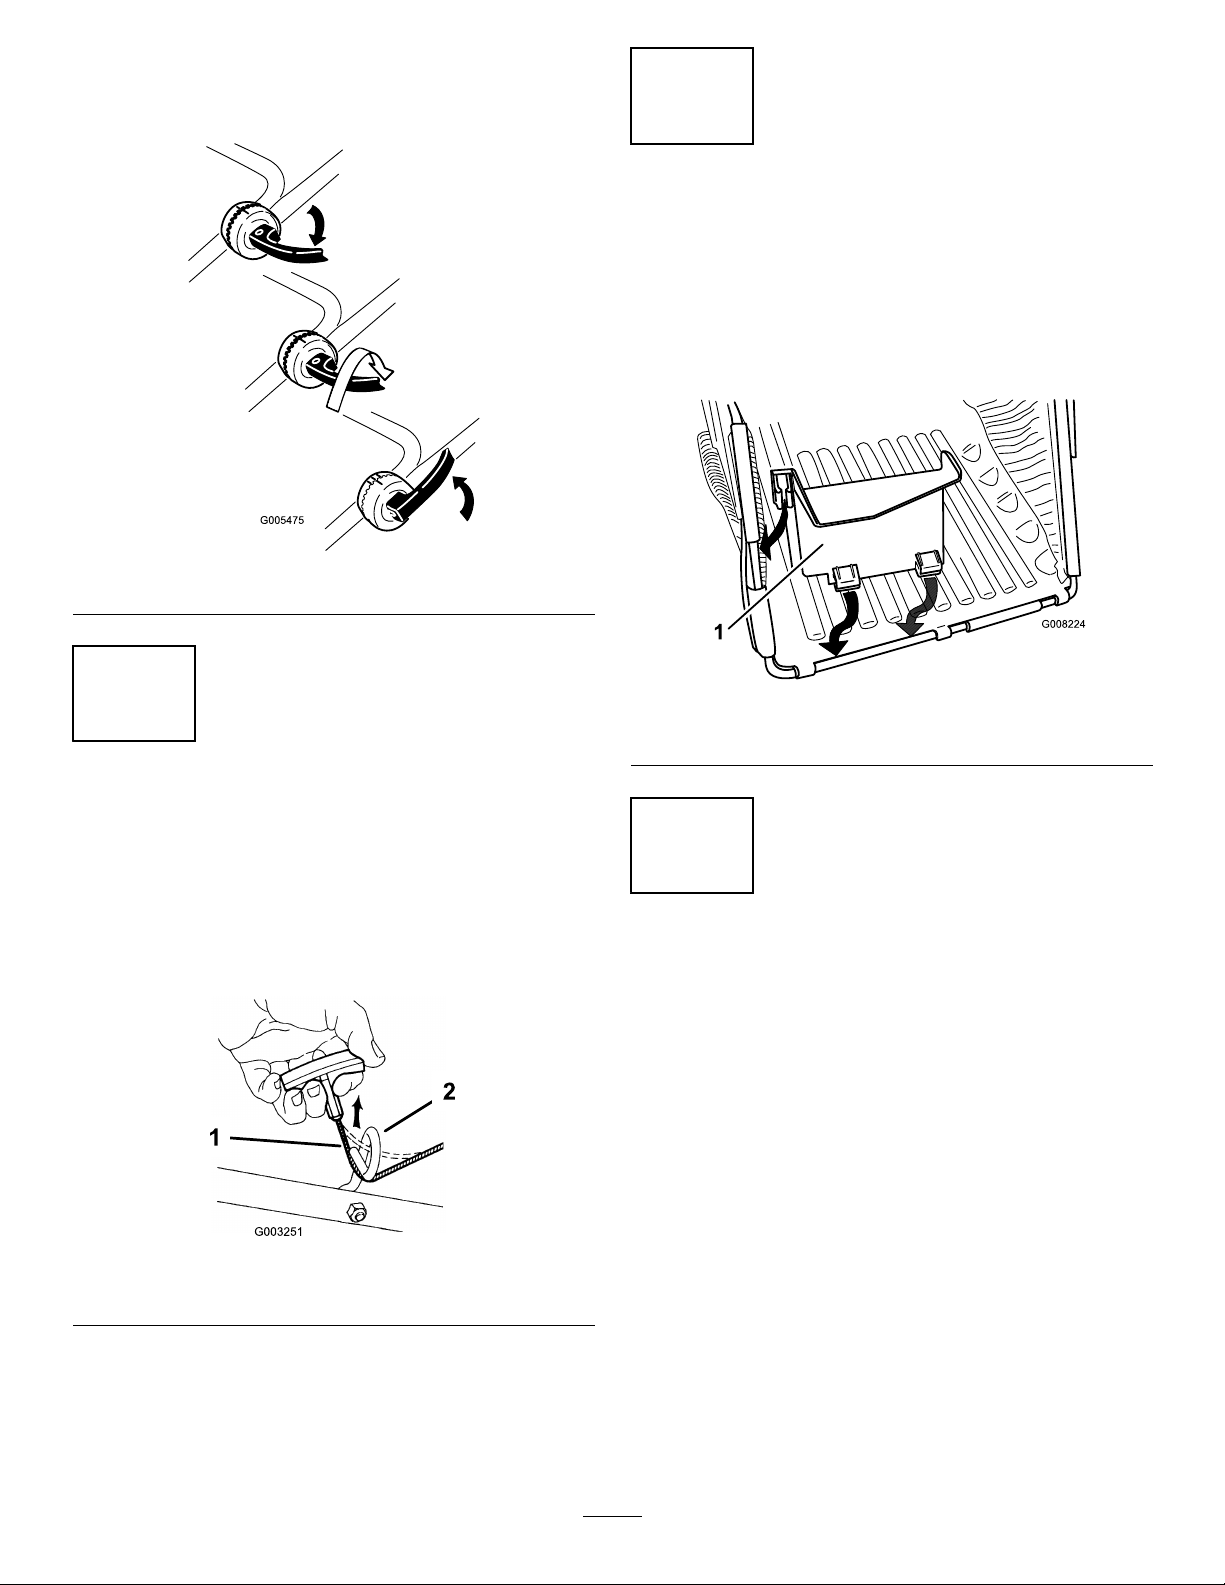
InstallingtheGrassBag
1.Stoptheengineandwaitforallmovingpartstostop.
2.Raiseandholdupthereardoor,installthebagon
thehandle,andlowerthereardoor(Figure20).
Rear-dischargingthe
Clippings
Usethereardischargeforcuttingverytallgrass.
Ifthebagisonthemower,removeit(refertoRemoving
theGrassBag)beforerear-dischargingtheclippings
(Figure21).
Figure21
Note:TheRecycling/bagginglevershouldbeinthe
baggingmode(Figure19).
Figure20
RemovingtheGrassBag
1.Stoptheengineandwaitforallmovingpartstostop.
2.Liftupthegrassbagupandawayfromthehandle.
Note:Tiltthegrassbagslightlybackwardtoprevent
thecollectedgrassclippingsfromfallingout.
WARNING
Thebladeissharp;contactingthebladecanresult
inseriouspersonalinjury.
Stoptheengineandwaitforallmovingpartstostop
beforeleavingtheoperatingposition.
OperatingTips
GeneralMowingTips
•Cleartheareaofsticks,stones,wire,branches,and
otherdebristhatthebladecouldhit.
•Avoidstrikingsolidobjectswiththeblade.Never
deliberatelymowoveranyobject.
•Ifthemowerstrikesanobjectorstartstovibrate,
immediatelystoptheengine,disconnectthewire
fromthesparkplug,andexaminethemowerfor
damage.
•Forbestperformance,installanewbladebeforethe
cuttingseasonbegins.
•ReplacethebladewhennecessarywithaToro
replacementblade.
CuttingGrass
•Cutonlyaboutathirdofthegrassbladeatatime.
DonotcutbelowtheCsettingunlessthegrassis
sparseoritislatefallwhengrassgrowthbeginsto
slowdown.RefertoAdjustingtheCuttingHeight.
12
Page 13

•Whencuttinggrassover15cmtall,mowatthe
highestcuttingheightsettingandwalkslower;then
mowagainatalowersettingforthebestlawn
appearance.Ifthegrassistoolong,themowermay
plugandcausetheenginetostall.
•Mowonlydrygrassorleaves.Wetgrassandleaves
tendtoclumpontheyardandcancausethemower
toplugortheenginetostall.
WARNING
–Raisethecuttingheightonyourmower.
–Cutthegrassmorefrequently.
–Overlapcuttingswathsinsteadofcuttingafull
swathwitheachpass.
–Setthecuttingheightonthefrontwheelsone
notchlowerthantherearwheels.Forexample,
setthefrontwheelsattheCsettingandtherear
wheelsattheDsetting.
Wetgrassorleavescancauseseriousinjuryif
youslipandcontacttheblade.Mowonlyindry
conditions.
•Alternatethemowingdirection.Thishelpsdisperse
theclippingsoverthelawnforevenfertilization.
•Ifthenishedlawnappearanceisunsatisfactory,try
oneormoreofthefollowing:
–Replacethebladeorhaveitsharpened.
–Walkataslowerpacewhilemowing.
CuttingLeaves
•Aftercuttingthelawn,ensurethathalfofthelawn
showsthroughthecutleafcover.Youmayneedto
makemorethanonepassovertheleaves.
•Iftherearemorethan13cmofleavesonthelawn,
setthefrontcuttingheightoneortwonotches
higherthantherearcuttingheight.
•Slowdownyourmowingspeedifthemowerdoes
notcuttheleavesnelyenough.
Maintenance
Note:Determinetheleftandrightsidesofthemachinefromthenormaloperatingposition.
RecommendedMaintenanceSchedule(s)
MaintenanceService
Interval
Aftertherst5hours
MaintenanceProcedure
•Changetheengineoil.
•Checktheengineoillevel.
Beforeeachuseordaily
Every25hours
Every50hours
Every100hours
Beforestorage
Yearly
Important:Refertoyour
•Ensurethattheenginestopswithin3secondsafterreleasingthebladecontrolbar.
•Cleanthemower.
•Chargethebatteryfor24hours(model21027only).
•Replacethebladeorhaveitsharpened(morefrequentlyiftheedgedullsquickly).
•Changetheengineoil.
•Cleanthecoolingsystem(refertoyourengineowner’smanual).
•Replacethesparkplug(refertoyourengineowner’smanual).
•Emptythefueltankbeforerepairsasdirectedandbeforeannualstorage.
•Replacetheairlter(morefrequentlyindustyoperatingconditions).
•Checkthesparkplug(refertoyourengineowner’smanual).
•Lubricatethewheelgears.
•RefertoyourEngineOperator’sManualforanyadditionalyearlymaintenance
procedures.
Engine Operator’ s Man ual
PreparingforMaintenance
1.Stoptheengineandwaitforallmovingpartstostop.
foradditionalmaintenanceprocedures.
2.Disconnectthesparkplugwirefromthesparkplug
(Figure22)beforeperforminganymaintenance
procedure.
13
Page 14

Figure22
3.Afterperformingthemaintenanceprocedure(s),
connectthesparkplugwiretothesparkplug.
Important:Beforetippingthemowertochange
theoilorreplacetheblade,allowthefueltank
torundrythroughnormalusage.Ifyoumust
tipthemowerpriortorunningoutoffuel,usea
handfuelpumptoremovethefuel.Alwaystip
themowerontoitssidewiththeairlterup.
WARNING
Tippingthemowermaycausethefueltoleak.
Gasolineisammable,explosiveandcancause
personalinjury.
ChangingtheEngineOil
ServiceInterval:Aftertherst5hours
Every50hours
Runtheengineafewminutesbeforechangingtheoil
towarmit.Warmoilowsbetterandcarriesmore
contaminants.
1.Performthepre-maintenanceprocedures;referto
PreparingforMaintenance.
2.Removethedipstick(Figure8).
3.Tipthemowerontoitsside,withtheairlterup,
todraintheusedoiloutthroughtheoillltube
Figure24).
(
Runtheenginedryorremovethegasolinewith
ahandpump;neversiphon.
ReplacingtheAirFilter
ServiceInterval:Yearly
1.Performthepre-maintenanceprocedures;referto
PreparingforMaintenance.
2.Opentheairltercoverandremovetheoldairlter
(Figure23).
Figure24
4.Afterdrainingtheoil,returnthemowertoits
operatingposition.
5.Slowlypouroilintotheoillltubeuntiltheoillevel
reachestheFullmarkonthedipstick(Figure8).
Donotoverll.(Max.ll:0.59l,type:SAE30
detergentoilwithanAPIserviceclassicationofSF,
SG,SH,SJ,SL,orhigher.)
6.Installthedipsticksecurely.
7.Disposeoftheusedoilproperlyatalocalrecycling
center.
ChargingtheBattery
ServiceInterval:Every25hours
Model21027only
Figure23
3.Installanewairlterandtheairltercover.
Alwaysusethechargerinashelteredareaandcharge
thebatteryfor24hoursatroomtemperature(22°C)
wheneverpossible.
1.Openthecovertothebatterycompartment
(Figure25).
14
Page 15

Figure25
5.Connectthebatterycabletothemowercableand
installthebatteryinthecompartment.
6.Securethecovertothebatterycompartment.
ReplacingtheFuse
Model21027only
Ifthebatterydoesnotchargeortheenginedoesnot
turnwiththeelectricstarter,thefusemaybeblown.
Replaceitwitha40-ampplug-intypefuse.Referto
InstallingtheFuse.
LubricatingtheWheelGears
2.Removethebatteryfromthecompartmentand
disconnectthebatterycablefromthemowercable
Figure26).
(
Figure26
3.Connectthechargertothebattery(Figure27).
ServiceInterval:Yearly
1.Removethewheelboltsontherearwheelsand
removetherearwheels.
2.Applyalubricatingoiltothegearasshownin
Figure28.
Figure28
3.Installtherearwheels.
Figure27
4.Plugthechargerintoawalloutletandchargethe
batteryfor24hours(Figure27).
Note:Whenthebatterynolongerholdsacharge,
recycleordisposeofthelead-acidbatteryaccording
tolocalcodes.
AdjustingtheSelf-propelDrive
Ifyourmowerdoesnotself-propelproperly,adjustthe
self-propeldrivecable.
1.Loosenthelockingnutbyhand(Figure29).
15
Page 16

Figure29
1.Adjustingnut2.Lockingnut
wrenchorareuncomfortableperformingthis
procedure,contactanAuthorizedServiceDealer.
Examinethebladewheneveryourunoutofgasoline.If
thebladeisdamagedorcracked,replaceitimmediately.
Ifthebladeedgeisdullornicked,haveitsharpenedor
replaceit.
WARNING
Thebladeissharp;contactingthebladecanresult
inseriouspersonalinjury.
Weargloveswhenservicingtheblade.
1.Disconnectthesparkplugwirefromthesparkplug.
RefertoPreparingforMaintenance.
2.Tipthemowerontoitssidewiththeairlterup
(Figure30).
2.Usetheadjustingnuttoadjusttheselfpropeldrive.
•Iftherearwheelsdonotrotatebackwardwhen
youpullthemowerbackward,turntheadjusting
nut1to3turnscounterclockwise(fromthe
operatingposition),dependingontheamount
ofcorrectionneeded.
•Ifthemowerdoesnotself-propel,turnthe
adjustingnut1to3turnsclockwise(fromthe
operatingposition),dependingontheamount
ofcorrectionneeded.
3.Startthemowerandusetheself-propeldriveto
checktheadjustment.
Note:Iftheself-propeldriveisnotproperly
adjusted,repeatstep2.
4.Whentheself-propeldriveisproperlyadjusted,
tightentheadjustingnutbyhand.
Note:Ifyourmowerstilldoesnotproperlyself-propel
afterperformingthisprocedure,contactanAuthorized
ServiceDealer.
ReplacingtheBlade
ServiceInterval:Every25hours—Replacetheblade
orhaveitsharpened(morefrequently
iftheedgedullsquickly).
Important:
the blade pr oper l y
Y ou will need a torque wr ench to install
.Ifyoudonothaveatorque
Figure30
3.Removetheblade,savingallmountinghardware.
4.Installthenewbladeandallmountinghardware.
Important:Positionthecurvedendsofthe
bladetopointtowardthemowerhousing.
5.Useatorquewrenchtotightenthebladebolt
to50N-m.
Important:Whileholdingthebladewitha
blockofwood,putyourweightbehindthe
ratchetorwrenchandtightentheboltsecurely.
EmptyingtheFuelTank
1.Stoptheengineandwaitforittocooldown
2.Disconnectthewirefromthesparkplug.
3.Removethecapfromthefueltank.
4.Useahandpumptosyphonthefuelintoaclean
approvedgasolinecontainer.
5.Connectthewiretothesparkplug.
16
Page 17

6.Runtheengineuntilitstops.
7.Stoptheengine.
7.Starttheengineagaintomakesurethatallthe
gasolineisoutofthecarburetor.
CleaningtheMower
WashingMethod
ServiceInterval:Beforeeachuseordaily—Cleanthe
mower.
WARNING
Themowermaydislodgematerialfromunderthe
mowerhousing.
•Weareyeprotection.
•Stayintheoperatingposition(behindthe
handle)whentheengineisrunning.
•Donotallowbystandersinthearea.
Forbestresults,cleanthemowersoonafteryouhave
completedmowing.
1.Ifthegrassbagisonthemower,removeit.
2.Lowerthemowertoitslowestcuttingheightsetting.
RefertoAdjustingtheCuttingHeight.
3.Movethemowerontoaatpavedsurface.
4.Attachagardenhosethatisconnectedtoawater
supplytothewashoutportonthemowerhousing
Figure31).
(
8.Shutoffthewateranddisconnectthegardenhose
fromthemower.
9.Starttheengineandrunitforafewminutestodry
thehousingtopreventitfromrusting.
ScrapingMethod
WARNING
Tippingthemowermaycausethefueltoleak
fromthecarburetororthefueltank.Gasolineis
extremelyammable,highlyexplosive,and,under
certainconditions,cancausepersonalinjuryor
propertydamage.
Runtheenginedryorremovethefuelwithahand
pump;neversiphonthefuel.
1.Performthepre-maintenanceprocedures;referto
PreparingforMaintenance.
2.Removethegrassbag.
3.Drainthefuelfromthefueltank.
4.Tipthemowerontoitssidewiththeairlterup.
5.Removethedirtandgrassclippingswithahardwood
orplasticscraper.Avoidburrsandsharpedges.
6.Spraytheundersideofthemowerhousingwith
water.
Important:Movethebladeaslittleaspossible
toavoidfuturestartingproblems.
Figure31
1.Washoutport
5.Turnthewateron.
6.Starttheengineandrunituntiltherearenomore
clippingsthatcomeoutfromunderthemower
housing.
7.Turnthemowerupright.
17
Page 18

Storage
Storethemowerinacool,clean,dryplace.
PreparingtheMowerfor
Storage
WARNING
Gasolinevaporscanexplode.
•Donotstoregasolinemorethan30days.
•Donotstorethemowerinanenclosurenearan
opename.
•Allowtheenginetocoolbeforestoringit.
1.Onthelastrefuelingoftheyear,addfuelstabilizer
tothefuelasdirectedbytheenginemanufacturer.
2.Runthemoweruntiltheenginestopsfromrunning
outoffuel.
3.Primetheengineandstartitagain.
4.Allowtheenginetorununtilitstops.Whenyoucan
nolongerstarttheengine,itissufcientlydry.
5.Disconnectthewirefromthesparkplug.
6.Removethesparkplug,add30mlofoilthrough
thesparkplughole,andpullthestarterropeslowly
severaltimestodistributeoilthroughoutthecylinder
topreventcylindercorrosionduringtheoff-season.
7.Looselyinstallthesparkplug.
8.Tightenallnuts,bolts,andscrews.
9.Chargethebatteryfor24hours,thenunplugthe
batterychargeranstorethemowerinanunheated
area.Ifyoumuststorethemowerinaheatedarea,
youmustchargethebatteryevery90days(model
21027only).
RemovingtheMowerfrom
Storage
1.Removethesparkplugandspintheenginerapidly
usingthestartertoblowtheexcessoilfromthe
cylinder.
2.Installthesparkplugandtightenitwithatorque
wrenchto20N-m.
3.Chargethebatteryfor24hours(model21027only).
4.Connectthewiretothesparkplug.
18
Page 19

InternationalDistributorList
Distributor:
AtlantisSuveSulamaSisstemleriLt
BalamaPrimaEngineeringEquip.HongKong85221552163
B-RayCorporation
CascoSalesCompany
CeresS.A.CostaRica
CSSCTurfEquipment(pvt)Ltd.SriLanka
CyrilJohnston&Co.
EquiverMexico525553995444
FemcoS.A.Guatemala
G.Y .K.CompanyLtd.
GeomechanikiofAthensGreece
GuandongGoldenStarChina
HakoGroundandGardenSweden
HakoGroundandGarden
HayterLimited(U.K.)
HydroturfInt.CoDubai
HydroturfEgyptLLC
IbeaS.P .A.
IrriamcPortugal351212388260
IrrigationProductsInt’lPvtLtd.India862283960789
JeanHeybroekb.v.Netherlands3130639461 1
Lely(U.K.)Limited
MaquiverS.A.Colombia
MaruyamaMfg.Co.Inc.
MetraKft
Mountelda.s.CzechRepublic
MunditolS.A.
OslingerTurfEquipmentSA
OyHakoGroundandGardenAb
ParklandProductsLtd.NewZealand6433493760
Prochaska&Cie
RTCohen2004Ltd.
Riversa
RothMotorgerateGmBh&Co.Germany
ScSvendCarlsenA/S
SolvertS.A.S.
SpyprosStavrinidesLimitedCyprus
SurgeSystemsIndiaLimited
T-MarktLogisticsLtd.Hungary3626525500
ToroAustraliaAustralia61395807355
ToroEuropeBVBABelgium3214562960
Country:
Turkey902163448674
Korea82325512076
PuertoRico7877888383
NorthernIreland442890813121
Japan81726325861
Norway4722907760
UnitedKingdom441279723444
UnitedArabEmirates97143479479
Egypt2025194308
Italy39033185361 1
UnitedKingdom441480226800
Japan81332522285
Hungary3613263880
Argentina541148219999
Ecuador59342396970
Finland35898700733
Austria4312785100
Israel97298617979
Spain
Denmark4566109200
France33130817700
India911292299901
PhoneNumber:
5062391138
941 12746100
5024423277
30109350054
862087651338
4635100000
5712364079
420255704220
34952837500
4971442050
35722434131
374-0269RevA
Page 20

TheToroWarranty
ConditionsandProductsCovered
TheToro®Companyanditsafliate,ToroWarrantyCompany,pursuantto
anagreementbetweenthem,jointlypromisetorepairtheT oroProduct
listedbelowifusedforresidentialpurposes*ifdefectiveinmaterialsor
workmanship.
Thefollowingtimeperiodsapplyfromthedateofpurchase:
ProductsWarrantyPeriod
WalkPowerMowers2yearlimitedwarranty
RearEngineRiders2yearlimitedwarranty
Lawn&GardenTractors
ElectricHandHeldProducts2yearlimitedwarranty
Snowthrowers
ConsumerZeroTurn
*OriginalPurchasermeansthepersonwhooriginallypurchasedtheT oro
Product
*Residentialpurposesmeansuseoftheproductonthesamelotasyour
home.Useatmorethanonelocation,orinstitutionalorrentaluse,is
consideredcommercialuse,andthecommercialusewarrantywould
apply.
2yearlimitedwarranty
2yearlimitedwarranty
2yearlimitedwarranty
LimitedWarrantyforCommercialUse
ToroConsumerProductsandattachmentsusedforcommercial,
institutional,orrentaluse,arewarrantedagainstdefectsinmaterials
orworkmanshipforthefollowingtimeperiodsfromthedateoforiginal
purchase:
ProductsWarrantyPeriod
WalkPowerMowers90daywarranty
RearEngineRiders90daywarranty
Lawn&GardenTractors
ElectricHandHeldProducts90daywarranty
Snowthrowers
ConsumerZeroTurn
90daywarranty
90daywarranty
45daywarranty
InstructionsforObtainingWarrantyService
IfyouthinkthatyourT oroProductcontainsadefectinmaterialsor
workmanship,followthisprocedure:
1.Contactyoursellertoarrangeserviceoftheproduct.Ifforanyreason
itisimpossibleforyoutocontactyourseller,youmaycontactany
ToroAuthorizedDistributortoarrangeservice.
2.Bringtheproductandyourproofofpurchase(salesreceipt)tothe
ServiceDealer.IfforanyreasonyouaredissatisedwiththeService
Dealer’sanalysisorwiththeassistanceprovided,contactusat:
CustomerCareDepartment,ConsumerDivision
TheT oroCompany
811 1LyndaleAvenueSouth
Bloomington,MN55420-1196
Manager:TechnicalProductSupport:001–952–887–8248
SeeattachedDistributorList
OwnerResponsibilities
YoumustmaintainyourT oroProductbyfollowingthemaintenance
proceduresdescribedintheOperator’sManual.Suchroutine
maintenance,whetherperformedbyadealerorbyyou,isatyourexpense.
ItemsandConditionsNotCovered
Thisexpresswarrantydoesnotcoverthefollowing:
•Costofregularmaintenanceserviceorwearparts,suchasrotor
blades(paddles),scraperblades,belts,fuel,lubricants,oilchanges,
sparkplugs,cable/linkageorbrakeadjustments
•Anyproductorpartwhichhasbeenalteredormisusedandrequires
replacementorrepairduetoaccidentsorlackofpropermaintenance
•Repairsnecessaryduetofailuretousefreshfuel(lessthanone
monthold),orfailuretoproperlypreparetheunitpriortoanyperiod
ofnon-useoveronemonth
•Engineandtransmission.Thesearecoveredbytheappropriate
manufacturer’sguaranteeswithseparatetermsandconditions
Allrepairscoveredbythesewarrantiesmustbeperformedbyan
AuthorizedToroServiceDealerusingToroapprovedreplacementparts.
GeneralConditions
Thepurchaseriscoveredbythenationallawsofeachcountry.Therights
towhichthepurchaserisentitledwiththesupportoftheselawsarenot
restrictedbythiswarranty.
374-0268RevA
 Loading...