

Page 1
22inRecycler
ModelNo.20379—SerialNo.400000000andUp
®
Introduction
Thisrotary-blade,walk-behindlawnmowerisintendedto
beusedbyresidentialhomeowners.Itisdesignedprimarily
forcuttinggrassonwell-maintainedlawnsonresidential
properties.Itisnotdesignedforcuttingbrushorfor
agriculturaluses.
Readthisinformationcarefullytolearnhowtooperateand
maintainyourproductproperlyandtoavoidinjuryand
productdamage.Youareresponsibleforoperatingthe
productproperlyandsafely.
YoumaycontactTorodirectlyatwww .Toro.comforproduct
andaccessoryinformation,helpndingadealer,ortoregister
yourproduct.
Wheneveryouneedservice,genuineToroparts,oradditional
information,contactanAuthorizedServiceDealerorToro
CustomerServiceandhavethemodelandserialnumbersof
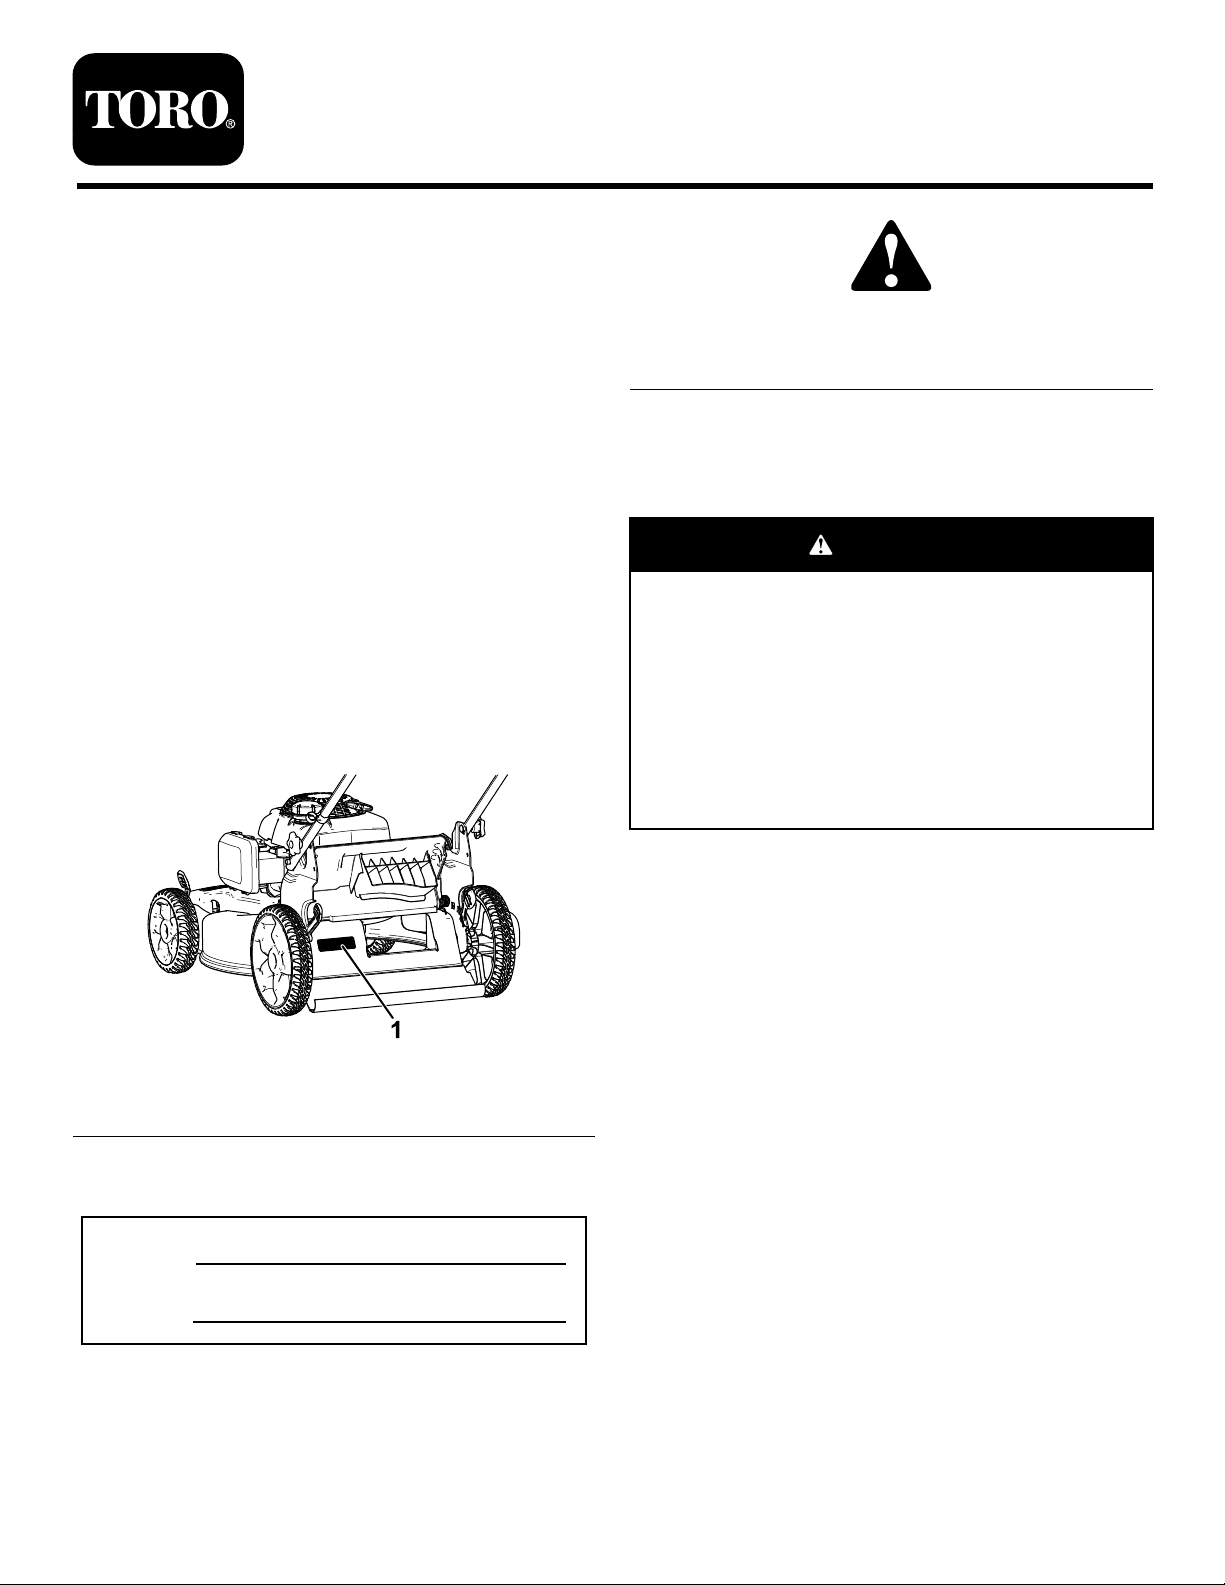
yourproductready.Figure1identiesthelocationofthe
modelandserialnumbersontheproduct.
FormNo.3412-288RevB
LawnMower
Operator'sManual
g000502
Figure2
1.Safety-alertsymbol
Thismanualuses2wordstohighlightinformation.
Importantcallsattentiontospecialmechanicalinformation
andNoteemphasizesgeneralinformationworthyofspecial
attention.
WARNING
CALIFORNIA
Proposition65Warning
Thisproductcontainsachemicalorchemicals
knowntotheStateofCaliforniatocausecancer,
birthdefects,orreproductiveharm.
Theengineexhaustfromthisproduct
containschemicalsknowntotheStateof
Californiatocausecancer,birthdefects,
orotherreproductiveharm.
Figure1
1.Modelandserialnumberplate
Writetheproductmodelandserialnumbersinthespace
below:
ModelNo.
SerialNo.
Thismanualidentiespotentialhazardsandhassafety
messagesidentiedbythesafety-alertsymbol(Figure2),
whichsignalsahazardthatmaycauseseriousinjuryordeath
ifyoudonotfollowtherecommendedprecautions.
ItisaviolationofCaliforniaPublicResourceCode
Section4442or4443touseoroperatetheengineonany
forest-covered,brush-covered,orgrass-coveredlandunless
theengineisequippedwithasparkarrester,asdenedin
Section4442,maintainedineffectiveworkingorderorthe
engineisconstructed,equipped,andmaintainedforthe
preventionofre.
g193170
ThissparkignitionsystemcomplieswithCanadianICES-002.
TheenclosedEngineOwner'sManualissuppliedfor
informationregardingtheUSEnvironmentalProtection
Agency(EPA)andtheCaliforniaEmissionControl
Regulationofemissionsystems,maintenance,and
warranty.Replacementsmaybeorderedthroughthe
enginemanufacturer.
NetTorque:Thegrossornettorqueofthisenginewas
laboratoryratedbytheenginemanufacturerinaccordance
withtheSocietyofAutomotiveEngineers(SAE)J1940.
Asconguredtomeetsafety,emission,andoperating
requirements,theactualenginetorqueonthisclassofmower
willbesignicantlylower.Gotowww.Toro.comtoview
specicationsonyourmowermodel.
©2017—TheToro®Company
8111LyndaleAvenueSouth
Bloomington,MN55420
Registeratwww.T oro.com.
OriginalInstructions(EN)
PrintedintheUSA
AllRightsReserved
*3412-288*B
Page 2

Contents
Safety
Introduction..................................................................1
Safety...........................................................................2
GeneralSafety.........................................................2
SafetyandInstructionalDecals.................................3
Setup............................................................................4
1AssemblingandUnfoldingtheHandle.....................4
2InstallingtheRecoil-starterRopeintheRope
Guide.................................................................5
3FillingtheEnginewithOil......................................5
4AssemblingtheGrassBag......................................6
ProductOverview..........................................................7
Operation.....................................................................8
BeforeOperation.......................................................8
BeforeOperationSafety...........................................8
FillingtheFuelTank................................................8
CheckingtheEngine-OilLevel..................................9
AdjustingtheHandleHeight.....................................9
AdjustingtheCuttingHeight....................................9
DuringOperation.....................................................10
DuringOperatingSafety..........................................10
StartingtheEngine.................................................10
UsingtheSelf-PropelDrive.....................................11
ShuttingOfftheEngine..........................................11
RecyclingtheClippings...........................................11
BaggingtheClippings.............................................11
Side-DischargingtheClippings.................................11
OperatingTips......................................................12
AfterOperation........................................................13
AfterOperatingSafety............................................13
CleaningundertheMachine.....................................13
FoldingtheHandle.................................................14
Maintenance.................................................................15
RecommendedMaintenanceSchedule(s)......................15
MaintenanceSafety.................................................15
PreparingforMaintenance.......................................15
ServicingtheAirFilter............................................15
ChangingtheEngineOil.........................................16
ReplacingtheBlade................................................17
AdjustingtheSelf-PropelDrive................................18
Storage........................................................................18
PreparingtheMachineforStorage............................18
RemovingtheMachinefromStorage.........................18
ThismachinehasbeendesignedinaccordancewithANSI
B71.1-2012.
GeneralSafety
Thisproductiscapableofamputatinghandsandfeetand
ofthrowingobjects.Alwaysfollowallsafetyinstructionsto
avoidseriouspersonalinjury.
Usingthisproductforpurposesotherthanitsintendeduse
couldprovedangeroustoyouandbystanders.
•ReadandunderstandthecontentsofthisOperator’ sManual
beforestartingtheengine.
•Donotputyourhandsorfeetnearmovingcomponents
ofthemachine.
•Donotoperatethemachinewithoutallguardsandother
safetyprotectivedevicesinplaceandworkingonthe
machine.
•Keepclearofanydischargeopening.Keepbystandersa
safedistanceawayfromthemachine.
•Keepchildrenoutoftheoperatingarea.Neverallow
childrentooperatethemachine.
•Stopthemachineandshutofftheenginebeforeservicing,
fueling,oruncloggingthemachine.
Improperlyusingormaintainingthismachinecanresult
ininjury.Toreducethepotentialforinjury,complywith
thesesafetyinstructionsandalwayspayattentiontothe
safety-alertsymbol,whichmeansCaution,Warning,or
Danger—personalsafetyinstruction.Failuretocomplywith
theseinstructionsmayresultinpersonalinjuryordeath.
Youcanndadditionalitemsofsafetyinformationintheir
respectivesectionsthroughoutthismanual.
2
Page 3
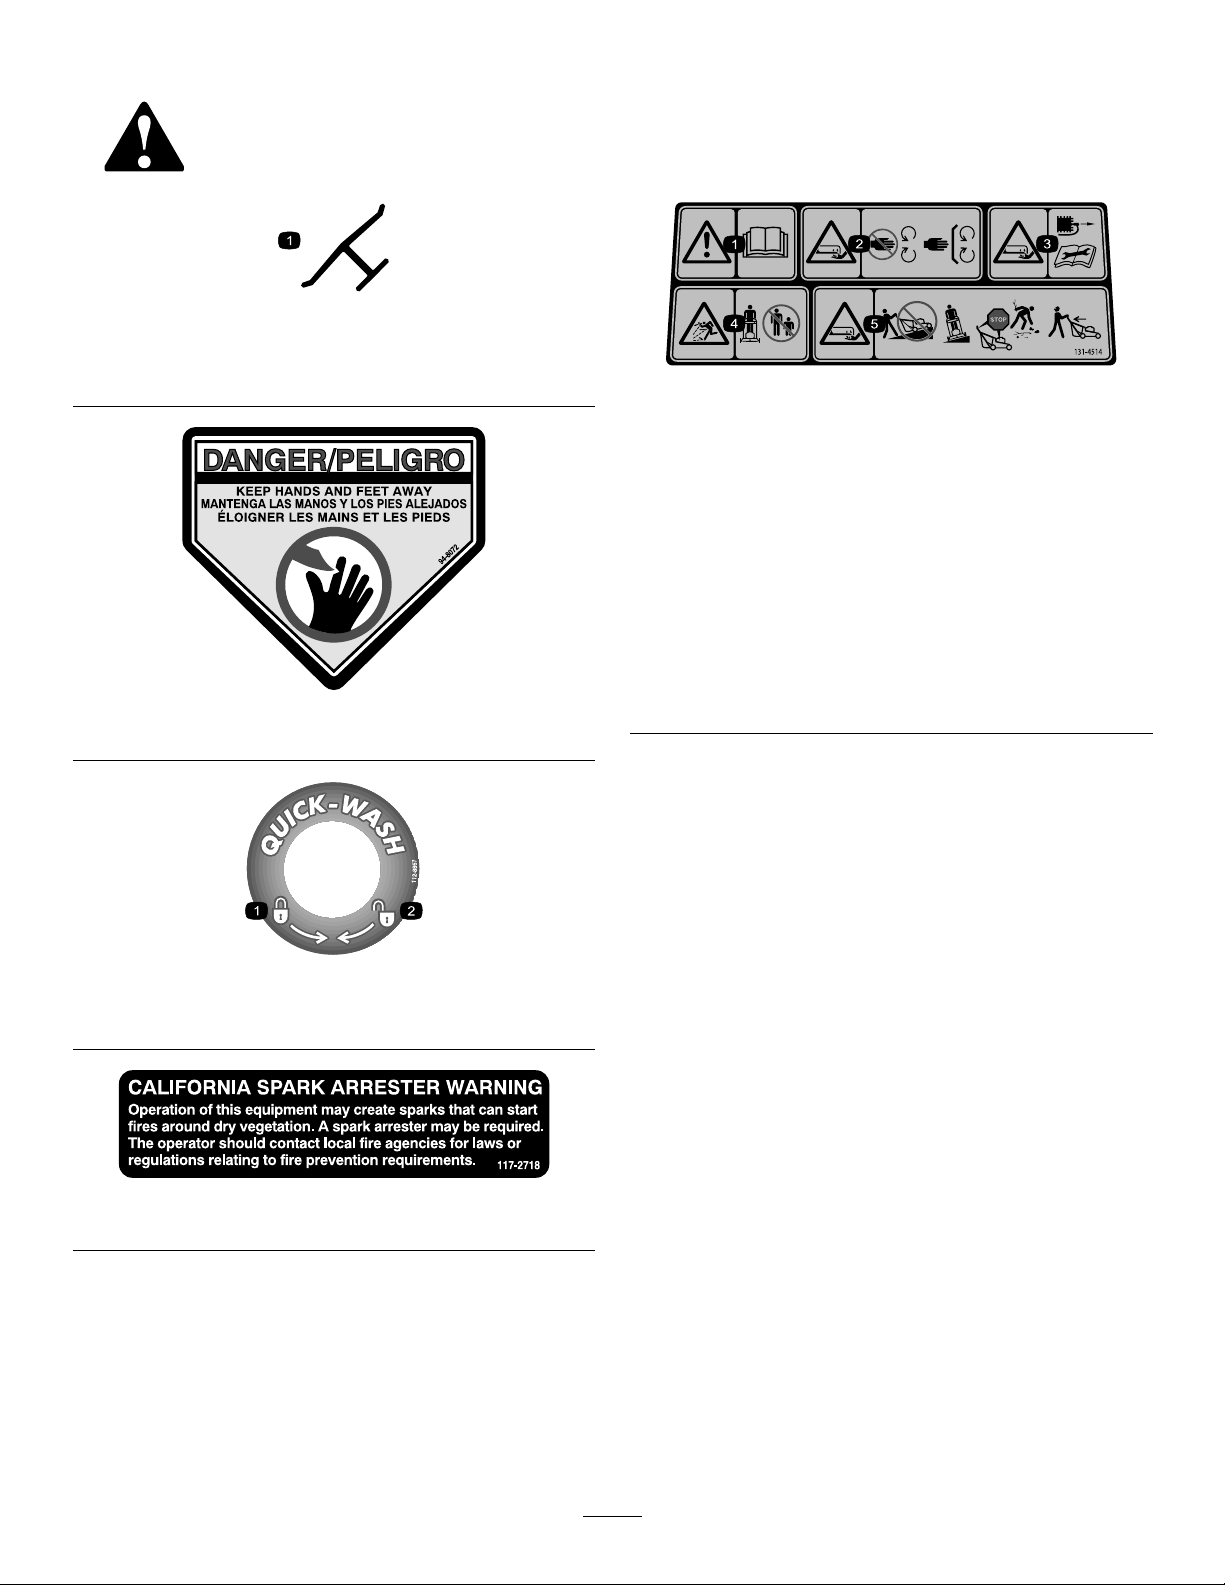
SafetyandInstructionalDecals
Safetydecalsandinstructionsareeasilyvisibletotheoperatorandarelocatednearanyareaofpotential
danger.Replaceanydecalthatisdamagedormissing.
Manufacturer'sMark
decaloemmarkt
1.Indicatesthebladeisidentiedasapartfromtheoriginal
machinemanufacturer.
94-8072
decal131-4514
131-4514
1.Warning—readtheOperator'sManual.
2.Cutting/dismembermenthazardofhandorfoot,mower
blade—stayawayfrommovingparts;keepallguardsand
shieldsinplace.
3.Cutting/dismembermenthazardofhandorfoot,mower
blade—disconnectthespark-plugwireandreadthe
instructionsbeforeservicingorperformingmaintenance.
4.Thrownobjecthazard—keepbystandersasafedistance
awayfromthemachine.
5.Cutting/dismembermenthazardofhandorfoot,mower
blade—donotoperateupanddownslopes;operatesideto
decal94-8072
sideonslopes;stoptheenginebeforeleavingtheoperating
position;andlookbehindyouwhenbackingup.
112-8867
1.Lock2.Unlock
117-2718
decal112-8867
decal117-2718
3
Page 4
Setup
Important:Removeanddiscardtheprotectiveplastic
sheetthatcoverstheengineandanyotherplasticor
wrappingonthemachine.
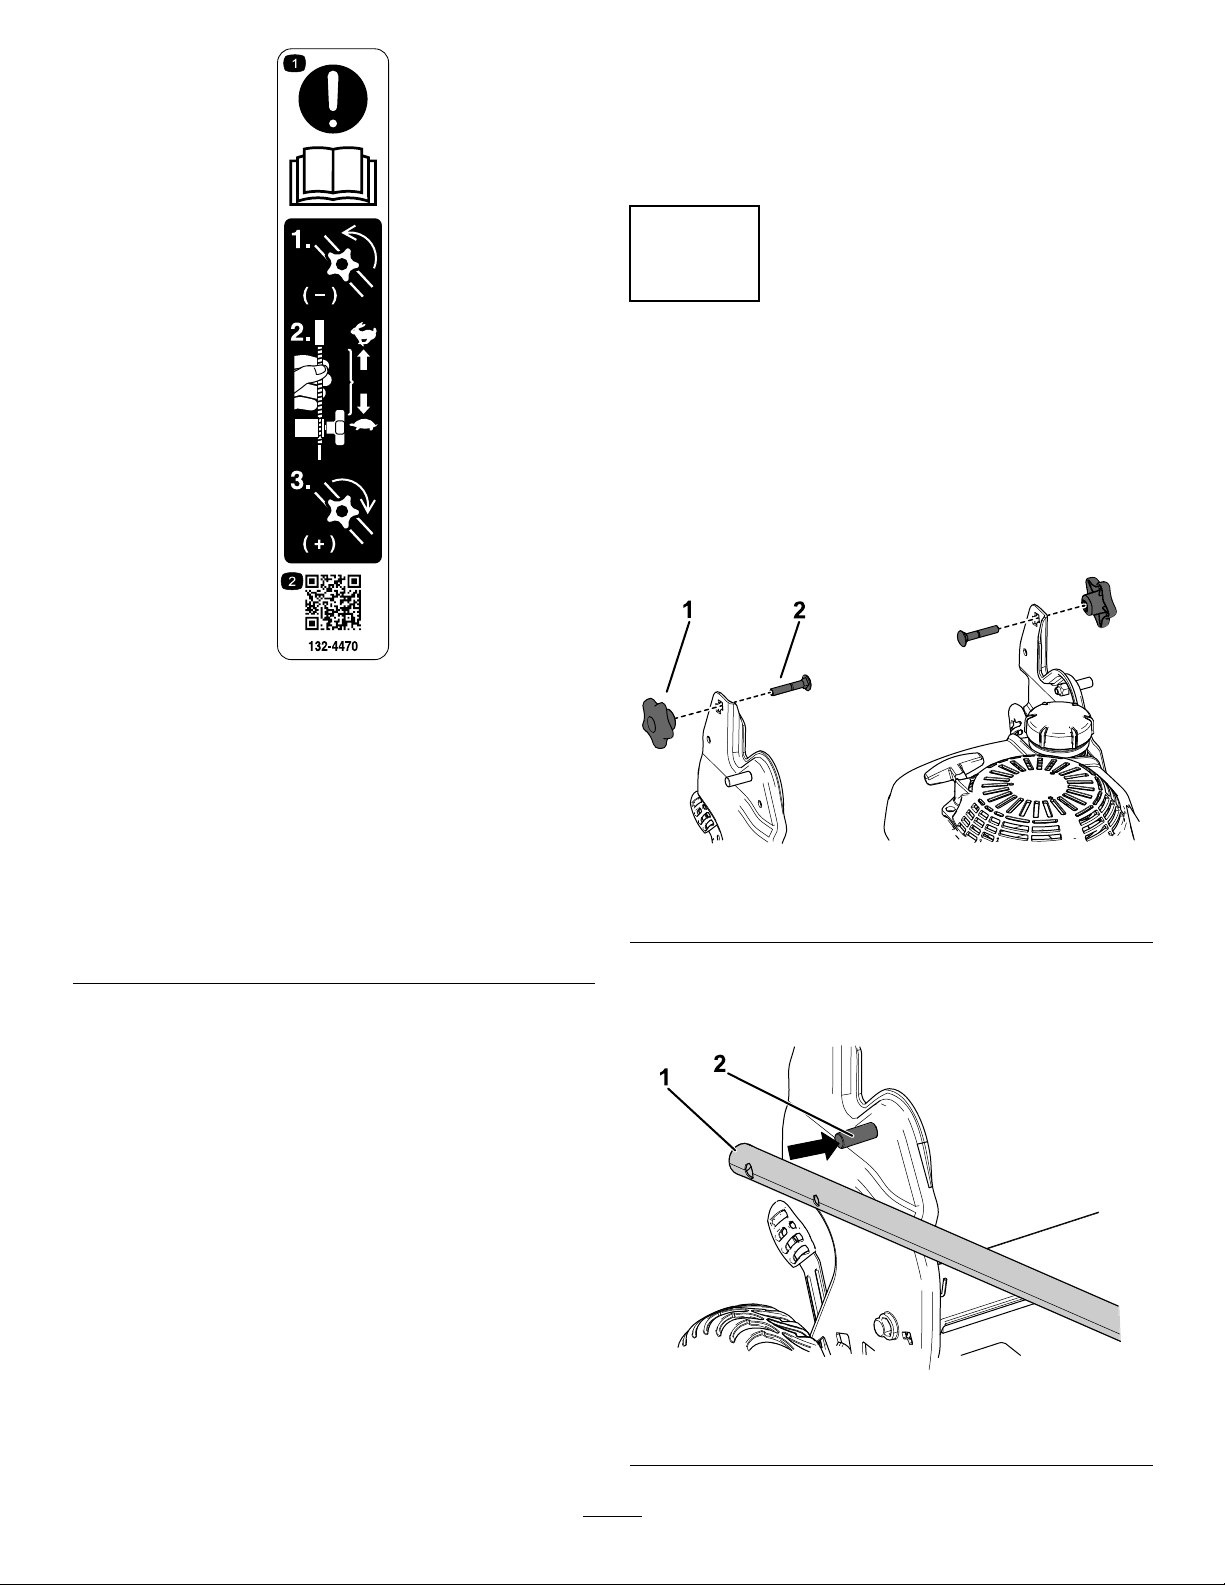
1
AssemblingandUnfoldingthe Handle
NoPartsRequired
Procedure
1.Removeandsavethe2handleknobsand2carriage
boltsfromthehandlebrackets(Figure3).
1.Attention;readthe
Operator'sManual—1)
Loosentheknobbyturning
itcounterclockwise;2)Pull
thecable(s)awayfrom
theenginetodecrease
thetraction,orpushthe
cable(s)towardtheengine
toincreasethetraction;
3)Tightentheknobby
turningitclockwise.
decal132-4470
132-4470
TractionAdjustment
2.ScantheQRcodefor
moreinformationon
tractionadjustment.
g195256
Figure3
1.Handleknob(2)2.Carriagebolt(2)
2.Installthehandleendsontothemowerhousingsothat
thepinattachedtoeachhandlebracketisinthelower
holeofitsrelatedhandleend(Figure4).
1.Handleend2.Pin
4
g189866
Figure4
Page 5
Note:Thepinsdonotshowthroughtheholesinthe
handleendswhenthehandleisinthefoldedposition.
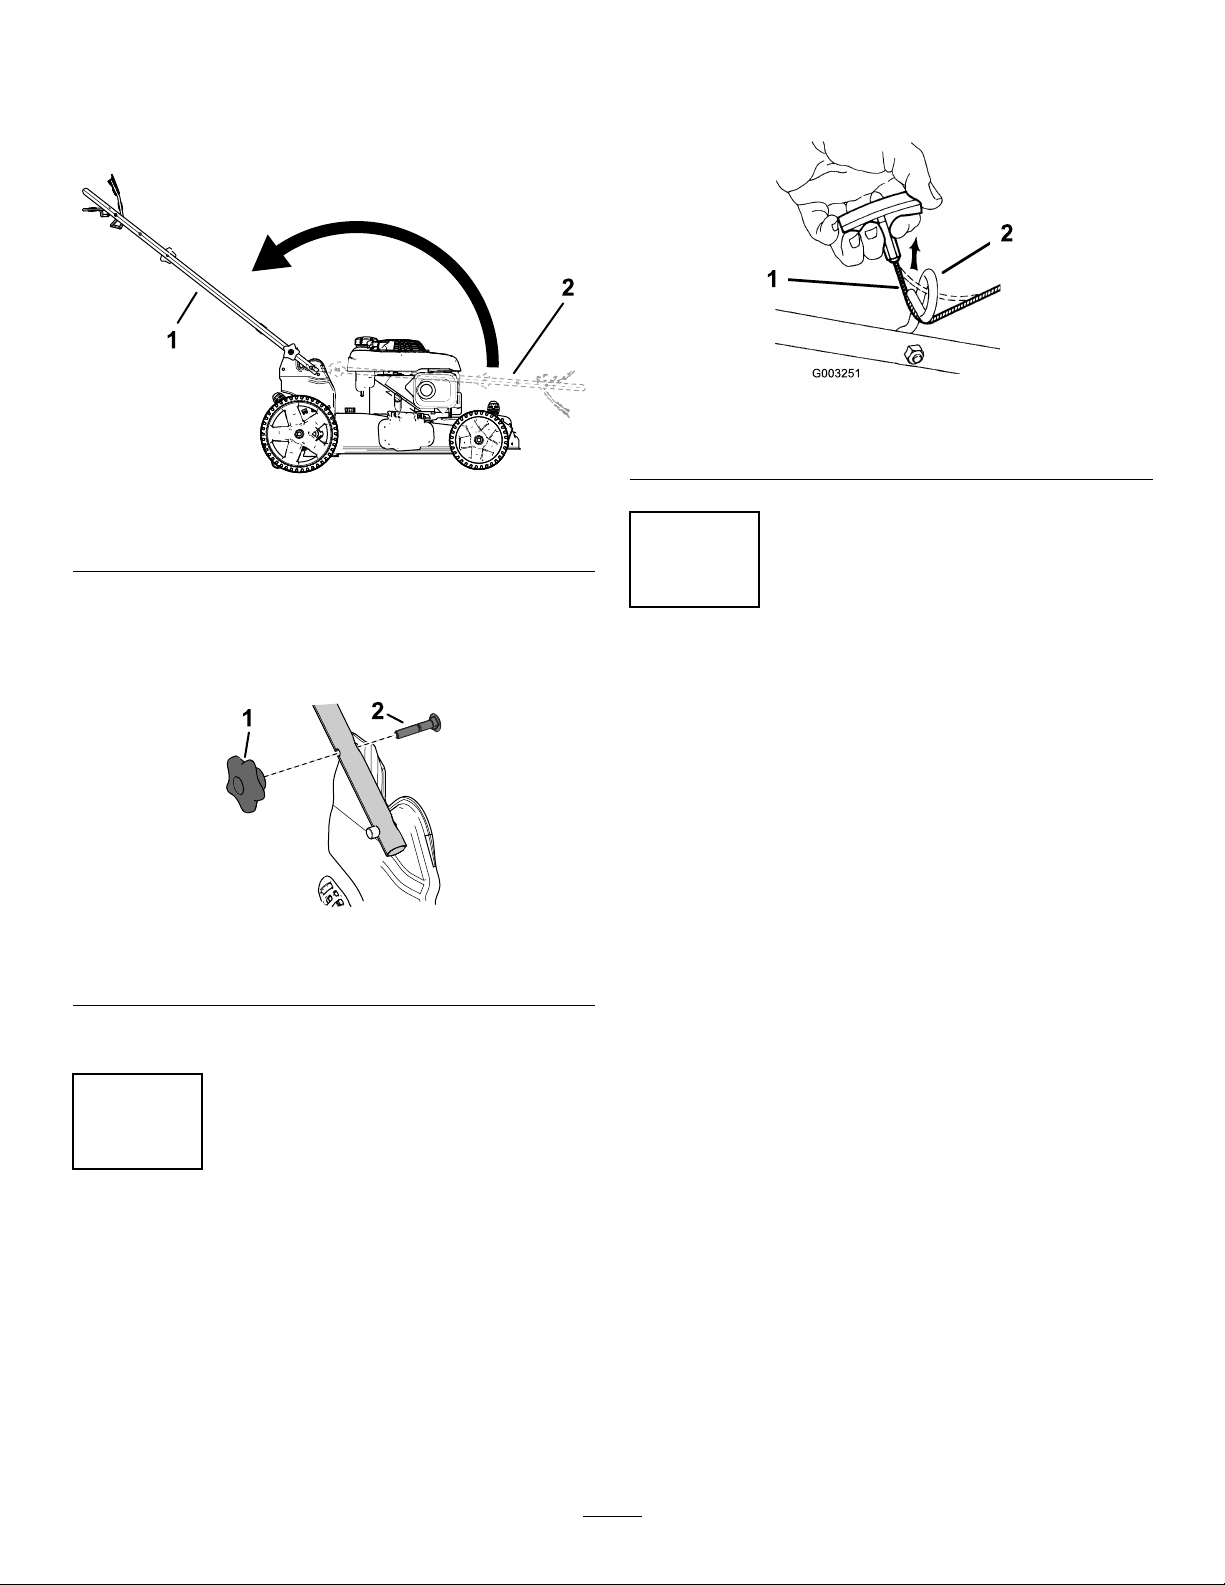
3.Unfoldthehandletotheoperatingpositionbyrotating
itrearward(Figure5).
Figure5
Holdtheblade-controlbartotheupperhandleandpullthe
recoil-starterropethroughtheropeguideonthehandle
(Figure7).
g003251
Figure7
1.Recoil-starterrope2.Ropeguide
g193172
1.Operatingposition
4.Insertthecarriagebolt(withtheboltheadtoward
theinside)throughtheupperorlowersquareholein
handlebracketandtheupperholeinthehandleend
(Figure6).
1.Handleknob
5.Looselyinstallthehandleknobsontothecarriagebolts.
2.Foldedposition
Figure6
2.Carriagebolt
3
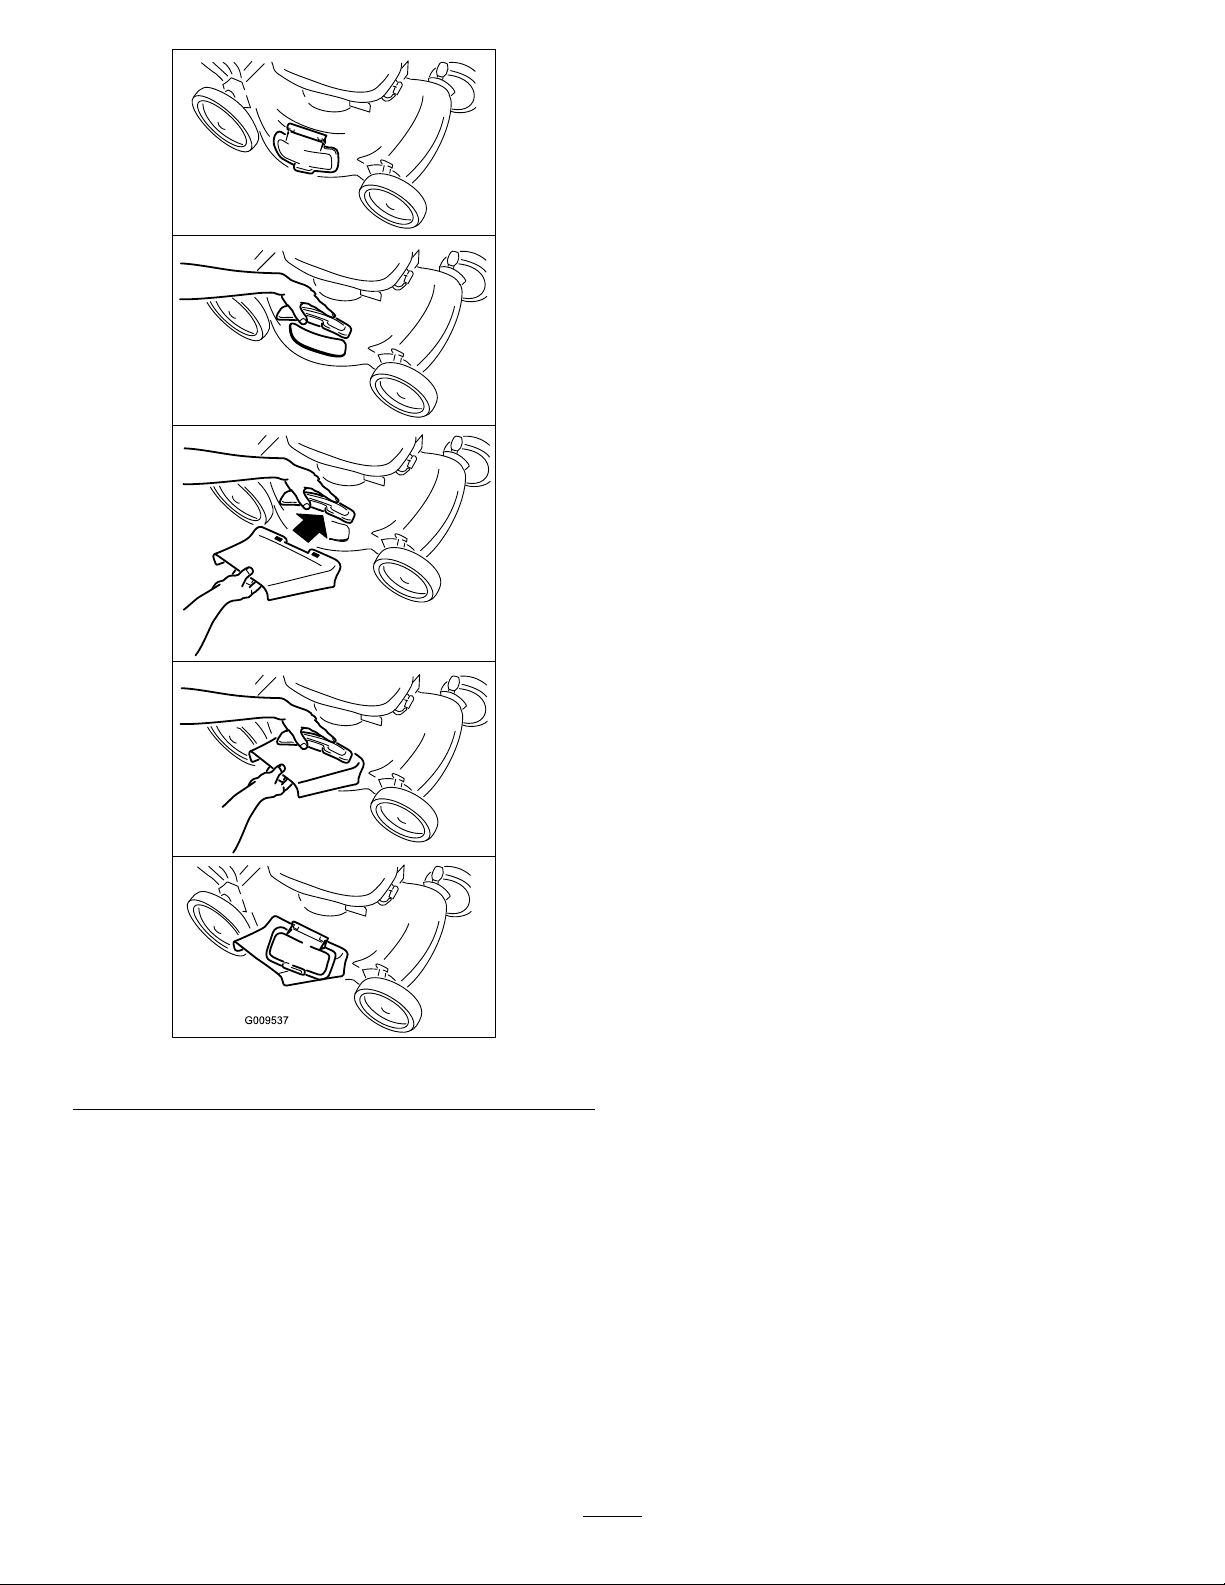
FillingtheEnginewithOil
NoPartsRequired
Procedure
Important:Yourmachinedoesnotcomewithoilin
theengine,butitdoescomewithabottleofoil.Before
startingtheengine,lltheenginewithoil.
Engineoilcapacity:0.5L(18oz)
g189871
Oilviscosity:SAE30orSAE10W-30detergentoil
APIserviceclassication:SJorhigher
Yourmachinedoesnotcomewithoilintheengine.
1.Movethemachinetoalevelsurface.
2.Removethedipstickbyrotatingthecap
counterclockwiseandpullingitout(Figure8).
2
InstallingtheRecoil-starter RopeintheRopeGuide
NoPartsRequired
Procedure
Important:Tostarttheenginesafelyandeasily
wheneveryouusethemachine,installtherecoil-starter
ropeintheropeguide.
5
Page 6
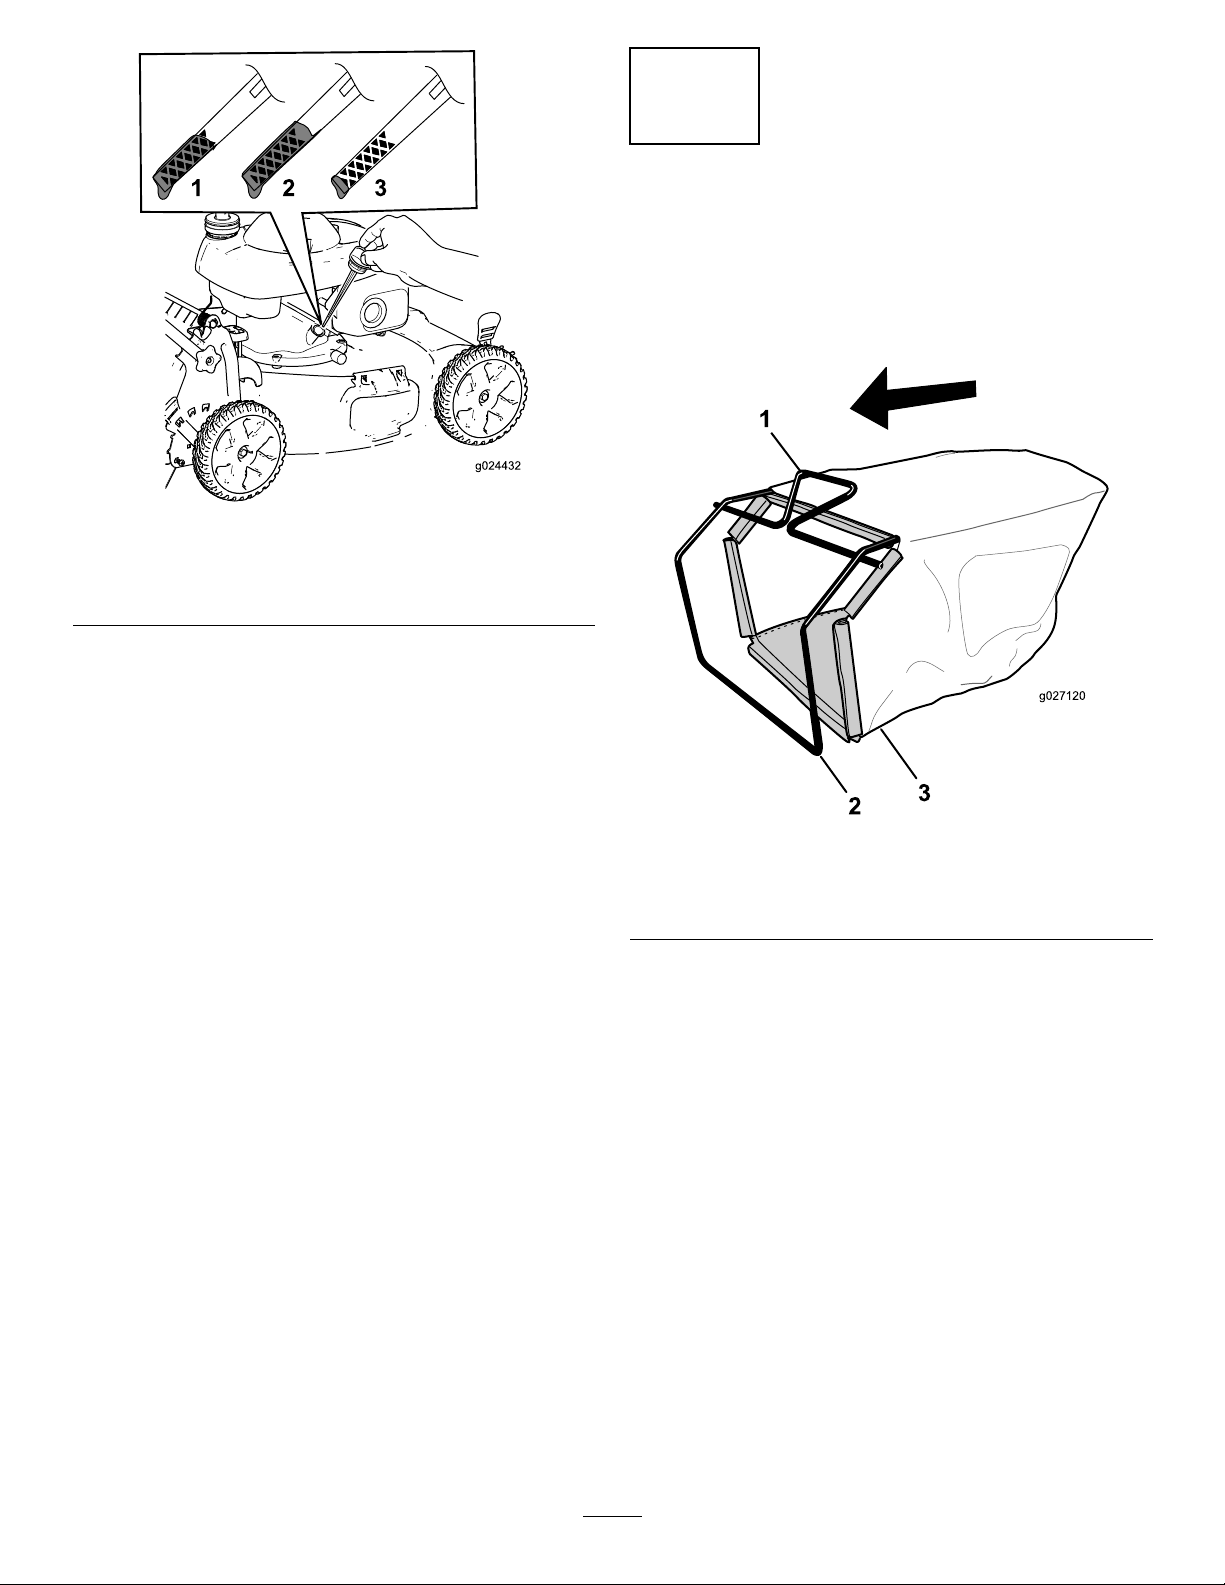
Figure8
1
2
3
g027120
1.Full3.Low
2.High
3.Carefullypourabout3/4oftheenginecapacityofoil
intotheoil-lltube.
4
AssemblingtheGrassBag
NoPartsRequired
Procedure
1.SlipthegrassbagovertheframeasshowninFigure9.
g024432
4.Waitabout3minutesfortheoiltosettleintheengine.
5.Wipethedipstickcleanwithacleancloth.
6.Insertthedipstickintotheoil-lltube,butdonot
screwitin,thenremovethedipstick.
7.Readtheoillevelonthedipstick(Figure8).
•Iftheoillevelonthedipstickistoolow ,carefully
pourasmallamountofoilintotheoil-lltube,
wait3minutes,andrepeatsteps3through6until
theoillevelonthedipstickisatthecorrectlevel.
•Iftheoillevelonthedipstickistoohigh,drain
theexcessoiluntiltheoillevelonthedipstickis
atthecorrectlevel;refertoChangingtheEngine
Oil(page16).
Important:Iftheoillevelintheengineistoo
lowortoohighandyouruntheengine,you
maydamagetheengine.
Important:Changetheengineoilafter
therst5operatinghours;changeityearly
thereafter.RefertoChangingtheEngineOil
(page16).
Figure9
1.Handle
2.Frame
Note:Donotslipthebagoverthehandle(Figure9).
2.Hookthebottomchannelofthebagontothebottom
oftheframe(Figure10).
3.Grassbag
g027120
8.Installthedipsticksecurely.
6
Page 7

g027121
ProductOverview
Figure10
3.Hookthetopandsidechannelsofthebagontothetop
andsidesoftheframe,respectively(Figure10).
g027121
g193178
Figure11
1.Blade-controlbar
2.Self-propel-drivebar9.Side-dischargedoor
3.Adjustmentknobforthe
self-propeldrive
4.Handleknob(2)11.Cutting-heightlever(4)
5.Fuel-tankcap12.Handle
6.Washoutport(notshown)
7.Airlter
8.Sparkplug
10.Oilll/dipstick(notshown)
13.Recoil-starthandle
g009571
Figure12
1.Grassbag2.Side-dischargechute
7
Page 8

Operation
BeforeOperation
BeforeOperationSafety
GeneralSafety
•Becomefamiliarwiththesafeoperationoftheequipment,
operatorcontrols,andsafetysigns.
•Checkthatallguardsandsafetydevices,suchasdoors
and/orgrasscatchers,areinplaceandworkingproperly.
•Alwaysinspectthemachinetoensurethattheblades,
bladebolts,andcuttingassemblyarenotwornor
damaged.
•Inspecttheareawhereyouwillusethemachineand
removeallobjectsthatthemachinecouldthrow .
•Adjustingthecuttingheightmaybringyouintocontact
withthemovingblade,causingseriousinjury.
–Shutofftheengineandwaitforallmovingpartsto
stop.
–Donotputyourngersunderthehousingwhen
adjustingthecuttingheight.
FillingtheFuelTank
•Forbestresults,useonlyclean,fresh,unleadedgasoline
withanoctaneratingof87orhigher((R+M)/2rating
method).
•ETHANOL:Gasolinewithupto10%ethanol(gasohol)
or15%MTBE(methyltertiarybutylether)byvolume
isacceptable.EthanolandMTBEarenotthesame.
Gasolinewith15%ethanol(E15)byvolumeisnot
approvedforuse.Neverusegasolinethatcontainsmore
than10%ethanolbyvolume,suchasE15(contains15%
ethanol),E20(contains20%ethanol),orE85(contains
upto85%ethanol).Usingunapprovedgasolinemay
causeperformanceproblemsand/orenginedamage.
Usingunapprovedgasolinewillnotbecoveredunderthe
productwarranty.
•Donotusegasolinecontainingmethanol.
•Donotstorefueleitherinthefueltankorinfuel
containersoverthewinterunlessfuelstabilizerhasbeen
addedtothefuel.
•Donotaddoiltogasoline.
Important:Toreducestartingproblems,addfuel
stabilizertothefuelallseason,mixingitwithgasoline
lessthan30daysold.
FuelSafety
DANGER
Fuelisextremelyammableandhighlyexplosive.
Areorexplosionfromfuelcanburnyouand
othersandcandamageproperty.
•Topreventastaticchargefromignitingthefuel,
placethecontainerand/ormachinedirectlyon
thegroundbeforelling,notinavehicleoron
anobject.
•Fillthefueltankoutdoors,inanopenarea,when
theengineiscold.Wipeupanyfuelthatspills.
•Donothandlefuelwhensmokingoraroundan
openameorsparks.
•Storefuelinanapprovedcontainerandkeepit
outofthereachofchildren.
WARNING
Fuelisharmfulorfatalifswallowed.Long-term
exposuretovaporscancauseseriousinjuryand
illness.
•Avoidprolongedbreathingofvapors.
•Keepyourhandsandfaceawayfromthenozzle
andthefuel-tankopening.
•Keepfuelawayfromyoureyesandskin.
Refertoyourenginemanualforadditionalinformation.
g193179
Figure13
8
Page 9

CheckingtheEngine-OilLevel
g0271 19
AdjustingtheHandleHeight
ServiceInterval:Beforeeachuseordaily
1.Movethemachinetoalevelsurface.
2.Removethedipstickbyrotatingthecap
counterclockwiseandpullingitout(Figure14).
Figure14
1.Full3.Low
2.High
Youcanraiseorlowerthehandlein1of2positionsthatis
morecomfortableforyou(Figure15).
g193180
Figure15
1.Loosenbothhandleknobsuntilyoucanpushthe
squareedgesofthecarriageboltsoutofthesquare
holesinthehandlebrackets.
2.Pushtheknobsuntiltheyareloose.
g024432
3.Movethehandletotheupperorlowerheightposition.
4.Pulltheknobsuntilthesquareedgesofeachcarriage
bolttsintoitsrelatedsquarehole.
5.Tightenthehandleknobsastightasyoucan.
3.Wipethedipstickcleanwithacleancloth.
4.Insertthedipstickintotheoil-lltube,butdonot
screwitin,thenremovethedipstick.
5.Readtheoillevelonthedipstick(Figure14).
•Iftheoillevelonthedipstickistoolow,slowly
pourasmallamountofoilintotheoil-lltube,
wait3minutes,andthenrepeatsteps3through5
untiltheoillevelisatthecorrectlevel.
•Iftheoillevelonthedipstickistoohigh,drain
theexcessoiluntiltheoillevelisatthecorrect
level.T odraintheexcessoil,refertoChangingthe
EngineOil(page16).
Important:Iftheoillevelinthecrankcaseis
toolowortoohighandyouruntheengine,
youmaydamagetheengine.
6.Installthedipstickintotheoil-lltubesecurely.
AdjustingtheCuttingHeight
CAUTION
Iftheenginehasbeenrunning,themuferwillbe
hotandcanseverelyburnyou.
Keepawayfromthehotmufer.
Adjustthecuttingheightasdesired.Setallthecutting-height
leverstothesameheight.Toraiseandlowerthemachine,
refertoFigure16.
g027119
Figure16
1.Lowerthemachine2.Raisethemachine
9
Page 10

Note:Thecutting-heightsettingsare25mm(1inch);35
mm(1-3/8inches);44mm(1-3/4inches);54mm(2-1/8
inches);64mm(2-1/2inches);73mm(2-7/8inches);83mm
(3-1/4inches);92mm(3-5/8inches);and102mm(4inches).
•Donotmowonexcessivelysteepslopes.Poorfooting
couldcauseaslip-and-fallaccident.
•Mowwithcautionneardrop-offs,ditches,or
embankments.
DuringOperation
DuringOperatingSafety
GeneralSafety
•Wearappropriateclothing,includingeyeprotection;
slip-resistant,substantialfootwear;andhearing
protection.Tiebacklonghair,securelooseclothing,and
donotwearjewelry.
•Donotoperatethemachinewhileill,tired,orunderthe
inuenceofalcoholordrugs.
•Thebladeissharp;contactingthebladecanresultin
seriouspersonalinjury.Shutofftheengineandwaitfor
allmovingpartstostopbeforeleavingtheoperating
position.
•Whenyoureleasetheblade-controlbar,theengineshould
shutoffandthebladeshouldstopwithin3seconds.If
not,stopusingyourmachineimmediatelyandcontactan
AuthorizedServiceDealer.
•Operatethemachineonlyingoodvisibilityand
appropriateweatherconditions.Donotoperatethe
machinewhenthereistheriskoflightning.
•Wetgrassorleavescancauseseriousinjuryifyouslipand
contacttheblade.Avoidmowinginwetconditions.
•Useextremecarewhenapproachingblindcorners,
shrubs,trees,orotherobjectsthatmayblockyourview .
StartingtheEngine
1.Holdtheblade-controlbaragainstthehandle(Figure
17).
g188706
Figure17
1.Blade-controlbar
2.Pulltherecoil-starthandle(Figure18)lightlyuntil
youfeelresistance,thenpullitsharply ,andallowitto
returntotheropeguideonthehandleslowly.
•Watchforholes,ruts,bumps,rocks,orotherhidden
objects.Uneventerraincouldcauseaslip-and-fall
accident.
•Stopthemachineandinspectthebladesafterstrikingan
objectorifthereisanabnormalvibrationinthemachine.
Makeallnecessaryrepairsbeforeresumingoperation.
•Beforeleavingtheoperatingposition,shutofftheengine,
andwaitforallmovingpartstostop.
•Iftheenginehasbeenrunningthemuferwillbehotand
canseverelyburnyou.Keepawayfromthehotmufer.
•Checkthegrasscatchercomponentsandthedischarge
guardfrequentlyandreplacethemwiththemanufacturer’ s
recommendedpartswhennecessary.
•UseaccessoriesandattachmentsapprovedbytheThe
Toro®Companyonly.
SlopeSafety
•Mowacrossthefaceofslopes;neverupanddown.Use
extremecautionwhenchangingdirectiononslopes.
g188707
Figure18
Note:Ifthemachinedoesnotstartafterseveral
attempts,contactanAuthorizedServiceDealer.
10
Page 11

UsingtheSelf-PropelDrive
G017321
•Toengagetheself-propeldrive:Squeezethe
self-propel-drivebaragainstthehandleandholdit
(Figure19).
Figure19
1.Self-propel-drivebar
Note:Themaximumself-propel-drivespeedisxed.
Toreducethespeed,increasethespacebetweenthe
self-propel-drivebarandthehandle.
•Todisengagetheself-propel-drive:releasethe
self-propel-drivebar.
InstallingtheGrassBag
1.Raiseandholdupthereardoor(Figure20).
g017321
Note:Themachinecomeswithfreewheelingclutches
thatmakeiteasiertopullthemachinerearward.To
disengagetheclutches,youmayneedtopushthemachine
forwardabout2.5cm(1inch)ormoreafteryourelease
theself-propel-drivebar.
ShuttingOfftheEngine
ServiceInterval:Beforeeachuseordaily
Toshutofftheengine,releasetheblade-controlbar.
Important:Whenyoureleasetheblade-controlbar,
boththeengineandbladeshouldstopwithin3seconds.
Iftheydonotstopproperly,stopusingyourmachine
immediatelyandcontactanAuthorizedServiceDealer.
RecyclingtheClippings
Yourmachinecomesfromthefactoryreadytorecyclethe
grassandleafclippingsbackintothelawn.
Ifthegrassbagisonthemachine,removeit;referto
RemovingtheGrassBag(page11).Iftheside-discharge
chuteisonthemachine,removeit;refertoRemovingthe
Side-DischargeChute(page12).
Figure20
1.Notches
2.Reardoor
2.Installthegrassbag,ensuringthatthepinsonthebag
restinthenotchesonthehandle(Figure20).
3.Lowerthereardoor.
3.Grassbagpin(2)
RemovingtheGrassBag
Toremovethebag,reversethestepsabove.
Side-Dischargingthe Clippings
Usesidedischargingforcuttingverytallgrass.
Ifthegrassbagisonthemachine,removeit;referto
RemovingtheGrassBag(page11).
InstallingtheSide-DischargeChute
g193181
BaggingtheClippings
Usethegrassbagwhenyouwanttocollectgrassandleaf
clippingsfromthelawn.
Iftheside-dischargechuteisonthemachine,removeit;refer
toRemovingtheGrassBag(page11).
Liftupthesidedoorandinstalltheside-dischargechute
(Figure21).
11
Page 12
•Avoidstrikingsolidobjectswiththeblade.Never
deliberatelymowoveranyobject.
•Ifthemachinestrikesanobjectorstartstovibrate,
immediatelyshutofftheengine,disconnectthewirefrom
thesparkplug,andexaminethemachinefordamage.
•Forbestperformance,installanewbladebeforethe
cuttingseasonbegins.
•ReplacethebladewhennecessarywithaToro
replacementblade.
CuttingGrass
•Cutonlyaboutathirdofthegrassbladeatatime.Donot
cutbelowthe54mm(2-1/8inch)settingunlessthegrass
issparseoritislatefallwhengrassgrowthbeginstoslow
down.RefertoAdjustingtheCuttingHeight(page9).
•Whencuttinggrassover15cm(6inches)tall,mowatthe
highestcuttingheightsettingandwalkslower;thenmow
againatalowersettingforthebestlawnappearance.If
thegrassistoolong,themachinemayplugandcause
theenginetostall.
•Wetgrassandleavestendtoclumpontheyardandcan
causethemachinetoplugortheenginetostall.Avoid
mowinginwetconditions.
Figure21
RemovingtheSide-DischargeChute
Toremovetheside-dischargechute,liftupthesidedoor,
removetheside-dischargechute,andlowertheside-discharge
door.
OperatingTips
•Beawareofapotentialrehazardinverydryconditions,
followalllocalrewarnings,andkeepthemachinefree
ofdrygrassandleafdebris.
•Alternatethemowingdirection.Thishelpsdispersethe
clippingsoverthelawnforevenfertilization.
•Ifthenishedlawnappearanceisunsatisfactory,try1
ormoreofthefollowing:
–Replacethebladeorhaveitsharpened.
–Walkataslowerpacewhilemowing.
–Raisethecuttingheightonyourmachine.
g009537
–Cutthegrassmorefrequently .
–Overlapcuttingswathsinsteadofcuttingafullswath
witheachpass.
CuttingLeaves
•Aftercuttingthelawn,ensurethathalfofthelawnshows
throughthecutleafcover.Youmayneedtomakemore
thanasinglepassovertheleaves.
•Slowdownyourmowingspeedifthemachinedoesnot
cuttheleavesnelyenough.
GeneralMowingTips
•Inspecttheareawhereyouwillusethemachineand
removeallobjectsthatthemachinecouldthrow .
12
Page 13

AfterOperation
AfterOperatingSafety
GeneralSafety
•Cleangrassanddebrisfromthemachinetohelpprevent
res.Cleanupoilorfuelspills.
•Allowtheenginetocoolbeforestoringthemachinein
anyenclosure.
•Neverstorethemachineorfuelcontainerwherethereis
anopename,spark,orpilotlight,suchasonawater
heateroronotherappliances.
g193192
Figure22
HaulingSafety
•Usecarewhenloadingorunloadingthemachine.
•Securethemachinefromrolling.
CleaningundertheMachine
ServiceInterval:Beforeeachuseordaily
WARNING
Themachinemaydislodgematerialfromunderthe
machine.
•Weareyeprotection.
•Stayintheoperatingposition(behindthe
handle)whentheengineisrunning.
•Donotallowbystandersinthearea.
Forbestresults,cleanthemachinesoonafteryouhave
completedmowing.
1.Lowerthemachinetothelowestcutting-heightsetting.
RefertoAdjustingtheCuttingHeight(page9).
1.Washoutport
5.Turnthewateron.
6.Starttheengineandrunituntiltherearenomore
clippingsthatcomeoutfromunderthemachine.
7.Shutofftheengine.
8.Shutoffthewateranddisconnectthegardenhose
fromthemachine.
9.Starttheengineandrunitforafewminutestodrythe
undersideofthemachinetopreventitfromrusting.
10.Shutofftheengineandallowittocoolbeforestoring
themachineinanenclosedarea.
2.Movethemachineontoaatpavedsurface.
3.Washouttheareaunderthereardoorwherethe
clippingsgofromtheundersideofthemachinetothe
grassbag.
4.Attachagardenhosethatisconnectedtoawater
supplytothewashoutportonthemachine(Figure22).
13
Page 14

FoldingtheHandle
WARNING
Foldingorunfoldingthehandleimproperlycan
damagethecables,causinganunsafeoperating
condition.
•Donotdamagethecableswhenfoldingor
unfoldingthehandle.
•Ifacableisdamaged,contactanAuthorized
ServiceDealer.
1.Removeandsavethe2handleknobsand2carriage
boltsfromthehandlebrackets(Figure23).
Important:Routethecablestotheoutsideofthe
handleknobsasyoufoldthehandle.
5.Tounfoldthehandle,referto1Assemblingand
UnfoldingtheHandle(page4).
Figure23
1.Handleknob(2)2.Carriagebolt(2)
2.Foldthehandlebyrotatingitforward(Figure24).
Figure24
1.Operatingposition
2.Foldedposition
3.Insertthecarriagebolt(withtheboltheadtowardthe
inside)throughthehandlebracketandtheupperhole
inthehandleend.Ensurethatthesquareedgesofeach
carriagebolttsintotheupperorlowersquareholein
itsrelatedhandlebracket.
g189871
g193193
4.Looselyinstallthehandleknobsandcarriageboltson
thehandlebrackets.
14
Page 15

Maintenance
Note:Determinetheleftandrightsidesofthemachinefromthenormaloperatingposition.
ReplacementpartsareavailablefromanAuthorizedServiceDealeroratwww .torodealer.com(UScustomersonly).
RecommendedMaintenanceSchedule(s)
MaintenanceService
Interval
Aftertherst5hours
Beforeeachuseordaily
Every50hours
Yearly
Yearlyorbeforestorage
Important:Refertoyourenginemanualforadditionalmaintenanceprocedures.
MaintenanceProcedure
•Changetheengineoil.
•Checktheengine-oillevelandaddoilasneeded.
•Ensurethattheenginestopswithin3secondsafterreleasingtheblade-controlbar.
•Cleangrassclippingsanddirtfromunderthemachine.
•Changetheengineoil.
•Servicetheairlter.
•Replacethebladeorhaveitsharpened(morefrequentlyiftheedgedullsquickly).
•Emptythefueltankbeforerepairsasdirectedandbeforeyearlystorage.
MaintenanceSafety
•Disconnectthespark-plugwirefromthesparkplug
beforeperforminganymaintenanceprocedure.
•Wearglovesandeyeprotectionwhenservicingthe
machine.
•Thebladeissharp;contactingthebladecanresultin
seriouspersonalinjury.Weargloveswhenservicingthe
blade.
•Nevertamperwithsafetydevices.Checktheirproper
operationregularly.
•Tippingthemachinemaycausethefueltoleak.Fuelis
ammableandexplosive,andcancausepersonalinjury.
Runtheenginedrytoremovethefuelwithahandpump;
neversiphonthefuel.
PreparingforMaintenance
1.Shutofftheengineandwaitforallmovingpartsto
stop.
2.Disconnectthespark-plugwirefromthesparkplug
(Figure25).
g193195
Figure25
1.Spark-plugwire
3.Afterperformingthemaintenanceprocedure(s),
connectthespark-plugwiretothesparkplug.
Important:Beforetippingthemachinetochange
theoilorreplacetheblade,allowthefueltankto
rundrythroughnormalusage.Ifyoumusttip
themachinepriortorunningoutoffuel,usea
handfuelpumptoremovethefuel.Alwaystipthe
machineontoitsside,withthedipstickdown.
ServicingtheAirFilter
ServiceInterval:Yearly
1.Pressdownonthelatchtabsontopoftheair-lter
cover(Figure26).
15
Page 16

g027782
Figure26
ChangingtheEngineOil
ServiceInterval:Aftertherst5hours
Every50hours/Yearly(whichevercomesrst)
Changingtheengineoilisnotrequired,butifyoudesire
tochangetheoil,usethefollowingprocedure.
Note:Runtheengineafewminutesbeforechangingthe
oiltowarmit.Warmoilowsbetterandcarriesmore
contaminants.
Engineoilcapacity:0.5L(18oz)
Oilviscosity:SAE30orSAE10W-30detergentoil
APIserviceclassication:SJorhigher
1.Movethemachinetoalevelsurface.
2.RefertoPreparingforMaintenance(page15).
3.Removethedipstickbyrotatingthecap
counterclockwiseandpullingitout(Figure27).
g027782
1.Latchtabs
2.Paperairlter
3.Foampre-lter
2.Openthecover.
3.Removethepaperairlterandthefoampre-lter
(Figure26).
4.Inspectthefoampre-lter,andreplaceitifitis
damagedorexcessivelydirty.
5.Inspectthepaperairlter.
•Iftheairlterisdamagedoriswetwithoilorfuel,
replaceit.
•Iftheairlterisdirty,tapitonahardsurface
severaltimesorblowcompressedairlessthan207
kPa(30psi)throughthesideofthelterthatfaces
theengine.
Note:Donotbrushthedirtoffthelter;brushing
forcesdirtintothebers.
6.Removethedirtfromtheair-lterbodyandthecover
usingamoistrag.
Important:Donotwipedirtintotheairduct.
g024432
Figure27
1.Full3.Low
2.High
4.Tipthemachineontoitsside(sothattheairlterisup)
todraintheusedoilfromtheoil-lltube(Figure28).
7.Installthefoampre-lterandthepaperairlterinto
theairlter.
8.Installthecover.
16
Page 17

Figure28
5.Afterdrainingtheusedoil,returnthemachinetothe
operatingposition.
6.Carefullypourabout3/4oftheenginecapacityofoil
intotheoil-lltube.
7.Waitabout3minutesfortheoiltosettleintheengine.
8.Wipethedipstickcleanwithacleancloth.
9.Insertthedipstickintotheoil-lltube,butdonot
screwitin,thenremovethedipstick.
10.Readtheoillevelonthedipstick(Figure27).
•Iftheoillevelonthedipstickistoolow ,carefully
pourasmallamountofoilintotheoil-lltube,
wait3minutes,andrepeatsteps8throughuntilthe
oillevelonthedipstickisatthecorrectlevel.
•Iftheoillevelonthedipstickistoohigh,drainthe
excessoiluntiltheoillevelonthedipstickisatthe
correctlevel.
1.RefertoPreparingforMaintenance(page15).
2.Tipthemachineontoitssidewiththeairlterup.
3.Useablockofwoodtoholdthebladesteady(Figure
29).
g188765
g005454
Figure29
4.Removetheblade,savingallmountinghardware
(Figure29).
5.Installthenewbladeandallmountinghardware
(Figure30).
Important:Iftheoillevelintheengineistoo
lowortoohighandyouruntheengine,youmay
damagetheengine.
11.Installthedipsticksecurely.
12.Recycletheusedoilproperly .
ReplacingtheBlade
ServiceInterval:Yearly
Important:
blade pr oper l y
areuncomfortableperformingthisprocedure,contact
anAuthorizedServiceDealer.
Examinethebladewheneveryourunoutoffuel.Iftheblade
isdamagedorcracked,replaceitimmediately.Iftheblade
edgeisdullornicked,haveitsharpenedandbalanced,or
replaceit.
WARNING
Thebladeissharp;contactingthebladecanresult
inseriouspersonalinjury.
Weargloveswhenservicingtheblade.
Y ou will need a torque wr ench to install the
.Ifyoudonothaveatorquewrenchor
g005455
Figure30
Important:Positionthecurvedendsoftheblade
topointtowardthemachinehousing.
17
Page 18

6.Useatorquewrenchtotightenthebladeboltto
82N∙m(60ft-lb).
Storage
Important:Abolttorquedto82N∙m(60ft-lb)is
verytight.Whileholdingthebladewithablock
ofwood,putyourweightbehindtheratchetor
wrenchandtightentheboltsecurely.Thisboltis
verydifculttoovertighten.
AdjustingtheSelf-PropelDrive
Wheneveryouinstallanewself-propelcableorifthe
self-propeldriveisoutofadjustment,adjusttheself-propel
drive.
1.Turntheadjustmentknobcounterclockwisetoloosen
thecableadjustment(Figure31).
Figure31
1.Handle(leftside)
2.Adjustmentknob5.Turntheknob
3.Self-propel-drivecable
4.Turntheknobclockwiseto
tightentheadjustment.
counterclockwiseto
loosentheadjustment.
Storethemachineinacool,clean,dryplace.
PreparingtheMachinefor Storage
1.Onthelastrefuelingoftheyear,addfuelstabilizer
(suchasToroPremiumFuelTreatment)tothefuel.
2.Disposeofanyunusedfuelproperly.Recycleit
accordingtolocalcodes,oruseitinyourautomobile.
Note:Oldfuelinthefueltankistheleadingcauseof
hardstarting.Donotstorefuelwithoutstabilizermore
than30days,anddonotstorestabilizedfuelmorethan
90days.
3.Runthemachineuntiltheengineshutsofffrom
runningoutoffuel.
4.Starttheengineagain.
5.Allowtheenginetorununtilitshutsoff.Whenyou
cannolongerstarttheengine,itissufcientlydry.
6.Disconnectthewirefromthesparkplug.
7.Removethesparkplug,add30ml(1oz)ofengine
oilthroughthespark-plughole,andpullthestarter
ropeslowlyseveraltimestodistributeoilthroughout
thecylindertopreventcylindercorrosionduringthe
off-season.
g027231
8.Looselyinstallthesparkplug.
9.Tightenallnuts,bolts,andscrews.
RemovingtheMachinefrom Storage
1.Checkandtightenallfasteners.
2.Adjustthetensiononthecable(Figure31)bypullingit
backorpushingitforwardandholdingthatposition.
Note:Pushthecabletowardtheenginetoincrease
thetraction;pullthecableawayfromtheengineto
decreasethetraction.
3.Turntheadjustmentknobclockwisetotightenthe
cableadjustment.
Note:Tightentheknobrmlybyhand.
2.Removethesparkplugandspintheenginerapidlyby
pullingtherecoil-starthandletoblowtheexcessoil
fromthecylinder.
3.Installthesparkplugandtightenitwithatorque
wrenchto20N∙m(15ft-lb).
4.Performanymaintenanceprocedures;referto
Maintenance(page15).
5.Checktheengine-oillevel;refertoCheckingthe
Engine-OilLevel(page9).
6.Fillthefueltankwithfreshfuel;refertoFillingthe
FuelTank(page8).
7.Connectthewiretothesparkplug.
18
Page 19

Notes:
Page 20

TheToroWarranty
A2-Y earFullWarranty(45DayLimitedWarrantyforCommercialUse)20inMulcher/Bagger
20inand22in
Recycler
®
TheToroGTSStartingGuarantee
A3-YearFullWarranty(NotApplicableforCommercialUse)
ConditionsandProductsCovered
TheToroCompanyanditsafliate,T oroWarrantyCompany,pursuantto
anagreementbetweenthem,jointlypromisetorepairtheT oroProduct
listedbelowifusedforresidentialpurposes*;ifitisdefectiveinmaterials
orworkmanshiporifitstopsfunctioningduetothefailureofacomponent;
oriftheT oroGTS(GuaranteedtoStart)enginewillnotstartontherstor
secondpull,providedtheroutinemaintenancerequiredintheOperator's
Manualhavebeenperformed.
Thiswarrantycoversthecostofpartsandlabor,butyoumustpay
transportationcosts.
Thefollowingtimeperiodsapplyfromtheoriginaldateofpurchase:
ProductsWarrantyPeriod
20inand22inRecyclerand20in
Mulcher/Bagger
Attachments
GTS(GuaranteedtoStart)3-yearfullwarranty
1
Engine
1
Engine
Battery
1
SomeenginesusedonT oroProductsarewarrantedbytheenginemanufacturer.
-CommercialUse
LimitedWarrantyforCommercialUse*
Gas-poweredT oroProductsusedforcommercial,institutional,orrental
use,arewarrantedfor45daysagainstdefectsinmaterialsorworkmanship.
Componentsfailingduetonormalweararenotcoveredbythiswarranty.
Fortheenginewarrantyperiods,seethetableabove.
TheT oroGTS(GuaranteedtoStart)StartingGuaranteedoesnotapply
whentheproductisusedcommercially*.
InstructionsforObtainingWarrantyService
IfyouthinkthatyourT oroProductcontainsadefectinmaterialsor
workmanship,orifanormal,able-bodiedadultcannolongerstartyour
product'sengineinoneortwopulls,followthisprocedure:
1.ContactanyAuthorizedT oroServiceDealertoarrangeserviceat
theirdealership.T olocateadealerconvenienttoyou,accessourweb
siteatwww.T oro.com.Y oumayalsocallthenumberslistedinitem#3
tousethe24-hourT oroDealerlocatorsystem.
2.Bringtheproductandyourproofofpurchase(salesreceipt)tothe
ServiceDealer.Thedealerwilldiagnosetheproblemanddetermineif
itiscoveredunderwarranty.
3.IfforanyreasonyouaredissatisedwiththeServiceDealer’s
analysisorwiththeassistanceprovided,contactusat:
ToroWarrantyCompany
CustomerCareDepartment,RLCDivision
811 1LyndaleAvenueSouth
Bloomington,MN55420-1 196
Tollfreeat866-214-9807(U.S.customers)
Tollfreeat866-214-9808(Canadiancustomers)
OwnerResponsibilities
YoumustmaintainyourT oroProductbyfollowingthemaintenance
proceduresdescribedintheOperator'sManual.Suchroutinemaintenance,
whetherperformedbyadealerorbyyou,isatyourexpense.
2-yearfullwarranty
2-yearfullwarranty
3-yearfullwarranty
Toro-45Days
Otherengines-90days
1-yearfullwarranty
WalkPowerMowers
SteelDecks
ItemsandConditionsNotCovered
Thereisnootherexpresswarrantyexceptforspecialemissionsystem
coverageandenginewarrantycoverageonsomeproducts.Thisexpress
warrantydoesnotcoverthefollowing:
•Costofregularmaintenanceserviceorparts,suchaslters,fuel,
lubricants,oilchanges,sparkplugs,airlters,bladesharpening
orwornblades,cable/linkageadjustments,orbrakeandclutch
adjustments
•Anyproductorpartwhichhasbeenaltered,misused,neglected,or
requiresreplacementorrepairduetoaccidentsorlackofproper
maintenance
•Pickupanddeliverycharges
•RepairsorattemptedrepairsbyanyoneotherthananAuthorizedT oro
ServiceDealer
•Repairsnecessaryduetofailuretofollowrecommendedfuel
procedure(consulttheOperator'sManualformoredetails)
–Removingcontaminantsfromthefuelsystemisnotcovered
–Useofoldfuel(morethanonemonthold)orfuelwhichcontains
morethan10%ethanolormorethat15%MTBE
–Failuretodrainthefuelsystempriortoanyperiodofnon-use
overonemonth
•Repairsoradjustmentstocorrectstartingdifcultiesduetothe
following:
–Failuretofollowpropermaintenanceproceduresorrecommended
fuelprocedures
–Rotarymowerbladestrikinganobject
•Specialoperationalconditionswherestartingmayrequiremorethan
twopulls:
–Firsttimestartsafterextendedperiodofnon-useoverthree
monthsorseasonalstorage
–Cooltemperaturestartssuchasthosefoundinearlyspringand
lateautumn
–Improperstartingprocedures-ifyouarehavingdifcultystarting
yourunit,pleasechecktheOperator'sManualtoensurethat
youareusingthecorrectstartingprocedures.Thiscansavean
unnecessaryvisittoanAuthorizedT oroServiceDealer.
GeneralConditions
AllrepairscoveredbythesewarrantiesmustbeperformedbyanAuthorized
ToroServiceDealerusingT oro-approvedreplacementparts.Repairbyan
AuthorizedT oroServiceDealerisyoursoleremedyunderthiswarranty.
NeitherTheToroCompanynorT oroWarrantyCompanyisliablefor
indirect,incidental,orconsequentialdamagesinconnectionwiththe
useoftheToroProductscoveredbythesewarranties,includingany
costorexpenseofprovidingsubstituteequipmentorserviceduring
reasonableperiodsofmalfunctionornon-usependingcompletionof
repairsunderthesewarranties.
Somestatesdonotallowexclusionsofincidentalorconsequential
damages,sotheaboveexclusionsmaynotapplytoyou.
Thiswarrantygivesyouspeciclegalrights,andyoumayalsohaveother
rightswhichvaryfromstatetostate.
CountriesOtherthantheUnitedStatesorCanada
ThiswarrantyisnotvalidinMexico.CustomerswhohavepurchasedT oroproductsexportedfromtheUnitedStatesorCanadashouldcontacttheirT oro
Distributor(Dealer)toobtainguaranteepoliciesforyourcountry ,province,orstate.IfforanyreasonyouaredissatisedwithyourDistributor'sserviceor
havedifcultyobtainingguaranteeinformation,contacttheT oroimporter .Ifallotherremediesfail,youmaycontactusatT oroW arrantyCompany .
AustralianConsumerLaw:AustraliancustomerswillnddetailsrelatingtotheAustralianConsumerLaweitherinsidetheboxoratyourlocalT oro
Dealer.
*Residentialpurposesmeansuseoftheproductonthesamelotasyourhome.Useatmorethanonelocation,orinstitutionalorrentaluse,isconsidered
commercialuse,andthecommercialusewarrantywouldapply.
374-0254RevG
 Loading...