

Page 1

FormNo.3367-809RevA
20inMulching/RearBaggingLawnMower
ModelNo.20314—SerialNo.311000001andUp
Operator'sManual
Introduction
Thisrotary-blade,walk-behindlawnmoweris
intendedtobeusedbyresidentialhomeowners
orprofessional,hiredoperators.Itisdesigned
primarilyforcuttinggrassonwell-maintainedlawns
onresidentialorcommercialproperties.Itisnot
designedforcuttingbrushorforagriculturaluses.
Readthisinformationcarefullytolearnhowtooperate
andmaintainyourproductproperlyandtoavoidinjury
andproductdamage.Youareresponsibleforoperating
theproductproperlyandsafely.
YoumaycontactTorodirectlyatwww.Toro.comfor
productandaccessoryinformation,helpndinga
dealer,ortoregisteryourproduct.
Wheneveryouneedservice,genuineToroparts,or
additionalinformation,contactanAuthorizedService
DealerorToroCustomerServiceandhavethemodel
andserialnumbersofyourproductready.
Figure1
identiesthelocationofthemodelandserialnumbers
ontheproduct.Writethenumbersinthespace
provided.
Figure2
1.Safetyalertsymbol
Thismanualusestwowordstohighlightinformation.
Importantcallsattentiontospecialmechanical
informationandNoteemphasizesgeneralinformation
worthyofspecialattention.
ThissparkignitionsystemcomplieswithCanadian
ICES-002.
Theenclosed
Engine Owner’ s Man ual
issupplied
forinformationregardingtheUSEnvironmental
ProtectionAgency(EPA)andtheCalifornia
EmissionControlRegulationofemissionsystems,
maintenance,andwarranty.Replacementsmaybe
orderedthroughtheenginemanufacturer.
Formodelswithstatedenginehorsepower,thegross
horsepoweroftheenginewaslaboratoryratedbythe
enginemanufacturerinaccordancewithSAEJ1940.
Asconguredtomeetsafety,emission,andoperating
requirements,theactualenginehorsepoweronthisclass
oflawnmowerwillbesignicantlylower.
Figure1
1.Modelandserialnumberplate
ModelNo.
SerialNo.
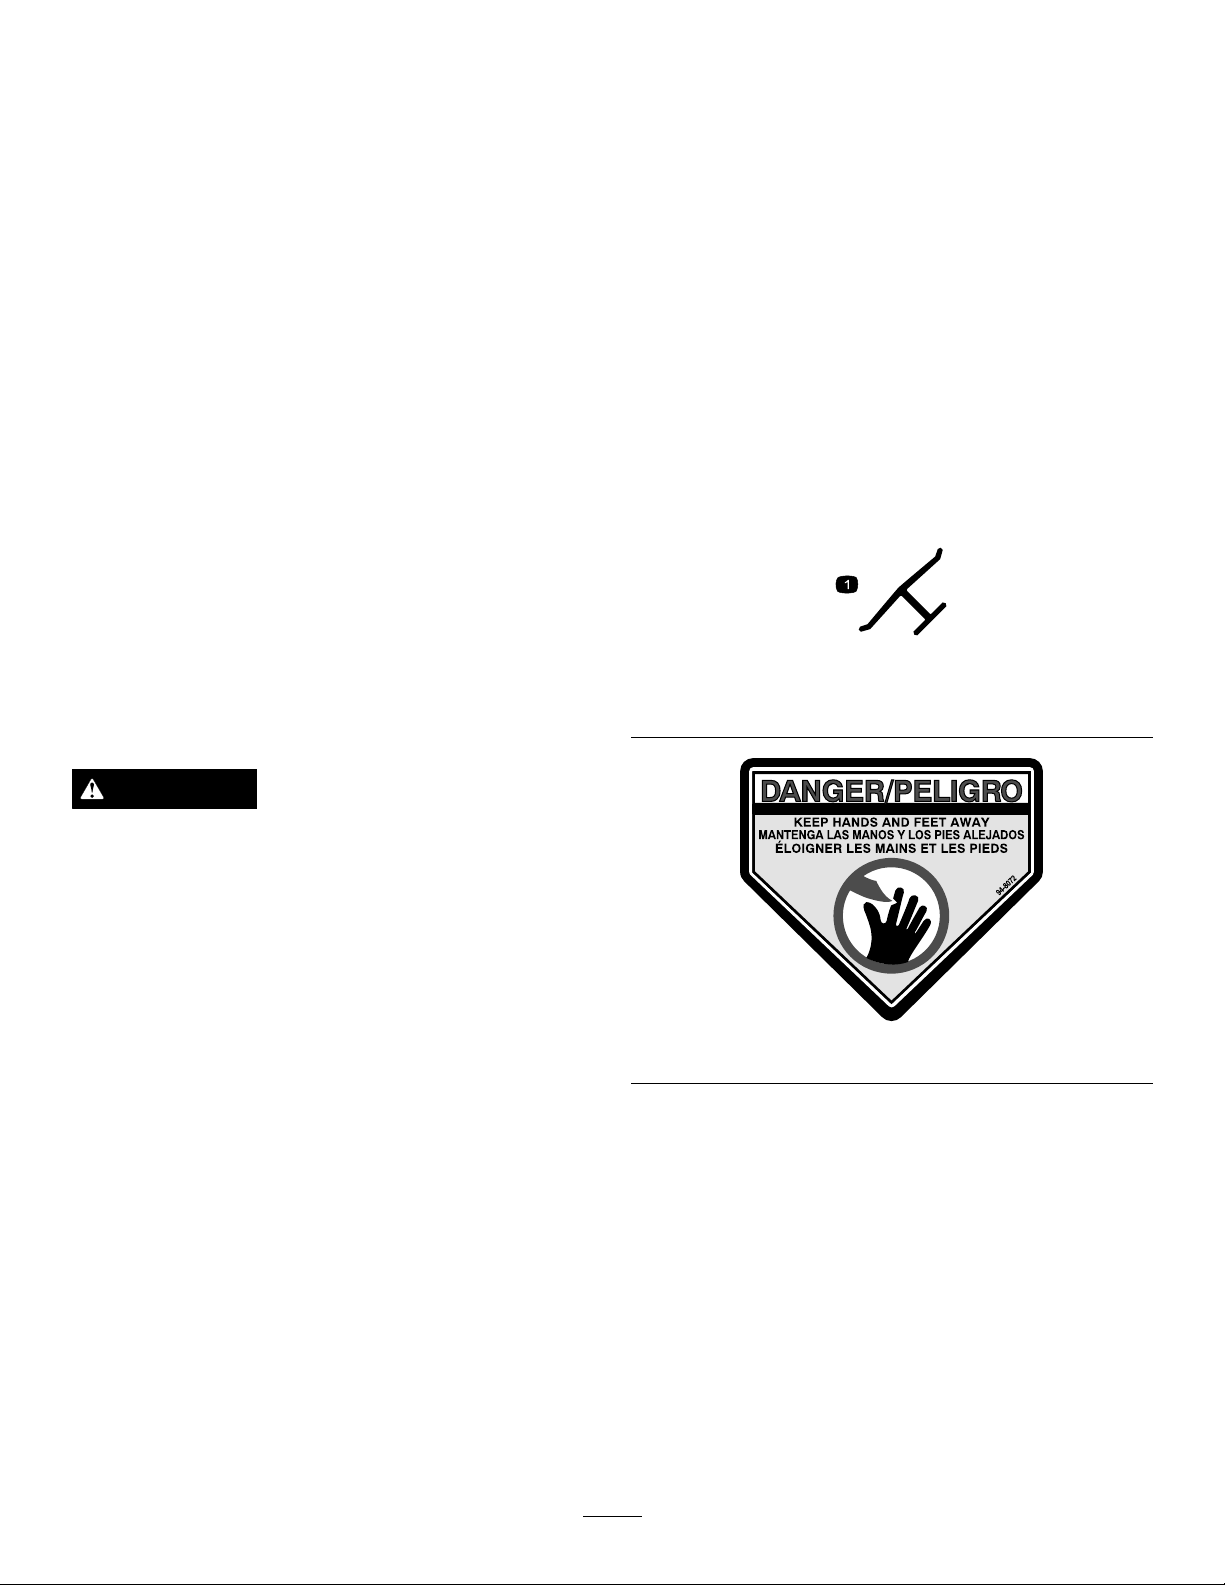
Thismanualidentiespotentialhazardsandhas
safetymessagesidentiedbythesafetyalertsymbol
(
Figure2),whichsignalsahazardthatmaycauseserious
injuryordeathifyoudonotfollowtherecommended
precautions.
©2010—TheToro®Company
8111LyndaleAvenueSouth
Bloomington,MN55420
Registeratwww.Toro.com.
Donottamperwiththeenginecontrolsoralterthe
governorspeed;doingsomaycreateanunsafecondition
resultinginpersonalinjury.
Safety
ThislawnmowermeetsorexceedstheCPSCblade
safetyrequirementsforwalk-behindrotarylawnmowers
andtheB71.1specicationsoftheAmericanNational
StandardsInstituteineffectatthetimeofproduction.
Readandunderstandthecontentsofthismanual
beforeyoustarttheengine.
Thesafetyalertsymbol(
topotentialpersonalinjuryhazards.Obeyallsafety
messagesthatfollowthissymboltoavoidpossibleinjury
ordeath.Improperlyusingormaintainingthismower
couldresultininjuryordeath.Toreducethispotential,
complywiththefollowingsafetyinstructions.
Figure2)isusedtoalertyou
OriginalInstructions(EN)
PrintedintheUSA
AllRightsReserved
Page 2

Thefollowinginstructionshavebeenadaptedfromthe
ANSI/OPEIstandardB71.1-2003.
Thiscuttingmachineiscapableofamputating
handsandfeetandofthrowingobjects.Failure
toobservethefollowingsafetyinstructionscould
resultinseriousinjuryordeath.
GeneralOperation
•Read,understand,andfollowallinstructionsonthe
machineandinthemanual(s)beforestarting.
•Donotputhandsorfeetnearorunderthemachine.
Keepclearofthedischargeopeningatalltimes.
•Onlyallowresponsibleadults,whoarefamiliarwith
theinstructions,tooperatethismachine.
•Cleartheareaofobjectssuchasrocks,wire,toys,
etc.,whichcouldbethrownbytheblade.Stay
behindthehandlewhentheengineisrunning.
•Besuretheareaisclearofbystandersbefore
operating.Stopmachineifanyoneentersthearea.
•Donotoperatemachinebarefootedorwhilewearing
sandals.Alwayswearsubstantialfootwear.
•Donotpullmachinebackwardunlessabsolutely
necessary.Alwayslookdownandbehindbeforeand
whilemovingbackward.
•Alwaysweareyeprotectionwhenoperatingmachine.
•Lightningcancausesevereinjuryordeath.Ifyousee
lightningorhearthunderinthearea,donotoperate
themachine;seekshelter.
•Seemanufacturer’sinstructionsforproperoperation
andinstallationofaccessories.Onlyuseaccessories
approvedbythemanufacturer.
SlopeOperation
Slopesareamajorfactorrelatedtoslipandfallaccidents,
whichcanresultinsevereinjury.Operationonallslopes
requireextracaution.Ifyoufeeluneasyonaslope,do
notmowit.
•Mowacrossthefaceofslopes;neverupanddown.
Exerciseextremecautionwhenchangingdirection
onslopes.
•Watchforholes,ruts,bumps,rocks,orotherhidden
objects.Uneventerraincouldcauseaslipandfall
accident.Tallgrasscanhideobstacles.
•Donotmowonwetgrassorexcessivelysteepslopes.
Poorfootingcouldcauseaslipandfallaccident.
•Donotmowneardrop-offs,ditches,or
embankments.Youcouldloseyourfootingor
balance.
•Neverdirectdischargedmaterialtowardanyone.
Avoiddischargingmaterialagainstawallor
obstruction.Materialmayricochetbacktoward
theoperator.Stopthebladewhencrossinggravel
surfaces.
•Donotoperatemachinewithouttheentiregrass
catcher,dischargeguard,rearguard,orothersafety
protectivedevicesinplaceandworking.
•Neverleavearunningmachineunattended.
•Stoptheengineandwaituntilthebladecomes
toacompletestopbeforecleaningthemachine,
removinggrasscatcher,oruncloggingthedischarge
guard.
•Operatemachineonlyindaylightorgoodarticial
light.
•Donotoperatemachinewhileundertheinuence
ofalcoholordrugs.
•Neveroperatemowerinwetgrass.Alwaysbesure
ofyourfooting;walk;neverrun.
•Disengagethedrivesystem,ifsoequipped,before
startingtheengine.
•Ifthemachineshouldstarttovibrateabnormally,
stoptheengineandcheckforthecauseimmediately.
Vibrationisgenerallyawarningoftrouble.
Children
Tragicaccidentscanoccuriftheoperatorisnotalertto
thepresenceofchildren.Childrenareoftenattractedto
themachineandthemowingactivity.Neverassume
thatchildrenwillremainwhereyoulastsawthem.
•Keepchildrenoutofthemowingareaandunder
thewatchfulcareofaresponsibleadultotherthan
theoperator.
•Bealertandturnmoweroffifachildentersthearea.
•Neverallowchildrentooperatethemachine.
•Useextracarewhenapproachingblindcorners,
shrubs,trees,orotherobjectsthatmayblockyour
viewofachild.
Service
SafeHandlingofGasoline
Toavoidpersonalinjuryorpropertydamage,use
extremecareinhandlinggasoline.Gasolineis
extremelyammableandthevaporsareexplosive.
•Extinguishallcigarettes,cigars,pipes,andother
sourcesofignition.
2
Page 3
•Useonlyanapprovedgasolinecontainer.
•Neverremovegascaporaddfuelwiththeengine
running.Allowenginetocoolbeforerefueling.
•Neverrefuelthemachineindoors.
•Neverstorethemachineorfuelcontainerwhere
thereisanopename,spark,orpilotlightsuchas
onawaterheateroronotherappliances.
•Neverllcontainersinsideavehicleoronatruck
ortrailerbedwithaplasticliner.Alwaysplace
containersonthegroundawayfromyourvehicle
beforelling.
•Removegas-poweredequipmentfromthetruck
ortrailerandrefuelitontheground.Ifthisisnot
possible,thenrefuelsuchequipmentwithaportable
container,ratherthanfromagasolinedispenser
nozzle.
•Keepthenozzleincontactwiththerimofthefuel
tankorcontaineropeningatalltimesuntilfuelingis
complete.Donotuseanozzlelock-opendevice.
•Checkgrasscatchercomponentsandthedischarge
guardfrequentlyandreplacewithmanufacturer’s
recommendedparts,whennecessary.
•Mowerbladesaresharp.Wrapthebladeorwear
gloves,anduseextracautionwhenservicingthem.
•Donotchangetheenginegovernorsettingor
overspeedtheengine.
•Maintainorreplacesafetyandinstructionlabels,as
necessary.
SafetyandInstructional
Decals
Important:Safetyandinstructiondecalsare
locatednearareasofpotentialdanger.Replace
damageddecals.
•Iffuelisspilledonclothing,changeclothing
immediately.
•Neveroverllfueltank.Replacegascapandtighten
securely.
WARNING
Exhaustcontainscarbonmonoxide,anodorless,
deadlypoisonthatcankillyou.
Donotruntheengineindoorsorinanenclosed
area.
GeneralService
•Neveroperatemachineinaclosedarea.
•Keepallnutsandboltstighttobesuretheequipment
isinsafeworkingcondition.
•Nevertamperwithsafetydevices.Checktheir
properoperationregularly.
•Keepmachinefreeofgrass,leaves,orotherdebris
build-up.Cleanupoilorfuelspillageandremove
anyfuel-soakeddebris.Allowmachinetocool
beforestoring.
Manufacturer’sMark
1.Indicatesthebladeisidentiedasapartfromtheoriginal
machinemanufacturer.
94-8072
•Ifyoustrikeaforeignobject,stopandinspectthe
machine.Repair,ifnecessary,beforestarting.
•Nevermakeanyadjustmentsorrepairswiththe
enginerunning.Disconnectthespark-plugwire
andgroundagainstenginetopreventunintended
starting.
3
Page 4
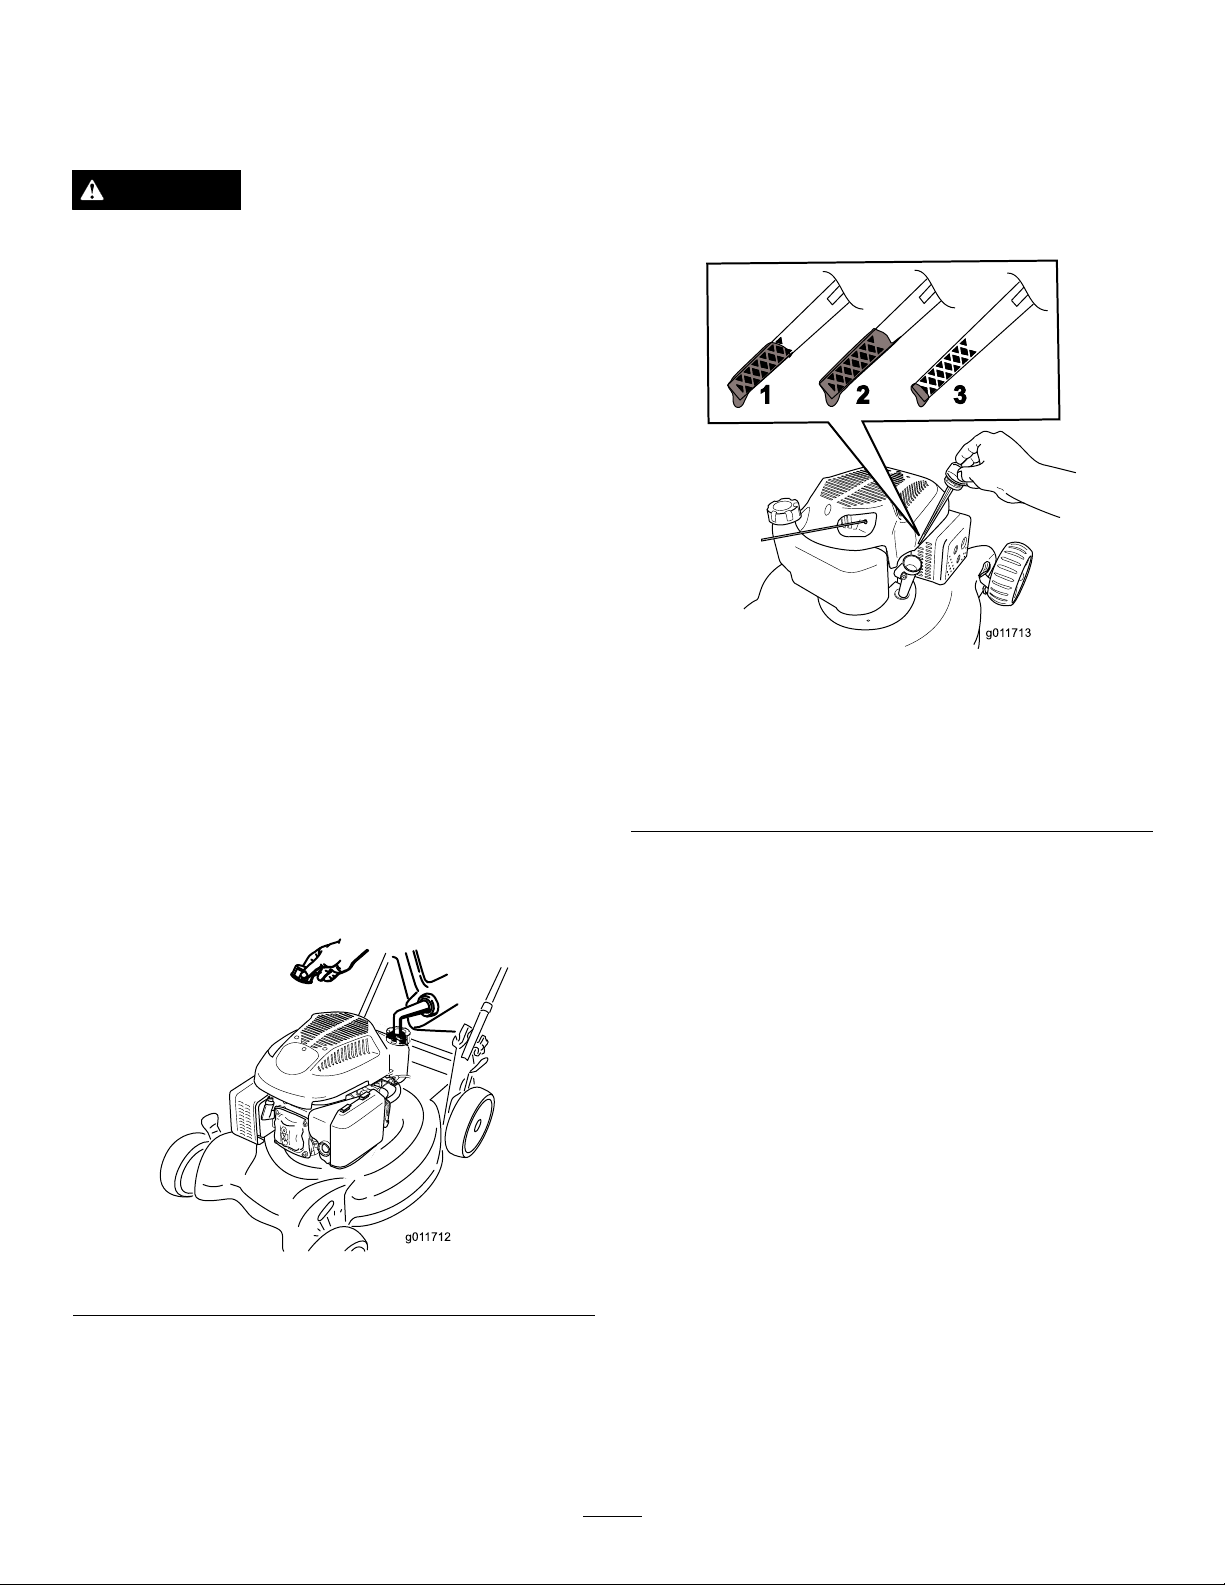
Setup
1
UnfoldingtheHandle
NoPartsRequired
Procedure
117-4143
1.Warning—readtheOperator’sManual.
2.Thrownobjecthazard—keepbystandersasafedistance
fromthemachine.
3.Cutting/dismembermenthazardofhandorfoot,mower
blade—disconnectthesparkplugwireandreadthe
instructionsbeforeservicingorperformingmaintenance.
4.Cutting/dismembermenthazardofhandorfoot,mower
blade—stayawayfrommovingpartsandkeepallguards
andshieldsinplace.
5.Cutting/dismembermenthazardofhandorfoot,mower
blade—donotmowupanddownslopes,onlymowacross;
stopthemowerandengine,pickupdebrisbeforeoperating;
lookbehindanddownwhenreversing.
WARNING
Foldingorunfoldingthehandleimproperlycan
damagethecables,causinganunsafeoperating
condition.
•Donotdamagethecableswhenfoldingor
unfoldingthehandle.
•Ifacableisdamaged,contactanAuthorized
ServiceDealer.
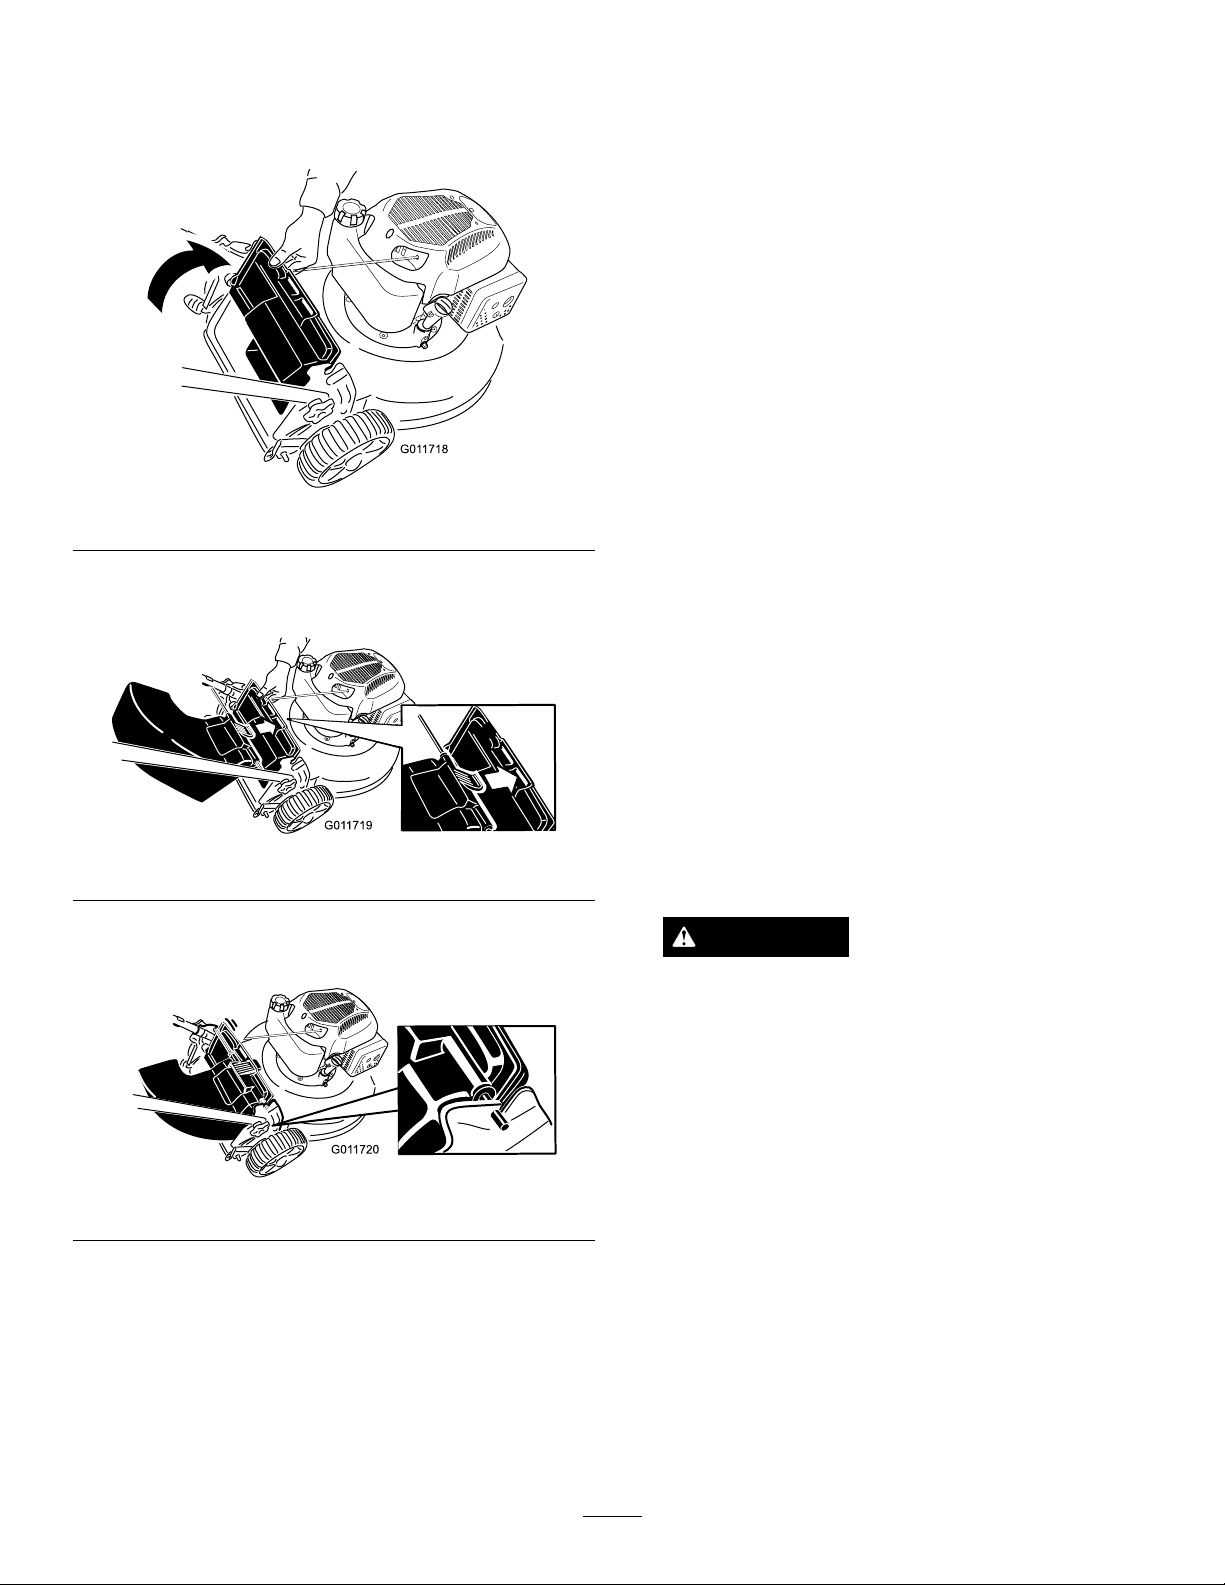
1.Loosenthehandleknobs(Figure3).
Important:Routethecablestotheoutsideof
thehandleasyouinstallthehandle.
Figure3
1.Handleknob(2)
2.Movethehandletotheoperatingposition.
3.Tightenthehandleknobsrmlybyhand(Figure3).
4
Page 5

2
FillingtheEnginewithOil
NoPartsRequired
Procedure
Important:Yourmowerdoesnotcomewithoil
intheengine.Beforestartingtheengine,llthe
enginewithoil.
Max.ll:20oz.(0.59l),type:SAE30orSAE10W-30
detergentoilwithanAPIserviceclassicationofSF,
SG,SH,SJ,SL,orhigher.
1.Movethemowertoalevelsurface.
Important:
5 operating hour s
Change the engine oil after the r st
;changeityearlythereafter.
RefertoChangingtheEngineOil.
ProductOverview
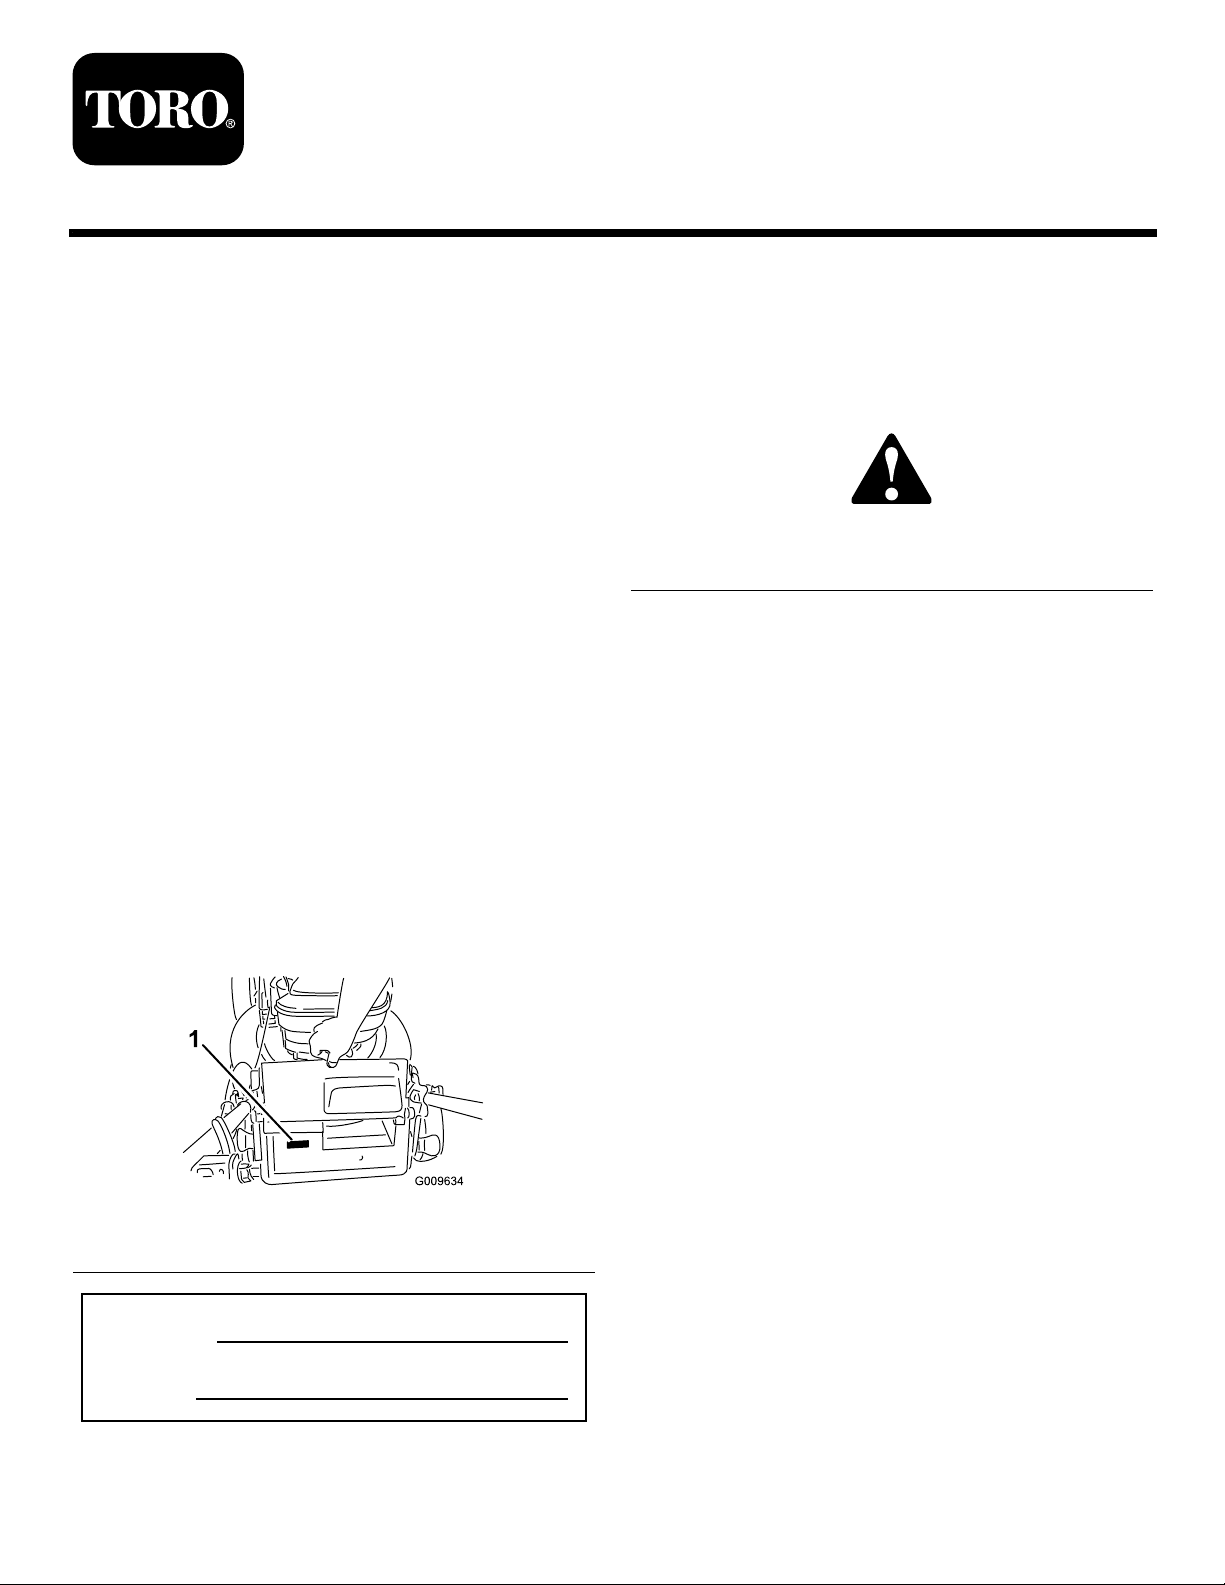
2.Removethedipstick(
1.Theoillevelisatits
maximum.
2.Theoillevelistoo
high—removeoilfrom
thecrankcase.
Figure4).
Figure4
3.Theoillevelistoo
low—addoiltothe
crankcase.
Figure5
1.Sparkplug6.Grassbag
2.Oilll/Dipstick(notshown)
3.Recoilstarthandle
4.Bladecontrolbar
5.Self-propeldrivebar
1.Reardischargedeector(optional)
7.Fueltankcap
8.Cuttingheightlevers(4)
9.Airlter
10.Primer
Figure6
3.Slowlypouroilintotheoilllhole,waitafew
minutes,andchecktheoillevelonthedipstickby
wipingthedipstickcleanandtheninserting,butnot
screwingin,theoilllcapintothehole(
Figure4).
Note:Filltheenginecrankcasewithoiluntilthe
dipstickindicatesthattheengineoilleveliscorrect
asshownin
Figure4.Ifyouoverlltheenginewith
oil,removetheexcessoilasdirectedinChanging
theEngineOil.
4.Installthedipstickandhandtightenitsecurely.
Specications
ModelWeightLengthWidthHeight
2031475lb
(34kg)
5
57in
(144cm)
21in
(54cm)
39in
(145cm)
Page 6
Operation
FillingtheFuelTank
DANGER
Gasolineisextremelyammableandexplosive.A
reorexplosionfromgasolinecanburnyouand
others.
•Topreventastaticchargefromignitingthe
gasoline,placethecontainerand/ormower
directlyonthegroundbeforelling,notina
vehicleoronanobject.
•Fillthetankoutdoorswhentheengineiscold.
Wipeupspills.
•Donothandlegasolinewhensmokingoraround
anopenameorsparks.
•Storegasolineinanapprovedfuelcontainer,out
ofthereachofchildren.
Fillthefueltankwithfreshunleadedregulargasoline
havinganoctaneratingatornear87fromamajor
name-brandservicestation(
Important:DonotuseE85orE20fuel.Alternative
fuelswithhighalcoholcontentcancausehard
starting,poorengineperformance,andmaycause
internalenginedamage.
Figure7).
2.Removethedipstickandwipeitwithacleancloth.
3.Insert,butdonotscrewin,thedipstickintothe
oilllhole.
4.Removethedipstickandcheckit.
5.Todeterminetheproperoillevelonthedipstick,
referto
1.Theoillevelisatits
maximum.
2.Theoillevelistoo
high—removeoilfrom
thecrankcase.
Figure8).
Figure8
3.Theoillevelistoo
low—addoiltothe
crankcase.
Important:Toreducestartingproblems,add
fuelstabilizertothefuelallseason,mixingitwith
gasolinelessthan30daysold.
Figure7
CheckingtheEngineOilLevel
ServiceInterval:Beforeeachuseordaily
6.Iftheoillevelislow ,slowlypouroilintotheoilll
hole,waitafewminutes,andchecktheoillevelon
thedipstickbywipingthedipstickcleanandthen
inserting,butnotscrewingin,theoilllcapinto
thehole.
Note:Max.ll:20oz.(0.59l),type:SAE30
orSAE10W -30detergentoilwithanAPIservice
classicationofSF,SG,SH,SJ,SL,orhigher.
Note:Filltheenginecrankcasewithoiluntilthe
dipstickindicatesthattheengineoilleveliscorrect
asshownin
Figure8.Ifyouoverlltheenginewith
oil,removetheexcessoilasdirectedinChanging
theEngineOil.
7.Installthedipstickandhandtightenitsecurely.
Important:
5 operating hour s
Change the engine oil after the r st
;changeityearlythereafter.
RefertoChangingtheEngineOil.
1.Movethemowertoalevelsurface.
6
Page 7
AdjustingtheCuttingHeight
StartingtheEngine
WARNING
Adjustingthecuttingheightmaybringyouinto
contactwiththemovingblade,causingserious
injury.
•Stoptheengineandwaitforallmovingparts
tostop.
•Donotputyourngersunderthehousingwhen
adjustingthecuttingheight.
CAUTION
Iftheenginehasbeenrunning,themuferwillbe
hotandcanseverelyburnyou.Keepawayfromthe
hotmufer.
Adjustthecuttingheightasdesired.Setallfourwheels
tothesameheight.
Note:Toraisethemower,moveallthecuttingheight
leversforward;tolowerthemower,movetheallthe
cuttingheightleversrearward(
Figure9).
1.Firmlypushintheprimer3timeswithyourthumb,
holdingtheprimerinforasecondbeforereleasing
iteachtime(Figure10).
Figure10
1.Primer
2.Holdthebladecontrolbar(Figure11)againstthe
handle.
Figure9
1.Raisethemower2.Lowerthemower
Note:Thecuttingheightsettingsare1inch(25mm);
1-1/2inch(38mm);2inches(51mm);2-1/2inches
(64mm);3inches(76mm);3-1/2inches(89mm);and
4inches(102mm).
Figure11
1.Bladecontrolbar
3.Pullrecoilstarthandle(Figure12).
Figure12
Note:Ifthemowerdoesnotstartafterseveral
attempts,contactanAuthorizedServiceDealer.
7
Page 8

UsingtheSelf-propelDrive
BaggingtheClippings
Tooperatetheself-propeldrive,squeezetheself-propel
drivebar(Figure13)towardthehandleandholdit.
Figure13
1.Self-propeldrivebar
Todisengagetheself-propeldrive,releasetheself-propel
drivebar.
Note:Themaximumself-propelgroundspeedisxed.
Toreducethegroundspeed,increasethespacebetween
theself-propeldrivebarandthehandle.
Usethegrassbagwhenyouwanttocollectgrassand
leafclippingsfromthelawn.
WARNING
Aworngrassbagcouldallowsmallstonesand
othersimilardebristobethrownintheoperator’sor
bystander’sdirectionandresultinseriouspersonal
injuryordeathtotheoperatororbystanders.
Checkthegrassbagfrequently.Ifitisdamaged,
installanewTororeplacementbag.
WARNING
Thebladeissharp;contactingthebladecanresult
inseriouspersonalinjury.
Stoptheengineandwaitforallmovingpartstostop
beforeleavingtheoperatingposition.
InstallingtheGrassBag
1.Liftupthereardeector(Figure15).
StoppingtheEngine
ServiceInterval:Beforeeachuseordaily
Tostoptheengine,releasethebladecontrolbar
(Figure14).
Important:Whenyoureleasethebladecontrol
bar,boththeengineandbladeshouldstopwithin
3seconds.Iftheydonotstopproperly,stopusing
yourmowerimmediatelyandcontactanAuthorized
ServiceDealer.
Figure14
MulchingtheClippings
Figure15
1.Reardeector
2.Insertthegrassbaghandleontothenotchesonthe
handlebrackets(Figure15).
RemovingtheGrassBag
1.Liftupthereardeector(Figure15).
2.Liftthegrassbaghandleoutfromthenotchesonthe
handlebracketsandremovethebagfromthemower.
3.Closethereardeector.
Yourmowercomesfromthefactoryreadytomulchthe
grassandleafclippingsbackintothelawn.
Ifthegrassbagisonthemower,removeit(referto
RemovingtheGrassBag)beforemulchingtheclippings.
DischargingtheClippings
Usetherear-dischargedeector(optional)forcutting
verytallgrass.
8
Page 9
InstallingtheRear-DischargeDeector
1.Ifthebagisonthemower,removeit.
2.Liftupthereardeectorandholdit(Figure16).
Figure16
3.Insertthetabontherear-dischargedeectorintothe
right-handslotinthereardeector(Figure17).
Figure17
OperatingTips
GeneralMowingTips
•Cleartheareaofsticks,stones,wire,branches,and
otherdebristhatthebladecouldhit.
•Avoidstrikingsolidobjectswiththeblade.Never
deliberatelymowoveranyobject.
•Ifthemowerstrikesanobjectorstartstovibrate,
immediatelystoptheengine,disconnectthewire
fromthesparkplug,andexaminethemowerfor
damage.
•Forbestperformance,installanewbladebeforethe
cuttingseasonbegins.
•ReplacethebladewhennecessarywithaToro
replacementblade.
CuttingGrass
•Cutonlyaboutathirdofthegrassbladeatatime.
Donotcutbelowthe2inch(51mm)settingunless
thegrassissparseoritislatefallwhengrassgrowth
beginstoslowdown.RefertoAdjustingtheCutting
Height.
•Whencuttinggrassover6inches(15cm)tall,mow
atthehighestcuttingheightsettingandwalkslower;
thenmowagainatalowersettingforthebestlawn
appearance.Ifthegrassistoolong,themowermay
plugandcausetheenginetostall.
•Mowonlydrygrassorleaves.Wetgrassandleaves
tendtoclumpontheyardandcancausethemower
toplugortheenginetostall.
4.Inserttherodontherear-dischargedeectorinto
thenotchesonthemower(
Figure18
Figure18).
RemovingtheRear-DischargeDeector
Toremovetherear-dischargedeector,reversethesteps
above.
WARNING
Wetgrassorleavescancauseseriousinjuryif
youslipandcontacttheblade.Mowonlyindry
conditions.
•Alternatethemowingdirection.Thishelpsdisperse
theclippingsoverthelawnforevenfertilization.
•Ifthenishedlawnappearanceisunsatisfactory,try
oneormoreofthefollowing:
–Replacethebladeorhaveitsharpened.
–Walkataslowerpacewhilemowing.
–Raisethecuttingheightonyourmower.
–Cutthegrassmorefrequently.
–Overlapcuttingswathsinsteadofcuttingafull
swathwitheachpass.
–Setthecuttingheightonthefrontwheelsone
notchlowerthantherearwheels.Forexample,
setthefrontwheelsat2inches(51mm)andthe
rearwheelsat2-1/2inches(64mm).
9
Page 10
CuttingLeaves
•Aftercuttingthelawn,ensurethathalfofthelawn
showsthroughthecutleafcover.Youmayneedto
makemorethanonepassovertheleaves.
•Iftherearemorethan5inches(13cm)ofleaves
onthelawn,setthefrontcuttingheightoneortwo
notcheshigherthantherearcuttingheight.
•Slowdownyourmowingspeedifthemowerdoes
notcuttheleavesnelyenough.
Maintenance
Note:Determinetheleftandrightsidesofthemachinefromthenormaloperatingposition.
RecommendedMaintenanceSchedule(s)
MaintenanceService
Interval
Aftertherst5hours
Beforeeachuseordaily
Every100hours
Beforestorage
Yearly
MaintenanceProcedure
•Changetheengineoil.
•Checktheengineoillevel.
•Ensurethattheenginestopswithin3secondsafterreleasingthebladecontrolbar.
•Cleangrassclippingsanddirtfromunderthemower.
•Checkthesparkplugandreplaceitifnecessary.
•Emptythefueltankbeforerepairsasdirectedandbeforeannualstorage.
•Cleanthecoolingsystem;removegrassclippings,debris,ordirtfromtheengine
aircoolingnsandstarter.Cleanthesystemmorefrequentlyindirtyorhigh-chaff
conditions.
•Replacetheairlter;replaceitmorefrequentlyindustyoperatingconditions.
•Changetheengineoil.
•Replacethebladeorhaveitsharpened(morefrequentlyiftheedgedullsquickly).
PreparingforMaintenance
1.Stoptheengineandwaitforallmovingpartstostop.
2.Disconnectthesparkplugwirefromthesparkplug
(
Figure19)beforeperforminganymaintenance
procedure.
WARNING
Tippingthemowermaycausethefueltoleak.
Gasolineisammable,explosiveandcancause
personalinjury.
Runtheenginedryorremovethegasolinewith
ahandpump;neversiphon.
Figure19
1.Sparkplugwire
3.Afterperformingthemaintenanceprocedure(s),
connectthesparkplugwiretothesparkplug.
Important:Alwaystipthemowerontoitsside
withthedipstickdown.
ReplacingtheAirCleaner
ServiceInterval:Yearly
1.Pressdownonthelatchtabsontopoftheaircleaner
cover(
10
Figure20).
Page 11
1.Latchtabs
2.Paperairlter
Figure20
3.Foampre-lter
ChangingtheEngineOil
ServiceInterval:Aftertherst5hours
Yearly
1.Ensurethatthefueltankcontainslittleornofuelso
thatfueldoesnotleakoutwhenyoutipthemower
ontoitsside.
2.Runtheengineafewminutesbeforechangingthe
oiltowarmit.
Note:Warmoilowsbetterandcarriesmore
contaminants.
3.Disconnectthewirefromthesparkplug.Referto
PreparingforMaintenance.
4.Removethedipstick.
5.Tipthemowerontoitsside,withthedipstickdown,
todraintheusedoiloutthroughtheoillltube
Figure21).
(
2.Openthecover.
3.Removethepaperairlterandthefoampre-lter
(Figure20).
4.Inspectthefoampre-lter,andreplaceitifitis
damagedorexcessivelydirty.
5.Inspectthepaperairlter.
A.Ifthepaperairlterisdamagedoriswetwithoil
orfuel,replaceit.
B.Ifthepaperairlterisdirty,tapitonahard
surfaceseveraltimesorblowcompressedairless
than30psi(207kPa)throughthesideofthe
lterthatfacestheengine.
Note:Donotbrushthedirtoffthelter;
brushingforcesdirtintothebers.
6.Removedirtfromtheaircleanerbodyandcover
usingamoistrag.Donotwipedirtintotheair
duct.
7.Insertthefoampre-lterandthepaperairlterinto
theaircleaner.
Figure21
6.Returnthemowertotheoperatingposition.
7.Slowlypouroilintotheoilllhole,waitafew
minutes,andchecktheoillevelonthedipstickby
wipingthedipstickcleanandtheninserting,butnot
screwingin,theoilllcapintothehole.
Note:Max.ll:20oz.(0.59l),type:SAE30
orSAE10W -30detergentoilwithanAPIservice
classicationofSF,SG,SH,SJ,SL,orhigher.
Note:Filltheenginecrankcasewithoiluntilthe
dipstickindicatesthattheengineoilleveliscorrect
asshownin(
Figure22).Ifyouoverlltheengine
withoil,removetheexcessoilasdirectedin
5.
8.Installthecover.
11
Page 12
1.Centerelectrodeinsulator
2.Sideelectrode
3.Airgap(nottoscale)
Figure23
Figure22
1.Theoillevelisatits
maximum.
2.Theoillevelistoo
high—removeoilfrom
thecrankcase.
3.Theoillevelistoo
low—addoiltothe
crankcase.
8.Installthedipstickandhandtightenitsecurely.
9.Disposeoftheusedoilproperlyatalocalrecycling
center.
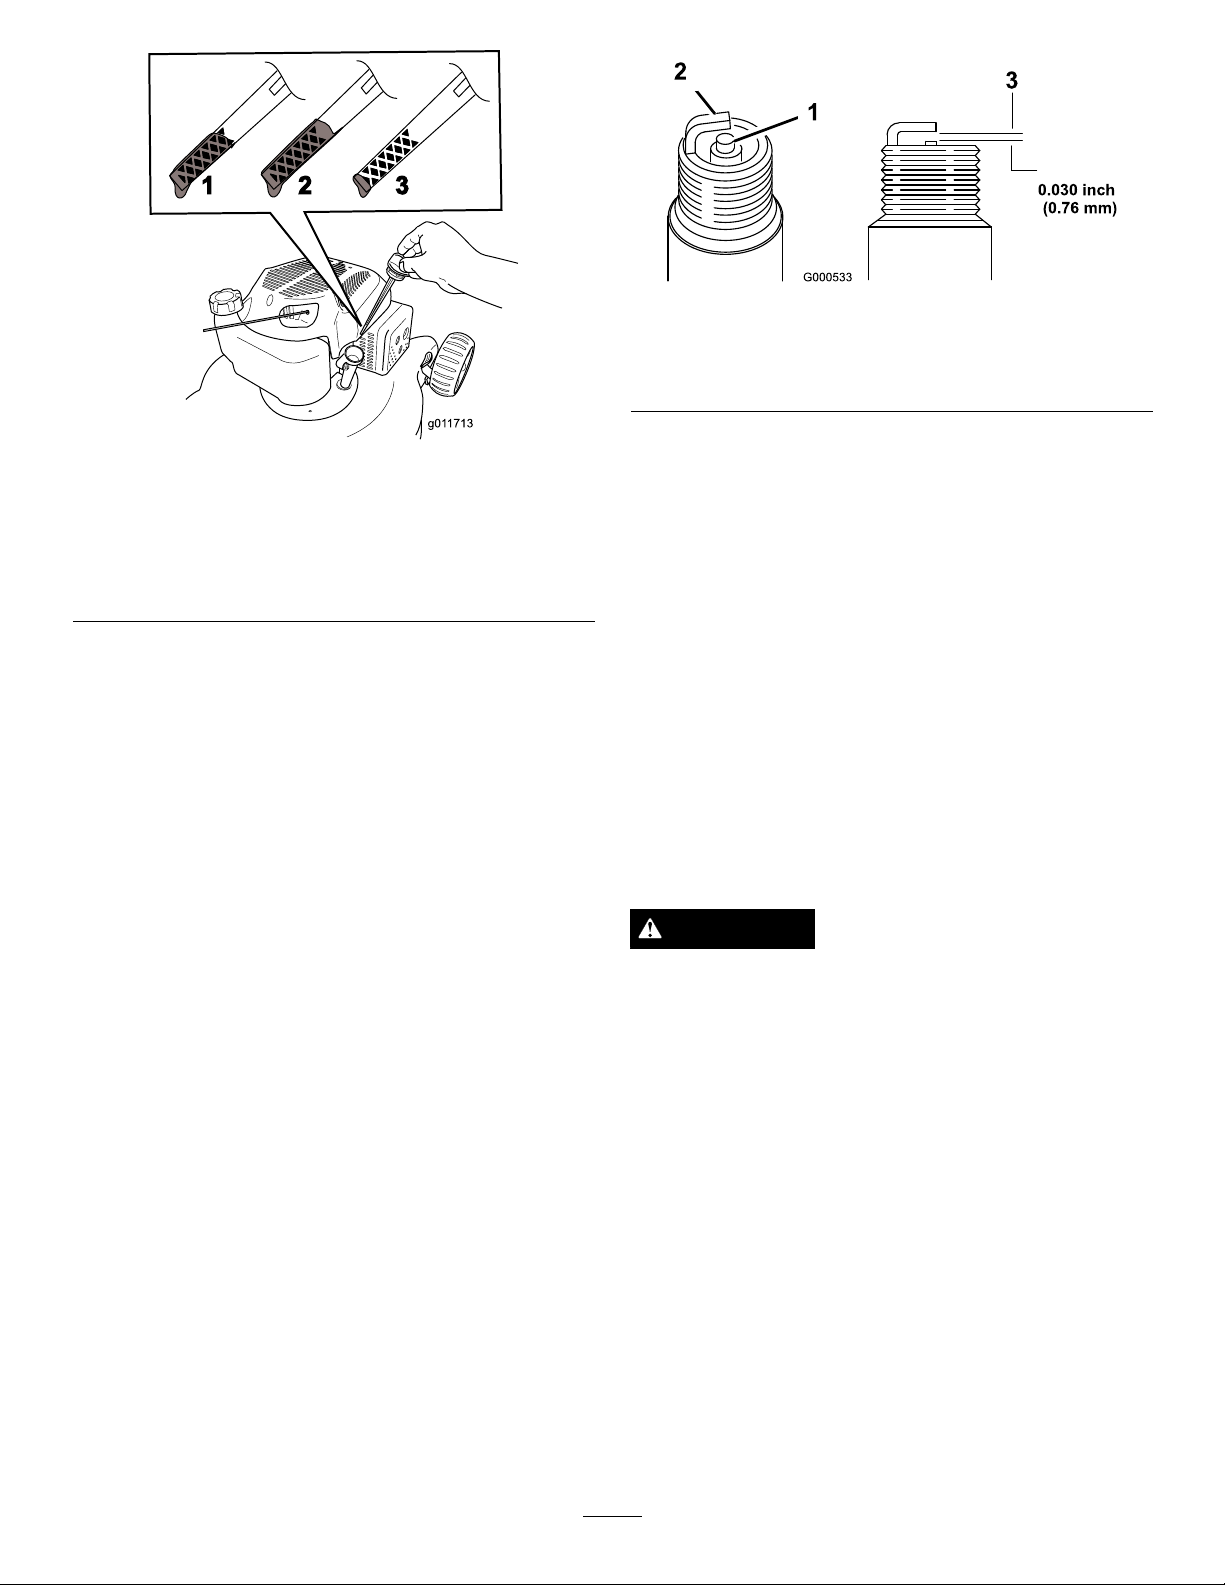
ServicingtheSparkPlug
ServiceInterval:Every100hours
Checkthesparkplugafterevery100operatinghours.
UseanChampionRN9YCsparkplugorequivalent.
1.Stoptheengineandwaitforallmovingpartstostop.
2.Disconnectthewirefromthesparkplug.
3.Cleanaroundthesparkplug.
4.Removethesparkplugfromthecylinderhead.
Important:Replaceacracked,fouled,or
dirtysparkplug.Donotcleantheelectrodes
becausegritenteringthecylindercandamage
theengine.
5.Setthegapontheplugto0.030inch(0.76mm)
Figure23).
(
6.Installthesparkplugandthegasketseal.
7.Torquetheplugto15ft-lb(20N-m).
8.Connectthewiretothesparkplug.
ReplacingtheBlade
ServiceInterval:Yearly
Important:
the blade pr oper l y
wrenchorareuncomfortableperformingthis
procedure,contactanAuthorizedServiceDealer.
Examinethebladewheneveryourunoutofgasoline.If
thebladeisdamagedorcracked,replaceitimmediately.
Ifthebladeedgeisdullornicked,haveitsharpenedor
replaceit.
WARNING
Thebladeissharp;contactingthebladecanresult
inseriouspersonalinjury.
•Disconnectthewirefromthesparkplug.
•Weargloveswhenservicingtheblade.
1.Disconnectthesparkplugwirefromthesparkplug.
RefertoPreparingforMaintenance.
2.Tipthemowerontoitsside,withtheairlterup.
3.Useablockofwoodtoholdthebladesteady.
4.Removetheblade(turnthebladebolt
counterclockwise),savingallthemountinghardware.
Y ou will need a torque wr ench to install
.Ifyoudonothaveatorque
5.Installthenewblade(turnthebladeboltclockwise)
andallmountinghardware(
12
Figure24).
Page 13
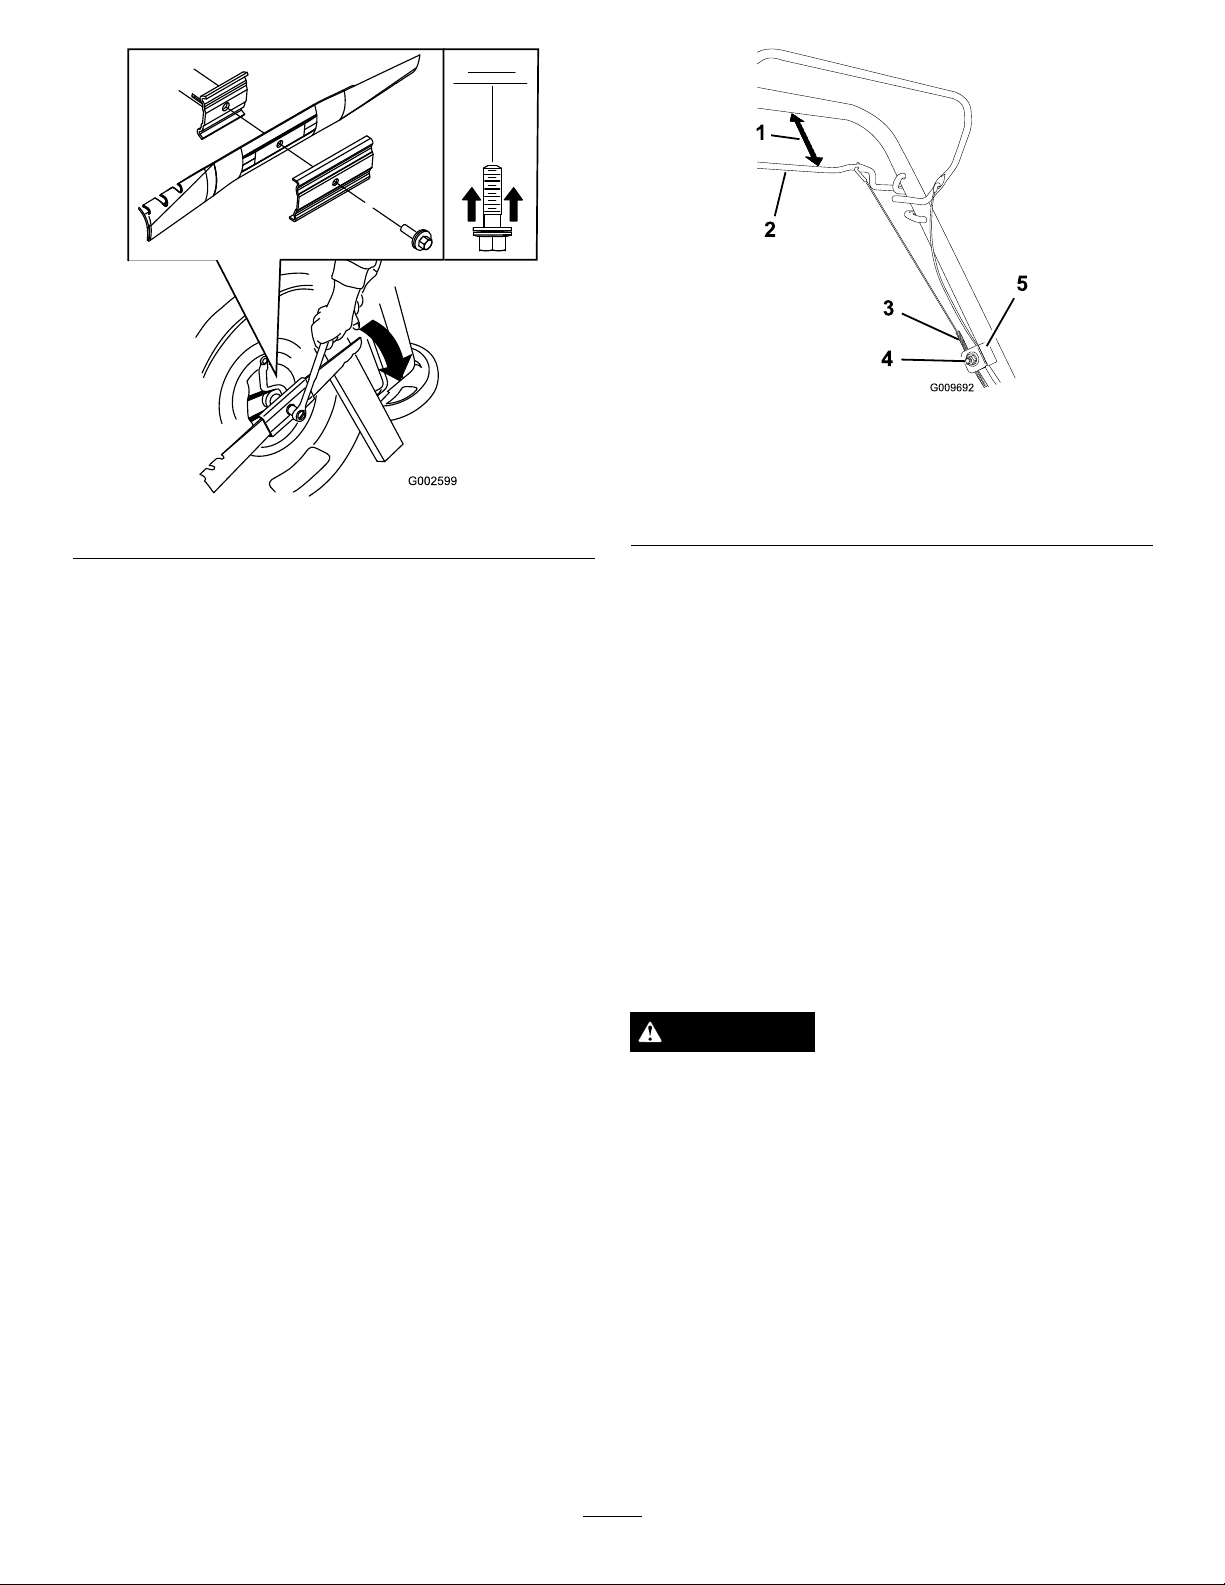
Figure24
Figure25
1.1to1-1/2inches(25to38
mm)
2.Self-propeldrivebar5.Cablesupport
3.Cablejacket
4.Cablesupportnut
Important:Positionthecurvedendsofthe
bladetopointtowardthemowerhousing.
6.Useatorquewrenchtotightenthebladeboltto
60ft-lb(82N-m).
Important:Abolttorquedto60ft-lb(82N-m)
isverytight.Whileholdingthebladewitha
blockofwood,putyourweightbehindthe
ratchetorwrenchandtightentheboltsecurely.
Thisboltisverydifculttoovertighten.
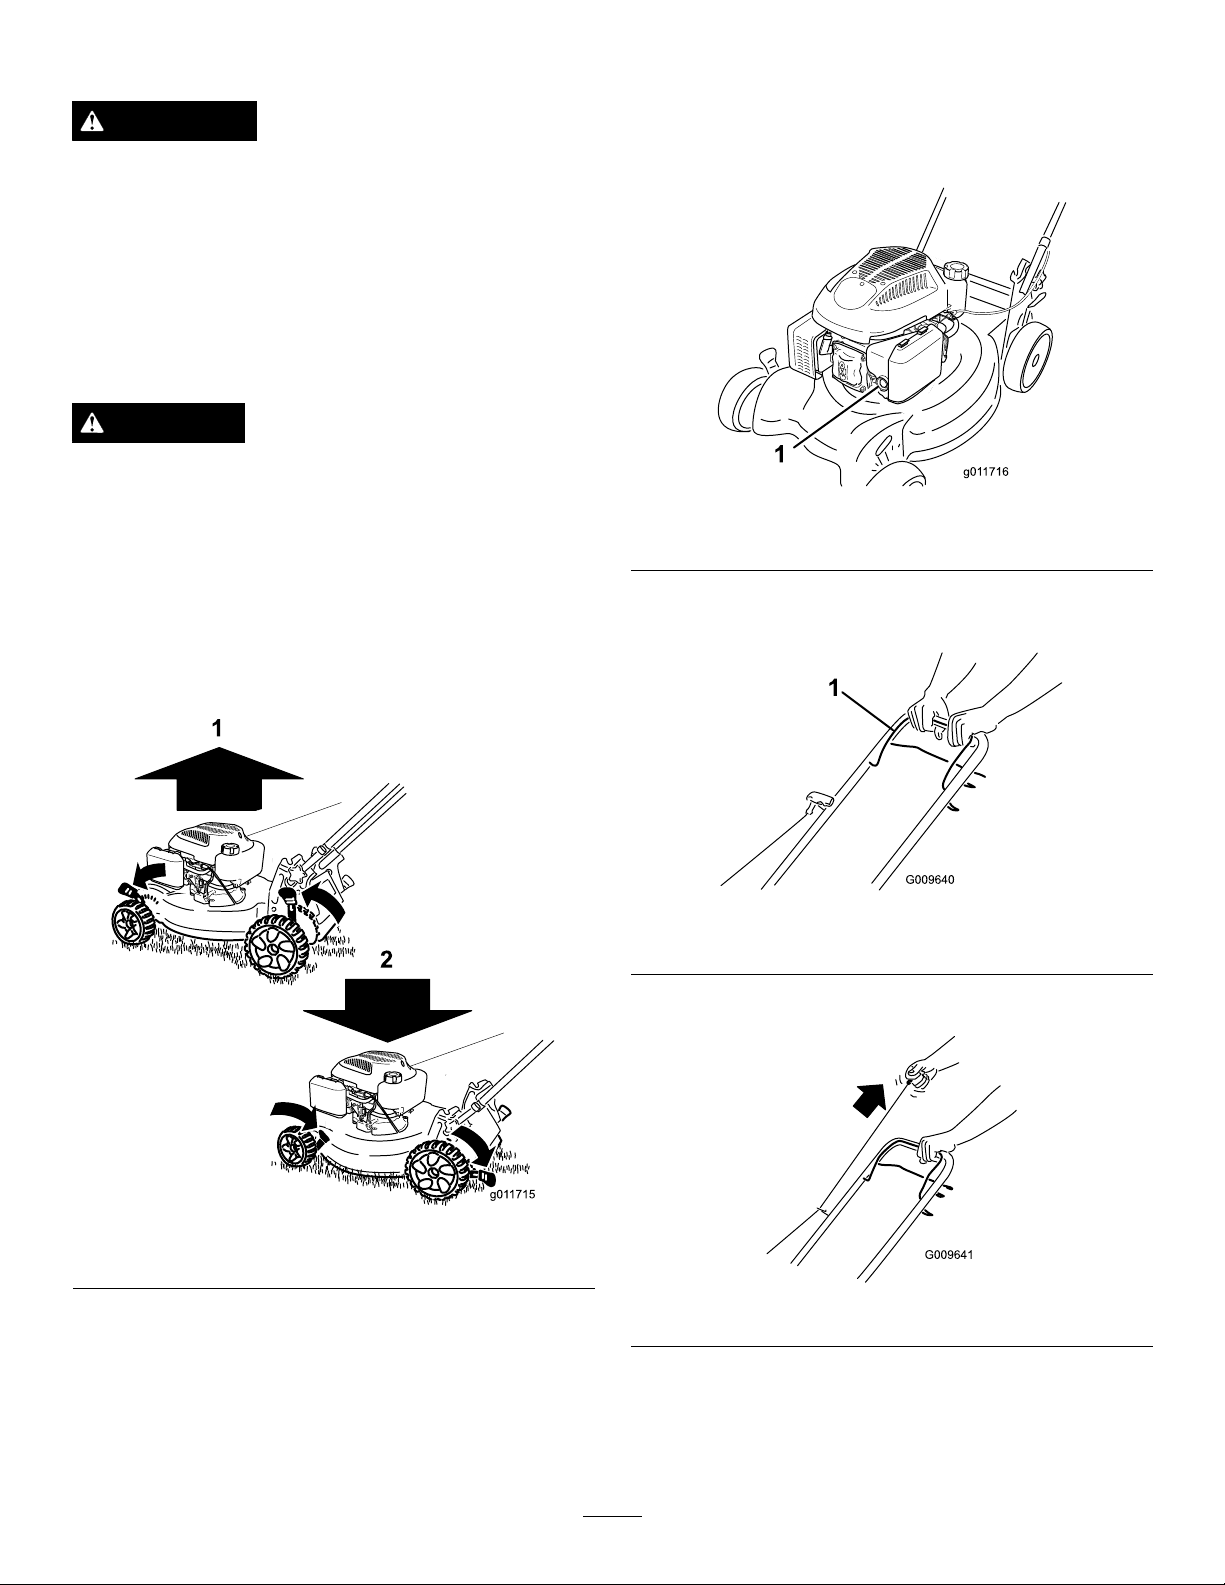
AdjustingtheSelf-propelDrive
Cable
Wheneveryouinstallanewself-propelcableorif
theself-propeldriveisoutofadjustment,adjustthe
self-propeldrivecable.
1.Loosenthecablesupportnut(
Figure25).
2.Holdtheself-propelbail1to1-1/2inches(25to38
mm)fromthehandle(Figure25).
3.Pulldownthecablejacket(towardthemower)until
thereisnoslackinthecable(
Figure25).
4.Tightenthenutonthecablesupport.
5.Releasetheself-propeldrivebarandensurethatthe
cableisloose.
Note:Thecablemustbeloosewiththeself-propel
drivebarinthereleasedposition;otherwise,the
mowermaycreepwhenyoudisengagethebar.
CleaningtheMower
ServiceInterval:Beforeeachuseordaily
WARNING
Themowermaydislodgematerialfromunderthe
mowerhousing.
•Weareyeprotection.
•Stayintheoperatingposition(behindthe
handle).
•Donotallowbystandersinthearea.
1.Withtheenginerunningonaatpavedsurface,
sprayastreamofwaterinfrontoftherightrear
wheel(Figure26).
Thewaterwillsplashintothepathoftheblade,
cleaningouttheclippings.
13
Page 14
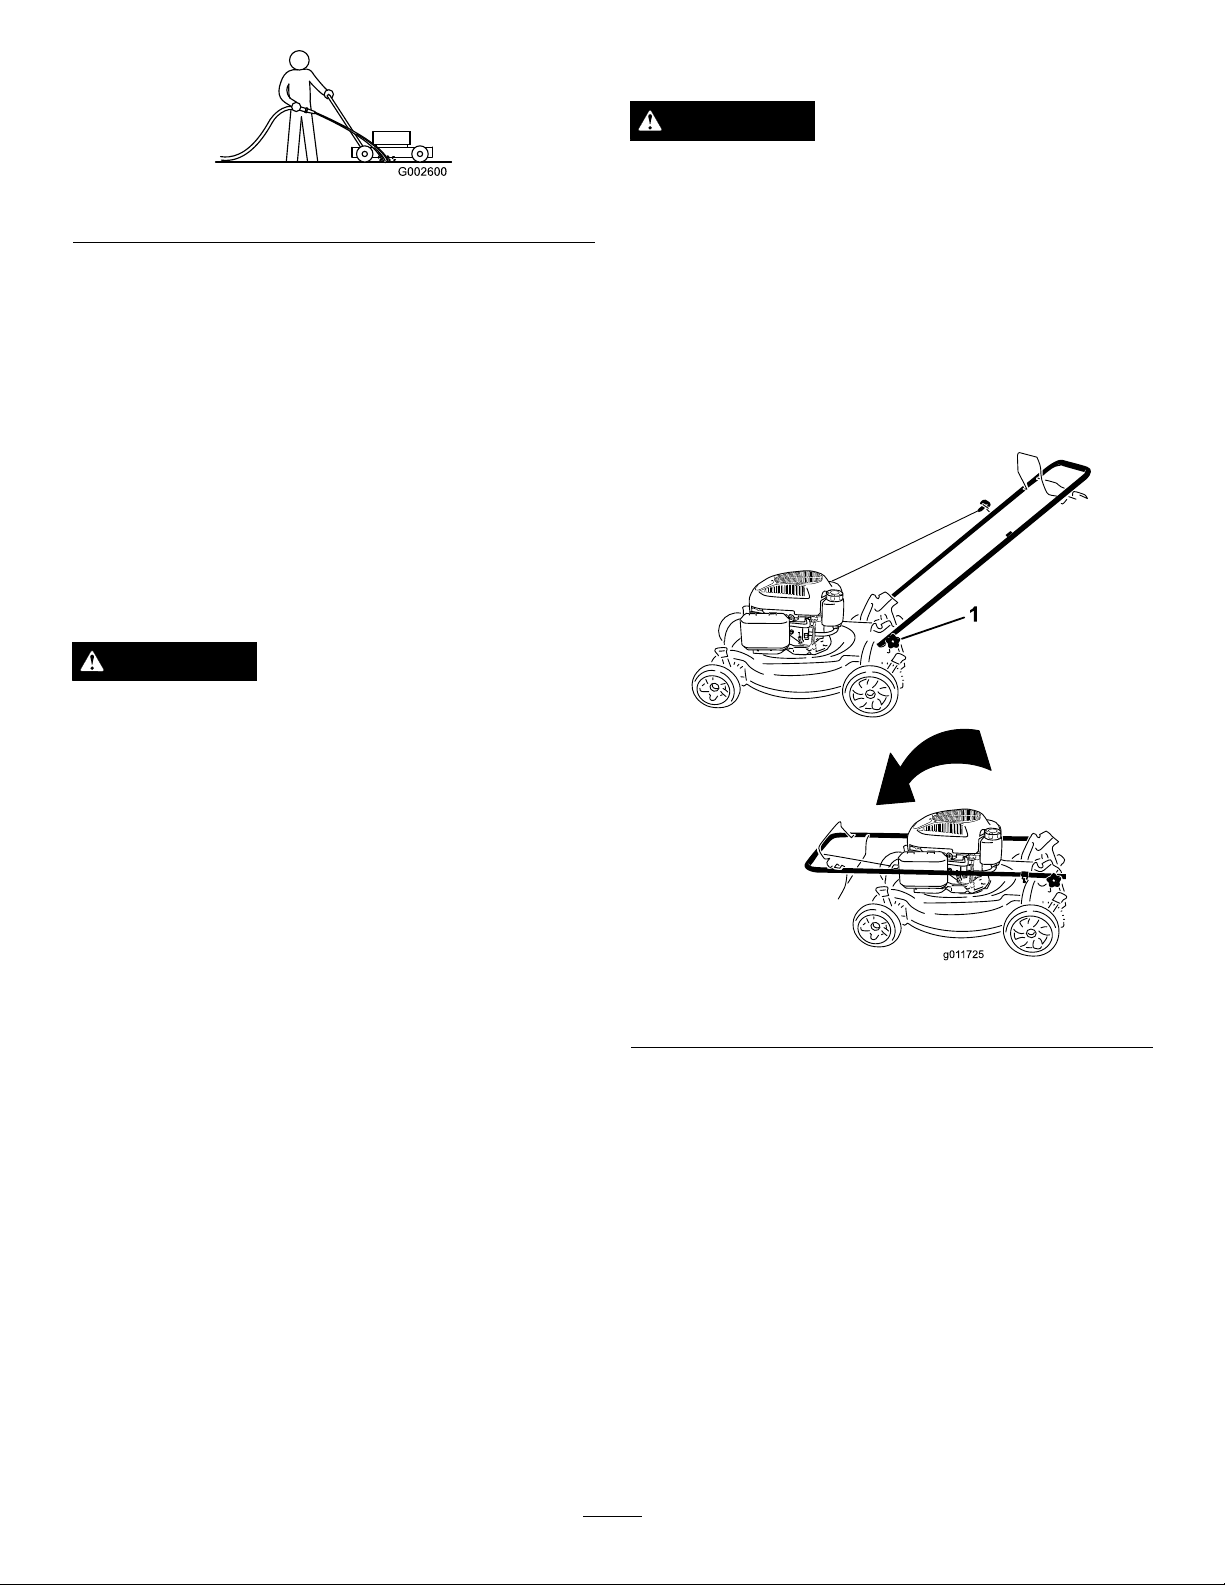
Figure26
2.Whennomoreclippingscomeout,stopthewater
andmovethemowertoadryarea.
3.Runtheengineforafewminutestodrythehousing
topreventitfromrusting.
Storage
Storethemowerinacool,clean,dryplace.
PreparingtheMowerfor
Storage
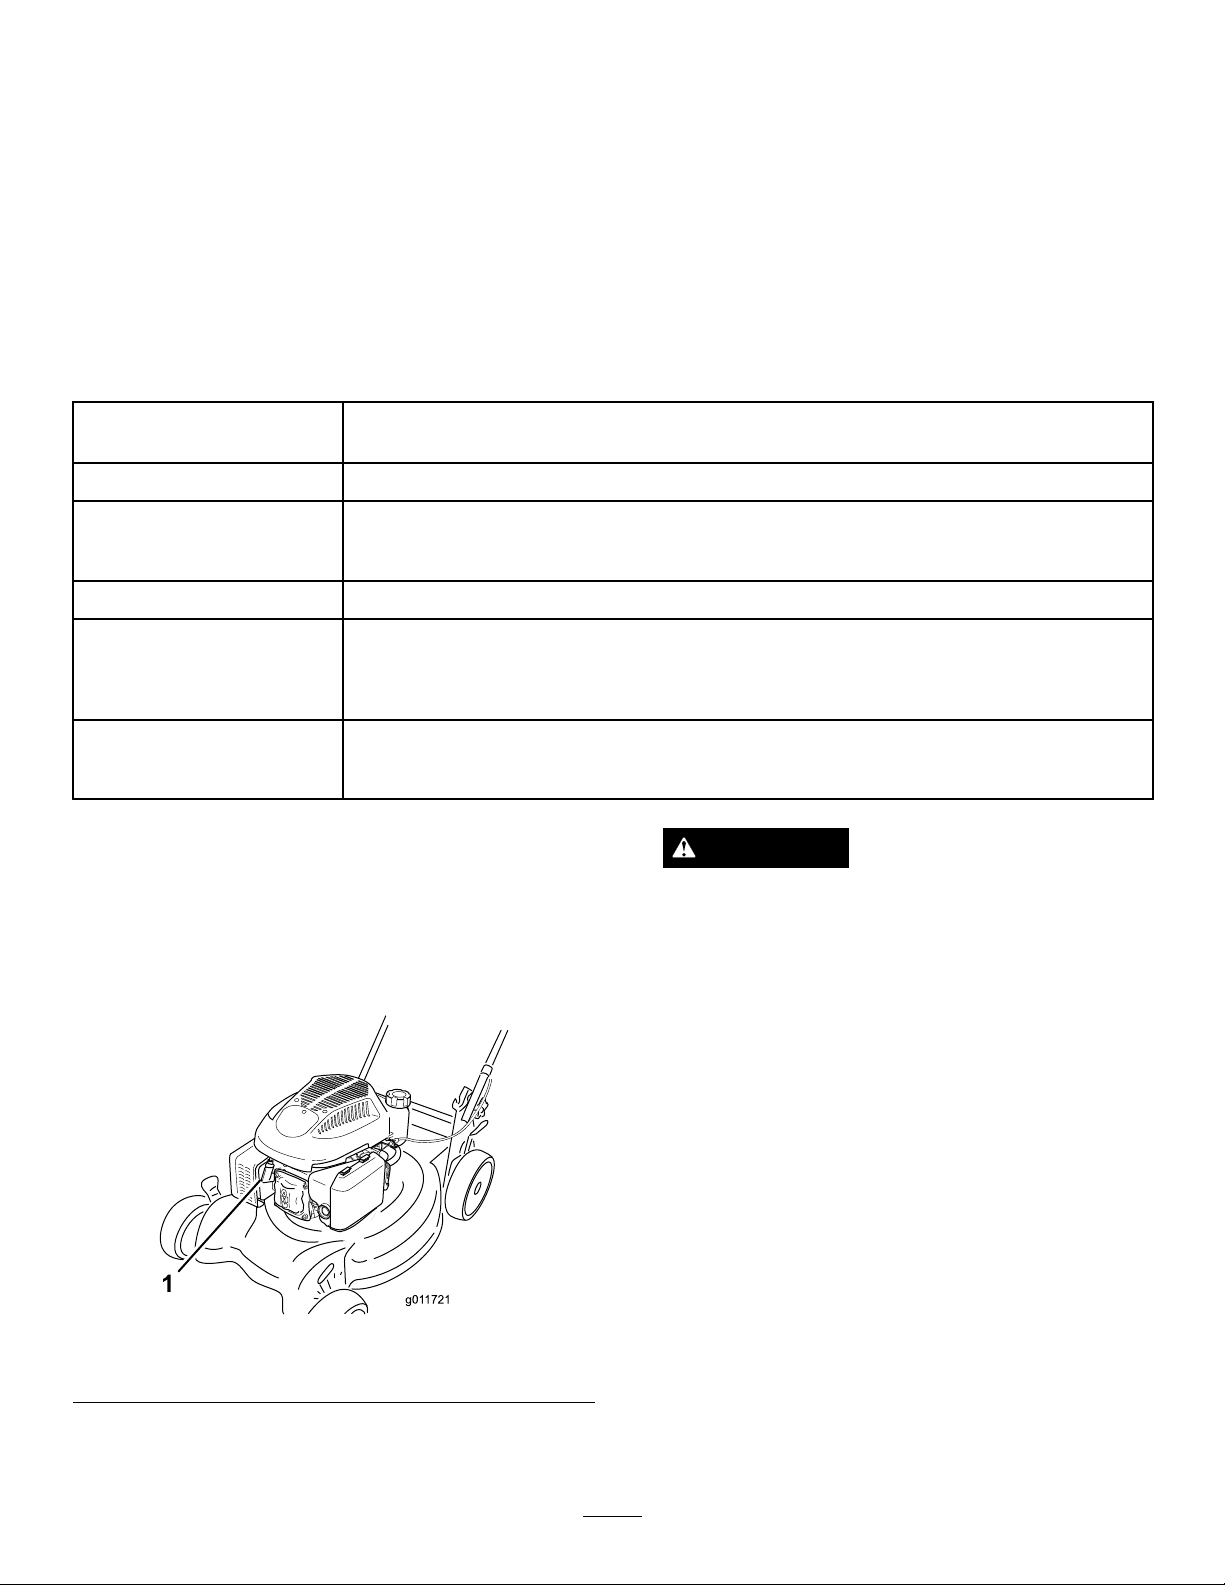
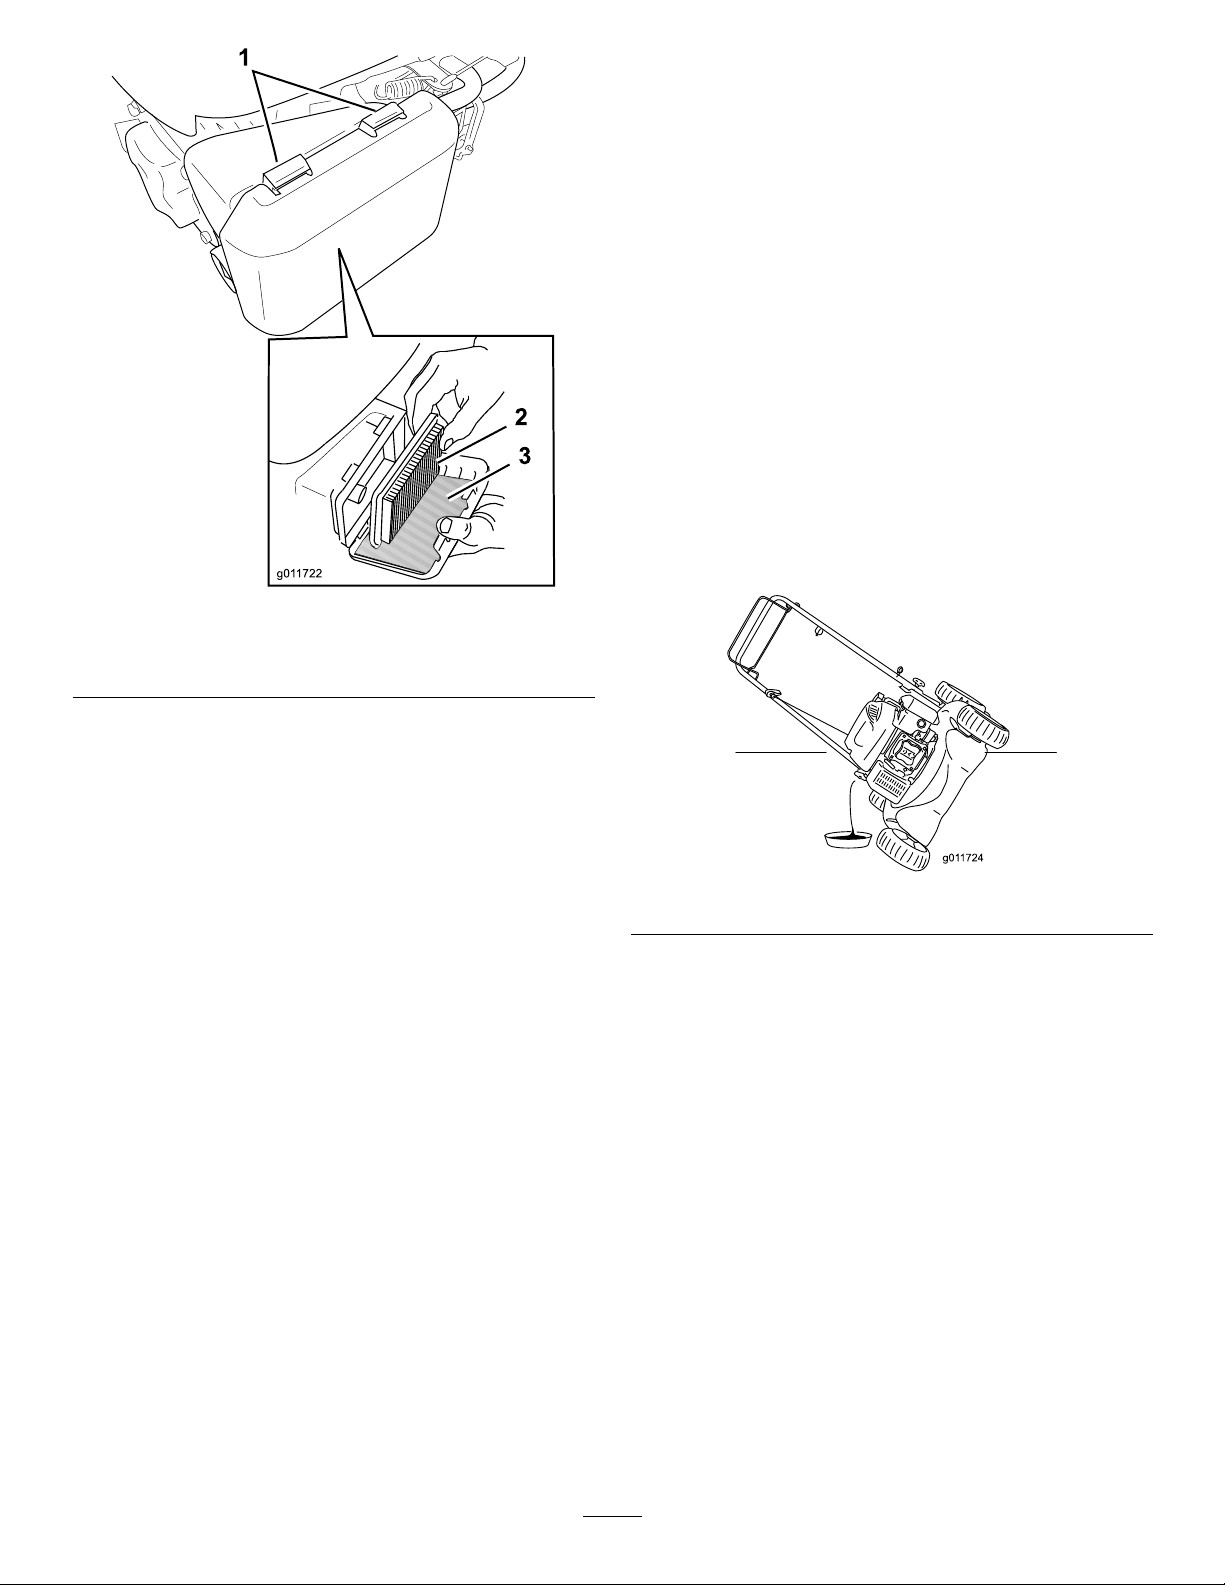
FoldingtheHandle
WARNING
Foldingorunfoldingthehandleimproperlycan
damagethecables,causinganunsafeoperating
condition.
•Donotdamagethecableswhenfoldingor
unfoldingthehandle.
•Ifacableisdamaged,contactanAuthorized
ServiceDealer.
1.Loosenthehandleknobsuntilyoucanmovethe
handlefreely(Figure27).
WARNING
Gasolinevaporscanexplode.
•Donotstoregasolinemorethan30days.
•Donotstorethemowerinanenclosurenearan
opename.
•Allowtheenginetocoolbeforestoringit.
1.Onthelastrefuelingoftheyear,addfuelstabilizer
tothefuelasdirectedbytheenginemanufacturer.
2.Runthemoweruntiltheenginestopsfromrunning
outoffuel.
3.Primetheengineandstartitagain.
4.Allowtheenginetorununtilitstops.Whenyoucan
nolongerstarttheengine,itissufcientlydry.
5.Disconnectthewirefromthesparkplug.
6.Removethesparkplug,add1oz.(30ml)ofoil
throughthesparkplughole,andpullthestarterrope
slowlyseveraltimestodistributeoilthroughoutthe
cylindertopreventcylindercorrosionduringthe
off-season.
Figure27
1.Handleknob(2)
2.MovethehandleforwardasshowninFigure27.
7.Installthesparkplugandtightenitwithatorque
wrenchto15ft-lb(20N-m).
8.Tightenallnuts,bolts,andscrews.
14
Page 15

Troubleshooting
Problem
Theenginedoesnotstart
Theenginestartshardorlosespower
PossibleCauseCorrectiveAction
1.Thewireisnotconnectedtothespark
plug.
2.Theprimerhasnotbeenpressed.2.Presstheprimer3times.
3.Thefuelcapventholeisplugged.3.Cleanthefuelcapventholeorreplace
4.Thesparkplugispitted,fouled,orthe
gapisincorrect.
5.Thefueltankisemptyorthefuel
systemcontainsstalefuel.
1.Theprimerhasnotbeenpressed.1.Presstheprimer3times.
2.Thefuelcapventholeisplugged.2.Cleanthefuelcapventholeorreplace
3.Theairlterelementisdirtyandis
restrictingtheairow.
4.Theundersideofthemowerhousing
containsclippingsanddebris.
5.Thesparkplugispitted,fouled,orthe
gapisincorrect.
6.Theengineoillevelistoolow,toohigh,
orexcessivelydirty .
7.Thefueltankcontainsstalefuel.7.Drainandllthefueltankwithfresh
1.Connectthewiretothesparkplug.
thefuelcap.
4.Checkthesparkplugandadjustthe
gapifnecessary.Replacethespark
plugifitispitted,fouled,orcracked.
5.Drainand/orllthefueltankwith
freshgasoline.Iftheproblempersists,
contactanAuthorizedServiceDealer.
thefuelcap.
3.Cleantheairlterpre-cleanerand/or
replacethepaperairlter.
4.Cleanunderthemowerhousing.
5.Checkthesparkplugandadjustthe
gapifnecessary.Replacethespark
plugifitispitted,fouled,orcracked.
6.Checktheengineoil.Changetheoilif
itisdirty;addordraintheoiltoadjust
theoilleveltotheFullmarkonthe
dipstick.
gasoline.
Theenginerunsrough
Themowerorenginevibratesexcessively
Thereisanunevencuttingpattern
Themowerdoesnotself-propel
1.Theprimerhasnotbeenpressed.1.Presstheprimer3times.
2.Thewireisnotconnectedtothespark
plug.
3.Thesparkplugispitted,fouled,orthe
gapisincorrect.
4.Theairlterelementisdirtyandis
restrictingtheairow.
1.Theundersideofthemowerhousing
containsclippingsanddebris.
2.Theenginemountingboltsareloose.2.Tightentheenginemountingbolts.
3.Theblademountingnutsareloose.3.Tightentheblademountingnuts.
4.Thebladeisbentorisoutofbalance.4.Balancetheblade.Ifthebladeisbent,
1.Y ouaremowinginthesamepattern
repeatedly.
2.All4wheelsarenotatthesameheight.2.Placeall4wheelsatthesameheight.
3.Theundersideofthemowerhousing
containsclippingsanddebris.
4.Thebladeisdull.
1.Thereisdebrisunderthebeltcover.
2.Theself-propeldrivecableisoutof
adjustmentorisdamaged.
2.Connectthewiretothesparkplug.
3.Checkthesparkplugandadjustthe
gapifnecessary.Replacethespark
plugifitispitted,fouled,orcracked.
4.Cleantheairlterpre-cleanerand/or
replacethepaperairlter.
1.Cleanunderthemowerhousing.
replaceit.
1.Changethemowingpattern.
3.Cleanunderthemowerhousing.
4.Sharpenandbalancetheblade.
1.Cleanthedebrisfromunderthebelt
cover.
2.Adjusttheself-propeldrivecable.
Replacethecableifnecessary.
15
Page 16

TheToroTotalCoverageGuarantee
A2-Y earFullWarranty(45DayLimitedWarrantyforCommercialUse)
TheToroGTSStartingGuarantee
A3-YearFullWarranty(NotApplicableforCommercialUse)
22inRecycler
20inMulcher/Bagger
WalkPowerMowers
®
ConditionsandProductsCovered
TheToroCompanyanditsafliate,T oroWarrantyCompany,pursuantto
anagreementbetweenthem,jointlypromisetorepairtheT oroProduct
listedbelowifusedforresidentialpurposes*;ifitisdefectiveinmaterials
orworkmanshiporifitstopsfunctioningduetothefailureofacomponent;
oriftheToroGTS(GuaranteedtoStart)enginewillnotstartontherstor
secondpull,providedtheroutinemaintenancerequiredintheOperator’s
Manualhavebeenperformed.
Thiswarrantycoversthecostofpartsandlabor,butyoumustpay
transportationcosts.
Thefollowingtimeperiodsapplyfromthedateofpurchase:
ProductsWarrantyPeriod
22inRecyclerand20inMulcher/Bagger
andAttachments
GTS(GuaranteedtoStart)3-yearfullwarranty
PowerTrain**3-yearfullwarranty
Battery
2-yearfullwarranty
1-yearfullwarranty
LimitedWarrantyforCommercialUse*
Gas-poweredT oroProductsusedforcommercial,institutional,or
rentaluse,arewarrantedfor45daysagainstdefectsinmaterialsor
workmanship.Componentsfailingduetonormalweararenotcovered
bythiswarranty.
TheToroGTS(GuaranteedtoStart)StartingGuaranteedoesnotapply
whentheproductisusedcommercially*.
InstructionsforObtainingWarrantyService
IfyouthinkthatyourT oroProductcontainsadefectinmaterialsor
workmanship,orifanormal,able-bodiedadultcannolongerstartyour
product’sengineinoneortwopulls,followthisprocedure:
1.ContactanyAuthorizedT oroServiceDealertoarrangeserviceattheir
dealership.Tolocateadealerconvenienttoyou,refertotheYellow
Pagesofyourtelephonedirectory(lookunder“LawnMowers”)or
accessourwebsiteatwww.T oro.com.Youmayalsocallthenumbers
listedinitem#3tousethe24-hourToroDealerlocatorsystem.
2.Bringtheproductandyourproofofpurchase(salesreceipt)tothe
ServiceDealer.Thedealerwilldiagnosetheproblemanddetermine
ifitiscoveredunderwarranty.
3.IfforanyreasonyouaredissatisedwiththeServiceDealer’s
analysisorwiththeassistanceprovided,contactusat:
CustomerCareDepartment,RLCDivision
TheT oroCompany
811 1LyndaleAvenueSouth
Bloomington,MN55420-1196
Tollfreeat866-214-9807(U.S.customers)
Tollfreeat866-214-9808(Canadiancustomers)
OwnerResponsibilities
YoumustmaintainyourToroProductbyfollowingthemaintenance
proceduresdescribedintheOperator’sManual.Suchroutine
maintenance,whetherperformedbyadealerorbyyou,isatyourexpense.
ItemsandConditionsNotCovered
Thereisnootherexpresswarrantyexceptforspecialemissionsystem
coverageandenginewarrantycoverageonsomeproducts.Thisexpress
warrantydoesnotcoverthefollowing:
•Costofregularmaintenanceserviceorparts,suchaslters,fuel,
lubricants,oilchanges,sparkplugs,airltersbladesharpening
orwornblades,cable/linkageadjustments,orbrakeandclutch
adjustments
•Anyproductorpartwhichhasbeenalteredormisusedandrequires
replacementorrepairduetoaccidentsorlackofpropermaintenance
•Repairsnecessaryduetofailuretousefreshfuel(lessthanone
monthold),orfailuretoproperlypreparetheunitpriortoanyperiod
ofnon-useoveronemonth
•Pickupanddeliverycharges
•Operationalmisuse,neglect,oraccidents
•RepairsorattemptedrepairsbyanyoneotherthananAuthorized
ToroServiceDealer
•Repairsoradjustmentstocorrectstartingdifcultiesduetothe
following:
–failuretofollowpropermaintenanceprocedures
–rotarymowerbladestrikinganobject
–contaminantsinthefuelsystem
–improperfuel(consultyourOperator’sManualifindoubt)
–failuretodrainthefuelsystempriortoanyperiodofnon-use
overonemonth
•Specialoperationalconditionswherestartingmayrequiremorethan
twopulls:
–rsttimestartsafterextendedperiodofnon-useoverthree
monthsorseasonalstorage
–cooltemperaturestartssuchasthosefoundinearlyspringand
lateautumn
–improperstartingprocedures-ifyouarehavingdifcultystarting
yourunit,pleasechecktheOperator’sManualtoensurethat
youareusingthecorrectstartingprocedures.Thiscansavean
unnecessaryvisittoanAuthorizedT oroServiceDealer.
GeneralConditions
Allrepairscoveredbythesewarrantiesmustbeperformedbyan
AuthorizedToroServiceDealerusingToro-approvedreplacementparts.
RepairbyanAuthorizedToroServiceDealerisyoursoleremedyunder
thiswarranty.
NeitherTheT oroCompanynorToroWarrantyCompanyisliablefor
indirect,incidental,orconsequentialdamagesinconnectionwiththe
useoftheT oroProductscoveredbythesewarranties,includingany
costorexpenseofprovidingsubstituteequipmentorserviceduring
reasonableperiodsofmalfunctionornon-usependingcompletionof
repairsunderthesewarranties.
Somestatesdonotallowexclusionsofincidentalorconsequential
damages,sotheaboveexclusionsmaynotapplytoyou.
Thiswarrantygivesyouspeciclegalrights,andyoumayalsohaveother
rightswhichvaryfromstatetostate.
CountriesOtherthantheUnitedStatesorCanada
CustomerswhohavepurchasedToroproductsexportedfromtheUnitedStatesorCanadashouldcontacttheirT oroDistributor(Dealer)toobtain
guaranteepoliciesforyourcountry,province,orstate.IfforanyreasonyouaredissatisedwithyourDistributor’sserviceorhavedifcultyobtaining
guaranteeinformation,contacttheT oroimporter.Ifallotherremediesfail,youmaycontactusatT oroWarrantyCompany.
*Residentialpurposesmeansuseoftheproductonthesamelotasyourhome.Useatmorethanonelocation,orinstitutionalor
rentaluse,isconsideredcommercialuse,andthecommercialusewarrantywouldapply .
**PowerTraincoverageincludesengineandtransmissiononly .Thetransmissionisdenedasthegearcase,internalcomponents,anddriveaxles.
374-0254RevA
Page 17
Cortacéspedde20pulgadasconmulching/ensacadotrasero
Nºdemodelo20314—Nºdeserie311000001ysuperiores
FormNo.3367-809RevA
Manualdeloperador
Introducción
Estecortacéspeddirigidodecuchillasrotativasestá
diseñadoparaserusadoporusuariosdomésticos
oporoperadoresprofesionalescontratados.
Estádiseñadoprincipalmenteparasegarcésped
bienmantenidoenzonasverdesresidencialeso
comerciales.Noestádiseñadoparacortarmalezao
paraaplicacionesagrícolas.
Leaestemanualdetenidamenteparaaprenderautilizar
ymantenercorrectamentesuproducto,yparaevitar
lesionesydañosalproducto.Ustedeselresponsablede
operarelproductodeformacorrectaysegura.
UstedpuedeponerseencontactodirectamenteconToro
enwww.Toro.comsideseainformaciónsobreproductos
yaccesorios,osinecesitalocalizarundistribuidoro
registrarsuproducto.
Cuandonecesiteasistenciatécnica,piezasgenuinasToro
oinformaciónadicional,póngaseencontactoconun
ServicioTécnicoAutorizadooconAsistenciaalCliente
Toro,ytengaamanolosnúmerosdemodeloyserie
desuproducto.
númerosdemodeloyserieenelproducto.Escribalos
númerosenelespacioprovisto.
Figura1identicalaubicacióndelos
Estemanualidenticapeligrospotencialesycontiene
mensajesdeseguridadidenticadosporelsímbolode
alertadeseguridad(Figura2),queseñalaunpeligroque
puedecausarlesionesgravesolamuertesiustedno
siguelasprecaucionesrecomendadas.
Figura2
1.Símbolodealertadeseguridad
Estemanualutilizadospalabrasmáspararesaltar
información.Importantellamalaatenciónsobre
informaciónmecánicaespecial,yNotaresalta
informacióngeneralquemereceunaatenciónespecial.
Estesistemadeencendidoporchispacumplelanorma
canadienseICES-002.
Man ual del pr opietario del motor
El
adjunto
ofreceinformaciónsobrelasnormasdelaU.S.
EnvironmentalProtectionAgency(EPA)ydela
CaliforniaEmissionControlRegulationsobre
sistemasdeemisiones,mantenimientoygarantía.
Puedesolicitarseunmanualnuevoalfabricante
delmotor.
Figura1
1.Placaconlosnúmerosdemodeloydeserie
Nºdemodelo
Nºdeserie
©2010—TheToro®Company
8111LyndaleAvenueSouth
Bloomington,MN55420
Registresuproductoenwww.Toro.com.
Enloscasosenqueseindicalapotenciaencvdel
motor,lapotenciabrutadelmotorfuecalculadaenel
laboratorioporelfabricantedelmotor,conarregloalo
estipuladoenSAEJ1940.Debidoaqueelmotorestá
conguradoparacumplirlosrequisitosdeseguridad,
emisionesyoperación,supotenciarealenestetipode
cortacéspedserásignicativamentemenor.
Nomanipuleloscontrolesdelmotornimodiquela
velocidadregulada;elhacerlopuedecrearcondiciones
insegurasconresultadodelesionespersonales.
Seguridad
Estecortacéspedcumpleosuperalosrequisitos
deseguridaddecuchillasCPSCparacortacéspedes
giratoriosdirigidosylasespecicacionesB71.1del
Traduccióndeloriginal(ES)
ImpresoenEE.UU.
Reservadostodoslosderechos
Page 18

InstitutoNorteamericanodeEstándaresNacionalesen
vigorenelmomentodefabricación.
dedescarga,elprotectortraserouotrosdispositivos
deprotección.
Leaycomprendaelcontenidodeestemanualantes
dearrancarelmotor.
Elsímbolodealertadeseguridad(
paraadvertirlesobrepotencialesriesgosdelesiones
personales.Observesiempretodoslosmensajesde
seguridadquesiguenaestesímboloconelndeevitar
posibleslesionesolamuerte.Elusoomantenimiento
incorrectosdeestecortacéspedpuedencausarlesiones
olamuerte.Parareducirestaposibilidad,cumplalas
siguientesinstruccionesdeseguridad.
Lassiguientesinstruccioneshansidoadaptadasdela
normaANSI/OPEIB71.1-2003.
Estamáquinadecorteescapazdeamputarmanos
ypiesydelanzarobjetosalaire.Elnoobservar
lassiguientesinstruccionesdeseguridadpuede
darlugaralesionescorporalesgraveseinclusola
muerte.
Figura2)seutiliza
Operacióngeneral
•Lea,comprendaysigatodaslasinstruccionesdel/de
losmanual(es)ylascolocadasenlamáquinaantes
dearrancarésta.
•Nocoloquelasmanosolospiescercadelamáquina
odebajodeésta.Manténgasealejadodelconducto
dedescargaentodomomento.
•Sólopermitaqueutilicenestamáquinaadultos
responsablesyfamiliarizadosconlasinstrucciones.
•Despejelazonadeobjetostalescomopiedras,
alambres,juguetes,etc.,quepodríanserarrojados
porlacuchilla.Permanezcadetrásdelmanillar
cuandoelmotorestáenmarcha.
•Asegúresedequenohayaotraspersonasenlazona
antesdeusarlamáquina.Parelamáquinasialguien
entraenlazona.
•Noutilicelamáquinasiustedestádescalzoolleva
sandalias.Llevesiemprecalzadofuerte.
•Notirehaciaatrásdelamáquinaamenosquesea
absolutamentenecesario.Antesdedesplazarsehacia
atrásymientraslohace,miresiemprehaciaabajoy
detrásdeusted.
•Nodirijanuncaelmaterialdescargadohacianadie.
Evitedescargarmaterialcontraunapareduotra
obstrucción.Elmaterialpodríarebotarhaciael
operador.Parelacuchillaalcruzarsuperciesde
grava.
•Nohagafuncionarlamáquinasinoestáncolocados
yfuncionandoelrecogedorcompleto,elprotector
•Nodejenuncadesatendidalamáquinasiestá
funcionando.
•Pareelmotoryesperehastaquelacuchillasedetenga
completamenteantesdelimpiarlamáquina,retirarel
recogedorodesatascarelprotectordedescarga.
•Utilicelamáquinasolamenteconluznaturalocon
unabuenailuminaciónarticial.
•Noutilicelamáquinabajolainuenciadedrogaso
alcohol.
•Noutilicenuncaelcortacéspedenhierbamojada.
Asegúresedepisarrmemente;camine;nocorra
nunca.
•Desengraneelsistemadetransmisión,silamáquina
estáequipadaconuno,antesdearrancarelmotor.
•Silamáquinacomienzaavibrardemaneraanormal,
pareelmotorycompruebelacausainmediatamente.
Lavibraciónsueleserunavisodeproblemas.
•Siempreutiliceprotecciónocularalusarlamáquina.
•Losrayospuedencausargraveslesionesoincluso
lamuerte.Sisevenrelámpagosorayososeoyen
truenosenlazona,noutilicelamáquina;busqueun
lugardonderesguardarse.
•Consultelasinstruccionesdelfabricanterespectoa
lainstalaciónyoperacióncorrectasdelosaccesorios.
Utilicesolamenteaccesorioshomologadosporel
fabricante.
Operaciónenpendientes
Laspendientessonunfactordeprimeraimportancia
relacionadoconaccidentes,especialmenteresbalones
ycaídas,quepuedencausarlesionesgraves.Entodas
laspendientesycuestassenecesitateneruncuidado
especial.Siustednosesienteconconanzaenuna
pendiente,nolasiegue.
•Sieguedetravéslascuestasypendientes,nuncahacia
arribaohaciaabajo.Extremelasprecaucionesal
cambiardedirecciónencuestasopendientes.
•Estéalertaaagujeros,surcos,montículos,rocas
uotrosobjetosocultos.Losterrenosdesiguales
puedencausarcaídasyresbalones.Lahierbaalta
puedeocultarobstáculos.
•Nosieguelahierbamojadaoenpendientes
excesivamenteempinadas.Sinopisarme,puede
resbalarycaer.
•Nosieguecercadeterraplenes,fosasotaludes.
Ustedpodríaperderelequilibrooresbalar.
2
Page 19

Niños
Puedenocurriraccidentestrágicossieloperadornoestá
alertaalapresenciadeniños.Amenudolosniñosse
sientenatraídosporlamáquinaylaactividaddesegar.
Nosuponganuncaquelosniñosvanapermaneceren
elúltimolugarenquelosvio.
•Mantengaalosniñosalejadosdelazonadesiegay
bajolaatentamiradadeunadultoresponsableque
noseaeloperador.
•Estéalertaypareelcortacéspedsientranniñosen
lazona.
•Nuncapermitaalosniñosutilizarlamáquina.
•Extremelaprecauciónalacercarseaesquinasciegas,
arbustos,árbolesuotrosobjetosquepuedanimpedir
queustedveaunniño.
entodomomentohastaqueterminederepostar.No
utilicedispositivosquemantenganabiertalaboquilla.
•Sisederramacombustiblesobresuropa,cámbiese
deropainmediatamente.
•Nuncallenedemasiadoeldepósitodecombustible.
Vuelvaacolocareltapóndegasolinayapriételo
rmemente.
ADVERTENCIA
Losgasesdeescapedelmotorcontienenmonóxido
decarbono,queesunvenenoinodoroquepuede
matarle.
Nohagafuncionarelmotordentrodeunedicioo
enunlugarcerrado.
Mantenimientogeneral
Mantenimiento
Manejosegurodelagasolina
Paraevitarlesionespersonalesodañosmateriales,
extremelasprecaucionesalmanejarlagasolina.
Lagasolinaesextremadamenteinamableylos
vaporessonexplosivos.
•Apaguecualquiercigarrillo,cigarro,pipauotra
fuentedeignición.
•Utilicesolamenteunrecipientedegasolina
homologado.
•Noretirenuncaeltapóndecombustibleniañada
combustibleconelmotorenmarcha.Dejequese
enfríeelmotorantesderepostarcombustible.
•Norepostenuncalamáquinaenunrecintocerrado.
•Noguardenuncalamáquinaounrecipientede
combustiblecercadeunallamadesnuda,chispao
llamapiloto,porejemploenuncalentadordeagua
uotroelectrodoméstico.
•Nohagafuncionarnuncalamáquinaenunlugar
cerrado.
•Mantengaapretadostodoslostornillosytuercas
paraasegurarsedequeelequipoestáencondiciones
defuncionamientoseguras.
•Nomanipulenuncalosdispositivosdeseguridad.
Comprueberegularmentequefuncionan
correctamente.
•Mantengalamáquinalibredeacumulacionesde
hierba,hojasyotrosresiduos.Limpiecualquier
derramedeaceiteocombustibleyretirecualquier
residuoempapadoencombustible.Dejequese
enfríelamáquinaantesdealmacenarla.
•Sigolpeaunobjetoextraño,pareeinspeccionela
máquina.Siesnecesario,repárelaantesdearrancar
denuevo.
•Nuncahagaajustesoreparacionesconelmotor
enmarcha.Desconecteelcabledelabujíayhaga
masaconélcontraelmotorparaevitarunarranque
accidental.
•Nollenenuncalosrecipientesdentrodeunvehículo
osobrelaplataformadeuncamiónoremolquecon
forrodeplástico.Coloquesiemprelosrecipientes
degasolinaenelsuelo,lejosdelvehículo,antesde
llenarlos.
•Retireunequipoconmotordegasolinadelcamión
odelremolqueyrepósteloenelsuelo.Siestono
esposible,reposteelequipodesdeunrecipiente
portátil,envezdeusarunsurtidoroboquilla
dosicadoradegasolina.
•Mantengalaboquillaencontactoconelbordedel
depósitodecombustibleoeloriciodelrecipiente
•Compruebefrecuentementeloscomponentesdel
recogedoryelprotectordedescargaysustitúyalos
porpiezasrecomendadasporelfabricantecuando
seanecesario.
•Lascuchillasdelcortacéspedestánmuyaladas.
Envuelvalacuchillaolleveguantes,yextremelas
precaucionesalmanejarlascuchillas.
•Nocambielosajustesdelreguladordelmotorni
hagafuncionarelmotoraunavelocidadexcesiva.
•Reviseosustituyalaspegatinasdeseguridade
instruccionescuandoseanecesario.
3
Page 20

Pegatinasdeseguridade
instrucciones
Importante:Haypegatinasdeseguridade
instruccionescolocadascercadezonasdepotencial
peligro.Sustituyacualquierpegatinadañada.
Marcadelfabricante
1.Indicaquelacuchillahasidoidenticadacomopiezadel
fabricanteoriginaldelamáquina.
94-8072
117-4143
1.Advertencia–leaelManualdeloperador.
2.Peligrodeobjetosarrojados–mantengaaotraspersonas
aunadistanciaprudencialdelamáquina.
3.Peligrodecorte/desmembramientodemanoopie,cuchilla
delcortacésped–desconecteelcabledelabujíaylea
lasinstruccionesantesderealizarcualquiertareade
mantenimiento.
4.Peligrodecorte/desmembramientodemanoopie,
cuchillasdelcortacésped–noseacerquealaspiezasen
movimientoymantengacolocadostodoslosprotectores.
5.Peligrodecorte/desmembramientodemanoopie,
cuchilladelcortacésped–nosieguelaspendienteshacia
arriba/abajo;sieguelaspendientesdetravés;pareel
cortacéspedyelmotor,yrecojacualquierresiduoantesde
empezarasegar;mirehaciaatrásyhaciaabajomientras
conduceenmarchaatrás.
4
Page 21

Montaje
2
1
Cómodesplegarelmanillar
Nosenecesitanpiezas
Procedimiento
ADVERTENCIA
Sipliegaodespliegaelmanillardeforma
incorrecta,puedendañarseloscables,creandounas
condicionesdeoperacióninseguras.
•Nodañeloscablesalplegarodesplegarel
manillar.
•Siuncableestádañado,póngaseencontacto
conelServicioTécnicoAutorizado.
1.Aojelospomosdelmanillar(Figura3).
Importante:Asegúresedequeloscables
quedanporfueradelmanillaralinstalarel
manillar.
Llenadodelcárterdeaceite
Nosenecesitanpiezas
Procedimiento
Importante:Sucortacéspedsesuministrasin
aceiteenelmotor.Antesdearrancarelmotor,llene
elmotordeaceite.
Capacidadmáxima:20onzas(0,59l),tipo:aceite
detergenteSAE30oSAE10W-30,conclasicaciónde
servicioAPISF ,SG,SH,SJ,SLosuperior.
1.Lleveelcortacéspedaunasupercienivelada.
2.Retirelavarilla(
Figura4).
Figura3
1.Pomodelmanillar(2)
2.Muevaelmanillaralaposicióndeoperación.
3.Aprietelospomosdelmanillarrmementeamano
(Figura3).
Figura4
1.Elniveldeaceiteestáal
máximo.
2.Elniveldeaceitees
demasiadoalto—retire
aceitedelcárter.
3.Viertaaceitelentamenteeneltapóndellenadode
aceite,espereunosminutosycompruebeelnivelde
aceiteenlavarillalimpiandolavarillaeinsertándola
sinenroscareneloricio(Figura4).
Nota:Lleneelcárterconaceitehastaquela
varillaindiquequeelniveldelaceitedelmotores
correcto,segúnsemuestraen
llenademasiadoelmotor,vacíeelexcesodeaceite
5
3.Elniveldeaceitees
demasiadobajo—añada
aceitealcárter.
Figura4.Siusted
Page 22

siguiendolasinstruccionesdelasecciónCómo
cambiarelaceitedelmotor.
4.Instalelavarillayapriételarmementesinusar
herramientas.
Especicaciones
ModeloPesoLongitudAnchuraAltura
2031434kg
(75libras)
144cm
(57pulg.)
54cm
(21pulg.)
145cm
(39pulg.)
Importante:
Cambie el aceite del motor
después de las primeras 5 horas de operación
despuéscadaaño.ConsulteCómocambiarel
aceitedelmotor.
Elproducto
,y
Figura5
1.Bujía6.Bolsaderecortes
2.Varilla/Llenadodeaceite
(noilustrado)
3.Arrancador8.Palancasdealturade
4.Barradecontroldela
cuchilla
5.Barradecontrol
delatransmisión
autopropulsada
1.Deectordedescargatrasera(opcional)
7.Tapóndeldepósitode
combustible
corte(4)
9.Filtrodeaire
10.Cebador
Figura6
6
Page 23

Operación
Cómollenareldepósitode
combustible
PELIGRO
Lagasolinaesaltamenteinamableyexplosiva.
Unincendioounaexplosiónprovocado(a)porla
gasolinapuedecausarlequemadurasaustedya
otraspersonas.
•Paraevitarqueunacargaestáticaincendie
lagasolina,coloqueelrecipientey/oel
cortacéspeddirectamentesobreelsueloantesde
repostar,noenunvehículoosobreotroobjeto.
•Lleneeldepósitoenelexteriorcuandoelmotor
estéfrío.Limpiecualquierderrame.
•Nomanejegasolinasiestáfumando,nicercade
unallamadesnudaochispas.
•Almacenelagasolinaenunrecipiente
homologadoymanténgalafueradelalcancede
losniños.
Vericacióndelniveldeaceite
delmotor
Intervalodemantenimiento:Cadavezqueseutilice
odiariamente
1.Lleveelcortacéspedaunasupercienivelada.
2.Retirelavarillaylímpielaconunpañolimpio.
3.Introduzcalavarillaeneloriciodellenadode
aceite,sinenroscarla.
4.Retirelavarillaycompruebeelniveldeaceite.
5.Paradeterminarelniveldeaceitecorrecto,consulte
Figura8.
Lleneeldepósitocongasolinafrescanormalsin
plomodeaproximadamente87octanos,deunamarca
reconocida(
Importante:NoutilicecombustibleE85oE20.
Loscombustiblesalternativosconaltocontenido
enalcoholpuedencausarproblemasenelarranque
omalrendimiento,ypuedencausardañosinternos
enelmotor.
Importante:Parareducirlosproblemasde
arranque,añadaestabilizadordecombustible
alcombustibledurantetodalatemporada,
mezclándolocongasolinacompradohacemenos
detreintadías.
Figura7).
Figura7
Figura8
1.Elniveldeaceiteestáal
máximo.
2.Elniveldeaceitees
demasiadoalto—retire
aceitedelcárter.
6.Sielniveldeaceiteesbajo,viertaaceitelentamente
eneltapóndellenadodeaceite,espereunosminutos
ycompruebeelniveldeaceiteenlavarillalimpiando
lavarillaeinsertándolasinenroscareneloricio.
Nota:Capacidadmáxima:20onzas(0,59l),tipo:
aceitedetergenteSAE30oSAE10W-30,con
clasicacióndeservicioAPISF,SG,SH,SJ,SLo
superior.
Nota:Lleneelcárterconaceitehastaquela
varillaindiquequeelniveldelaceitedelmotores
correcto,segúnsemuestraen
llenademasiadoelmotor,vacíeelexcesodeaceite
siguiendolasinstruccionesdelasecciónCómo
cambiarelaceitedelmotor.
7.Instalelavarillayapriételarmementesinusar
herramientas.
3.Elniveldeaceitees
demasiadobajo—añada
aceitealcárter.
Figura8.Siusted
7
Page 24

Importante:
Cambie el aceite del motor
después de las primeras 5 horas de operación
despuéscadaaño.ConsulteCómocambiarel
aceitedelmotor.
Nota:Lasalturasdecorteson1pulg.(25mm);
,y
1-1/2pulg.(38mm);2pulg.(51mm);2-1/2pulg.
(64mm);3pulg.(76mm);3-1/2pulg.(89mm);y
4pulg.(102mm).
Ajustedelaalturadecorte
ADVERTENCIA
Alajustarlaalturadecorte,ustedpodríatocarla
cuchillaenmovimiento,loquepodríacausarle
graveslesiones.
•Pareelmotoryespereaquesedetengantodas
laspiezasenmovimiento.
•Nopongalosdedosdebajodelacarcasaal
ajustarlaalturadecorte.
CUIDADO
Sielmotorhaestadoenmarcha,elsilenciador
estarámuycalienteypuedecausarlequemaduras
graves.Manténgasealejadodelsilenciadorsiéste
estácaliente.
Ajustelaalturadecortesegúndesee.Ajustelascuatro
ruedasalamismaaltura.
Nota:Paraelevarelcortacésped,muevatodaslas
palancasdealturadecortehaciaadelante;parabajarel
cortacésped,muevatodaslaspalancasdealturadecorte
haciaatrás(
Figura9).
Cómoarrancarelmotor
1.Aprieteelcebador3vecesconeldedopulgar,
presionandoconfuerza,ymanteniendolapresión
duranteunsegundoantesdesoltarlo(
Figura10
1.Cebador
2.Sujetelabarradecontroldelacuchilla(Figura11)
contraelmanillar.
Figura10).
Figura9
1.Elevarelcortacésped2.Bajarelcortacésped
Figura11
1.Barradecontroldelacuchilla
3.Tiredelacuerdadearranque(Figura12).
Figura12
8
Page 25

Nota:Sielcortacéspednoarrancadespuésde
variosintentos,póngaseencontactoconelServicio
TécnicoAutorizado.
Usodelatransmisión
autopropulsada
Paraoperarlatransmisiónautopropulsada,apriete
labarradecontroldetransmisiónautopropulsada
Figura13)haciaelmanillarymanténgalaallí.
(
Figura13
1.Barradecontroldelatransmisiónautopropulsada
Paradesengranarlatransmisiónautopropulsada,suelte
labarradecontroldetransmisiónautopropulsada.
Nota:Lavelocidadmáximasobreelterrenocon
transmisiónautopropulsadaesja.Parareducirla
velocidadsobreelterreno,aumenteelespacioentrela
barradelatransmisiónautopropulsadayelmanillar.
Figura14
Recicladodelosrecortes
Sucortacéspedvienepreparadodefábricaparael
mulching,esdecir,parapicarlosrecortesdehierbay
hojasydevolverlosalcésped.
Silabolsaderecortesestáinstaladaenelcortacésped,
retírela(consulteCómoretirarlabolsaderecortes)antes
depicarlosrecortes.
Ensacadodelosrecortes
Utilicelabolsaderecortessiusteddesearecogerlos
recortesdehierbayhojasdelcésped.
ADVERTENCIA
Silabolsaderecortesestádesgastada,pueden
arrojarsepequeñaspiedrasyotrosresiduos
similaresalazonadondeestáeloperadoruotra
persona,provocandolesionespersonalesgravesola
muertealoperadoroalaotrapersona.
Cómopararelmotor
Intervalodemantenimiento:Cadavezqueseutilice
odiariamente
Parapararelmotor,sueltelabarradecontroldela
cuchilla(
Importante:Cuandoustedsueltelabarrade
controldelacuchilla,elmotorylacuchilla
deberándetenerseen3segundosomenos.Sinose
parancorrectamente,dejedeusarelcortacésped
inmediatamenteypóngaseencontactoconun
ServicioTécnicoAutorizado.
Figura14).
Compruebefrecuentementelabolsaderecortes.Si
estádañada,instaleunabolsaderecambioToro
nueva.
ADVERTENCIA
Lacuchillaestámuyalada;cualquiercontactocon
lacuchillapuedecausarlesionespersonalesgraves.
Pareelmotoryespereaquesedetengantodaslas
piezasenmovimientoantesdeabandonarelpuesto
deloperador.
Instalacióndelabolsaderecortes
1.Levanteeldeectortrasero(Figura15).
9
Page 26

Figura15
1.Deectortrasero
2.Introduzcaelasadelabolsaderecortesenlas
muescasdelossoportesdelmanillar(Figura15).
Cómoretirarlabolsaderecortes
1.Levanteeldeectortrasero(Figura15).
3.Introduzcalapestañadeldeectordedescarga
traseraenlaranuraderechadeldeectortrasero
(Figura17).
Figura17
4.Introduzcalavarilladeldeectordedescargatrasera
enlasmuescasdelcortacésped(
Figura18).
2.Retireelasadelabolsaderecortesdelasmuescas
delossoportesdelmanillaryretirelabolsadel
cortacésped.
3.Cierreeldeectortrasero.
Descargadelosrecortes
Utiliceeldeectordedescargatrasera(opcional)para
segarhierbamuyalta.
Montajedeldeectordedescarga
trasera
1.Silabolsaderecortesestáinstaladaenelcortacésped,
retírela.
2.Levanteeldeectortraseroysujételo(
Figura16).
Figura18
Desmontajedeldeectordedescarga
trasera
Paradesmontareldeectordedescargatrasera,sigalos
pasosanterioresensentidoinverso.
Consejosdeoperación
Consejosgeneralesdesiega
•Despejelazonadepalos,piedras,alambres,ramas
yotrosresiduosquepodríansergolpeadosporla
cuchilla.
•Evitegolpearobjetossólidosconlacuchilla.No
sieguenuncaporencimadeobjetoalguno.
Figura16
•Sielcortacéspedgolpeaunobjetooempiezaa
vibrar,pareinmediatamenteelmotor,desconecte
elcabledelabujíaeinspeccioneelcortacéspeden
buscadedaños.
•Paraobtenerelmejorrendimiento,instaleuna
cuchillanuevaantesdequeempiecelatemporada
desiega.
•Sustituyalacuchillacuandoseaprecisoporuna
cuchilladerepuestoToro.
10
Page 27

Cómocortarlahierba
•Cortesolamenteunterciodelahojadehierba
cadavez.Nocorteconunajusteinferiora51mm
(2pulg.)amenosquelahierbaseaescasa,oanales
delotoñocuandoelritmodecrecimientodela
hierbaempiezaadecaer.ConsulteAjustedelaaltura
decorte.
•Cuandocortehierbademásde15cm(6pulg.)
dealto,siegueprimerousandolaalturadecorte
másaltayandedespacio,luegosieguedenuevoa
unaalturamenorparaobtenerelmejoraspectode
césped.Silahierbaesdemasiadoalta,puedeatascar
elcortacéspedyhacerquesecaleelmotor.
•Sieguesolamentehierbauhojassecas.Lahierba
mojadaylashojasmojadastiendenapegarseal
suelo,ypuedenatascarelcortacéspedohacerquese
caleelmotor.
ADVERTENCIA
Lahierbamojadaolashojasmojadaspueden
causarlegraveslesionessiustedresbalaytoca
lacuchilla.Sieguesolamenteencondiciones
secas.
•Alterneladireccióndecorte.Estoayudaa
dispersarlosrecortesentodoelcésped,dandouna
fertilizaciónmáshomogénea.
•Sielaspectonaldelcéspednoessatisfactorio,
pruebea:
–Cambiarlacuchillaomandarlaaalar.
–Caminarmásdespaciomientrassiega.
–Elevarlaalturadecortedelcortacésped.
–Cortarelcéspedconmásfrecuencia.
–Solaparlospasillosdecorteenlugardecortarun
pasillocompletoencadapasada.
–Ajustarlaalturadecorteunamuescamenosen
lasruedasdelanterasqueenlastraseras.Por
ejemplo,ajustelasruedasdelanterasa51mm
(2pulg.)ylastraserasa64mm(2-1/2pulg.).
Cómocortarhojas
•Despuésdesegarelcésped,asegúresedequela
mitaddelcéspedseveatravésdelacoberturade
hojascortadas.Esposiblequetengaquehacermás
deunapasadaporencimadelashojas.
•Sihaymásde13cm(5pulg.)dehojasenelcésped,
ajustelaalturadecortedelasruedasdelanterasuna
muescaodosmásaltaqueladelasruedastraseras.
•Sieguemásdespaciosielcortacéspednocortalas
hojassucientementenas.
11
Page 28

Mantenimiento
Nota:Losladosderechoeizquierdodelamáquinasedeterminandesdelaposiciónnormaldeloperador.
Calendariorecomendadodemantenimiento
Intervalodemanteni-
mientoyservicio
Despuésdelasprimeras
5horas
Cadavezqueseutilice
odiariamente
Cada100horas
Antesdelalmacenamiento
Cadaaño
Procedimientodemantenimiento
•Cambieelaceitedelmotor.
•Compruebeelniveldeaceitedelmotor.
•Asegúresedequeelmotorseparaenelplazode3segundosdespuésdesoltarla
barradecontroldelacuchilla.
•Retirelosrecortesdehierbaylasuciedaddedebajodelacarcasa.
•Reviselabujíaycámbieladesernecesario.
•Vacíeeldepósitodecombustibleantesdeefectuarreparaciones,segúnlas
instrucciones,yantesdelalmacenamientoanual.
•Limpieelsistemaderefrigeración;retirelosrecortesdehierba,residuosysuciedad
delasaletasderefrigeracióndelmotorydelarrancador.Limpieelsistemaconmás
frecuenciasihaymuchasuciedadograncantidadderecortes.
•Cambieelltrodeaire;cámbieloconmásfrecuenciaencondicionesdemucho
polvo.
•Cambieelaceitedelmotor.
•Cambielacuchillaohagaquelaalen(másamenudosisedesalarápidamente).
Preparaciónparael
mantenimiento
1.Pareelmotoryespereaquesedetengantodaslas
piezasenmovimiento.
2.Desconecteelcabledelabujía(
realizarcualquierprocedimientodemantenimiento.
Figura19)antesde
ADVERTENCIA
Alvolcarelcortacésped,puedehaberfugas
decombustible.Lagasolinaesinamabley
explosiva,ypuedecausarlesionespersonales.
Dejefuncionarelmotorhastaquenoquede
combustible,oretirelagasolinaconunabomba
demano;nuncautiliceunsifón.
Figura19
1.Cabledelabujía
3.Despuésderealizarel/losprocedimiento(s)de
mantenimiento,conecteelcabledelabujíaalabujía.
Importante:Siemprecoloqueelcortacésped
deladoconlavarilladeaceitehaciaabajo.
Sustitucióndellimpiadorde
aire.
Intervalodemantenimiento:Cadaaño
1.Presionehaciaabajoloscierresdelapartesuperior
delatapadellimpiadordeaire(Figura20).
12
Page 29

Cómocambiarelaceitedel
motor
Intervalodemantenimiento:Despuésdelasprimeras
5horas
Cadaaño
1.Asegúresedequeeldepósitodecombustibleno
contienecombustible(oquecontienemuypoco)
paraquenoseproduzcaunderramedecombustible
cuandocoloqueelcortacéspeddelado.
2.Hagafuncionarelmotorduranteunosminutosantes
decambiarelaceiteparacalentarelaceite.
Nota:Elaceitecalienteuyemejorytransporta
máscontaminantes.
3.Desconecteelcabledelabujía.ConsultePreparación
paraelmantenimiento.
4.Retirelavarilla.
Figura20
1.Cierres3.Pre-ltrodegomaespuma
2.Filtrodeairedepapel
2.Abralatapa.
3.Retireelltrodeairedepapelyelpre-ltrode
gomaespuma(Figura20).
4.Inspeccioneelpre-ltrodegomaespuma,ycámbielo
siestádañadooexcesivamentesucio.
5.Inspeccioneelltrodeairedepapel.
A.Sielltrodeairedepapelestádañadoomojado
conaceiteocombustible,sustitúyalo.
B.Sielltrodeairedepapelestásucio,golpéelo
variasvecesenunasupercieduraopaseaire
comprimidoamenosde207kPa(30psi)através
delladodelltroqueestáfrentealmotor.
Nota:Noutiliceuncepilloparalimpiarelltro;
elcepilladoobligaalasuciedadapenetrarenlas
bras.
5.Coloqueelcortacéspeddeladoconlavarillade
aceitehaciaabajoparadrenarelaceiteusadoatravés
deltubodellenadodeaceite(
Figura21
Figura21).
6.Pongaelcortacéspeddepie.
7.Viertaaceitelentamenteeneltapóndellenadode
aceite,espereunosminutosycompruebeelnivelde
aceiteenlavarillalimpiandolavarillaeinsertándola
sinenroscareneloricio.
6.Eliminecualquiersuciedaddelcuerpodellimpiador
deaireylatapaconunpañohúmedo.Nodejeque
lasuciedadpenetreenelconductodeaire.
7.Introduzcaelpre-ltrodegomaespumayelltrode
airedepapelenellimpiadordeaire.
8.Coloquelatapa.
Nota:Capacidadmáxima:20onzas(0,59l),tipo:
aceitedetergenteSAE30oSAE10W-30,con
clasicacióndeservicioAPISF,SG,SH,SJ,SLo
superior.
Nota:Lleneelcárterconaceitehastaquelavarilla
indiquequeelniveldelaceitedelmotorescorrecto,
segúnsemuestraenFigura22.Siustedllena
demasiadoelmotor,vacíeelexcesodeaceitesegún
seindicaen5.
13
Page 30

1.Aislantedelelectrodocentral
2.Electrodolateral
3.Huecoentreelectrodos(noaescala)
Figura23
Figura22
1.Elniveldeaceiteestáal
máximo.
2.Elniveldeaceitees
demasiadoalto—retire
aceitedelcárter.
3.Elniveldeaceitees
demasiadobajo—añada
aceitealcárter.
8.Instalelavarillayapriételarmementesinusar
herramientas.
9.Eliminecorrectamenteelaceiteusadoenuncentro
dereciclajehomologado.
Mantenimientodelabujía
Intervalodemantenimiento:Cada100horas
Reviselabujíacada100horasdefuncionamiento.Utilice
unabujíaChampionRN9YCoequivalente.
1.Pareelmotoryespereaquesedetengantodaslas
piezasenmovimiento.
2.Desconecteelcabledelabujía.
3.Limpiealrededordelabujía.
4.Retirelabujíadelaculata.
6.Instalelabujíaylajunta.
7.Aprietelabujíaa20Nm(15pies-libra).
8.Conecteelcabledelabujía.
Cómocambiarlacuchilla
Intervalodemantenimiento:Cadaaño
Importante:
dinamométrica para instalar la cuchilla
cor r ectamente
dinamométricaopreerenorealizareste
procedimiento,póngaseencontactoconelServicio
TécnicoAutorizado.
Examinelacuchillacadavezqueseacabelagasolina.
Silacuchillaestádañadaoagrietada,sustitúyala
inmediatamente.Siellodelacuchillaestáromootiene
desperfectos,mandealarlacuchillaocámbiela.
ADVERTENCIA
Lacuchillaestámuyalada;cualquiercontactocon
lacuchillapuedecausarlesionespersonalesgraves.
•Desconecteelcabledelabujía.
•Lleveguantesalrealizarelmantenimientode
lacuchilla.
Usted necesitará una lla v e
.Sinodisponedeunallave
Importante:Silabujíaestáagrietadaosucia,
cámbiela.Nolimpieloselectrodos,porque
cualquierarenillaqueentreenelcilindropuede
dañarelmotor.
5.Fijeelhuecoentreloselectrodosen0,76mm
(0,030pulg.)(
Figura23).
1.Desconecteelcabledelabujía.ConsultePreparación
paraelmantenimiento.
2.Coloqueelcortacéspeddeladoconelltrodeaire
haciaarriba.
3.Utiliceunbloquedemaderaparainmovilizarla
cuchilla.
4.Retirelacuchilla(gireelpernodelacuchillaenel
sentidocontrarioalasagujasdelreloj)yguarde
todoslosherrajesdemontaje.
5.Instalelacuchillanueva(gireelpernodelacuchilla
enelsentidodelasagujasdelreloj)ytodoslos
herrajesdemontaje(
14
Figura24).
Page 31

Figura24
1.25a38mm(1a
1-1/2pulg.)
2.Barradecontrol
delatransmisión
autopropulsada
3.Cubiertadelcable
Figura25
4.Tuercadelsoportedel
cable
5.Soportedelcable
Importante:Coloquelacuchillacon
losextremoscurvoshacialacarcasadel
cortacésped.
6.Utiliceunallavedinamométricaparaapretarel
pernodelacuchillaa82Nm(60pies-libra).
Importante:Unpernoapretadoa82Nm
(60pies-libra)quedamuyrme.Mientrassujeta
lacuchillaconunbloquedemadera,aplique
todasufuerzaalallaveyaprieteelperno
rmemente.Serámuydifícilapretaresteperno
demasiado.
Ajustedelcabledela
transmisiónautopropulsada
Cadavezqueinstaleunnuevocabledelatransmisión
autopropulsadaosilatransmisiónautopropulsada
estámalajustada,ajusteelcabledelatransmisión
autopropulsada.
1.Aojelatuercadelsoportedelcable(
Figura25).
2.Sujetelabarradelatransmisiónautopropulsadaa
unadistanciade25a38mm(1a1-1/2pulg.)del
manillar(Figura25).
3.Tirehaciaabajodelacubiertadelcable(haciael
cortacésped)hastaeliminarlaholguraenelcable
Figura25).
(
4.Aprietelatuercadelsoportedelcable.
5.Sueltelabarradelatransmisiónautopropulsaday
asegúresedequeelcableestásuelto.
Nota:Elcabledebequedarsueltocuandousted
sueltelabarradelatransmisiónautopropulsada;
deotraformaelcortacéspedpodríadesplazarse
haciaadelantecuandolabarraestáenposición
desengranada.
Limpiezadelcortacésped
Intervalodemantenimiento:Cadavezqueseutilice
odiariamente
ADVERTENCIA
Elcortacéspedpuedesoltarmaterialdedebajode
lacarcasa.
•Lleveprotecciónocular.
•Permanezcaenlaposicióndeoperación(detrás
delmanillar).
•Nopermitalapresenciadeotraspersonasen
lazona.
15
Page 32

1.Conelmotorenmarchasobreunasupercieplana
pavimentada,dirijaunchorrodeaguahaciadelante
delaruedatraseraderecha(Figura26).
Elaguaentraráenlazonadelacuchilla,arrastrando
losrecortes.
Figura26
2.Cuandoyanosalganmásrecortes,cierreelgrifodel
aguaymuevaelcortacéspedaunazonaseca.
3.Hagafuncionarelmotorduranteunosminutospara
quesesequelacarcasa,evitandoqueseoxide.
Almacenamiento
Almaceneelcortacéspedenunlugarfresco,limpioy
seco.
7.Instalelabujíayapriételaconunallave
dinamométricaa20Nm(15pies-libra).
8.Aprietetodoslospernos,tuercasytornillos.
Cómoplegarelmanillar
ADVERTENCIA
Sipliegaodespliegaelmanillardeforma
incorrecta,puedendañarseloscables,creandounas
condicionesdeoperacióninseguras.
•Nodañeloscablesalplegarodesplegarel
manillar.
•Siuncableestádañado,póngaseencontacto
conelServicioTécnicoAutorizado.
1.Aojelospomosdelmanillarhastaquepuedamover
elmanillarlibremente(
Figura27).
Preparacióndelcortacésped
paraelalmacenamiento
ADVERTENCIA
Losvaporesdelagasolinapuedenexplosionar.
•Noguardelagasolinadurantemásde30días.
•Noguardeelcortacéspedenunlugarcerrado
cercadeunallamadesnuda.
•Dejequeseenfríeelmotorantesdeguardarlo.
1.Enelúltimorepostajedelaño,añadaestabilizador
alcombustiblesiguiendolasinstruccionesdel
fabricantedelmotor.
2.Hagafuncionarelcortacéspedhastaqueelmotorse
pareporhabersequedadosingasolina.
3.Cebeelmotoryarránquelodenuevo.
4.Dejequefuncioneelmotorhastaquesepare.
Cuandoyanosepuedearrancarelmotor,está
sucientementeseco.
Figura27
1.Pomodelmanillar(2)
2.Muevadelmanillarhaciaadelantesegúnseindica
Figura27.
en
5.Desconecteelcabledelabujía.
6.Retirelabujía,añada30ml(1onza)deaceitea
travésdeloriciodelabujía,ytiredelacuerdadel
arrancadorlentamentevariasvecesparaquese
distribuyaelaceiteporelcilindro,conelndeevitar
lacorrosiónduranteelperiododeinactividad.
16
Page 33

Solucióndeproblemas
ProblemaPosiblecausa
Elmotornoarranca
Elmotoresdifícildearrancaropierde
potencia
Accióncorrectora
1.Elcablenoestáconectadoalabujía.
2.Nosehapulsadoelcebador.2.Pulseelcebador3veces.
3.Eloriciodeventilacióndeltapón
deldepósitodecombustibleestá
bloqueado.
4.Labujíaestápicada,suciaola
distanciaentreloselectrodoses
incorrecta.
5.Eldepósitodecombustibleestávacío
oelsistemadecombustiblecontiene
combustibleviejo.
1.Nosehapulsadoelcebador.1.Pulseelcebador3veces.
2.Eloriciodeventilacióndeltapón
deldepósitodecombustibleestá
bloqueado.
3.Elltrodellimpiadordeaireestásucio
yestáobstruyendoelujodeaire.
4.Losbajosdelacarcasadelcortacésped
contienenrecortesyresiduos.
5.Labujíaestápicada,suciaola
distanciaentreloselectrodoses
incorrecta.
6.Elniveldelaceitedelmotores
demasiadobajoodemasiadoalto,oel
aceiteestádemasiadosucio.
7.Eldepósitodecombustiblecontiene
combustibleviejo.
1.Conecteelcabledelabujía.
3.Limpieeloriciodeventilacióndel
tapóndecombustible,osustituyael
tapóndecombustible.
4.Inspeccionelabujíayajusteelhueco
siesnecesario.Sustituyalabujíasi
estápicada,suciaoagrietada.
5.Dreney/olleneeldepósitode
combustiblecongasolinafresca.Siel
problemanosesoluciona,póngase
encontactoconelServicioTécnico
Autorizado.
2.Limpieeloriciodeventilacióndel
tapóndecombustible,osustituyael
tapóndecombustible.
3.Limpieelpreltrodelltrodeairey/o
cambieelltrodeairepapel.
4.Limpiedebajodelacarcasa.
5.Inspeccionelabujíayajusteelhueco
siesnecesario.Sustituyalabujíasi
estápicada,suciaoagrietada.
6.Compruebeelaceitedelmotor.
Cambieelaceitesiestásucio;añada
oretireaceiteparaajustarelnivelde
aceitealamarcaLlenodelavarilla.
7.Dreneylleneeldepósitode
combustiblecongasolinafresca.
Elmotornofuncionaregularmente
Elcortacéspedoelmotorvibra
excesivamente
Elpatróndecorteesdesigual
1.Nosehapulsadoelcebador.1.Pulseelcebador3veces.
2.Elcablenoestáconectadoalabujía.
3.Labujíaestápicada,suciaola
distanciaentreloselectrodoses
incorrecta.
4.Elltrodellimpiadordeaireestásucio
yestáobstruyendoelujodeaire.
1.Losbajosdelacarcasadelcortacésped
contienenrecortesyresiduos.
2.Lospernosdemontajedelmotorestán
sueltos.
3.Lastuercasdemontajedelacuchilla
estánsueltas.
4.Lacuchillaestádobladao
desequilibrada.
1.Ustedestásegandorepetidamentecon
elmismopatrón.
2.Lascuatroruedasnoestánalamisma
altura.
3.Losbajosdelacarcasadelcortacésped
contienenrecortesyresiduos.
4.Lacuchillanoestáalada.4.Aleyequilibrelacuchilla.
2.Conecteelcabledelabujía.
3.Inspeccionelabujíayajusteelhueco
siesnecesario.Sustituyalabujíasi
estápicada,suciaoagrietada.
4.Limpieelpreltrodelltrodeairey/o
cambieelltrodeairepapel.
1.Limpiedebajodelacarcasa.
2.Aprietelospernosdemontajedel
motor.
3.Aprietelastuercasdemontajedela
cuchilla.
4.Equilibrelacuchilla.Silacuchillaestá
doblada,cámbiela.
1.Cambieelpatróndesiega.
2.Ajustelascuatroruedasalamisma
altura.
3.Limpiedebajodelacarcasa.
17
Page 34

ProblemaPosiblecausa
Accióncorrectora
Elcortacéspednoavanza.
1.Hayresiduosdebajodelacubiertade
lacorrea.
2.Elcabledelatransmisión
autopropulsadaestámalajustadoo
dañado.
1.Limpielosresiduosdedebajodela
cubiertadelacorrea.
2.Ajusteelcabledelatransmisión
autopropulsada.Cambieelcablesies
necesario.
18
Page 35

Unagarantíacompletade2años(Garantíalimitadade45díasparaelusocomercial)
LaGarantíaTorodeCoberturaTotal
GarantíadeArranqueGTSdeToro
Unagarantíacompletade3años(noaplicablealusocomercial)
Recyclerde22pulgadas
Picador/ensacadorde20pulgadas
Cortacéspedesdirigidos
®
Condicionesyproductoscubiertos
TheToroCompanyysualiado,T oroWarrantyCompany,bajounacuerdo
entresí,prometenconjuntamenterepararelproductoT oronombradoa
continuaciónquehayasidousadoconpropósitosresidenciales*,sitiene
defectosdematerialesomanodeobraosidejadefuncionardebidoal
fallodeuncomponente,osielmotorToroGTS(GuaranteedtoStart
-GarantíadeArranque)noarrancaenelprimerosegundointento,
siemprequesehayarealizadotodoelmantenimientorutinarioindicado
enelManualdeloperador.
Estagarantíacubreelcostedepiezasymanodeobra,perousteddebe
pagarloscostesdetransporte.
Lossiguientesplazossonaplicablesdesdelafechadelacompra:
Productos
Recyclerde22pulgadasy
Picador/Ensacadorde20pulgadas
yAccesorios
GTS(GuaranteedtoStart)Garantíacompletade3años
Trendetransmisión**Garantíacompletade3años
Batería
Periododegarantía
Garantíacompletade2años
Garantíacompletade1año
Garantíalimitadaparaelusocomercial*
LosproductosdegasolinaToroutilizadosconpropósitoscomerciales,
institucionalesodealquilerestángarantizadosdurante45díascontra
defectosenmaterialesomanodeobra.Loscomponentesquefallan
debidoalusoydesgastenormalesnoestáncubiertosporestagarantía.
LaGarantíadearranqueToroGTSnoesaplicablecuandoelproducto
esusadoconnescomerciales*.
Instruccionesparaobtenerasistenciabajolagarantía
SiustedcreequesuProductoTorotieneundefectodematerialesomano
deobra,osiunadultodecapacidadnormalyanopuedearrancarel
motordesuproductoconunoodosintentos,sigaesteprocedimiento:
1.PóngaseencontactoconcualquierDistribuidorAutorizadoToropara
concertarelmantenimientoensusinstalaciones.Paralocalizar
undistribuidorcercadeusted,consultelasPáginasAmarillas
telefónicas(mireen"cortacéspedes")ovisitenuestrositioweb
enwww.Toro.com.Tambiénpuedellamaralosnúmerosque
aparecenenelapartado3parausarelsistemadelocalizaciónde
DistribuidoresT orolas24horasaldía.
2.Lleveelproductoysupruebadecompra(reciboofacturadeventa)
alDistribuidor.Eldistribuidordiagnosticaráelproblemaydeterminará
siestácubiertoporlagarantía.
3.Siporalgunarazónustednoestásatisfechoconelanálisisdel
Distribuidoroconlaasistenciarecibida,póngaseencontactocon
nosotrosenladirecciónsiguiente:
CustomerCareDepartment,RLCDivision
TheT oroCompany
811 1LyndaleAvenueSouth
Bloomington,MN55420-1196
Teléfonogratuito:866-214-9807(clientesdeEE.UU.)
Teléfonogratuito:866-214-9808(clientesdeCanadá)
Responsabilidadesdelpropietario
UsteddebemantenersuProductoTorosiguiendolosprocedimientosde
mantenimientodescritosenelManualdeloperador.Dichomantenimiento
rutinario,searealizadoporundistribuidoroporustedmismo,espor
cuentadeusted.
•Elcostedemantenimientoregular,servicioopiezas,comopor
ejemploltros,combustible,lubricantes,cambiosdeaceite,bujías,
ltrosdeaire,aladodecuchillasocuchillasdesgastadas,ajustesde
cables/acoplamientosoajustesdefrenosyembragues
•Cualquierproductoopiezaquehayasidomodicadoomalutilizado
oquehayanecesitadosersustituidooreparadodebidoaaccidente
ofaltademantenimientoadecuado
•Reparacionesdebidasanoutilizarcombustiblefresco(comprado
hacemenosdeunmes)onoprepararadecuadamentelaunidad
antesdecualquierperiododenoutilizaciónsuperioraunmes
•Costesderecogidayentrega
•Maluso,negligenciaoaccidentes
•Reparacionesointentosdereparaciónporpartedepersonasno
pertenecientesaunDistribuidorAutorizadoToro
•Reparacionesoajustesparacorregirproblemasdearranquedebidos
alosiguiente:
–nosehanseguidolosprocedimientoscorrectosde
mantenimiento
–lacuchilladelcortacéspedgiratoriohagolpeadounobjeto
–contaminantesenelsistemadecombustible
–combustibleincorrecto(encasodeduda,consulteelManual
deloperador)
–nosehadrenadoelsistemadecombustibleantesdeunperiodo
deinactividadsuperioraunmes
•Condicionesdeoperaciónespecialesquepuedenrequerirmásde
dosintentosdearranque:
–primerarranquedespuésdeunperiodoextendidodeinactividad
superioratresmesesodealmacenamientoestacional
–arranqueabajatemperatura,porejemploaliniciodela
primaveraoalnaldelotoño
–procedimientosdearranqueincorrectos-sitienedicultad
alarrancarsuunidad,reviseelManualdeloperadorpara
asegurarsedequeestásiguiendolosprocedimientosde
arranquecorrectos.Estopuedeahorrarleunavisitainnecesaria
alServicioTécnicoAutorizadoToro.
Condicionesgenerales
Todaslasreparacionescubiertasporestasgarantíasdebenserrealizadas
porunServicioTécnicoTorousandopiezasderepuestoaprobadospor
Toro.LareparaciónporunDistribuidorAutorizadoToroessuúnico
remediobajoestagarantía.
NiTheT oroCompanyniToroWarrantyCompanysonresponsables
dedañosindirectos,incidentalesoconsecuentesrespectoaluso
delosproductosTorocubiertosporestasgarantías,incluyendo
cualquiercosteogastoporlaprovisióndeequiposdesustitucióno
servicioduranteperiodosrazonablesdemalfuncionamientoono
utilizaciónhastalaterminacióndereparacionesbajoestasgarantías.
Algunosestadosnopermitenexclusionesdedañosincidentaleso
consecuentes,demaneraquelasexclusionesarribacitadaspuedenno
seraplicablesausted.
Estagarantíaleotorgaaustedderechoslegalesespecícos;esposible
queustedtengaotrosderechosquevaríandeunestadoaotro.
Elementosycondicionesnocubiertos
Nohayotragarantíaexpresasalvolacoberturaespecialdesistemasde
emisiónylagarantíasobremotoresenalgunosproductos.Estagarantía
expresanocubre:
374-0254RevB
Page 36

PaísesfueradeEstadosUnidosoCanadá
LosclientesquecompraronproductosT oroexportadosdelosEstadosUnidosoCanadádebenponerseencontactoconsuDistribuidorToropara
obtenerpólizasdegarantíaparasupaís,provinciaoestado.Siporcualquierrazónustednoestásatisfechoconelservicioofrecidoporsudistribuidor,
ositienedicultadenobtenerinformaciónsobrelagarantía,póngaseencontactoconelimportadorToro.Sifallantodoslosdemásrecursos,
puedeponerseencontactoconnosotrosenT oroWarrantyCompany.
*"Propósitoresidencial"signicaelusodelproductoenlamismaparcelaenqueseencuentrasuvivienda.Elusoenmás
deunlugar,oelusoinstitucionaloalquiler,seconsideracomousocomercialyseríaaplicablelagarantíadeusocomercial.
**Lacoberturadeltrendetransmisiónincluyeelmotorylatransmisiónsolamente.Latransmisiónsedenecomolacajadeengranajes,los
componentesinternosylosejesmotores.
374-0254RevB
Page 37

Tondeusedéchiqueteuse/àbacarrièrede20pouces
N°demodèle20314—N°desérie311000001etsuivants
FormNo.3367-809RevA
Manueldel'utilisateur
Introduction
Cettetondeuseàconducteurmarchantàlame
rotativeestdestinéeaugrandpublic,aux
professionnelsetauxutilisateurstemporaires.Elle
estprincipalementconçuepourtondrelespelouses
entretenuesrégulièrementdesterrainsprivéset
commerciaux.Ellen'estpasconçuepourcouper
lesbroussaillesnipourunusageagricole.
Lisezattentivementcesinformationspourapprendre
commentutiliseretentretenircorrectementvotre
produit,etéviterdel'endommageroudevousblesser.
Vousêtesresponsabledel'utilisationsûreetcorrecte
duproduit.
VouspouvezcontacterTorodirectementà
www.Toro.compourtoutrenseignementconcernant
unproduitouunaccessoire,pourobtenirl'adressedes
dépositairesoupourenregistrervotreproduit.
Lorsquevouscontactezundistributeurouunréparateur
Toroagréépourl'entretiendevotremachine,pourvous
procurerdespiècesTorod'origineoupourobtenirdes
renseignementscomplémentaires,soyezprêt(e)àlui
fournirlesnumérosdemodèleetdesérieduproduit.
Figure1indiquel'emplacementdesnumérosdemodèle
etdesérieduproduit.Inscrivezlesnumérosdans
l'espaceréservéàceteffet.
Lesmisesengardedecemanuelsoulignentlesdangers
potentielsetsontsignaléesparlesymboledesécurité
Figure2),quiindiqueundangerpouvantentraîner
(
desblessuresgravesoumortellessilesprécautions
recommandéesnesontpasrespectées.
Figure2
1.Symboledesécurité
Deuxtermessontégalementutiliséspourfairepasser
desinformationsessentielles.Important,pourattirer
l'attentionsurdesinformationsmécaniquesspéciques,
etRemarque,poursignalerdesinformationsd'ordre
généralméritantuneattentionparticulière.
Cesystèmed’allumageparétincelleestconformeàla
normecanadienneICES-002
Man uel de l’utilisateur du moteur
Le
ci-joint
estfourniàtitrederéférenceconcernantla
réglementationdel’agenceaméricainededéfense
del’environnement(EPA)etlaréglementation
antipollutiondel’étatdeCalifornierelativesaux
systèmesantipollution,àl’entretienetàlagarantie.
Vouspouvezvousenprocurerunnouvelexemplaire
envousadressantauconstructeurdumoteur.
Figure1
1.Plaquedesnumérosdemodèleetdesérie
N°demodèle
N°desérie
©2010—TheToro®Company
8111LyndaleAvenueSouth
Bloomington,MN55420
Pourlesmodèlesdontlapuissancedumoteurest
indiquée,lapuissancebrutedumoteuraétémesurée
enlaboratoireparleconstructeurdumoteurselon
SAEJ1940.Étantcongurépoursatisfaireauxnormes
desécurité,antipollutionetd'exploitation,lemoteur
montésurcetteclassedetondeuseauraunepuissance
effectivenettementinférieure.
Nemodiezpasabusivementlescommandesdumoteur
nileréglagedurégulateurdevitesse,celarisqueraitde
compromettrelefonctionnementsûrdelamachineet
deprovoquerdesblessurescorporelles.
Sécurité
Cettetondeuseestconformeauxoudépasselesnormes
desécuritéCPSCrelativesauxlamespourlestondeuses
autotractéesetlesspécicationsdelanormeB71.1de
Enregistrezvotreproduitàwww.T oro.com.Traductiondutexted'origine(FR)
ImpriméauxÉtats-Unis
Tousdroitsréservés
Page 38

l'AmericanNationalStandardsInstituteenvigueurau
momentdelaproduction.
•Nelaissezjamaislamachineenmarchesans
surveillance.
Lisezetassimilezlecontenudecemanuelavantde
mettrelemoteurenmarche.
Lesymboledesécurité(
potentielssusceptiblesdecauserdesblessures.Respectez
touslesmessagesdesécuritéquisuiventcesymbole
pouréviterdesaccidents,potentiellementmortels.
L'usageoul'entretienincorrectdecettetondeusepeut
occasionnerdesaccidents,parfoismortels.Pourréduire
lesrisques,respectezlesconsignesdesécuritésuivantes.
Lesinstructionsquisuiventsontadaptéesdelanorme
ANSI/OPEIB71.1-2003.
Cettetondeusepeutsectionnerlesmainsetles
pieds,etprojeterdesobjets.Desaccidentsgraves
oumortelspeuventseproduiresilesconsignesde
sécuritésuivantesnesontpasrespectées.
Figure2)signaledesdangers
Consignesgénérales
d'utilisation
•Vousdevezlire,comprendreetrespectertoutesles
instructionsquigurentsurlamachineetdansle(s)
manuel(s)avantdedémarrer.
•N'approchezpaslesmainsoulespiedsdelamachine.
Nevoustenezjamaisdevantl'ouvertured'éjection.
•Seuleslespersonnesadultesresponsablesquiont
prisconnaissancedesinstructionssontautoriséesà
utiliserlamachine.
•Débarrassezlazonedetravaildespierres,jouets,
câbles,etc.quipourraientêtreprojetésparlalame.
Restezderrièreleguidonquandlemoteuresten
marche.
•Vériezquepersonnenesetrouvedanslazonede
travailavantd'utiliserlamachine.Arrêtezlamachine
siquelqu'unentredanslazonedetravail.
•N'utilisezpaslamachinepiedsnusouchausséde
sandales.Porteztoujoursdeschaussuressolides.
•Netirezjamaislamachineenarrière,saufencas
d'absoluenécessité.Vérieztoujourssilavoieest
librejustederrièrelamachineetsursatrajectoire
avantdereculer.
•Nedirigezjamaisl'éjectionversquiquecesoit.
N'éjectezpasl'herbecoupéecontreunmurouun
obstacle.Ellepourraitêtrerenvoyéeversl'opérateur.
Arrêtezlalamequandvouspassezsurdugravier.
•N'utilisezpaslamachinesilebacàherbeaucomplet,
ledéecteurd'éjection,ledéecteurarrièreouautres
dispositifsdesécuriténesontpasinstalléseten
parfaitétatdemarche.
•Arrêtezlemoteuretattendezl'arrêtcompletdela
lameavantdenettoyerlamachine,deretirerlebacà
herbeoudedéboucherledéecteurd'éjection.
•Travaillezuniquementàlalumièredujourouavec
unbonéclairagearticiel.
•N'utilisezpaslamachinesousl'emprisedel'alcool,
dedroguesoudemédicaments.
•N'utilisezjamaislatondeusesurdel'herbehumide.
Veillezànepasperdrel'équilibre;avancezàune
allurenormale,necourezpas.
•Désengagezlesystèmed'entraînement,lecas
échéant,avantdemettrelemoteurenmarche.
•Silamachinesemetàvibrerdefaçonanormale,
coupezlemoteuretcherchez-enimmédiatementla
cause.Lesvibrationsindiquentgénéralementqu'un
problèmeexiste.
•Protégez-voustoujourslesyeuxquandvousutilisez
lamachine.
•Lafoudrepeutprovoquerdesblessuresgravesou
mortelles.Sivousobservezlafoudreouquevous
entendezletonnerreàproximité,n'utilisezpasla
machineetmettez-vousàl'abri.
•Reportez-vousauxinstructionsduconstructeur
concernantl'utilisationetlemontaged'accessoires.
N'utilisezquelesaccessoiresagréésparle
constructeur.
Utilisationsurpente
Lespentespeuventaugmentersignicativementles
risquesdedérapageoudechutequipeuvententraîner
desblessuresgraves.Lesmanœuvressurpentes,quelles
qu'ellessoient,demandentuneattentionparticulière.Ne
travaillezpassurlespentessurlesquellesvousnevous
sentezpasàl'aise.
•Travailleztransversalementàlapente,jamaisvers
lehautouverslebas.Soyezextrêmementprudent
lorsquevouschangezdedirectionsurunterrainen
pente.
•Méez-vousdestrous,ornières,bosses,rochersou
autresobstaclescachés.Lesirrégularitésdeterrain
peuventvousfairedéraperetprovoquervotrechute.
L'herbehautepeutmasquerlesaccidentsduterrain.
•Netondezpasquandl'herbeesthumidenisurdes
pentesraides.Vouspourriezglisseretvousblesser
entombant.
•Netondezpasàproximitédedénivellations,fossés
ouberges,aurisquedeglisseroudeperdrel'équilibre.
2
Page 39

Enfants
Desaccidentstragiquespeuventsurvenirsil'utilisateur
nesaitpasquedesenfantssontprésents.Lesenfants
sontsouventattirésparlamachineetl'activitédetonte.
Nepartezjamaisduprincipequelesenfantssetrouvent
encorelàoùvouslesavezvuspourladernièrefois.
•Veillezàcequelesenfantsrestenthorsdelazonede
travail,souslagarded'unadulteresponsableautre
quel'utilisateur.
duravitaillement.N'utilisezpasundispositifde
verrouillagedupistoletenpositionouverte.
•Siducarburants'estrépandusurvosvêtements,
changez-vousimmédiatement.
•Neremplissezjamaisexcessivementleréservoir
decarburant.Remettezenplacelebouchondu
réservoiretserrez-leàfond.
ATTENTION
•Montrez-vousvigilantetcoupezlemoteurdela
tondeusesiunenfantpénètredanslazonedetravail.
•Nelaissezjamaisunenfantutiliserlamachine.
•Soyezparticulièrementprudentàl'approchede
tournantsaveugles,debuissons,d'arbresoud'autres
objetssusceptiblesdedissimulerunenfantàvotre
vue.
Entretien
Manipulationsûredel'essence
Pouréviterdevousblesseroudecauserdes
dommagesmatériels,manipulezl'essenceavec
uneextrêmeprudence.L'essenceestextrêmement
inammableetsesvapeurssontexplosives.
•Éteignezcigarettes,cigares,pipesetautressources
d'étincelles.
•N'utilisezquedesbidonsàessencehomologués.
•N'enlevezjamaislebouchonduréservoiretn'ajoutez
jamaisdecarburantlorsquelemoteurtourne.
Laissezrefroidirlemoteuravantdefaireleplein.
•Nefaitesjamaislepleinàl'intérieur.
•Neremisezjamaislamachinenilesbidonsde
carburantàproximitéd'uneammenue,d'une
sourced'étincellesoud'uneveilleuse,tellecelleque
l'ontrouvesurunchauffe-eauoud'autresappareils.
•Neremplissezjamaislesbidonsdecarburantà
l'intérieurd'unvéhiculeoudanslacaissed'un
véhiculeutilitairedontlerevêtementestenplastique.
Poseztoujourslesbidonssurlesol,àl'écartdu
véhicule,avantdelesremplir.
•Descendezlamachineduvéhiculeoudelaremorque
etposez-laàterreavantderemplirleréservoirde
carburant.Sicen'estpaspossible,laissezlamachine
danslevéhiculeousurlaremorque,maisremplissez
leréservoiràl'aided'unbidon,etnondirectement
àlapompe.
•Mainteneztoutletempslepistoletencontactavec
lebordduréservoiroudubidonjusqu'àlan
Lesgazd'échappementcontiennentdumonoxyde
decarbone,ungazinodoremortel.
Nefaitespastournerlemoteuràl'intérieurd'un
localfermé.
Entretiengénéral
•Nefaitesjamaistournerlemoteurdansunlocal
fermé.
•Gardeztouslesécrousetboulonsbienserréspour
êtresûrdepouvoirutiliserlamachinesansdanger.
•N'enlevezpasetnemodiezpaslesdispositifsde
sécurité.Contrôlezrégulièrementqu'ilsfonctionnent
bien.
•Nelaissezpasl'herbe,lesfeuillesoud'autresdébris
s'accumulersurlamachine.Nettoyezlescoulées
éventuellesd'huileoudecarburantetéliminezles
débrisimbibésdecarburant.Laissezrefroidirla
machineavantdelaremiser.
•Sivousheurtezunobstacle,arrêtezetexaminezla
machine.Réparezlamachinesinécessaireavantde
laremettreenmarche.
•N'effectuezjamaisderéglagesouderéparations
lorsquelemoteurestenmarche.Débranchezlel
delabougied'allumageetmettez-leàlamassecontre
lemoteurpouréviterlesdémarragesaccidentels.
•Vériezfréquemmentl'étatdescomposants
dubacàherbeetdudéecteurd'éjection,et
remplacezlespiècesquienontbesoinpardespièces
recommandéesparleconstructeur.
•Leslamesdutablierdecoupesonttranchantes.
Vousnedevezlestoucherqu'avecdesgantsou
enveloppéesdansunchiffon,ettoujoursaveclaplus
grandeprécaution.
•Nemodiezpasleréglagedurégulateuretnefaites
pastournerlemoteuràunrégimeexcessif.
•Remplacezlesautocollantsd'instructionoude
sécuritémanquantsouendommagés,selonles
besoins.
3
Page 40

Autocollantsdesécuritéet
d'instruction
Important:Lesautocollantsdesécuritéet
d'instructionsontplacésprèsdesendroits
potentiellementdangereux.Remplacezles
autocollantsendommagés.
Marquedufabricant
1.Identielalamecommepièced'origine.
94-8072
117-4143
1.Attention–lisezleManueldel'utilisateur.
2.Risquedeprojections–tenezlesspectateursàbonne
distancedelamachine.
3.Risquedecoupure/mutilationdesmainsoudespiedspar
lalamedutablierdecoupe–débranchezlabougieetlisez
lesinstructionsavantd'entreprendreunentretienouune
révision.
4.Risquedecoupure/mutilationdesmainsetpiedsparla
lame–nevousapprochezpasdespiècesmobileset
gardeztouteslesprotectionsenplace.
5.Risquedecoupure/mutilationdesmainsetpiedsparla
lame—n'utilisezpaslamachinedanslesensdelapente,
maistoujourstransversalement;arrêtezlamachineet
lemoteur,ramassezlesdébrisavantdetondre;vériez
toujourssilavoieestlibrejustederrièrelamachineetsur
satrajectoireavantdefairemarchearrière.
4
Page 41

Miseenservice
2
1
Dépliageduguidon
Aucunepiècerequise
Procédure
ATTENTION
Vousrisquezd'endommagerlescâblesetderendre
lamachinedangereuseàutilisersivouspliezou
dépliezmalleguidon.
•Veillezànepasendommagerlescâblesenpliant
oudépliantleguidon.
•Siuncâbleestendommagé,adressez-vousàun
réparateuragréé.
1.Desserrezlesboutonsduguidon(Figure3).
Important:Faitespasserlescâblesàl'extérieur
duguidonpendantquevousmontezleguidon.
Pleind'huilemoteur
Aucunepiècerequise
Procédure
Important:Lecartermoteurdelatondeuseest
videàlalivraison.Avantdemettrelemoteuren
marche,faiteslepleind'huilemoteur.
Remplissagemax.:0.59l(20oz),type:huiledétergente
SAE30ouSAE10W-30declassedeserviceAPISF,
SG,SH,SJ,SLousupérieure.
1.Garezlamachinesurunsolplatethorizontal.
2.Retirezlajauge(
Figure4).
Figure3
1.Boutonduguidon(2)
2.Placezleguidonenpositiond'utilisation.
3.Serrezsolidementlesboutonsduguidonàlamain
Figure3).
(
Figure4
1.Leniveaud'huileestau
maximum.
2.Leniveaud'huileesttrop
élevé–vidangezune
partiedel'huile.
3.Versezlentementl'huileparl'oricederemplissage,
attendezquelquesminutespuisvérierleniveau
d'huilesurlajauge,enl'essuyantsurunchiffon
propreetenl'insérantdansl'orice,maissans
visserlebouchon(
Remarque:Versezdel'huiledanslecartermoteur
jusqu'àcequelajaugeindiqueleniveaucorrect,
commeillustréàla
excessivementlecartermoteur,vidangezl'excédent
5
3.Leniveaud'huileesttrop
bas–ajoutezdel'huile
danslecarter.
Figure4).
Figure4.Sivousremplissez
Page 42

d'huilecommeexpliquéàlasectionVidangeet
remplacementdel'huilemoteur.
4.Remettezlajaugeenplaceetvissez-lafermement.
Important:
Changez l'huile moteur après les
5 pr emièr es heur es de f onctionnement
foisparan(voirVidangedel'huilemoteur).
Vued'ensembledu
produit
,puisune
Caractéristiquestechniques
Modèle
2031434kg
Poids
(75lb)
LongueurLargeur
144cm
(57po)
Hauteur
54cm
(21po)
145cm
(39po)
Figure5
1.Bougie6.Bacàherbe
2.Goulotde
remplissage/jauge(non
représenté)
3.Poignéedulanceur8.Leviersdehauteurde
4.Barredecommandedela
lame
5.Barred'autotraction10.Amorceur
1.Déecteurd'éjectionarrière(option)
7.Bouchonduréservoirde
carburant
coupe(4)
9.Filtreàair
Figure6
6
Page 43

Utilisation
Remplissageduréservoirde
carburant
Contrôleduniveaud'huile
moteur
Périodicitédesentretiens:Àchaqueutilisationouune
foisparjour
DANGER
L'essenceestextrêmementinammableet
explosive.Unincendieouuneexplosioncausé(e)
parl'essencepeutvousbrûler,ainsiqueles
personnessetenantàproximité.
•Pouréviterquel'électricitéstatiquen'enamme
l'essence,posezlerécipientet/oulatondeuse
directementsurlesol,pasdansunvéhiculeou
surunsupportquelconque,avantdefairele
plein.
•Remplissezleréservoirdecarburantquand
lemoteurestfroid.Essuyezlecarburant
éventuellementrépandu.
•Nefumezjamaisenmanipulantdel'essenceet
tenez-vousàl'écartdesammesnuesoudes
sourcesd'étincelles.
•Conservezl'essencedansunrécipient
homologué,horsdeportéedesenfants.
Remplissezlecarburantavecdel'essencesansplomb
ordinairefraîched'unemarqueréputéeayantunindice
d'octaneégalouprochede87(
Important:N'utilisezpasdecarburantE85ou
E20.D'autrescarburantsàhauteteneurenalcool
peuventrendreledémarragedifcile,réduireles
performancesdumoteuretcauserdesdommages
auxorganesinternesdumoteur.
Important:Pourréduirelesproblèmesde
démarrage,ajoutezunstabilisateuràchaqueplein
etutilisezdel'essencestockéedepuismoinsd'un
mois.
Figure7).
1.Garezlamachinesurunsolplatethorizontal.
2.Retirezlajaugeetessuyez-lasurunchiffonpropre.
3.Remettezlajaugedansl'oricederemplissage,mais
nelavissezpas.
4.Retirezlajaugeetvériezleniveau.
5.Pourdéterminerleniveaud'huilecorrectindiquépar
lajauge,voir(
1.Leniveaud'huileestau
maximum.
2.Leniveaud'huileesttrop
élevé–vidangezune
partiedel'huile.
6.Sileniveauesttropbas,versezlentementde
l'huileparl'oricederemplissage,attendezquelques
minutespuisvérierleniveaud'huilesurlajaugeen
l'essuyantsurunchiffonpropreetenl'insérantdans
l'orice,maissansvisserlebouchon.
Figure8).
Figure8
3.Leniveaud'huileesttrop
bas–ajoutezdel'huile
danslecarter.
Figure7
Remarque:Remplissagemax.:0,59l(20oz),
type:huiledétergenteSAE30ouSAE10W-30
declassedeserviceAPISF ,SG,SH,SJ,SLou
supérieure.
Remarque:Versezdel'huiledanslecartermoteur
jusqu'àcequelajaugeindiqueleniveaucorrect,
commeillustréàla
excessivementlecartermoteur,vidangezl'excédent
d'huilecommeexpliquéàlasectionVidangeet
remplacementdel'huilemoteur.
7.Remettezlajaugeenplaceetvissez-lafermement.
7
Figure8.Sivousremplissez
Page 44

Important:
Changez l'huile moteur après les
5 pr emièr es heur es de f onctionnement
foisparan(voirVidangedel'huilemoteur).
,puisune
Remarque:Leshauteursdecoupesuivantessont
disponibles:25mm(1"),38mm(1,5"),51mm(2"),
64mm(2,5"),76mm(3"),89mm(3,5")et102mm(4").
Réglagedelahauteurde
coupe
ATTENTION
Pendantleréglagedelahauteurdecoupe,vous
risquezdetoucherlalameenmouvementetde
vousblessergravement.
•Arrêtezlemoteuretattendezl'arrêtdetoutes
lespiècesmobiles.
•Nemettezpaslesdoigtssouslecarterdutablier
decoupequandvousréglezlahauteurdecoupe.
PRUDENCE
Silemoteurvientdetourner,lesilencieuxesttrès
chaudetrisquedevousbrûlergravement.Nevous
approchezpasdusilencieuxencorechaud.
Choisissezlahauteurdecoupevoulue.Réglezlesquatre
rouesàlamêmehauteur.
Remarque:Pouréleverletablierdecoupe,déplacez
touslesleviersdehauteurdecoupeenavant;ramenez
lesleviersenarrièrepourabaisserletablierarrière
Figure9).
(
Démarragedumoteur
1.Appuyezfermementà3reprisessurl'amorceuravec
lepouce,enmarquantunepaused'uneseconde
chaquefois(Figure10).
Figure10
1.Amorceur
2.Maintenezlabarredecommandedelalame
(
Figure11)contreleguidon.
1.Éleverletablierdecoupe
Figure9
2.Abaisserletablierde
coupe
Figure11
1.Barredecommandedelalame
3.Tirezsurlapoignéedulanceur(Figure12).
Figure12
8
Page 45

Remarque:Silemoteurnedémarrepasaprès
plusieurstentatives,contactezunréparateuragréé.
Utilisationdelacommande
d'autotraction
Pouractionnerlesystèmed'autotraction,serrezet
maintenezlabarredecommande(Figure13)contrele
guidon.
Déchiquetage
Àlalivraison,votretondeuseestprêtepourle
"déchiquetage",c.-à-d.prêteàhacherl'herbeetles
feuillescoupéespournourrirvotrepelouse.
Silebacàherbeestmontésurlatondeuse,retirez-le
(voirRetraitdubacàherbe)avantdeprocéderau
déchiquetage.
Ramassagedel'herbecoupée
Utilisezlebacàherbepourrecueillirl'herbeetlesfeuilles
coupéesàlasurfacedelapelouse.
ATTENTION
Silebacàherbeestusé,desgravillonsouautres
débrissimilairesrisquentd'êtreprojetésvers
l'utilisateuroudespersonnesàproximité,etde
causerdesblessuresgravesoumortelles.
Figure13
1.Barred'autotraction
Pourdésengagerl'autotraction,relâchezlabarre
d'autotraction.
Remarque:Lavitessededéplacementmaximaleest
xe.Pourralentir,éloignezlabarred'autotractiondu
guidon.
Arrêtdumoteur
Périodicitédesentretiens:Àchaqueutilisationouune
foisparjour
Pourarrêterlemoteur,relâchezlabarredecommande
delalame(Figure14).
Important:Lorsquevousrelâchezlabarrede
commandedelalame,lemoteuretlalamedoivent
s'arrêterenmoinsde3secondes.Sicen'estpasle
cas,arrêtezimmédiatementd'utiliserlatondeuseet
adressez-vousàunréparateuragréé.
Examinezfréquemmentlebac.S'ilestendommagé,
remplacez-leparunbacToroneufd'origine.
ATTENTION
Lalameesttranchanteetvousrisquezdevous
blessergravementàsoncontact.
Coupezlemoteuretattendezl'arrêtdetoutesles
piècesenmouvementavantdequitterlaposition
deconduite.
Montagedubacàherbe
1.Soulevezledéecteurarrière(Figure15).
Figure14
Figure15
1.Déecteurarrière
2.Insérezlapoignéedubacàherbedanslescransdes
supportsduguidon(
9
Figure15).
Page 46

Retraitdubacàherbe
1.Soulevezledéecteurarrière(Figure15).
2.Sortezlapoignéedubacàherbedescransdes
supportsetdéposezlebacdelatondeuse.
3.Refermezledéecteurarrière.
Éjectiondesdéchetsd'herbe
Utilisezledéecteurd'éjectionarrière(option)quand
voustondezdel'herbetrèshaute.
Montagedudéecteurd'éjection
arrière
1.Enlevezlebacàherbes'ilsetrouvesurlatondeuse.
2.Soulevezledéecteurarrièreetmaintenez-ledans
cetteposition(
Figure16).
Figure18
Retraitdudéecteurd'éjectionarrière
Pourretirerledéecteurd'éjectionarrière,inversezla
procéduredécriteplushaut.
Conseilsd'utilisation
Conseilsdetontegénéraux
•Débarrassezlazonedetravaildesbranches,pierres,
câbles,bâtonsetautresdébrisquipourraientêtre
ramassésetprojetésparlalame.
•Évitezdeheurterdesobstaclesaveclalame.Ne
passezjamaisintentionnellementsurunobjetquel
qu'ilsoit.
•Silatondeuseaheurtéunobstacleoucommence
àvibrer,coupezimmédiatementlemoteur,
débranchezlabougieetvériezsilatondeusen'est
pasendommagée.
Figure16
3.Insérezlalanguettedudéecteurd'éjectionarrière
danslafentedroitedudéecteurarrière(
Figure17
4.Insérezlatigedudéecteurd'éjectionarrièredans
lescransdelatondeuse(Figure18).
Figure17).
•Pourdemeilleursrésultats,montezunelameneuve
audébutdelasaisondetonte.
•Remplacezlalamedèsquenécessaireparunelame
Torod'origine.
Latonte
•Netondezl'herbequesur1/3desahauteuràchaque
fois.N'utilisezpasunehauteurdecoupeinférieureà
51mm(2"),saufsil'herbeestclairseméeouàlan
del'automnequandlapoussecommenceàralentir
(voirRéglagedelahauteurdecoupe).
•Sil'herbefaitplusde15cm(6"),effectuezd'abord
unpremierpassageàvitesseréduiteàlahauteurde
coupelaplushaute.Effectuezensuiteundeuxième
passageàunehauteurdecoupeinférieurepour
obtenirunecoupeplusesthétique.L'herbetrop
longuerisqued'obstruerlatondeuseetdefairecaler
lemoteur.
•Netondezquesil'herbeoulesfeuillessontsèches.
L'herbeetlesfeuilleshumidesonttendanceà
s'agglomérersurlapelouseetrisquentd'obstruerla
tondeuseetdefairecalerlemoteur.
10
Page 47

ATTENTION
Entravaillantsurl'herbeoulesfeuilleshumides,
vousrisquezdeglisseretdevousblesser
gravementsivoustouchezlalameentombant.
Netondezquesil'herbeestsèche.
–Empiétezsurlespassagesprécédentspourne
tondrequ'unelargeurdebanderéduite.
–Réglezlahauteurdecoupedesrouesavantun
cranendessousdecelledesrouesarrière.Par
exemple,réglezlesrouesavantà51mm(2")et
lesrouesarrièreà64mm(2-1/2").
•Alternezladirectiondelatonte.Celapermetde
disperserlesdéchetsplusuniformémentetd'obtenir
unefertilisationplushomogène.
Hachagedefeuilles
•Aprèslatonte,50%delapelousedoitêtrevisible
souslacouchedefeuilleshachées.Àceteffet,
•Sil'aspectdelapelousetonduen'estpassatisfaisant,
essayezuneouplusieursdessolutionssuivantes:
–Remplacezlalameoufaites-laaiguiser.
–Tondezenavançantpluslentement.
vousdevrezpeut-êtrerepasserplusieursfoissurles
feuilles.
•Silacouchedefeuillesfaitplusde13cm(5")
d'épaisseur,réglezlesrouesavantunoudeuxcrans
plushautquelesrouesarrière.
–Augmentezlahauteurdecoupe.
–Tondezplussouvent.
•Ralentissezlavitessededéplacementsilesfeuillesne
sontpashachéesassezmenues.
Entretien
Remarque:Lescôtésgaucheetdroitdelamachinesontdéterminésd’aprèslapositiondeconduite.
Programmed'entretienrecommandé
Périodicitéd'entretienProcédured'entretien
Aprèsles5premières
heuresdefonctionnement
•Vidangezetchangezl'huilemoteur.
•Contrôlezleniveaud'huilemoteur.
Àchaqueutilisationou
unefoisparjour
Toutesles100heures
Avantleremisage
Unefoisparan
•Vériezquelemoteurs'arrêtedansles3secondessuivantlerelâchementdela
barredecommandedelalame.
•Enlevezl'herbecoupéeetautresdébrisaccumuléssousletablierdecoupe.
•Examinezetremplacezlabougieaubesoin.
•Vidangezleréservoirdecarburantavantleremisageetavantlesréparationsqui
lenécessitent.
•Nettoyezlesystèmederefroidissement,enlevezlesdéchetsd'herbe,lesdébrisou
lessaletéséventuellementaggloméréssurlesailettesderefroidissementdumoteur
etsurledémarreur.Nettoyezlesystèmeplusfréquemments'ilyabeaucoupde
saletéoudepoussière.
•Remplacezleltreàair;remplacez-leplusfréquemmentsil'atmosphèreesttrès
poussiéreuse.
•Vidangezetchangezl'huilemoteur.
•Remplacezlalameoufaites-laaiguiser(plussouventsielles'émousserapidement).
Préparationàl'entretien
1.Arrêtezlemoteuretattendezl'arrêtdetoutesles
piècesmobiles.
2.Débranchezlabougie(Figure19)avantdeprocéder
àunquelconqueentretien.
11
Page 48

Figure19
1.Fildebougie
3.Lorsquel'entretienestterminé,rebranchezlabougie.
ATTENTION
Ducarburantpeuts'échapperlorsquela
tondeuseestbasculéesurlecôté.L'essenceest
inammableetexplosive,etpeutprovoquerdes
blessures.
Laisseztournerlemoteurjusqu'àcequ'il
s'arrêtefautedecarburantouvidangezlereste
d'essenceavecunepompemanuelle,pasun
siphon.
Important:Basculeztoujourslatondeusesur
lecôté(jaugeenbas).
Remplacementdultreàair
Figure20
1.Languettesdeverrouillage
2.Élémentenpapierdultre
àair
3.Préltreenmousse
2.Ouvrezlecouvercle.
3.Retirezl'élémentenpapieretlepréltreenmousse
Figure20).
(
4.Vérierl'étatdupréltreenmousseetremplacez-le
s'ilestendommagéouexcessivementencrassé.
5.Examinezl'élémentenpapier.
Périodicitédesentretiens:Unefoisparan
1.Appuyezsurleslanguettesdeverrouillageenhautdu
couvercledultreàair(Figure20).
A.Remplacezl'élémentenpapiers'ilestendommagé
ouhumidiépardel'huileoudel'essence.
B.Sil'élémentenpapierestencrassé,tapotez-le
àplusieursreprisessurunesurfacedureou
soufezdel'aircompriméàmoinsde207kPa
(30psi)parlecôtédultrequiestfaceaumoteur.
Remarque:Nebrossezpasleltrepourle
débarrasserdesimpuretés,carcelaaurapour
effetd'incrusterlesimpuretésdanslesbres.
6.Éliminezlapoussièreducorpsetducouvercledu
ltreàairavecunchiffonhumide.Nefaitespas
pénétrerdepoussièredansleconduitd'air.
7.Insérezlepréltreenmousseetl'élémentenpapier
dansleltreàair.
8.Remettezlecouvercleenplace.
12
Page 49

Vidangeetremplacementde
l'huilemoteur
Périodicitédesentretiens:Aprèsles5premières
heuresdefonctionnement
Unefoisparan
1.Vériezqueleréservoirdecarburantest
pratiquementoucomplètementvidepouréviter
toutefuitedecarburantquandvouscouchezla
tondeusesurlecôté.
2.Faitestournerlemoteurpendantquelquesminutes
avantlavidangepourréchaufferl'huile.
Remarque:L'huilechaudes'écouleplusfacilement
etentraîneplusd'impuretés.
3.Débranchezlabougie.VoirPréparationàl'entretien.
4.Retirezlajauge.
5.Inclinezlatondeusesurlecôté(jaugeenbas)pour
vidangerl'huileusagéeparlegoulotderemplissage
(
Figure21).
Figure22
1.Leniveaud'huileestau
maximum.
2.Leniveaud'huileesttrop
élevé–vidangezune
partiedel'huile.
3.Leniveaud'huileesttrop
bas–ajoutezdel'huile
danslecarter.
8.Remettezlajaugeenplaceetvissez-lafermement.
Figure21
6.Redressezlatondeuseàlapositionnormale
d'utilisation.
7.Versezlentementl'huileparl'oricederemplissage,
attendezquelquesminutespuisvérierleniveau
d'huilesurlajauge,enl'essuyantsurunchiffon
propreetenl'insérantdansl'orice,maissans
visserlebouchon.
Remarque:Remplissagemax.:0,59l(20oz),
type:huiledétergenteSAE30ouSAE10W-30
declassedeserviceAPISF ,SG,SH,SJ,SLou
supérieure.
Remarque:Versezdel'huiledanslecartermoteur
jusqu'àcequelajaugeindiqueleniveaucorrect,
commeillustréàla(Figure22).Sivousremplissez
excessivementlecartermoteur,vidangezl'excédent
d'huilecommeexpliquésous
5.
9.Débarrassez-vouscorrectementdel'huileusagéeen
ladéposantdansuncentrederecyclageagréé.
Entretiendelabougie
Périodicitédesentretiens:Toutesles100heures
Contrôlezlabougietoutesles100heuresd'utilisation.
UtilisezunebougieChampionRN9YCoudetype
équivalent.
1.Arrêtezlemoteuretattendezl'arrêtdetoutesles
piècesmobiles.
2.Débranchezlabougie.
3.Nettoyezlasurfaceautourdelabougie.
4.Retirezlabougiedelaculasse.
Important:Remplacezlabougiesielleest
ssurée,calaminéeouencrassée.Nenettoyez
paslesélectrodes,cardesparticulesrisquent
detomberdanslaculasseetd'endommagerle
moteur.
5.Réglezl'écartementdesélectrodesà0,76mm
(0,030")(
Figure23).
13
Page 50

Figure23
1.Électrodecentraleetbecisolant
2.Électrodelatérale
3.Écartement(pasàl'échelle)
6.Posezlabougieetlejoint.
7.Serrezlabougieà20Nm(15pi-lb).
8.Connectezlabougie.
Figure24
Remplacementdelalame
Périodicitédesentretiens:Unefoisparan
Important:
dynamométrique pour monter la lame
cor r ectement
vousnevoussentezpascapabled'effectuercette
procédure,adressez-vousàunréparateuragréé.
Examinezl'étatdelalamechaquefoisqueleréservoir
d'essenceestvide.Silalameestendommagéeoufêlée,
remplacez-laimmédiatement.Silalameestémousséeou
ébréchée,faites-laaiguiserouremplacez-la.
ATTENTION
Lalameesttranchanteetvousrisquezdevous
blessergravementàsoncontact.
•Débranchezlabougie.
•Portezdesgantspoureffectuerl'entretiende
lalame.
1.Débranchezlabougie(voirlaPréparationà
l'entretien).
V ous aur ez besoin d'une clé
.Sivousn'enpossédezpasousi
Important:Lesextrémitésrelevéesdelalame
doiventêtredirigéesverslatondeuse.
6.Àl'aided'uneclédynamométrique,serrezle
boulondelalameà81Nm(60pi-lb).
Important:Unboulonvisséà81Nm(60pi-lb)
esttrèsserré.Bloquezlalameavecunecaleen
bois,appuyezdetoutvotrepoidssurlerochet
oulaclé,etserrezleboulonsolidement.Il
estpratiquementimpossibledetropserrerce
boulon.
Réglageducâblede
commanded'autotraction
Lorsquevousinstallezunnouveaucâbledecommande
d'autotractionouquel'autotractionestdéréglée,vous
devezréglerlecâbledecommanded'autotraction.
1.Desserrezl'écroudusupportdeguidageducâble
Figure25).
(
2.Basculezlatondeusesurlecôté(ltreàairversle
haut).
3.Immobilisezlalameavecunmorceaudebois.
4.Déposezlalame(tournezleboulondelalamedans
lesensantihoraire)etmetteztouslesxationsde
côté.
5.Montezunelameneuve(tournezleboulondela
lamedanslesenshoraire)ettouteslesxations
Figure24).
(
14
Page 51

1.25à38mm(1à1-1/2")
2.Barred'autotraction
3.Gaineducâble
Figure25
4.Écroudesupportdecâble
5.Supportdecâble
Figure26
2.Lorsqu'ilneresteplusd'herbesurlalame,arrêtez
l'eauetdéplacezlatondeuseàunendroitsec.
3.Laisseztournerlemoteurpendantquelquesminutes
poursécherlecarteretl'empêcherderouiller.
Remisage
Remisezlatondeusedansunlocalfrais,propreetsec.
2.Maintenezlabarredecommanded'autotractionà25
à38mm(1à1,5")duguidon(Figure25).
3.Tirezlagaineducâbleverslebas(verslatondeuse)
jusqu'àcequ'iln'yaitplusdemoudanslecâble
Figure25).
(
4.Serrezl'écroudusupportdeguidageducâble.
5.Relâchezlabarredecommanded'autotractionet
vérierquelecâbleestlâche.
Remarque:Lecâbledoitêtredétenduquand
labarredecommanded'autotractionestrelâchée,
sinonlatondeusepeutsedéplacerquandlabarre
estdésengagée.
Nettoyagedelatondeuse
Périodicitédesentretiens:Àchaqueutilisationouune
foisparjour
ATTENTION
Del'herbepeutêtreprojetéedesouslatondeuse.
•Portezuneprotectionoculaire.
•Restezàlapositiondeconduite(derrièrele
guidon).
•Nelaissezpersonnepénétrerdanslazonede
travail.
1.Mettezlemoteurenmarchelorsquelatondeusese
trouvesurunesurfacerevêtueplaneetdirigezunjet
d'eaudevantlarouearrièredroite(Figure26).
L'eauéclabousseraendirectiondelalameetenlèvera
lesdébrisd'herbeagglomérés.
Préparationdelatondeuseau
remisage
ATTENTION
Lesvapeursd'essencesontexplosives.
•Neconservezpasl'essenceplusd'unmois.
•Neremisezpaslatondeusedansunlocalfermé
oùsetrouveuneammenue.
•Laissezrefroidirlemoteuravantderemiserla
tondeuse.
1.Lorsdudernierpleindelasaison,ajoutezun
stabilisateuraucarburantselonlesinstructionsdu
constructeurdumoteur.
2.Laisseztournerlemoteurdelatondeusejusqu'àce
qu'ils'arrêtefautedecarburant.
3.Amorcezetremettezlemoteurenmarche.
4.Laissezlemoteurtournerjusqu'àcequ'ils'arrêtede
nouveau.Lemoteurestsufsammentseclorsqu'il
n'yaplusmoyendelefairedémarrer.
5.Débranchezlabougie.
6.Retirezlabougieetversez30ml(1oz)d'huiledans
l'ouverturelaisséeparlabougie.Tirezensuitela
poignéedulanceurlentementàplusieursreprises
pourbienrépartirl'huileàl'intérieurducylindreet
empêchercelui-ciderouillerpendantleremisagede
lamachine.
7.Montezetserrezlabougieà20Nm(15pi-lb)àl'aide
d'uneclédynamométrique.
8.Serreztouslesécrous,boulonsetvis.
15
Page 52

Pliageduguidon
ATTENTION
Vousrisquezd'endommagerlescâblesetderendre
lamachinedangereuseàutilisersivouspliezou
dépliezmalleguidon.
•Veillezànepasendommagerlescâblesenpliant
oudépliantleguidon.
•Siuncâbleestendommagé,adressez-vousàun
réparateuragréé.
1.Desserrezlesboutonsduguidonjusqu'àcequele
guidonbougelibrement(Figure27).
Figure27
1.Boutonduguidon(2)
2.Pliezleguidonenavantcommeindiquéàla
Figure27).
(
16
Page 53

Dépistagedesdéfauts
ProblèmeCausepossible
Lemoteurnedémarrepas.
Lemoteurdémarredifcilementouperd
delapuissance.
Mesurecorrective
1.Labougien'estpasconnectée.1.Branchezlabougie.
2.L'amorceurn'apasétéactionné.2.Appuyezà3reprisessurl'amorceur.
3.L'éventdubouchonduréservoirde
carburantestbouché.
4.Labougieestpiquéeouencrassée,
oul'écartementdesélectrodesest
incorrect.
5.Leréservoirdecarburantestvideou
lecircuitd'alimentationcontientdu
carburantquin'estpasfrais.
1.L'amorceurn'apasétéactionné.1.Appuyezà3reprisessurl'amorceur.
2.L'éventdubouchonduréservoirde
carburantestbouché.
3.L'élémentltrantestencrassécequi
limiteledébitd'air.
4.Ledessousducarterdutablierde
coupecomportedesdéchetsd'herbe
coupéeetautresdébris.
5.Labougieestpiquéeouencrassée,
oul'écartementdesélectrodesest
incorrect.
6.Leniveaud'huilemoteuresttropbas,
trophautoul'huileesttropencrassée.
7.Leréservoirdecarburantcontientdu
carburantquin'estpasfrais.
3.Nettoyezl'éventouremplacezle
bouchon.
4.Contrôlezlabougieetréglez
l'écartementdesélectrodesaubesoin.
Remplacezlabougiesielleestpiquée,
encrasséeoussurée.
5.Vidangezleréservoird'essenceet/ou
remplissez-led'essencefraîche.Si
leproblèmepersiste,consultezun
dépositaireagréé.
2.Nettoyezl'éventouremplacezle
bouchon.
3.Nettoyezlepréltredultreàairet/ou
remplacezl'élémentenpapier.
4.Nettoyezledessousducarterdutablier
decoupe.
5.Contrôlezlabougieetréglez
l'écartementdesélectrodesaubesoin.
Remplacezlabougiesielleestpiquée,
encrasséeoussurée.
6.Contrôlezleniveaud'huilemoteur.
Remplacezl'huilesielleestencrassée,
faitesl'appointouvidangezunepartie
del'huilejusqu'àobtentionduniveau
correct(repèremaximum)surlajauge.
7.Vidangezleréservoirdecarburantet
remplissez-led'essencefraîche.
Lemoteurnetournepasrégulièrement.
Latondeuseoulemoteurvibre
excessivement.
1.L'amorceurn'apasétéactionné.1.Appuyezà3reprisessurl'amorceur.
2.Labougien'estpasconnectée.2.Branchezlabougie.
3.Labougieestpiquéeouencrassée,
oul'écartementdesélectrodesest
incorrect.
4.L'élémentltrantestencrassécequi
limiteledébitd'air.
1.Ledessousducarterdutablierde
coupecomportedesdéchetsd'herbe
coupéeetautresdébris.
2.Boulonsdemontagedumoteur
desserrés.
3.Lesécrousdexationdelalamesont
desserrés.
4.Lalameestfausséeoudéséquilibrée.
3.Contrôlezlabougieetréglez
l'écartementdesélectrodesaubesoin.
Remplacezlabougiesielleestpiquée,
encrasséeoussurée.
4.Nettoyezlepréltredultreàairet/ou
remplacezl'élémentenpapier.
1.Nettoyezledessousducarterdutablier
decoupe.
2.Serrezlesboulonsdemontagedu
moteur.
3.Serrezlesécrousdexationdela
lame.
4.Équilibrezlalame.Remplacezlalame
sielleestfaussée.
17
Page 54

ProblèmeCausepossible
Mesurecorrective
Latonten'estpasuniforme.
Latondeusen'avancepas
automatiquement.
1.Voustondezensuivantlemême
parcourschaquefois.
2.Lesquatrerouesnesontpasàla
mêmehauteur.
3.Ledessousducarterdutablierde
coupecomportedesdéchetsd'herbe
coupéeetautresdébris.
4.Lalameestémoussée.
1.Lecouvercledecourroiecomportedes
débris.
2.Lecâbledecommanded'autotraction
estdérégléouendommagé.
1.Changezleparcoursdelatondeuse.
2.Réglezles4rouesàlamêmehauteur.
3.Nettoyezledessousducarterdutablier
decoupe.
4.Affûtezetéquilibrezlalame.
1.Enlevezlesdébrissouslecouvercle
delacourroie.
2.Réglezlecâbledecommande
d'autotraction.Remplacezlecâbleau
besoin.
18
Page 55

Unegarantieintégralede2ans(garantielimitéede45jourspourusagecommercial)
LagarantieintégraleToro
GarantiededémarrageGTSToro
Unegarantieintégralede3ans(nes’appliquepasàl’usagecommercial)
Recycler®22pouces
Déchiqueteuse/dispositifde
ramassagede20pouces
Tondeusesautotractées
Conditionsetproduitscouverts
TheT oroCompanyetsalialeT oroWarrantyCompany,envertud'un
accordmutuel,s'engagentconjointementàréparerlesproduitsT oro
ci-dessouss'ilssontemployéspourunusagerésidentiel*,s'ilsprésentent
undéfautdematériauxoudefabricationous'ilscessentdefonctionner
parsuitedeladéfaillanced'uncomposant;ousilemoteurToroGTS
(GuaranteedtoStart-Démarragegaranti)nedémarrepasàlapremière
ouàladeuxièmetentativeaulanceur,àconditionquel'entretiencourant
requisdansleManueldel'utilisateuraitétéeffectué.
Cettegarantiecouvrelecoûtdespiècesetdelamain-d'œuvre,maisle
transportestàvotrecharge.
Duréesdelagarantieàpartirdeladated'achat:
Produits
Recyclerde22pouceset
déchiqueteuse/Dispositifde
ramassagede20pouceset
accessoires
GTS(démarragegaranti)Garantieintégralede3ans
Groupemotopropulseur**Garantieintégralede3ans
Batterie
Périodedegarantie
Garantieintégralede2ans
Garantieintégralede1an
Garantielimitéepourusagecommercial*
LesproduitsT oroàmoteuràessenceutilisésàdesnscommerciales,
pardesinstitutionsoudonnésenlocationssontcouvertscontretout
défautdefabricationoudematériauxpendantunepériodede45jours.
Lesdéfaillancesdecomposantsduesàuneusurenormalenesontpas
couvertesparcettegarantie.
LagarantiededémarrageToroGTSnes'appliquepassileproduitest
utiliséàdesnscommerciales.*
Commentfaireintervenirlagarantie?
SivouspensezquevotreproduitToroprésenteundéfautdefabrication
ous'ilnedémarreplusaprèsunoudeuxessaisparn'importequeladulte
physiquementapte,suivezlaprocédureci-dessous:
1.DemandezàundépositaireouréparateurT oroagréédeprendre
enchargevotreproduit.Poursavoiroùsetrouveledépositaire
ouleréparateurleplusproche,consultezlesPagesJaunes
(sous"T ondeusesàgazon")ourendez-voussurnotresitewebà
www.T oro.com.Vouspouvezaussiappelerlesnumérosindiqués
aupoint3pourconsulternotresystèmepermanentdelocalisation
desdépositaires.
2.Lorsquevousvousrendezchezleréparateur,apportezleproduitet
unepreuved'achat(reçu).Leréparateurdiagnostiqueraleproblème
etdétermineras'ilestcouvertparlagarantie.
3.Si,pouruneraisonquelconque,vousn'êtespassatisfaitdu
diagnosticdevotreréparateuroudesconseilsprodigués,n'hésitez
pasànouscontacteràl'adressesuivante:
CustomerCareDepartment,RLCDivision
TheT oroCompany
811 1LyndaleAvenueSouth
Bloomington,MN55420-1196
Numérovert:866-214-9807(auxÉtats-Unis)
Numérovert:866-214-9808(auCanada)
Responsabilitésdupropriétaire
VotreproduitT orodoitêtreentretenuensuivantlesprocéduresd'entretien
décritesdansleManueldel'utilisateur.Cetentretiencourantestàvos
frais,qu'ilsoiteffectuéparvousouparundépositaire.
Cequelagarantienecouvrepas
Iln'existeaucuneautregarantieexpresse,àpartlagarantiespécialedu
systèmeantipollutionetdumoteurpourcertainsproduits.Cettegarantie
expressenecouvrepas:
•Lesfraisnormauxd'entretienetderemplacementdepièces,telles
quelesltres,lecarburant,leslubriants,leschangementsd'huile,
lesbougies,lesltresàair,l'affûtagedeslames,leslamesusées,
leréglagedescâbles/delatringlerieouleréglagedesfreinsetde
l'embrayage.
•Lesproduitsoupiècesayantsubidesmodicationsouunusage
abusif,etnécessitantunremplacementouuneréparationenraison
d'unaccidentoud'undéfautd'entretien.
•Lesréparationsrequisesenraisondel'utilisationdecarburantnon
frais(vieuxdeplusd'unmois)oud'unemauvaisepréparationdela
tondeuseavanttoutepériodedenon-utilisationdeplusd'unmois.
•Lesfraisdepriseàdomicileetdelivraison.
•Toutdégâtdûàunusageabusif,àunmauvaistraitementouàdes
accidents.
•Lesréparationsoutentativesderéparationparquiconqueautre
qu'unréparateurToroagréé
•Lesréparationsouréglagesnécessairespourcorrigerlesproblèmes
dedémarragecauséspar:
–lenon-respectdesprocéduresd'entretiencorrectes
–desdégâtssubisparlalamedelatondeusequiheurteun
obstacle
–lacontaminationducircuitd'alimentation
–l'emploidumauvaiscarburant(reportez-vousauManuelde
l'utilisateurencasdedoute)
–l'omissiondelavidangeducircuitd'alimentationavanttoute
périodedenon-utilisationdeplusd’unmois
•Certainesconditionsdedémarrageexigentunouplusieursessais,
notamment:
–lepremierdémarrageaprèsunepériodedenon-utilisationde
plusdetroismoisouaprèsleremisagesaisonnier
–lesdémarragespartempsfroid,parexempleaudébutdu
printempsetàlandel'automne.
–méthodesdedémarrageincorrectes-sivousavezdesdifcultés
àdémarrerlemoteur,vériezdansleManueldel'utilisateur
quevoussuivezbienlesprocéduresdedémarragecorrectes.
Vouséviterezpeut-êtreainsiunevisiteinutilechezunréparateur
agrééT oro.
Conditionsgénérales
Touteslesréparationscouvertesparcesgarantiesdoiventêtreeffectuées
parunréparateurToroagréé,àl'aidedepiècesderechangeagréées
parT oro.LaréparationparunréparateurToroagrééestleseul
dédommagementauquelcettegarantiedonnedroit.
LasociétéTheToroCompanyetlasociétéToroWarrantydéclinent
touteresponsabilitéencasdedommagessecondairesouindirects
liésàl'utilisationdesproduitsTorocouvertsparcesgaranties,
notammentquantauxcoûtsetdépensesencouruspourseprocurer
unéquipementouunservicedesubstitutiondurantunepériode
raisonnablepourcausededéfaillanceoud'indisponibilitéen
attendantlaréparationsousgarantie.
L'exclusiondelagarantiedesdommagessecondairesouindirectsn'est
pasautoriséedanscertainsétatsoupays,etpeutdoncnepass'appliquer
dansvotrecas.
Cettegarantievousaccordedesdroitsspéciques,auxquelspeuvent
s'ajouterd'autresdroitsquivarientselonlesétats.
AutrespaysquelesÉtats-UnisetleCanada
PourlesproduitsToroexportésdesÉtats-UnisouduCanada,demandezàvotredistributeur(dépositaire)T orolapolicedegarantieapplicabledansvotre
pays,régionouétat.Si,pouruneraisonquelconque,vousn'êtespassatisfaitdesservicesdevotredistributeur,ousivousavezdumalàvousprocurer
lesinformationsdegarantie,adressez-vousàl'importateurToro.Endernierrecours,adressez-vousàlasociétéT oroWarranty.
*L'usagerésidentielnormaldésignel'utilisationduproduitsurleterrainoùsetrouvevotremaison.L'utilisationdansplusieurs
lieuxoupardesinstitutionsoulalocationestconsidéréecommeunusagecommercial,couvertparlagarantiecommerciale.
374-0254RevB
Page 56

**Lagarantiedugroupemotopropulseurcouvreuniquementlemoteuretlatransmission.Latransmissionestdéniecommelaboîted'engrenages,les
composantsinternesetlesessieuxmoteurs.
374-0254RevB
 Loading...