

Page 1
TrashBagKit
g020053
1
2
3
GrandStand
ModelNo.121-7530
Installthiskitontheleftsideofthemachine.Installing
itontheleftsideallowsforinstallationoftheChute
GateKitontherightside.
LooseParts
Usethechartbelowtoverifythatallpartshavebeenshipped.
®
FormNo.3374-108RevA
Mower
InstallationInstructions
ProcedureDescription
Bagbracket1
1
2
3
Bolt,3/8x1inch(threadforming)
Cupholder
Screw,#10x5/8inch
Flatwasher2
Locknut,#10
Trashbag1Installthetrashbag
1
InstallingtheBagBracketto
theMower
Partsneededforthisprocedure:
1Bagbracket
2
Bolt,3/8x1inch(threadforming)
Qty.
Use
2
1
2
2
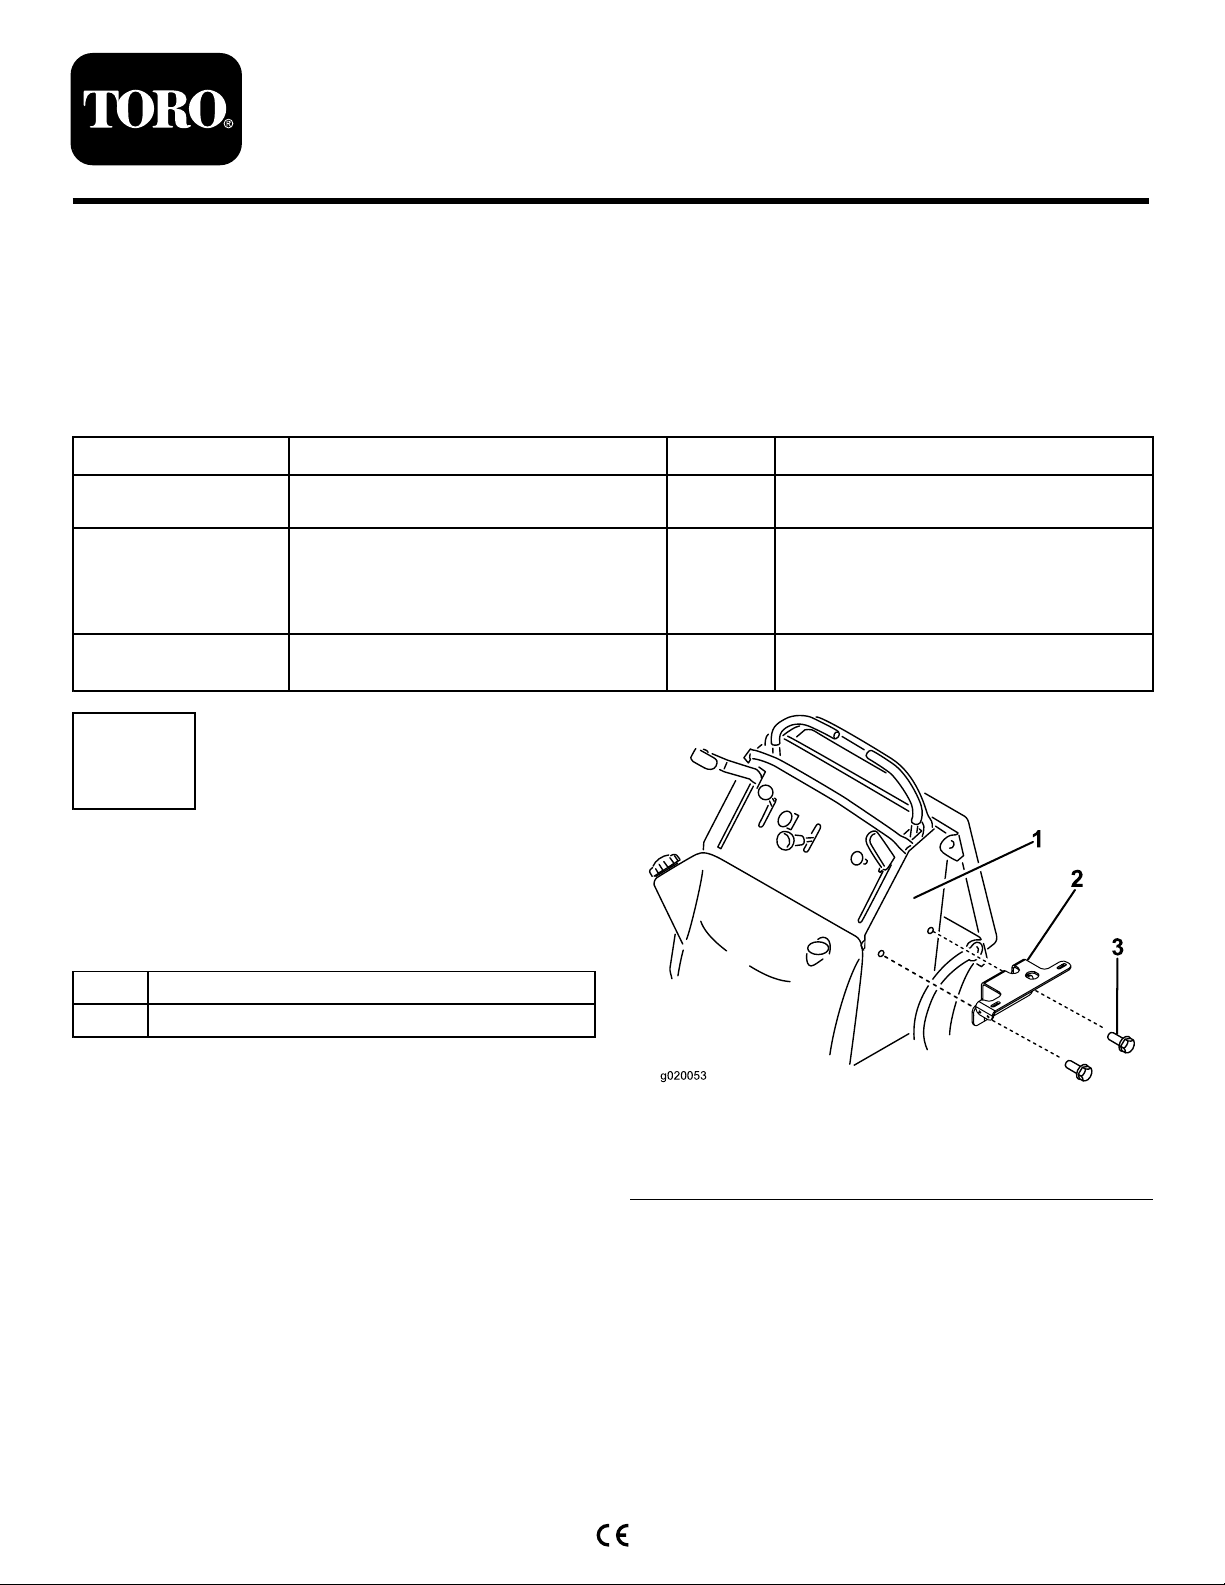
Installthebagbrackettothemower
Installthecupholder
Procedure
Installingthiskitontheleftsideallowsforinstallation
oftheChuteGateKitontherightside.
Installthebrackettothesideofthemachinewith2bolts
(3/8x1inch)(
bolts.Theholesdonotrequiretapping.
©2012—TheToro®Company
8111LyndaleAvenueSouth
Bloomington,MN55420
Figure1).Theboltsarethreadforming
Figure1
1.Leftsideofmachine3.Bolt,(3/8x1inch)
2.Bracket
Registeratwww.T oro.com.
OriginalInstructions(EN)
PrintedintheUSA.
AllRightsReserved
Page 2
2
g020054
1
2
3
4
5
g020055
2
1
3
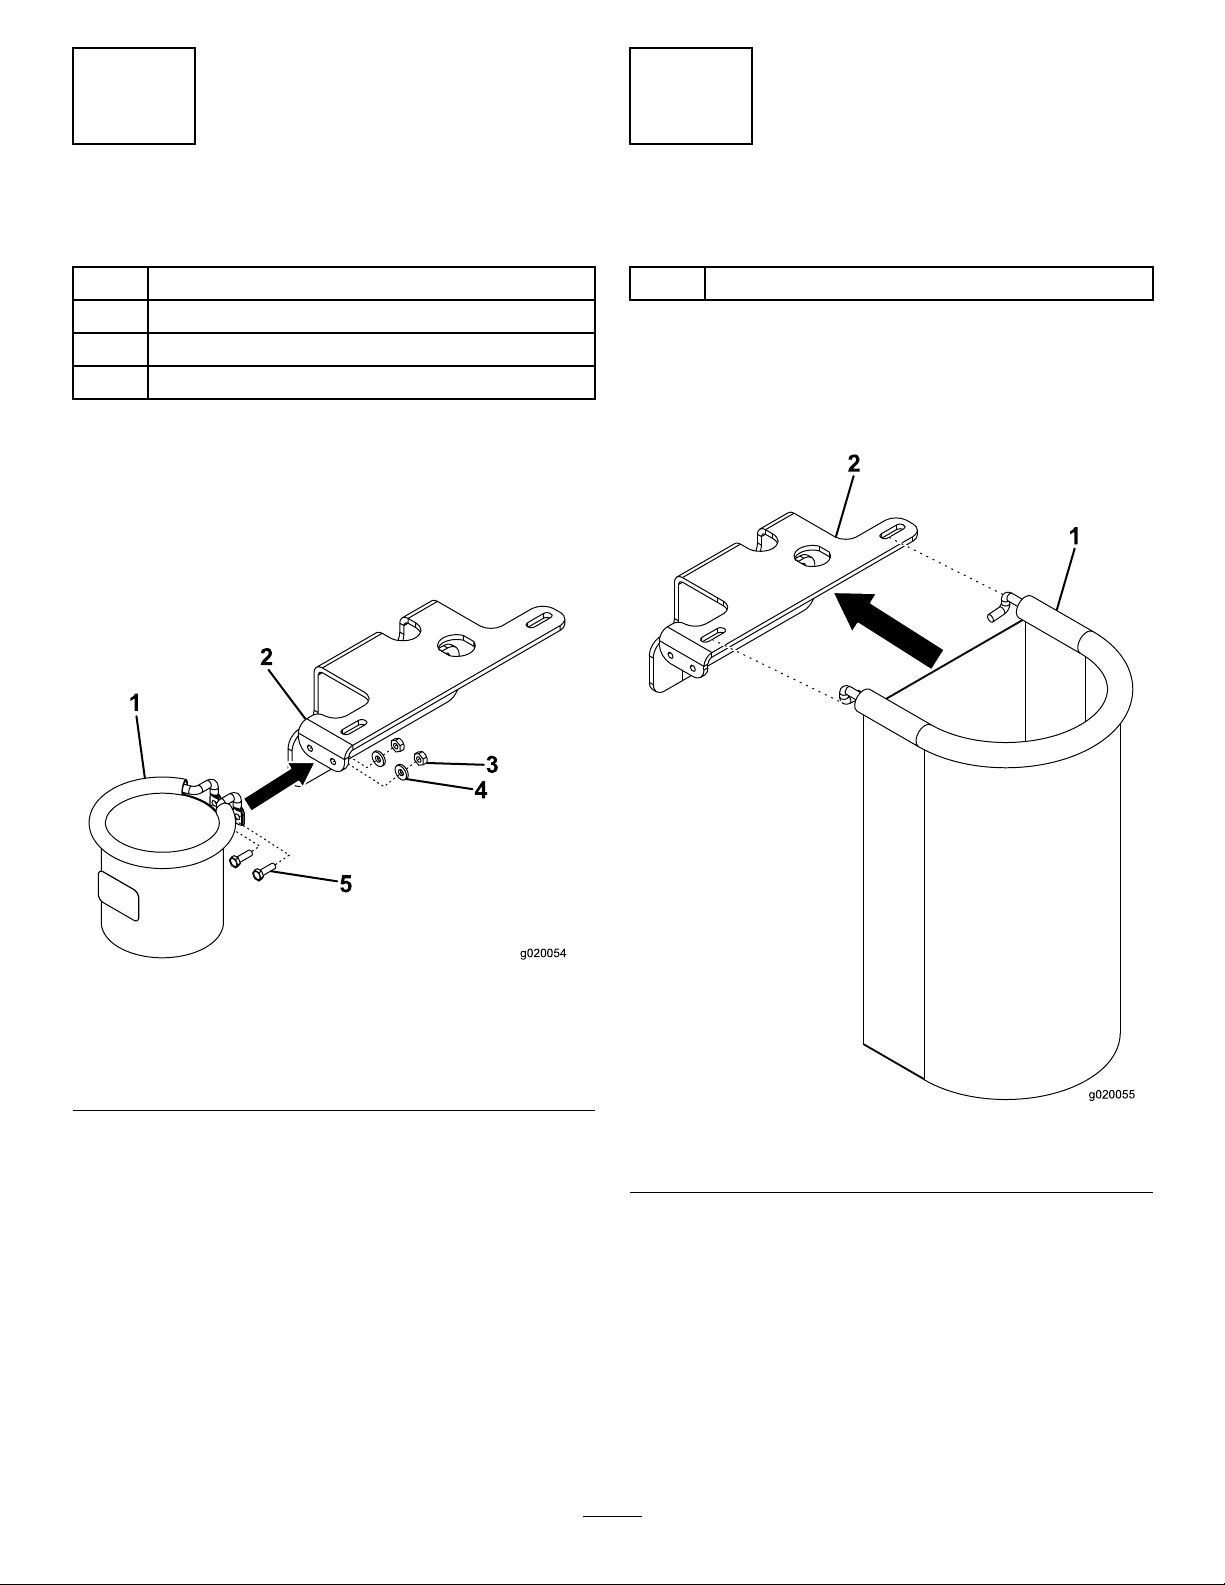
InstallingtheCupHolder
Partsneededforthisprocedure:
1
Cupholder
2
Screw,#10x5/8inch
2Flatwasher
2
Locknut,#10
Procedure
Installthecupholdertothebagbracketwith2(#10
x5/8inch)screws,2washersand2locknuts(#10)
(Figure2).Positionthewashersbetweenthebracket
andthelocknuts.
InstallingtheTrashBag
Partsneededforthisprocedure:
1Trashbag
Procedure
Installthetrashbagintotheslotsinthebagbracket
Figure3).
(
1.Cupholder
2.Bagbracket
3.Locknut(#10)
Figure2
4.Washer
5.Screw(#10x5/8inch)
Figure3
1.Trashbag2.Bagbracket
2
 Loading...