

Page 1
CEKit
forModel78531and7854148inE-ZVac™Bagger
ModelNo.117-3827
ModelNo.117-3828
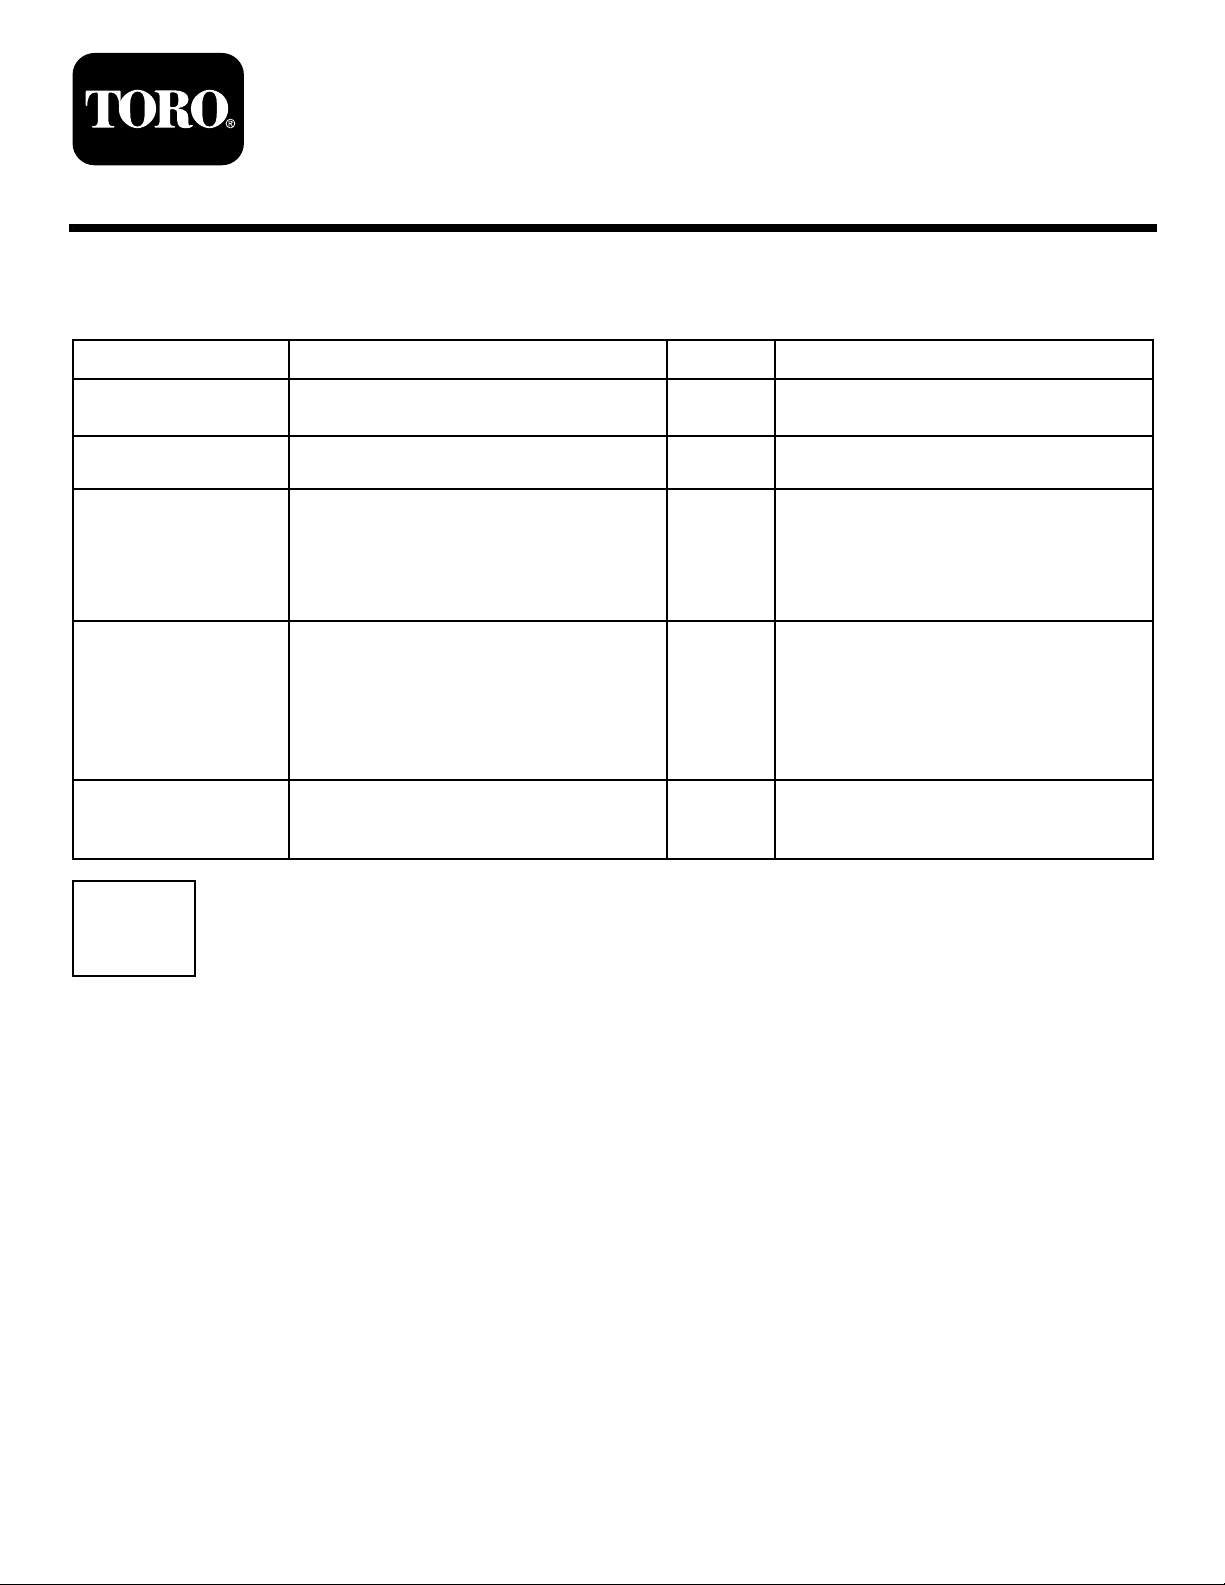
LooseParts
Usethechartbelowtoverifythatallpartshavebeenshipped.
FormNo.3365-242RevA
InstallationInstructions
ProcedureDescription
1
2
3
4
5
Nopartsrequired
Warningdecal1
Covermissingdecal
Blowercover1
Bolt(5/16x5/8inch)
U-nut1
Flatwasher(5/16inch)
Pushnut(5/16inch)
Leftguard
Backguard1
Frontguard1
Lowerguard1
Bolt(5/16x3/4inch)
Flangenut(5/16inch)
U-bolt(3/8x1inch)
Flangenut(3/8inch)
Weight3
Qty.
Use
–
1
1
1
1
1
2
2
2
4
Preparethemower.
Installthedecals.
Installthecovers.
Installtheguards.
Installthemountingbrackets.
1
PreparingtheMower
NoPartsRequired
Procedure
1.Thoroughlycleanmowerdeck.Alldebrismustbe
removedtoensurethekitwilltproperly.
2.Repairallbentordamagedareasandreplaceany
missingparts.
©2010—TheT oro®Company
8111LyndaleAvenueSouth
Bloomington,MN55420
Registeratwww.Toro.com.
OriginalInstructions(EN)
PrintedintheUSA.
AllRightsReserved
Page 2

2
g013158
6
7
8
3
InstallingtheDecals
Partsneededforthisprocedure:
1Warningdecal
1
Covermissingdecal
Procedure
1.Removetheexistingblowercover(Figure2).Save
thehardware.
2.Cleantheareawherethedecalswillgo(
3.InstallthedecalsasshowninFigure1.
Figure1).
InstallingtheCovers
Partsneededforthisprocedure:
1Blowercover
1
Bolt(5/16x5/8inch)
1U-nut
1
Flatwasher(5/16inch)
1
Pushnut(5/16inch)
Procedure
1.Removetheexistingbeltcover(Figure2).Saveall
existinghardware
2.Removethelatchfromthebeltcover.
3.Drilla11/32inchdiameterholewheretheexsitng
latchinthebeltcoverwasinstalled(
4.Installthebolt(5/16x5/8inch)intothecoverand
secureittothebeltcoverwithawasher(5/16inch)
andpushnut(5/16inch)(Figure2).
5.Installthebeltcoverandtightenthebolt(5/16x
5/8inch)(Figure2).
6.InstalltheU-nutintothebeltcoverbracket
Figure2).
(
7.Installthenewblowercover(Figure2).
Figure2).
1.Covermissingdecal
Figure1
2.Warningdecal
1.Existinghardware
2.Newblowercover
3.Existingbeltcover
4.Bolt(5/16x5/8inch)
Figure2
5.Drilla11/32inchdiameter
holeinthebeltcover
6.Flatwasher(5/16inch)
7.Pushnut(5/16inch)
8.U-nut
2
Page 3

4
InstallingtheGuards
Partsneededforthisprocedure:
1
Leftguard
1Backguard
1Frontguard
1Lowerguard
2
Bolt(5/16x3/4inch)
2
Flangenut(5/16inch)
Procedure
1.Removetheexistinghardwarearoundtheblowerfor
theleftguard,lowerguardandbackguard(
Saveallexistinghardware
2.Installtheleftguardwithexistinghardware
Figure3).
(
Figure3).
3.Installthebackguardwithexistinghardware
(Figure3).
4.Installthelowerguardwithexistinghardware
(Figure3).
5.Installthefrontguardwitha2bolts(5/16x3/4
inch)and2angenuts(5/16inch)(
Figure3).
Figure3
1.Existinghardware5.Frontguard
2.Leftguard6.Bolt(5/16x3/4inch)
3.Backguard7.Lowerguard
4.Flangenut(5/16inch)
3
Page 4

5
InstallingtheMounting
Brackets
Partsneededforthisprocedure:
2
U-bolt(3/8x1inch)
4
Flangenut(3/8inch)
3Weight
Procedure
Donotusetheweightthatisshippedwiththebagger.
Installthe3weightsunderthefootpanwith2U-bolts
and4angenuts(3/8inch)(Figure4).
Figure4
1.U-bolt3.Flangenut
2.Weight
4
 Loading...