

Toro 112-7070 Installation Instructions

Form No. 3358-314 Rev A
60in Recycler® Kit
For Turbo Force® Cutting Unit for Mid-Size Mowers
Model No. 112–7070
Installation Instructions
Note: Deter mine the left and right sides of the mac hine from the nor mal operating position.
Safety
Side Discharge or Mulch
Grass
W ithout the g rass deflector , discharge
co v er , or complete g rass catcher assembl y
mounted in place, y ou and other s ar e
exposed to blade contact and thr o wn de bris.
Contact with r otating mo w er blade(s) and
thr o wn de bris will cause injur y or death.
• Nev er r emo v e the g rass deflector fr om
the mo w er because the g rass deflector
r outes material do wn to w ard the turf.
If the g rass deflector is ev er dama ged,
r eplace it immediatel y .
• Nev er put y our hands or feet under the
mo w er .
• Nev er tr y to clear the discharge ar ea or
mo w er blades unless y ou disenga ge the
po w er tak e of f (PT O) lev er and tur n the
ignition k ey to of f. Also r emo v e the k ey
and pull the wir e of f the spar k plug(s).
Ensure the mo w er has the hing ed g rass deflector
that disperses clippings to the side and do wn
to w ard the turf , while in side disc harg e mode .
T o m ulc h g rass clippings , the baffles m ust be
installed into the mo w er as sho wn in the follo wing
ste ps .
© 2007—The Toro® Company
8111 Lyndale Avenue South
Bloomington, MN 55420
Register at www.Toro.com. Original Instructions (EN)
Printed in the USA.
All Rights Reserved

Installation
Loose Parts
Use the chart below to verify that all parts have been shipped.
Step
1
2
3
4
5
6
No parts required
No parts required
No parts required
Discharge plate
Bolt (3/8 x 1 inch)
Flange nut (3/8 inch)
Left bafe
Center bafe
Right bafe
Bolt, (3/8 x 7/8 inch)
Flange nut, (3/8 inch)
Bolt, (3/8 x 1 inch)
Washer, (13/32 inch)
Locknut, (3/8 inch)
Recycler blades
Description
Qty.
–
–
–
1
2
2
1
1
1
8
8
1
1
1
3
Prepare the mower.
Remove the existing blades.
Remove the existing bafes.
Install the discharge plate.
Install the bafes.
Install the new blades.
Use
Step
1
Preparing the Mower
No Parts Required
Procedure
1. T horoughly clean mo w er dec k. All debris m ust
be remo v ed to ensure baffles will fit properly
ag ainst mo w er dec k.
2. R e pair all bent or damag ed areas of mo w er
dec k and re place any missing par ts .
Step
2
Removing the Existing
Blades
No Parts Required
Procedure
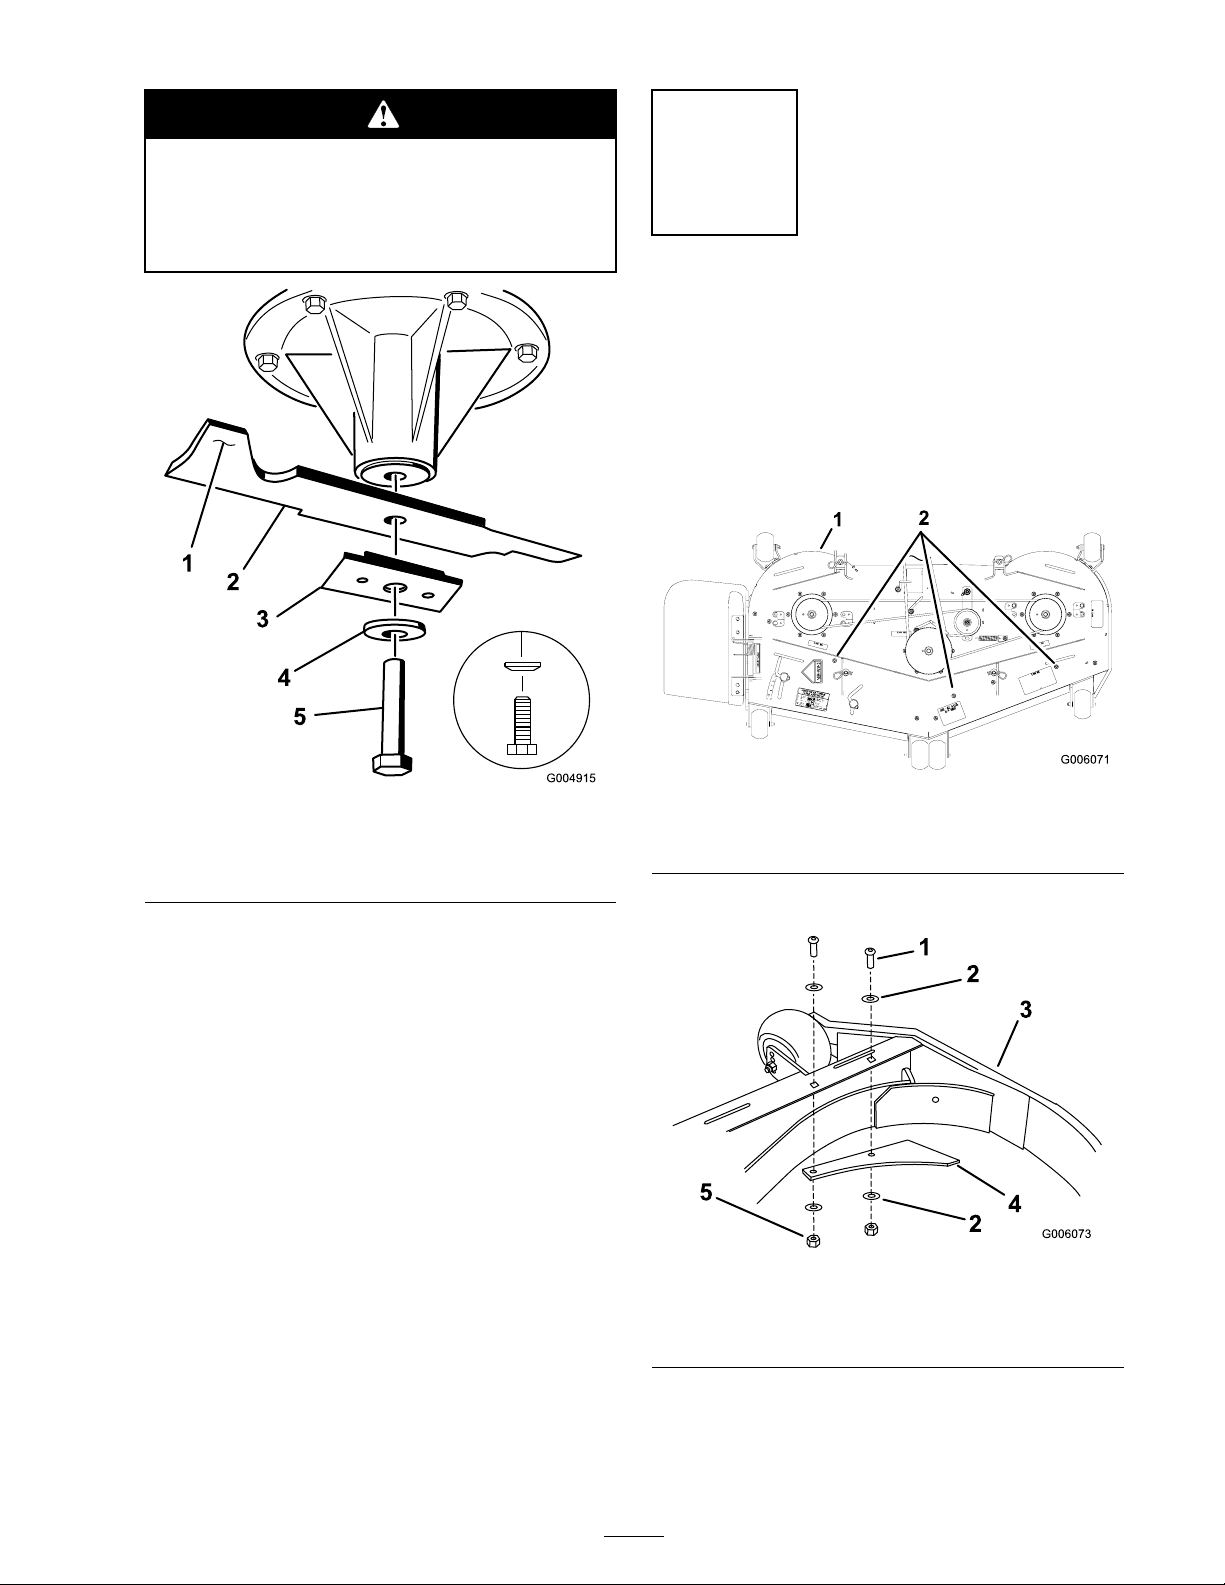
R emo v e the existing blades from the spindles
( Figure 1 ).
Note: Sa v e the blades for use when in side
disc harging mode . Use the blade bolt and w asher
for installing the recycler blades in Ste p 4.
2
A blade is shar p . Contact with shar p blade
can cause serious per sonal injur y .
W ear g lo v es or wrap shar p edges of the
blade with a ra g .
Step
3
Removing the Existing
Bafes
No Parts Required
Procedure
1. R emo v e the three n uts and bolts in the holes
needed to install the baffles ( Figure 2 ).
Figure 1
1. Sale area of blade 4. Curved washer
2. Blade 5. Blade bolt
3. Blade stiffener
Figure 2
1. Mower deck 2. Remove these nuts and
2. R emo v e the left front plate baffle ( Figure 3 ).
Figure 3
1. Bolt 4. Left front plate bafe
2. Washer
3. Left front of mower deck
bolts
5. Nut
Note: In the ste ps belo w , the bolts are
threaded into the mo w er dec k. R emo v e the
n uts first before remo ving bolts .
3
 Loading...