

Page 1
Form No. 3327-865
Muffler and Spark Arrester Kit
200 Series Z Masters
Part No. 105–1677
Part No. 105–1678
Part No. 105–1679
Part No. 105–3633
Installation Instructions
Important When finished installing the spark arrester, store this sheet with your Operator’s Manual for future reference.
Loose Parts
Note: Use the chart below to identify parts for assembly.
Description Qty. Use
Muffler
Gasket
Spark arrester
Clamp
Installing the Muffler
1. Stop the PTO, set the parking brake, stop the engine,
and remove the ignition key.
2. Allow the traction unit to cool completely.
3. Remove the muffler heat shield.
4. Remove the four nuts and lock washers securing the
muffler to the studs on the engine.
5. Remove the old muffler and gaskets from the engine,
ensuring that you clean all pieces of the gaskets off of
the engine exhaust manifold.
6. Slide the new gaskets over the studs on the engine.
7. Install the new muffler on the studs on the engine,
securing it tightly using the lock washers and nuts
removed in step 4.
8. Install the muffler heat shield.
1
2
1
1
Installing the muffler
Installing the spark arrester
2
3
1
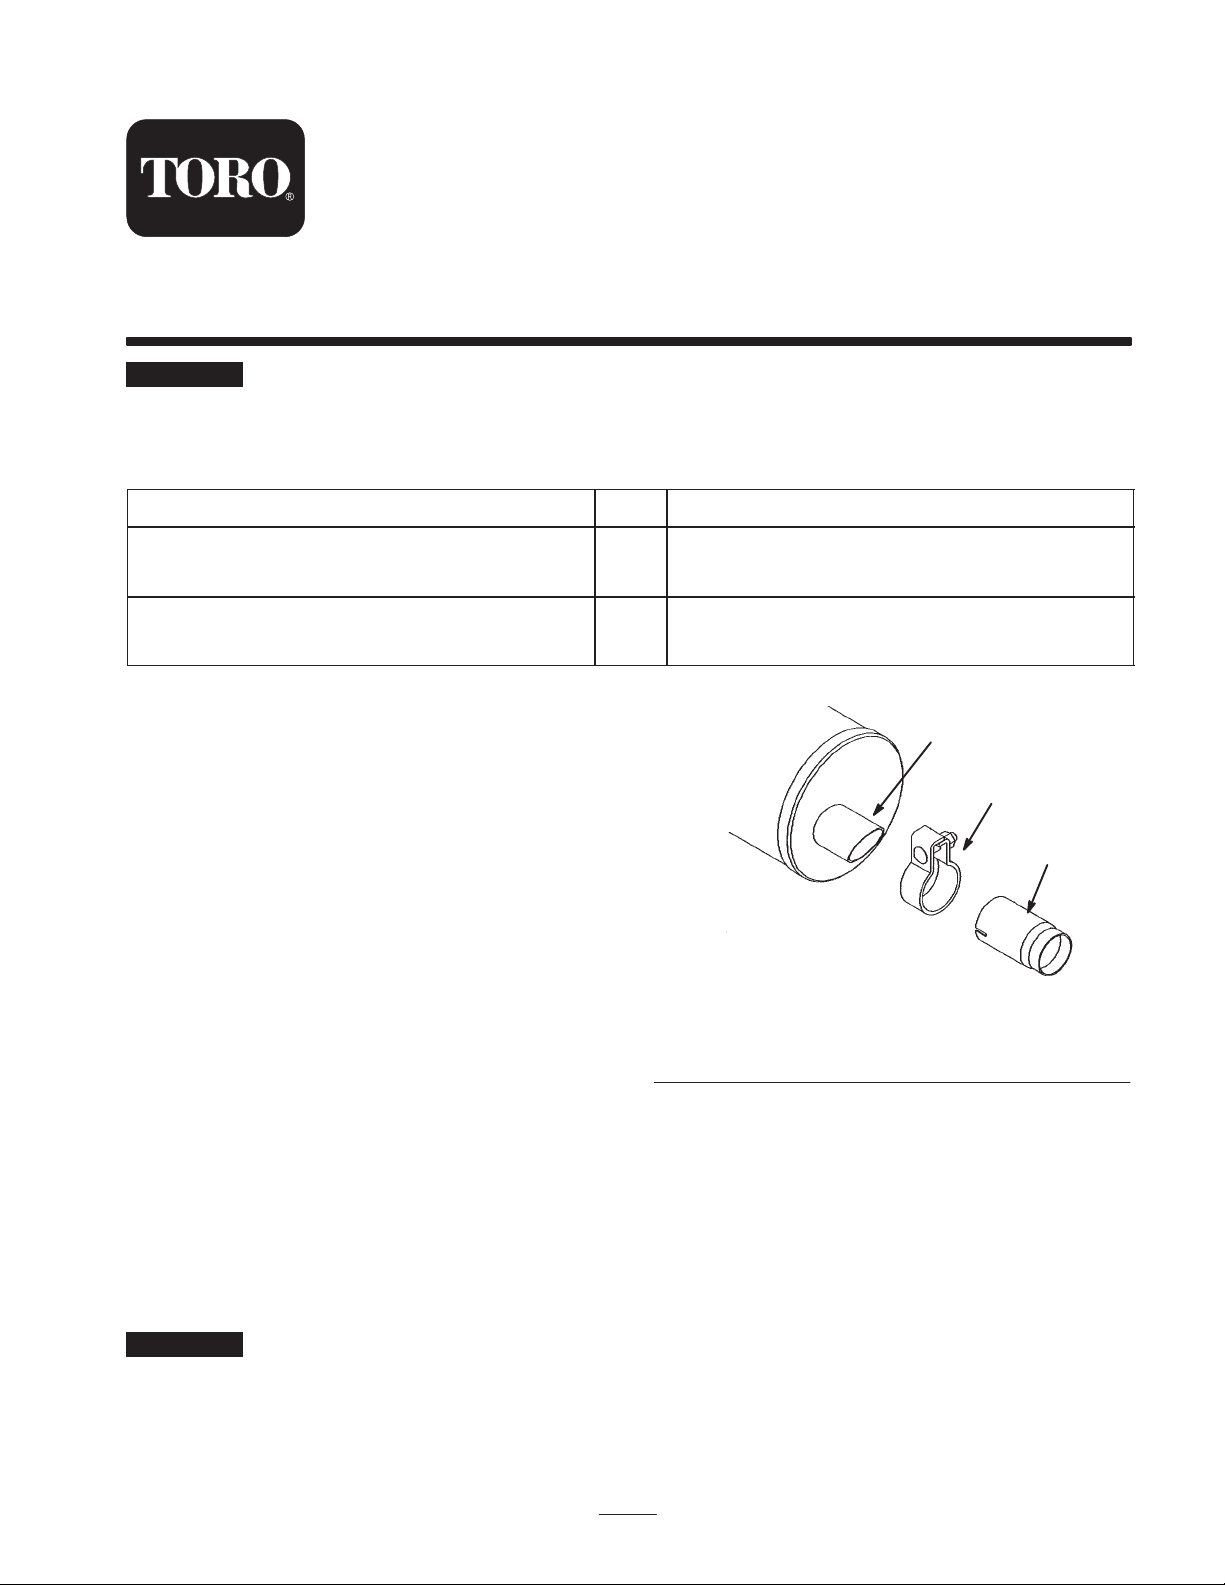
Figure 1
1. Spark arrester
2. Muffler exhaust outlet
2. Slide the clamp over the arrester until it is flush with the
slotted end of the arrester so that the clamp covers the
slots in the arrester (Fig. 1).
3. Clamp
Installing the Spark Arrester
1. Slide the slotted end of the spark arrester over the
exhaust outlet on the muffler as far as possible by hand
(Fig. 1).
Important Do not use a hammer or other instrument to
pound the arrester onto the exhaust outlet. Pounding on the
arrester will damage it.
2002 by The Toro Company
8111 Lyndale Avenue South
Bloomington, MN 55420-1196
3. Tighten the clamp.
Maintaining the Spark Arrester
Inspect the spark arrester every 50 hours for damage, such
as holes in the screen, and for build-up on the screen. If it
is damaged, replace it with a new spark arrester. If it is
dirty, remove it and clean the screen with a wire brush
and/or soak it in solvent. Install it as indicated in the
previous procedure.
All Rights Reserved
1
Printed in the USA
 Loading...