

Page 1
ASSEMBLY AND USE
INSTRUCTION BOOKLET
Congratulations on choosing the Top Flite Smart Stripe, the professional way to cut MonoKote
®
stripes for trimming film-covered models. Once you assemble and use the Smart Stripe for the first
time, you'll wonder how you ever got along without one. With a little practice, you'll be cutting trim
stripes as narrow as 1/32" with precision and consistency unattainable with a straightedge and
hobby knife.
The Smart Stripe can be mounted on your workbench for use, then slid off the attachment
screws in seconds if space is limited. Bench mounting is particularly useful when loading the roller,
as you can pull the film tight with one hand as you wind it on with the other.
Colors can be quickly changed by preparing several rollers (sold separately) with your favorite
shades, or loading more than one color on the roller supplied with your Smart Stripe.
The best part of using MonoKote stripes instead of the sticky-back variety is the satisfaction of
knowing your trim scheme won't come off after a few flights. Not only will you have a durable finish,
but you’ll also have forty-seven MonoKote colors from which to choose, and an unlimited range of
stripe widths.
Top Flite Model Mfg.
3002 N. Apollo Dr., Suite 1
Champaign, IL 61822
Technical Assistance – Call (217) 398-8970, ext. 5
© Copyright 2008 STRPP01 V 1.1
Page 2
2
ASSEMBLE THE
SMART
STRIPE
TOOLS REQUIRED
Screwdrivers – Phillips and a small flat blade type
7/16" Wrench or 4-way prop wrench (Great Planes
#GPMP2000)
Common pliers
6" draftsman's triangle or carpenter's square
Flat file
Bar soap or paraffin wax
Paper towels
Electric drill (Optional)
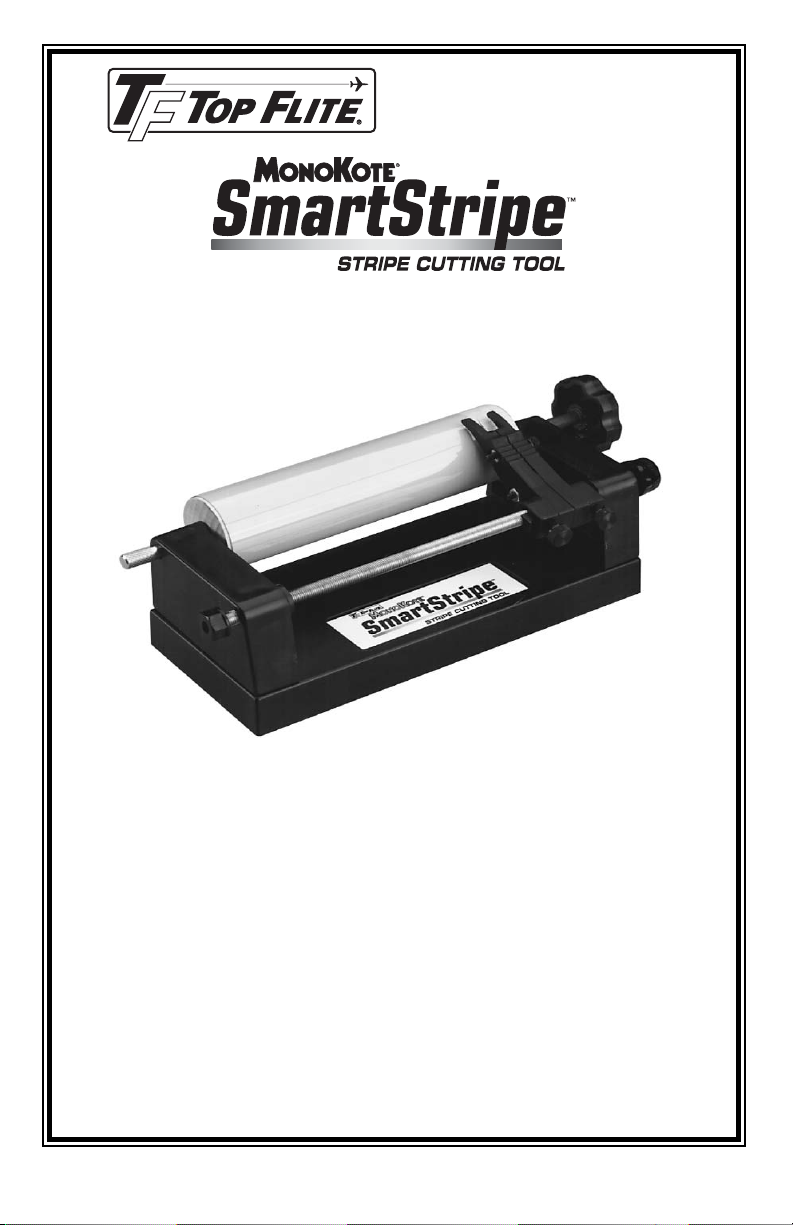
PARTS LIST
NOTE: Some parts will be found under the
cardboard insert.
QTY. PART # DESCRIPTION
1 STRP001 BASE
2 STRP002 UPRIGHT
1 STRP003 LEFT BLADE HOLDER
1 STRP004 RIGHT BLADE HOLDER
1 NYLON107 THREADED INSERT
1 HRDWD023 WOOD ROLLER
1 METAL068 DEAD PIN
1 SCRW106 1/4-20 ROLLER KNOB
1 SCRW105 1/4-32 x 8" THREADED SHAFT
1 KNOB001 KNOB FOR THREADED SHAFT
2 SCRW107 4-40 X 3/4" SCREW W/KNOB
2 SCRW102 6-32 X 1/4" SCREW W/KNOB
1 BLADE08 #11 BLADE
2 NUTS002 4-40 HEX NUT
1 NYLON108 1/4" UNTHREADED NYLON
HEX NUT
4 SCRW047 #6 X 1/2" SHEET METAL
SCREW
2 WSHR005 #4 FLAT WASHER
1 SCRW030 1/4-20 X 1" HEX HEAD BOLT
1 STRPP01 INSTRUCTIONS
1 STRPD01 DECAL
A WORD ABOUT SAFETY
Used properly, the Smart Stripe is a safe and
dependable tool. However, like a hobby knife, you are
dealing with a very sharp, exposed blade. The best
way to avoid being cut is to remove the blade when
loading the roller or any time you're not using it. We
also suggest covering the blade point with a small
balsa block when removing the stripes from the
roller. Keep the Smart Stripe out of children's reach
at all times.
ASSEMBLE THE BLADE HOLDER
NOTE: An exploded view diagram is provided in the
center of this booklet for reference while assembling
your Smart Stripe.
1. Slide a #4 flat washer onto each of the two
4-40 x 3/4" blade holder screws, then insert the
screws through the right half of the blade holder.
2. Install the left half of the blade holder onto
the screws.
3. Insert a #11 blade between the blade holders to see
how it is supposed to fit, then remove the blade. Please
be careful–the blade is sharp, sharp, sharp!
4. Join the blade holder halves together. First insert
two 4-40 hex nuts into their retainers on the left half
of the blade holder.Then finger tighten the two blade
holder screws.
5. Slide the threaded insert through the hole at the
back (square) end of the blade holder.
6. Start the 6-32 x 1/4" blade holder alignment
screws into the holes at the back of the blade holder,
but don't tighten them.
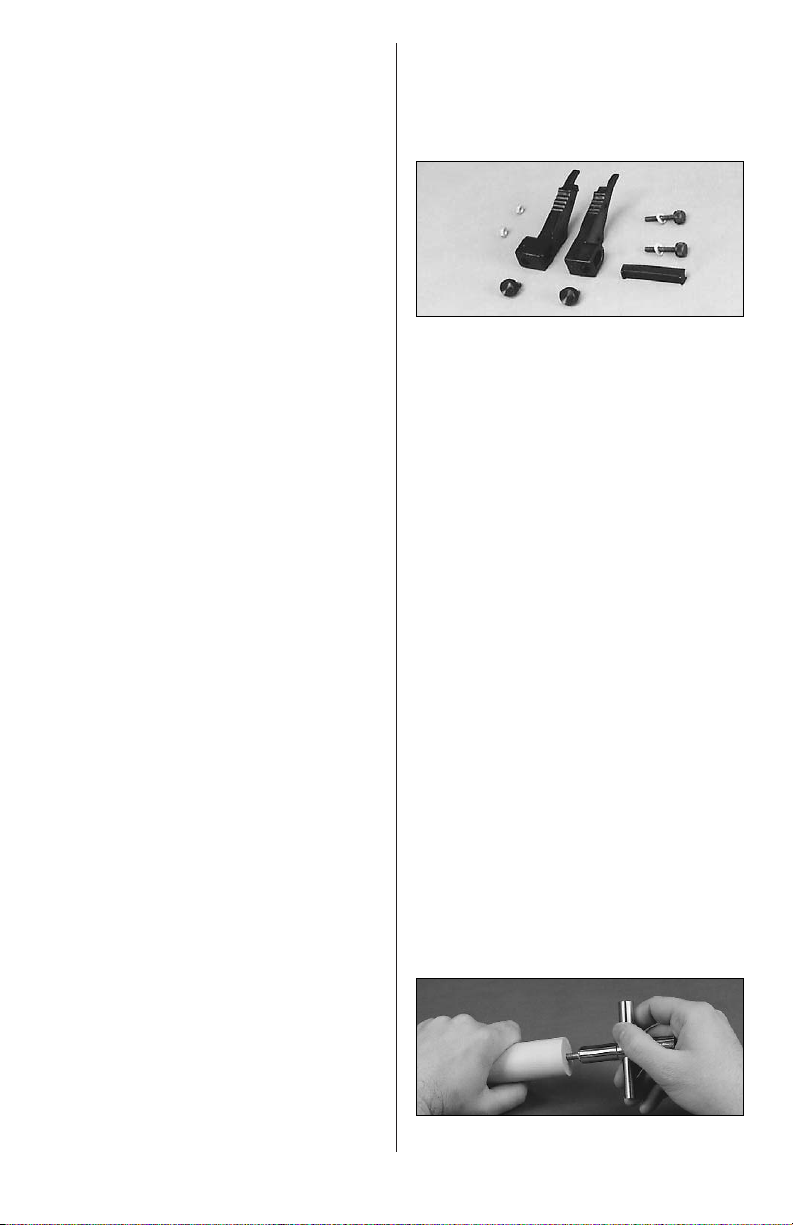
PREPARE THE ROLLER
1. Insert the dead pin into the holes in both ends of
the hardwood roller to determine which hole the
dead pin can be most easily inserted into and
removed from. Make threads in the hole at the
opposite end of the roller as explained in the
following steps.
2. Use the 1/4-20 x 1" hex head bolt to make
threads in the end of the hardwood roller determined
Page 3
3
in step #1. A four-way prop wrench works well for
this operation. Twist the bolt all the way into the roller
until the head contacts the wood, or strong
resistance is felt, then remove it.
3. Rub some bar soap or paraffin wax as a lubricant
onto the shaft threads of the 1/4-20 roller knob, then
screw the knob in and out of the threaded hole to
distribute the lubricant. Do not use excessive force
when performing this operation to avoid breaking the
knob or stripping the threads. If the threads tighten
up, remove the screw and add more lubricant. You
want this screw to be very easy to install and
remove.
FINAL ASSEMBLY
NOTE: The following steps describe assembling the
Smart Stripe for right-hand operation. If you are
left-handed, simply switch the position of the knobs,
hex nut and dead pin from one side to the other.
1. Now is an excellent time to decide where you
would like to mount your Smart Stripe. It need not be
mounted permanently, but it will help to have it
mounted when loading the roller. Position the base
where you will mount it, then use a pencil to mark
the mounting screw locations on your workbench.
2. Remove the backing from the pressure sensitive
decal and apply it to the recessed area in the base
as shown on the box cover.
3. Attach the right and left uprights to the base with
four #6 x 1/2" sheet metal screws. Notice that the
right side is fixed and the left side is adjustable.
Tighten the left side screws just enough to hold the
upright in position, but still allow it to be moved.
4. Use the roller as a spacer to set the distance
between the front and rear uprights, then tighten the
screws on the adjustable side. Make sure the
uprights are parallel to one another.
5. File or grind a 3/16" wide flat spot 1/16" from
one end of the threaded steel shaft.
NOTE: The blade holder should be “broken in” by
screwing the threaded shaft through it several times.
Turning the threaded shaft with an electric drill works
well for this job.
6. Insert the threaded shaft into the hole nearest you
in the left hand upright. Verify that the threaded
insert is centered, with its tabs overlapping the sides
of the right and left blade holder, then thread the
shaft through the blade holder assembly. Keep
turning until 1-1/2" of thread protrudes out the
opposite side of the blade holder. Insert the threaded
shaft through the hole in the other upright.
7. Install the small knob on the threaded shaft on
the flat spot end. Install the 8-32 x 1/8" Set Screw
into the small Knob and tighten.
8. Wrap a thick cushion of paper towels around the
threaded shaft to protect the threads, then grip it
tightly with pliers. Use a 7/16" prop wrench to thread
the nylon hex nut on the end of the shaft as shown.
NOTE: This special hex nut is intentionally not
threaded. When fully seated, it will remain locked in
position. Thread the hex nut onto the shaft until it just
touches the upright, to remove any side-play.
9. Hold the roller between the uprights with the
threaded hole on the right. Slide the 1/4" dead pin
through the left upright into the unthreaded hole in
the roller. Insert the roller knob through the right
upright, then screw it into the roller until you feel a
little resistance.
10. Check your work. Does the roller turn freely
without side-play? Does the threaded rod work
smoothly, also without side-play?
1/16" 3/16" Threaded Shaft
Page 4

1 Base
2 Upright
3L Blade Holder – Left
3R Blade Holder – Right
4 Wood Roller
5 1/4" Dead Pin
6 1/4-20 Roller Knob
7 Threaded Steel Shaft
8 Shaft Knob
9 4-40 Screws W/Knob
10 #4 Washers
11 6-32 Screws W/Knob
12 4-40 Hex Nuts
13 Nylon Hex Nut
14 #6 x 1/2" Sheet Metal Screws
15 8-32 x 1/8" Set Screw
16 #11 Blade
17 Threaded Insert
See Inset at Right
Blade Holder Inset
10
16
9
17
11
12
14
1
2
15
8
5
7
2
13
6
4
14
3R
3L
Page 5

6
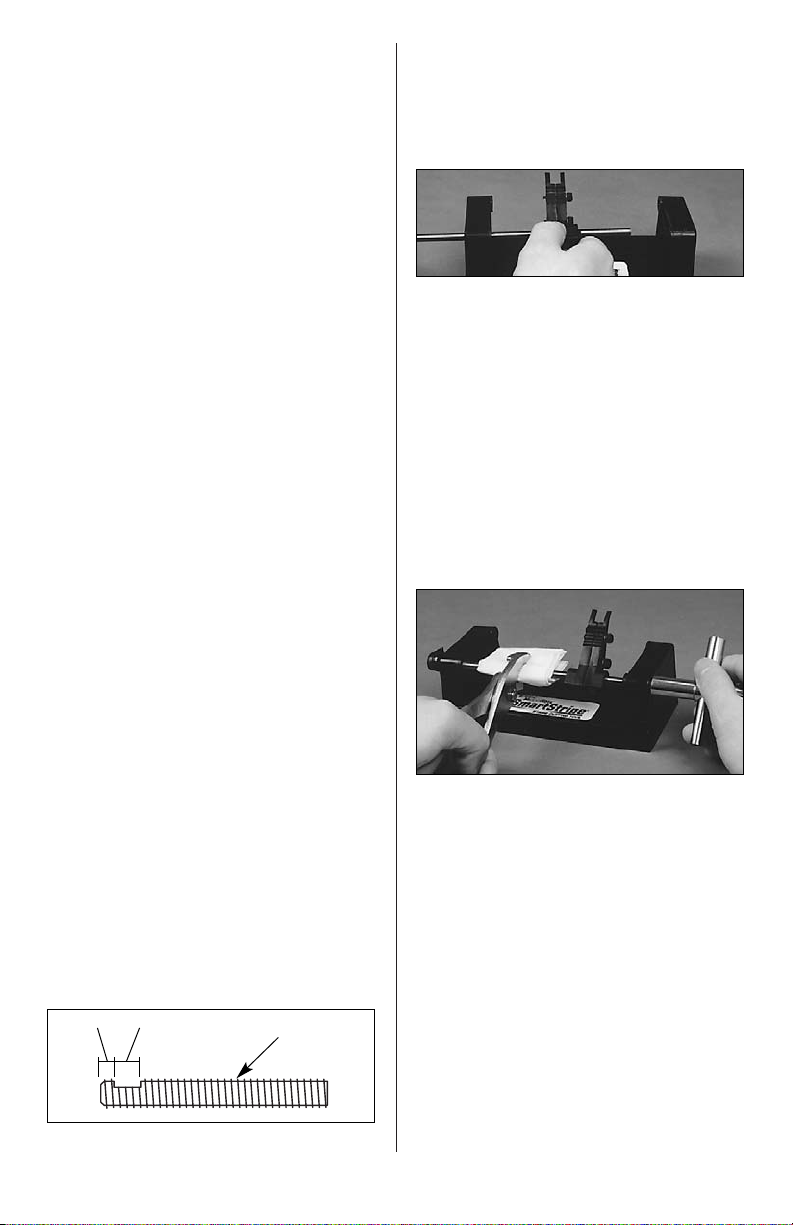
BLADE ALIGNMENT
IMPORTANT: The blade must be exactly
perpendicular to the roller or your stripes will not be
straight and even.
1. Install a #11 blade as shown above.
2. Raise the blade holder to a vertical position.
Check the angle between the centerline of the blade
holder and the base with a triangle – it should be 90
degrees. If needed, the blade holder can be tilted left
or right by adjusting the two screws on the back
edge. Don't overtighten the adjustment screws or
you will cause the blade holder to bind on the
threaded rod. When the angle is correct, gently
finger tighten the adjustment screws evenly on the
back of the blade holder to allow free movement
when the threaded rod is rotated. Re-check the angle.
MOUNTING THE SMART STRIPE
TO YOUR BENCH
We have found it much easier to load the roller when
the Smart Stripe is mounted to the workbench. When
cutting stripes, mounting is not necessary.
1. Decide where to mount your Smart Stripe, then
measure and mark two screw locations exactly
6-7/16" apart. You may have already marked these
locations on your workbench prior to assembly.
Center punch the hole locations, drill 1/8" pilot holes,
then screw a #8 x 5/8" sheet metal screw (not
included) part-way into your work bench at each
mark. Test fit the Smart Stripe by setting it on the
screws and sliding it back or forth to seat it. Adjust
the height of the screws until the base will just slide
under the screw heads and "click" into position.
USING YOUR
SMART
STRIPE
LOADING THE ROLLER
1. Cut a 4"-wide strip of MonoKote to whatever
length you require. A simple way to cut a 6' long strip
is to cut a 4" width off a full roll by using a finetoothed razor saw.
2. Place the MonoKote on your work bench in front
of you, with the loose end coming off the top and
pointing toward the roller. Position the MonoKote
strip about 1/16" from the left side of the roller. Use
cellophane tape across the entire width of the
MonoKote to fasten it to the top of the roller.
3. Hold the MonoKote roll firmly with your left hand
while winding it onto the roller with your right. Slowly
move the MonoKote across the roller about 1/32"
per rotation so that one edge will be staggered like
shingles toward the center of the roll. When you
reach the end of the roll, secure the MonoKote in
position with a strip of cellophane tape across the
entire width.
4. Wrap a strip of cellophane tape around the
MonoKote shingles, extending it over onto the roller.
This technique will prevent the MonoKote from
shifting sideways.
Wood Roller
Shingled MonoKote
Note: Drawing Not To Scale
Page 6

7
CUTTING STRIPES
1. Position the blade over the untaped end of the
MonoKote, about the same distance in as the width
of the shingles. Gently press down on the blade
holder while rotating the roller. Keep turning the
roller until the blade reaches the wood.
2. Remove the scrap MonoKote. Check that the cut
edge on the roller is straight and smooth. Move the
blade holder over 1/8" (4 revolutions of the knob)
and make a test stripe.
3. Remove and examine the test stripe. The edges
should be parallel and straight – if not, try another
cut using less pressure on the blade holder. After a
few practice cuts, you will develop a feel for how
much pressure is enough. With practice (and an
accurately aligned blade) you will be able to cut
1/32" wide panel line stripes with ease.
4. Remember, each revolution of the threaded shaft
knob moves the blade holder 1/32".
REVOLUTIONS STRIPE WIDTH
1 --------------1/32"
2 --------------1/16"
3 --------------3/32"
4----------------1/8"
6 --------------3/16"
8----------------1/4"
12----------------3/8"
16----------------1/2"
Use sharp blades.MonoKote will dull the edge
of a new blade after only a few cuts and, although it
will continue cutting, the stripe edges will be ragged
and the blade won't track straight.
Make sure the blade is fully inserted into the
blade holder,so only the tip of the blade contacts the
MonoKote when cutting.
More than one color of MonoKote can be loaded
at one time. Just stack a couple of colors, then roll them
on tightly. Also, narrower strips of different colors can
be loaded on the roller side-by-side.
Periodically check the fit of the uprights
against the roller. There should be no end-play.
If you get fine "hairs" when cutting narrow
stripes you are: (a) pressing too hard on the blade
holder, causing the blade to flex or (b) the blade is
out of alignment with the roller.
Use sharp blades, light pressure, and tightly
rolled MonoKote for consistently good stripes. A little
practice also helps.
STRIPE APPLICATION
Install a Top Flite Hot Sock™ on your sealing
iron. Set the iron for about one-third less heat than
you use for covering.
In most cases the MonoKote backing will come
off without any help. Position the stripe and tack it
down at one end. Gently pull the stripe taut, close to
the surface you are covering. For straight lines, tack
the stripe down at its other end point. Set the iron
down on the stripe at several points without sliding it
back and forth – just press down. Keep pressing the
stripe onto the surface until the entire length is in
position.
After applying all of the stripes to your model
as described, turn up the heat to your normal
covering setting and seal the stripes to the surface
with a gentle sliding motion, keeping the iron parallel
with the stripe.
When applying wide stripes, tack one end
down; then, while holding the stripe slightly off the
surface, iron it down starting at the tacked end. Keep
working the iron toward the open end. By so doing
you will be squeezing out the air bubbles as you
proceed. If you do get a few air bubbles, prick them
with a needle, then touch them with the iron to expel
the trapped air.
Page 7

Narrow stripes can be made to go around
curves. Stripes with widths of 1/8" or less work the
best. Heat the stripe with the tip of the iron as you
work it around the curve, a little at a time.
Clean off any color residue from around the
edges with Top Flite CA Debonder (TOPR1028) or
lacquer thinner. This should only be done if color
residue is visible. Don't apply debonder or thinner to
all stripes.
We hope you enjoy using your Smart Stripe as
much as we do in the Top Flite model shop. Before
you know it, you will be turning out professionallooking, low-maintenance trim schemes that will
generate lots of "oohs" and "ahs" at the flying field.
Top Flite®MonoKote®Hot Sock™Iron Cover
Very inexpensive and easy to use, the soft, 100%
cotton Hot Sock simply ties over your sealing iron’s
shoe to prevent it from scratching and hazing your
covering. Hot Sock also protects your sealing iron,
extending its working life. TOPR2175
Hobbico®#11 Knife Blades
The Top Flite Smart Stripe works best with a fresh,
sharp cutting blade. Made of hardened carbon steel,
Hobbico #11 blades are ground to a long-lasting,
razor-sharp edge. Each low-priced package contains
100 blades. Keep a supply on
hand! HCAR0311
Top Flite®MonoKote®Trim Seal Tool
Seal hinge gaps, wing saddles, inside corners and
intricate trim schemes with ease, using the ingenious
Trim Seal Tool. Features include high/low heat control
and adjustable shoe depth. Two tips and an aluminum
stand are also included.
TOPR2200
Top Flite®MonoKote®SmartCut™Trimming Tool
Specifically designed for trimming covering material
around a model airplane’s unique contours,
SmartCut helps even first-time finishers achieve
clean edges and virtually invisible seams. Two
standard #11 blades are included.
TOPR2400
Top Flite®Smart Stripe™Wooden Rollers
These optional wooden rollers, designed specifically
for the Smart Stripe, let you keep your favorite
MonoKote colors always wrapped and ready for
cutting into stripes. They're economical and easily
interchangeable on the cutting tool. TOPR2425
 Loading...