

Page 1
1
M4AC
Manual V1.0
2020.08
www.toolkitrc.com
ToolkitRC Technology (Shenzhen) Co.. Ltd
@ToolkitRC 2020
Page 2

2
Introduction
Tips
Important
Information
Thank you for purchasing the M4AC balance
charger, please read this manual carefully before use.
Key Points
Further information
To ensure you have the best experience with this
product please scan the QR code below to stay up to
date with news, information and firmware updates for
your charger. Or visit www.toolkitrc.com.
@ToolkitRC 2020
Page 3

3
Safety
1. M4ACallows input voltage of AC100-240V, do not
change or modify the power cable and ensure the
charger is only connected to a suitable AC power outlet.
2. Do not use this product in the environment of heat,
humidity, flammable liquids or explosive gas.
3. Please do not use this charger without supervision.
Never leave charging batteries unattended.
4. When not using this product, please unplug the input
power.
5. When using the charging function, please set a
current that matches the battery. Do not set an excessive
current for charging to avoid damage to the battery.
Check the guidelines of your battery’s manufacturer for
correct charging instructions.
@ToolkitRC 2020
Page 4

4
Contents
Introduction
Key Points
Further information
Safety
Contents
M4AC Layout
Quick start
Charge settings
1,Battery type setting
2,Current setting
Start charging
Terminal voltage setting and manual
calibration
.....................................................................
..........................................................
.............................................................
.............................................
................................................................
........................................................
.............................................................
....................................................
.........................................
..............................................
.....................................................
...........................................................
2
2
2
3
4
6
7
9
9
11
12
14
DEFAULT.
Specification
............................................................
.......................................................
@ToolkitRC 2020
14
15
Page 5

5
Product description
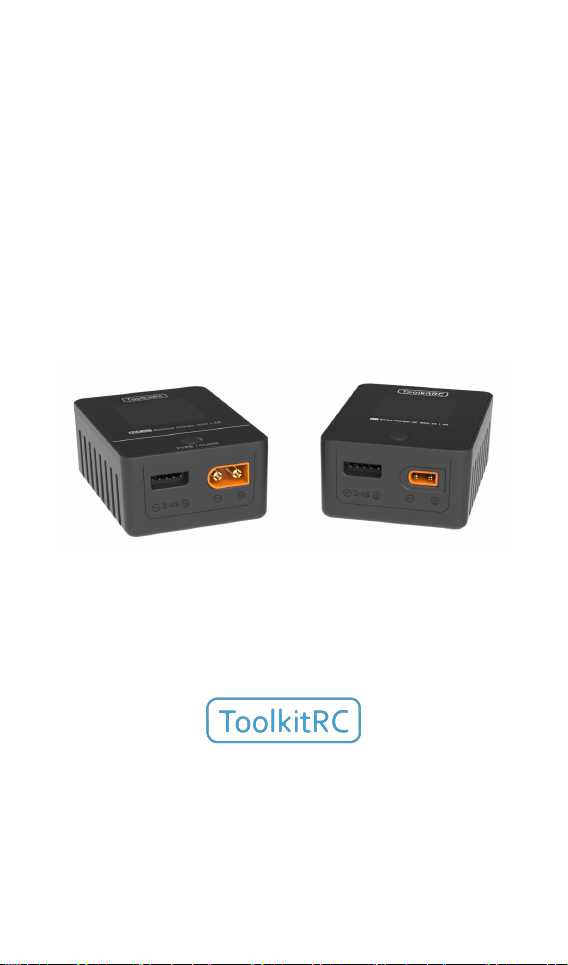
The M4ACis an AC balance charger. Small in size,
yet high in power density. Featuring an IPS wide viewing
angle display and charging accuracy as low as 5mV.
Charge and balance management of LiPo, LiHV,
LiFe & Lion 1-4S batteries.
Wide voltage input AC 100-240 30W.
Charging current: Maximum 2.5A @MAX 25W.
Lithium battery cut-off voltage can be set (TVC
function).
Battery voltage can be manually calibrated.
Charging accuracy: <0.005V.
Balance current: 200mA.
1.54 inch, IPS full viewing angle display.
High resolution 240*240 pixels.
@ToolkitRC 2020
Page 6
6
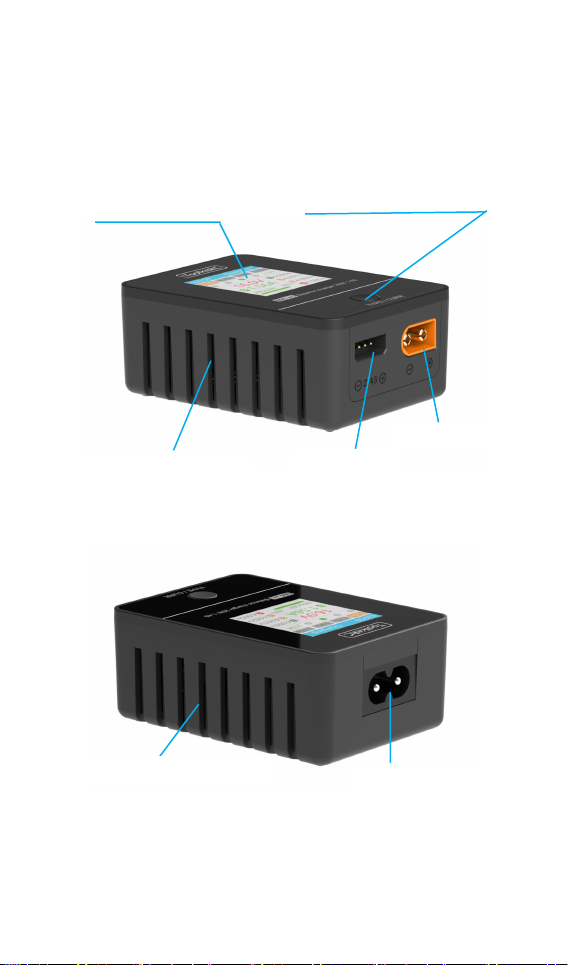
M4ACLayout
display screen
Type/Current
(Long press: Type
Short press: Current)
output main port
balance port
AC input port
Heat dissipation vents
heat dissipation vents
Front
Back
@ToolkitRC 2020
Page 7
7
Quick start
1,Connect the M4ACto a suitable 100-240V AC to
power outlet.
2,The display shows the boot logo and stays for 2
seconds.
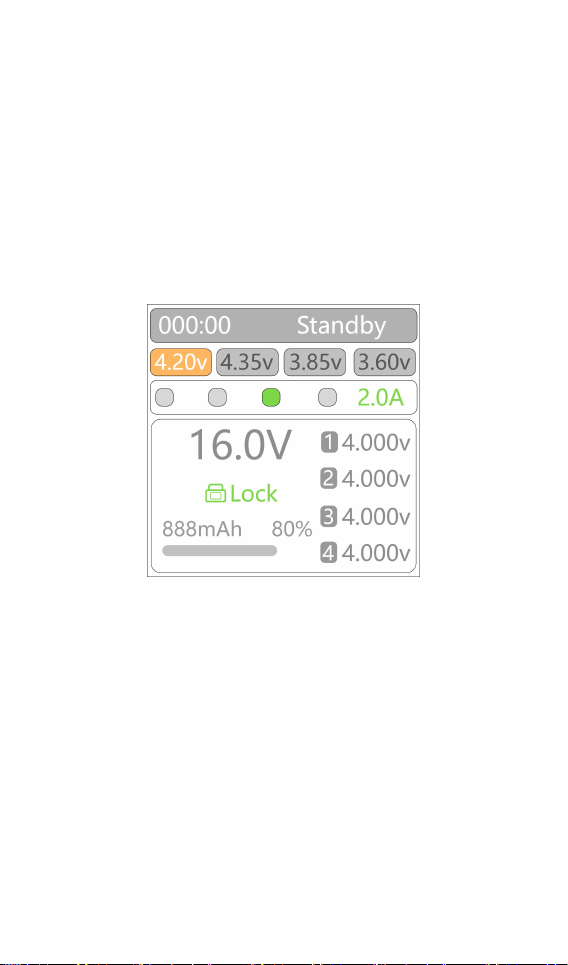
3,After booting up, the screen enters the main
interface as shown below:
4,Short press [Type/Current] key to release the locked
state.
5,Long press [Type/Current] key to select the cut-off
voltage to be charged.
6,Short press [Type/Current] key to select the current
to be charged.
7,When the output main port and the balance port
voltage match, it will automatically start charging.
@ToolkitRC 2020
Page 8

8
=================================
Tips:
Every time you turn on the charger, you need to
press the button once to release the lock. This safety feature
is to prevent incorrect selection of battery type and current.
=================================
@ToolkitRC 2020
Page 9
9
Charging settings
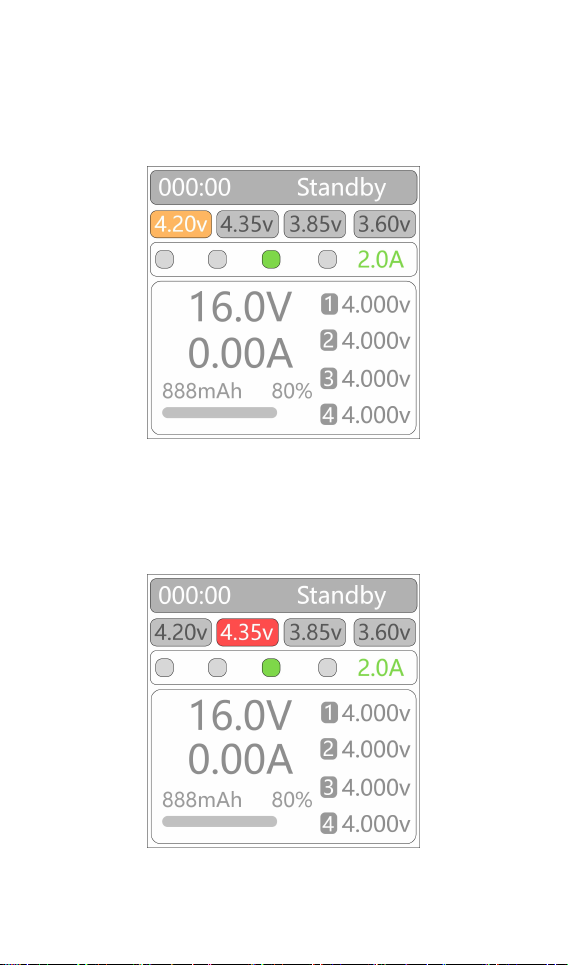
After the power is turned connected and the charger
unlocked, the screen will display the following.
1,Battery type setting
Long press [Type/Current] key to select battery
cut-off voltage (battery type), the display is as follows.
Different cut-off voltages correspond to different
@ToolkitRC 2020
Page 10

10
battery types. The following table:
4.20V
Lipo
4.35V
LiHv
3.85V
Lipo-Stroage
3.60V
LiFe
Important:
1, Choosing the wrong battery type to charge may
Vocabulary explanation:
=================================
damage the battery, the charger, and cause fire hazards.
Please choose carefully.
2, Please do not use this product to charge the battery
that is not marked with the battery type.
=================================
1, Lipo: Often referred to as a lithium polymer battery, a
battery with a nominal voltage of 3.70V and 4.20V when fully
charged.
2, LiHV: Often referred to as a high-voltage lithium
battery, a battery with a nominal voltage of 3.85V and 4.35V
when fully charged.
3, LiFe: Often referred to as an iron-lithium battery, a
battery with a nominal voltage of 3.30V and 3.60V when fully
charged.
4, Lion: Often called a lithium-ion battery, a battery with
a nominal voltage of 3.60V and 4.10V when fully charged.
@ToolkitRC 2020
Page 11
11
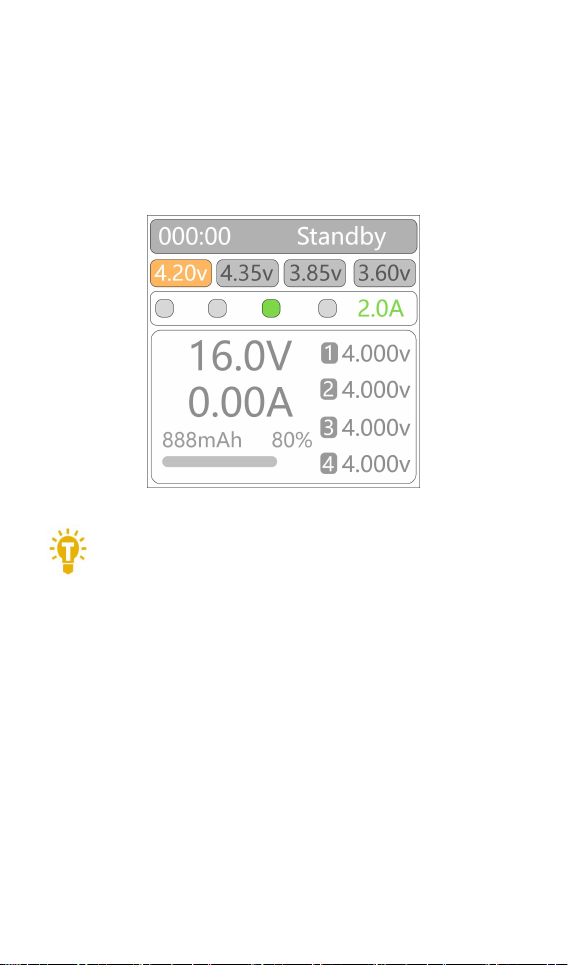
2,Current setting
Tips:
When selecting the current, it is recommended to use
a charging rate of 1C-2C. For example: 1000mAh
Short press [Type/Current] key to select the
charging current, the current can be selected from 4
levels of values, 0.5A, 1.0A, 2.0A, 2.5A. The display is as
follows.
=================================
battery, it is recommended to use 1.0A-2.0A for charging,
which will effectively improve the cycle life of the battery.
Always check the battery manufacturers guidelines and
charging instructions before charging.
=================================
@ToolkitRC 2020
Page 12
12
Start charging
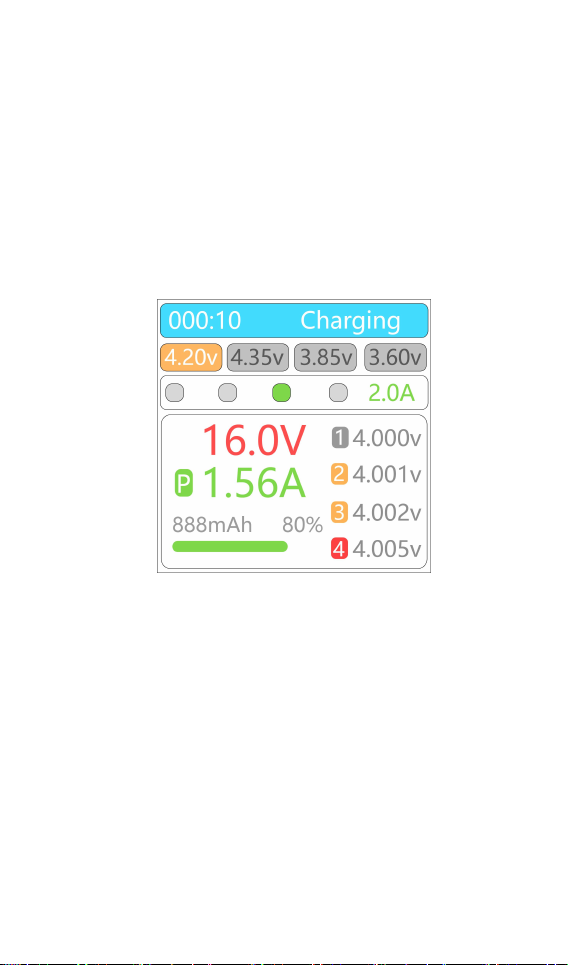
After setting the battery voltage and current,
connect the battery. After the charger detects that the
voltage between the main port and the balance port
matches, it will automatically start charging.
Display as follows:
@ToolkitRC 2020
Page 13

13
Display content description:
Tips:
When charging a 1S battery, the battery voltage needs
000:10:This charging time.
Charging:Charger working status.
4.20v:The selected rechargeable battery type.
4.35v 3.85v 3.60v:Other types of rechargeable batteries.
16.0V:Current rechargeable battery voltage.
1.56A:Current charging current.
P:Current limit sign. P:Power current limit, T:High
temperature current limit, F:The battery or one of the
cells is full.
888mAh:Accumulated capacity that has been charged.
1 4.000V: The first battery voltage, this cell is not
balancing
2 4.001V: The second battery voltage, this cell is slowly
balancing
3 4.002V: The third battery voltage, this cell is slowly
balancing
4 4.005V: The fourth battery voltage, this cell is quickly
balancing
=================================
to be provided to the balance port at the same time, so that
the charger can recognize and start charging.
=================================
@ToolkitRC 2020
Page 14
14
Terminal voltage setting and
manual calibration
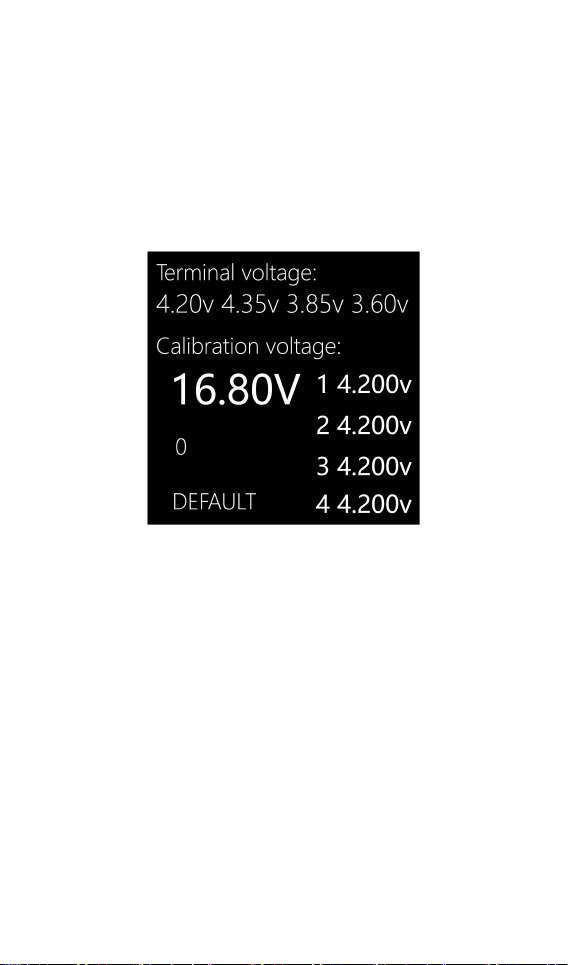
Before connecting to the power supply, press and
hold [Type/Current] key to enter the calibration mode,
as shown below:
Terminal volte: The terminal voltage after the battery is
fully charged. Each battery allows to modify the voltage
range of plus or minus 10mV.
Calibration voltage: Battery calibration voltage, if the cell
voltage readings appear to be incorrect, use a
high-quality voltage meter to measure the actual
voltage, and then set this value to be the same as the
meter. To achieve voltage calibration.
DEFAULT: Restore to factory default.
@ToolkitRC 2020
Page 15

15
Specification
Charging
Input
AC 100-240V @MAX 30W
Battery
type
LiPo LiHv LiFe LipoStorage
1-4S
Charging
power
0.5-2.5A @ 25W
Balance
current
MAX 200mA @2-4S
Charging
accuracy
<0.005V
Display
LCD
IPS 1.54 inch 240*240 resolution
Product
Size
75mm*54mm*30mm
Weight
120g
Individual
packing
Size
80mm*58mm*58mm
Weight
180g
@ToolkitRC 2020
 Loading...