


 Loading...
Commander
Automatic Wrapper
User’s Guide
Model 0648
64058950 (R04)

©Mettler-Toledo, Inc. 2010
No part of this manual may be reproduced or transmitted in any form or by any means, electronic or mechanical, including photocopying and recording, for any purpose without the express written permission of Mettler-Toledo, Inc.
U.S. Government Restricted Rights: This documentation is furnished with Restricted Rights.

METTLER TOLEDO®
Customer Feedback
Attention: Retail Quality Manager - MTWR
If you have a problem with one of our products or publications, or just a suggestion on how we can serve you better, please fill out this form and send it to the address on the opposite side of this page (U.S. postage paid), or fax it to us at (614) 438-4355. Your feedback will help us to improve product performance, quality, and service.
Part / Product Name:
Part / Model Number: |
|
Date: |
|
|
|
Provided By: |
|
|
|
|
|
Customer Name: |
|
|
|
|
|
Address: |
|
|
|
|
|
Phone Number: |
Fax Number: |
|
|
|
|
|
|
|
Your comments on product performance, quality, or service: |
|
|
Do not write in space below. For METTLER TOLEDO use only.
Response (where appropriate). Include root cause analysis and corrective action taken.
METTLER TOLEDO 64058950
METTLER TOLEDO
1900 Polaris Parkway
Columbus, Ohio 43240
METTLER TOLEDO® is a registered trademark of Mettler-Toledo, Inc.
©2010 Mettler-Toledo, Inc. Printed in USA


INTRODUCTION
This publication is provided solely as a guide for individuals who have received Technical Training in servicing the METTLER TOLEDO product.
Information regarding METTLER TOLEDO Technical Training may be obtained by writing to:
Mettler-Toledo, Inc. 1900 Polaris Parkway Columbus, Ohio 43240 (614) 438-4511
FCC Notice
This device complies with Part 15 of the FCC Rules and the Radio Interference Requirements of the Canadian Department of Communications. Operation is subject to the following conditions: (1) this device may not cause harmful interference, and (2) this device must accept any interference received, including interference that may cause undesired operation.
This equipment has been tested and found to comply with the limits for a Class A digital device, pursuant to Part 15 of FCC Rules. These limits are designed to provide reasonable protection against harmful interference when the equipment is operated in a commercial environment. This equipment generates, uses, and can radiate radio frequency energy and, if not installed and used in accordance with the instruction manual, may cause harmful interference to radio communications. Operation of this equipment in a residential area is likely to cause harmful interference in which case the user will be required to correct the interference at their own expense.
METTLER TOLEDO RESERVES THE RIGHT TO MAKE REFINEMENTS OR
CHANGES WITHOUT NOTICE.

PRECAUTIONS
READ this manual BEFORE operating or servicing this equipment.
FOLLOW these instructions carefully.
SAVE this manual for future reference.
DO NOT allow untrained personnel to operate, clean, inspect, maintain, service, or tamper with this equipment.
ALWAYS DISCONNECT this equipment from the power source before cleaning or performing maintenance.
CALL METTLER TOLEDO for parts, information, and service.

 WARNING
ONLY PERMIT QUALIFIED PERSONNEL TO SERVICE THIS
EQUIPMENT. EXERCISE CARE WHEN MAKING CHECKS,
TESTS AND ADJUSTMENTS THAT MUST BE MADE WITH
POWER ON. FAILING TO OBSERVE THESE PRECAUTIONS
CAN RESULT IN BODILY HARM AND/OR PROPERTY
DAMAGE.

 WARNING
FOR CONTINUED PROTECTION AGAINST SHOCK
HAZARD CONNECT TO PROPERLY GROUNDED OUTLET
ONLY.
DO NOT REMOVE THE GROUND PRONG.

 WARNING
DISCONNECT ALL POWER TO THIS UNIT BEFORE
REMOVING THE FUSE OR SERVICING.

 CAUTION
BEFORE CONNECTING/DISCONNECTING ANY INTERNAL ELECTRONIC COMPONENTS OR INTERCONNECTING WIRING BETWEEN ELECTRONIC EQUIPMENT ALWAYS REMOVE POWER AND WAIT AT LEAST THIRTY (30) SECONDS BEFORE ANY CONNECTIONS OR DISCONNECTIONS ARE MADE. FAILURE TO OBSERVE THESE PRECAUTIONS COULD RESULT IN DAMAGE TO OR DESTRUCTION OF THE EQUIPMENT OR BODILY HARM.
 CAUTION
OBSERVE PRECAUTIONS FOR HANDLING ELECTROSTATIC SENSITIVE DEVICES.

Publication Revision
History
Part Number |
Date |
Revisions |
64058950
08/07 New manual
Rev 00
64058950 |
04/08 |
Tray size update (ch4); Fusion GUI update (ch 6) |
|
Rev 01 |
|||
|
|
||
|
|
|
|
64058950 |
09/08 |
Fusion Added; Reports Chapter Added (9) |
|
Rev 02 |
|||
|
|
||
|
|
|
|
64058950 |
05/10 |
Images updated in Chapter 7 |
|
Rev 03 |
|||
|
|
||
|
|
|
|
|
|
Expanded and updated Chapter 1, Chapter 2 Operation, |
|
64058950 |
07/10 |
Chapter 6 Controller, and 8 Troubleshooting. Added |
|
Rev 04 |
Fusion 4.2 enhancements. Added Chapter 10 label |
||
|
|||
|
|
requirements. |
Disposal
In conformance with the European Directive 2002/96/EC on Waste Electrical and Electronic Equipment (WEEE) this device may not be disposed of in domestic waste. This also applies to countries outside the EU, per their specific requirements.
Please dispose of this product in accordance with local regulations at the collecting point specified for electrical and electronic equipment.
If you have any questions, please contact the responsible authority or the distributor from which you purchased this device.
Should this device be passed on to other parties (for private or professional use), the content of this regulation must also be related.
Thank you for your contribution to environmental protection.
CONTENTS
1 |
Commander System........................................................................................ |
1-1 |
|
Introduction ........................................................................................................................ |
1-1 |
|
Power and Temperature Specifications ................................................................................. |
1-2 |
2 |
Operation ....................................................................................................... |
2-1 |
|
System Power Up ................................................................................................................ |
2-1 |
|
Wrapper Power Switch ........................................................................................................ |
2-2 |
|
Controller Power Switch ...................................................................................................... |
2-3 |
|
Controller - Finding Product PLUs......................................................................................... |
2-4 |
|
Calling up PLUs ..................................................................................................................... |
2-4 |
|
Tare and Graphical Tare....................................................................................................... |
2-6 |
|
PLU Screen ......................................................................................................................... |
2-7 |
|
Controller - Quick Edits...................................................................................................... |
2-10 |
|
Film Tension ..................................................................................................................... |
2-13 |
|
Printer – Label Printing...................................................................................................... |
2-14 |
|
Belt Temperature Controls ................................................................................................. |
2-15 |
|
Auto Shut-offs ................................................................................................................... |
2-16 |
|
Stop Switch ......................................................................................................................... |
2-17 |
|
Normal Shut-down............................................................................................................. |
2-18 |
3 |
Film Loading .................................................................................................. |
3-1 |
|
Loading Instructions ............................................................................................................ |
3-1 |
4 |
Trays.............................................................................................................. |
4-1 |
|
Loading the Trays ................................................................................................................ |
4-1 |
|
Tray Specifications .............................................................................................................. |
4-2 |
|
Tray Reference Chart – 11” Film .......................................................................................... |
4-3 |
|
Tray Reference Chart – 13” Film .......................................................................................... |
4-4 |
5 |
Printers.......................................................................................................... |
5-1 |
|
Introduction ........................................................................................................................ |
5-1 |
|
Loading Label Stock ............................................................................................................ |
5-2 |
6 |
Controller - Operation ..................................................................................... |
6-1 |
|
Introduction ........................................................................................................................ |
6-1 |
|
Main Screen Elements......................................................................................................... |
6-2 |
|
PLU Screen ......................................................................................................................... |
6-3 |
|
Options Button....................................................................................................................... |
6-4 |
|
Label Format.............................................................................................................. |
6-4 |
|
Grade........................................................................................................................ |
6-4 |
|
Bottom Label Format................................................................................................... |
6-4 |
|
Satellite Graphic ......................................................................................................... |
6-4 |
|
Linked Graphic........................................................................................................... |
6-4 |
|
DayGlo Graphic.......................................................................................................... |
6-4 |
Accumulator .............................................................................................................. |
6-4 |
Run Total .................................................................................................................. |
6-5 |
Print Inhibits .............................................................................................................. |
6-5 |
Place Label Button ................................................................................................................. |
6-6 |
Edge Offset................................................................................................................ |
6-6 |
PLU Pricing Modes.............................................................................................................. |
6-7 |
By-Weight PLU ...................................................................................................................... |
6-7 |
By-Count PLU........................................................................................................................ |
6-7 |
Standard Pack PLU ................................................................................................................ |
6-7 |
PLU Search Modes .............................................................................................................. |
6-8 |
Country of Origin Labeling (COOL) ..................................................................................... |
6-10 |
Preconfigured COOL Statements............................................................................................. |
6-10 |
Custom COOL Statements ..................................................................................................... |
6-12 |
Forced COOL ....................................................................................................................... |
6-13 |
COOL PreText ...................................................................................................................... |
6-13 |
Wrapper Control ............................................................................................................... |
6-14 |
Mode Buttons ...................................................................................................................... |
6-15 |
Done Button ........................................................................................................................ |
6-15 |
Film Setting ......................................................................................................................... |
6-16 |
Status................................................................................................................................. |
6-17 |
Convey Package.................................................................................................................. |
6-17 |
Lower Infeed........................................................................................................................ |
6-17 |
Film Temperature Fields........................................................................................................ |
6-18 |
Ambient Film Temp .................................................................................................. |
6-18 |
Actual Belt Temp ...................................................................................................... |
6-18 |
Set Belt Temp .......................................................................................................... |
6-18 |
Error Logs ........................................................................................................................... |
6-20 |
Cut Film Button.................................................................................................................... |
6-21 |
More Data........................................................................................................................... |
6-21 |
Firmware Type ......................................................................................................... |
6-21 |
Firmware Version ..................................................................................................... |
6-21 |
Firmware Date ......................................................................................................... |
6-21 |
Wrapper ID Number ................................................................................................. |
6-21 |
Side Clamp Stretch Distance...................................................................................... |
6-21 |
Center Clamp Run Distance....................................................................................... |
6-21 |
Total Packages Wrapped .......................................................................................... |
6-22 |
Packages Wrapped Since Service .............................................................................. |
6-22 |
Packages Wrapped Since Powerup ............................................................................ |
6-22 |
Package Height ....................................................................................................... |
6-22 |
Package Width ........................................................................................................ |
6-22 |
Package Length ....................................................................................................... |
6-22 |
Refresh ................................................................................................................... |
6-22 |
Return..................................................................................................................... |
6-22 |
Operations Menu............................................................................................................... |
6-23 |
Cutting Tests ....................................................................................................................... |
6-23 |
Void Transactions ................................................................................................................ |
6-24 |
Verify Labels........................................................................................................................ |
6-24 |
Setup Overview................................................................................................................. |
6-25 |
Unit Setup ........................................................................................................................ |
6-25 |
Choose Department.............................................................................................................. |
6-26 |
Scale Mode ......................................................................................................................... |
6-26 |
Price Settings....................................................................................................................... |
6-26 |
Manual Mode Keys............................................................................................................... |
6-26 |
Allow Lbs for............................................................................................................ |
6-26 |
Allow By Qtr Pound................................................................................................... |
6-26 |
Allow By Half Pound ................................................................................................. |
6-27 |
Tare to Use .......................................................................................................................... |
6-27 |
Proportional Tare...................................................................................................... |
6-27 |
By-Weight Tare ........................................................................................................ |
6-27 |
Accumulators Setup.............................................................................................................. |
6-27 |
Void Available...................................................................................................................... |
6-28 |
Scale Settings ...................................................................................................................... |
6-28 |
Print Mixed Net Weight.............................................................................................. |
6-29 |
Print Horizontal or Vertical Tabular NF......................................................................... |
6-29 |
Calculate Std Pack Unit Price per-lb ............................................................................ |
6-30 |
Hide Keypad ............................................................................................................ |
6-30 |
HTML by PLU ........................................................................................................... |
6-30 |
Allow Alternate Language .......................................................................................... |
6-30 |
Detail Logs .............................................................................................................. |
6-30 |
Keypress Beep ......................................................................................................... |
6-30 |
Safety Loop.............................................................................................................. |
6-30 |
Alerts ...................................................................................................................... |
6-30 |
Screen Saver............................................................................................................ |
6-30 |
Frequent Shopper Text............................................................................................... |
6-30 |
Printer & Label Setup ........................................................................................................ |
6-31 |
Choose Store Logo ............................................................................................................... |
6-31 |
Label Printer Setup ............................................................................................................... |
6-32 |
Current Label Stock................................................................................................... |
6-32 |
Eject Length ............................................................................................................. |
6-32 |
Image Offset ............................................................................................................ |
6-32 |
Run Total Label Format ............................................................................................. |
6-33 |
Label Width ............................................................................................................. |
6-33 |
Stripped Delivery ...................................................................................................... |
6-33 |
NF Label Format....................................................................................................... |
6-33 |
General Label Formats .............................................................................................. |
6-34 |
Nuval Label Graphic ................................................................................................. |
6-34 |
Dayglo Printer Setup............................................................................................................. |
6-35 |
DayGlo Printer.......................................................................................................... |
6-35 |
Eject Length ............................................................................................................. |
6-35 |
Current Label Stock................................................................................................... |
6-35 |
Image Offset ............................................................................................................ |
6-35 |
Label Format............................................................................................................ |
6-35 |
Stripped Delivery ...................................................................................................... |
6-35 |
Calibrate Printer Gap Sensor.................................................................................................. |
6-36 |
Bottom Label Printer Setup and Calibrate Bottom Printer ........................................................... |
6-36 |
Barcode Setup................................................................................................................... |
6-37 |
Barcode Type....................................................................................................................... |
6-37 |
GS1 Databar Barcodes.............................................................................................. |
6-38 |
Presets Setup.................................................................................................................... |
6-40 |
Pages ................................................................................................................................. |
6-40 |
Add Page ................................................................................................................ |
6-41 |
Adding Preset Pages By Department ........................................................................... |
6-42 |
Adding Pages using Custom ..................................................................................... |
6-43 |
Edit Page ................................................................................................................ |
6-45 |
Graphical Tare Presets.............................................................................................. |
6-46 |
Keys................................................................................................................................... |
6-47 |
Edit Preset Keys ....................................................................................................... |
6-47 |
|
Backroom Setup................................................................................................................ |
6-55 |
|
Cycle Lifter .............................................................................................................. |
6-55 |
|
Cycle Xfer................................................................................................................ |
6-55 |
|
Cycle Convey........................................................................................................... |
6-55 |
|
Hardware Version Information.................................................................................... |
6-55 |
|
Choose Indexer.................................................................................................................... |
6-56 |
|
Date Forward Hour............................................................................................................... |
6-56 |
|
Select Film Size ................................................................................................................... |
6-56 |
|
Macros Setup ...................................................................................................................... |
6-57 |
|
Macro Placement................................................................................................................. |
6-60 |
|
Setup Passwords/Levels .................................................................................................... |
6-61 |
|
Service Scale Setup .......................................................................................................... |
6-62 |
|
Enable By-Count Auto Clear .................................................................................................. |
6-62 |
|
Enable Force Count .............................................................................................................. |
6-62 |
|
Enable Forced COOL ............................................................................................................ |
6-62 |
|
Auto Sense.......................................................................................................................... |
6-63 |
|
PLU Transaction Timeout ...................................................................................................... |
6-63 |
|
Search Screen Timeout ......................................................................................................... |
6-63 |
|
Transaction Screen Overrides ................................................................................................ |
6-63 |
|
Quick Edits ....................................................................................................................... |
6-64 |
|
View Version Information................................................................................................... |
6-64 |
|
View Logs......................................................................................................................... |
6-64 |
|
Minimize Application ........................................................................................................ |
6-64 |
|
Serial Devices Setup ......................................................................................................... |
6-64 |
|
Load Cell Setup ................................................................................................................ |
6-64 |
|
Launch External Program................................................................................................... |
6-65 |
|
Report Generator............................................................................................................... |
6-65 |
|
Quit To Desktop................................................................................................................. |
6-66 |
|
Shutdown System.............................................................................................................. |
6-66 |
7 |
Cleaning and Maintenance.............................................................................. |
7-1 |
|
Wrapper - Daily Cleaning .................................................................................................... |
7-1 |
|
Cleaning Precautions ............................................................................................................ |
7-1 |
|
Daily Cleaning...................................................................................................................... |
7-2 |
|
Infeed / Riser Cleaning ........................................................................................................ |
7-5 |
|
To Clean................................................................................................................... |
7-5 |
|
To re-insert............................................................................................................... |
7-5 |
|
Controller Screen – Daily Cleaning ...................................................................................... |
7-6 |
|
Printer - Cleaning ............................................................................................................... |
7-7 |
|
External Cleaning ................................................................................................................. |
7-7 |
|
Mechanism Cleaning ............................................................................................................ |
7-8 |
8 |
Troubleshooting.............................................................................................. |
8-1 |
|
Printer - Troubleshooting Guide............................................................................................ |
8-1 |
No Label is Printed or Issued ................................................................................................. |
8-1 |
Applicator Won’t Pick or Apply Labels..................................................................................... |
8-1 |
Label Placement Varies on Package ....................................................................................... |
8-2 |
Label Applicator Won’t Turn Labels......................................................................................... |
8-2 |
Light Print or mottled print on Labels..................................................................................... |
8-2 |
Extra Labels Are Printed ........................................................................................................ |
8-3 |
Labels Not Indexing Correctly ................................................................................................ |
8-3 |
Printer Status LED ................................................................................................................. |
8-4 |
Wrapper - Troubleshooting Guide ......................................................................................... |
8-4 |
Film Tearing or Film Tracking Poorly ...................................................................................... |
8-4 |
Trays left open, poor overwrap, or no overwrap....................................................................... |
8-5 |
Not picking film .................................................................................................................... |
8-5 |
|
Error Logs ........................................................................................................................... |
8-6 |
|
Controller Error Log............................................................................................................... |
8-6 |
|
Wrapper System Error Log ..................................................................................................... |
8-7 |
|
Error Display Screens .......................................................................................................... |
8-8 |
|
Commander Error Codes........................................................................................................ |
8-8 |
|
Commander Help ................................................................................................................ |
8-14 |
|
Remote Access Assistance................................................................................................... |
8-14 |
9 |
Extra Programs............................................................................................... |
9-1 |
|
Commander Task Manager................................................................................................... |
9-1 |
|
Overview: .............................................................................................................................. |
9-1 |
|
Requirements and Installation.................................................................................................. |
9-2 |
|
Environment .......................................................................................................................... |
9-2 |
|
Application Flow .................................................................................................................... |
9-2 |
|
Production Reports ............................................................................................................ |
9-14 |
|
Main Screen ........................................................................................................................ |
9-14 |
|
Custom Production Report..................................................................................................... |
9-15 |
|
Daily Production Report ........................................................................................................ |
9-18 |
|
Price Override Report ............................................................................................................ |
9-19 |
|
Detailed PLU Report.............................................................................................................. |
9-20 |
|
Department Summary ........................................................................................................... |
9-21 |
|
Setup: Configuring Reports .................................................................................................... |
9-22 |
|
Additional Controls ............................................................................................................... |
9-26 |
10 |
Label Requirements ...................................................................................... |
10-1 |
|
General Requirements ....................................................................................................... |
10-1 |
|
Label Paper ......................................................................................................................... |
10-1 |
|
Adhesive ............................................................................................................................. |
10-2 |
|
Release Liner ....................................................................................................................... |
10-2 |
|
Total Thickness Label + Adhesive + Liner................................................................................ |
10-2 |
|
Light Transmission For Gap Sensor Operation.......................................................................... |
10-2 |
|
Label Stripping..................................................................................................................... |
10-2 |
|
Finished Label Roll Requirements....................................................................................... |
10-3 |
|
Core and Method of Label Attachment..................................................................................... |
10-3 |
|
Die Cutting .......................................................................................................................... |
10-3 |
|
Slitting ................................................................................................................................ |
10-3 |
|
Winding.............................................................................................................................. |
10-4 |
Label Curl ........................................................................................................................... |
10-4 |
Splicing .............................................................................................................................. |
10-5 |
Finished Label and Roll Dimensional Requirements............................................................. |
10-5 |
Preprinted Labels.............................................................................................................. |
10-7 |
Special Shaped Labels ...................................................................................................... |
10-9 |
Definition Of Transmission Optical Density ......................................................................... |
10-9 |
Label and Liner Optical Density........................................................................................ |
10-10 |
Black Stripe Optical Density............................................................................................. |
10-10 |

For your notes

Chapter 1: Commander System
Introduction
1 |
Commander System |
Introduction
The METTLER TOLEDO Commander is an integrated prepack wrapper and labeling system. The Commander consists of three components: Model 648 Automatic Wrapper, Commander Controller Module, and Printer(s). Your system could have one or two printers for Data labels and DayGlo labels.
By having all three components in one built-in system the Commander will:
•Reduce Overall Footprint of Wrapping System
•Reduce the Number of System Components
•New and Improved Electronics and Reporting Capability
•Combine Functions of Wrapper and Controller
The Commander is designed to wrap items pre-placed into foam or paper trays.
This User’s Guide discusses the operation and minor maintenance/troubleshooting of the Commander Wrapper, Controller, and Printer. This manual will cover operation for software versions up to Revision 4.2. For details on setup and maintenance please refer to the Printer Service Manual (P/N C82784900A rev. 2 or higher), UC Software Technical Manual (B16588100A rev 4 or higher) or the Commander Wrapper Service Manual (P/N 64058951).
1-1

METTLER TOLEDO® Commander User's Guide
Power and Temperature Specifications
The Commander wrapper is not designed to wrap loose and/or liquid products. This unit is not intended for washdown or hazardous area operation, or for operation in environments of extreme dust, heat, cold, or humidity.
Electrical and |
208/230 VAC, 14.1 Amps, 50/60 Hz. |
|
ETL #2002405 |
||
Certification |
||
Conforms to UL Standard 763 and CSA C22.2 195 |
||
|
||
|
|
|
|
208 VAC/50-60 Hz |
|
Voltage/Amperes |
(can be configured for 240 VAC) |
|
|
20A Supply/2350 VA (default) |
|
|
|
|
Recommended |
|
|
Operating |
40°F to 70°F (5°C to 20°C) |
|
Temperature |
||
|
||
Range |
|
|
|
|
|
Humidity |
5% to 95% |
|
Non-condensing |
||
|
||
|
|
|
Wrapper Weight |
600 lbs |
|
|
|
|
Shipping Weight |
900 lbs |
|
with 2 printers |
||
|
||
|
|
1-2

Chapter 2: Operation
System Power Up
2 |
Operation |
System Power Up
There are two main power switches on the Commander wrapper. The wrapper power switch controls power to the wrapper electrical components and the printers. The controller power switch is independent of the wrapper power switch and controls power only to the controller. Shown below are the power switch locations. When powering a system up, the wrapper should be powered up first (2) and then the controller (4). Refer to the power up sequence 1-5 below.
4
Lift cover, press 1 on the Controller power switch to turn power on.
1
Remove any items from the belts, then keep hands clear.
3
Printer LED displays green for Ready. If not, check power switch inside cover.
5
Allow sealing belt to reach operating temperature. Select Wrapper Control to view or change.
2
Turn the wrapper power switch lever to 1 (on).
Keep hands clear of the machine infeed and discharge areas. A message will appear on the Controller indicating that the machine is powering up. Press the START button, in the message box, to begin the Startup Self Test.
Note: the machine will not initiate the Self Test until the START button has been pressed. During the test, the conveyors are in motion. Make sure the belts are clear of any items before pressing the button.
Wait for the Sealing Belt to reach the programmed temperature before starting to wrap packages (usually 20-30 minutes). To view the current temperature, press the Wrapper button. Adjust the temperature if needed. The temperature will display highlighted in Blue if the belt is too cold and in Red if the belt is too hot. When the belt reaches the assigned temperature the field will have no highlighted color.
2-1

METTLER TOLEDO® Commander User's Guide
Wrapper Power Switch
There is a main ON/OFF power switch located on the front right of the Wrapper. This switch removes power to the wrapper electrical components and the printers. Power to the controller will remain on. If this switch is turned off while the Controller is still on, an error message will alert the operator that communication to the other machine functions has failed.
ON
OFF
1.Turn Power Switch clockwise from 0 (off) to I (on) to turn on the machine power.
2.Keep hands clear of the machine infeed and discharge areas. An error message will appear on the Controller indicating that the machine is powering up. Press the START button, in the message box, to begin the Self Test.
Note: the machine will not initiate the Self Test until the START button has been pressed. During the test, the conveyors are in motion. Make sure the belts are clear of any items before pressing the button.
3.Wait for the Sealing Belt to reach the programmed temperature before starting to wrap packages (usually 20-30 minutes). To view the current temperature, from the Controller hit the Wrapper button and adjust the temperature if needed. The temperature will display highlighted in Blue if the belt is too cold and in Red if the belt is too hot. When the belt reaches the assigned temperature the field will have no highlighted color.
4.When the Belt Temperature reaches its assigned temperature, the machine is ready to wrap.
Note: The Controller is powered separately and is not controlled by the Wrapper ON/OFF power switch.
2-2

Chapter 2: Operation
Controller Power Switch
Controller Power Switch
The controller power is separate from the main wrapper. The controller power can be left on for day-to-day operation to minimize start up time. The Controller can be turned on
(1) or off (0) by pressing the switch located under the top cover behind the controller. Pressing the switch to off (0) starts a “soft shutdown” procedure. This procedure must be performed before disconnecting the power to the wrapper. The same shutdown procedure may be initiated from the controller screen - “Setup / Shutdown System”. Do not interrupt the soft shutdown procedure.
OFF
ON
Controller Power Switch
2-3

METTLER TOLEDO® Commander User's Guide
Controller - Finding
Product PLUs
Calling up PLUs
There are three ways to call PLUs: Preset Buttons, Numeric Entry or by Searching.
These are Preset Buttons. Simply press them once to call the PLU.
2-4
Chapter 2: Operation
Controller - Finding Product PLUs
This is the Numeric Keypad. You key in the PLU Number, and then press ENTER.
This is the Search Button. By pressing the search button you can locate the PLU based on its name or part of its name.
2-5

METTLER TOLEDO® Commander User's Guide
Tare and Graphical Tare
If forced tare is enabled and Graphical Tare is enabled, calling a PLU or pressing the Tare override (by pressing the Tare box on a By Weight PLU) will bring up a copy of the Graphical Tare screen. If the forced tare is enabled but not Graphical Tare, the standard Forced Tare wizard keyboard will display.
Tare can be entered by either selecting the preset key, entering the value, or by placing the container on the platter then pressing the “Platter Tare” key.
Graphical Tare screen
2-6

Chapter 2: Operation
PLU Screen
PLU Screen
There are options on this screen that can be changed before you start weighing and labeling.
You can change items such as the Use By Date if they are not prohibited in the Unit’s Setup.
2-7

METTLER TOLEDO® Commander User's Guide
You can select a Macro assigned to the PLU and adjust the Label Placement.
If you wish, you can change the Extra Text.
2-8

The OPTIONS button is used if you wish to change the graphics, grade, accumulator or label format.
NOTE: this PLU screen is in Normal or Pre-Wrapped Mode; in Wrap Only or Manual Mode the Place Label button would be gray and unavailable.
Chapter 2: Operation
PLU Screen
Wrapper Control takes you to the wrapper control screen where you can modify various settings of the wrapper itself, such as the tension and temperature of the film.
The Place Label button allows you to graphically select the location and orientation that the label will be placed on the package.
2-9

METTLER TOLEDO® Commander User's Guide
NOTE: back on the PLU screen, the PRINT button does not need to be pressed for each package; all the actions will begin based on the weight change on the scale.
When you are done, press the CLEAR button to EXIT this PLU.
-If in NORMAL Mode the machine will weigh and wrap a package and labels will be printed and applied automatically.
-If in PRE-WRAPPED Mode the package will go through the system, be weighed and labeled but not wrapped.
-If in MANUAL Mode the package will be weighed but not run through the system. The label will print out and need to be manually removed and applied to the package.
-If in WRAP ONLY Mode the package will be wrapped but not weighed and no label will be issued or applied.
The Mode can be changed from the Wrapper Control screen.
Controller - Quick Edits
By using the Quick Edits selection on the Controller, some of the more common numeric data in a PLU record can be changed. The Quick Edit function changes the record in the database immediately. Items that can be changed include the price, tare, shelf-life, and use-by date.
Quick Edits are accessed by pressing the Setup button on the Main screen. The Setup screen is shown below.
2-10

NOTE: Quick Edits is not for adding new records or deleting PLUs. See the UC editor section in the UC Software Tech Manual for information on adding and deleting PLUs.
Chapter 2: Operation
Controller - Quick Edits
To return to the Main screen, press the Return button. Touch the Quick Edits button to enter the Quick Edits mode and select the department (below). Press Next.
The Quick Edits screen displays the current department. Type in the PLU number and press the Enter key. The PLU data will be retrieved from the database. To change any of the displayed fields, touch the box that displays the data.
2-11

METTLER TOLEDO® Commander User's Guide
The PLU can also be converted to a Frequent Shopper price by touching the Frequent Shopper Type and Price boxes.
To change the Shelf Life or Use By dates by touching the appropriate boxes and selecting a new date from the calendar.
Touch the arrow keys at the top to change the month. You can also enter the date numerically by touching the “Use Numerical Keypad” key.
Touch the new date, and then press the OK key to make the change.
Repeat this process for any other items that need to be modified.
2-12

Chapter 2: Operation
Film Tension
Film Tension
NOTE: the Commander can use either 11” or 13” film. This setting is based on the film size the machine was set up for at installation. Contact Mettler Toledo service if you wish to use a different film size than what the machine is currently configured for.
This section explains how film tension is used to achieve the best wrap program for a particular tray and how the sealing belt temperature is used.
Film Setting controls the tension of the film during the wrapping process. This ensures a properly wrapped tray with the least amount of wrinkles. The Film Setting is found by pressing the Wrapper Control button on the PLU screen or the Wrapper Button on the
Main screen.
|
C |
5: Low Tension 13” |
OK |
C |
|
C
From the Wrapper Control screen, select a film setting appropriate to the type of package being wrapped.
3 |
Medium Tension |
Normal tension mode for most products |
|
|
and trays. The default film tension setting |
|
|
is 3. |
|
|
|
5 |
Low Tension |
Less tension for larger trays with height |
|
|
greater than 3 inches, less stable trays, |
|
|
fragile products, or products with sharp |
|
|
edges that may tear the film. |
|
|
|
The default setting is a film tension of 3 for 13” film.
2-13
METTLER TOLEDO® Commander User's Guide
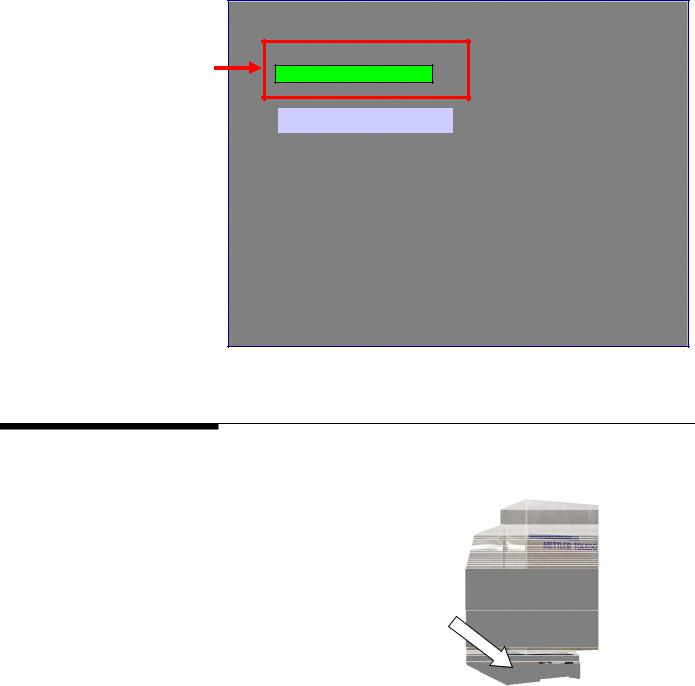
When a change is made to the Film Tension, the field will change color while the wrapper is adjusting to the new setting. The film tension usually adjusts within a few seconds. When ready, a white background will be displayed again. DO NOT send anything through the wrapper until the white background appears.
5: Low Tension 13”
OK
C
C
C
Printer – Label Printing
Check the printer’s status LED (front of unit) to make sure the printer is ready.
Green LED indicates printer is ready.
Red LED indicates an error condition.
Orange LED indicates a blocked sensor.
2-14
Loading...