

Page 1

Commander
Automatic Wrapper
User’s Guide
Model 0648
64058950 (R04)
Page 2

©Mettler-Toledo, Inc. 2010
No part of this manual may be reproduced or transmitted in any form or by any means, electronic or
mechanical, including photocopying and recording, for any purpose without the express written
permission of Mettler-Toledo, Inc.
U.S. Government Restricted Rights: This documentation is furnished with Restricted Rights.
Page 3
®
METTLER TOLEDO
Customer Feedback
Attention: Retail Quality Manager - MTWR
If you have a problem with one of our products or publications, or just a
suggestion on how we can serve you better, please fill out this form and
send it to the address on the opposite side of this page (U.S. postage paid),
or fax it to us at (614) 438-4355. Your feedback will help us to improve
product performance, quality, and service.
Part / Product Name:
Part / Model Number: Date:
Provided By:
Customer Name:
Address:
Phone Number: Fax Number:
Your comments on product performance, quality, or service:
Do not write in space below. For METTLER TOLEDO use only.
Response (where appropriate). Include root cause analysis and corrective action taken.
METTLER TOLEDO 64058950
METTLER TOLEDO
1900 Polaris Parkway
Columbus, Ohio 43240
METTLER TOLEDO® is a registered trademark of Mettler-Toledo, Inc.
©2010 Mettler-Toledo, Inc.
Printed in USA
Page 4

Page 5

INTRODUCTION
This publication is provided solely as a guide for individuals who have received Technical Training in
servicing the METTLER TOLEDO product.
Information regarding METTLER TOLEDO Technical Training may be obtained by writing to:
Mettler-Toledo, Inc.
1900 Polaris Parkway
Columbus, Ohio 43240
(614) 438-4511
FCC Notice
This device complies with Part 15 of the FCC Rules and the Radio Interference Requirements of the
Canadian Department of Communications. Operation is subject to the following conditions: (1) this device
may not cause harmful interference, and (2) this device must accept any interference received, including
interference that may cause undesired operation.
This equipment has been tested and found to comply with the limits for a Class A digital device, pursuant
to Part 15 of FCC Rules. These limits are designed to provide reasonable protection against harmful
interference when the equipment is operated in a commercial environment. This equipment generates,
uses, and can radiate radio frequency energy and, if not installed and used in accordance with the
instruction manual, may cause harmful interference to radio communications. Operation of this equipment
in a residential area is likely to cause harmful interference in which case the user will be required to correct
the interference at their own expense.
METTLER TOLEDO RESERVES THE RIGHT TO MAKE REFINEMENTS OR
CHANGES WITHOUT NOTICE.
Page 6
A
PRECAUTIONS
READ this manual BEFORE
operating or servicing this
equipment.
FOLLOW these instructions
carefully.
SAVE this manual for future
reference.
DO NOT allow untrained
personnel to operate, clean,
inspect, maintain, service, or
tamper with this equipment.
LWAYS DISCONNECT this
equipment from the power
source before cleaning or
performing maintenance.
CALL METTLER TOLEDO for parts,
information, and service.
WARNING
ONLY PERMIT QUALIFIED PERSONNEL TO SERVICE THIS
EQUIPMENT. EXERCISE CARE WHEN MAKING CHECKS,
TESTS AND ADJUSTMENTS THAT MUST BE MADE WITH
POWER ON. FAILING TO OBSERVE THESE PRECAUTIONS
CAN RESULT IN BODILY HARM AND/OR PROPERTY
DAMAGE.
WARNING
FOR CONTINUED PROTECTION AGAINST SHOCK
HAZARD CONNECT TO PROPERLY GROUNDED OUTLET
ONLY.
DO NOT REMOVE THE GROUND PRONG.
WARNING
DISCONNECT ALL POWER TO THIS UNIT BEFORE
REMOVING THE FUSE OR SERVICING.
CAUTION
BEFORE CONNECTING/DISCONNECTING ANY INTERNAL ELECTRONIC
COMPONENTS OR INTERCONNECTING WIRING BETWEEN ELECTRONIC
EQUIPMENT ALWAYS REMOVE POWER AND WAIT AT LEAST THIRTY (30)
SECONDS BEFORE ANY CONNECTIONS OR DISCONNECTIONS ARE MADE.
FAILURE TO OBSERVE THESE PRECAUTIONS COULD RESULT IN DAMAGE TO OR
DESTRUCTION OF THE EQUIPMENT OR BODILY HARM.
CAUTION
OBSERVE PRECAUTIONS FOR HANDLING ELECTROSTATIC SENSITIVE DEVICES.
Page 7
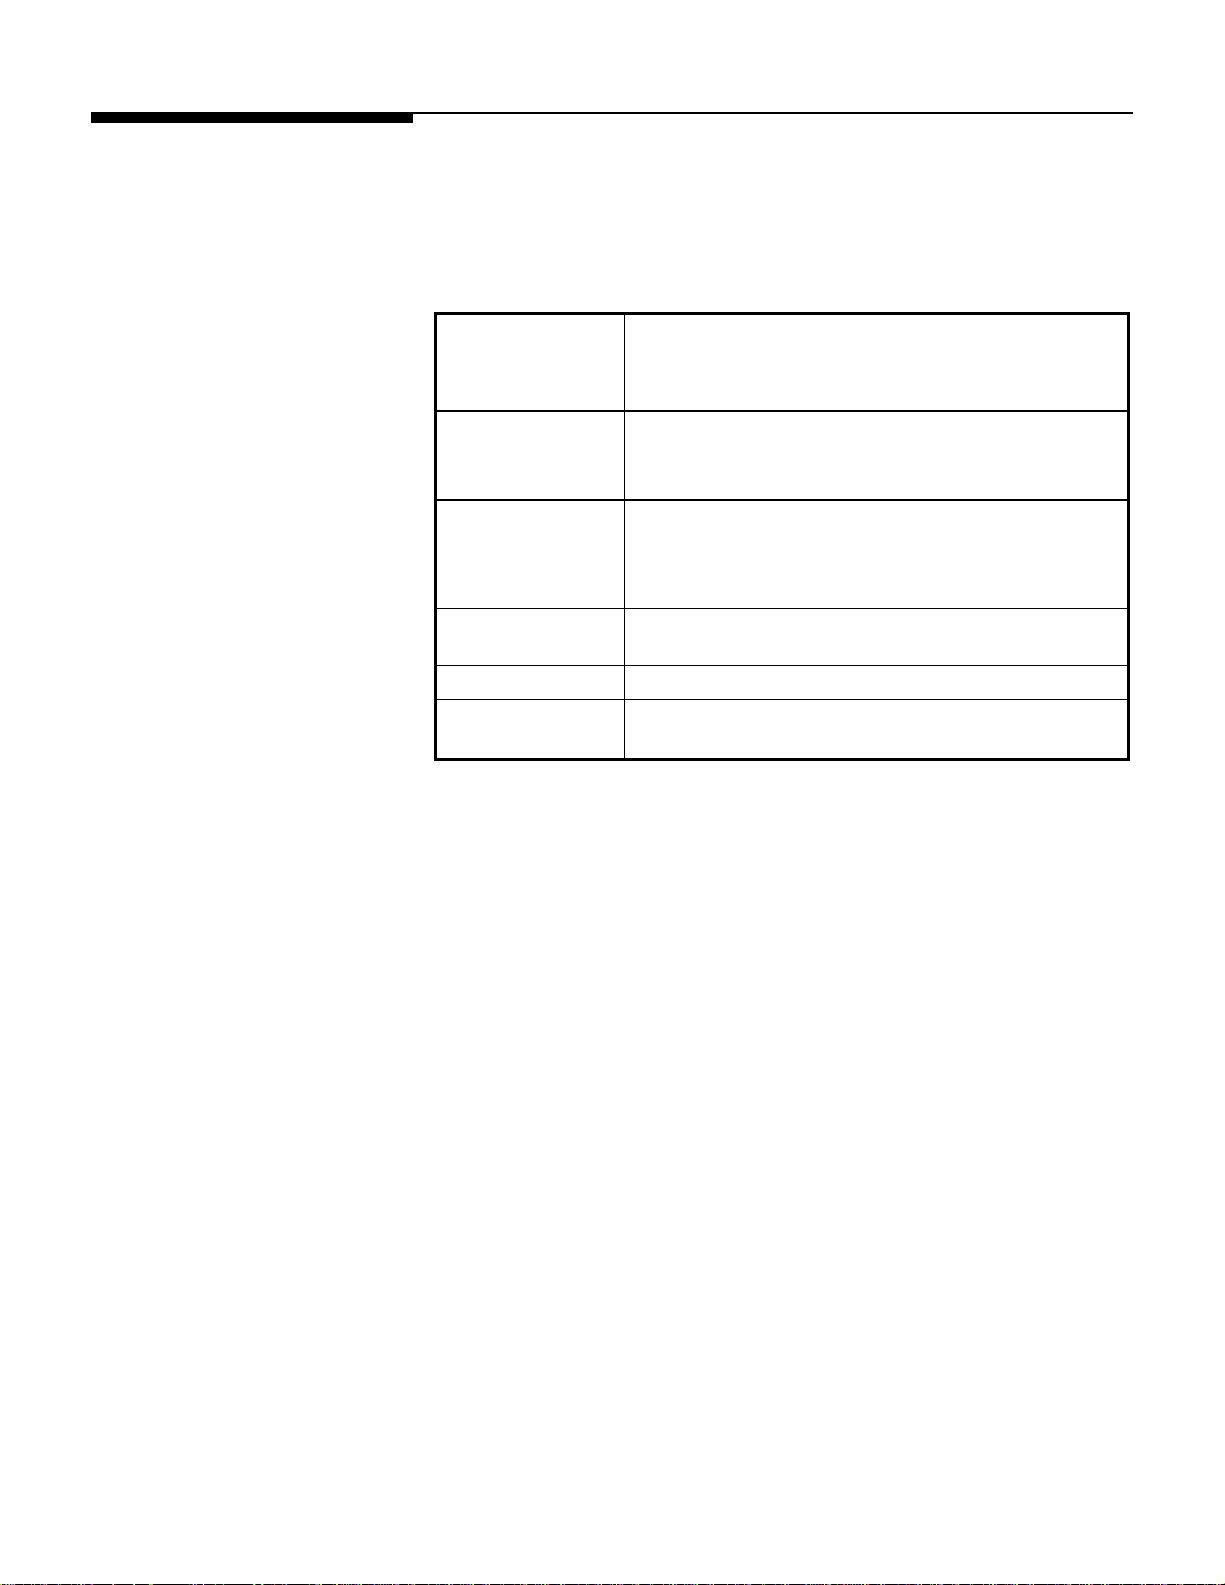
Publication Revision
History
Part Number Date Revisions
64058950
Rev 00
08/07 New manual
Disposal
64058950
Rev 01
64058950
Rev 02
64058950
Rev 03
64058950
Rev 04
In conformance with the European Directive 2002/96/EC on Waste Electrical and
Electronic Equipment (WEEE) this device may not be disposed of in domestic waste.
This also applies to countries outside the EU, per their specific requirements.
Please dispose of this product in accordance with local regulations at the collecting
point specified for electrical and electronic equipment.
04/08 Tray size update (ch4); Fusion GUI update (ch 6)
09/08 Fusion Added; Reports Chapter Added (9)
05/10 Images updated in Chapter 7
Expanded and updated Chapter 1, Chapter 2 Operation,
07/10
Chapter 6 Controller, and 8 Troubleshooting. Added
Fusion 4.2 enhancements. Added Chapter 10 label
requirements.
If you have any questions, please contact the responsible authority or the distributor
from which you purchased this device.
Should this device be passed on to other parties (for private or professional use), the
content of this regulation must also be related.
Thank you for your contribution to environmental protection.
Page 8

CONTENTS
1 Commander System........................................................................................ 1-1
Introduction ........................................................................................................................1-1
Power and Temperature Specifications .................................................................................
2 Operation....................................................................................................... 2-1
System Power Up ................................................................................................................2-1
Wrapper Power Switch ........................................................................................................2-2
Controller Power Switch ......................................................................................................2-3
Controller - Finding Product PLUs.........................................................................................2-4
Calling up PLUs .....................................................................................................................2-4
Tare and Graphical Tare.......................................................................................................2-6
PLU Screen .........................................................................................................................
Controller - Quick Edits......................................................................................................
Film Tension .....................................................................................................................2-13
Printer – Label Printing......................................................................................................2-14
Belt Temperature Controls .................................................................................................2-15
Auto Shut-offs ...................................................................................................................2-16
Stop Switch ......................................................................................................................... 2-17
Normal Shut-down.............................................................................................................2-18
1-2
2-7
2-10
3 Film Loading .................................................................................................. 3-1
Loading Instructions ............................................................................................................3-1
4 Trays.............................................................................................................. 4-1
Loading the Trays ................................................................................................................4-1
Tray Specifications ..............................................................................................................4-2
Tray Reference Chart – 11” Film ..........................................................................................4-3
Tray Reference Chart – 13” Film ..........................................................................................
4-4
5 Printers.......................................................................................................... 5-1
Introduction ........................................................................................................................5-1
Loading Label Stock ............................................................................................................5-2
6 Controller - Operation..................................................................................... 6-1
Introduction ........................................................................................................................6-1
Main Screen Elements.........................................................................................................
PLU Screen .........................................................................................................................
Options Button....................................................................................................................... 6-4
Label Format.............................................................................................................. 6-4
Grade........................................................................................................................ 6-4
Bottom Label Format................................................................................................... 6-4
Satellite Graphic ......................................................................................................... 6-4
Linked Graphic........................................................................................................... 6-4
DayGlo Graphic.......................................................................................................... 6-4
6-2
6-3
Page 9

Accumulator .............................................................................................................. 6-4
Run Total .................................................................................................................. 6-5
Print Inhibits.............................................................................................................. 6-5
Place Label Button ................................................................................................................. 6-6
Edge Offset................................................................................................................ 6-6
PLU Pricing Modes..............................................................................................................6-7
By-Weight PLU ...................................................................................................................... 6-7
By-Count PLU........................................................................................................................ 6-7
Standard Pack PLU ................................................................................................................ 6-7
PLU Search Modes ..............................................................................................................6-8
Country of Origin Labeling (COOL) .....................................................................................6-10
Preconfigured COOL Statements............................................................................................. 6-10
Custom COOL Statements ..................................................................................................... 6-12
Forced COOL ....................................................................................................................... 6-13
COOL PreText ...................................................................................................................... 6-13
Wrapper Control ...............................................................................................................6-14
Mode Buttons...................................................................................................................... 6-15
Done Button........................................................................................................................ 6-15
Film Setting ......................................................................................................................... 6-16
Status................................................................................................................................. 6-17
Convey Package..................................................................................................................6-17
Lower Infeed........................................................................................................................ 6-17
Film Temperature Fields........................................................................................................ 6-18
Ambient Film Temp .................................................................................................. 6-18
Actual Belt Temp ...................................................................................................... 6-18
Set Belt Temp .......................................................................................................... 6-18
Error Logs........................................................................................................................... 6-20
Cut Film Button.................................................................................................................... 6-21
More Data........................................................................................................................... 6-21
Firmware Type ......................................................................................................... 6-21
Firmware Version ..................................................................................................... 6-21
Firmware Date ......................................................................................................... 6-21
Wrapper ID Number ................................................................................................. 6-21
Side Clamp Stretch Distance...................................................................................... 6-21
Center Clamp Run Distance....................................................................................... 6-21
Total Packages Wrapped .......................................................................................... 6-22
Packages Wrapped Since Service .............................................................................. 6-22
Packages Wrapped Since Powerup ............................................................................ 6-22
Package Height ....................................................................................................... 6-22
Package Width ........................................................................................................ 6-22
Package Length ....................................................................................................... 6-22
Refresh ................................................................................................................... 6-22
Return..................................................................................................................... 6-22
Operations Menu...............................................................................................................
Cutting Tests ....................................................................................................................... 6-23
Void Transactions ................................................................................................................ 6-24
Verify Labels........................................................................................................................ 6-24
6-23
Setup Overview.................................................................................................................6-25
Unit Setup ........................................................................................................................6-25
Choose Department.............................................................................................................. 6-26
Scale Mode ......................................................................................................................... 6-26
Page 10

Price Settings....................................................................................................................... 6-26
Manual Mode Keys............................................................................................................... 6-26
Allow Lbs for............................................................................................................ 6-26
Allow By Qtr Pound................................................................................................... 6-26
Allow By Half Pound................................................................................................. 6-27
Tare to Use.......................................................................................................................... 6-27
Proportional Tare...................................................................................................... 6-27
By-Weight Tare ........................................................................................................6-27
Accumulators Setup..............................................................................................................6-27
Void Available...................................................................................................................... 6-28
Scale Settings ......................................................................................................................6-28
Print Mixed Net Weight.............................................................................................. 6-29
Print Horizontal or Vertical Tabular NF......................................................................... 6-29
Calculate Std Pack Unit Price per-lb ............................................................................ 6-30
Hide Keypad ............................................................................................................ 6-30
HTML by PLU ...........................................................................................................6-30
Allow Alternate Language ..........................................................................................6-30
Detail Logs .............................................................................................................. 6-30
Keypress Beep ......................................................................................................... 6-30
Safety Loop.............................................................................................................. 6-30
Alerts ......................................................................................................................6-30
Screen Saver............................................................................................................ 6-30
Frequent Shopper Text............................................................................................... 6-30
Printer & Label Setup ........................................................................................................6-31
Choose Store Logo ...............................................................................................................6-31
Label Printer Setup ............................................................................................................... 6-32
Current Label Stock................................................................................................... 6-32
Eject Length ............................................................................................................. 6-32
Image Offset ............................................................................................................6-32
Run Total Label Format ............................................................................................. 6-33
Label Width ............................................................................................................. 6-33
Stripped Delivery ......................................................................................................6-33
NF Label Format....................................................................................................... 6-33
General Label Formats .............................................................................................. 6-34
Nuval Label Graphic ................................................................................................. 6-34
Dayglo Printer Setup............................................................................................................. 6-35
DayGlo Printer.......................................................................................................... 6-35
Eject Length ............................................................................................................. 6-35
Current Label Stock................................................................................................... 6-35
Image Offset ............................................................................................................6-35
Label Format............................................................................................................ 6-35
Stripped Delivery ......................................................................................................6-35
Calibrate Printer Gap Sensor.................................................................................................. 6-36
Bottom Label Printer Setup and Calibrate Bottom Printer ........................................................... 6-36
Barcode Setup...................................................................................................................6
-37
Barcode Type.......................................................................................................................6-37
GS1 Databar Barcodes.............................................................................................. 6-38
Presets Setup....................................................................................................................6-40
Pages................................................................................................................................. 6-40
Add Page ................................................................................................................6-41
Adding Preset Pages By Department ...........................................................................6-42
Page 11

Adding Pages using Custom ..................................................................................... 6-43
Edit Page ................................................................................................................ 6-45
Graphical Tare Presets.............................................................................................. 6-46
Keys................................................................................................................................... 6-47
Edit Preset Keys ....................................................................................................... 6-47
Backroom Setup................................................................................................................6-55
Cycle Lifter .............................................................................................................. 6-55
Cycle Xfer................................................................................................................ 6-55
Cycle Convey........................................................................................................... 6-55
Hardware Version Information.................................................................................... 6-55
Choose Indexer.................................................................................................................... 6-56
Date Forward Hour...............................................................................................................6-56
Select Film Size ................................................................................................................... 6-56
Macros Setup ...................................................................................................................... 6-57
Macro Placement.................................................................................................................6-60
Setup Passwords/Levels ....................................................................................................
6-61
Service Scale Setup ..........................................................................................................6-62
Enable By-Count Auto Clear .................................................................................................. 6-62
Enable Force Count ..............................................................................................................6-62
Enable Forced COOL ............................................................................................................ 6-62
Auto Sense.......................................................................................................................... 6-63
PLU Transaction Timeout ...................................................................................................... 6-63
Search Screen Timeout ......................................................................................................... 6-63
Transaction Screen Overrides ................................................................................................ 6-63
Quick Edits .......................................................................................................................6-64
View Version Information...................................................................................................6-64
View Logs.........................................................................................................................6-64
Minimize Application ........................................................................................................6-64
Serial Devices Setup .........................................................................................................6-64
Load Cell Setup ................................................................................................................6-64
Launch External Program...................................................................................................6-65
Report Generator...............................................................................................................6-65
Quit To Desktop.................................................................................................................6-66
Shutdown System..............................................................................................................6-66
7 Cleaning and Maintenance.............................................................................. 7-1
Wrapper - Daily Cleaning ....................................................................................................7-1
Cleaning Precautions............................................................................................................ 7-1
Daily Cleaning...................................................................................................................... 7-2
Infeed / Riser Cleaning........................................................................................................7-5
To Clean................................................................................................................... 7-5
To re-insert............................................................................................................... 7-5
Controller Screen – Daily Cleaning ......................................................................................7-6
Printer - Cleaning .............................................................................................................
External Cleaning ................................................................................................................. 7-7
Mechanism Cleaning ............................................................................................................ 7-8
..7-7
8 Troubleshooting.............................................................................................. 8-1
Printer - Troubleshooting Guide............................................................................................
8-1
Page 12

No Label is Printed or Issued ................................................................................................. 8-1
Applicator Won’t Pick or Apply Labels..................................................................................... 8-1
Label Placement Varies on Package .......................................................................................8-2
Label Applicator Won’t Turn Labels......................................................................................... 8-2
Light Print or mottled print on Labels..................................................................................... 8-2
Extra Labels Are Printed ........................................................................................................ 8-3
Labels Not Indexing Correctly ................................................................................................ 8-3
Printer Status LED .................................................................................................................8-4
Wrapper - Troubleshooting Guide .........................................................................................8-4
Film Tearing or Film Tracking Poorly ......................................................................................8-4
Trays left open, poor overwrap, or no overwrap....................................................................... 8-5
Not picking film ....................................................................................................................8-5
Error Logs ...........................................................................................................................8-6
Controller Error Log............................................................................................................... 8-6
Wrapper System Error Log ..................................................................................................... 8-7
Error Display Screens ..........................................................................................................8-8
Commander Error Codes........................................................................................................ 8-8
Commander Help ................................................................................................................ 8-14
Remote Access Assistance................................................................................................... 8-14
9 Extra Programs............................................................................................... 9-1
Commander Task Manager...................................................................................................9-1
Overview: .............................................................................................................................. 9-1
Requirements and Installation.................................................................................................. 9-2
Environment .......................................................................................................................... 9-2
Application Flow ....................................................................................................................9-2
Production Reports ............................................................................................................9-14
Main Screen ........................................................................................................................ 9-14
Custom Production Report..................................................................................................... 9-15
Daily Production Report ........................................................................................................ 9-18
Price Override Report ............................................................................................................ 9-19
Detailed PLU Report.............................................................................................................. 9-20
Department Summary........................................................................................................... 9-21
Setup: Configuring Reports .................................................................................................... 9-22
Additional Controls ...............................................................................................................9-26
10 Label Requirements...................................................................................... 10-1
General Requirements .......................................................................................................
Label Paper......................................................................................................................... 10-1
Adhesive ............................................................................................................................. 10-2
Release Liner ....................................................................................................................... 10-2
Total Thickness Label + Adhesive + Liner................................................................................ 10-2
Light Transmission For Gap Sensor Operation.......................................................................... 10-2
Label Stripping..................................................................................................................... 10-2
Finished Label Roll Requirements.......................................................................................10-3
Core and Method of Label Attachment..................................................................................... 10-3
Die Cutting .......................................................................................................................... 10-3
Slitting ................................................................................................................................ 10-3
Winding.............................................................................................................................. 10-4
10-1
Page 13

Label Curl ........................................................................................................................... 10-4
Splicing .............................................................................................................................. 10-5
Finished Label and Roll Dimensional Requirements.............................................................
10-5
Preprinted Labels..............................................................................................................10-7
Special Shaped Labels ......................................................................................................10-9
Definition Of Transmission Optical Density .........................................................................10-9
Label and Liner Optical Density........................................................................................
Black Stripe Optical Density.............................................................................................
10-10
10-10
Page 14

For your notes
Page 15

1 Commander System
Introduction
The METTLER TOLEDO Commander is an integrated prepack wrapper and labeling
system. The Commander consists of three components: Model 648 Automatic
Wrapper, Commander Controller Module, and Printer(s). Your system could have
one or two printers for Data labels and DayGlo labels.
By having all three components in one built-in system the Commander will:
• Reduce Overall Footprint of Wrapping System
• Reduce the Number of System Components
• New and Improved Electronics and Reporting Capability
• Combine Functions of Wrapper and Controller
Chapter 1: Commander System
Introduction
The Commander is designed to wrap items pre-placed into foam or paper trays.
This User’s Guide discusses the operation and minor maintenance/troubleshooting of
the Commander Wrapper, Controller, and Printer. This manual will cover operation for
software versions up to Revision 4.2. For details on setup and maintenance please refer
to the Printer Service Manual (P/N C82784900A rev. 2 or higher), UC Software
Technical Manual (B16588100A rev 4 or higher) or the Commander Wrapper Service
Manual (P/N 64058951).
1-1
Page 16
METTLER TOLEDO® Commander User's Guide
Power and Temperature Specifications
The Commander wrapper is not designed to wrap loose and/or liquid products. This unit
is not intended for washdown or hazardous area operation, or for operation in
environments of extreme dust, heat, cold, or humidity.
Electrical and
Certification
Voltage/Amperes
Recommended
Operating
Temperature
Range
Humidity
Wrapper Weight
Shipping Weight
with 2 printers
208/230 VAC, 14.1 Amps, 50/60 Hz.
ETL #2002405
Conforms to UL Standard 763 and CSA C22.2 195
208 VAC/50-60 Hz
(can be configured for 240 VAC)
20A Supply/2350 VA (default)
40°F to 70°F (5°C to 20°C)
5% to 95%
Non-condensing
600 lbs
900 lbs
1-2
Page 17

p
2 Operation
System Power Up
There are two main power switches on the Commander wrapper. The wrapper power
switch controls power to the wrapper electrical components and the printers. The
controller power switch is independent of the wrapper power switch and controls power
only to the controller. Shown below are the power switch locations. When powering a
system up, the wrapper should be powered up first (2) and then the controller (4). Refer
to the power up sequence 1-5 below.
Chapter 2: Operation
System Power Up
4
Lift cover, press 1
on the Controller
power switch to
turn
ower on.
5
Allow sealing belt to reach
operating temperature.
Select Wrapper Control to
view or change.
1
Remove any items
from the belts, then
keep hands clear.
3
Printer LED displays
green for Ready. If
not, check power
switch inside cover.
2
Turn the wrapper
power switch lever
to 1 (on).
Keep hands clear of the machine infeed and discharge areas. A message will appear on
the Controller indicating that the machine is powering up. Press the START button, in the
message box, to begin the Startup Self Test.
Note: the machine will not initiate the Self Test until the START button has been pressed.
During the test, the conveyors are in motion. Make sure the belts are clear of any items
before pressing the button.
Wait for the Sealing Belt to reach the programmed temperature before starting to wrap
packages (usually 20-30 minutes). To view the current temperature, press the Wrapper
button. Adjust the temperature if needed. The temperature will display highlighted in Blue
if the belt is too cold and in Red if the belt is too hot. When the belt reaches the
assigned temperature the field will have no highlighted color.
2-1
Page 18

METTLER TOLEDO® Commander User's Guide
Wrapper Power Switch
There is a main ON/OFF power switch located on the front right of the Wrapper. This
switch removes power to the wrapper electrical components and the printers. Power to
the controller will remain on. If this switch is turned off while the Controller is still on, an
error message will alert the operator that communication to the other machine functions
has failed.
ON
1. Turn Power Switch clockwise from 0 (off) to I (on) to turn on the machine power.
2. Keep hands clear of the machine infeed and discharge areas. An error message will
appear on the Controller indicating that the machine is powering up. Press the
START button, in the message box, to begin the Self Test.
Note: the machine will not initiate the Self Test until the START button has been
pressed. During the test, the conveyors are in motion. Make sure the belts are clear
of any items before pressing the button.
3. Wait for the Sealing Belt to reach the programmed temperature before starting to
wrap packages (usually 20-30 minutes). To view the current temperature, from the
Controller hit the Wrapper button and adjust the temperature if needed. The
temperature will display highlighted in Blue if the belt is too cold and in Red if the
belt is too hot. When the belt reaches the assigned temperature the field will have
no highlighted color.
OFF
2-2
4. When the Belt Temperature reaches its assigned temperature, the machine is ready
to wrap.
Note: The Controller is powered separately and is not controlled by the Wrapper ON/OFF
power switch.
Page 19

Controller Power Switch
Chapter 2: Operation
Controller Power Switch
The controller power is separate from the main wrapper. The controller power can be left
on for day-to-day operation to minimize start up time. The Controller can be turned on
(1) or off (0) by pressing the switch located under the top cover behind the controller.
Pressing the switch to off (0) starts a “soft shutdown” procedure. This procedure must
be performed before disconnecting the power to the wrapper. The same shutdown
procedure may be initiated from the controller screen - “Setup / Shutdown System”. Do
not interrupt the soft shutdown procedure.
OFF
ON
Controller Power Switch
2-3
Page 20
METTLER TOLEDO® Commander User's Guide
Controller - Finding Product PLUs
Calling up PLUs
There are three ways to call PLUs: Preset Buttons, Numeric Entry or by Searching.
These are Preset Buttons.
Simply press them once
to call the PLU.
2-4
Page 21
This is the Numeric Keypad.
You key in the PLU Number,
and then press ENTER.
Chapter 2: Operation
Controller - Finding Product PLUs
This is the Search Button.
By pressing the search
button you can locate the
PLU based on its name or
part of its name.
2-5
Page 22

METTLER TOLEDO® Commander User's Guide
Tare and Graphical Tare
If forced tare is enabled and Graphical Tare is enabled, calling a PLU or pressing the
Tare override (by pressing the Tare box on a By Weight PLU) will bring up a copy of the
Graphical Tare screen. If the forced tare is enabled but not Graphical Tare, the standard
Forced Tare wizard keyboard will display.
Tare can be entered by either selecting the preset key, entering the value, or by placing
the container on the platter then pressing the “Platter Tare” key.
Graphical Tare screen
2-6
Page 23
PLU Screen
There are options on this screen
that can be changed before you
start weighing and labeling.
Chapter 2: Operation
PLU Screen
You can change items such as
the Use By Date if they are not
prohibited in the Unit’s Setup.
2-7
Page 24

METTLER TOLEDO® Commander User's Guide
You can select a Macro
assigned to the PLU and
adjust the Label Placement.
If you wish, you can
change the Extra Text.
2-8
Page 25
The OPTIONS button is used
if you wish to change the
graphics, grade, accumulator
or label format.
Chapter 2: Operation
PLU Screen
NOTE: this PLU screen is in Normal
or Pre-Wrapped Mode; in Wrap
Only or Manual Mode the Place
Label button would be gray and
unavailable.
Wrapper Control takes you to the wrapper control screen where you can modify various
settings of the wrapper itself, such as the tension and temperature of the film.
The Place Label button allows you to graphically select the location and orientation that
the label will be placed on the package.
2-9
Page 26
METTLER TOLEDO® Commander User's Guide
NOTE: back on the PLU screen, the PRINT
button does not need to be pressed for
each package; all the actions will begin
based on the weight change on the scale.
When you are done, press the CLEAR
button to EXIT this PLU.
Controller - Quick Edits
- If in NORMAL Mode the machine will weigh and wrap a package and labels will be
printed and applied automatically.
- If in PRE-WRAPPED Mode the package will go through the system, be weighed and
labeled but not wrapped.
- If in MANUAL Mode the package will be weighed but not run through the system.
The label will print out and need to be manually removed and applied to the
package.
- If in WRAP ONLY Mode the package will be wrapped but not weighed and no label
will be issued or applied.
The Mode can be changed from the Wrapper Control screen.
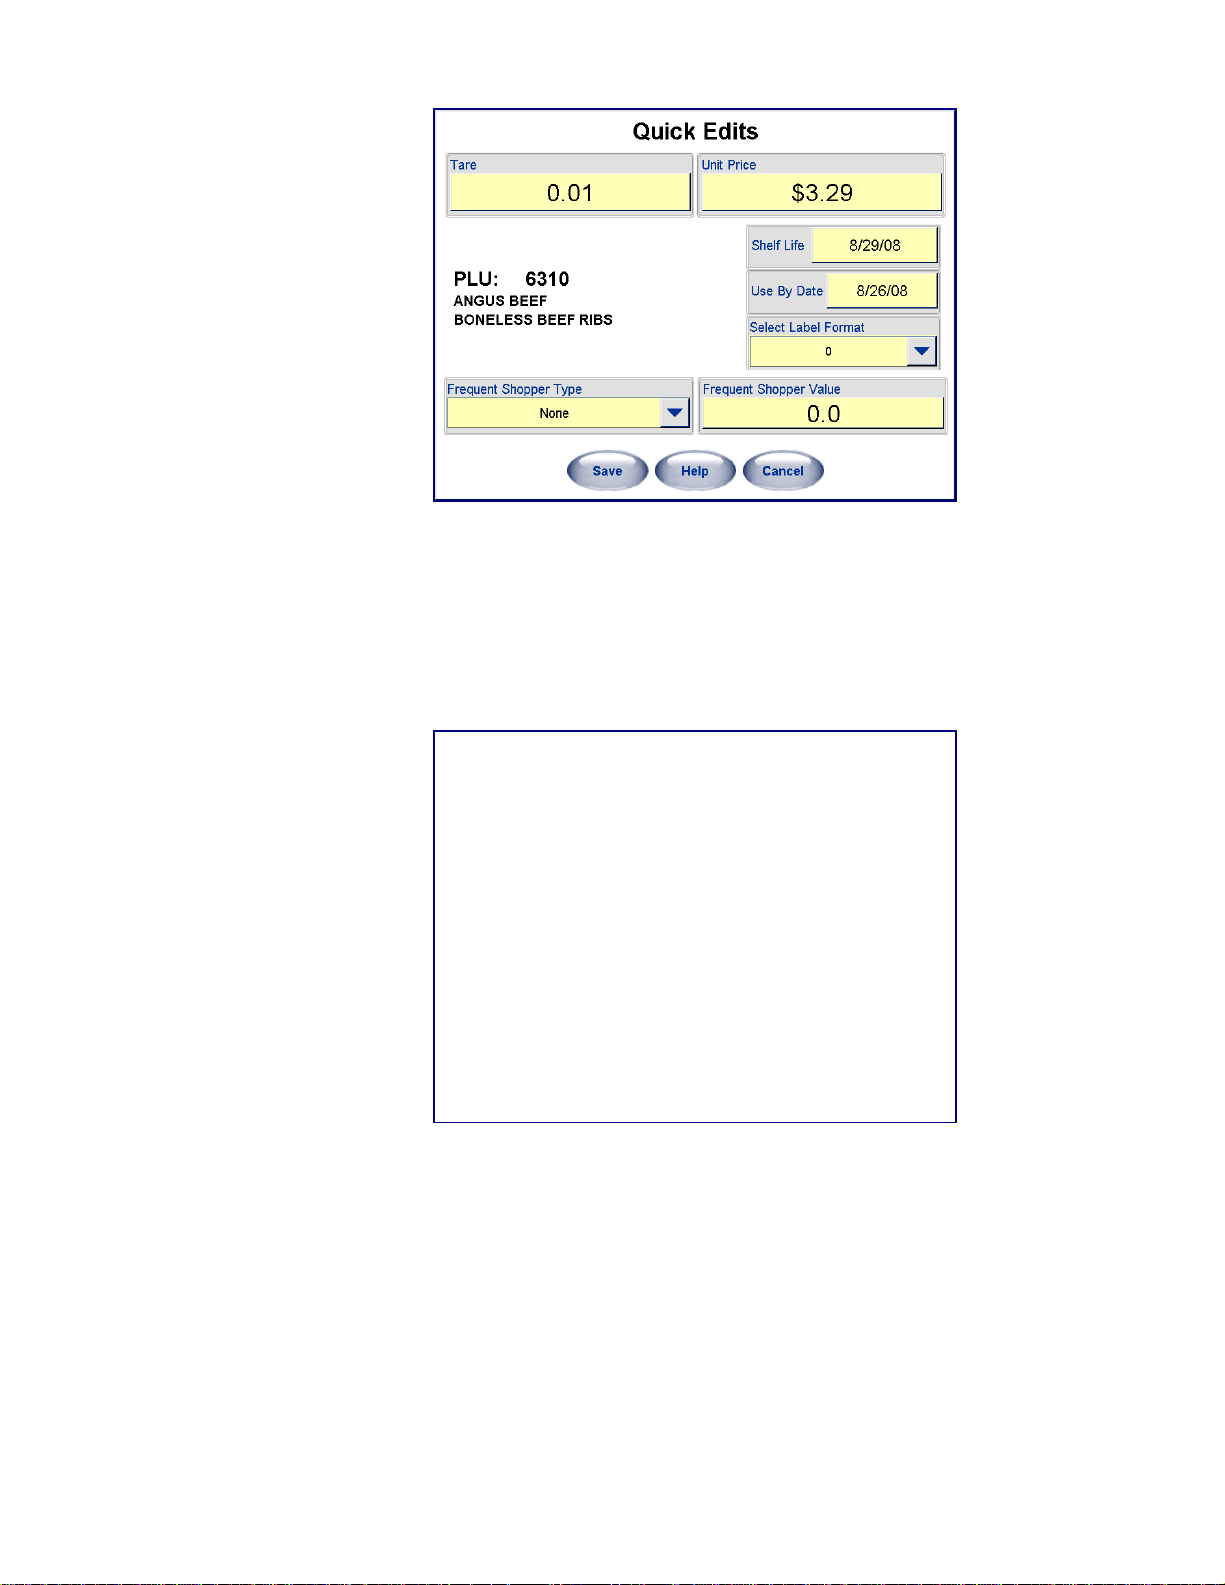
By using the Quick Edits selection on the Controller, some of the more common
numeric data in a PLU record can be changed. The Quick Edit function changes the
record in the database immediately. Items that can be changed include the price, tare,
shelf-life, and use-by date.
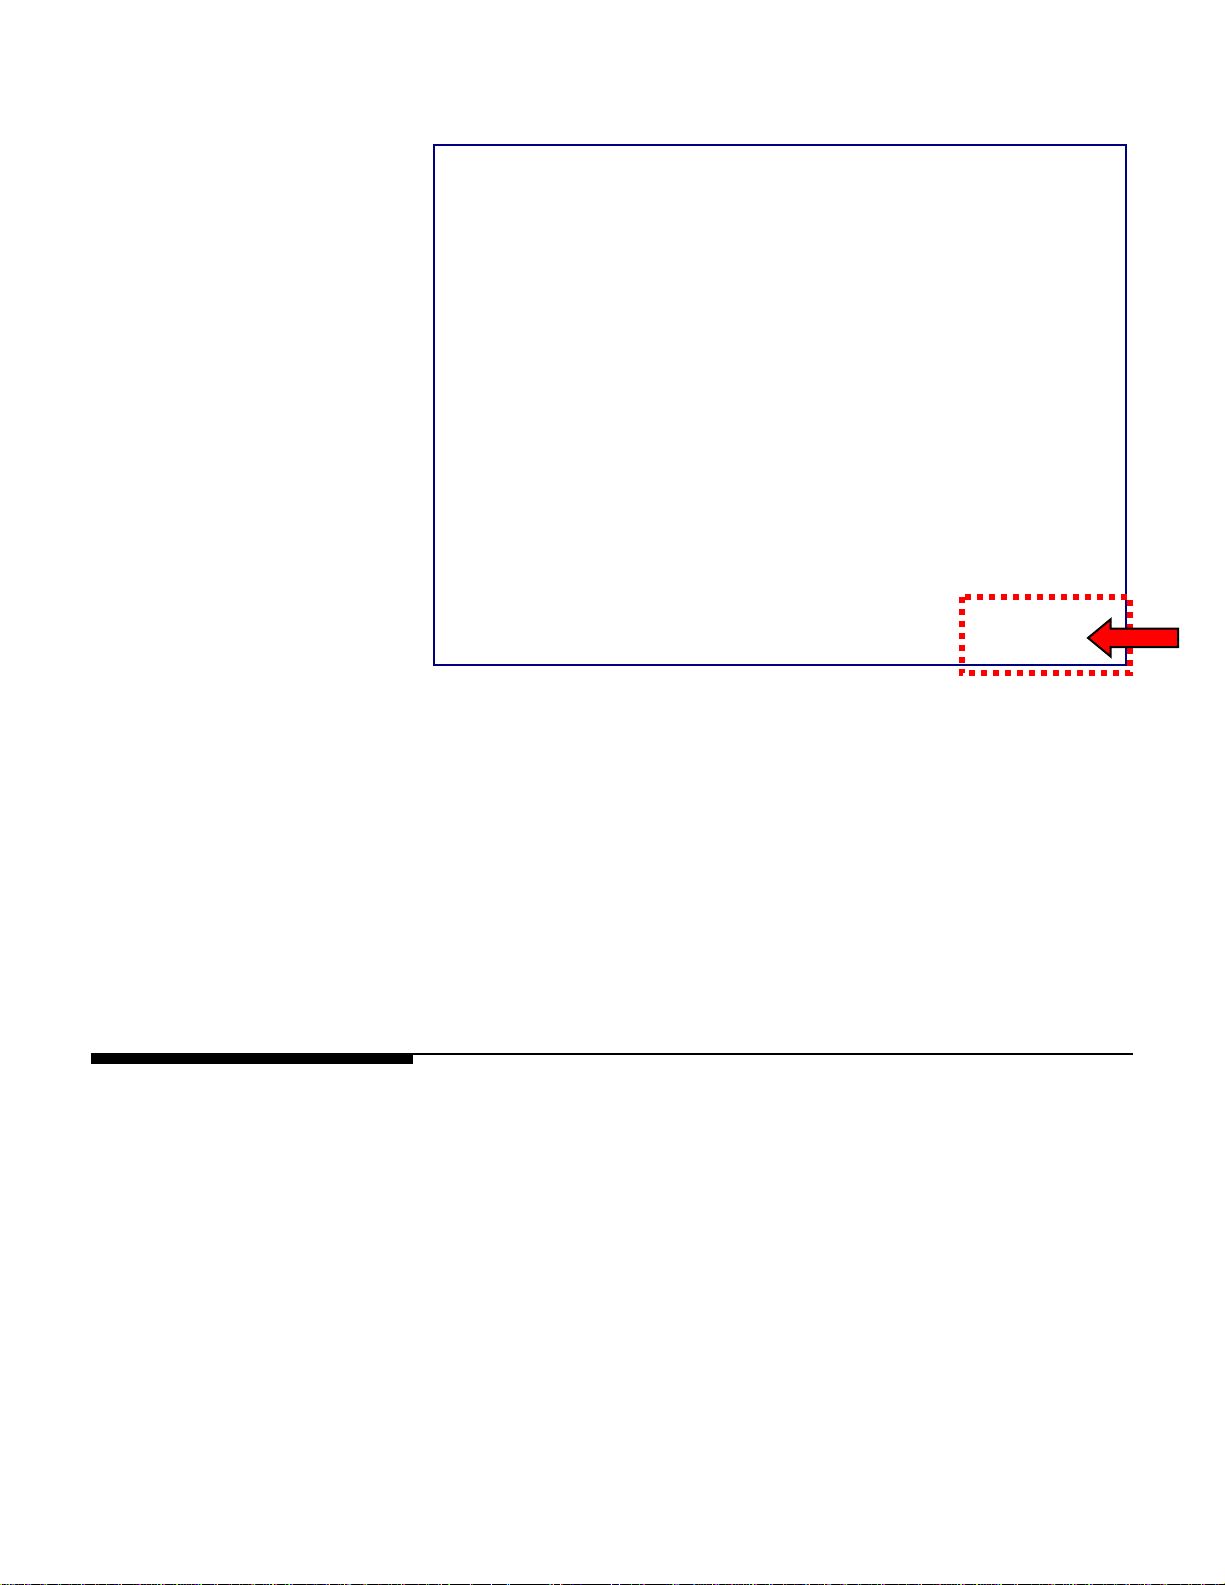
Quick Edits are accessed by pressing the Setup button on the Main screen. The Setup
screen is shown below.
2-10
Page 27

NOTE: Quick Edits is not for adding
new records or deleting PLUs. See
the UC editor section in the UC
Software Tech Manual for
information on adding and deleting
PLUs.
Chapter 2: Operation
Controller - Quick Edits
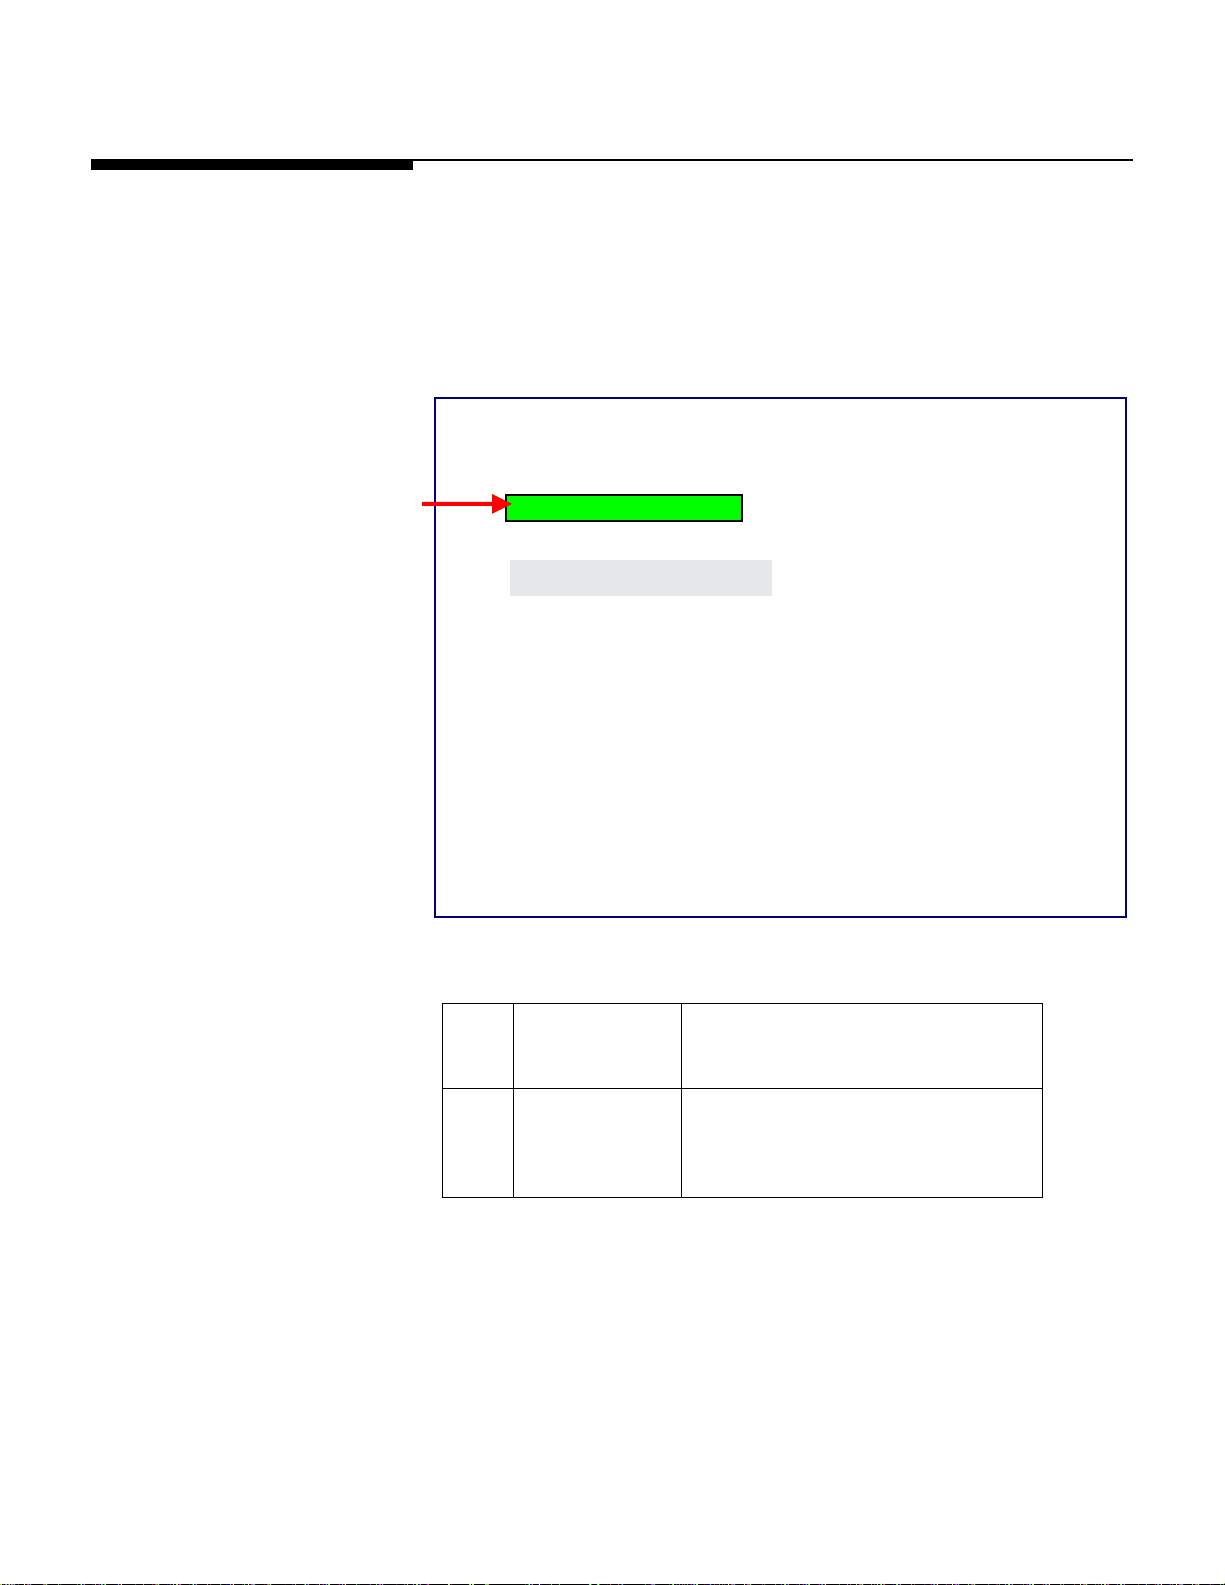
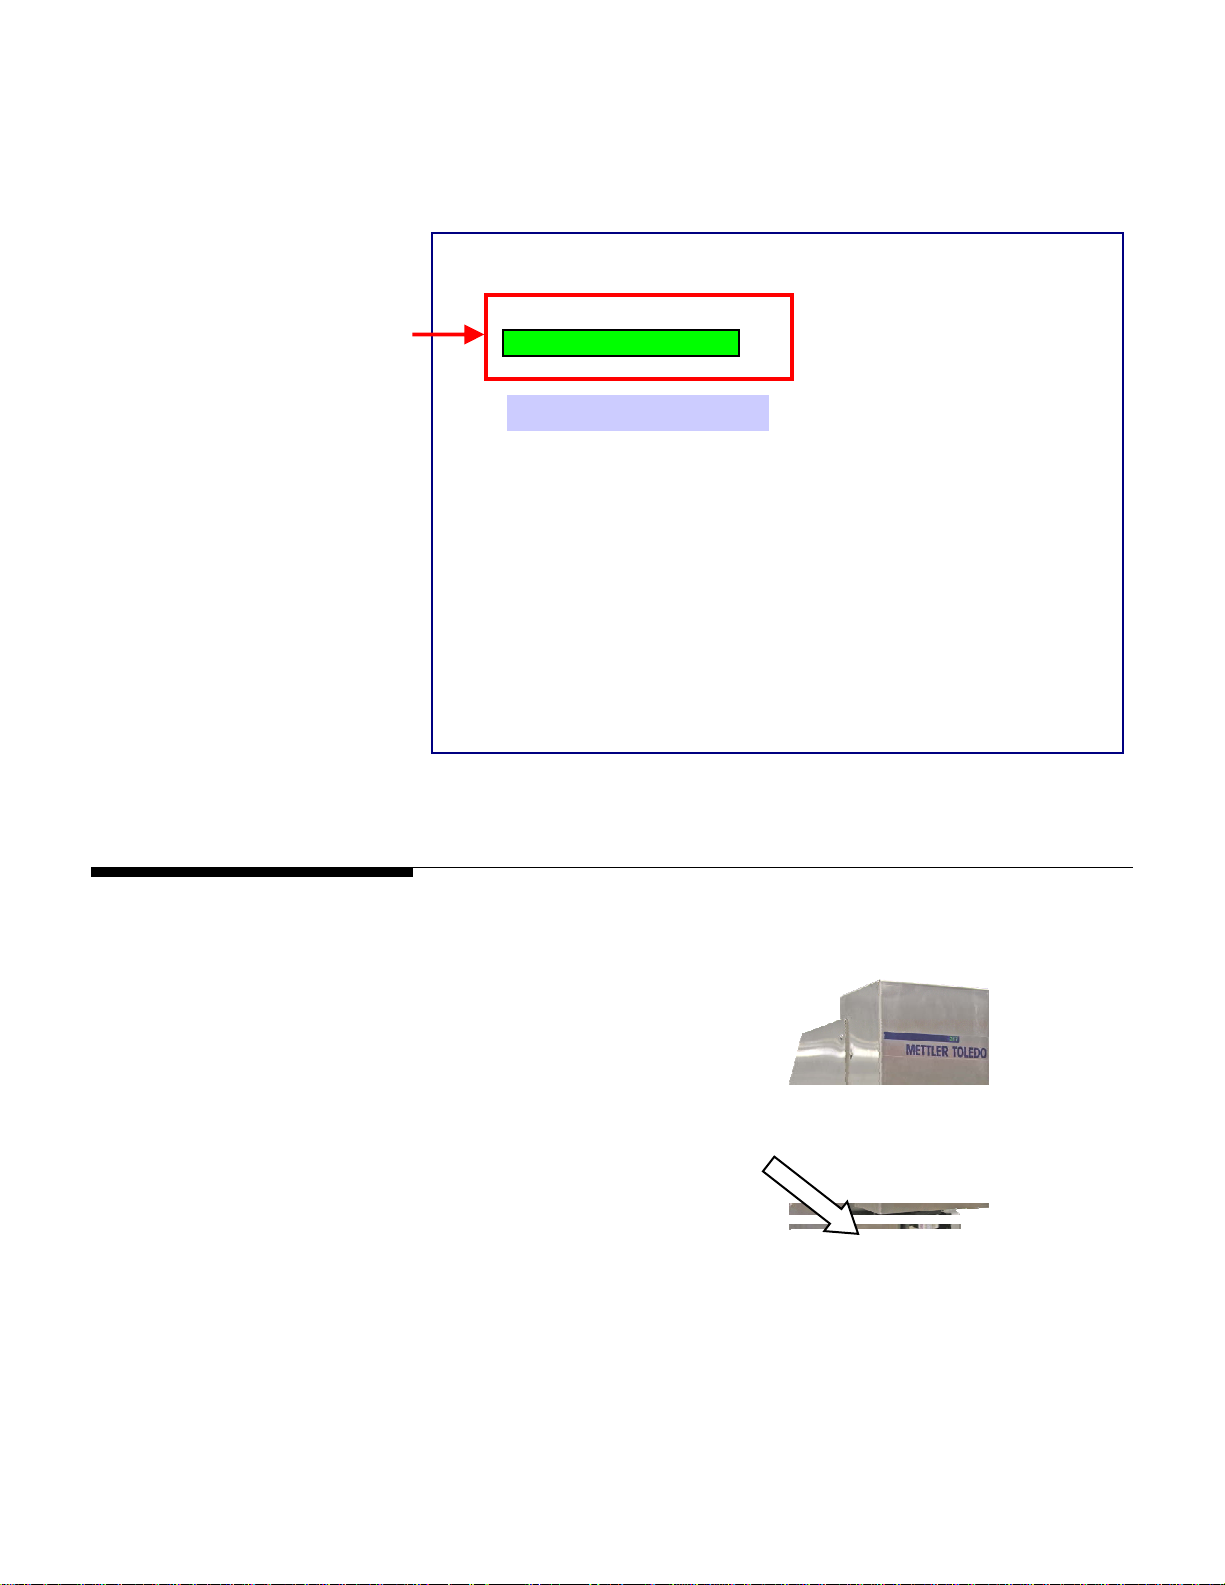
To return to the Main screen, press the Return button. Touch the Quick Edits button to
enter the Quick Edits mode and select the department (below). Press Next.
The Quick Edits screen displays the current department. Type in the PLU number and
press the Enter key. The PLU data will be retrieved from the database. To change any of
the displayed fields, touch the box that displays the data.
2-11
Page 28
METTLER TOLEDO® Commander User's Guide
The PLU can also be converted to a Frequent Shopper price by touching the Frequent
Shopper Type and Price boxes.
To change the Shelf Life or Use By dates by touching the appropriate boxes and
selecting a new date from the calendar.
Touch the arrow keys at the top to change the month. You can also enter the date
numerically by touching the “Use Numerical Keypad” key.
Touch the new date, and then press the OK key to make the change.
Repeat this process for any other items that need to be modified.
2-12
Page 29
Film Tension
Chapter 2: Operation
Film Tension
This section explains how film tension is used to achieve the best wrap program for a
particular tray and how the sealing belt temperature is used.
Film Setting controls the tension of the film during the wrapping process. This ensures
a properly wrapped tray with the least amount of wrinkles. The Film Setting is found by
pressing the Wrapper Control button on the PLU screen or the Wrapper Button on the
Main screen.
NOTE: the Commander can use
either 11” or 13” film. This setting is
based on the film size the machine
was set up for at installation. Contact
Mettler Toledo service if you wish to
use a different film size than what the
machine is currently configured for.
From the Wrapper Control screen, select a film setting appropriate to the type of package
being wrapped.
5: Low Tension 13”
OK
C
C
C
3 Medium Tension Normal tension mode for most products
and trays. The default film tension setting
is 3.
5 Low Tension Less tension for larger trays with height
greater than 3 inches, less stable trays,
fragile products, or products with sharp
edges that may tear the film.
The default setting is a film tension of 3 for 13” film.
2-13
Page 30
METTLER TOLEDO® Commander User's Guide
When a change is made to the Film Tension, the field will change color while the
wrapper is adjusting to the new setting. The film tension usually adjusts within a few
seconds. When ready, a white background will be displayed again. DO NOT send
anything through the wrapper until the white background appears.
5: Low Tension 13”
OK
C
C
C
Printer – Label Printing
Check the printer’s status LED (front of unit) to make sure the printer is ready.
Green LED indicates printer is ready.
Red LED indicates an error condition.
Orange LED indicates a blocked sensor.
2-14
Page 31

Belt Temperature Controls
NOTE: The film may not be completely
sealed until the belt temperature has
reached the designated level. In a cold
room, this could take up to fifteen
minutes when first powered up.
NOTE: If the desired temperature is
higher than the actual temperature, the
actual temperature field will appear in
blue until the belt temperature increases
to the desired temperature. If the
desired temperature is lower than
actual temperature, the actual belt
temperature will appear in red until the
belt cools down to the set temperature.
Chapter 2: Operation
Belt Temperature Controls
To set the belt temperature, press the Set Belt Temp box and select the desired
temperature from the drop down list. The temperature is shown in degrees centigrade (C).
The actual and ambient temperature is also show below the selected belt temperature.
5: Low Tension 13”
OK
C
C
C
If after reaching the selected temperature the film does not seal, increase the
temperature. If the film is charring or browning, decrease the temperature.
C
5: Low Tension 13”
OK
C
C
C
C
C
2-15
Page 32

METTLER TOLEDO® Commander User's Guide
Auto Shut-offs
The Commander comes equipped with three (3) Interlock Switches and one (1) Stop
Switch, all of which stop operation of the unit if they are actuated.
One interlock switch is actuated when the safety light curtain (located at the Infeed
Safety Sensors), is broken; two are triggered if the top covers on the Canopy or Transfer
Conveyor are opened; and the Stop Switch (located on the front of the machine) is
actuated by manually pushing down.
Canopy Safety
Switch
Stop Switch
2-16
Transfer
Inside view of Infeed
Safety Switch
with Photoeye detail
Infeed Safety Sensors
Conveyor
Safety
Switch
Page 33

Stop Switch
The Commander will stop all
wrapper movement immediately
when the Stop Switch is pressed
down.
Chapter 2: Operation
Auto Shut-offs
Once depressed, the Stop Switch must be reset
before operation can begin again. Follow the
arrows turning the Stop Switch clockwise.
This will activate the Switch again. Then follow
instructions on the controller screen to re-start the
wrapper.
2-17
Page 34

METTLER TOLEDO® Commander User's Guide
Normal Shut-down
The main power switch on the front of the Commander will turn off power to the wrapper
electronics and the printers. Turn this switch off first to 0 (off).
The controller power is not switched by the wrapper power switch and uses a dedicated
switch for shutting down or powering up. The Controller power switch will perform a soft
shut down of the operating system or it can be shut down using the Setup – Shutdown
System functions on the controller. Do this after switching the wrapper power switch off.
When using the machine daily, or for extended downtime, the following is
recommended.
For daily use:
• Turn the Wrapper Power Switch OFF.
• Leave the Controller Power ON.
Extended Down Time (Two or more days)
• Turn the Wrapper Power Switch to OFF.
• Turn the Controller Power Switch to OFF.
2-18
Page 35

3 Film Loading
Loading Instructions
The Commander is designed to work with either 11 inch or 13 inch food-grade stretch
film from 58 to 80 gauge. For a list of approved film vendors, contact Mettler Toledo.
The film width will be set up at installation time by a qualified technician to work with
your choice of film. Loading film is easy and once familiar with the machine, changing
film will generally take less than a minute. To change or load new film, perform the
following steps. Power to the Commander does not need turned off.
1
Open the top cover.
Open the transfer belt cover.
Lift the transfer belt to the locking
position using the handle until it
locks in the raised position.
Note: if the unit has a DayGlo
printer in place, remove the
printer’s lock pin and rotate the
printer so it is not blocking the
way.
Release the film bobbin using
4
the latch and pivot the bobbin
outwards.
Hold the bobbin and rotate the
handwheel counter-clockwise to
release the tension.
Remove any empty film roll.
Chapter 3: Film Loading
Loading Instructions
2
3 3
5
3-1
Page 36

METTLER TOLEDO® Commander User's Guide
6
8
10
12
Position the new film roll so
the film unrolls from the top
and away from the machine.
Slide the new roll of film on
the bobbin until the roll
contacts the stop disk.
Note: if using 11” film the roll
will not contact the stop disk
and must be centered by the
distributor.
Tighten the handwheel (clockwise)
to secure the film to the bobbin.
Re-latching the film bobbin.
Pull the film and thread it first
under the dancer roller.
Continue pulling the film up over
the curved rollers and into and
through the film folders.
Lower the transfer belt by first
lifting by the handle and using
the tab on the locking lever to lift
the lever up.
Make sure you have a firm
hold on the handle to safely
lower the belt.
Close the transfer belt cover.
7
9
11
13
3-2
Page 37

Chapter 3: Film Loading
Loading Instructions
From the front of the machine,
14
grab the film and pull it up.
While continuing to hold the
film, close the top cover.
15
On the Controller, press the CUT
16
FILM button.
The Controller screen will then
return to the previous function
17
and the machine is then ready
to use.
3-3
Page 38

METTLER TOLEDO® Commander User's Guide
For your notes
3-4
Page 39

4 Trays
Loading the Trays
The Commander wrapper is designed to wrap product contained in standard food trays,
designed for automatic wrapping.
If the dimensions of the tray exceed the maximum allowed by the machine, the machine
will stop and reject the tray.
1. Trays must be sufficiently rigid and the item must be contained completely within
the dimensions of the tray.
2. Place the tray on the Infeed Belt against the black guide on the right side to start the
machine.
3. Proper placement is when the red sensor light (A) shines on the upper right hand
corner of the tray. Simultaneously, a short beep will sound when placement is
correct.
Chapter 4: Trays
Loading the Trays
4. A tray must pass through the photoeyes before the next package can be placed and
weighed. Allow belts to stop before placing the next tray.
A
4-1
Page 40

METTLER TOLEDO® Commander User's Guide
Tray Specifications
All products must be completely contained in the trays. If a product overhangs the tray
damage can occur and the machine will not be able to properly wrap the product.
The trays must also be stiff enough to support the product properly.
No water or liquid can be in the tray.
The tray dimensions used by the Commander must fall within the following limits
(shown using 13” film). When the Commander is set up for 11 inch film, 9S and
10x14 trays are too large for the film and cannot be used.
13”
Film
Minimum
(mm)
Minimum
(in)
Maximum
(mm)
Maximum
(in)
L 180 7.1 400 15.8
W 130 5.1 260 10.3
H 20 0.8 133 5.25
Maximum allowable dimensions will be less when using the machine with 11 inch film.
Some trays will require loading a certain way, landscape or portrait. Refer to the tray
loading reference tables for 11 inch and 13 inch machines on the following pages.
4-2
Page 41

Tray Reference Chart – 11” Film
Chapter 4: Trays
Tray Reference Chart – 11” Film
If tray height is
less than 3”
If tray height is
less than 3”
If tray height is
greater than 3”
If tray height is
greater than 3”
If tray height is
greater than 3”
4-3
Page 42

METTLER TOLEDO® Commander User's Guide
Tray Reference Chart – 13” Film
If tray height is
less than 3”
If tray height is
less than 3”
If tray height is
less than 3”
If tray height is
greater than 3”
If tray height is
greater than 3”
If tray height is
greater than 3”
4-4
Page 43

5 Printers
Introduction
Thermal label printers on the Commander have a large label capacity and are designed
to print labels containing human-readable information, UPC/EAN bar code symbols, and
graphics. Your system may have one or two printers installed, a Price Label
Printer/Applicator or DayGlo Label Printer/Applicator.
When used in an automatic system such as the Commander System, the price label
applicator can apply 2.63 in. (67mm) wide labels with lengths of 2.1 in. (53mm) to
4.2 in. (106mm).
The DayGlo label applicator can apply 1.56 in. (40mm) wide labels with lengths from
0.9 in. (23mm) to 1.5 in. (38mm).
The label print width range is 1.57 in. (40mm) to 3.14 in. (80mm).
All information and settings to the printer are set by the Controller.
Chapter 5: Printers
Introduction
For additional information on the printer and label specifications, refer to the 317
Service Manual (P/N C82784900A rev. 2 or higher).
Ope
5-1
Page 44

METTLER TOLEDO® Commander User's Guide
Loading Label Stock
The power can be left ON when changing labels on the 317 printer.
Some systems have two printers installed. If your system has two printers, the process
of changing labels is the same on both printers.
Note: Mettler-Toledo recommends cleaning the printer mechanism with every label
change.
For reference, you can always refer to the loading instructions located below or on the
inside of each printer door.
The following step-by-step instructions follow along with this diagram.
Before you begin installing the new labels, place the new roll of
labels on the Ticket Wheel with the labels unwinding from the
top to the front of the printer.
5-2
Page 45

Chapter 5: Printers
Loading Label Stock
Begin installation of the labels
by raising the ski bracket.
1
Route the labels around the rear
guide and into the printer
engine.
2
Manually feed about 2 1/2" of
3
labels into the printer or until it
stops when it reaches the rubber
platen roller. Make sure the
labels go through the Gap
Sensor.
Press and release the Label
Feed button until labels are fed
approximately 16 inches
straight down from the stripper
bar.
4
Remove the labels from the liner.
5
Route the labels around the
rear guide and into the printer
6
engine.
5-3
Page 46

METTLER TOLEDO® Commander User's Guide
7
Note: if using perforated or black preprinted stock, a Service Technician may need to
adjust the printer for proper indexing of the labels.
Remove the liner take-up clip
from the take-up spool. Wind
the liner around the take-up
spool and secure with the liner
clip.
Lower the Ski Bracket.
Once the new labels are in
place, close the side cover and
secure the knob.
Your printer is now ready to go.
Check the Status LED on the
front of the printer.
• GREEN indicates the printer
is Ready.
• ORANGE indicates a
blocked label taken sensor.
Recheck that you have
threaded the labels
correctly.
8
5-4
Page 47

6 Controller - Operation
Introduction
PrePack Controller software is designed for use in a PrePack Food Environment. The
PrePack Controller is a part of a programmable wrapper system that offers very flexible
programming and formatting with an easy-to-use user interface.
Chapter 6: Controller - Operation
Introduction
Classic Interface
Fusion Interface
The Commander controller can display in either a Classic or Fusion interface. All
functions and options are available in both interfaces; it is simply a matter of operator
viewing preference.
For further details on changing the controller interface, see the UC Software Technical
Manual (B16588100A) or contact your system administrator.
6-1
Page 48

METTLER TOLEDO® Commander User's Guide
Main Screen Elements
1
14
13
2
3
4
5
6
7
9
12 11 10 8
Weight Display. Touch to zero the scale.
1
Current Department, date, time, and network ID.
2
Price Look Up (PLU) number display.
3
CLEAR button clears values from the display.
4
ENTER accepts the displayed value.
5
BACKSPACE erases the last entry. When pressed again it erases digits to the left.
6
The Search button is used to search the Database for a PLU based on alpha-numeric input from
7
the operator.
The Operations button is used to access the Cutting Test and Void Transactions functions
8
The Wrapper button is used to access various settings for the wrapper such as the tension of the
9
film and the temperature of the belt. This button will appear RED if there is an error in the
wrapping unit.
If the Help system is enabled, a Help button will appear on certain screens. When touched, this
10
button will launch the Help system. The arrow describes the area occupied by the button when it
is enabled.
The Setup button is used to enter the controller's Setup Mode.
11
Preset Page Selector Buttons are used to select the preset page you wish to use to perform a
12
transaction. When there are more buttons than can be displayed on the screen, use the arrow left
or arrow right buttons to toggle through all of the pages. The current page will be highlighted.
These buttons are configured in Setup mode in Presets Setup.
Preset Buttons are used for one-touch call up of PLU records. A PLU number can be assigned to a
13
certain key. When this key is pressed, it calls up the record assigned to it.
Gross/Net indicator. When Net displays, this indicates a tare weight.
14
Main Screen Elements
6-2
Page 49

PLU Screen
1
19
18
17
16
15
2 3 4
Chapter 6: Controller - Operation
PLU Screen
5
6
7
8
9
10
11
1 This is the weight of the item (less the tare) if the PLU is sold by weight. Touch to zero the scale.
2
The Tare is programmed into the PLU record. Touch this box to override the tare, if allowed in setup.
3
The Unit Price is programmed into the PLU record. Touch to override (if allowed in setup). This is used to calculate the
Total Price.
4
This value is the Total Price of the item. If the item is sold by weight, this is the unit price multiplied by the weight of the
item. Total Price is never operator accessible.
5
Pack Date uses the current date set in the controller. This will print on the label if it is included in the label format.
6
Shelf Life is programmed into the PLU record. This date is used to show the date when the item should not be sold
anymore. This date will print on the label if it is included in the label format. When the box is white, this date can be
changed.
7
The Use By Date is programmed into the PLU record. This date is calculated based on the current Pack Date. The item
should not be consumed beyond this date. This date will print on the label if it is included in the label format. When the box
is white, this date can be changed.
8
Clear ends the transaction and returns the display to the Main Screen.
9
The Options button is used for temporary overrides to change various settings.
10
A Help button will appear on certain screens. When touched, this button will launch the Help system.
11
Print - prints the item label.
12
Landscape/Turn Label allows the user to modify the label’s orientation.
13
The Place Label button allows you to graphically select the location and orientation that the label will be placed on the
package.
14
Wrapper Control takes you to the Wrapper Control screen where you can modify various settings of the wrapper itself, such
as the tension and temperature of the film.
15
Total Packages, Total Weight, and Run Total show any accumulated totals that apply to the current Run.
16
Family Pack is a macro that is setup to reduce the price when sold in larger quantities.
17
Rewrap flags the transaction as an item that was previously weighed and pulled from the case.
18
The Extra Text number is programmed into the PLU record so when the PLU is called, the associated Extra Text is called.
When the box is white, this can be changed.
19
Gross/Net indicator: when Net displays, this indicates a tare weight.
14 15 16
PLU Screen Elements
6-3
Page 50

METTLER TOLEDO® Commander User's Guide
Options Button
The Options button on the PLU Screen is used for the following temporary overrides.
The Options screen below allows overrides on all of the items. The boxes are white,
indicating overrides are allowed. If the boxes are not white, no overrides are allowed.
The overrides can be enabled or disabled from the Transaction Screen Overrides
screen in the Service Scale Setup, as shown below. In order to allow the overrides, the
boxes must be checked.
Label Format
An alternate label format can be selected for this run using this override.
Grade
You can select another Grade for this run using the drop down menu.
Bottom Label Format
If configured, this is used to apply a bottom label to every package when used in
an automatic system with a bottom label applicator.
Satellite Graphic
If a Satellite Graphic is configured on the label, you can use this to override the
graphic used for this run, or disable it for this run.
Linked Graphic
If a linked graphic is configured on the label and in the PLU record, this can be
used to select another for this run.
DayGlo Graphic
If there is a DayGlo printer used, the programmed graphic can be changed for this
run. Select from a drop down list or using the Keypad enter the graphic’s
corresponding number.
Accumulator
A different accumulator for the totals information can be selected using this
function.
6-4
Page 51

Chapter 6: Controller - Operation
Run Total
Totals from the selected PLU’s current run are gathered based on weight, cost, and
number of packages. These are displayed on the PLU Edit Screen. They can be
printed on a “Run Totals” label if needed.
Note: the Run Totals label format is set up from the Label Printer Setup screen.
Print Inhibits
Select the Print Inhibits button from the Options screen to view what items you can
refrain from printing on a label for this transaction.
PLU Screen
6-5
Page 52

METTLER TOLEDO® Commander User's Guide
Place Label Button
Selecting the Place Label button on the PLU screen will bring up the Label Placement
Note: when the printer is in
Wrap Only or Manual
Mode the Place Label
button on the PLU screen
turns gray and the text is
replaced by the Mode you
are in.
screen.
From this screen you can graphically select where on a package the final label will be
placed as well as the orientation of the label.
1
At this point, the button
cannot be selected because
label placement is not
required when the wrapper
is in Wrap Only or Manual
Mode.
2
The green arrow (1) shows the edge of the package the offset is applied to. The red
letter A (2) indicates the orientation of the label graphics.
You can select a landscape or portrait package orientation. Then click on one of the
squares to assign a quadrant that the label will be applied. Next a label will appear and
by clicking on it you can change rotate the label 90°.
Note: Label Placement must be assigned prior to running packages through the
wrapper system. Depending on which label orientation has been selected, the 317
printer(s) may need to be manually adjusted as well.
Th
6-6
However, once label placement has been designated, if a package is going to be
inserted Landscape rather than Portrait checking the Turn Label button on the PLU
screen will adjust label placement. The label will correct to be in the designated
quadrant regardless of package orientation.
Edge Offset
Edge Offset shows the numeric value of where the label will begin from the edge of the
package. Default is 25.
Page 53

PLU Pricing Modes
By-Weight PLU
Chapter 6: Controller - Operation
PLU Pricing Modes
PLU is an abbreviation for Price Look Up. The PLU is a reference number assigned to
access a product's record that includes fields such as the description, price, tare, etc.
Different PLU's will have different pricing modes. Meat is normally sold "By Weight" by
the pound or kilogram. Many bakery products are sold "By Count". Other products may
be sold in a standard package that all weighs the same (or assumes all weight is the
same or a minimum value). The different pricing modes are as follows:
Examples of products sold by weight are meats, cheese, poultry, and produce. ByWeight items can be priced in three ways:
• Priced "Per Pound" - Typically weighed items are priced per the pound. The weight
multiplied by the unit price equals the total price of the product to the customer.
• Priced "Per Fraction of a Pound" (fractional) - The item may also be priced by the
fraction of the pound (where legal and desired). Pricing per 1/4 pound and per 1/2
pound are available.
• "Pounds for" price - The PLU may be sold with a pounds for price (rather than price
per pound). (2 pounds for $1.00).
By-Count PLU
Standard Pack PLU
Note: if the scale is calibrated for kilograms (kg), the above applies but based off of kg.
Examples of items sold by the count are cookies, donuts, rolls, bread, etc. Example: 4
Apples for $0.69. The By-Count PLU allows the operator to use the wrapper for a
labeling operation. Pricing is entered as a certain quantity of items for a set price. If the
total weight for the items is needed, a weight field can be configured on the label to print
the weight of the items in addition to the By-Count information.
Examples of items sold by Standard Pack include whole chickens, sheet cakes, bread,
etc. The Standard Pack PLU is similar to By-Count and also allows the operator to use
the wrapper for a labeling operation. The labels indicate the net weight of the item and
total price of the item. These types of items all weigh the same (or are assumed to
weigh the same or of a minimum value).
6-7
Page 54

METTLER TOLEDO® Commander User's Guide
PLU Search Modes
The Search Function allows you to search for a PLU by name or partial name. This is
helpful if the PLU number is unknown or if a list of choices is desired.
From the Main Screen, click on the Search button.
From here the Search screen will appear. Select the Department you want via a
dropdown menu (1). Then using the keyboard (2) type in the word, or portion of the
word, you are looking for and hit the Search button (3).
The returned search list is browsed via a scroll bar.
1
2
3
6-8
Page 55

Chapter 6: Controller - Operation
PLU Search Modes
This will return a list of any PLU in the database which contains that word as part of a
keyword or description. Highlight the PLU by touching it.
This will return the PLU in the PLU Screen.
6-9
Page 56

METTLER TOLEDO® Commander User's Guide
Country of Origin Labeling (COOL)
Country of Origin Labeling (COOL) is information assigned to a specific PLU that
designates where a product came from and the processing it went through.
If a COOL is associated with a PLU, you will be prompted to choose a preconfigured
COOL statement or, in some cases, create custom COOL statements prior to going on to
the PLU transition screen.
COOL associations are set up from the UC Editor. For more information on the COOL
setup procedure see the UC Editor Manual or UC Software Technical Manual.
Preconfigured COOL Statements
If a PLU is selected that has a forced COOL statement, the Preconfigured COOL
Declaration screen will appear. Preconfigured COOL Declaration screen consists of:
Current COOL Text (1) – will display the text which is selected from the bottom list and
this text will appear on the label if proceeding with the transaction.
Default COOL Text (2) – will display the defaulted COOL text which will be printed on
the label if nothing else is selected.
Most Recently Used Text (3) – the COOL text statement that was last used on a
transaction and printed on a label for the selected PLU.
List (4) of possible preconfigured text that can be applied to the selected PLU.
1
2
3
4
6-10
After selecting the text you wish to use, hit
Enter. You will continue onto the PLU
screen, where the COOL text area will be
displayed (5).
5
Page 57

Chapter 6: Controller - Operation
Country of Origin Labeling (COOL)
If a COOL statement is configured to the PLU but it is not “forced” (meaning you are able
to complete a transaction without selecting a COOL statement to be printed on the
label), a No COOL button is available.
Select No COOL if you wish to complete the transaction and have the label printed
without any COOL statement.
This PLU does not have COOL Statements Enforced,
so a transaction can proceed without a COOL
statement by using No COOL
If the PLU selected has data that will allow the user to construct a custom COOL
statement, the Custom button is available as well.
This PLU does have COOL Statements Enforced,
so Preconfigured Text or Custom Text must be
selected before proceeding.
6-11
Page 58

METTLER TOLEDO® Commander User's Guide
Custom COOL Statements
Custom COOL statements are constructed from keywords or production steps and
country names. If a PLU record has custom COOL production steps and country
names associated with it, a Custom button will appear at the bottom of the
Preconfigured COOL Declaration screen.
Note: If there is no Preconfigured COOL text associated with the PLU, the user will be
immediately taken to the Custom COOL dialogs.
Select a Production Step (1) followed by a Country (2). Continue in that fashion until
satisfied with the new custom COOL declaration (view in the Custom COOL Text field
on the top of the screen).
Choose the Done button when complete.
The Undo button will undo the last entry and you may continue to “undo” until all
countries and production steps are removed.
The Clear button will completely clear the custom declaration allowing a new
declaration to be built.
6-12
Page 59

Forced COOL
Chapter 6: Controller - Operation
Country of Origin Labeling (COOL)
There is a flag on the PLU record that indicates that COOL is to be forced on that PLU.
There is also a setting within Service Scale Setup that enables forced COOL on the
wrapper. When both of these are set, the Commander will not allow a transaction to
complete without a COOL statement selected for printing on the label.
COOL PreText
COOL Pre-Text is a single text record associated with the PLU in the PLU record. It is
not changeable and is always printed on the label. The most common use of it is to
identify if seafood is farm raised or caught in the wild.
6-13
Page 60

METTLER TOLEDO® Commander User's Guide
Wrapper Control
You can access the Wrapper Control screen two ways: from the main screen by clicking
on the WRAPPER button (no PLU needed) or from the PLU screen by clicking on
Wrapper Program box.
From the Wrapper Control screen you can regulate various wrapper settings as well as
view error logs.
5: Low Tension 13”
OK
C
C
C
6-14
Page 61

Mode Buttons
Chapter 6: Controller - Operation
Wrapper Control
The Commander Wrapper can be set to one of four (4) modes (the active Mode will
appear with white text):
Normal Mode – the package will go through the entire cycle. It will be weighed,
wrapped and labeled.
Manual Mode – the package does not physically go into the wrapper. After weighing, a
label is printed and you will need to manually removed the label and apply it to the
package. Remove the package and, if desired, place a new package to be weighed; the
process must be repeated for each package, labels will not be printed automatically.
Wrap Only – the package will not be weighed nor labeled (automatically or manually).
The package literally is only wrapped.
Pre-Wrapped – the package will run through the system however it will only be
weighed and labeled. It will not be wrapped, by selecting this mode it is assumed the
package is already wrapped.
Note: If you access the Wrapper Control screen without a PLU (i.e. from the Main
screent Wrapper button) all the Mode buttons will appear gray and cannot be selected
except for Wrap Only. This is because for any wrapping mode other than Wrap Only
you need a PLU selected.
Done Button
If you access the Wrapper Control screen by using the Wrapper Control button on the
PLU screen, the Done button will begin to countdown (10 through 1). If no selection or
changes have been made it will automatically return to the PLU screen. This prevents
the wrapper from being left in the Wrapper Control screen while a PLU is active.
The countdown will reset to 10 after each change made in the Wrapper Control screen.
Select the Done button when you have made your changes or at anytime during the
countdown to return to the PLU screen.
Note: the countdown does not occur if you enter from the Wrapper button on the Main
screen.
6-15
Page 62

METTLER TOLEDO® Commander User's Guide
Film Setting
Film Setting controls the tension of the film during the wrapping process. This ensures
a properly wrapped tray with the least amount of wrinkles. The Film Setting is found by
pressing the Wrapper Control button on the PLU screen or the Wrapper Button on the
Main screen.
5: Low Tension 13”
OK
C
C
C
From the Wrapper Control screen, press a Film Setting appropriate to the type of
package being wrapped.
3 Medium Tension Normal tension mode for most products
and trays. The default film tension setting
is 3.
5 Low Tension Less tension for larger trays with height
greater than 3 inches, less stable trays,
fragile products, or products with sharp
edges that may tear the film.
The default setting is a film tension of 3 for 13” film.
Note: the Commander has two film size options, 11” or 13”. The setting is based on the
how the wrapper was set up at the time of installation. To change the film size, contact
your service office.
6-16
Page 63

Chapter 6: Controller - Operation
Wrapper Control
When a change is made to the Film Tension, the field will change color while the
wrapper is adjusting to the new setting. The film tension usually adjusts within a few
seconds. When ready a white background will be displayed again, do not send
anything through the wrapper until the white background appears.
Status
The Status field shows the current status of the Commander wrapper. If OK is not
displayed check the error logs and if needed contact a service technician.
5: Low Tension 13”
OK
C
C
C
Convey Package
Lower Infeed
The Convey Package button cycles the transfer and sealing belts, which allows a
package left on the belt, such as due to an error, to move forward. Eliminating someone
having to walk around and reach into the discharge end to retrieve the package.
The Lower Infeed button lowers the infeed so the scale can be verified without having to
go into a PLU and cancel the tare.
The button is only active when Wrapper Control is accessed from the main screen. If
you are in the PLU the Infeed should already be lowered and the button will appear gray
and be deactivated.
6-17
Page 64

METTLER TOLEDO® Commander User's Guide
Film Temperature Fields
There are three (3) fields that deal with the temperature of the belt and film.
Note: you will not get proper
sealing until the Set Belt
Temperature has reached
the designated temperature.
If after reaching the selected
temperature the film does
not seal, increase the
temperature. If the film is
charring or browning,
decrease the temperature.
5: Low Tension 13”
OK
C
C
C
Ambient Film Temp
Ambient Film Temperature lists the temperature near the film roll.
Actual Belt Temp
Actual Belt Temperature lists the temperature of the sealing belt. This temperature is
adjusted from the Set Belt Temp filed (see below).
Set Belt Temp
From the Set Belt Temperature field you can adjust the temperature of the belt by three
(3) degrees at a time. Typical temperature is around 135° C for sealing.
Select the desired temperature from the drop down list.
6-18
Page 65

Chapter 6: Controller - Operation
Wrapper Control
If the desired temperature is higher than the actual temperature, the actual temperature
field will appear in blue until the belt temperature cools to the desired temperature. If the
desired temperature is lower than actual temperature, the actual belt temperature will
appear in red until the belt cools down to the set temperature.
C
5: Low Tension 13”
OK
OK
C
C
C
C
C
6-19
Page 66

METTLER TOLEDO® Commander User's Guide
Error Logs
By clicking on Last 10 Errors or All Hardware Errors a new screen displaying the
current error logs will appear. This will either have just the last 10 errors detected by the
wrapper or all the errors since the last servicing depending on which error display was
selected. For further details see Chapter 8: Troubleshooting.
5: Low Tension 13”
OK
C
C
C
6-20
Page 67

Cut Film Button
More Data
Chapter 6: Controller - Operation
Wrapper Control
The Cut Film button will have the wrapper cut the film off. Once cut, the film needs to be
removed manually.
The Cut Film function is helpful when resetting the machine after an error, when clearing
a film obstruction or when loading film.
Clicking on More Data will display a screen with additional wrapper information.
Firmware Type
Firmware Type will display the model of the wrapper being used.
Firmware Version
Firmware Version will display the current version of wrapper being used.
Firmware Date
Firmware Date displays the date of release.
Wrapper ID Number
Wrapper ID Number will show the wrapper model identification number. This number
will be needed for all service calls.
Side Clamp Stretch Distance
This displays the amount the Side Clamp stretched wrapping the last package.
Center Clamp Run Distance
This displays the amount the Center Clamp pulled the film back wrapping the last
package.
6-21
Page 68

METTLER TOLEDO® Commander User's Guide
Total Packages Wrapped
This field displays the total number of packages wrapped from initial installation. This
number cannot be reset.
Packages Wrapped Since Service
The number of packages wrapped since the last date of servicing is displayed. This
number is reset by a service technician when the wrapper is serviced.
Packages Wrapped Since Powerup
The number of packages wrapped since last time the wrapper was powered up. This
number resets to zero (0) every time the wrapper is shut off.
Package Height
Package Height displays the detected height of the last package wrapped.
Package Width
Package Width displays the detected width of the last package wrapped.
Package Length
Package Length displays the the detected length of the last package wrapped.
Refresh
Use the Refresh button to refresh the wrapper information displayed.
Return
Use the Return button to return to Wrapper Control.
6-22
Page 69

Operations Menu
Chapter 6: Controller - Operation
Operations Menu
When you press the Operations button, the Operations screen will display. In this
screen you can perform the following functions.
Cutting Tests
The Cutting Test allows the operator to enter the primal weight and cost of a product.
Data collected during a Cutting Test can be used produce a report detailing the saleable
yield of a primal cut. The operator can enter and exit the test at any time and resume at
a later date.
To include bone and fat in the tests, the following two By-Weight PLU records should be
created:
Bone - Enter unit price as zero.
Fat - Enter unit price as zero.
6-23
Page 70

METTLER TOLEDO® Commander User's Guide
NOTE: the date is entered into the test
only when the PRINT key is touched.
The Bone and Fat items run at zero
price will appear below the saleable
yield line on the report.
Void Transactions
The controller will recognize the zero price non-saleable items and will split them from
the saleable items on the report. A third By-Weight PLU for miscellaneous trimmings can
also be created and included in the test.
After all of the items have been entered in the cutting test, everything should be weighed
and a label printed for each PLU.
The test is complete when all items from the test product are run.
Use this feature to void previous transactions so your totals collection will remain
accurate. Highlight the transaction, and then click the Void button.
Verify Labels
A dialog screen will appear to verify voiding the transaction. Click OK to confirm.
This function is used if you wish to print labels of all or selected PLUs. The information
printed on the label is determined by the Verify Label Format selected.
6-24
Page 71

Setup Overview
Note: Exercise care when
changing any machine
configuration settings. You
could accidentally disable a
printer, disable the PLU
database, etc.
Chapter 6: Controller - Operation
Setup Overview
The Controller’s Setup screens are accessed by pressing the Setup button on the Main
screen. The Setup screen is shown below. To return to the Main screen, press the
Return button. Touch the other buttons to enter into the desired setup topics.
Unit Setup
The following sections detail common functions available to the operator on the Setup
screen. Your particular unit may be configured differently than outlined in this chapter. A
password may be required to access setup so not all setup features may be available to
you.
Unit Setup is used to select the default department, configure Special Price settings,
customize the screens, and select other special options. The Unit Setup screen is shown
below.
6-25
Page 72

METTLER TOLEDO® Commander User's Guide
Choose Department
This is the "home" department where this wrapper will be used. PLUs called from the
numeric keypad will be from this department.
Scale Mode
Select from the following modes of operation:
PrePack – Print on weight change only.
PrePack – Print by weight change or print key.
Price Settings
You will be asked to press the
calibration switch before you
will be allowed to make
changes in this area. The
calibration switch may be
protected by a Weights and
Measures Seal. If this seal is
broken, the unit may require
certification again before use.
Manual Mode Keys
This selection defines the rules for rounding weight calculations, unit price, count, and
discounts.
By Weight Prices: Select Rounding Method 0-4 below.
By Weight Pricing Method: 0: Calculate Savings First and 1: Calculate Member Price
First. When selecting "0", the dollars/cents saved value is calculated first, and then the
member total price is calculated. When selecting "1", the member total price is
calculated first, and then the dollars/cents saved value is calculated. The calculations
apply only for the $/cents off the unit price for a By-Weight PLU.
By Weight Calculated Weight: Select Rounding Method 0-4 below.
Percentage Discount: Select Rounding Method 0-4 below.
By Count Prices: Select Rounding Method 0-4 below
Rounding Methods 0-4
0: FIVE UP (2.5350 ROUNDS TO 2.54)
1: FIVE DOWN (2.5350 ROUNDS TO 2.53)
2: IEEE ROUNDING (EVEN) (2.5350 ROUNDS TO 2.54, and 2.5450 ROUNDS TO 2.54)
3: TRUNCATE DOWN (2.5374 ROUNDS TO 2.53)
4: TRUNCATE UP (2.5315 ROUNDS TO 2.54)
6-26
A manual transaction allows the operator to manually price and label items if the unit is
offline from the database.
Allow Lbs for
Checking this box will allow this pricing mode during a manual transaction. Example:
The price could be set at 5 pounds for $4.00.
Allow By Qtr Pound
Some locations allow pricing by quarter pound. If this is legal in your area, you can
check the box to enable this pricing mode during a manual transaction. When this is
allowed, pricing at $1.00 per quarter pound is equivalent to $4.00 per pound.
Page 73

Tare to Use
Accumulators Setup
Chapter 6: Controller - Operation
Unit Setup
Allow By Half Pound
Some locations allow pricing by half pound. If this is legal in your area, you can check
the box to enable this pricing mode during a manual transaction. When this is allowed
pricing at $1.00 per half pound is equivalent to $2.00 per pound.
Select Tare 1 or Tare 2 fields to use as the default tare for this unit.
Proportional Tare
If Proportional Tare is used, it is stored in the Tare 2 field.
By-Weight Tare
By-Weight tares are stored in the Tare 1 field.
Note: The Net Weight will be the gross weight minus the By-Weight Tare, minus ( the
proportional tare times (the Gross Weight, minus By-Weight Tare value)).
Net wt = gross wt – by weight tare – (proportional tare * (gross wt – by weight tare))
Accumulators allow you to label a transaction as a specific type to allow for better
tracking of totals. This screen is used to select which accumulators to use, to Rename
the user accumulators, and to Set the Symbol that will print on the label when a user
accumulators is selected by the operator.
The “Rewrap(R)” and “Inventory(I)” are predefined and cannot be edited. However, you
can define three custom accumulators. When these accumulators are used, the symbol
in parentheses will print on the label as a flag. When creating custom labels, these
fields must be configured on the label. In addition, three custom accumulators can be
defined and the symbol used to flag these accumulators on the label and in the
database selected using the QWERTY keyboard (Set Symbol).
6-27
Page 74

METTLER TOLEDO® Commander User's Guide
Void Available
If you wish to allow the operator to void a previous transaction, check this box. Leaving
the box unchecked does not allow voids.
Scale Settings
The Scale Settings button has multiple pages of settings for the scale application.
Hit the Next Page button for further Scale Setting options.
6-28
Page 75

Chapter 6: Controller - Operation
Unit Setup
Print Mixed Net Weight
When checked, the Commander will print both avoirdupois (US Standard) and metric
weight on the label.
Print Horizontal or Vertical Tabular NF
You can select to print NF (NutriFact) in a horizontal, tabular format, instead of a
vertical, non-tabular format. You can also select Meat Nutrifacts in a vertical tabular
format.
Vertical Format
6-29
Page 76

METTLER TOLEDO® Commander User's Guide
Horizontal Format
Calculate Std Pack Unit Price per-lb
When checked, the Commander will calculate the unit price on a standard pack item as
a per pound unit price based on the net weight and the total price.
Hide Keypad
This function is not valid in the PrePack application.
HTML by PLU
This function is not valid in the PrePack application.
Allow Alternate Language
This function is not valid in the PrePack application.
Detail Logs
This setting is used for troubleshooting the unit. When checked, the application will
produce very detailed log files that are used to help troubleshoot issues.
Keypress Beep
When checked, the application will produce an audible “beep” when any button is
touched.
Safety Loop
This function is not valid in the PrePack application.
Alerts
This function will allow Alert warnings to fire when certain situations occur or certain
thresholds have been hit.
Screen Saver
This function is not valid in the PrePack application.
Frequent Shopper Text
The user can configure the exact text used for the three Frequent Shopper price fields
when displayed.
6-30
Page 77

Printer & Label Setup
Chapter 6: Controller - Operation
Printer & Label Setup
This screen is used to configure your printers, print verification labels, and to set up the
bar codes printed by the printer.
Choose Store Logo
Select the graphic that will print on all labels that have a store logo field defined.
6-31
Page 78

METTLER TOLEDO® Commander User's Guide
Label Printer Setup
Note: PLUs can be set to
print in MANUAL or
AUTOMATIC Mode.
Current Label Stock
The size of the labels listed must match the size of the labels that you will be using in
the data label printer “Printer 1” (the data label printer). Standard sizes available
include: 2.1”, 2.4”, 3.3”, 3.7”, 4.2”, 4.7”, 5.1”, and Continuous (roll stock).
Eject Length
This is the position the label will stop at after printing. This setting is used primarily with
an automatic applicator to compensate for variances in printers and labels. For
example, this setting can be used to make label pickup easier for an automatic labeler
by moving the stop position out if the labels are sticking to the liner, or to move the label
stop back if they are falling off the liner prematurely. To move the label stop position
farther out from the printer, increase this value. To move the stop position to stop
towards the printer, decrease this value. The default is 12.5 mm.
Image Offset
The Image Offset (in mm) is used to raise or lower the printed image on the label. The
factory default is 0.0 mm. To raise the image on a label, lower the value. To lower the
image on a label, increase the value.
GRADE 1 TEXT 7/27/06
NET WT UNIT PRICE
1.11 lb $1.99/lb
DESCRIPTION 1
DESCRIPTION 2
**TOTAL PRICE**
$2.21
23
00111 50221
ADDRESS 1
ADDRESS 2
The printing is too high
on the label on the left.
To lower the printing so
it is centered vertically
on the label, increase
the Image Offset value.
For example, by entering
an offset value higher
than the default 0.0,
such as 3.0, will lower
the image position.
6-32
Page 79

Chapter 6: Controller - Operation
Printer & Label Setup
GRADE 1 TEXT 7/27/06
NET WT UNIT PRICE
1.11 lb $1.99/lb
DESCRIPTION 1
DESCRIPTION 2
**TOTAL PRICE**
$2.21
The printing is properly
centered vertically on
the label to the left. No
adjustment is necessary.
23
00111 50221
ADDRESS 1
ADDRESS 2
DESCRIPTION 1
DESCRIPTION 2
GRADE 1 TEXT 7/27/06
Note: Exercise care when
1.11 lb $1.99/lb
23
00111 50221
ADDRESS 1
ADDRESS 2
**TOTAL PRICE**
$2.21
The printing is too low
on the label on the left.
To raise the printing so
it is centered vertically
on the label, decrease
the Image Offset value. If
the value is at 0.0 (the
minimum) increase the
Eject Offset to a higher
number (13.5).
Run Total Label Format
Select the style of the label to use when printing the “Totals” labels.
Label Width
The Label Width (in mm) is used to set the label parameters. The factory default is
64.0 mm.
Stripped Delivery
This entry is determined by how you install the labels in the Label Printer. Stripped
delivery means the label is delivered for application stripped from the liner. When this
box is checked, the labels will be stripped from the liner and the takeup motor will wind
up the used liner on the takeup spool. When this box is not checked, the takeup motor
is disabled and the labels are installed to deliver the label and liner. Unstripped mode
(box unchecked) means you could print a batch of labels to be applied at a later time.
NF Label Format
This entry defines whether a separate NF label will be generated and, if so, what format
to use.
Note: this feature is not available in an automatic system with an indexer as there is no
way to apply 2 labels.
6-33
Page 80

METTLER TOLEDO® Commander User's Guide
General Label Formats
By pressing the Label Format field, you enable the selection of prefabricated labels that
will suit various fields throughout the interface.
Nuval Label Graphic
The Nuval™ graphic can be printed anywhere on a label. It is positioned on the label by
specifying the Nuval™ graphic using SmartLabel V3.0 or higher. The value printed in
the graphic is defined in the PLU record by specifying “90” in the Linked Record 11 Type
field, and the Linked Record 11 number as the Nuval™ score (range 0-100). If the
score is invalid (greater than 100), the graphic will not be printed.
63
6-34
Page 81

Dayglo Printer Setup
Chapter 6: Controller - Operation
Printer & Label Setup
DayGlo Printer
Click in the box to configure the DayGlo printer. Once selected the following options will
appear and can be configured.
Eject Length
This is the position the label will stop at after printing. To have the label stop farther out
from the printer, increase this value. The default is 12.5 mm.
Current Label Stock
This is the size of the labels you have installed in the DayGlo printer. Currently the only
selection is DayGlo labels.
Image Offset
The Image Offset (in mm) is used to raise or lower the printed image on the label. The
default is 0.0 mm. To raise the image on a label, lower the value. To lower the image
on a label, increase the value. For details, refer to Image Offset section in the Label
Printer setup.
Label Format
This is the format style of the labels in the DayGlo printer. Currently the only selection is
for DayGlo graphic. If NONE is selected, no DayGlo Label will be printed.
Stripped Delivery
This entry is determined by how you install the labels in the printer. Stripped delivery
means the label is delivered for application stripped from the liner. When this box is
checked (stripped mode), the labels will be stripped from the liner and the takeup motor
will wind up the used liner on the takeup spool.
When this box is not checked, (unstripped mode), the takeup motor is disabled and the
label taken sensor is ignored. In this mode, you could print a batch of labels to be applied
at a later time. Continuous stock should always be run with this unchecked (disabled).
6-35
Page 82

METTLER TOLEDO® Commander User's Guide
Calibrate Printer Gap Sensor
By selecting “Calibrate Label Printer” or “Calibrate DayGlo Printer” the gap sensor in
the printer can be recalibrated if labels are not ejecting properly (multiple labels or
partial labels ejected).
After selecting “Calibrate Label Printer” or “Calibrate DayGlo Printer” hit “Accept” and
catch the ejected calibration test labels.
Bottom Label Printer Setup and Calibrate Bottom Printer
These features are forthcoming with the addition of a bottom labeler to the Commander
wrapper system.
6-36
Page 83

Barcode Setup
Chapter 6: Controller - Operation
Barcode Setup
Barcode Type
Bar Code Format Codes:
N Item number Digits.
C Check Digit.
0 The number zero.
$ Total Price Digits.
# Weight Digits.
X Symbol Check Digit.
D Digit.
Select a Barcode Type of either UPC or EAN bar code symbols. When UPC is selected,
only valid UPC settings will display. When EAN-13 is selected, only valid EAN settings
will display.
When UPC Barcode is selected:
By-Weight Prefix
By-Count Prefix
Std. Pack Prefix
Run Total Prefix
Select the bar code prefix. This is the bar code type and is the
first character of the bar code. The default is 2.
0 General Merchandise. (No price is encoded)
1 Not identified.
2 Random-Weight. Item number with total price encoded.
3 National Drug and Health items. Similar to Type-0.
4 In-Store Marking.
5 Coupons.
6 General Merchandise. (No price is encoded)
7 General Merchandise. (No price is encoded)
By-Weight Format
By-Count Format
Std. Pack Format
Run Total Format
Refer to the code explanations on the left.
NNNNN ##### X (5-D Item/5-D Wgt)
NNNNN N#### X (6-D Item/4-D Wgt)
NNNNN 0#### X (5-D Item/0/4-D Wgt)
NNNNN C#### X (5-D Item/C/4-D Wgt)
NNNNN $$$$$ X (5-D Item/5-D Price)
NNNNN N$$$$ X (6-D Item/4-D Price)
NNNNN 0$$$$ X (5-D Item/0/4-D Price)
NNNNN C$$$$ X (5-D Item/C/4-D Price)
6-37
Page 84

METTLER TOLEDO® Commander User's Guide
Bar Code Format Codes:
N Item number Digits.
C Check Digit.
0 The number zero.
$ Total Price Digits.
# Weight Digit.
X Symbol Check Digit.
D Digit.
Price Check
Override
When a PLU contains a command to turn off the price check
digit, (Ex: Action Code 49), this selection determines what will
print in the price check digit space. A hard zero or a six-digit
item number can be selected.
Manufacturer
Number
This selection allows for a default five-digit manufacturer
number, when used with type 0, 1, 3, 5, 6, or 7 bar codes,
replacing the first five MSD digits of the item number.
When EAN-13 Barcode is selected:
By-Weight Prefix
Enter the bar code prefix. The default is 21.
By-Count Prefix
Std. Pack Prefix
Run Total Prefix
By-Weight Format
By-Count Format
Std. Pack Format
Run Total Format
Refer to the code explanations on the left.
NNNNC ##### X (4-D Item/C/5-D Wgt)
NNNNN ##### X (5-D Item/5-D Wgt)
NNNNC $$$$$ X (4-D Item/C /5-D Price)
NNNNN C$$$$ X (5-D Item/C/4-D Price)
NNNN$ $$$$$ X (4-D Item/6-D Price)
NNNNN $$$$$ X (5-D Item/5-D Price)
NNNNN N$$$$ X (6-D Item/4-D Price)
GS1 Databar Barcodes
GS1 Databar is a stacked barcode that can have up to 3 rows of barcode data. It can
contain up to 7 different pieces of information (Application IDs). The data always
contains the Application ID 01 or GTIN number (the 14 digit item number of the PLU),
and can contain the following optional Application IDs (in order generated in the
barcode):
ID Data Item Notes
01 GTIN Always selected, 14 digit Item Number
392x Total Price up to 15 digits, “x” is decimal position
8005 Unit Price 6 digits (no precision indicated)
15 Sell By Date 6 digits (YYMMDD)
17 Use By Date 6 digits (YYMMDD)
13 Pack Date 6 digits (YYMMDD)
3103* Net Wt (KG) 6 digits, lower 3 are right of decimal point
3202* Net Wt (Lb) 6 digits, lower 2 are right of decimal point
30* Count up to 8 digits
* = can contain one of these fields based on loadcell setting and package type
(BW/BC/SP)
The desired fields can be configured in the PLU record, or in Setup / Barcode Settings if
the PLU record is set to “Use Scale Settings”. The Barcode Settings screen has an
additional checkbox to put a human readable text line under the barcode. Only one line
of text will be drawn and the number of characters depends on the width of the barcode
field.
6-38
Page 85

Chapter 6: Controller - Operation
Barcode Setup
Since this symbology is “variable width” based on the number of fields selected, the
barcode will be rendered from the starting position (top, left) of the barcode field defined
in the label format, and continue to the right edge of the label. It will be rendered for the
specified field height. If the data will not fit in one row of bars, two or three rows will be
generated, each row being one half or one third of the height.
Examples are:
GTIN only
GTIN, Total Price, and Count
All possible fields
6-39
Page 86

METTLER TOLEDO® Commander User's Guide
Presets Setup
Presets are used for one-touch call up of PLU records. Instead of entering the PLU
number, the preset keys are assigned for a specific PLU number and department. Then,
when it the preset key is pressed, the PLU is automatically called up. There can be
many pages of presets and the PLUs can be called from any department. The pages are
selected using the Page Buttons at the bottom of the screen. You must first configure the
pages, and then the preset keys for that page can be configured. With Version 4.2 or
later, a new page type “Graphical Tare” can also be created with the preset editor.
Pages
Here is an example screen that has been configured with various departments.
6-40
Pages are represented by the buttons along the bottom of the screen, usually different
departments. To setup preset pages, press the Pages button.
Page 87

Chapter 6: Controller - Operation
Presets Setup
Then select the action you want to perform Add, Go to, Edit, or Remove a Page, you
can also Add or Remove a Linked Page, as well as Remove all pages or Swap
Pages.
Add Page
To add new pages, press the Pages button (1) then select Add Page (2) from the
dropdown menu.
1
2
This will give you an initial screen that you can select the overall look of the Page. Press
the Page Format box (1) and select Text-based page, Graphical page or Graphical
Tare page. Press the Page Layout (2) and select the number and size of the preset
keys on the page (4x3, 4x4, or 4x6 Text or Graphical Preset) or (2x2, 2x3, 3x2, or
3x3 Graphical Tare).
1
2
3
If you wish the page to be accessed using a button on the bottom of the screen, select
the check box Show on Tab Bar? (3). If the page will be used as a link accessed by
pressing one of the preset keys, leave the box unchecked.
6-41
Page 88

METTLER TOLEDO® Commander User's Guide
Hit the Next button to continue the Page setup.
You can add pages automatically by selecting By Department for the Page Type, or
manually create them using Custom.
If you select By Department, pages of preset keys for all of the PLUs in that department
will be created. To program the preset keys manually, select "Custom" from the drop
down menu. Select either "By Department" or "Custom" from the drop down list and
press Next> to continue.
Adding Preset Pages By Department
If you are adding pages by department, next select the department from the drop down
list and press Next> to continue. Select the department page you wish to create from
the drop down menu.
6-42
Page 89

Chapter 6: Controller - Operation
Presets Setup
Based on which department you selected, the number of pages automatically created
will correspond to all the PLUs from that selected department.
You can go back by pressing the <Back button, finish by pressing the Done button, or
cancel all by pressing Cancel.
Note: When you are all done programming presets, remember to press the Save button
before exiting the Presets Menu to save your settings.
Adding Pages using Custom
First select Custom from the dropdown menu, then press Next>.
6-43
Page 90

METTLER TOLEDO® Commander User's Guide
This will give you a page where you can Rename the page (all new pages default to
“Page X”) and / or give the page an Alternate Name. An Alternate Name is used when
the Alternate Language button is pressed.
The exact same process is used to set or edit the Alternate Page Name and to Rename a
Page.
NOTE: When you are
finished programming
presets, be sure to
press SAVE before
exiting or the changes
will not be saved.
To edit the new page name, press the Rename Page button, and then type in the new
page name. Hit the Apply button when you have completed the new Page name.
This will return you to the Add Preset Page screen.
6-44
You can go back by pressing the <Back button, finish by pressing the Done button, or
cancel all by pressing Cancel.
Note: When you are all done programming presets, remember to press the Save button
before exiting the Presets Menu to save your settings.
Page 91

Chapter 6: Controller - Operation
Presets Setup
Edit Page
Editing a Page is similar to Adding a Page, only you are modifying an existing Preset
Page, rather than creating one.
Select the Page you want to edit along the bottom bar (1), press the Pages button then
select Edit Page from the dropdown menu.
1
This will return the Edit Preset Page screen. From here you can edit the Page Name,
the Alternate Name, and the Page Layout.
You can also modify the Show on Tab Bar? option. When checked the Page will appear
along the bottom of all screens.
6-45
Page 92

METTLER TOLEDO® Commander User's Guide
Graphical Tare Presets
The Graphical Tare preset must have the tare value as Line 2 of the description. It is
automatically inserted when the tare is entered and should not be manually edited.
The Tare override (by pressing the Tare box on a By Weight PLU) will bring up a copy of
the Graphical Tare screen. The Graphical Tare feature is enabled by Unit Setup / Scale
Settings. If the feature is enabled but no tare pages are configured, then the standard
Forced Tare wizard will be used.
The graphic images for the containers exist in a sub-directory of the “Mettler
Toledo\Service\images” directory called “tares”.
Tare can be entered by either selecting the preset key, entering the value, or by placing
the container on the platter then pressing the “Platter Tare” key. Graphical tare is enabled
from the Unit Setup/Scale Settings page.
6-46
Page 93

Keys
Chapter 6: Controller - Operation
Presets Setup
Edit Preset Keys
Use Edit Preset to add or modify a preset Key (PLU).
To ADD a preset: select a blank (empty) preset key and then press the Keys button.
Select Edit Preset from the dropdown menu.
To EDIT an existing preset: to modify an existing preset button select a populated preset
button and then press the Keys button. Select press Edit Preset from the dropdown
menu.
Follow the below instructions for the next step for both Adding and Editing a Preset Key.
6-47
Page 94

METTLER TOLEDO® Commander User's Guide
Press Choose PLU to select a PLU for the key or Choose Page to have the key link to
another Preset page.
Choose PLU
To select a new PLU, touch the Choose PLU key. Press the Next> key to continue
without changing the PLU.
If you pressed the Choose PLU button, there are two methods to find PLU; List and
Search.
List Method
Select the department where the PLU is located by touching the + button next to the
department. You can scroll through the list of PLU numbers.
6-48
Select the PLU you wish to use by touching it so it is highlighted, then press the Select
key.
Page 95

Chapter 6: Controller - Operation
Presets Setup
This will return you to the PLU number in the Configure Preset Wizard screen.
Search Method
If you use the Search key, you can find a PLU by the PLU number or the PLU
description.
6-49
Page 96

METTLER TOLEDO® Commander User's Guide
Select by PLU Number if you know an individual PLU’s number. You will be prompted
with a keypad, enter the number by touching the screen.
After entering the number, hit Enter. If the number is valid it will return details on the
number for you to select on the page. If the number is not a valid PLU number, you will
receive a screen telling you it does not match.
6-50
Page 97

Chapter 6: Controller - Operation
Presets Setup
Select the Search method, by PLU Description if you want to return a list of possible
PLUs.
This will give you a keyboard to type in a phrase or part of a phrase that will be
searched in the PLUs.
After typing in the search, hit Apply.
6-51
Page 98

METTLER TOLEDO® Commander User's Guide
For example, a search of the description “Veal” returned the following results:
Highlight the PLU you wish to use, then press the Select key. By pressing the Edit the
Description or Alternate Description key, you can modify those descriptions, or go
back to select a different PLU by pressing <Back, or complete the procedure by pressing
Done.
6-52
At this point, you can press Done to quit or program another preset. When you are
finished, remember to press the Save button to save and exit. To exit without saving any
of the changes, press the Cancel button.
Choose Page
If you want the preset key to link to another preset page (rather than a PLU), touch the
Choose Page button.
Page 99

Chapter 6: Controller - Operation
Presets Setup
The returned list will have all available Preset Pages that you could assign to the Preset
Key.
Touch the page you wish to assign to the key. Once highlighted, page details will
appear on the right.
Touch the Select button once you have made your selection.
6-53
Page 100

METTLER TOLEDO® Commander User's Guide
You will be returned to the Configure Preset Wizard, the Page Name and Page # lines
will reflect the Page you just selected. Hit the Next> button.
On the next Configure Preset Wizard screen you can edit the Description and the
Alternate Description of the Preset Page you just added.
Note: this is not a global Description name change. Any Description changes will only
apply to this instance where the Page has been added in as a Key.
6-54
 Loading...