

Page 1
READ AND SAVE THESE INSTRUCTIONS
WARNING: A risk of fire and electrical shock exists in all electrical appliances
and may cause personal injury or death. Please follow all safety instr uctions.
• COOL WALL EXTERIOR
• 2-HOUR TIMER
• INTERIOR LIGHT
• 4 RACK POSITIONS
• AUTOMATIC SAFETY SHUT-OFF
• ELECTRONIC TOAST COLOR CONTROL
• INCLUDES HEAVY DUTY WIRE RACK, ENAMEL BAKE PAN AND
BROIL INSERT
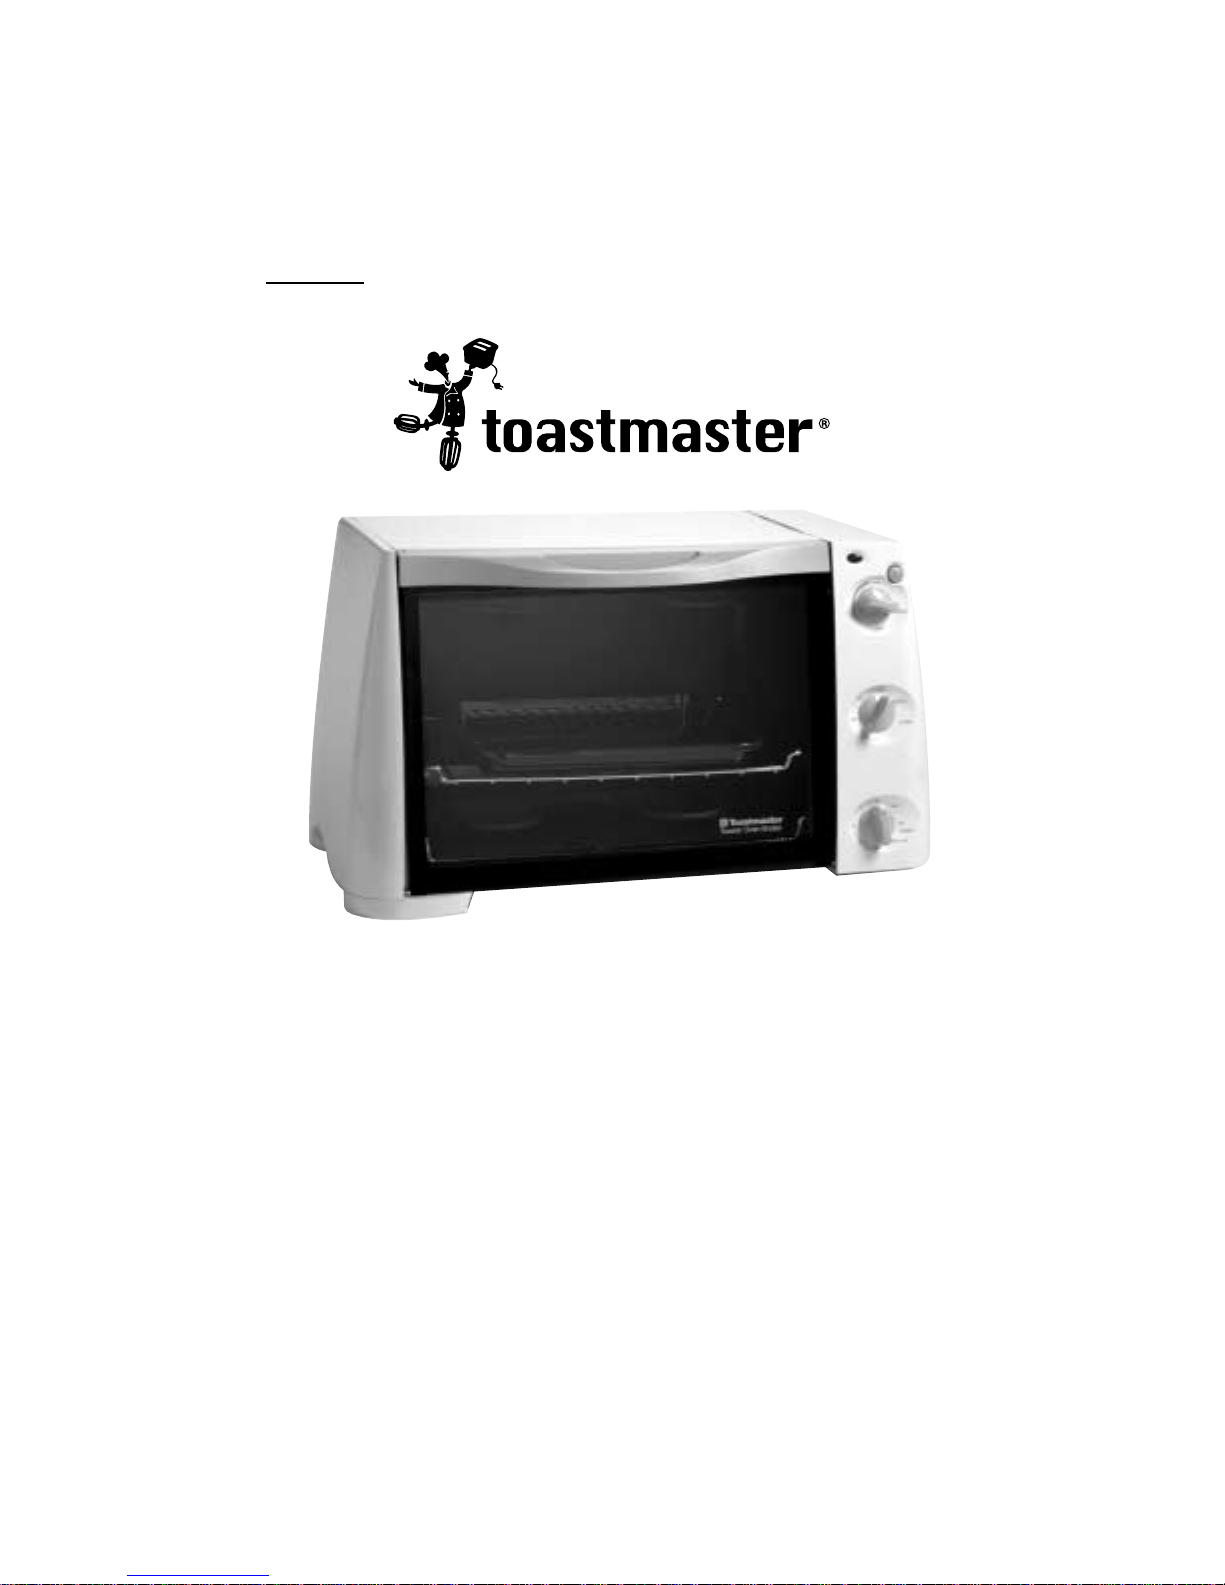
6-Slice Toaster-Oven Broiler
with Removable Liner
Use and Care Guide - Model 358
Page 2

IMPORTANT SAFEGUARDS
When using electrical appliances, basic safety precautions should always
be followed to reduce the risk of fire, electric shock and injury to persons,
including the following:
• Read all instructions before using appliance.
• Close supervision is necessary when any appliance is used near
children.
• This appliance is not for use by children.
• Do not touch hot surfaces. Use handles or knobs and oven mitts.
• Do not operate any damaged appliance. Do not operate with a
damaged cord or plug, or after the appliance malfunctions or has been
dropped or damaged in any manner. Return appliance to the nearest
authorized service center for examination, repair, electrical or
mechanical adjustment.
• Before using this appliance, move it four to six inches from the wall or
any object on the countertop. Do not store any item on top of the
appliance. Do not use on surfaces where heat may cause a problem.
• A fire may occur if this appliance touches or is covered by flammable
material, including curtains, draperies, walls, etc., when in operation.
• Do not store any materials, other than manufacturer’s recommended
accessories, in this oven when not in use.
• Do not cover any part of the oven with metal foil. This will cause
overheating of the oven.
• Extreme caution should be exercised when using containers constructed
of other than metal.
• Do not place any flammable material such as paper, cardboard, plastic,
etc. in the oven.
• When broiling, the bake/broil pan and broil insert rack must be used.
• Oversized foods or utensils must not be inserted into the
toaster-oven-broiler.
• Do not immerse cord, plug or appliance in water or other liquid. See
instructions for cleaning.
• Do not use outdoors or while standing in a damp area.
• Do not clean with metal scouring pads. Pieces of the pad may break off
and touch electrical parts.
• Unplug from outlet when not in use and before cleaning. Turn controls to
OFF position before unplugging. Allow to cool before attaching or
removing parts and before cleaning the appliance.
• CAUTION: Never leave toaster-oven-broiler unattended when broiling,
top browning or toasting.
• Do not let cord hang over edge of table or counter, or touch hot surfaces.
• The toaster-oven-broiler is Off when the oven and timer controls are in
the Off position.
• Extreme caution must be used when moving an appliance containing hot
oil or other hot liquids.
• Use extreme caution when removing broiling pan or disposing of hot
grease.
2
Page 3

• Do not place on or near a hot gas or electric burner or in a heated oven.
• Use attachments only if recommended by Toastmaster Inc.
• Only use appliance as indicated in these instructions.
SAVE THESE INSTRUCTIONS
CAUTION: A short power supply cord is provided to reduce the risk of
personal injury resulting from becoming entangled in or tripping over a longer
cord. Extension cords are available from local hardware stores and may be
used if care is exercised in their use. If an extension cord is required, special
care and caution is necessary. Also the cord must be: (1) marked with an
electrical rating of 125 V and at least 13 A, 1625 W, and (2) the cord must
be arranged so that it will not drape over the countertop or tabletop where it
can be pulled on by children or tripped over accidentally.
POLARIZED PLUG: This appliance has a polarized plug, (one blade is wider
than the other). As a safety feature to reduce the risk of electrical shock, this
plug is intended to fit in a polarized outlet only one way. If the plug does
not fit fully in the outlet, reverse the plug. If it still does not fit, contact a
qualified electrician. Do not attempt to defeat this safety feature.
ELECTRIC POWER: If the electric circuit is overloaded with other appliances,
your appliance may not operate properly. It should be operated on a
separate electrical circuit from other appliances.
THIS PRODUCT IS FOR HOUSEHOLD USE ONLY
3
Page 4
4
Your product may vary slightly from illustration.
Power Light
TOAST
Button
TOAST
Control
OVEN
Control
TIMER
Removable
Liner
Figure 1
Wire
Rack
Upper
Rack Position
Lower
Rack Position
Wire
Handle
Broil Insert
Rack
Bake/Broil
Pan
Figure 2
Figure 3
Page 5

5
GETTING TO KNOW YOUR TOASTER-OVEN-BROILER
Remove all packaging materials including the piece of paper that has been
placed between the top of the oven door and oven for protection during
shipping. Also remove the piece of cardboard that has also been placed
between the bottom of the oven door and the oven.
Your new Toastmaster toaster-oven-broiler has the versatility to bake,
defrost, broil, toast, top brown and keep foods warm. The adjustable
thermostat allows you to prepare recipes according to package or recipe
directions. The Power Light will be on any time the unit is operating. Both
upper and lower heating elements will be on when toasting, baking,
defrosting, top browning and keep foods warm. Only the upper element
will be on when broiling.
The toaster-oven-broil has an interior oven light that comes on
automatically when the oven door is opened and the oven is plugged in.
CAUTION: APPLIANCE SURFACES ARE HOT DURING AND AFTER USE.
CAUTION: ALWAYS WEAR PROTECTIVE, INSULATED OVEN MITTS ON
HANDS WHEN TOUCHING HOT OVEN OR HOT DISHES AND FOOD OR
WHEN INSERTING OR REMOVING RACK, PAN OR BAKING DISH.
ALWAYS ALLOW OVEN TO COOL DOWN BEFORE REMOVING LINER.
Ovenware manufacturers do not recommend using see-through glass
baking containers or lids in toaster-oven-broilers. Glass-ceramic baking
containers may be used. Do not use oven roasting bags in this oven, as they
may come in contact with the heating elements.
BAKE/BROIL PAN, WIRE RACK AND BROIL INSERT RACK
For best results use pan to bake, defrost, top brown, keep warm and to
minimize clean-up due to spills. For toasting, place bread directly on wire
rack. When broiling, both the pan and the broil insert rack must be used.
WIRE RACK
The wire rack must be used for all cooking functions. It may be inserted in
either the upper or lower rack position as shown in Figure 1.
The wire rack may also be inverted for two additional positions. Each
section of instructions suggest a specific rack position, however, the rack
may be adjusted to accommodate the different thickness of foods.
TIMER
The TIMER control dial also acts as the oven’s ON and OFF switch. Turn
the
timer clockwise to select the appropriate cooking time up to 2 hours
. When
cooking time is complete, a signal will sound and the unit will turn off
automatically. If you are cooking for less than 10 minutes, using the timer
is not recommended.
Page 6

6
INSTRUCTIONS FOR TOAST
1. Remove pan and wire rack.
2. Plug into 120 V ~ 60 Hz outlet.
3. Center food on wire rack. Place in shelf position #2 of oven and close
the door.
4. Turn TOAST control to the desired shade.
5. Press the TOAST button. The power light will come on. Condensation
may build up on door glass, but will evaporate during toasting.
6. The unit shuts off automatically when the cycle is complete. The power
light will go off or watch toast until desired color is achieved and shut
off unit manually by opening the oven door. This will shut the unit off
without damaging the oven. To restart, push TOAST button again.
7. Unplug and allow to cool before cleaning.
HINTS FOR TOAST
• Follow toaster food directions.
• Frozen and heavy breads require a darker setting. (i.e. bagels and
English muffins)
• One slice requires a lighter setting than several slices.
INSTRUCTIONS FOR TOP BROWN
1. Remove pan and wire rack.
2. Plug into 120 V ~ 60 Hz outlet.
3. Place wire rack in shelf position #2 of oven. Center a baking container
or food on wire rack, or use bake pan. Close door.
4. Adjust TOAST control to desired shade.
5. Press TOAST button. The power light will come on.
6. The unit shuts off automatically when the cycle is complete. The power
light will go off. Watch food to avoid over-browning. To stop cycle
manually, open the oven door.
7. Unplug and allow to cool before cleaning.
HINTS FOR TOP BROWN
• For a darker color set the toast control to a darker shade and restart the
cycle by pressing the TOAST button. Watch until desired color is
achieved and shut unit off manually by opening the oven door.
• Top brown may be used to top brown bagels, English muffins or melt
cheese on sandwiches or casseroles.
INSTRUCTIONS FOR KEEP WARM
1. Remove pan and wire rack.
2. Plug into 120 V ~ 60 Hz outlet.
3. Place wire rack in shelf position #2 of oven. Center a baking container
or food on the wire rack, or use bake pan. Close door.
4. Turn OVEN control to 200° and TIMER to desired time or to Stay On.
The power light will come on.
Page 7

7
5. When finished, turn the OVEN and TIMER controls to the OFF
position. The power light will go off.
6. Unplug and allow to cool completely before cleaning.
HINTS FOR KEEP WARM
• Use for short periods of time after food is cooked.
• To heat frozen or cold foods, see instructions for defrost.
INSTRUCTIONS FOR BAKE
1. Remove pan and wire rack.
2. Plug into 120 V ~ 60 Hz outlet.
3. Place wire rack in shelf position #2 of oven. Close door.
4. Turn OVEN control to desired temperature. Turn TIMER to desired time
or to Stay On. The power light will come on. Allow 10 minutes for
preheat.
5. After preheating, center a baking container or food directly on wire
rack or use bake pan. Close door. Set TIMER to desired time or to Stay
On. The power light will come on. Bake according to package or
recipe directions.
6. When finished turn OVEN and TIMER controls to the OFF position.
The power light will go off.
7. Unplug and allow to cool before cleaning.
HINTS FOR BAKE
• To prevent heat loss, avoid opening door excessively.
• Foil may be used to cover glass-ceramic baking container if ends are
tucked closely against edge of pan.
INSTRUCTIONS FOR DEFROST
1. Remove pan and wire rack.
2. Plug into 120 V ~ 60 Hz outlet.
3. Place wire rack in shelf position #2 of oven.
4. Center a baking container or food on wire rack or use bake pan.
Close door.
NOTE: Defrost will take approximately 1/3 of the time recommended
on the package for defrosting at room temperature.
5. Turn OVEN control to 200° and TIMER to desired time or to Stay On.
The power light will come on.
6. When finished turn the OVEN and TIMER controls to the OFF position.
The power light will go off.
7. Unplug and allow to cool completely before cleaning.
HINTS FOR DEFROST
• Do not use this method for meat, poultry or fish.
• Do not cover food.
• Brush frozen dough with vegetable oil to prevent drying out and remove
food to preheat oven before baking.
Page 8

8
INSTRUCTIONS FOR BROIL
1. Remove pan and wire rack.
2. Plug into 120 V ~ 60 Hz outlet.
3. Place wire rack in shelf position #1 of oven.
4. Place broil insert rack in broil pan and position food on broil insert,
(see Figure 2). Place into oven and close door.
5. Turn OVEN control to Broil and TIMER to desired time or to Stay On.
The power light will come on.
6. When finished turn OVEN and TIMER controls to the OFF position.
The power light will go off.
7. Unplug and allow to cool completely before cleaning.
HINTS FOR BROIL
• Always use pan with the broil insert – this allows juices and fat to drip
into pan and decreases spattering while broiling.
• Do not place aluminum foil on top of broil insert – this traps grease and
can cause a fire.
• Trim excess fat from meat and score edges to reduce curling and smoke.
• Always thaw meats before broiling.
• Remove grease from pan and wash after each use.
CLEAN-UP OF OVEN INTERIOR
Your toaster-oven-broiler features a removable liner that is dishwasher safe.
For best results, remove liner and clean thoroughly after each use.
1. Always unplug and allow to cool completely before cleaning or
moving.
2. Remove pan, broil insert, and wire rack. Wash with a non-abrasive
cleaner, rinse and dry thoroughly or wash in a dishwasher.
3. Carefully remove the liner by grasping the wire handle and pulling
straight out, (see Figure 3).
4. Clean liner with a cleaner such as Soft Scrub
®
, Bon ami®, Ajax
®,
or any
other product safe for cookware. Rinse and dry thoroughly. The liner
may also be placed in the dishwasher for cleaning.
Note: For best results, some clean-up of spills may be necessary
before putting into dishwasher.
5. Slide liner back into the oven and close oven door.
Page 9
9
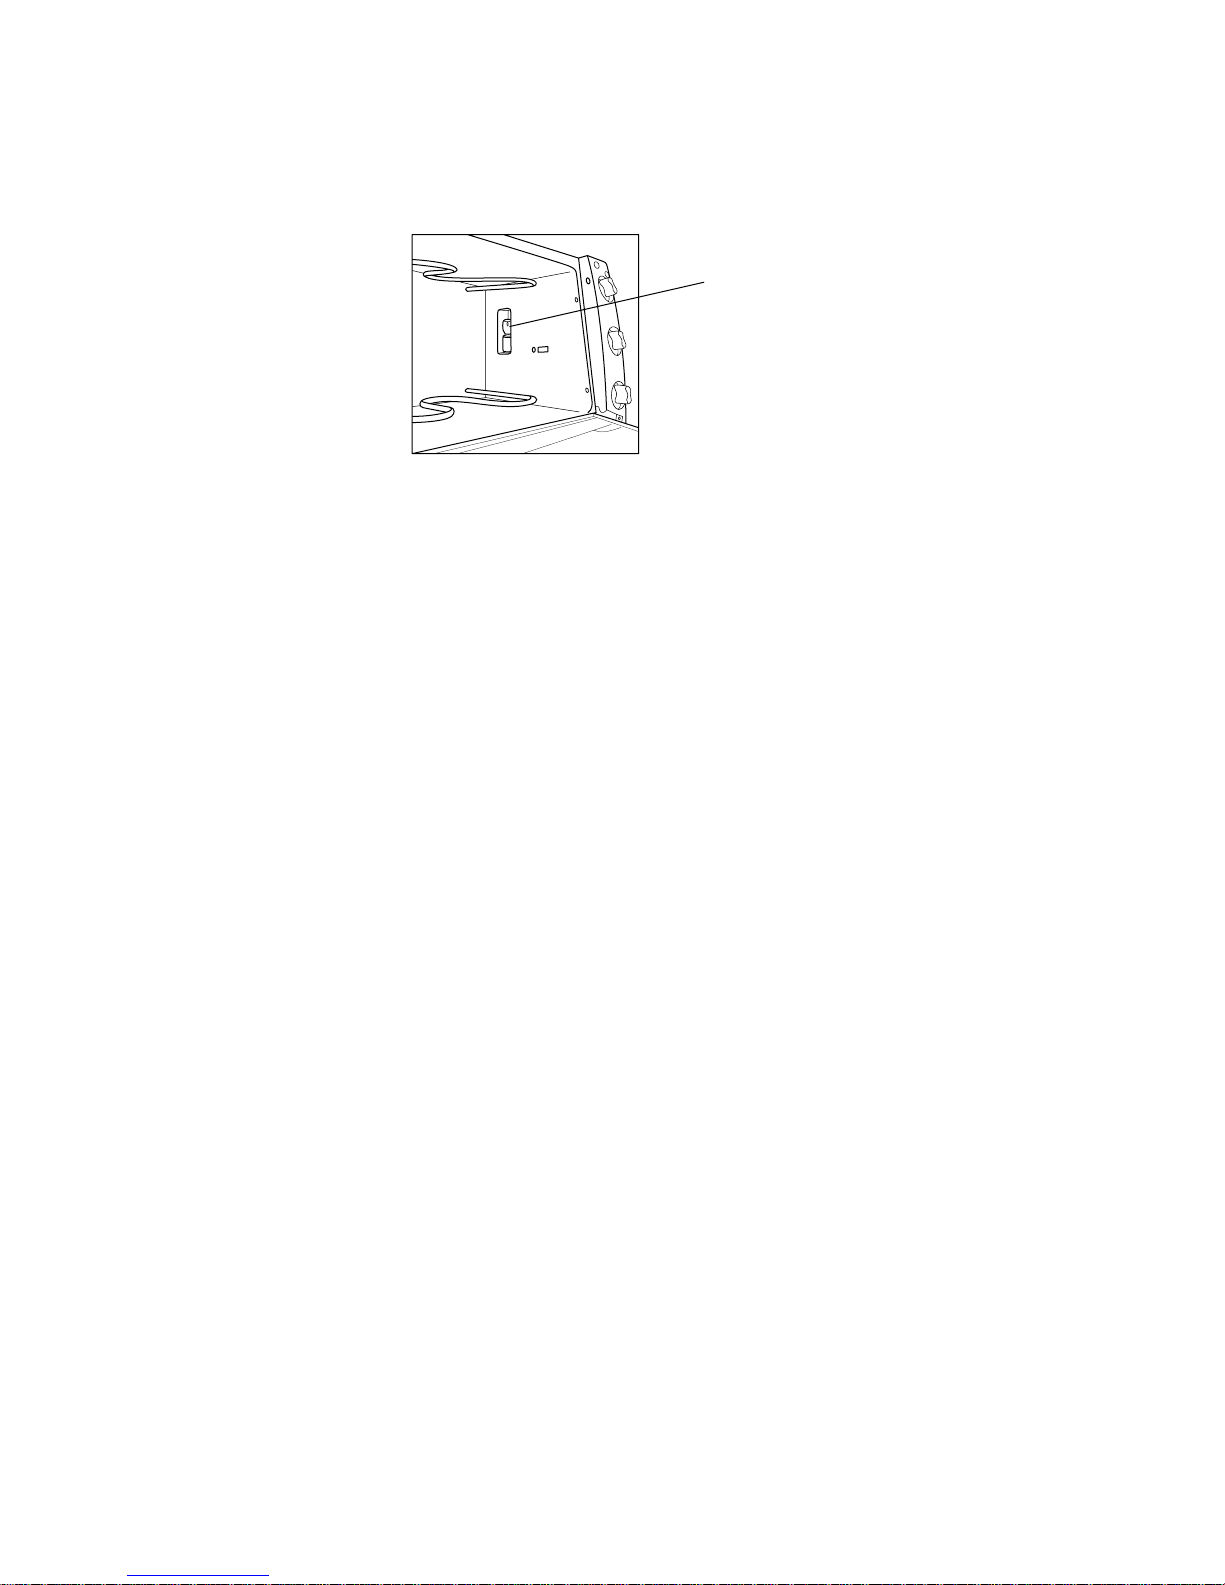
Interior Light
(with light panel removed)
Figure 4
CLEAN-UP OF OVEN DOOR AND EXTERIOR
1. Always unplug and allow to cool completely before cleaning or
moving.
2. Clean with glass cleaner or mild detergent and damp cloth or plastic
scouring pad. Do not use an abrasive cleaner or pad as they might
scratch the finish.
3. Rinse and dry thoroughly with a clean cloth. Allow to dry before
closing door.
TO REPLACE OVEN LIGHT
Replacement bulb must be ordered from Toastmaster Consumer Parts
(1-800-947-3745)
1. Unplug unit and allow oven to cool completely.
2. Carefully remove the liner by grasping the wire handle and pulling
out, (see Figure 3).
3. Remove the screws securing the light panel.
4. Remove the light panel.
5. Remove bulb by unscrewing, (see Figure 4).
6. Replace with new bulb, turning gently to tighten.
7. Replace the light panel.
8. Replace the screws to secure the light panel.
9. Slide liner back into the oven and close oven door.
Any servicing requiring disassembly other than the above cleaning must
be p erfo rmed by an authorized service center.
SERVICE INFORMATION
Please refer to warranty statement to determine if in-warranty service applies.
This appliance must be serviced by a Toastmaster authorized service center.
Unauthorized service will void warranty. Consult your phone directory under
“Appliances-Household-Small-Service and Repair,” or call 1-800-947-3744
in the U.S. and Canada, 52-5-397-2848 in Mexico.
If an authorized service center is not available locally, your appliance may be
returned postage prepaid to our National Service Center at the address shown
on the back of this book.
Page 10

KEEP DATED SALES RECEIPT FOR WARRANTY SERVICE.
Keep this booklet. Record the following for reference:
Date purchased
Model number
Date code (stamped on bottom)
10
LIMITED ONE-YEAR GUARANTEE
Toastmaster Inc. warrants this product, to original purchaser, for one year from purchase date to be free of defects in material
and workmanship.
This warranty is the only written or express warranty given by Toastmaster Inc. This warranty gives you specific legal rights. You
may have other rights which vary from state to state. ANY OTHER RIGHT WHICH YOU MAY HAVE, INCLUDING ANY IMPLIED
WARRANTY OF MERCHANTABILITY OR FITNESS FOR A PARTICULAR PURPOSE IS LIMITED IN DURATION TO THE DURATION OF
THIS WARRANTY.
Defective product may be brought or sent (freight prepaid) to an authorized service center listed in the phone book, or to Service
Department, Toastmaster Inc., 1409 E. Morgan Street, Boonville, Mo. 65233, for free repair or replacement at our option.
Your remedy does not include: cost of inconvenience, damage due to product failure, transportation damages, misuse, abuse, accident or the like, or commercial use. IN NO EVENT SHALL TOASTMASTER INC. BE LIABLE FOR INCIDENTAL OR CONSEQUENTIAL
DAMAGES.
Some states do not allow limitations on how long an implied warranty lasts, or allow the exclusion or limitation of incidental
or consequential damages, so the above limitations or exclusions may not apply to you.
For information, write Consumer Claims Manager, at the Boonville address. Send name, address, zip, telephone area code and
daytime number, model, serial number, and purchase date.
EVERYBODY EATS. It’s a fact of life.
But sometimes preparing
meals can become a chore.
That’s why TOASTMASTER has been invited
into millions of kitchens just like yours
so we can HELP YOU MASTER your
mixing, baking, grilling, toasting,
brewing, heating and serving
tasks WITH EASE AND STYLE.
The TOASTMASTER name stands for a
CELEBRATION of INNOVATION designed
to serve your life and keep you
COOKIN’ IN STYLE.
Products must be adequately protected to avoid shipping damage. Surround
your appliance with three inches of protective padding and include a copy of
your dated sales receipt and a note explaining the problem you have
experienced. We recommend insuring your package. No CODs accepted.
Page 11

LISEZ ET CONSERVEZ CES INSTRUCTIONS
AVERTISSEMENT : Tout appareil électrique présente un risque d’incendie et de
choc électrique pouvant provoquer des blessures graves ou mortelles. Veuillez
observer toutes les mesures de sécurité.
Four rôtissoire-Grille-pain 6 tranches
avec intérieur amovible
Guide d’Utilisation et d’Entretien pour le Modèle 358
• PAROIS EXTERIEURES FROIDES
• MINUTERIE DE 2 HEURES
• ECLAIRAGE INTERIEUR
• 4 POSITIONS DE GRILLES
• ARRET AUTOMATIQUE DE SECURITE
• CONTROLE ELECTRONIQUE DE LA COULEUR DU TOAST
• CONTIENT UNE GRILLE RESISTANTE, UNE PLAQUE DE
CUISSON EN EMAIL ET UNE GRILLE POUR GRILLER
MESURES DE SECURITE
IMPORTANTES
Afin de réduire les risques d’incendie, d’électrocution et de blessures
pendant l’utilisation de tout appareil électroménager, toujours observer les
précautions élémentaires de sécurité, y compris les suivantes :
• Lire toutes les instructions avant d’utiliser l’appareil.
• Se montrer particulièrement vigilant lorsqu’un appareil électroménager
est utilisé à proximité d’enfants.
• Cet appareil ne doit pas être utilisé par des enfants.
• Ne pas toucher les surfaces brûlantes. Utiliser les poignées ou
les boutons et des gants de cuisine.
• Ne jamais faire fonctionner un appareil endommagé. Ne pas se servir
d’un appareil dont le cordon électrique ou la fiche est endommagé(e),
d’un appareil qui ne fonctionne pas, qui est tombé ou a été endommagé
d’une quelconque manière. Envoyer l’appareil au centre de réparation
agréé le plus proche pour qu’il soit examiné, réparé ou réglé
électriquement ou mécaniquement.
11
Page 12

• Avant d’utiliser cet appareil, laisser un espace de 10 à 15 cm entre lui
et le mur ou tout autre objet sur le plan de travail. Ne poser aucun objet
sur le dessus de l’appareil. Ne pas utiliser sur des surfaces sur lesquelles
la chaleur pourrait causer des problèmes.
• Un incendie pourrait être déclenché si cet appareil touche ou est
recouvert par un objet inflammable tel que rideau, torchon, mur, etc.
• Lorsque le four ne fonctionne pas, ne pas y entreposer d’accessoires
autres que ceux recommandés par le fabricant.
• Ne pas recouvrir de papier métallique toute partie du four. Ceci
provoquerait une surchauffe du four.
• Une attention toute particulière doit être portée lors de l'utilisation de
récipients autre qu'en métal.
• Ne pas mettre dans le four des matériaux inflammables tels que le
papier, le carton, le plastique, etc.
• La plaque de cuisson/à rôtir ainsi que la grille de cuisson doivent être
utilisées lorsque le four est en mode rôtissoire.
• Les aliments et ustensiles de grandes tailles ne doivent pas être introduits
dans le four gril rôtissoire.
• Ne pas immerger le cordon, la fiche ou l’appareil dans l’eau ou tout
autre liquide. Se référer aux instructions de nettoyage.
• Ne pas utiliser l’appareil à l’extérieur ni lorsque l’on se tient dans un
endroit humide.
• Ne pas nettoyer l’appareil avec un tampon à récurer métallique. Des
morceaux de tampon pourraient se détacher et entrer en contact avec les
parties électriques.
• Débrancher l’appareil lorsqu’il n’est pas en service et avant de le
nettoyer. Toujours éteindre l’appareil (“OFF”) avant de le débrancher.
Laisser refroidir l’appareil avant de monter ou démonter des pièces et
avant de le nettoyer.
• ATTENTION : Ne jamais laisser le four rôtissoire sans surveillance
lorsqu’il est en mode rôtissoire ou grille-pain, ou lorsqu’il est utilisé pour
gratiner un plat.
• Ne pas laisser le cordon pendre du bord d’une table ou d’un plan de
travail, ni toucher des surfaces chaudes.
• Le four gril rôtissoire est éteint quand le bouton de la température et la
minuterie sont sur la position “OFF” (ARRET).
• Faire extrêmement attention en déplaçant un appareil contenant de
l’huile ou tout autre liquide brûlant.
• Une extrême attention est nécessaire lorsque vous retirez le plateau à
rôtir ou que vous jetez la graisse chaude.
• Ne pas placer l’appareil sur ou près d’une cuisinière à gaz ou
électrique, ni dans un four chaud.
• N’utiliser que les accessoires recommandés par Toastmaster Inc.
• N’utiliser cet appareil que conformément aux instructions données dans
ce guide.
12
Page 13

CONSERVEZ CES INSTRUCTIONS
ATTENTION : Le cordon d’alimentation fourni est court afin de réduire les
risques de blessures qui pourraient survenir si l’on s’emmêle ou si l’on
trébuche dans un cordon plus long. Vous pouvez utiliser des rallonges,
disponibles dans les quincailleries locales, en prenant les précautions qui
s’imposent. Si une rallonge est nécessaire, veuillez faire très attention lors
de son utilisation. De plus, le cordon d’alimentation doit : (1) présenter des
caractéristiques nominales d’au moins 13 A, 125 V ~, 1625 W et (2) être
disposé de façon à ne pas retomber du plan de travail ou de la table où
des enfants pourraient le tirer ou trébucher dessus par mégarde.
FICHE POLARISEE : Cet appareil est équipé d’une fiche polarisée (l’une des
lames est plus large que l’autre). Cette précaution est destinée à réduire les
risques d’électrocution ; la fiche ne peut être branchée dans une prise que
dans un sens. Si la fiche ne peut pas être insérée à fond dans la prise,
retournez-la. Si elle ne peut toujours pas être branchée, consultez un
électricien qualifié. Ne pas essayer de modifier ce dispositif de sécurité.
ALIMENTATION ELECTRIQUE : Si le circuit électrique est surchargé par
d’autres appareils, l’appareil peut ne pas fonctionner correctement. Dans la
mesure du possible, il doit être branché sur un circuit électrique séparé des
autres appareils.
CE PRODUIT EST DESTINE A UN USAGE MENAGER
Votre produit peut différer légèrement de l'illustration.
Voyant lumineux
Bouton
"TOAST"
Réglage
"TOAST"
Réglage
"FOUR"
PROGRAMMATEUR/
MINUTERIE
Figure 1
Grille
métallique
Hauteur de grille
la plus haute
Hauteur de grille
la plus basse
13
Page 14

Intérieur
amovible
Poignée métallique
Grille pour
rôtissoire
Plaque à
cuisson/grill
Figure 2
Figure 3
FAITES CONNAISSANCE AVEC VOTRE FOUR GRIL ROTISSOIRE
Retirez tous les matériaux d’emballage, y compris le morceau de papier qui
a été placé entre le haut de la porte du four et le four, pour la protection de
l’appareil durant l’expédition. Retirez également le morceau de carton qui
a été placé entre le bas de la porte et le four.
Votre nouveau four gril rôtissoire Toastmaster est très polyvalent, il peut cuire,
rôtir, décongeler, griller, faire gratiner et garder les aliments au chaud. Le
thermostat réglable vous permet de préparer des plats selon les indications de
l’emballage ou de la recette. Le voyant lumineux restera allumé tout le temps
du fonctionnement de l’appareil. Les deux éléments chauffants supérieurs et
inférieurs seront en marche quand le four sera en mode grille-pain, cuisson,
décongélation, gratin et maintien au chaud. Seuls l’élément chauffant
supérieur sera en marche quand le four sera en mode rôtissoire.
Le four gril rôtissoire est doté d’un éclairage intérieur qui se met automatiquement
en marche lorsque la porte du four est ouverte et que le four est branché.
14
Page 15

ATTENTION : LES SURFACES DE L’APPAREIL SONT CHAUDES PENDANT ET
APRES L’UTILISATION.
ATTENTION : VOUS DEVEZ TOUJOURS PORTER DES GANTS DE CUISINE
PROTECTEURS ET ISOLANTS LORSQUE VOUS TOUCHEZ LE FOUR CHAUD
OU DES ALIMENTS ET DES PLATS CHAUDS, OU ENCORE LORSQUE VOUS
PLACEZ OU RETIREZ LES GRILLES, MOULES OU PLATS DE CUISSON.
LAISSER TOUJOURS REFROIDIR LE FOUR AVANT D’ENVELER
L’INTERIEUR AMOVIBLE.
Les fabricants de vaisselle pour la cuisson au four déconseillent l’utilisation
de plats ou couvercles en verre transparent dans les fours grils rôtissoires.
Les plats en verre céramique peuvent être utilisés. Ne pas utiliser de sacs
pour rôtir, car ils pourraient entrer en contact avec les éléments chauffants
MOULE A CUIRE/ROTIR, GRILLE METALLIQUE ET ACCESSOIRE POUR ROTIS
Pour obtenir de meilleurs résultats et simplifier le nettoyage dû à des
débordements, il est préférable d’utiliser un moule pour cuire, décongeler,
faire gratiner et maintenir au chaud. Pour le grille-pain, placez directement
le pain sur la grille métallique. Lorsque le four est en mode rôtissoire, vous
devez placer le moule et le support pour rôtis sur la grille.
GRILLE METALLIQUE
La grille métallique doit être utilisée pour tous les modes de cuisson. Elle
peut être placée soit en position haute, soit en position basse comme
l’indique la figure 1.
La grille peut également être inversée pour obtenir deux positions
supplémentaires. Dans les instructions de chaque fonction, une hauteur de
grille est conseillée ; néanmoins vous pouvez adapter la hauteur de grille
selon les différentes épaisseurs des aliments.
PROGRAMMATEUR/MINUTERIE
Le cadran de réglage de la MINUTERIE (“TIMER”) fonctionne comme
bouton MARCHE/ARRET (“ON/OFF”) du four. Tournez la minuterie dans
le sens des aiguilles d’une montre pour sélectionner le temps de cuisson
approprié, jusqu’à 2 heures. Lorsque le temps de cuisson est terminé, un
signal sonore retentit et l’appareil s’arrête automatiquement. Si la cuisson
dure moins de 10 minutes, la minuterie n’est pas néssaire.
Si vous ne souhaitez pas utiliser la minuterie, tournez simplement le cadran
sur la position “ST AY ON” pour mettre le four en marche et laisser cuire tout
en surveillant les aliments. Tournez le cadran sur la position “OFF” (ARRET)
quand la cuisson est terminée.
15
Page 16

INSTRUCTIONS POUR LE GRILLE-PAIN
1. Sortez la plaque et la grille métallique.
2. Branchez la fiche dans une prise de 120 V ~ 60 Hz.
3. Disposez les aliments au centre de la grille métallique. Placez-la en
position n°2 du four et refermez la porte du four.
4. Tournez le bouton de réglage "TOAST" sur la teinte désirée.
5. Appuyez sur le bouton "TOAST". Le voyant lumineux s’allume. De la
condensation peut s’accumuler sur la vitre de la porte, mais elle
s’évaporera quand le gril sera en marche.
6. L’appareil s’éteint automatiquement lorsque le cycle est terminé.
Le voyant d’alimentation s’éteindra, ou surveillez vos toasts jusqu’à ce
qu’ils atteignent la couleur désirée et éteignez le four manuellement en
ouvrant la porte du four. Cela éteindra l’appareil sans endommager
le four. Pour remettre en marche, appuyez à nouveau sur le bouton
"TOAST".
7. Débranchez l'appareil et laissez-le refroidir avant de le nettoyer.
CONSEILS POUR LES TOASTS
• Suivez les instructions du grille-pain, lorsque vous grillez de la nourriture.
• Les pains lourds ou congelés nécessitent une couleur plus foncée.
(par exemple bagels et muffins anglais).
• Une seule tranche exige un programme plus clair que plusieurs tranches.
INSTRUCTIONS POUR FAIRE GRATINER
1. Sortez la plaque et la grille métallique.
2. Branchez la fiche dans une prise de 120 V ~ 60 Hz.
3. Placez la grille métallique sur la position n°2 du four. Disposez le plat
de cuisson ou les aliments au centre de la grille métallique ou utilisez
un moule. Fermez la porte
4. Tournez le bouton de réglage "TOAST" sur la teinte désirée.
5. Appuyez sur le bouton "TOAST". Le voyant lumineux s’allume.
6. L’appareil s’éteint automatiquement lorsque le cycle est terminé.
Le voyant lumineux s’éteint. Surveillez les aliments pour éviter qu’ils ne
gratinent trop. Pour arrêter le cycle manuellement, ouvrez la porte du four.
7. Débranchez l'appareil et laissez-le refroidir avant de le nettoyer.
CONSEILS POUR FAIRE GRATINER
• Pour obtenir une couleur plus foncée, réglez le bouton de réglage "TOAST"
sur une teinte plus foncée et remettez le cycle en route en appuyant sur le
bouton "TOAST". Surveillez jusqu'à obtention de la couleur désirée et
éteignez l'appareil manuellement en ouvrant la porte du four.
• Cette fonction peut être utilisée pour dorer les bagels, les muffins anglais,
pour faire fondre du fromage sur des sandwichs, ou pour faire gratiner
un plat.
16
Page 17

INSTRUCTIONS POUR LE MAINTIEN AU CHAUD
1. Sortez la plaque et la grille métallique.
2. Branchez la fiche dans une prise de 120 V ~ 60 Hz.
3. Placez la grille métallique sur la position n°2 du four. Disposez le plat
de cuisson ou les aliments au centre de la grille métallique ou utilisez
un moule. Fermez la porte.
4. Tournez le bouton de réglage "FOUR" (“OVEN”) sur 93° C et la
“MINUTERIE” ("TIMER") sur le temps de cuisson désiré ou sur la
position "Stay On". Le voyant lumineux s’allume.
5. Lorsque la cuisson est terminée, placez les boutons de réglage "FOUR"
(“OVEN”) et “PROGRAMMATEUR” ("TIMER") sur la position “ARRET”
("OFF"). Le voyant lumineux s’éteint.
6. Débranchez l’appareil et laissez-le refroidir complètement avant de le
nettoyer.
CONSEILS POUR MAINTENIR LA NOURRITURE AU CHAUD
• Utilisez cette fonction pendant de courtes durées après avoir cuit la
nourriture.
• Pour réchauffer des aliments surgelés ou froids, reportez-vous aux
instructions pour la décongélation.
INSTRUCTIONS POUR LA CUISSON
1. Sortez la plaque et la grille métallique.
2. Branchez la fiche dans une prise de 120 V ~ 60 Hz.
3. Placez la grille métallique sur la position n°2 du four. Fermez la porte.
4. Tournez le bouton de réglage "FOUR" (“OVEN”) sur la température
désirée. Réglez la “MINUTERIE” ("TIMER") sur le temps de cuisson
désiré ou sur la position "Stay On". Le voyant lumineux s’allume.
Accordez 10 minutes pour le préchauffage.
5. Après le préchauffage, disposez le plat de cuisson ou les aliments au
centre de la grille ou utilisez un moule. Fermez la porte. Réglez la
“MINUTERIE” ("TIMER") sur le temps de cuisson désiré ou sur la
position "Stay On". Le voyant lumineux s’allume. Faites cuire selon les
indications de l’emballage ou de la recette.
6. Lorsque la cuisson est terminée, placez les boutons de réglage
"FOUR" (“OVEN”) et “MINUTERIE” ("TIMER") sur la position "ARRET"
(“OFF”). Le voyant lumineux s’éteint.
7. Débranchez l'appareil et laissez-le refroidir avant de le nettoyer.
CONSEILS POUR LA CUISSON
• Pour éviter les pertes de chaleur, veillez à ne pas ouvrir la porte de
manière excessive.
• Du papier aluminium peut être utilisé pour couvrir le plat de cuisson à
condition que les extrémités soient bien repliées contre les parois du moule.
17
Page 18

INSTRUCTIONS POUR LA DECONGELATION
1. Sortez la plaque et la grille métallique.
2. Branchez la fiche dans une prise de 120 V ~ 60 Hz.
3. Placez la grille métallique sur la position n°2 du four.
4. Disposez le plat de cuisson ou les aliments au centre de la grille
métallique ou utilisez un moule. Fermez la porte.
REMARQUE : La décongélation prendra environ 1/3 du temps de
décongélation à température ambiante indiqué sur l’emballage.
5. Tournez le bouton de réglage "FOUR" (“OVEN”) sur 93° C et la
“MINUTERIE” ("TIMER") sur le temps de cuisson désiré ou sur la
position "Stay On". Le voyant lumineux s’allume.
6. Lorsque la cuisson est terminée, placez les boutons de réglage
"FOUR" (“OVEN”) et “MINUTERIE” ("TIMER") sur la position
"ARRET". Le voyant lumineux s’éteint.
7. Débranchez l’appareil et laissez-le refroidir complètement avant de le
nettoyer.
CONSEILS POUR LA DECONGELATION
• N’utilisez pas cette méthode pour la viande, la volaille ou le poisson.
• Ne pas recouvrir la nourriture.
• Badigeonnez la pâte congelée d’huile pour éviter qu’elle ne dessèche et
sortez les aliments du four pour le préchauffer avant la cuisson.
INSTRUCTIONS POUR LA ROTISSOIRE
1. Sortez la plaque et la grille métallique.
2. Branchez la fiche dans une prise de 120 V ~ 60 Hz.
3. Placez la grille métallique sur la position n°1 du four.
4. Placez le support pour rôtis dans le moule de cuisson et disposez les
aliments sur le support pour rôtis (voir Figure 2). Mettez dans le four
et fermez la porte.
5. Tournez le bouton de réglage "FOUR" (“OVEN”) sur la position
rôtissoire et la “MINUTERIE” ("TIMER") su r l e t emps de cuisson désiré
ou sur la position "Stay On". Le voyant lumineux s’allume.
6 Lorsque la cuisson est terminée, placez les boutons de réglage
"FOUR" (“OVEN”) et “MINUTERIE” ("TIMER") sur la position
"ARRET". Le voyant lumineux s’éteint.
7. Débranchez l’appareil et laissez-le refroidir complètement avant de le
nettoyer.
CONSEILS POUR LA ROTISSOIRE
• Utilisez toujours le moule avec le support pour rôtis ; cela permet aux jus
de cuisson et à la graisse de s’écouler dedans et cela réduit les
éclaboussures pendant la cuisson.
• Ne mettez pas de papier aluminium sur le support de la rôtissoire, il
risquerait de retenir la graisse et cela pourrait s’enflammer.
18
Page 19

Eclairage intérieur
(Avec le pannneau
lumineux envelé)
Figure 4
• Enlevez le surplus de gras de la viande et entaillez les bords pour réduire
la fumée et éviter qu’elle ne se recroqueville.
• Faites toujours décongeler la viande avant de la faire rôtir.
• Videz la graisse de la lèchefrite et lavez-la après chaque utilisation.
NETTOYAGE DE L’INTERIEUR DU FOUR
Votre four gril rôtissoire dispose d’un intérieur amovible qui convient au
lave-vaisselle. Pour de meilleurs résultats, enveler l’intérieur amovible puis
nettoyer complètement après chaque emploi.
1. Débranchez toujours l’appareil et laissez-le refroidir complètement
avant de le nettoyer ou de le déplacer.
2. Sortez la plaque, le support pour rôtis et la grille métallique.
Nettoyez-les avec un produit nettoyant non abrasif, rincez et séchez
complètement ou lavez-les dans le lave-vaisselle.
3. Sortez avec précaution l’intérieur en saisissant la poignée métallique
et en la tirant (voir Figure 3).
4. Nettoyez l’intérieur avec un détergent tel que Solf Scrub
®
, Bon ami®,
Ajax
®
, ou tout autre produit sain pour ustensils de cuisine rincez et
séchez complètement. L’intérieur peut également être lavé au
lave-vaisselle.REMARQUE : Pour de meilleurs résultats, rinser
l’ensemble avant de les placer dans le lave vaisselle.
5. Glissez l’intérieur dans le four et refermez la porte.
19
NETTOYAGE DE LA PORTE ET DE L'EXTERIEUR DU FOUR
1. Débranchez toujours l’appareil et laissez-le refroidir complètement
avant de le nettoyer ou de le déplacer.
2. Nettoyez avec un produit lave vitre ou un détergent doux, et avec un
chiffon humide ou un tampon à récurer en plastique. Ne pas utiliser
de produit ni de tampon abrasif, car ceux-ci pourraient érafler la
finition du four.
3. Rincez et essuyez complètement avec un chiffon humide. Laissez
sécher avant de refermer la porte.
Page 20

POUR REMPLACER L’AMPOULE DU FOUR
Les ampoules de rechange doivent être commandées auprès du service de
Pièces de rechange de Toastmaster (1-800-947-3745).
1. Débranchez l’appareil et laissez-le refroidir complètement.
2. Sortez avec précaution l’intérieur en saisissant la poignée métallique
et en la tirant (voir Figure 3).
3. Envelez les vis tenant le panneau lumineux.
4. Envelez le panneau lumineux.
5. Pour retirer l’ampoule, dévissez-la (voir Figure 4).
6. Remplacez-la par une ampoule neuve, en la tournant doucement pour
la visser en place.
7. Repositionnez le panneau lumineux.
8. Revissez les vis du panneau lumineux.
9. Glissez l’intérieur dans le four et refermez la porte.
Hormis les opérations de nettoyage ci-dessus, tout entretien ou réglage
exigeant un démontage doit être confié à un centre de réparations agréé.
RENSEIGNEMENTS CONCERNANT LE SERVICE APRES-VENTE
Veuillez vous reporter à la déclaration de garantie pour déterminer si les
réparations nécessaires sont sous garantie. Cet appareil doit être réparé
dans un centre de service après-vente agréé Toastmaster. Toute réparation
non autorisée entraînera l'annulation de la garantie. Consultez l'annuaire
téléphonique sous la rubrique "Appareils Electroménagers-Entretien et
Réparations" ou appelez le 1-800-947-3744 (aux USA et au Canada) ou
le 52-5-397-2848 (au Mexique).
Si un centre de service après-vente n'est pas disponible localement, vous
pouvez renvoyer votre appareil en port payé à notre Centre National de
Service Après-Vente, à l'adresse indiquée au dos de ce livret.
Les appareils doivent être correctement protégés pour éviter tout dommage
lors de l’expédition. Nous suggérons à l’utilisateur d’entourer
l’appareil d’une épaisseur de 8 cm de matériaux de protection et
d’inclure une note expliquant la nature du problème, ainsi qu’une copie du
reçu de vente daté. Nous vous conseillons d'assurer votre paquet. Aucun
paquet envoyé en contre remboursement ne sera accepté.
20
Page 21

Nous mangeons tous. Ceci est chose acquise.
Pourtant, il arrive que la préparation du repas se
transforme en corvée.
C’est la raison pour laquelle TOASTMASTER est
convié dans des millions de cuisines semblables à la
vôtre afin de VOUS AIDER A MAITRISER le travail de
préparation et de cuisson, les rôtis, grillades
et plats mijotés, ainsi que le réchauffage
et service de vos mets
En GRANDE CLASSE ET SANS EFFORT INUTILE.
La marque TOASTMASTER est synonyme de
CELEBRATION DE L’INNOVATION conçue
pour vous servir et vous permettre de continuer à
CUISINER EN GRANDE CLASSE.
GARDEZ LE REÇU DE VENTE DATE POUR TOUTE REPARATION SOUS
GARANTIE.
Conservez ce livret. Notez les renseignements suivants pour référence
ultérieure :
Date d’achat
Numéro du modèle
Code de date (estampillé sur le dessous de l’appareil)
21
GARANTIE LIMITEE DE UN AN
Toastmaster Inc. garantit à l’acheteur d’origine de ce produit, pendant un an à partir de sa date d’achat, qu’il est exempt de tout
défaut de pièce et de main-d’œuvre.
La présente garantie est la seule garantie écrite ou expresse donnée par Toastmaster Inc. Cette garantie donne certains droits
légaux spécifiques. Il est possible qu’il existe d’autres droits qui varient suivant les provinces. TOUT AUTRE DROIT
POUVANT EXISTER, Y COMPRIS TOUTE GARANTIE IMPLICITE DE QUALITE MARCHANDE OU D’ADEQUATION A UN USAGE PARTICULIER, EST LIMITE(E) A LA DUREE DE LA PRESENTE GARANTIE.
Rapporter ou renvoyer (port payé) tout produit défectueux à un centre de réparation agréé figurant dans l’annuaire
téléphonique ou au service de réparation : Service Department, Toastmaster Inc., 1409 East Morgan St, Boonville, MO. 65233,
E.-U.A., pour le faire réparer ou remplacer gratuitement, à notre discrétion.
Le recours de l’utilisateur n’inclut pas : les frais de désagrément, les dégâts causés par la défaillance du produit, les dégâts subis
lors de son transport, de son utilisation incorrecte ou abusive, de tout accident ou événement semblable, ou de son
utilisation commerciale. EN AUCUN CAS TOASTMASTER INC. NE SERA TENUE POUR RESPONSABLE DE DOMMAGES DIRECTS OU
INDIRECTS.
Certaines provinces n’admettent pas de limites de temps pour les garanties implicites ou admettent l’exclusion ou la
limitation des dommages fortuits ou conséquents ; il se peut donc que les limitations ou exclusions ci-dessus ne s’appliquent
pas à tous les cas.
Pour tout renseignement, écrire au “Consumer Claims Manager”, à l’adresse de Boonville MO, E.-U. Indiquer son nom,
adresse, code postal, numéro de téléphone du jour et code régional, ainsi que les numéros de modèle et de série, et la date
d’achat de l’appareil.
Page 22

LEA Y GUARDE ESTAS INSTRUCCIONES
ADVERTENCIA: Todos los electrodomésticos presentan el riesgo de incendio y de
electrocución, con la capacidad de provocar lesiones importantes o incluso la
muerte. Por favor siga todas las instrucciones de seguridad.
Horno Tostador de Parrilla - para 6
Rebanadas con Interior Extraíble
Guía de Uso y Cuidados - Modelo 358
• PARED EXTERIOR QUE SE MANTIENE FRIA
• CRONOMETRO DE 2 HORAS
• LUZ INTERIOR
• 4 POSICIONES DE LA REJILLA
• APAGADO DE SEGURIDAD AUTOMATICO
• CONTROL ELECTRONICO DE COLOR DEL TOSTADO
• INCLUYE REJILLA REFORZADA, BANDEJA PARA HORNEAR Y
PARRILLA DE INSERCION ESMALTADA
MEDIDAS DE SEGURIDAD
IMPORTANTES
Cuando use electrodomésticos, siempre debe seguir las precauciones de
seguridad básicas para así reducir el riesgo de incendio, electrocución y
lesiones a personas, incluyendo las siguientes:
• Lea todas las instrucciones antes de utilizar el aparato.
• Es necesario ejercer una estricta supervisión cuando cualquier aparato
se utilice cerca de los niños.
• Este aparato no debe ser utilizado por niños.
• No toque las superficies calientes. Utilice las asas o las perillas y los
guantes para el horno
• No opere ningún aparato dañado. No opere con un cable o enchufe
dañado, o después de que el aparato funcione mal, o si se ha dejado
caer o ha resultado dañado de cualquier manera. Devuelva el aparato
al centro de servicio autorizado más cercano para su inspección,
reparación y ajuste eléctrico o mecánico.
22
Page 23

• Antes de utilizar este aparato, muévalo de 10 a 15 centímetros de la
pared o de cualquier objeto sobre la mesa. No guarde ningún artículo
en la parte superior del aparato. No se utilice en superficies en donde
el calor pueda provocar un problema.
• Se puede producir un fuego si este aparato toca o está cubierto por
material inflamable, incluyendo cortinas, tapicería, paredes, etc.,
mientras está en operación.
• No almacene ningún material en este horno, con excepción de los
accesorios recomendados por el fabricante, cuando no esté en uso.
• No cubra ninguna parte del horno con papel metálico. Esto provocaría
el sobrecalentamiento del horno.
• Es necesario tomar todas las debidas precauciones cuando se utilicen
envases construidos con materiales no metálicos.
• No coloque ningún material inflamable como papel, cartón, plástico,
etc., dentro del horno.
• Cuando ase, es necesario utilizar la bandeja para hornear/asar y la
parrilla de inserción .
• No se deben colocar alimentos ni utensilios con un tamaño exagerado
dentro del horno tostador de parrilla.
• No sumerja el cable, la clavija o el aparato en agua o en otro líquido.
Vea las instrucciones de limpieza.
• No lo utilice en exteriores o en áreas húmedas.
• No lo limpie con estropajos de metal. Se pueden romper partes de los
estropajos y tocar las piezas eléctricas.
• Desenchufe el aparato del tomacorriente cuando no lo esté utilizando o
antes de la limpieza. Gire los controles a la posición "OFF" (Apagado)
antes de desenchufar. Deje enfriar el aparato antes de colocarle o
quitarle piezas y antes de limpiarlo.
• PRECAUCION: Nunca deje el horno tostador de parrilla desatendido
cuando ase, dore o tueste.
• No deje colgar el cable sobre el borde de la mesa o mostrador, ni deje
que toque las superficies calientes.
• Cuando los controles del horno y cronómetro estén en la posición de
"OFF" (Apagado) el horno tostador de parrilla estará apagado.
• Es necesario que ejerza un cuidado extremo durante el traslado de un
aparato que contenga aceite u otros líquidos calientes.
• Es necesario que tome todas las precauciones necesarias cuando
extraiga la bandeja para asar o se deseche la grasa caliente.
• No lo coloque encima o cerca de quemadores calientes, eléctricos o de
gas, o en un horno caliente.
• Utilice solamente los accesorios recomendados por Toastmaster Inc.
• Utilice el aparato solo como se indica en estas instrucciones.
GUARDE ESTAS INSTRUCCIONES
23
Page 24

PRECAUCION: Se provee un cable eléctrico corto para el aparato para
reducir el riesgo de lesiones personales resultantes de enredarse o tropezar
con un cable más largo. En caso de que necesite un cable eléctrico más
largo, puede conseguir cables de extensión en las ferreterías de su
localidad, y pueden ser usados si se ejercen las precauciones debidas. Si
usted requiere un cable de extensión, se necesita tener cuidados y
atenciones especiales. Además, el cable deberá: (1) Estar marcado con un
grado eléctrico de al menos 125 V, 13 A, 1.625 W y (2) el cable debe
colocarse de tal forma que no cuelgue sobre la superficie de la mesa o
mostrador, donde los niños puedan jalarlo o alguien se pueda tropezar
accidentalmente.
CLAVIJA POLARIZADA Este aparato posee una clavija polarizada (una de
sus patas es más ancha que la otra). Como una medida de seguridad para
reducir el riesgo de descargas eléctricas, ésta clavija está diseñada para
conectar solamente de una manera en un tomacorriente polarizado. Si la
clavija no conecta completamente en el tomacorriente, inviértala. Si aún no
conecta bien, consulte a un electricista calificado. No intente alterar esta
medida de seguridad.
CORRIENTE ELECTRICA: Si el circuito eléctrico está sobrecargado con otros
aparatos, su aparato puede que no funcione apropiadamente. Este debería
de ser operado en un circuito eléctrico separado del resto de los demás
aparatos.
ESTE PRODUCTO ES SOLAMENTE PARA USO DOMESTICO
El producto puede variar un poco en relación con la ilustración.
Control del
HORNO
Figura 1
Rejilla
Posición Superior
de la Rejilla
Posición Inferior
de la Rejilla
Luz Indicadora
Botón de
TOSTADO
Control de
TOSTADO
CRONOMETRO
24
Page 25

Asa de
alambre
Parilla de
inserción
Bandeja para
hornear/asar
Figura 2
Figura 3
CONOCIENDO SU HORNO TOSTADOR DE PARRILLA
Retire todos los materiales de embalaje incluyendo las piezas de papel que
han sido colocadas entre la parte superior de la puerta del horno y el
horno para protegerlo durante el envío. También retire las piezas de cartón
que también han sido colocadas entre la parte inferior de la puerta del
horno y el horno.
Su nuevo horno tostador de parrilla de Toastmaster tiene la versatilidad de
cocer, descongelar, asar, tostar, dorar y mantener los alimentos calientes. El
termostato ajustable le permite preparar recetas de acuerdo a los paquetes
o las instrucciones de la receta. La luz indicadora se encenderá durante el
tiempo que la unidad esté en operación. Ambos elementos de
calentamiento, el superior y el inferior se prenderán cuando tueste, hornee,
descongele, dore y mantenga alimentos calientes. Cuando ase, solamente
el elemento de calentamiento superior se encenderá.
El horno tostador de parrilla tiene una luz interior que se enciende
automáticamente cuando la puerta del horno esta abierta y cuando el
horno esta conectado.
Interior
extraíbe
25
Page 26

PRECAUCION: LAS SUPERFICIES DEL APARATO ESTAN CALIENTES
DURANTE Y DESPUES DE SU EMPLEO.
PRECAUCION: UTILICE SIEMPRE GUANTES DE PROTECCION PARA EL
HORNO CUANDO TOQUE EL HORNO CALIENTE O PLA TOS Y ALIMENTOS
CALIENTES, O CUANDO INSERTE O EXTRAIGA LA REJILLA, LA BANDEJA
O EL RECIPIENTE PARA HORNEAR.
SIEMPRE PERMITA QUE EL HORNO SE ENFRIE ANTES DE EXTRAER EL
INTERIOR.
Los fabricantes de productos para hornos no recomiendan utilizar
recipientes o tapas de cristal transparentes para asar en los hornos
tostadores de parrilla. Se pueden utilizar recipientes para hornear de
cristal cerámica. No utilice bolsas para asar en este horno, ya que pueden
hacer contacto con los elementos de calentamiento.
BANDEJA PARA HORNEAR/ASAR, REJILLA Y PARRILLA DE INSERCION
Para mejores resultados utilice la bandeja para hornear, descongelar,
dorar, mantener el calor y minimizar la limpieza provocada por los
derrames. Para tostar, coloque el pan directamente sobre la rejilla. Cuando
ase, es necesario utilizar la bandeja y la parrilla de inserción.
REJILLA
La rejilla debe usarse para todas las funciones de cocimiento. Puede ser
colocada en la posición superior o inferior del horno como se muestra en
la Figura 1.
La rejilla también se puede invertir para dos posiciones adicionales. Cada
sección de instrucciones sugiere una posición específica de la
rejilla, sin embargo, la rejilla puede ser ajustada para acomodar diferentes
tipos de comidas.
CRONOMETRO
El dial de control del CRONOMETRO también funciona como el
interruptor de "ON" (encendido) y "OFF" (apagado) del horno. Gire el
cronómetro en dirección de las manecillas del reloj para seleccionar el
tiempo apropiado de cocción a aproximadamente 2 horas. Cuando el
cronómetro de cocción pare, una señal sonará y la unidad se apagará
automáticamente. Si cocina por menos de 10 minutos, no se recomienda
usar el cronómetro.
Si no desea usar el cronómetro, simplemente gire el dial a la posición de
"Stay On" para encender el horno y vigile bien la comida. Regréselo a la
posición "OFF" (apagado) cuando termine de cocinar.
26
Page 27

INSTRUCCIONES PARA TOSTAR
1. Retire la bandeja y la rejilla.
2. Enchúfelo en un tomacorriente de 120 V ~ 60 Hz.
3. Centre la comida en la rejilla. Colóquela en la posición n°2 del horno
y cierre la puerta.
4. Gire el dial de control de TOSTADO hasta el tono deseado.
5. Presione el botón de TOSTADO. La luz indicadora se encenderá. Se
puede acumular condensación en el interior de la puerta de cristal,
pero se evaporará durante el proceso de tostado.
6. La unidad se apagará automáticamente cuando el ciclo se complete.
La luz indicadora se apagará o cuide el tostado hasta que se
obtenga el tono deseado y apague la unidad manualmente abriendo
la puerta del horno. Esto apagará la unidad sin dañar el horno. Para
encender de nuevo, presione el botón de TOSTADO.
7. Desenchufe la unidad y deje que se enfríe antes de limpiarla.
SUGERENCIAS PARA TOSTAR
• Siga las instrucciones de alimentos de la tostadora.
• Los panes congelados y de consistencia más gruesa requieren un ajuste
más obscuro. (como los “bagels” y los panecillos ingleses)
• Una rebanada requiere un ajuste de tono más claro que varias
rebanadas.
INSTRUCCIONES PARA DORAR
1. Retire la bandeja y la rejilla.
2. Enchúfelo en un tomacorriente de 120 V ~ 60 Hz.
3. Coloque la rejilla en la posición n°2 del horno. Centre el recipiente
para hornear o la comida en la rejilla, o use la bandeja para
hornear. Cierre la puerta.
4. Ajuste el control de TOSTADO al tono deseado.
5. Presione el botón de TOSTADO. La luz indicadora se encenderá.
6. La unidad se apagará automáticamente cuando el ciclo se complete.
La luz indicadora se apagará. Cuide la comida para evitar que se
dore demasiado. Para parar el ciclo manualmente, abra la puerta del
horno.
7. Desenchufe la unidad y deje que se enfríe antes de limpiarla.
SUGERENCIAS PARA DORAR
• Para un tono más obscuro ajuste el control de tostado a un tono más
obscuro y vuelva a iniciar el ciclo presionando el botón de TOSTADO.
Cuide hasta que se obtenga el tono deseado y apague la unidad
manualmente abriendo la puerta del horno.
• La característica de dorado puede utilizarse para dorar la parte
superior de los “bagels”, panecillos ingleses o para fundir queso en los
sándwiches o en los platillos.
27
Page 28

INSTRUCCIONES PARA MANTENER EL CALOR
1. Retire la bandeja y la rejilla.
2. Enchúfelo en un tomacorriente de 120 V ~ 60 Hz.
3. Coloque la rejilla en la posición n°2 del horno. Centre el recipiente
para hornear o la comida en la rejilla, o use la bandeja para
hornear. Cierre la puerta.
4. Gire el dial de control del HORNO a 93°C y el CRONOMETRO al
tiempo deseado o a "Stay On" (encendido permanente). La luz
indicadora se encenderá.
5. Cuando termine, gire el dial de control del HORNO y el
CRONOMETRO a la posición de "OFF" (apagado). La luz
indicadora se apagará.
6. Desenchufe la unidad y deje que se enfríe completamente antes de
limpiarla.
SUGERENCIAS PARA MANTENER EL CALOR
• Utilice durante breves períodos de tiempo después de que los alimentos
estén cocinados.
• Para calentar comidas frías o congeladas, vea las instrucciones para
descongelar.
INSTRUCCIONES PARA HORNEAR
1. Retire la bandeja y la rejilla.
2. Enchúfelo en un tomacorriente de 120 V ~ 60 Hz.
3. Coloque la rejilla en la posición n°2 del horno. Cierre la puerta.
4. Gire el dial de control del HORNO hasta la temperatura deseada.
Gire el CRONOMETRO al tiempo deseado o a "Stay On"
(encendido permanente). La luz indicadora se encenderá. Deje pasar
10 minutos para precalentar.
5. Después de precalentar, centre el recipiente para hornear o la
comida directamente en la rejilla o use la bandeja para hornear.
Cierre la puerta. Ajuste el CRONOMETRO al tiempo deseado o a
"Stay On" (encendido permanente). La luz indicadora se encenderá.
Hornee de acuerdo a la receta o a las instrucciones del paquete.
6. Cuando termine gire el dial de control del HORNO y el
CRONOMETRO a la posición de "OFF" (apagado). La luz
indicadora se apagará.
7. Desenchufe la unidad y deje que se enfríe antes de limpiarla.
SUGERENCIAS PARA HORNEAR
• Para prevenir la pérdida de calor, evite abrir la puerta excesivamente.
• Puede usar papel de aluminio para cubrir el recipiente para hornear de
cristal cerámica si las orillas del papel están unidas a las orillas de la
bandeja.
28
Page 29

INSTRUCCIONES PARA DESCONGELAR
1. Retire la bandeja y la rejilla.
2. Enchúfelo en un tomacorriente de 120 V ~ 60 Hz.
3. Coloque la rejilla en la posición n°2 del horno.
4. Centre el recipiente para hornear o la comida en la rejilla o use la
bandeja para hornear. Cierre la puerta.
NOTA: El tiempo de descongelación tomará aproximadamente 1/3
del tiempo recomendado para descongelar a temperatura ambiente
en el paquete.
5. Gire el dial de control del HORNO a 93°C y el CRONOMETRO al
tiempo deseado o a "Stay On" (encendido permanente). La luz
indicadora se encenderá.
6. Cuando termine gire el dial de control del HORNO y el
CRONOMETRO a la posición de "OFF" (apagado). La luz
indicadora se apagará.
7. Desenchufe la unidad y deje que se enfríe completamente antes de
limpiarla.
SUGERENCIAS PARA LA DESCONGELACION
• No utilice este método para la carne, aves, o pescado.
• No cubra los alimentos.
• Cubra la masa congelada con aceite utilizando una brocha para
impedir que se seque. Saque la comida para precalentar el horno antes
de hornear.
INSTRUCCIONES PARA ASAR
1. Retire la bandeja y la rejilla.
2. Enchúfelo en un tomacorriente de 120 V ~ 60 Hz.
3. Coloque la rejilla en la posición n°1 del horno.
4. Coloque la parrilla de inserción en la bandeja para asar y coloque la
comida sobre la parrilla de inserción, (vea la Figura 2). Colóquela
dentro del horno y cierre la puerta.
5. Gire el dial de control del HORNO al ajuste de "Broil" (asado) y el
CRONOMETRO al tiempo deseado o a "Stay On" (encendido
permanente). La luz indicadora se encenderá.
6. Cuando termine gire el dial de control del HORNO y el
CRONOMETRO a la posición de "OFF" (apagado). La luz
indicadora se apagará.
7. Desenchufe la unidad y deje que se enfríe completamente antes de
limpiarla.
SUGERENCIAS PARA ASAR A LA PARRILLA
• Siempre use la bandeja con la parrilla de inserción, esto permite que el
jugo y la grasa goteen en la bandeja y disminuye las salpicaduras
mientras asa.
29
Page 30

• No cubra la parrilla con papel de aluminio; esto atrapa la grasa y
puede causar un fuego.
• Quite el exceso de grasa de la carne y corte las orillas para reducir el humo.
• Siempre descongele la carne antes de asar.
• Quite la grasa de la bandeja y lávela después de cada uso.
LIMPIEZA DEL INTERIOR DEL HORNO
Su horno tostador de parrilla tiene un interior extraíble que puede lavarse
en el lavaplatos automático. Para mejores resultados, extraiga el interior y
límpielo completamente después de cada uso.
1. Siempre desenchufe la unidad y permita que se enfríe completamente
antes de moverla o limpiarla.
2. Retire la bandeja, la parrilla de inserción y la rejilla. Lávelas con un
limpiador no abrasivo, enjuague y seque completamente o lávelas en
un lavaplatos automático.
3. Saque cuidadosamente el interior del horno agarrándolo por el asa
de alambre y jalándolo hacia fuera, (vea la Figura 3).
4. Limpie el interior con un límpiador como Soft Scrub
®
,Bon ami®, Ajax®,
o cualquier otro producto que sea seguro para recipientes para
horno. Enjuague y seque completamente. Tambien puede lavar el
interior del horno en el lavaplatos automático.
NOTA: Para mejores resultados, puede que sea necessario limpiar
algunos derrames antes de meterlo al lavaplatos automático.
5. Deslice el interior dentro del horno y cierre la puerta del horno.
Luz interior
(sin el panel
protector de la luz)
Figura 4
LIMPIEZA DE LA PUERTA Y DEL EXTERIOR DEL HORNO
1. Siempre desenchufe la unidad y permita que se enfríe completamente
antes de moverla o limpiarla.
2. Limpie con un producto limpiador de vidrios o un detergente suave y
un trapo húmedo o un estropajo plástico. No utilice un producto de
limpieza o un estropajo abrasivo ya que podrían rayar el acabado.
3. Enjuague y seque cuidadosamente con un trapo limpio. Deje secar
antes de cerrar la puerta.
30
Page 31

REEMPLAZO DE LA LUZ DEL HORNO
La bombilla (foco) de reemplazo debe ser ordenada del departamento de
Partes para el Consumidor de Toastmaster (1-800-947-3745)
1. Desenchufe la unidad y deje que se enfríe completamente.
2. Saque cuidadosamente el interior del horno agarrándolo por el asa
de alambre y jalándolo hacia fuera, (vea la Figura 3).
3. Quite los tornillos que aseguran el panel protector de la luz.
4. Quite el panel protector de la luz.
5. Quite la bombilla (foco) destornillándola, (vea la Figura 4).
6. Reemplácela con la nueva bombilla (foco), girándola ligeramente
para apretarla.
7. Vuelva a colocar el panel protector de la luz.
8. Vuelva a colocar los tornillos para asegurar el panel protector de la luz.
9. Meta de nuevo el interior dentro del horno y cierre la puerta.
Cualquier tipo de servicio que requiera desensamblar el aparato, excepto por
las tareas de limpieza antes mencionadas, deberá ser practicado por un centro
de servicio autorizado.
INFORMACION DE SERVICIO
Por favor, consulte la declaración de garantía para determinar si la garantía
de servicio está vigente. Este aparato debe ser reparado por un centro de
servicio autorizado de Toastmaster. Cualquier tipo de servicio no autorizado
anulará la garantía. Consulte su directorio telefónico bajo "Electrodomésticos
Pequeños - Servicio y Reparación", o llame al 1-800-947-3744 en los
Estados Unidos y Canadá, 52-5-397-2848 en México.
En caso de que no haya un centro de servicio autorizado local, puede devolver
el aparato, mediante envío prepagado al Centro Nacional de Servicio (National
Service Center) a la dirección que se indica en la última página de este folleto.
El producto deberá estar debidamente protegido para evitar daños durante
el envío. Envuelva el aparato con 8 cm de material protector
almohadillado, incluya también una copia de la factura de venta fechada
y una nota explicando el problema en cuestión. Aconsejamos que certifique
el paquete al enviarlo. No se aceptan envíos contrareembolso.
31
GARANTIA LIMIT
ADA DE UN AÑO
Toastmaster Inc. Garantiza al consumidor original durante un periodo de un año a partir de la fecha de compra que el
producto no posee ningún defecto ni en el material ni en su fabricación.
Esta garantía es la única garantía escrita o expresa otorgada por Toastmaster Inc. Esta garantía proporciona al comprador derechos legales
específicos. Puede que el consumidor disponga de otros derechos que varían de estado a estado. CUALQUIER OTRO DERECHO DEL QUE PUEDA
DISPONER, INCLUYENDO CUALQUIER GARANTIA IMPLICITA DE COMERCIALIZACION O DE ADECUACION PARA UN FIN PARTICULAR,
ESTA LIMITADA A LA DURACION DE ESTA GARANTIA.
El producto defectuoso se puede llevar o enviar (flete pre-pagado) a un centro de servicio técnico autorizado que aparezca en una
guía telefónica o al Departamento de Servicio Técnico, Toastmaster Inc, 1409 E, Morgan Street, Boonville, Mo. 65233, para su reparación
gratuita o substitución dependiendo de nuestro criterio.
Su remedio no incluye: costo de las incomodidades, daños provocados por el fallo del producto, daños en el transporte,
utilización incorrecta, accidentes o similares ó el uso comercial. EN NINGUN CASO TOASTMASTER INC. SERA RESPONSABLE POR DAÑOS
IMPREVISTOS O EMERGENTES.
Algunos estados no permiten limitaciones en la duración de una garantía implícita, ni permiten la exclusión o limitación de daños
imprevistos o emergentes, de manera que puede que las limitaciones que aparecen arriba no sean válidas en su caso.
Para obtener más información, escriba al Director de Reclamaciones del Consumidor, enviando la carta a la dirección de Boonville. Envíe
el nombre, dirección, código postal, prefijo telefónico y número de teléfono en el que esté disponible durante el día, modelo, número
de serie y fecha de compra.
Page 32

CONSERVE EL RECIBO DE VENTAS FECHADO PARA EL SERVICIO
TECNICO CUBIERTO POR LA GARANTIA.
Mantenga este folleto. Apunte lo siguiente como referencia:
Fecha de compra
Número del Modelo
Código de la Fecha (imprimido en el fondo)
ESPECIFICACIONES TECNICAS
Potencia Nominal (Watts) 1.400 W
Tension de Alimentacion o Tension Nominal (Volts) 127 V ~
Frencuencia de Operacion o Frecuencia Nominal (Hertz) 1.568 Hz
TODO EL MUNDO COME. Es un hecho ineludible.
Pero algunas veces el preparar
comidas puede volverse una tarea.
Es por eso que TOASTMASTER ha sido invitado
a millones de cocinas como la suya
para poder AYUDARLE A DOMINAR sus
tareas de mezclar, hornear, asar, tostar,
preparar, calentar y servir
CON FACILIDAD Y ESTILO.
La marca TOASTMASTER representa una
CELEBRACION de la INNOVACION diseñada
para servirle y mantenerle
COCINANDO CON ESTILO.
National Service Center
1409 E. Morgan Street
Boonville, Missouri 65233
In USA and Canada call:
Consumer Service 1-800-947-3744
Consumer Parts 1-800-947-3745
Hours: 8:00 a.m. - 5:30 p.m. CST
Aux É.-U. et au Canada, veuillez appeler
Service consommateur : 1-800-947-3744
Piéces détachées consommateur : 1-800-947-3745
Heures ouvrables : 8 h - 5 h 30 Heure Centrale
En México - 52-5-397-2848
Horario: 8:00 a.m. hasta 5:30 p.m., hora del Centro
Toastmaster de México, SA de CV
Cerrada de Recursos
Hidráulicos Numero 6
La Loma Industrial
Tlalnepantla de Baz, C.P. 54060
Estado de México
PART NO. 34251P01
 Loading...