

Toa WM-270, WM-271 Operating Instructions Manual
[Operating Instructions]
WIRELESS
MICROPHONE
WM-270
WM-271
Please fo llo w th e instructions in this manual to obtain
the optimum results from this unit. We also recommend you keep this manual handy for future reference.
GENERAL DESCRIPTION
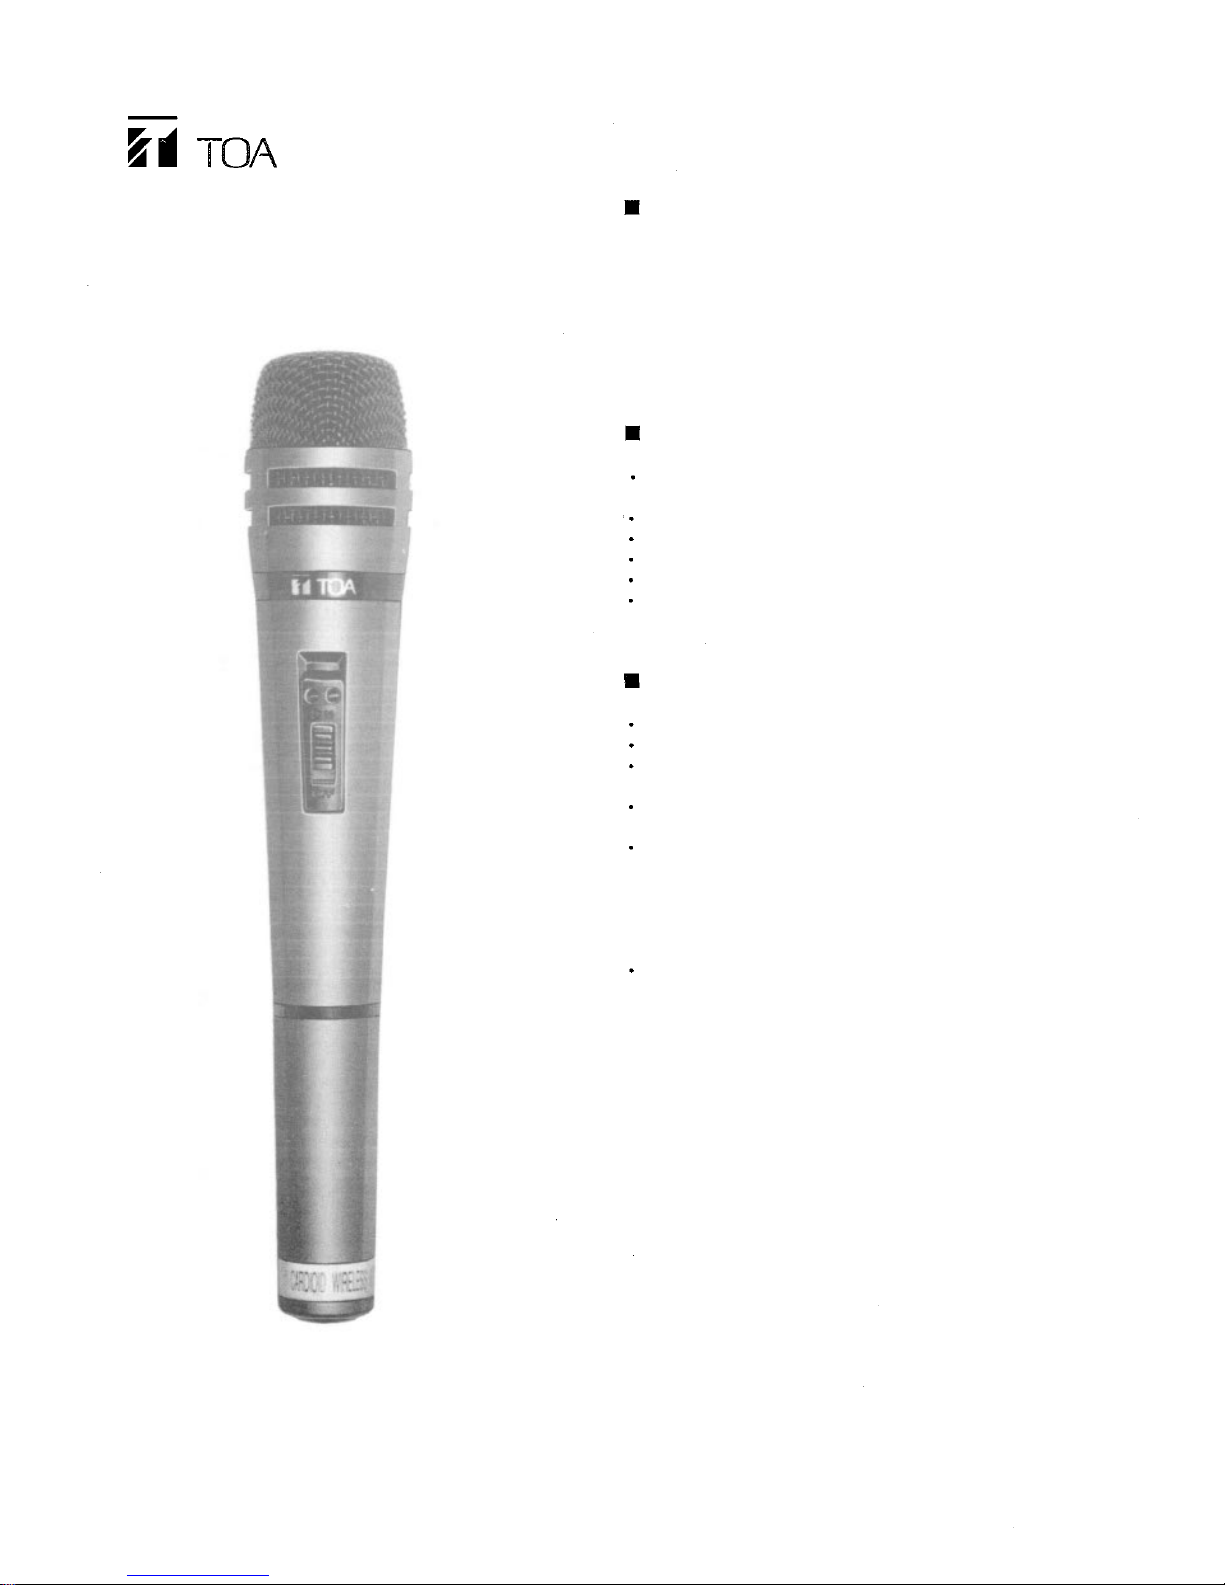
Compact and light weight, the TOA WM-270
(WM-271) is a hand-held type wireless microphone for
speech. It incorporates a compressor/expander system noise reduction circuit to minimize the influence
of high-frequency noise generated from digital equipment such as personal computers and word processors.
FEATURES
Continuous operation for 12 hours or more on one
alkaline battery (LR6/1.5V).
Two battery indicators (green and red).
Internal I.D. signal generator for tone squelch.
Anti-rolling construction.
Stopper to prevent the fal l of a battery case.
Compressor/expander system noise reduction circuit.
USE R PRECAUTIONS
Take care not to dro p the unit on to a hard floor.
Do not flip nor blow into the microphone head.
Avoid placing the unit in areas of extremely high
humidity and temperature.
Never open the unit nor touch its internal compo-
nents.
Clean the unit's exterior periodically with a soft dry
cloth. If it gets very dirty, wipe first with a soft damp
cloth lightly soaked in a neutral d etergent, and then
dry with a soft cloth.
Never use thinner, benzine, or other solvents, which
may damage plastic part o f the unit.
Remove the battery if the unit is to be stored f or two
weeks or more.
TOA Corporation
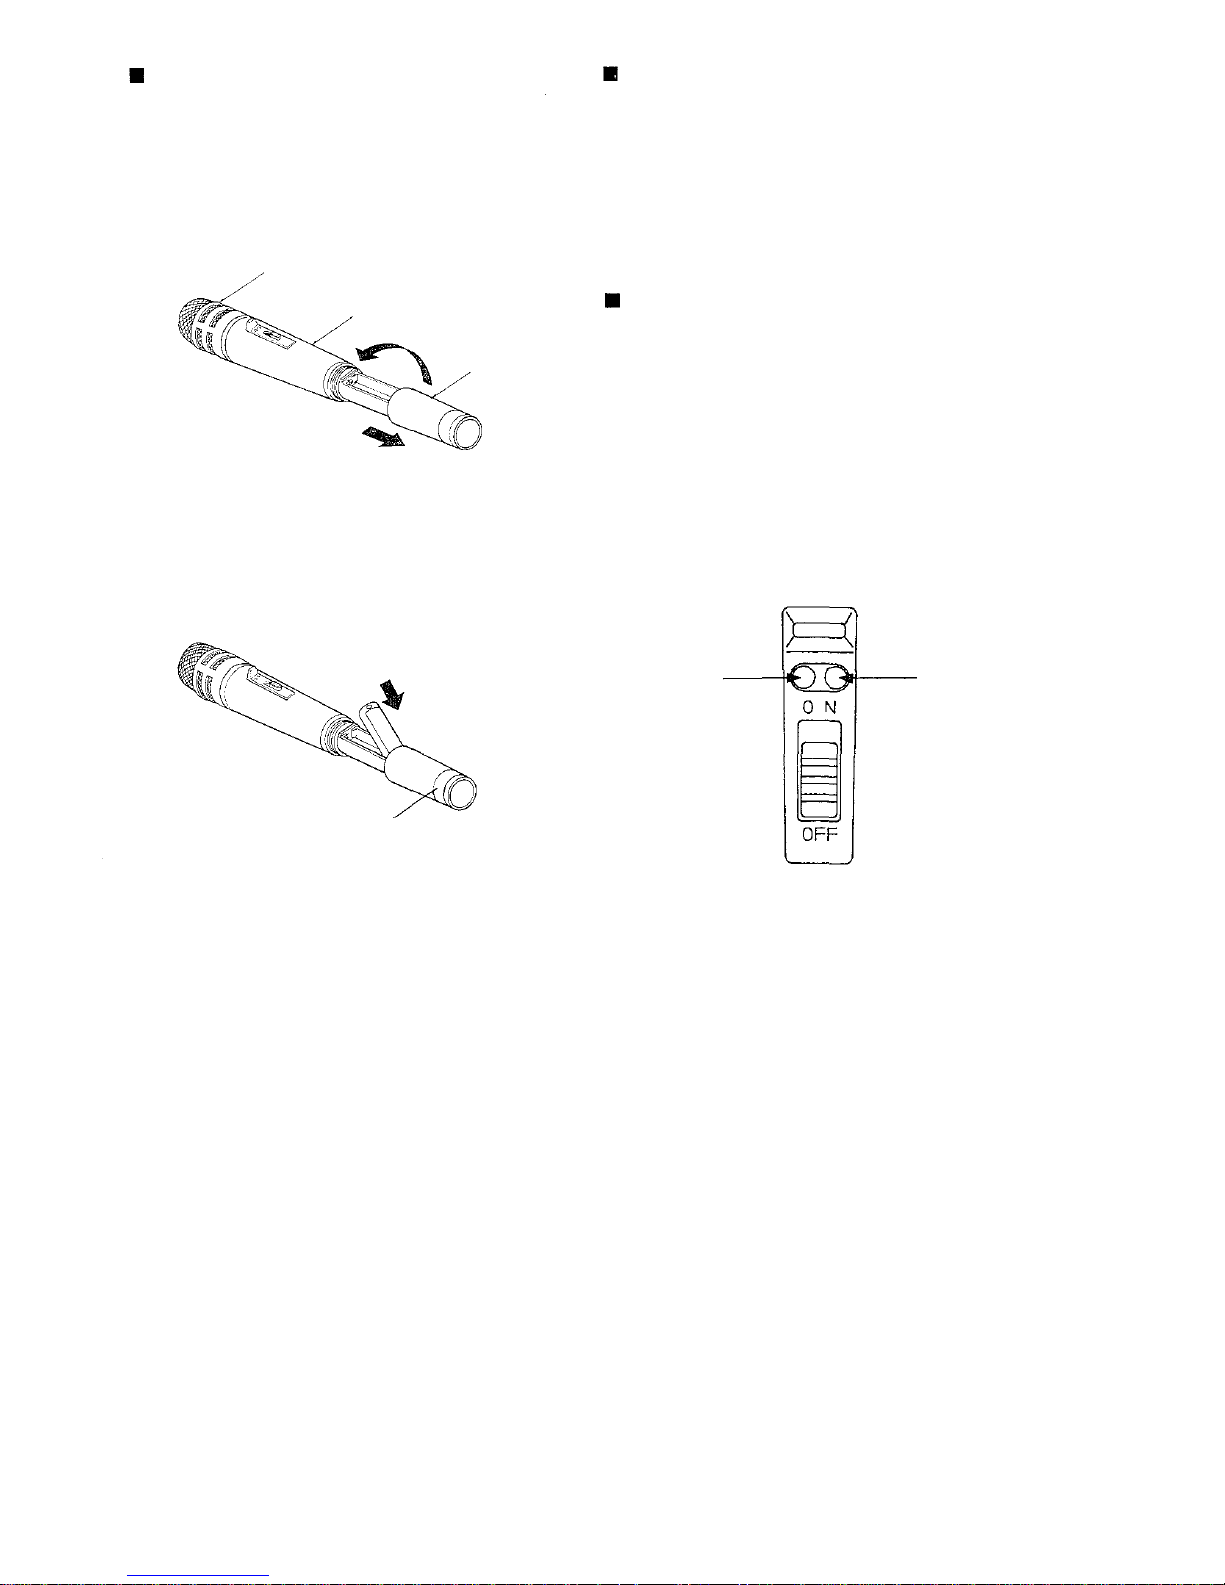
BATTERY LOADING
Us e LR6 type alkaline battery.
1. Hold the microphone body and rotate t he microphone grip anticlockwise. (Fig. 1) The microphone
grip is so designed that it can not be completely
removed from the body because the battery grip
past the lock point as damage may occur.
Microphone head
Body
Grip
2. Observing correct polarity instructed inside the
battery compartment, insert a battery. (Fig. 2)
Name plate
(Color identification label)
3. Replace the microphone grip by sliding the grip
upward and hand tightening the grip in a clockwise
position.
HOW TO USE
1. Ver if y tha t t he receiver fr equency is identical with
the microphone (transmitter) frequency.
2. Set the microphone on/off switch to ON, and verify
that the green battery indicator lights.
3. Set the on/off switch to OFF after use and verify
that the green LED is extinguished.
BATTERY REPLACEMENT
1. Th e alkaline battery LR6 can be continuously used
for approximately 12 hours. (The manganese
battery R6 fo r approximately fo ur hours.)
2. Battery indicator
When the battery voltage is sufficient, the green
LED lights. The green LED becomes dim mer as
the battery voltage drops, and the red LED lights.
In such a case, renew the alkaline battery LR6
inside an hour or two (renew the manganese
battery R6 inside a half hour.).
Fig.
1
Fig.
2
Fig.
3
Red LED
Green LED
 Loading...