

Page 1
1/18TH2WD MINI MONSTER TRUCK & RACING TRUCK
NO.6223-F
INSTRUCTION MANUAL
WARRANTY
Before assembling, please read the instruction manual first
Thunder Tiger Corporation guarantees this model kit to be free from defects in both material and workmanship.
The total monetary value under warranty will in no case exceed the cost of the original kit purchased. This warranty
does not cover any components damaged by use or modification. Part or parts missing from this kit must be
reported within 60 days of purchase. No part or parts will be sent under warranty without proof of purchase. To
receive part or parts under warranty, the service center must receive a proof of purchase and/or the defective part
or parts. Should you find a defective or missing part, contact the authorized Thunder Tiger Service/Distributor
nearest you. Under no circumstances can a dealer or distributor accept return of a kit if assembly has started.
Page 2
1
INTRODUCTION
Thank you for purchasing the Thunder Tiger ZK-2/ZT-2 Mini- Monster truck/Mini Racing Truck. Thunder
Tiger strives to bring you the highest level of quality and service we can provide. We race and test our
products around the world to bring you state-of-the-art items.
This instruction manual contains the steps you will use to prepare and use your new vehicle. Please read
all instructions and familiarize yourself with the systems and controls of this product before operating.
You should enjoy many hours of trouble free use from this advanced R/C product. We offer on-line help
24-7 on our www.acehobby.com or www.thundertiger.com.tw web site and our product specialists are
ready to take your call if you have any technical questions. Have fun and enjoy the exciting world of R/C.
Precaution
Thanks you for purchasing a Thunder Tiger product. Please read all instructions thoroughly before
operation.
1. This product is not a toy. It is a high performance model product. It is important to familiarize yourself
with the model, its manual, and its construction before assembly or operation. Children's operating
under the supervision of the adults is necessary.
2. Do not operate model products in rain, on public roads, near crowds, near airport, or near areas with
restricted radio operation.
3. This product, its parts, and its construction tools can be possibly harmful to your health. Always
exercise extreme caution when assembling and/or operating this product. Do not touch any part of
model that rotates.
4. Check your radio frequency with the proper operating frequency of the area or country. Always check
if there are any modelers operating on the same frequency as you are. Also, check your radio for
proper operation before operating a mode.
5. Use an adequate charger for the batteries and follow the instruction correctly.
6. Right after use, do not touch equipment on the model because they may generate high temperatures!
7. Do not stall the motor. The ESC may fail if power is applied to the motor when car cannot move freely.
8. Improper operations may cause personal and/or property damage. Thunder Tiger and its distributor
have no control over damage resulting from shipping, improper building materials, construction, or
improper usage.
By the act of assembling or operating this product, the user accepts all resulting liability. If the buyer is
not prepared to accept this liability, then he/she return this product in new, unassembled, and unused
condition to the place of purchase
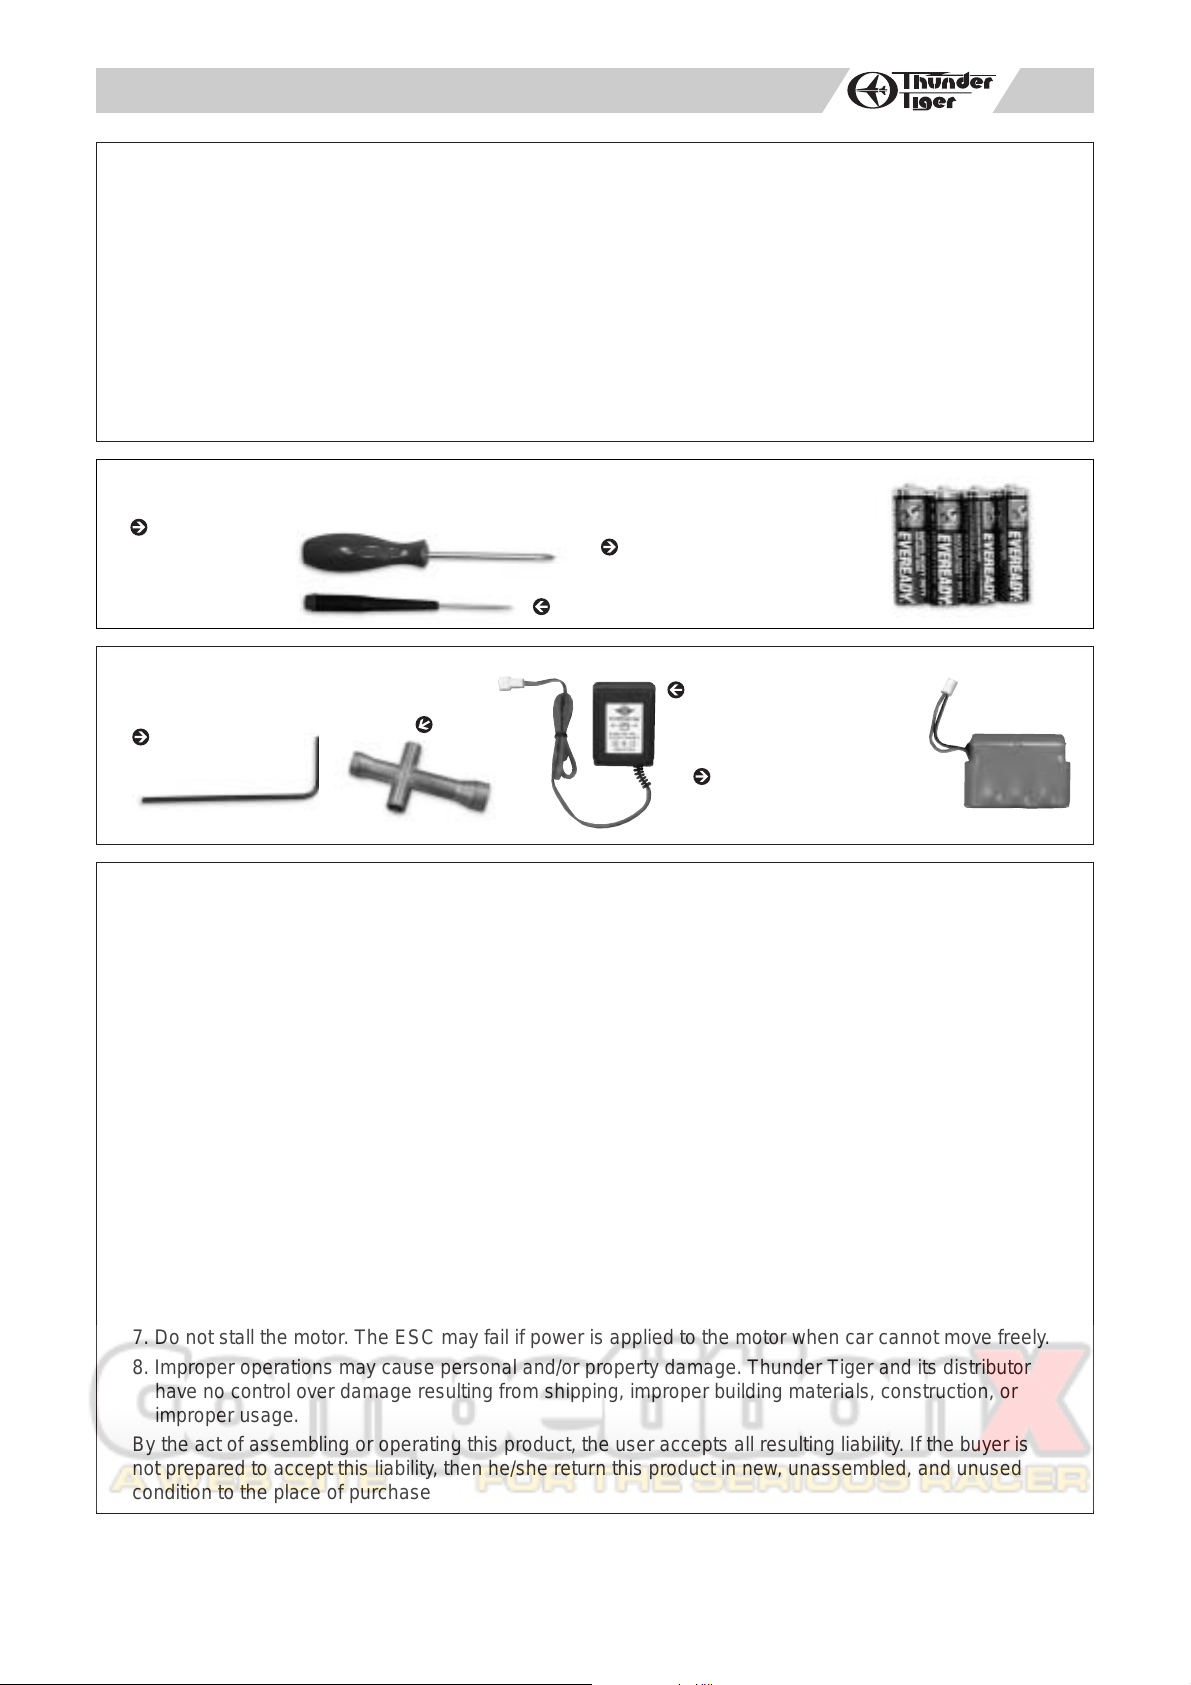
ITEMS REQUIRED FOR OPERATION
TOOLS INCLUDED
Hex wrench,
1.5mm, 3/32"
8 AA Size Alkaline Batteries
For Transmitter Operation
Phillips
Screwdriver(S)
1100Mah,Ni-Hm Batteries,
7.2V(6cell) power pack
10 hours battery charger
4-way cross
wrench
Allen Wrench(0.5mm)
Page 3
2
The Radio Control System
1
8
9
10
11
12
2
4
5
6
7
3
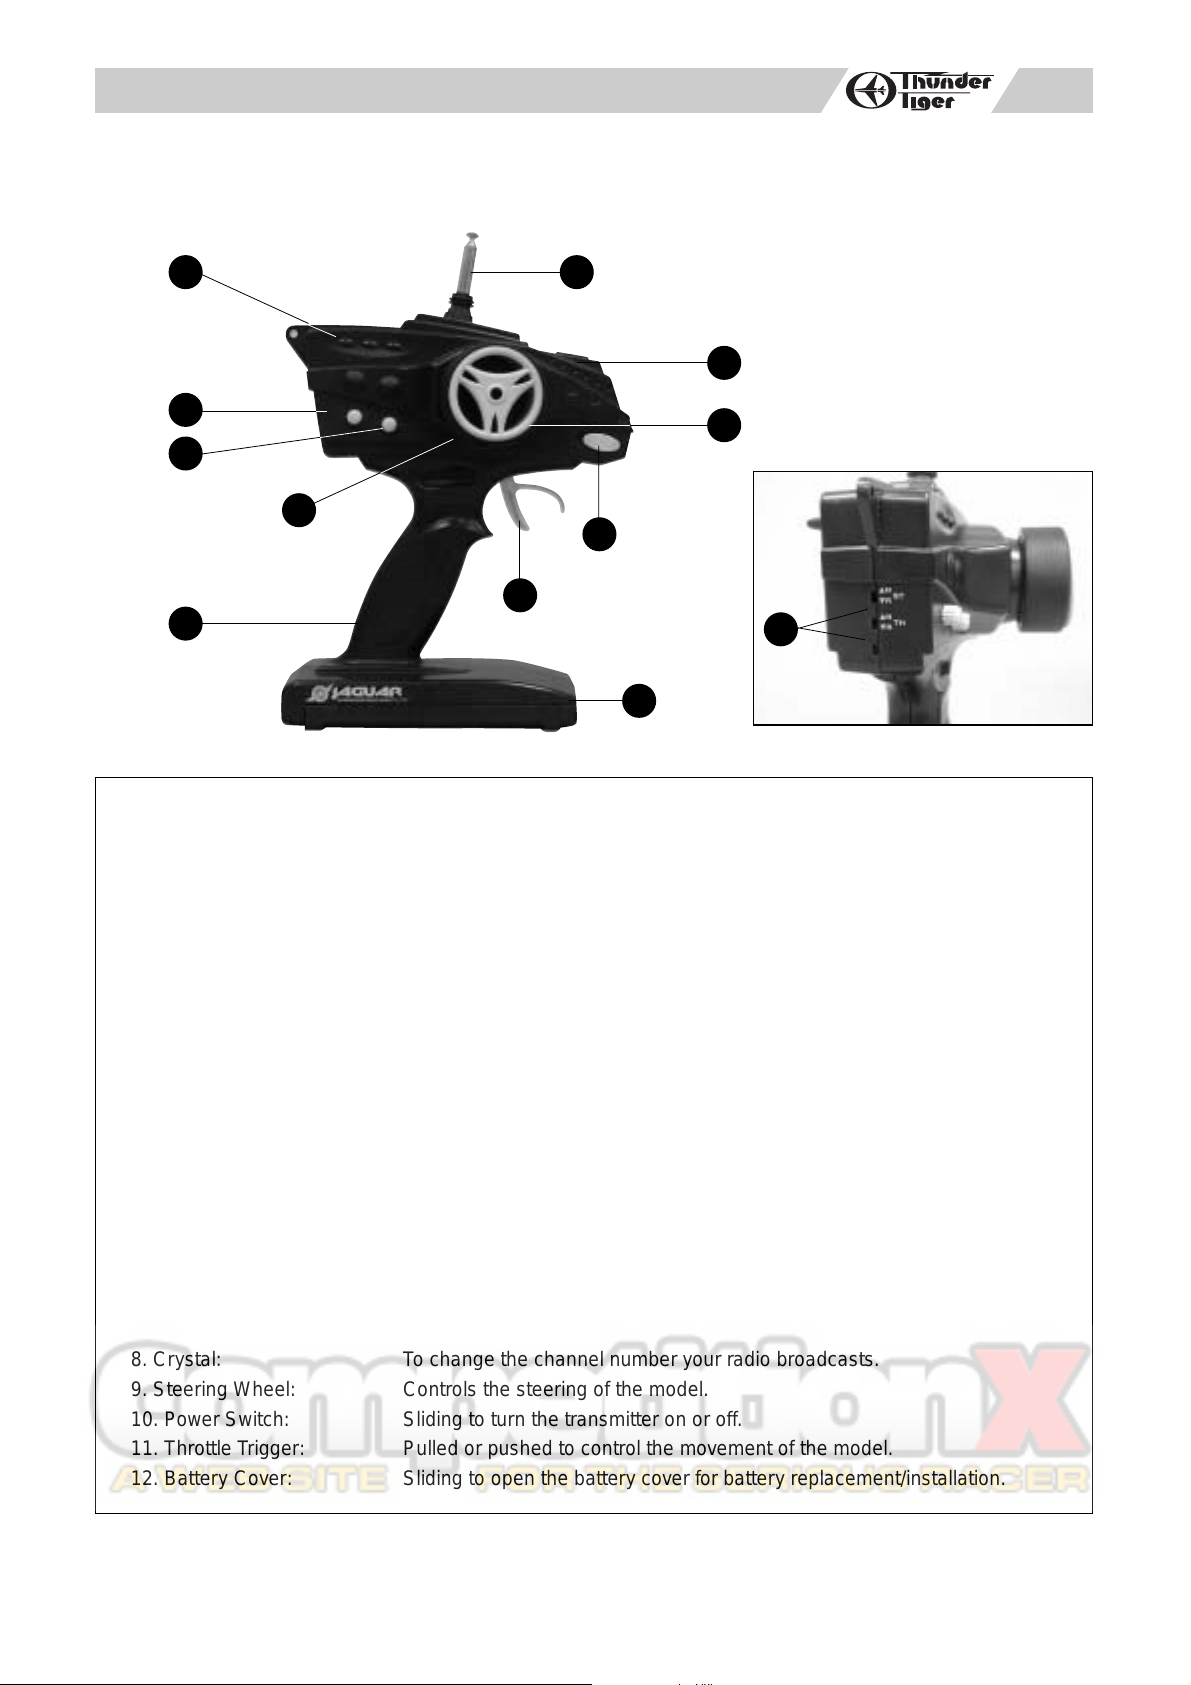
The Transmitter
Thunder Tiger ZK-2/ZT-2 Mini- Monster truck/Mini Racing Truck features with an advanced PCM FM
radio control system, including a micro servo, RS-10 Receiver/Speed Control and a ACE Jaguar 2-Ch
FM PCM pistol grip transmitter. Before operating your new radio system, please take a few minutes to
familiarize yourself with the various features of the system by reading the introduction below,
1. Transmitter Antenna: Never operate the transmitter without extending this antenna or you may
create interference to other modeler.
2. Battery Level Indicator: Three LED display to indicate the battery voltage level. If the Red LED
flashes, please replace the batteries.
3. Servo Reversing Switches: To reverse the servo's rotation direction at the flip of the switch. The
reversing switches are recessed into the transmitter to prevent accidental
operation.
4. Steering Trim: Adjusts the steering in small increments or decrements to run the model
straight.
5. Throttle Trim: Adjusts the throttle in small increments or decrements to shift the neutral
position.
6. Steering D/R (Dual Rates): Allows you to choose between two different control sensitivities.
7. External Charging Jack: Recharges the transmitter battery only as using a rechargeable Nicd or
Nimh battery pack.
8. Crystal: To change the channel number your radio broadcasts.
9. Steering Wheel: Controls the steering of the model.
10. Power Switch: Sliding to turn the transmitter on or off.
11. Throttle Trigger: Pulled or pushed to control the movement of the model.
12. Battery Cover: Sliding to open the battery cover for battery replacement/installation.
Page 4

3
The RS-10 Receiver/Speed Module
1. Receiver & ESC: Receives the signal from the transmitter to control your vehicle and control the
power input and rotating direction of the motor.
2. Crystal: To change the channel it receives
3. Power Switch: Sliding to turn the unit on or off.
4. Antenna Holder/Tube: Mounts the antenna tube as a transmitter's link.
5. Power Harness Plug: Connects the battery pack to the unit.
6. Steering Servo Plug: Connects the steering servo to the unit.
7. Motor Plug: Connects the motor to the unit to get power supply.
8.Steering Servo: ACE Micro Servo
C1016
provides enough to push/pull the steering servo saver.
(Electric Speed Control)
The RS-10 Receiver/Speed Module
uses 27mhz band to operate your
vehicle. Each band has 6 different frequencies available allowing users to change the crystals for
versatile operating at the same time. When changing the crystal, just replace a set of crystal plugging on
transmitter and on receiver simultaneously by pulling it out. Then push a new set of crystal into the
socket carefully on the RS module and Transmitter respectively. (Caution: do not bend the two pins of the
crystal or it would cause damage of your model.) The following frequencies are available.
27MHz
Frequency List
* 26.995 MH Brown Flag * 27.045 MH Red Flag
* 27.0295 MH Orange Flag * 27.145 MH Yellow Flag
* 27.195 MH Green Flag * 27.225 MH Blue Flag
Each frequency is assigned a colored flag. Attach this flag to the end of your transmitter antenna so that
other modelers can determine your frequency from a distance. This is very important since it is not
possible for more than one model to operate on the same frequency at the same time.
2
4
5
3
5
6 1
Page 5

4
PREPARING THE RADIO
a. Install the antenna into transmitter
b. Check the frequency printed on the transmitter crystal.
c. Check the frequency printed on the RS ESC/Receiver module and crystal. Make sure it matches
with the transmitter crystal. Make sure no one will operate on the same frequency when you are.
When there is a radio glitch, it will most likely be caused by improper crystal, damaged crystal, or
people operating on the same frequency.
1
aa bb cc
BA TTERY INSTALLATION
a. Install 8 AA size alkaline batteries into the transmitter.
b. Install supplied power pack into the batter holder. And then secure the battery holder under the
battery cover plate and RS ESC/Receiver module by using a small "R" clip.
c. Connect the plug harness of the battery with the RS ESC/Receiver module.
2
aa bb cc
RADIO OPERATION
a When turning radio on, first turn on the transmitter.
b. Then, turn on the receiver. When turning off, first turn the receiver off, then the transmitter off. It's
an important hint to prevent unexpected damages.
c. To reverse the functions of servos, use the small, white servo reverse switches located on side of
the pistol transmitter. To trim the servos on pistol transmitter, use the trim switches on side of the
steering wheel (the ST. trims steering, and the TH trims throttle/brake).
d.Do not run flat the battery of your transmitter in case of losing control of the car.
3
aa bb cc
Page 6

5
STEERING ADJUSTMENT
a. Check the radio steering functions. With the radio transmitter and receiver on, turn the steering
wheel/stick to the left. The front tires/wheels should turn left accordingly. If not, flip the steering
servo reverse switch.
b. Return the steering wheel/stick to neutral. The front tires/wheels should point straight forward. If
not, use the steering trim lever to correct it.
c. Turn the steering wheel/stick to the right. The front tires/wheels should turn right accordingly.
4
aa bb cc
dd ee ff
BA TTERY CHARGING
a. Make sure that the battery pack is completely discharged prior to charging. Discharging the
battery pack by running the electric motor until it slows down or using a discharger(Not included).
b. For best results, let the battery pack cool before charging. Heat may prevent the battery pack from
charging to full capacity and also decreases the performance of the battery.
c. Once the battery ready to be charged, first plug the AC quick charger into the outlet of AC power
source, and then connect the battery input/output harness to the charger.
d. Continued to monitor the battery as it is being charged. As soon as the battery is fully charged,
disconnect the battery. from the charger plug(Over-charging or charging incorrectly using
inadequate chargers may cause the battery pack to become dangerously hot.)
5
aa bb cc
Running with A.T.L function
RS module features Anti-Throttle-Lock(A-T-L)function which has been designed to prevent incorrect
operation of turning on the transmitter. The function will work in the conditions below,
a. When turning on your vehicle, turn the transmitter on first, and your vehicle second. If the order is
reversed(Vehicle first, transmitter second), there is no throttle for operation.
b. When turning on your vehicle, leave the trigger in the natural position. If you pull the trigger too much
before switching on, the power will be disconnected temporarily for safety.
If the A.T.L function works; turn off the vehicle first and follow the guide to turn on the radio
again!(Radio first, vehicle second!!!)
Page 7

6
RIDE HEIGHT ADJUSTMENT
Ride height is the distance from the ground to the bottom of the chassis. By removing or installing
the pre-load spring clips, the distance can be decreased or increased to adapt to the different
terrains. Basically, a rough surface will need a higher ride height.
6
MAINTENANCE AFTER RUNING
a. Always turn off the radio system and unplug the battery pack when not using the truck..
b. Remove the sand, dirt, and any other elements completely from the truck before you store it.
c. Never use chemicals or any solvents to clean the chassis as it may cause damage to the electronics
components and plastic parts as well. Use compressed air, soft paintbrush, or used toothbrush to
clean dust and dirt.
Hop-ups
Thunder Tiger is pleased to inform our customers that you don't need to wait for long-term developed
optional parts anymore. Thunder Tiger also offers you the chance to turn your truck into "Factory"
version! Thunder Tiger offers a series of optional parts for your appreciative choosing. It's much durable,
faithful and perfect fitting than any other aftermarket hop-up parts made for your mighty truck. Please
contact your hobby shop for much more exciting coming soon product information.
* Alum. Oil-Filled Shock Absorbers
* Competition High Power Motor
* Competition Mini ESC and Receiver
* High Torque Micro Servo
Page 8

7
 Loading...