

Page 1
THULE RACK GUIDELINES
®
When using Thule Load Carriers and accessories, the user must understand the precautions. The points listed below will assist you in using the rack system and will
encourage safety.
■
For quality fits and safety, use only the recommended rack or accessory as
stated in Thule’s current Fit Guide. Do not assume a rack will fit, always check
the current Fit Guide when obtaining a new vehicle. Use only Thule accessories
on Thule Load Carriers. Using other brands will void your warranty.
■
Do not carry more than 75 kg (165 lbs.) on Thule Load Carriers. Thule Load
Carriers do not increase gutter or roof strength. Thule can not warranty loads
that exceed this limit. Total load = cargo weight plus weight of accessories
used to carry cargo.
■
Always make sure car doors are open when mounting a roof rack system.
Make sure all knobs, bolts, screws, straps, and locks are firmly attached, tightened and locked before every trip. Knobs, bolts, screws, straps, and locks must
be periodically inspected for signs of wear, corrosion, and fatigue. Check your
load at stops during the trip to ensure continued fastening security.
■
Check local and state laws governing projection of objects beyond the width of
a vehicle. Be aware of the width and height of your cargo since low clearance
branches, bridges, and parking garages can affect the load. All cargo will
affect the vehicle’s driving behavior. Never drive with any lock, knob or rack
in an open or unlocked position. All long loads such as, but not limited to, sailboards, surfboards, kayaks, canoes, and lumber must be tied down front and
rear to the bumpers or tow hooks of the vehicle.
■
Remove your Thule rack and accessories when they are not in use and before
entering automatic car washes. Do not attach Thule rack to vinyl tops, T-tops
or fiberglass tops or to vehicles not listed in the current Fit Guide.
■
All locks must be turned and moved periodically to ensure smooth operation.
Use graphite or dry lubricant to help this. Thule locks are designed to deter
vandalism and theft. Remove valuable gear if your vehicle is unattended for
an extended period. Place at least one key in the glove compartment.
Replacement keys are available only through your Thule dealer.
■
For safety to your vehicle and rack system, obey all posted speed limits and
traffic cautions. Adapt your speed to the conditions of the road and the load
being carried.
■
Do not use Thule load carriers and accessories for purposes other than those
for which they were designed. Do not exceed their carrying capacity. Failure to
follow these guidelines or the product’s instructions will void the warranty.
■
Consult with your Thule dealer if you have any questions regarding the operations and limits of Thule products. Review all instructions and warranty information carefully.
#
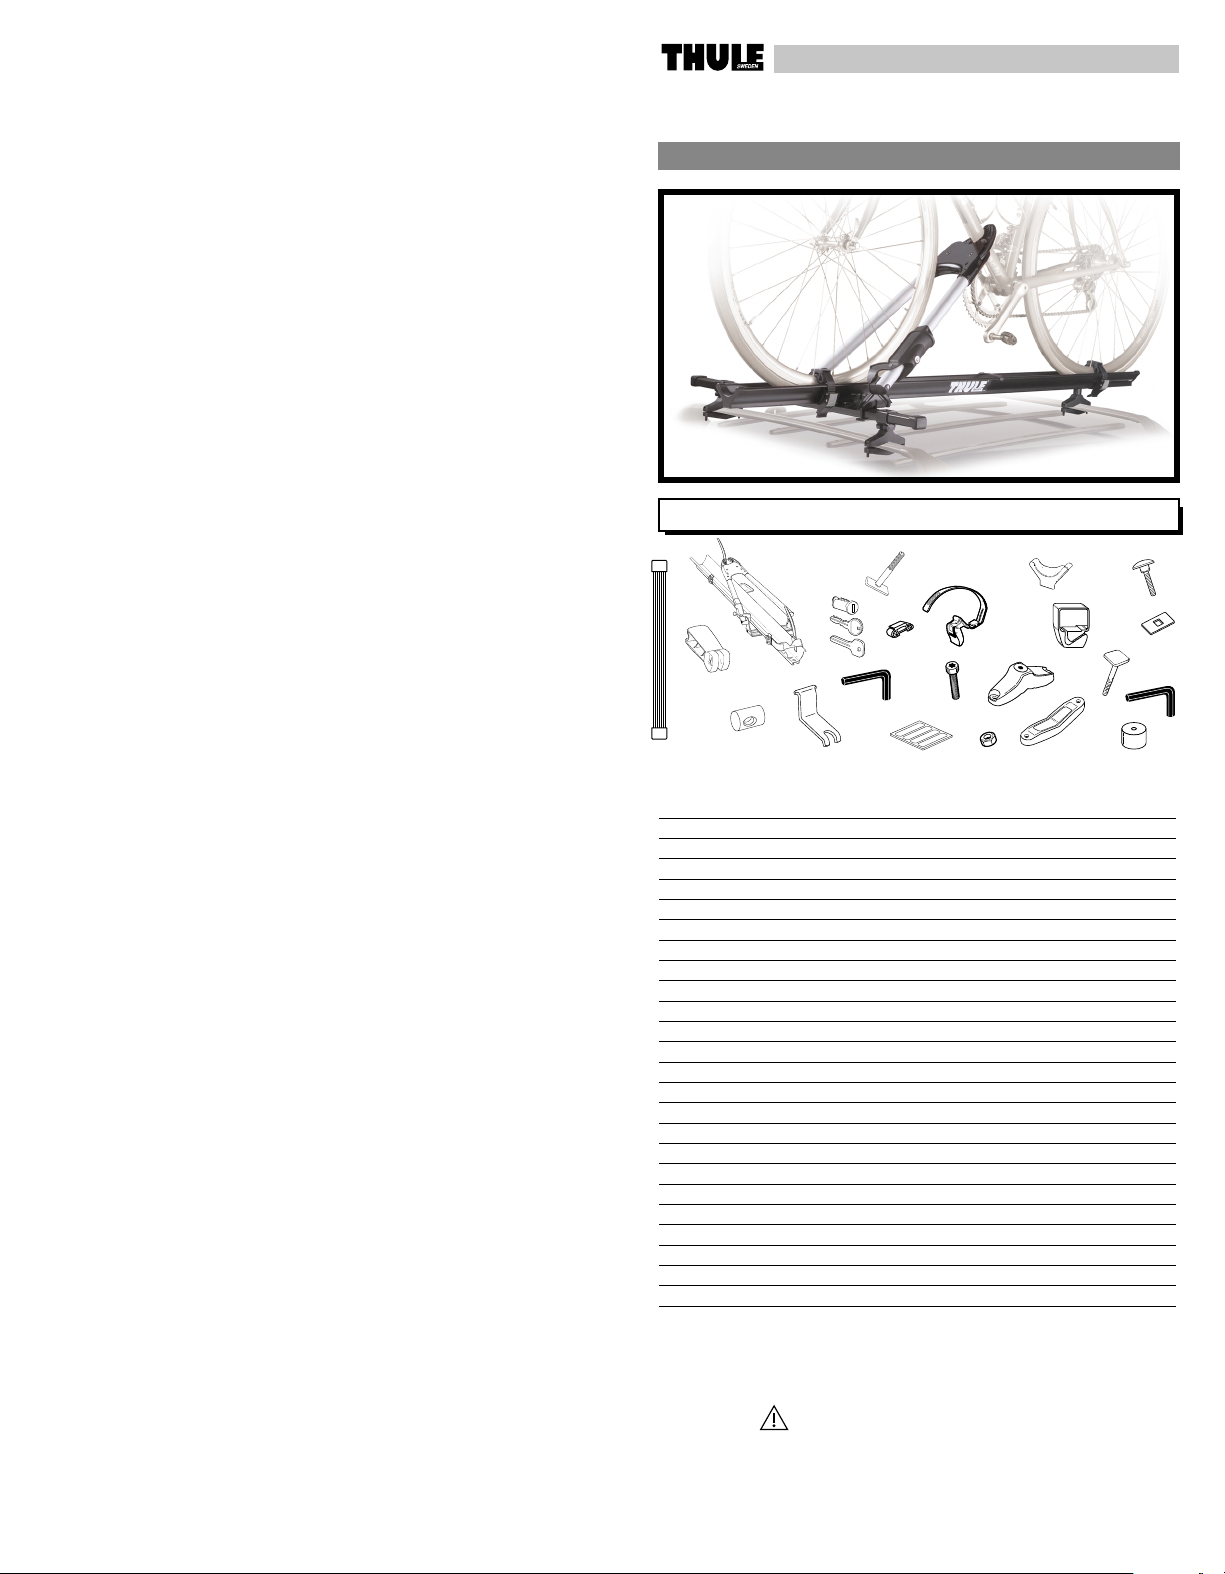
899xt BigMouth™Rack-Pack
PARTS INCLUDED
A
J
R
D
F
E
U
part description part# qty
A upright carrier 753-2390 1
B wheel strap 753-2715 2
C road bike adapter 853-1405 2
D Lever 853-3506 2
E Barrel Nut 853-0446 2
F L-Clamp 853-2087 2
G T-Bolt 853-2040 2
H hex key 853-0930 1
I end cap 853-1436 2
J wheel tray 853-1402-56 1
K carriage bolt 915-0625-11 2
L rectangular washer 853-2154 2
M square bar clamp-on 853-2156 2
N top mounting clamp* 853-5267 4
O bottom mounting clamp* 853-5268 4
P hex nut* 936-0600-11 12
Q tamper proof screw M6* 853-5269 8
R load bar 853-0182-35 1
S rubber pad* 853-5293 1
T tamper proof wrench* 853-5270 1
U square head bolt* 853-2089 2
V spacer* 853-5284 2
W lock cylinder* – 2
X locking key* – 2
Y change key – 1
G
W
X
Y
B
C
H
Q
S
I
M
N
P
U
O
™
K
L
T
V
THULE U.S.A., 42 SILVERMINE RD.
SEYMOUR CT 06483
501-5318
* NOTE: Parts included for attaching additional bike carrier
MAXIMUM CAPACITY 2 BIKES
Not recommended for ’00- Ford Excursion.
For attachment to ’00- Nissan Xterra and ’00 - Nissan Frontier Crew Cab use longer bolts in part bag
#753-2756 (NOT INCLUDED IN #889) available from local Thule dealer.
INSTALLATION INSTRUCTIONS
Page 2
PREASSEMBLY
S
W
E
D
E
N
®
12"
(30.5cm)
S
W
E
D
E
N
®
PREASSEMBLY
1
• Assemble bolts,
square washers,
and clamp-ons.
• Attach clamp-ons to
included load bar.
• Ribs on bar face up.
• Press nuts into top
mounting clamps.
3
• Attach bar assembly to front of rack.
• Assemble bolts and
bottom mounting
clamp for front bar.
FOR DRIVER’S SIDE MOUNTING
4
• Carrier has been assembled for passenger side
mounting. If you wish to mount carrier on the
opposite side of vehicle follow steps A and B.
• Tighten snugly.
2
minimum
• Apply rubber pads to
bottom mounting clamp.
21”
• Thread top mounting
clamps onto bolts.
Do not
overtighten.
• Press nuts into bottom
mounting clamps.
• Loosen down tube holder assembly on
A
bottom of tray with hex key and slide
down to the opposite end of tray.
• Position front edge of down tube holder
B
plate 12” (30.5cm) from the end of the tray
and re-tighten.
Page 3

CARRIER INSTALLATION
FRONT AND REAR HARDWARE
5
A
• Slide T bolt into
channel under
wheel tray.
• Buckle on same
side as lock.
• Loosly thread top
C
mounting clamp and
spacer onto rear of tray.
B
• Slide strap into
tray channel.
6
• Open handle.
• Fasten carrier to the load bars by engaging T-bolt and
L-clamp (as illustrated) and turning the mounting lever
clockwise. Close the mounting lever back down on the
mounting plate. There should be firm pressure when
closing the lever. If it is too tight, release tension by
pulling the lever back up and turning it counter clockwise. If it is too loose, pull the lever back up and tighten the lever clockwise. Close mounting lever.
1
FRONT
2
3
6
D
• Align endcap tabs.
• Snap onto tray.
ATTACH TO RACK
• Install carrier onto bar by sliding it into position. Pull the
mounting lever/T-bolt assembly up and out of the way
to make sliding onto the load bars easier.
REAR
• Tighten top mounting
clamp to tray.
• Assemble bolts
and bottom
mounting clamp
for rear bar.
• Tighten snugly.
24” min.
7
FrontBack
• Install lock.
Page 4

®
BIKE INSTALLATION
3
2
1
8
9
• Release handle from
open position. (jaws
will clamp downtube)
• Push down on slider.
• Engage handle with
slider and close fully.
• Center downtube
in middle of jaws.
11
• Turn to lock.
• Locking deters
theft of bike
and carrier.
SECURE REAR TIRE
12
Slide on
adapter.
Mountain bike
10
Make sure handle is
fully closed and jaws
are secure on bike
downtube.
Road bike
COMPATIBILITIES/RESTRICTIONS
■
No more than 2 bikes can be carried on #899xt.
■
Installation of #899xt may interfere with full opening of rear hatches.
■
Only compatible with #589, #599xt, and #525 carriers.
■
Due to their wind resistance, it is not recommended to carry disk wheels or
wheels with covers on Thule bike or wheel carriers.
■
Failure to properly install, adjust, use, and maintain the quick release mechanism on this carrier may result in damage to the vehicle and bike as well as
serious personal injury.
■
Any modification to bike dropouts can cause insufficient fork mount clamping
pressure and may result in damage or loss of bike.
 Loading...