

Page 1

T 5173 GF AND V 51 NB
COLOUR TELEVISION
with nicam digital stereo
sound and fastext
Page 2
+
+
_
_
MAINS CONNECTION AND REMOTE BATTERIES
MAINS CONNECTION
The TV is suitable for use on a.c. mains supply, 220-240V, 50 Hz only. It must not
be connected to d. c. mains.
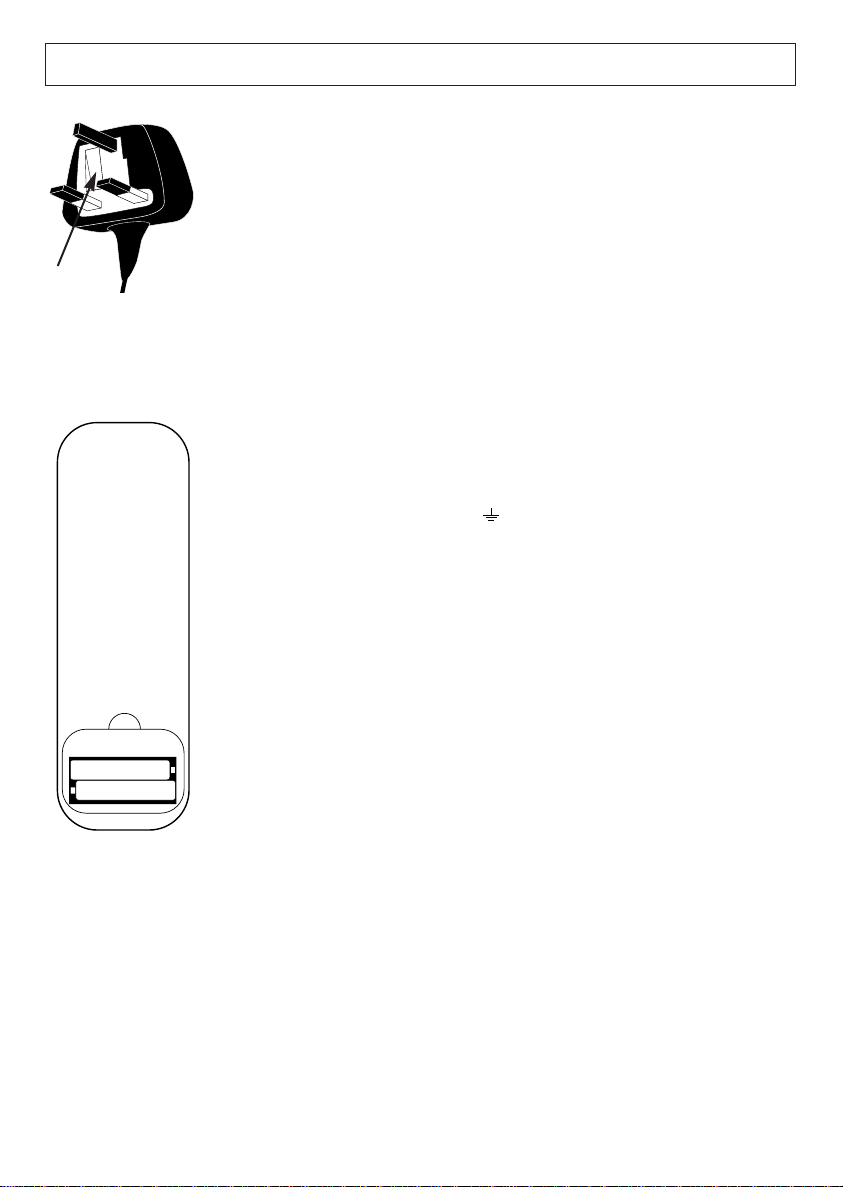
NOTE : The mains lead of the TV is fitted with a moulded plug. If the mains sockets
are not compatible or if for any reason the plug is removed please follow these
directions :
The moulded plug cannot be rewired and if removed must be disposed of safely.
5A fuse
DO NOT under any circumstances plug the severed plug into any mains socket as
this could result in electric shock.
IMPORTANT : If the plug is removed rewire new plug as follows :
The wires in the mains plug are coloured in accordance with the following code :
BLUE - NEUTRAL
BROWN - LIVE
As the colours of the wires in the mains lead of this apparatus may not correspond
with the coloured markings identifying the terminals in your plug, proceed as
follows :
BLUE wire to the terminal coded N (Neutral) or coloured black.
BROWN wire to the terminal coded L (Live) or coloured red.
DO NOT make any connection to the terminal in the plug which is marked by the
letter E or by the safety earth symbol or coloured green or green and yellow.
A fused plug must be fitted with a 5A fuse approved by ASTA or BSI to BS 1362
and fuse covers must always be securely replaced.
REMOTE BATTERIES
The remote control requires two batteries size AAA as supplied with the unit.
Unclip the cover at the rear and insert the batteries the correct way round as
shown. The ends are usually marked + and –. Replace the batteries when the unit
no longer operates at normal viewing distances.
For a clearer environment, please dispose of used batteries in the containers
provided for this purpose.
NOTE
When replacing batteries do not mix old and new - do not mix makes and types.
Alkaline types are recommended for long life. Never risk damage to the remote
control by extreme heat - do not leave close to a radiator or on a window ledge in
direct sunshine.
- 2 -
Page 3
VCR
MENU
PR +PR -
PR +PR -
VCR FUNCTIONS
STATUS
3421
7865
0/AV
STOPVTFUNC
VT
9
-
VT
TV
II
+
F 3090
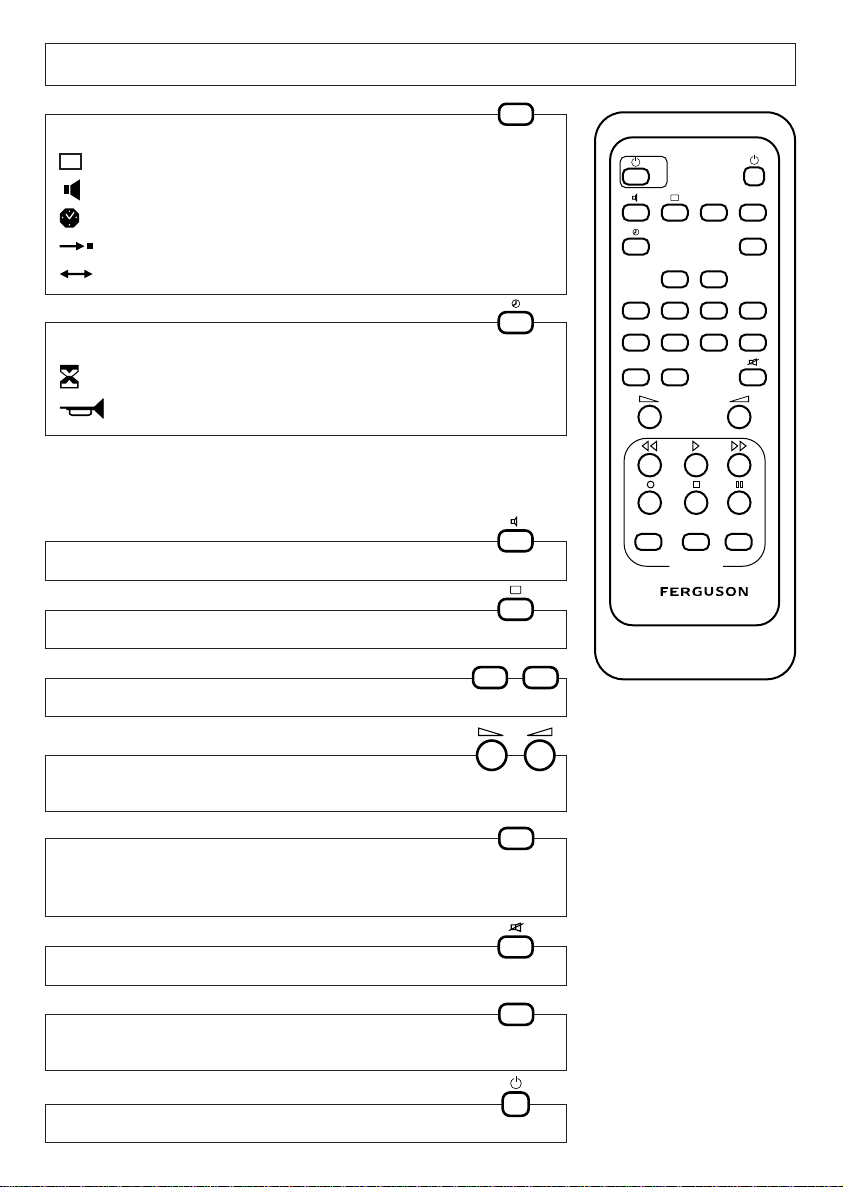
THE REMOTE CONTROL
MENU
MAIN MENU
PREF.
PREF.
——:——
Program.
Organis.
TIMER MENU
to call up the menus :
——————————————————————————
Picture
A
Sound —————————————— 9
A
Setting the clock
A
Manual channel setting
A
Re-organizing programmes
A
——————————————————————
———————————————
—————————————
to select functions :
Stand-By (Sleep timer)
A
———————————————————————————————
Alarm
A
———————————
page 11
13
15
8
page 13
14
The menus Program., Organis. and TIMER can be locked. If you cannot
display them, see page 19 on how to unlock them. The first line of the menus
is automatically selected. To select another line, simply press the button again,
to move down through the menus.
II
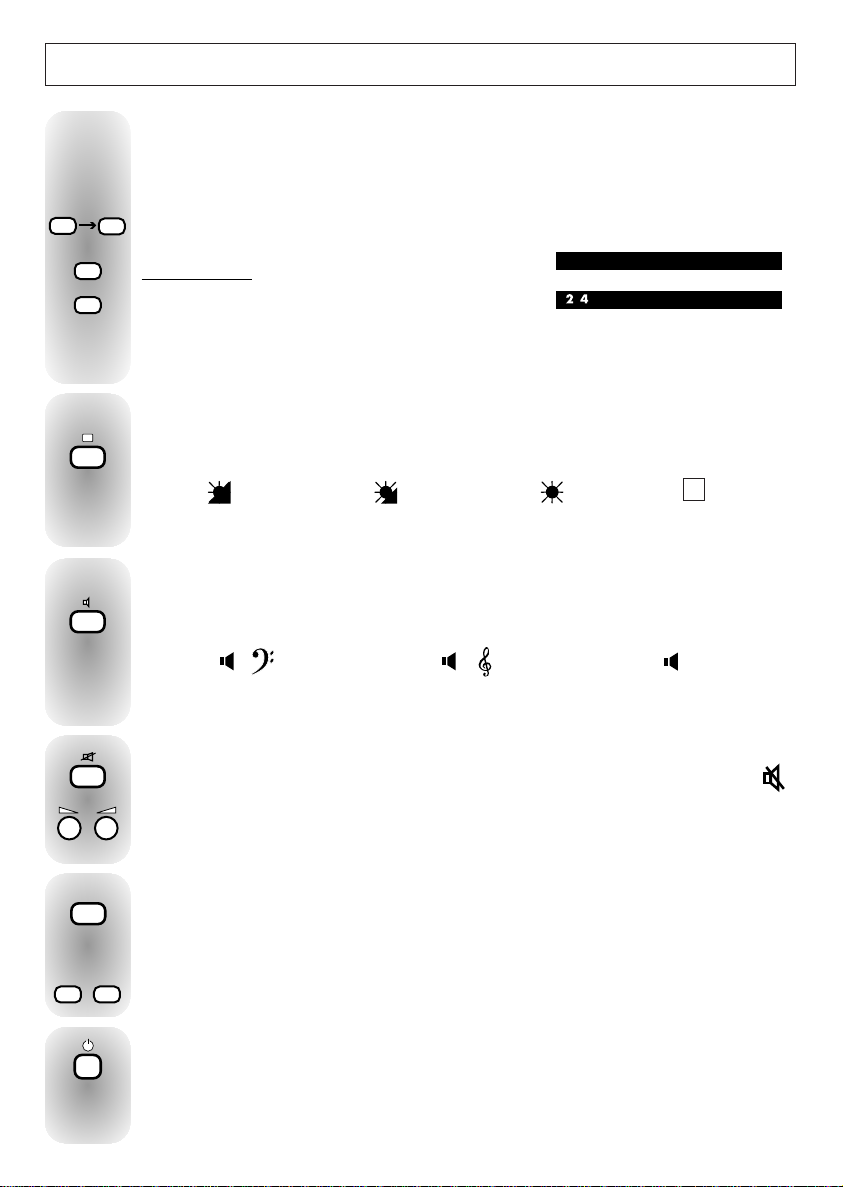
SOUND SELECTION
PICTURE SELECTION
PROGRAMME SELECTION
VOLUME LEVEL,
and adjustment or selection in menus.
INFORMATION DISPLAY,
(current channel, time, pre-sets)
and to leave menus.
PR +PR -
+
-
TV
SOUND MUTE
TELETEXT
and scroll up through the menus.
STAND-BY
VT
- 3 -
Page 4
CONTENTS
Page
CONNECTIONS AND CONTROLS ..................... 4 - 5
TO TURN ON ............................................................ 5
AUTOMATIC CHANNEL SETTING ...................... 6 - 7
RE-ORGANIZING PROGRAMMES.......................... 8
SOUND ADJUSTMENTS........................................... 9
PICTURE ADJUSTMENTS........................................ 11
DAY TO DAY OPERATION ..................................... 12
OTHER FUNCTIONS ............................................... 13
ALARM..................................................................... 14
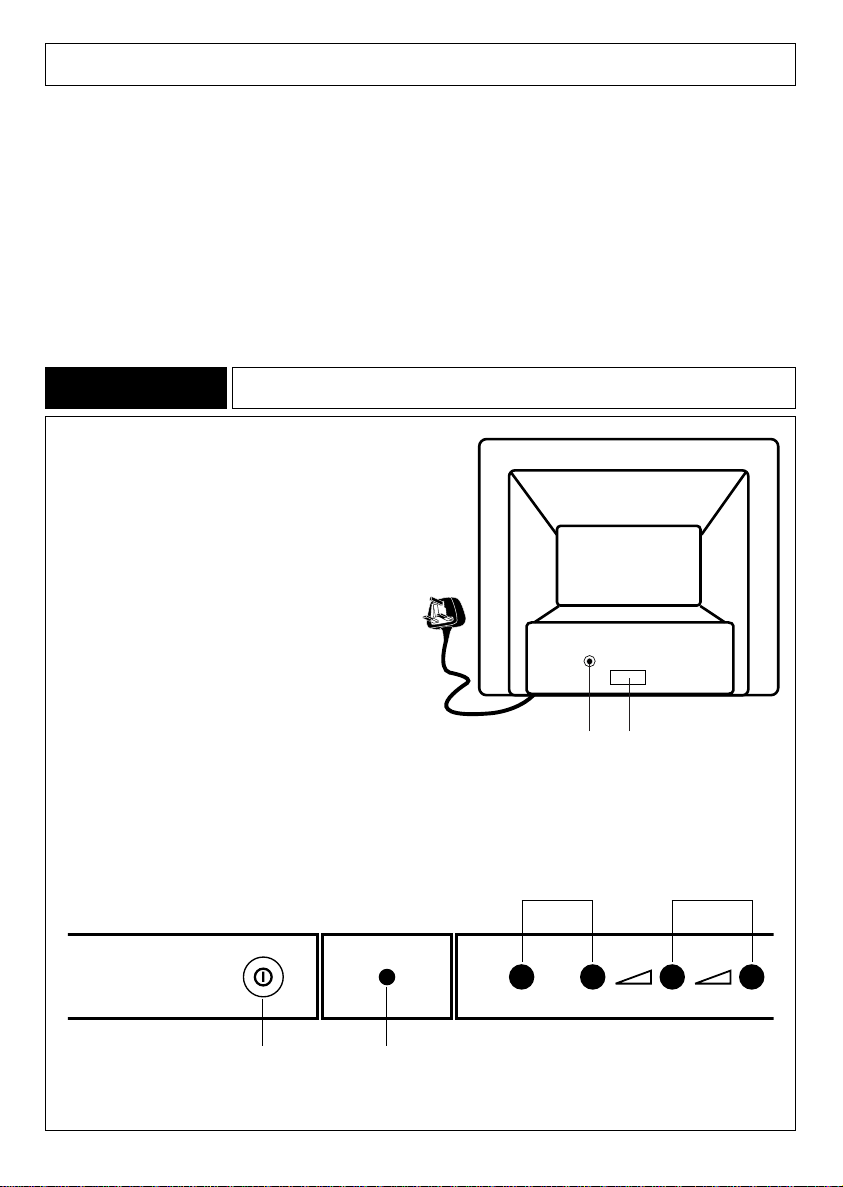
CONNECTIONS AND CONTROLST 5173 GF
At the back of the set.
Connect to A. C. main supply
220 - 240 V ~ 50 Hz.
Page
MANUAL CHANNEL SETTING............................... 15
CHILD LOCK ............................................................ 16
CHANNEL NUMBER GUIDE............................ 17 - 18
TELETEXT AND FASTEXT ........................................ 19
CONNECTIONS....................................................... 20
LOCKING MENU..................................................... 21
REMOTE CONTROL................................................. 22
SAFE USE OF EQUIPMENT..................................... 13
PERITELEVISION (SCART) PIN CONNECTIONS... 24
In front of the set.
On/off switch
Programme selection
PR
—
On/Stand-By light
Green : on/Red : Stand-By
- 4 -
PR +
SCART socketAerial socket
Volume
—
+
Page 5
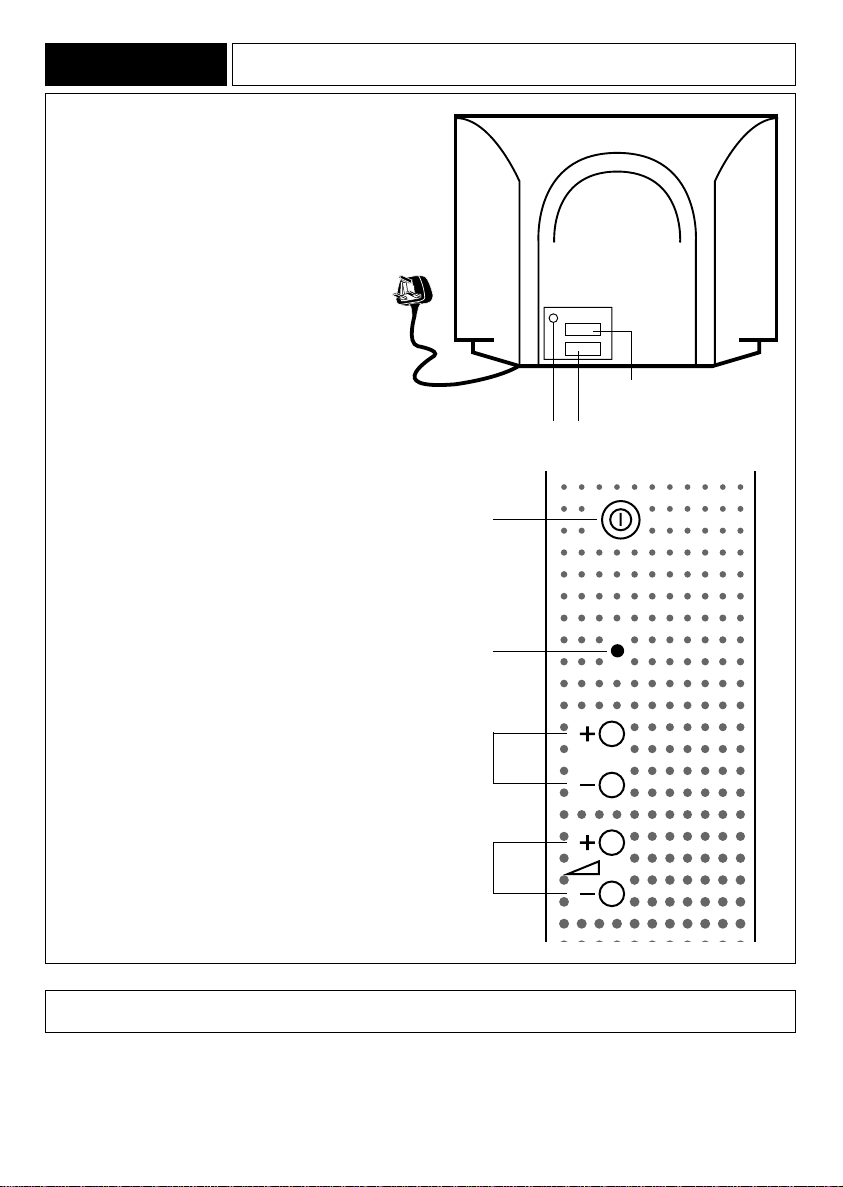
CONNECTIONS AND CONTROLSV 51 NB
At the back of the set.
Connect to A. C. main supply
220 - 240 V ~ 50 Hz.
In front of the set.
SCART socket AV2
Aerial socket SCART socket AV1
On/off switch
On/Stand-By light
Green : On/Red : Stand-By
Programme
selection
Volume
Pr
TO TURN ON
Press the on/off switch; the indicator light comes on.
Press button 1 on the remote control.
If your television set has not been tuned in, you may now begin tuning the channels.
Proceed to selecting the menu language in the INSTALLATION MENU page 6.
- 5 -
Page 6
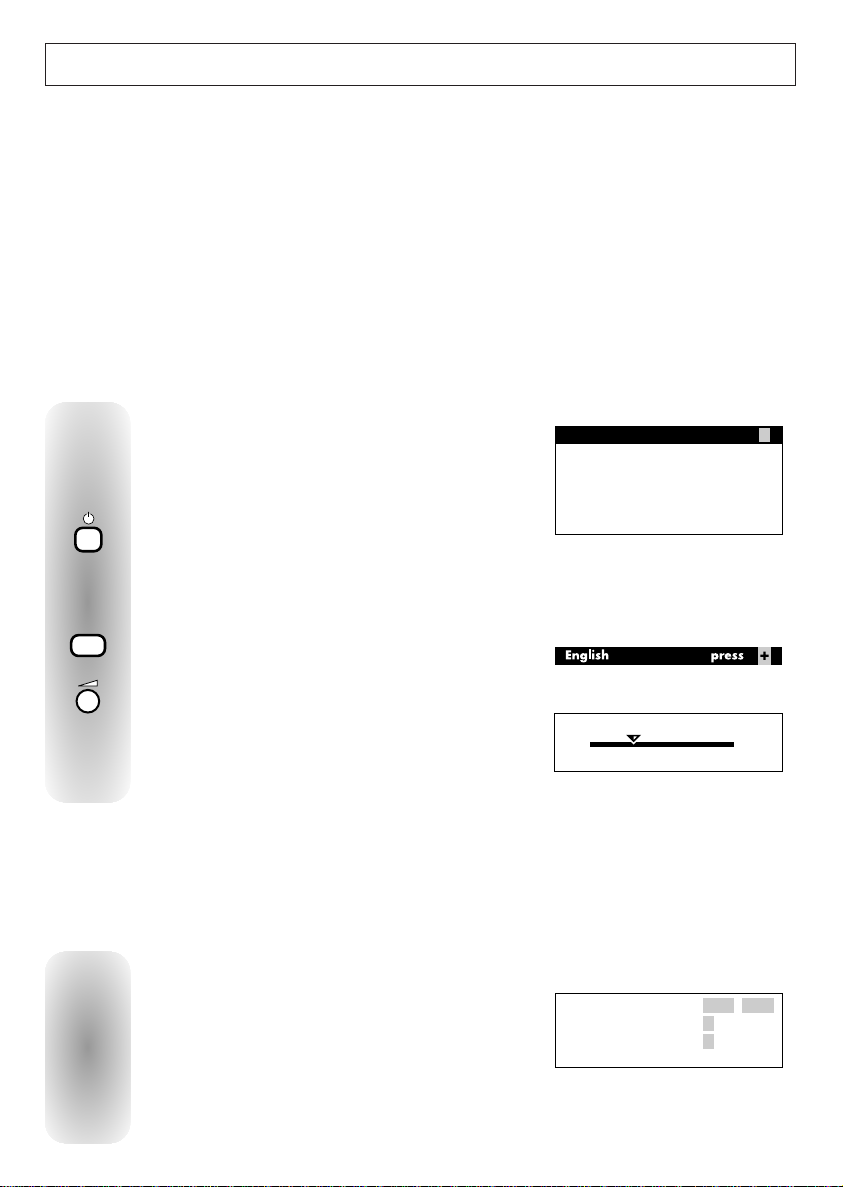
English press
Deutsch
Français
Français (Belgique, Suisse)
Italiano
Español
INSTAL. MENU
+
AUTO-PROGRAMMING
Searching for stations
UK
Stations found : XX
CCXX
AUTOMATIC CHANNEL SETTING
To select a station PR
—
/ PR +
To give a prog. no. +
To erase this station
—
When completed : press
[ TV ]
PROGRAMME ORGANIZER
PR 01 CH22
This set is equipped with an automatic search system which will search and store all channels
available in your region. To help identify the programmes, we suggest that you have to hand a TV
guide or daily newspaper.
Ensure that the aerial lead is connected to the television and any VCR or SAT equipment that is
connected via the antenna is turned on but do not switch on if also/only connected to a Scart/AV input.
If your VCR is connected by RF cable and not by SCART and if you do not find the VCR output through
Autoprogramming, then go to Manual Channel Setting.
1. INSTALLATION MENU
When the television set is turned on for the first time,
the Installation menu appears automatically.
If this menu is not displayed, you can make it
appear as follows :
- Switch the television to Stand-By.
- Switch off the television by pressing the on/off switch and wait for the light to go out.
—
button on the television keypad
MENU
- Switch the set back on, whilst keeping the PR/Pr
pressed down until the INSTALLATION MENU appears.
Press repeatedly the button to select the menu
language you require.
+
Press briefly, a new menu appears, automatic
search begins. The cursor will move from left to right.
Please wait until the following
menu appears.
2. PROGRAMME ORGANIZER MENU
This menu is used for :
• allocating programme numbers and name the
programmes auto tune has found (ie. BBC 1 in
Prog. 1, etc…).
• storing the changes made in memory.
• erasing a programme.
- 6 -
Page 7
To select a station PR
—
/ PR +
To give a prog. no. +
To erase this station
—
When completed : press
[ TV ]
PROGRAMME ORGANIZER
PR 01 CH22
ERASING - STORING PROGRAMMES
TV
Name : — — —
—
To store and continue
PROGRAMME ORGANIZER
PR 01 CH22
Program No : —
—
PR +PR -
-
MENU
+
MENU
PR -
PR +
+
-
+
+
-
+
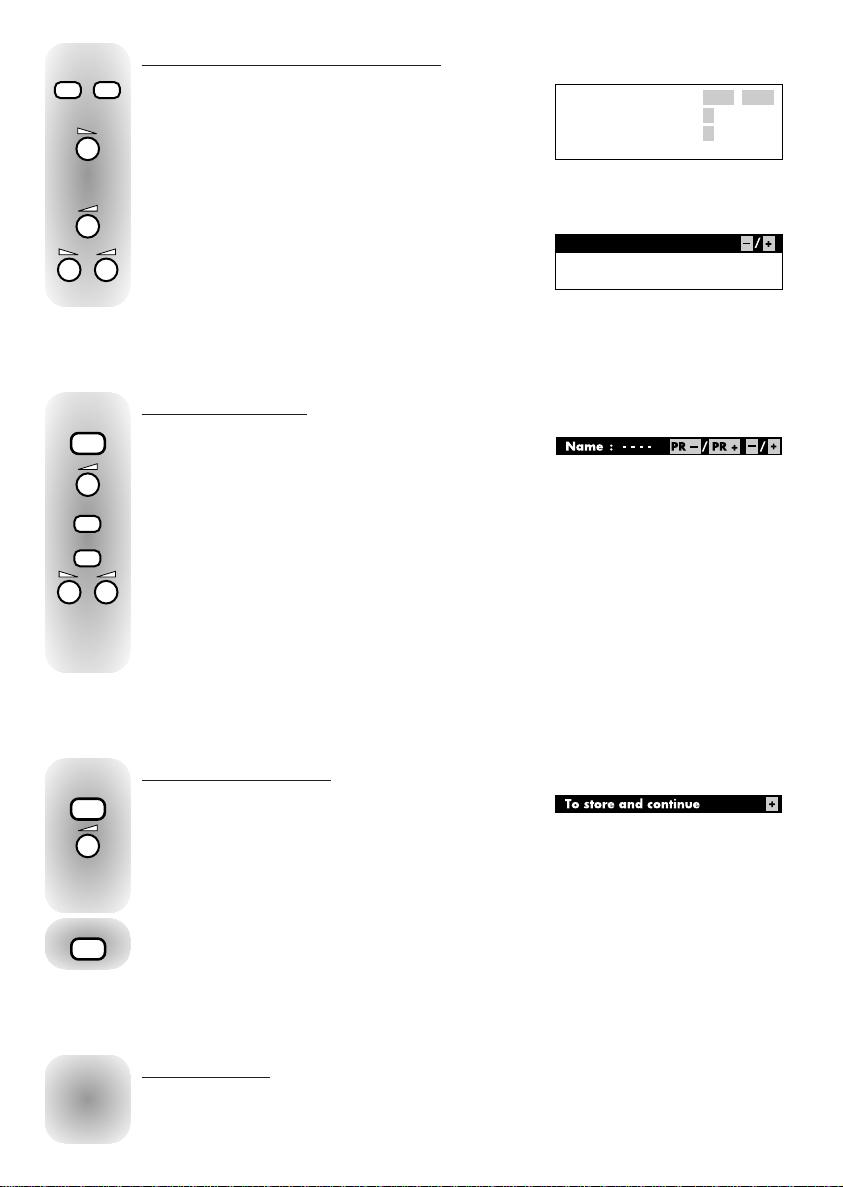
Select the programme.
To erase :
keep pressed for some seconds until the station
disappears.
To store :
press briefly and a new menu will appear.
Select the number that you want to give
to the programme.
PROGRAMME NAME
Press briefly to move to the Name line.
Press briefly. The first dash flashes.
Hold down (PR +) : the characters are displayed in ascending order.
Hold down (PR —): the characters are displayed in descending order.
When the character you are looking for is displayed, move on to the next ( + ), or
preceding dash ( —).
To insert a space, use the empty character (between ß and A).
TO STORE IN MEMORY
Press briefly to select the Store line.
Press briefly to store your changes in memory, the + turns to OK.
The PROGRAMME ORGANIZER menu then reappears.
Repeat the above procedure to change other programmes.
Press briefly to clear the menu from the screen.
NEW CHANNELS
If a channel is not found or a new channel starts to broadcast in your region please
refer to MANUAL CHANNEL SETTING.
- 7 -
Page 8
MENU
MENU
MENU
+
+
+
PREF.
PREF.
— —
: —
—
Program.
Organis.
+
MENU
TV
Name : — — —
—
To store and continue
PROGRAMME ORGANIZER
PR 01 CH22
Program No : —
—
PR +PR -
-
-
+
To select a station PR
—
/ PR +
To give a prog. no. +
To erase this station
—
When completed : press
[ TV ]
PROGRAMME ORGANIZER
PR 01 CH22
NEW REGION
TV
(If you move to another region, or you want to start again for any other
Start the automatic search again and reorganise the programmes. To do this, call up the
INSTALLATION menu and proceed as described earlier (page 6).
All programmes and names previously stored are then erased.
Press briefly to clear the menu from the screen.
RE-ORGANIZING PROGRAMMES
If you subsequently wish to re-organize the order of your programmes please proceed as follows :
Press briefly to call up the main menu.
Press repeatedly until
the Organis. line is selected.
Press briefly and the PROGRAMME ORGANIZER
menu is displayed.
While the television is in any AV mode, (audio-visual), PROGRAMME ORGANIZER
menu cannot be displayed.
Select the programme.
To erase :
keep pressed for some seconds
until the station disappears.
To store :
press briefly and a new menu will appear.
Select the number that you want to give
to the programme.
Press repeatedly to select the Store line.
Press briefly to store your changes in memory, the + turns to OK.
The PROGRAMME ORGANIZER menu then reappears.
Repeat the above procedure to change other programmes.
Press briefly to clear the menu from the screen.
- 8 -
Page 9

NICAM DIGITAL STEREO
+
-
+
MENU
MENU
Stereo Mono
—
/ +
Super On Off
AV1Out Stereo Mono
PREF.
PREF.
PREF.
— —
: —
—
Program.
Organis.
+
MENU
NICAM (Near Instantaneous Companded Audio
Multiplex) digital audio.
The digital signal broadcast together with the
existing sound and pictures of terrestrial
television are decoded by this receiver to enable
high quality stereo sound to be reproduced with
advantages similar to those of compact discs. i.
e. extended dynamic range and channel
separation with low noise and low distortion.
These are considerable benefits compared with
the current standard system. The digital channel
separation will allow the Broadcasters to
transmit dual languages as an alternative feature
after the service is established.
You will be able to take full advantage of this
exciting new facility. The increase in overall
realism and ambience created by this new
dimension in television sound will bring
increased viewing enjoyment to all forms of
programme material-to sport as well as the more
obvious advantages to all forms of musical
entertainment.
In the absence of NICAM signals or if the
NICAM signal becomes extremely weak, the
receiver will select the standard system
automatically.
The standard signal can also be chosen by
selecting the mono mode using the appropriate
IMC on-screen graphics display. This is known
as forced mono.
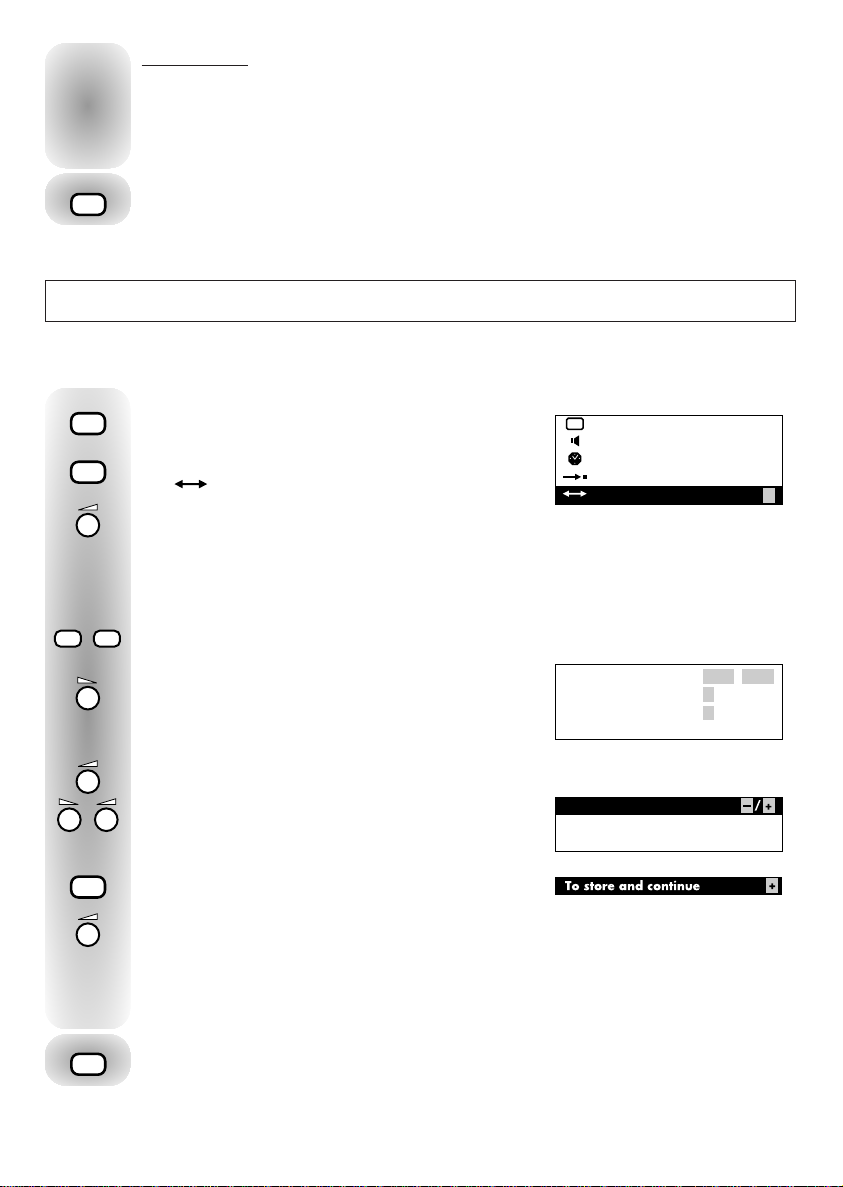
SOUND ADJUSTMENTS
Press briefly to call up the main menu.
The
PREF.
line is selected.
Press briefly to select the PREF. line.
Press briefly and the Sound menu appears.
The line is selected.
This varies depending on the sound type received.
NICAM STEREO or MONO SOUND
DUAL SOUND
NICAM 3 SOUND
AV SOUND
Select the desired sound for the loudspeakers.
- 9 -
Page 10
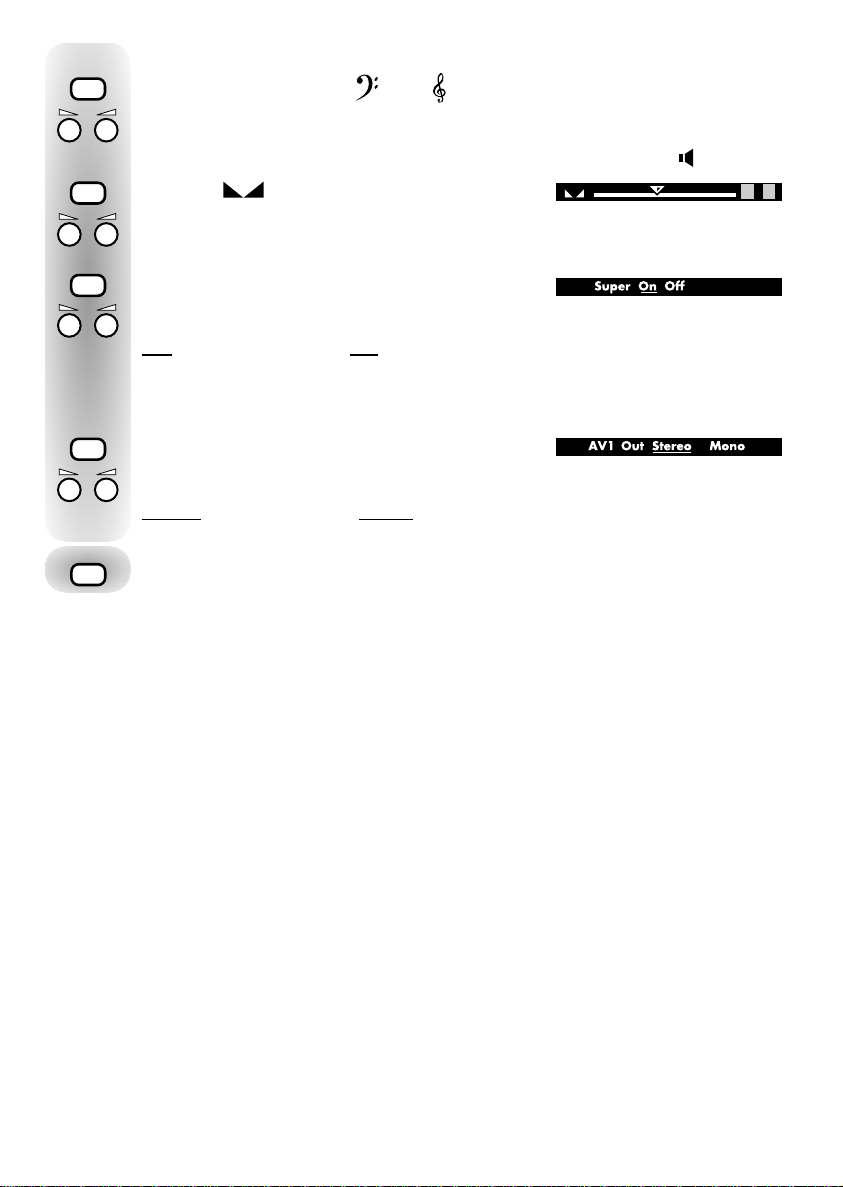
To adjust the tone
-+-
+
-
+
-
+
MENU
MENU
MENU
MENU
—
/ +
TV
Select successively the lines and ,
then adjust bass and treble to the desired level.
These personal adjustments can be recalled at a later stage (page 12,
PREF
)
Select the line.
To balance the sound level between the right and left sound channels.
Select the Super line.
Press briefly to choose:
Off : normal sound On : stereo-effect sound for mono broadcasts,
wide stereo sound for stereo broadcasts.
The sound available on the AV1 socket should be matched to the type of VCR connected
to AV1.
Select the AV1 Out line.
Press briefly to choose :
Stereo : stereo VCR Mono : mono VCR
Press briefly to remove the menu from the screen.
- 10 -
Page 11

PICTURE ADJUSTMENTS
PREF.
PREF.
— —
: —
—
Program.
Organis.
+
MENU
—
/ +
On Off
Format 4/3 16/9
PREF.
TV
+
-
-
+
MENU
MENU
MENU
-
+
MENU+MENU
Press briefly to call up the main menu.
The
Press briefly and the picture menu appears.
The first line is selected.
Press the button repeatedly to select the function you want to adjust :
PREF.
line is selected
=
BRIGHTNESS
=
COLOUR
=
CONTRAST
=
SHARPNESS
=
TINT
The tint adjustment is active only in NTSC mode.
To carry out the adjustments.
These personal adjustments can be recalled at a
later stage (page 12,
PREF.
).
PROGRAMME NUMBER DISPLAY
Select the line.
Press briefly to select :
On : constantly displayed Off : only displayed briefly after programme change
S-VIDEO
(This line appears only for an AV programme)
This is used to select S - VIDEO for use with devices (camcorders) which output this
type of signal (S - VHS or HI - 8).
Select the line.
Press briefly to select :
On : S - VIDEO Off : VIDEO
PICTURE FORMAT
(only with special 16/9 signals)
This is used to select the format.
Select the Format line.
Press briefly to select the format : 4/3 or 16/9.
Whenever a programme change is made, the set automatically switches over to the 4/3
picture format.
Press briefly to clear the menu from the screen.
- 11 -
Page 12
DAY TO DAY OPERATION
2
—
II
TV
PR +PR -
-
+
SWITCHING ON - SELECTING PROGRAMMES
Switch on the television set with the mains on/off switch if the indicator is off.
If it is on, select the desired programme :
For the programmes from 1 to 9 :
0/AV
1
Press briefly the corresponding number.
For the programmes from 10 to 59 :
2
Press and hold on the decimal (tens) number.
4
Press the (units) number.
When the set is in Stand-By mode, you can also switch it on using buttons
Pr —/+ or PR —/+ on the keyboard (if the television is not CHILD LOCKED).
PICTURE ADJUSTMENTS
The television picture can be adapted to suit the current lighting conditions.
Press repeatedly to choose the setting you wish :
=
Dark
=
Dim
SOUND ADJUSTMENTS
The television sound can be adapted to suit the sound of programme being watched.
Press repeatedly to choose the option you wish :
=
Bright
PREF
=
Personal adjustments
PREF
Debates, news etc…
=
Musical programmes
=
=
Personal adjustments
SOUND MUTE - VOLUME ADJUSTMENT
Pressing once turns the sound off.
The sound returns if the button is pressed once more.
Set the volume as desired.
DISPLAY - PROGRAMME UP-DOWN
Displays the settings for the channel being watched: programme name and number sound - time - Stand-By timer - alarm setting.
Some details will only be displayed if they have been entered.
Press repeatedly to run through the programmes stored in memory.
STAND-BY - AUTOMATIC SWITCH OFF
Press briefly. The Stand-By light turns red.
Note : The television will automatically switch to Stand-By after a few minutes if there is
no signal on the channel being watched.
- 12 -- 12 -
Page 13
MENU
MENU
MENU
MENU
+
+
-
-
+
OTHER FUNCTIONS
TV
TV
+
-
-
— —
: —
—
—
— : —
—
On Off
Program. No. : 01
+
—
— —
: —
—
+
—
TV
TV
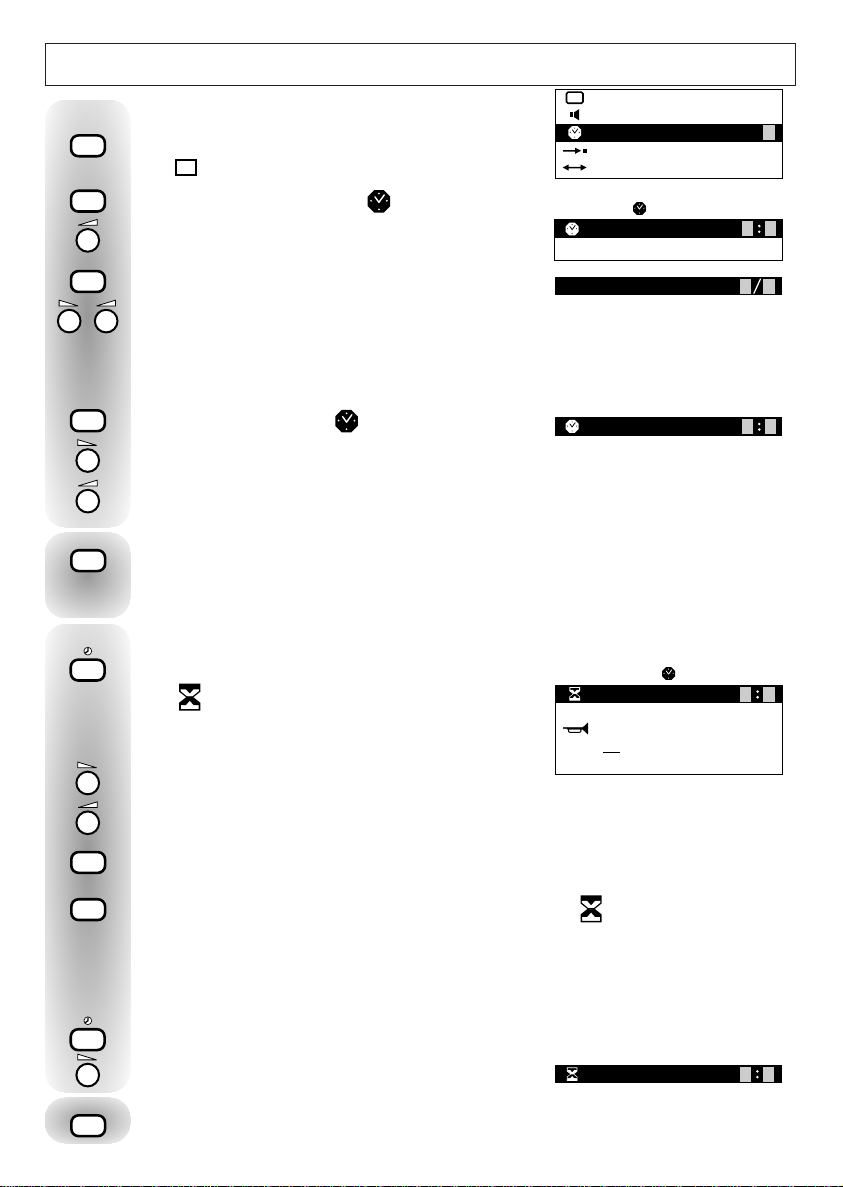
SETTING THE CLOCK
Press briefly to call up the main menu.
The
Press repeatedly to select the
Press briefly. The Time Set menu is displayed.
Press briefly to select the Program. No. line.
Using the —/ + keys, choose a programme which broadcasts teletext. The teletext time of
this programme only will be used as a reference for the internal clock.
sets itself automatically every time the television is turned on at the on/off switch on the
reference programme, or select the time as follows :
Press briefly to select the line.
Press —repeatedly to adjust the hours.
Press + repeatedly to adjust the minutes.
Press briefly to clear the menu from the screen.
If you turn the television off at the on/off switch, the time setting is lost and the clock
must be reset.
STAND-BY (SLEEP TIMER)
PREF.
line is selected.
——:——
line.
MENU
PREF.
PREF.
— —
: —
—
Program.
Organis.
— —
—
— : —
Program. No. : 02
Program. No. : 02
— —
+
: —
—
—
+
—
+
—
The internal clock
: —
—
+
—
Press briefly. The menu shown on the right is displayed.
The line is selected.
Stand-By times of between 15 minutes and
4 hours can be set (in 15-minute steps).
Press repeatedly to adjust the hours (max. 4 hours).
Press repeatedly to adjust the minutes (from 0 to 45 minutes in 15-minute steps).
Press briefly to clear the menu from the screen.
The time left before Stand-By can be checked at any time:
Press briefly. The time left is displayed for a few seconds. 00 : 13
The television will be switched to Stand-By at the end of the timer interval.
The Stand-By light flashes to indicate that the CHILD LOCK function has been activated.
The set can only be switched on again using the remote control, not by the keyboard.
You can cancel a sleep timer command :
Press briefly to display the menu.
Press repeatedly to go back to
Press briefly to clear the menu from the screen.
——: ——.
- 13 -
Page 14

ALARM
TV
This cannot be used if the clock is not set.
You can programme your television set to switch on automatically to a chosen programme at
a chosen time. Firstly, make sure that the internal clock is set to the correct time. To do so :
TV
Press briefly.
If the time display is
——: ——,
you cannot set the alarm. In this case, or if the time
displayed is incorrect, you must first set the clock or. Refer to the SETTING THE CLOCK
section.
If the time displayed is correct, the alarm can be programmed.
Press briefly. The menu shown on the right will appear.
—
— : —
—
Press briefly to select the line.
-
Press repeatedly to adjust the hours.
+
— —
: —
—
On Off
Program. No. : 01
+
—
Press repeatedly to adjust the minutes.
Adjusting the alarm time automatically activates the alarm function :
+
On is selected.
Select the Program. No. line.
+
-
On Off
Program. No. : 02
—
+
—
Choose the programme you want the set to switch on to.
If you wish to cancel the alarm function,
+
select the On line.
+
-
Select Off to deactivate the alarm function.
On Off
On Off
—
+
—
Press briefly to clear the menu from the screen.
Switch the television to Stand-By.
The Stand-By light flashes. The television will switch on to the selected channel at the
time programmed. The symbol appears on the bottom right of the screen. It will
automatically switch off after five minutes if no key is pressed on the remote control or
on the television keypad.
If the set is switched on before the alarm function is activated, it will not switch to the
programme selected for the alarm at the programmed time.
It is possible to programme both the automatic switching off (SLEEP TIMER) and
switching on (ALARM). In this case, the automatic switching on time must be
programmed to take place after the switching off time.
- 14 -
Page 15

MENU
Norm :
CH X X
CC
Program. No. : X X
Name :
— — — —
UK
—
+
/
PROGRAM.
MENU
MENU
MENU
0/AV
6
+
-
+
MANUAL CHANNEL SETTING
Norm :
CH X X
CC
Program. No. : X X
Name :
— — — —
UK
—
+
/
PROGRAM.
MENU
-
+
PREF.
PREF.
— —
: —
—
Program.
Organis.
+
MENU
Press briefly to call up the main menu.
Press repeatedly to select
the Program. line.
While the television is in any AV mode, (audiovisual), PROGRAM. menu cannot be displayed.
Press briefly to display the PROGRAM.
menu. The first line is selected.
This line is inactive in the UK.
1. CHANNEL SEARCH
A
If you do not know the channel numbers
Select the line.
Start the search by pressing :
—
: backward channel search. + : Forward channel search.
The cursor will move and the channel numbers are displayed on the CH line when
received via the aerial or on the CC line for cable network.
Once a station has been received, the picture appears on the screen. If the picture,
corresponds to the station required, go to the line, otherwise continue the search.
A
If you already know the channel numbers
Select the CH line for TV channels (aerial) or CC for cable networks.
Enter the channel number (it must have 2 digits).
e. g. : channel 6, enter 0 and then 6.
If your VCR is connected by RF cable and if you do not find the VCR output through
Autoprogramming, set channel to 38 or 60 (see User Manual of your VCR) and use fine
tune up and down until the VCR output is found.
Once found, then memorise the frequency against your chosen programme number (eg9).
2. FINE TUNING
(OPTIONAL)
Fine tune can be used to remove
interference if necessary.
Press briefly to select the line.
Press + or —to change the picture as necessary.
If you have a decoder to receive a scrambled channel, the TV set goes into AV when this
channel is being received.
In this case, disconnect the SCART socket from your decoder and call up the
PROGRAM. menu. Select the line (Fine Tuning), reconnect the SCART socket
and adjust the fine tuning if necessary.
- 15 -
Page 16

MENU
+
PR -
PR +
-
+
TV
MENU
+
+
CH X X
CC
Program. No. : X X
Memo
PROGRAM.
Name :
— — — —
CH X X
CC
Program. No. : X X
Name :
— — — —
Memo
—
+
/
PROGRAM.
3. PROGRAMME NUMBER
—
+
/
CH X X
CC
Program. No. : X X
Name :
— — — —
Memo
PROGRAM.
MENU
Press briefly to select the Program. No. line.
Enter an unused programme number
using the remote control.
4. CHANNEL NAME
Press briefly to move to the Name line.
Press briefly. The first dash flashes.
Hold down (PR +) : the characters are
displayed in ascending order.
Hold down (PR —): the characters are displayed in descending order.
When the character you are looking for is displayed, move on to the next ( + ), or
preceding dash ( —).
To insert a space, use the empty character (between ß and A).
5. STORING IN MEMORY
Press briefly to select the Memo line.
Press briefly. The + turns to OK. The channel is
stored in memory. One second later, the
line is selected again.
Search for and store all channels for the same standard.
Press briefly to remove the menu from the screen.
CHILD LOCK
You can prevent the use of your television set without the remote control.
The TV set is child locked :
- After the sleep timer function.
- After switching off the TV set by holding down the Stand-By button on the remote
control for more than 4 seconds.
The CHILD LOCK function is indicated by the flashing of the Stand-By light. The television
can only be switched back on using the remote control which cancels the child lock.
- 16 -
Page 17

CHANNEL NUMBER GUIDE
Rumster Forest
Rosemarkie
Knock More
Durris
Angus
Keelylang Hill
Orkney
Islands
Islands
Eitshal
Black Hill
Craigkelly
Darvel
Selkirk
Chatton
Limavady
Divis
Brougher
Moutain
Caldbeck/Sandale
Pontop Pike
Bilsdale West Moor
Winter Hill
Emley
Moor
Belmont
Waltham
Moel-y-Parc
The Wrekin
Sandy Heath
Llanddona
Sutton
Coldfield
Tacolneston
Sudbury
Ridge Hill
Oxford
Crystal
Palace
Hannington
Mendip
Presely
Blaenplwyf
Wenvoe
Carmel
Dover
Heathfield
Bluebell Hill
Midhurst
Rowridge
Stockland Hill
Beacon Hill
Caradon Hill
Huntshaw Cross
Redruth
Scilly
Channel Islands
Fremont Point
Only the main transmitters are listed. There are in addition many relay stations, and full lists are
available from the Broadcasting Authorities.
BBC 1
BBC 2
ITV
London & South-East
Bluebell Hill 40 46 43* 65*
Crystal Palace 26D33D23D30
Dover 50 56 66D53
Heathfield 49 52 64D67
Oxford 57D63D60D53
South-West
Beacon Hill 57 63 60D53
Caradon Hill 22* 28* 25D32
Huntshaw Cross 55 62 59D65
Redruth 51 44 41D47
Stockland Hill 33 26 23D29
Channel Islands
Fremont Point 51 44 41* 47
South
Hannington 39D45D42D66
Midhurst 61 55 5*8 68*
Rowridge 31D24D27D21
West
Mendip 58D64D61D54
East
Sandy Heath 31D27D24D21
Sudbury 51D44D41D47
Tacolneston 62D55D59D65
Midlands
Ridge Hill 22 28 25* 32*
Sutton Coldfield 46D40D43D50
The Wrekin 26 33 23 29
Waltham 58D64D61D54
North
Belmont 22D28D25D32
Emley Moor 44D51D47D41
North-West
Caldbeck 30* 34* 28D32
Winter Hill 55D62D59D65
North-East
Bilsdale West Moor 33* 26* 29D23
Chatton 39 45 49* 42*
Pontop Pike 58D64D61D54
Scotland
Angus 57 63 60* 53*
Black Hill 40D46D43D50
Sandale 22 – – –
Caldbeck – 34 28D32
Craigkelly 31D27D24D21
Darvel 33 26 23D29
Durris 22D28D25D32
Eitshal 33 26 23 29
Keelylang Hill 40 46 43 50
Knock More 33 26 23* 29*
Rosemarkie 39 45 49* 42*
Rumster Forest 31 27 24* 21*
Selkirk 55 62 59D65
CH4
Wales
Blaenplwyf 31D27D24 21
D
Carmel 57 63 60* 53*
D
Llanddona 57D63D60* 53*
D
Moel-y-Parc 52 45 49* 42*
D
Presely 46 40 43* 50*
Wenvoe 44D51D41D47
D
Northern Ireland
D
Brougher Mountain 22 28 25* 32*
D
Divis 31D27D24D21
D
Limavady 55 62 59* 65*
D
UK MAIN TRANSMITTERS
D
D
D
D
D
D
D
D
D
D
D
D
D
D
D
D
D
D
D
*
Expected to commence NICAM transmissions
before the end of 1995
D
Already transmitting NICAM
D
- 17 -
BBC 1
BBC 2
ITV
CH4
D
D
Page 18

CHANNEL NUMBER GUIDE (IRELAND)
Miles
0 1020304050
Mt.Leinster
Kippure
Dublin
Three Rock
Cairn Hill
Maghera
Mullaghanish
Clermont Carn
Divis
Truskmore
Brougher
Hollywell
Hill
Limavady
NORTHERN
IRELAND
IRISH REPUBLIC
N
In addition to the RTE main transmitters listed, there are many RTE transposers throughout the
country. If your area is not covered by a main transmitter and you are not sure of the channel
numbers of your local transmissions, your television dealer is the best person to advise you. He will
also know whether you need a horizontal or vertical aerial to suit the transmissions.
REPUBLIC OF IRELAND
North-West
RTE 1
RTE 2
Holywell Hill 23 26
Truskmore 09 (1) 07 (G)
North-East
Clermont Carn 52 56
East
Kippure 08 (H) 10 (J)
Dublin & East
Three Rock 29 33
West
Maghera 02 (B) 08 (H)
Central
Cairn Hill 40 43
South-West
Mullaghanish 04 (D) 07 (G)
South East
Mount Leinster 06 (F) 09 (I)
NORTHERN IRELAND
BBC 1
Brougher Mountain 22 28 25 32
Divis 31 27 24 21
Limavady 55 62 59 65
WALES
BBC WALES
Presely 46 40 43 50
BBC 2
BBC 2
UTV
HTV
CH4
S4C
- 18 -
Page 19

+
+
-
TELETEXT AND FASTEXT
TEXT
Press the TEXT button to access teletext
services, then use the number buttons
to directly select any teletext page. All
pages are three-digit numbers. For
example, to select page 251, press 2
then 5 then 1.
If you enter a number which does not
exist, (for example 800), the symbol
> 800 < appears briefly on the top of
the screen.
RED, GREEN, YELLOW, BLUE
These buttons have different functions
according to which of two sub-menus
is displayed in the four colours across
the top of the screen.
FASTEXT : Used with the first submenu as a method of fast page access
to select, according to its colour, the
title of one of four linked pages. Once
selected four new titles will appear.
If you press the coloured buttons in
rapid succession, it may be too quick
for the system and a rolling green
header line may appear until the
page you want is transmitted.
TEXT CONTROL : Used with the
second sub-menu for entering subpage numbers (red) and controlling
reveal (green), expand (yellow) and
mix (blue) as explained below.
SUB-MENUS
Use the button to toggle between
the first and second sub-menus which
are displayed as the bottom line of the
teletext page.
MIX
With the second sub-menu displayed,
press the BLUE button to superimpose
a text page over a TV picture. To
return to text only, press the BLUE
button again.
RED
GREEN
II
9
NUMBER BUTTONS
VCR
0/AV
-
STOPVTFUNC
YELLOW
MENU
TEXT
BLUE
VT
TV
PR +PR -
3421
7865
+
VT
SUBTITLES AND
NEWSFLASHES ON TV
PICTURES
When the subtitle teletext
page (normally 888) is
selected, subtitles for the hard
of hearing will be
superimposed on the TV
picture if the Broadcaster is
providing this facility. The
menu line and header line of
the teletext page will
disappear after about 10
seconds. To access further
teletext pages, the blue TEXT
button must be pressed
again. Subtitles can be
cancelled by pressing the TV
button.
- 19 -
TV
REVEAL
Some pages have concealed
information which can be revealed by
pressing the GREEN button while the
second sub-menu is displayed. Press
the GREEN button again to conceal it.
EXPAND
With the second sub-menu displayed,
press the YELLOW button once to
expand the top half of the page, press
again to expand the bottom half and
press again to restore the complete
page.
HOLD (STOP)
Rolling sub-pages can be held on
screen for as long as you wish by
pressing the button. Press again
to restore the rolling sequence.
INDEX ( )
This will access the index page of the
section you are currently in. Pressing it
again will take you to the main index
(page 100).
SELECTING A SUB-PAGE/
ROLLING PAGE
Select the required page, then with the
second sub-menu displayed
(use button) press the RED
button. Using the number buttons, first
enter 00 and then two digits for the
sub-page number required (for 1 to 9,
enter 01 to 09). The sub-page you
want will then be captured and held
on screen.
RETURN TO TELEVISION
VIEWING
Press the TV button.
Page 20

CONNECTIONS
0/AV
1. VIDEO RECORDER CONNECTION
Refer to your VCR manual.
VIA THE AERIAL SOCKET
Enables connection of the aerial and, if required, a video-recorder, (see note for the latter).
To tune the channel reserved for your video-recorder, you must insert a cassette and start it
playing. Next locate the corresponding channel on your television by carrying out “Manual
channel setting” (p. 15). Store at any programme ending with a 9 (9, 19, 29, etc…). Each
time you use the video-recorder, switch to the programme assigned to it.
VIA THE SCART SOCKET 1 (AV1)
This is used to connect :
• a PAY-TV (VIDEO) decoder
• a VHS, 8 mm, S-VHS or Hi-8 video recorder or camcorder (VIDEO)
• a PC or video games console (RGB)
VIA THE SCART SOCKET 2 (AV2) - (V 51 NB)
This is used to connect :
• a VHS or 8 mm (VIDEO), video recorder or camcorder
If you have two VCRs, the PAY-TV decoder must be connected to the VCR connected to the
Euro-AV1 socket. If you have a satellite receiver, refer to the operating manual in order to
find out the type of signal delivered. You can connect it to the PAY-TV socket of the second
VCR if the latter is fitted with one.
2. CALLING THE AUDIOVISUAL PROGRAMMES
Press once or twice to call AV1 or AV2 (V 51 NB).
In most cases, the television set changes automatically to AV1, when the VCR connected
to the Euro-AV socket is in play back mode.
When the VCR is stopped and if you have not changed channel during play, the TV set
returns to the station previously watched.
If the television has been switched on by the video recorder, it will be placed on standby
when the video recorder is switched off.
The TV set changes automatically to 16/9 format if the unit connected supplies the
control voltage.
4. COPYING VIDEO TAPES (V 51 NB)
Connect the playback VCR to the Euro-AV1 socket in playback mode. Connect the
recording VCR to the Euro-AV2 socket in recording mode.
During the copying of the tape the picture on the screen is the picture of the played tape.
Note : S-VHS cannot be copied via the television.
- 20 -
Page 21

LOCKING MENU
MENU
-
+
-
+
-
+
-
+
-
+
MENU
TV
This menu is used for:
- locking the Program., Organis. and TIMER menus,
- limiting the volume.
MENU DISPLAY
Switch the television to Stand-By, then switch it off by pressing the on/off switch.
To display the Locking menu, switch the set back on using the on/off switch whilst
holding down the Stand-By button of the remote control for at least 6 seconds.
The menu to the right will appear :.........................
The MAIN MENU line is selected.
LOCKING AND UNLOCKING THE PROGRAM. AND ORGANIS. MENUS
Press briefly to select ON. The Program. and Organis. menus are now no longer
accessible.
Press briefly to select OFF. The Program. and
Organis. menus are then accessible again :............
LOCKING AND UNLOCKING THE TIMER MENU.
Press briefly to select
the TIMER MENU line............................................
Press briefly to select ON.
The Timer menu is now no longer accessible.
Press briefly to select OFF. The TIMER menu is then accessible again.
VOLUME LIMITING
Press briefly to select
the MAX line :................................................
Set the maximum volume desired.
The volume will be limited to this level.
Press briefly to remove the menu from the screen.
- 21 -
Page 22

REMOTE CONTROL
VCR
MENU
PR +PR -
PR +PR -
VCR FUNCTIONS
STATUS
3421
7865
0/AV
STOPVTFUNC
VT
9
-
VT
TV
II
+
F 3090
PR +PR -
STATUS
VCR
VIDEO CASSETTE RECORDER COMMANDS USING THE TV REMOTE CONTROL UNIT
Selected Ferguson Video recorders can be operated by direct infra-red remote control.
This facility will be referred to in the appropriate video recorder operating instructions.
Contact your Ferguson dealer for more details.
REWIND/SEARCH :
If this button is pressed and held in during playback,
fast picture search (reverse) is obtained.
Rewind will be obtained if the recorder is in Stop mode.
PLAY :
Press to start playback. When the Peritelevision socket
is used see the section headed "Video recorder connection".
FAST FORWARD/SEARCH :
If this button is pressed and held in during playback, fast picture
search (forwards) will be obtained. Fast forward will be
obtained if the recorder is in Stop mode.
STOP : Press to stop tape movement.
PAUSE/STILL : Press during playback for pause.
RECORD : Press to start recording.
PR-/PR+ : VCR Programme selection
STATUS : To switch your VCR between TV and video modes,
to display information on the screen or to leave the menus.
Press to switch on or on Stand-By.
- 22 -
Page 23

SAFE USE OF EQUIPMENT
➦
➦
10
cm
5
cm
➦
10 cm
10 cm
10 cm
This equipment has been designed and
manufactured to meet international safety
standards but, like any electrical equipment,
care must be taken if you are to obtain the best
results and safety is to be assured.
Do read the Operating Instructions before you
attempt to use the equipment.
Do ensure that all electrical connections
(including the mains plug, extension leads and
interconnections between pieces of equipment)
are properly made and in accordance with the
manufacturer’s instructions. Switch off and
withdraw the mains plug when making or
changing connections.
Do consult your dealer if you are ever in doubt
about the installation, operation or safety of
your equipment.
Don’t continue to operate the equipment if you
are in any doubt about it working normally or
if it is damaged in any way–switch off,
withdraw the mains plug and consult your
dealer.
Don’t remove any fixed cover as this may
expose dangerous voltages.
Don’t obstruct the ventilation of the equipment,
for example with curtains or soft furnishings.
Overheating will cause damage and shorten
the life of the equipment.
Don’t listen to headphones at high volume, as
such use can permanently damage your
hearing.
Don’t use makeshift stands and NEVER fix legs
with wood screws–to ensure complete safety
always fit the manufacturer’s approved stand
or legs, with the fixings provided, according to
the instructions.
Don’t allow electrical equipment to be exposed
to rain or moisture.
ABOVE ALL
NEVER let anyone especially children push
anything into holes, slots or any other opening
in the case–this could result in a fatal electric
shock.
NEVER guess or take chances with electrical
equipment of any kind–it is better to be safe
than sorry.
WARNING: Do not use cleaning agents
containing ethyl alcohol, such as methylated
spirits.
This equipment should be switched to standby
when it is unattended for a few hours. This can
be done using the remote control. However, for
long periods of absence, switch off at the
on/off switch on the front of the TV so that the
red indicator light goes out. Make sure that
your family know how to do this. Special
arrangements may need to be made for infirm
or handicapped people.
- 23 -
Page 24

1 5 9 13 17 21
3 7 11 15 19
4 8 12 16 20
2 6 10 14 18
PERITELEVISION (SCART) PIN CONNECTIONS
Video inputs
Composite video or sync:
Pin 20 (pin 17 return).
RGB:
Red–Pin 15 (pin 13 return).
Green–Pin 11(pin 9 return).
Blue–Pin 7 (pin 5 return).
Video output
Composite video:
Pin 19 (pin 17 return).
Audio inputs
Signal levels
Composite video (in/out): 1 Vp-p ±3dB,
positive going, 75Ω.
Sync: 0.3Vp-p–3dB + 1OdB, negative
going, 75Ω.
RGB (input): 0.7Vp-p ±3dB, positive
going, 75Ω.
Audio (in/out): 0.5V r.m.s. (nominal)
Input impedance: ≥10 kΩ (20Hz–20kHz)
Output impedance: ≤ 1 kΩ (20Hz
–20kHz).
SCART socket connections
A–Pin 6 (pin 4 return).
B–Pin 2 (pin 4 return).
Audio outputs
A–Pin 3 (pin 4 return).
B–Pin 1 (pin 4 return).
Fast blanking (input)
Pin 16, + 1V to +3V for fast blanking
switching, 75Ω.
The socket is shown as viewed from the
rear of the TV.
NOTE: if an unsynchronised TV picture
results after viewing an external source
(with a fast blanking signal) connected to
AV, this voltage must be removed to return
to TV mode.
Signal selection
Facilities are provided for automatic
switching when the equipment connected
provides switching voltages as follows:
Pin 8: +9.5V to +12V
- Auto switching to auxiliary O/AUX
channel.
Pin 16: + 1V to + 3V–Auto switching to
RGB.
The descriptions and characteristics given here are of informative signifiance only, and non
committal. In fact, to keep up the high quality of our products, we reserve the right to make changes
or improvements without previous notice.
- 24 -
Page 25

Guarantee
This guarantee is automatically effective from
the date of purchase of the equipment.The
appropriate sections should be completed by the
dealer and purchaser at the time of purchase.
This guarantee should then be retained by the
purchaser and kept safely so that it may be ref erred to and produced if required should a claim
be made during the guarantee period.
Terms of Guarantee
1. The component parts used in this television
receiver, with the exception of the colour picture tube, are guaranteed by Thomson multimedia Limited against failure due to faulty
material or workmanship for a period of one
year from the date of purchase. The colour
picture tube is guaranteed separately for one
year unless extended at the time of purchase,
see "Picture Tube Guarantee".
2. Should the equipment fail to operate satisfactorily it should then be reported to the dealer
from whom it was purchased who will normally be able to provide service and make any
claim under guarantee on your behalf.
3. If it proves impossible to contact the dealer,
you should contact the Thomson multimedia
Limited Service Depot for advice stating the
model and serial numbers, date of purchase,
and the name and address of the dealer from
whom it was bought.
4. This guarantee is effective in the United
Kingdom only.
5. Thomson multimedia Limited reserves the
right to vary the specifications of the equipment without notice.
FOR COMPLETION BY THE PURCHASER
Purchaser’s Name …………………………………
Address ………………………………………………
…………………………………………………
PLEASE NOTE: It will not be necessary for the
dealer or purchaser to return this guarantee to
Thomson multimedia Limited when making a claim
under guarantee, unless requested to do so, provided tha the model and serial numbers, date of
sale, and the purchaser’s name and address are
quoted on the order or advice note.
FOR COMPLETION BY THE DEALER
MODEL No.
SERIAL No. ............................................
DATE OF PURCHASE ……………………
Dealer’s Stamp or Name and Address.
............................................
Picture Tube Guarantee
The colour picture tube is separately guaranteed
for twelve months free, or four years (optional
extra) requiring registration. Ask your dealer for
full details at the time of purchase.
This Guarantee in no way affects any statutory
right of a consumer.
THOMSON multimedia
CROWN ROAD
ENFIELD, MIDDLESEX EN1 1DZ
FERGUSON
is a registered trade-mark
This publication is printed on 100% recycled paper.
252 920 00
 Loading...