

Page 1

EN
MusicMatch
TM
Software
The MusicMatch Jukebox
This music management software, to be installed on your PC, allows you to compress music files recorded from you audio CDs into MP3
format and stores them on your PC.
• It makes the search and download of Internet music easier,
• It allows for the management of compressed music and the creation of your own playlist,
• The Jukebox is a true audio player installed on your PC,
• It gives access to thousands of net radios available on the web today.
You can download music files encoded in MP3 from several Internet sites like www.mp3.com.
PLAYING MP3
• Use .mp3 as the extension when converting audio files into MP3 for saving onto CD-R(W) or CD-ROM, e.g. Rocky08.mp3. Do not use
any other extension e.g. .doc, .pdf.
• Do not use the .mp3 extension for other text or non-audio data files as this may result in serious malfunction and harmful noise
interference.
Page 2
SOURCE SURROUND
PRESET
-
PRESET
+
POWER / ECO
PHONES
Thomson multimedia
46/47 quai A. Le Gallo
92648 Boulogne Cedex
FRANCE
RCS nanterre
B322 019 464
55334910
www.thomson-multimedia.com
Page 3

VOLUME
mp3
BAND/APP
RPT/PGM TEST
TREBLE
TUNE
-
TUNE
+
usermanual
DPL915VD
Page 4
Safety Information
Thomson Information
CAUTION!
Invisible laser radiation when open. Avoid exposure to
beam. Class 1 laser product. This system must be opened
only by qualified technicians to prevent accidents caused
by the laser beam.
LASER λ = 780 nm, P max = 5 mW
Rating Information: At bottom of the unit
this unit comply with the existing requirements
In accordance with the rating plate of the
unit, this unit complies with current
standards concerning electrical safety and
electromagnetic compatibility.
Please respect the environment Before
throwing any batteries away, consult your
distributor who may be able to take them
back for specific recycling.
Have a Blast- Just Not in Your Eardrums
Make sure you turn down the volume on
the unit before you put on headphones.
Increase the volume to the desired level
only after headphone are in place.
For UK Only
CONNECT THE MAIN LEAD INTO A MAINS POWER
SOCKET
POWER SUPPLY 230V. It must not be connected to D.C.
mains.
Note; The mains lead of the set is fitted with a molded
plug. If the mains socket are not compatible or if for any
reason the plug is removed please follow the directions
below. The molded plug cannot be rewired and if
removed must be disposed of safely.
DO NOT under any circumstances plug the severed plug
into any mains socket as this could result in electric shock.
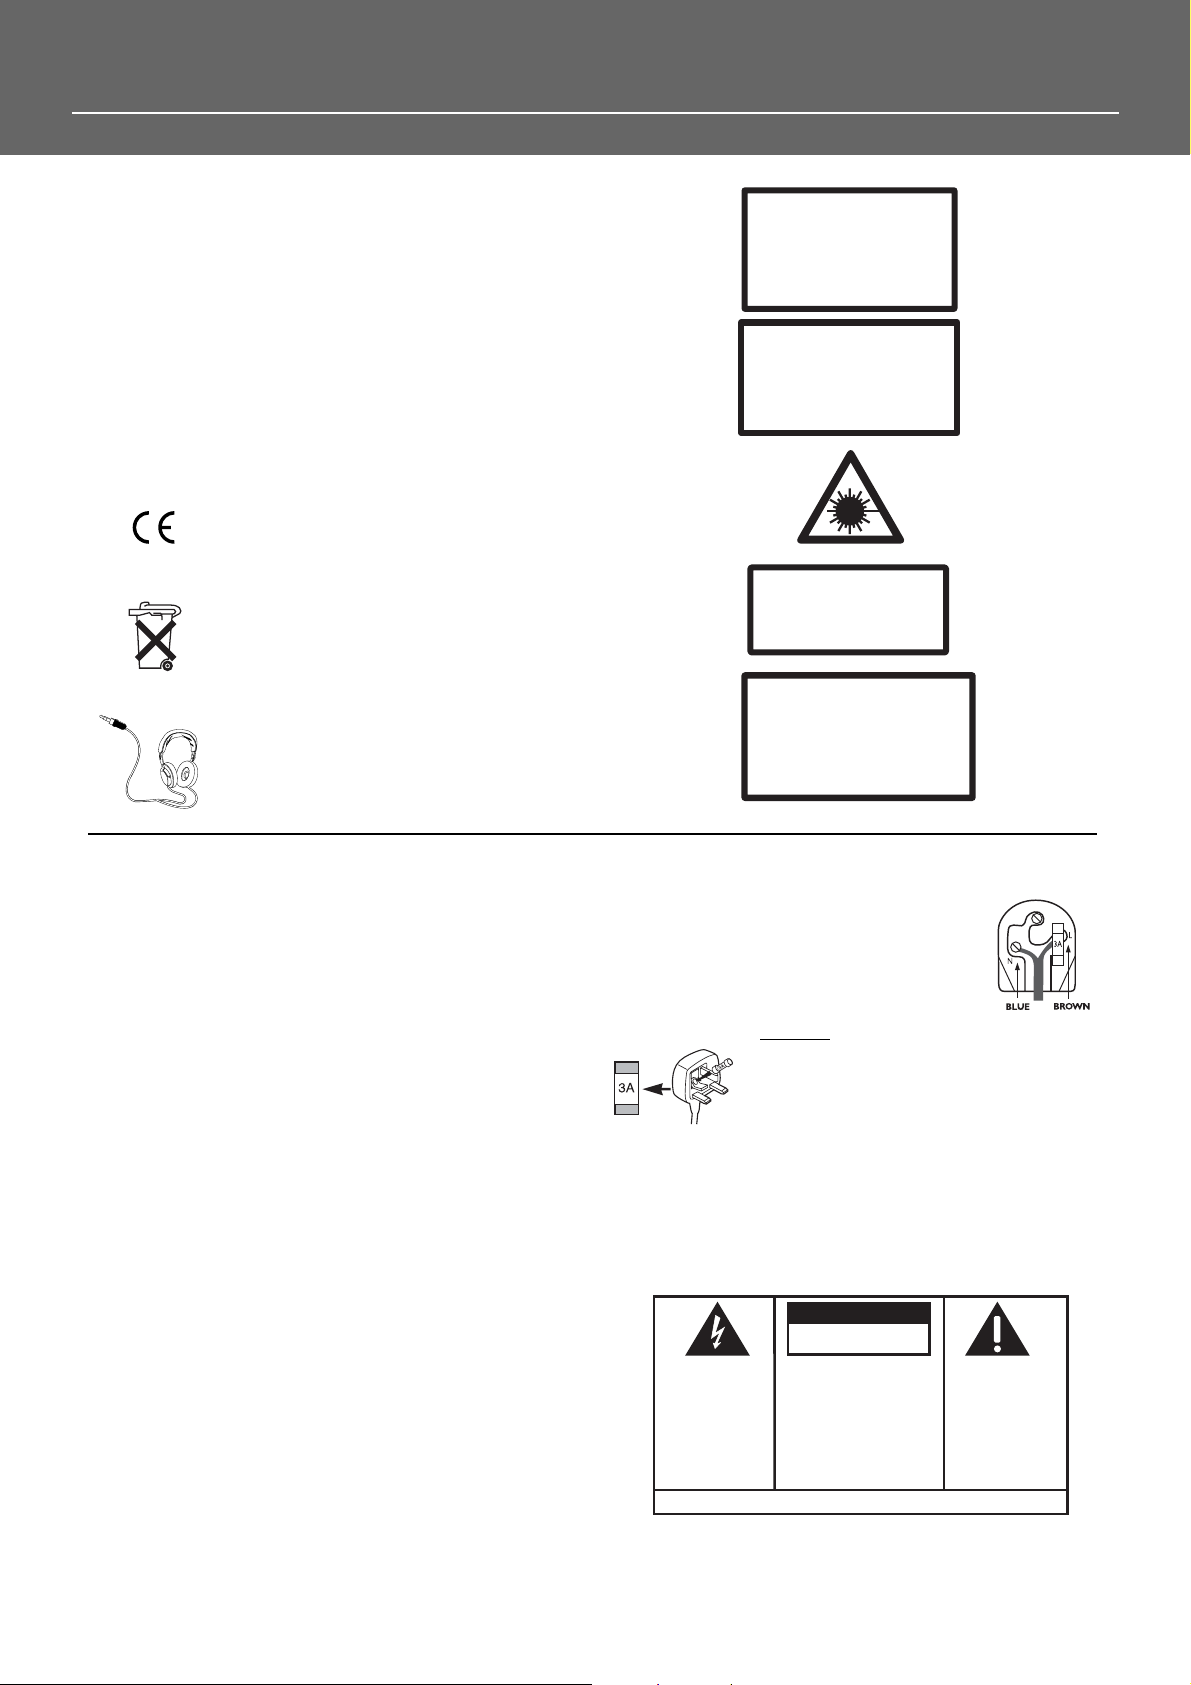
Important: If the plug is removed, rewire the new plug
as follow:
The wires in the mains plug are coloured in accordance
to the following code:
BLUE = NEUTRAL/BROWN = LIVE
If the colours of the wires in the mains lead of this
apparatus may not correspond with the coloured
markings identifying the terminals in your
plug, proceed as follows:
BLUE wire to the terminal coded N
(Neutral) or coloured black.
BROWN wire to the terminal coded L (Live)
or coloured red.
DO NOT
make any connection to the
terminal in the plug which is marked by
the letter E or by the earth symbol or
coloured green or green and yellow.
A fused plug must be fitted with a 3A fuse approved by
ASTA or BS1362 and fuse covers must be always be
securely replaced. If you set does not work, the fuse may
be blown.
ADVARSEL!
USYNLIG LASERSTRÅLNING VED ÅBNING NAR
SIKKERHEDSAFBR
UNGDÅ UDSAETTELSE FOR STRÅLNING.
VORSICHT!
UNSICHTBARE LASERSTRALUNG
WENN ABDECKUNG GEÖFFNET UND SICHERHEITS–
VERRIEGELUNG ÜBERBRÜCKT.
NICHT DEM LASERSTRAHL AUSSETZEN!
CAUTION – INVISIBLE LASER RADIATION
WHEN OPEN AND INTERLOCKS FAILED OR
DEFEATED. AVOID EXPOSURE TO BEAM.
ATTENTION –
DANGEREUX EN CAS D'OUVERTURE ET LORSQUE
LA SECURITE EST NEUTRALISEE.
EXPOSITION DANGEREUSE AU FAISCEAU.
VARNING–
OSYNLIG LASERSTRÅLNING NÄR DENNA DEL
ÄR ÖPPNAD OCH SPÄRRAN ÄR URKOPPLADE.
BETRAKTA EJ STRÅLEN.
VARO!
AVAT TAESSA JA SOUJALUKITUS OHITETT
OLET AL
LASERSÄTEIL YLLE ÄLÄ KA TSO SÄTEESEEN.
YDERE ER UDE AF FUNKTION.
RAYONNEMENT LASER INVISIBLE
CLASS 1 LASER PRODUCT
LASER KLASSE 1
APP
AREIL A LASER DE CLASSE 1
LUOKAN 1 LASERLAITE
KLASS 1 LASERAPP
TTIINA NÄKYMÄTTÖMÄLLE.
ARA
T
AESSA
CAUTION
RISK OF ELECTRIC SHOCK
DO NOT OPEN
THE LIGHTNING
FLASH AND ARROWHEAD WITHIN THE
TRIANGLE IS A
WARNING SIGN
ALERTING YOU OF
"DANGEROUS
VOLTAGE" INSIDE
THE PRODUCT.
SEE MARKING ON BOTTOM / BACK OF PRODUCT
CAUTION: TO REDUCE THE
RISK OF ELECTRIC SHOCK,
DO NOT REMOVE COVER
(OR BACK). NO USERSERVICEABLE PARTS INSIDE. REFER SERVICING
TO QUALIFIED SERVICE
PERSONNEL.
THE EXCLAMATION
POINT WITHIN THE
TRIANGLE IS A
WARNING SIGN
ALERTING YOU OF
IMPORTANT
INSTRUCTIONS
ACCOMPANYING
THE PRODUCT.
WARNING: TO PREVENT FIRE
SHOCK HAZARD,
TO RAIN OR MOISTURE.
DO NOT EXPOSE THIS PR ODUCT
OR ELECTRICAL
Page 5

1
Table of Content
Safety Infor
mation
Getting Started
Unpacking the DVD Receiver . . . . . . . . .2
Unpacking the Speakers . . . . . . . . . . . . .2
Inserting Batteries into Remote Control .3
Set Up and Maintenance of the
Receiver . . . . . . . . . . . . . . . . . . . . . . . . . .3
Protect your Components from
Overheating . . . . . . . . . . . . . . . . . . . . . . .3
Connecting to Audio-Visual
Components . . . . . . . . . . . . . . . . . . . . . .4
Digital Connection . . . . . . . . . . . . . . . . .5
Connecting Antennas . . . . . . . . . . . . . . .5
Connecting the Speakers . . . . . . . . . . . . .6
Connecting the Subwoofer . . . . . . . . . . .6
Positioning your Speaker . . . . . . . . . . . . .7
Front Speaker Placement . . . . . . . . . . . . .7
Preferred Surround Placement . . . . . . . .8
Advanced Surround Setting . . . . . . . . . .8
Test Tone / Channel Balance . . . . . . . . . .9
Connecting for Power . . . . . . . . . . . . . . .9
Using Headphones . . . . . . . . . . . . . . . . . .9
Factory Setting . . . . . . . . . . . . . . . . . . . . .9
Operating your Receiver
Receiver Controls . . . . . . . . . . . . . . . . . .10
Your Remote Control . . . . . . . . . . . . . . .11
Display . . . . . . . . . . . . . . . . . . . . . . . . . .12
Switching On/Off . . . . . . . . . . . . . . . . . .13
Selection of Audio/Video Source . . . . . .13
Using the Remote to Control Additional
Components . . . . . . . . . . . . . . . . . . . . . .14
Advanced Sound Control
Sound Enhancement Systems . . . . . . . .15
Fine Setting of Components . . . . . . . . .16
Fine Setting of the Speakers . . . . . . . . .17
Advanced Setting . . . . . . . . . . . . . . . . .17
DVD Player
Basic Playback Features . . . . . . . . . . . . .19
Quick Search . . . . . . . . . . . . . . . . . . . . .19
Freeze Frame and Frame Advance . . . .19
Slow Motion Playback . . . . . . . . . . . . .20
On-Screen Banner Display . . . . . . . . . . .20
Setup Menu . . . . . . . . . . . . . . . . . . . . . .25
CD/MP3 Player
MP3 Recommendations . . . . . . . . . . . . .30
Loading and Playing an Audio CD . . . .30
On-Screen Banner Display for CD
Playback . . . . . . . . . . . . . . . . . . . . . . . . .32
On-Screen Display for MP3 playback . . .35
Radio
Operating the Radio . . . . . . . . . . . . . . .37
Troubleshooting Tips . . . . . . . . . .
40
Care and Maintenance . . . . . . . . .42
Universal Remote Control
TV functions . . . . . . . . . . . . . . . . . . . . .43
VCR/SAT Functions . . . . . . . . . . . . . . . . .43
Universal Remote Control
Programming . . . . . . . . . . . . . . . . . . . .44
Remote Codes . . . . . . . . . . . . . . . . . . . .44
Language Codes . . . . . . . . . . . . . .45
EN
Page 6

Getting Started
Unpacking the DVD Receiver
You should receive the following items:
2
One DVD receiver unit
One pair of “AA”
batteries
One Pig-Tail
antenna wire
One external AM loop
antenna
one video cable (single wire)
with yellow RCA connectors;
• one instruction book;
• one safety leaflet;
• one Quick
Connection Guide
One RCA Universal
Remote Control
(RC800D)
Unpacking The Speakers
• one set of speakers including 1 set of left and right front
speakers, 1 centre speaker, 1 subwoofer and 1 set of left
and right rear speakers.
• 6 speaker cables including:
2 X grey/black cable
for rear speakers
1 X brown/black
cable for subwoofer
1 X blue/black cable
for center speaker
2 X red/black cable
for front speakers
one SCART cable;
mp3
POWER / ECO
SOURCE SURROUND
PRESET
- PRESET +
PHONES
BAND/APP
RPT/PGM
TUNE - TUNE +
TREBLE
VOLUME
+ -
+ -
TV
SAT/
CAB
VIDEO/
VCR
FRONT SPEAKERS
SUBWOOFER
CENTER SPEAKER
REAR SPEAKERS
(SURROUND SOUND)
Page 7
Getting Started
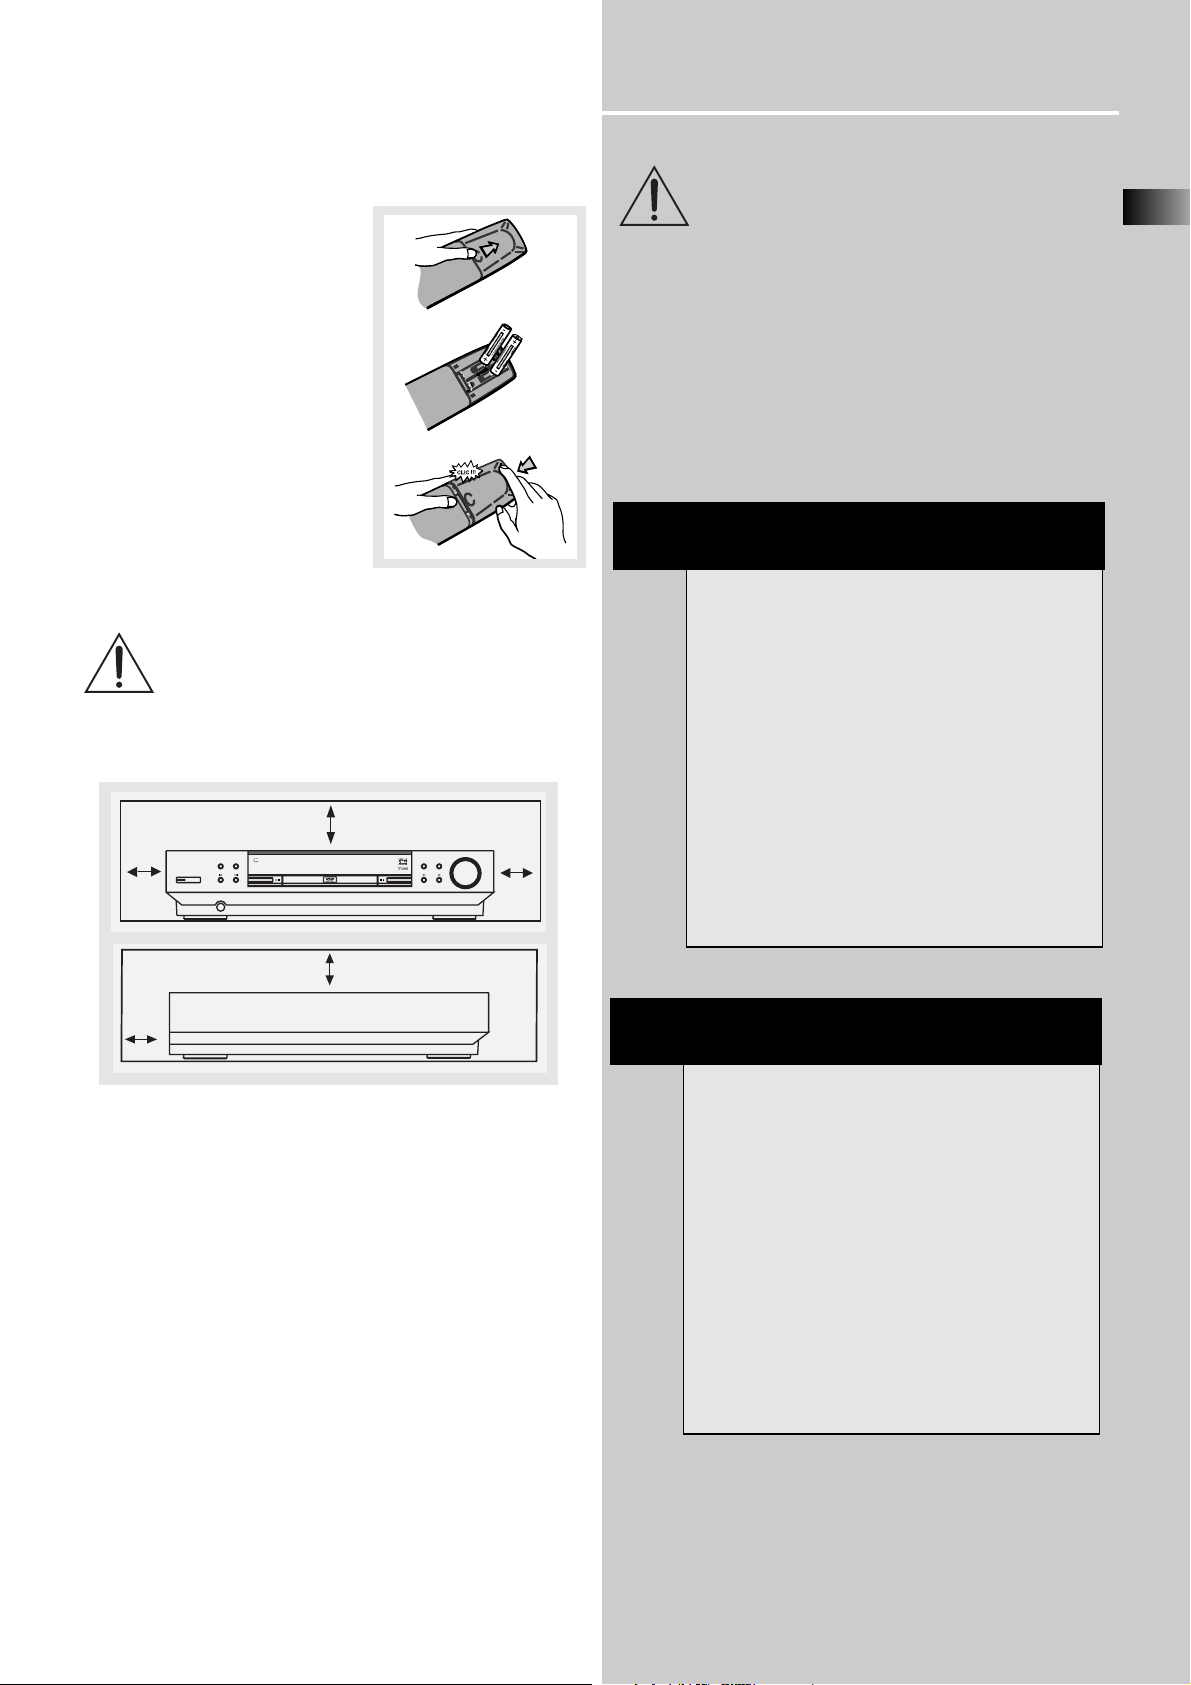
Inserting Batteries into Remote Control
1. Press the part indicated and
push in the direction of the arrow
to open the battery compartment
door.
2. Insert two AA(LR06) batteries
according to the + and - signs on
the battery compartment.
3. Press to close the cover.
To use the remote control, point it
directly at your receiver.
Set up and Maintenance of the Receiver
IMPORTANT NOTE
• Provide spaces for sufficient ventilation as indicated
below. If the space is insufficient, the unit may overheat
resulting in malfunction and shorter life time.
• Do not connect to the AC power cords until all connections are completed.
• Do not use your set immediately after transferring it from
a cold place to a warm place: there is risk of condensation.
• Do not expose your set to water and excessively high
temperatures.
• After having disconnected your set, clean the case with a
soft cloth, or with a slightly damp leather chamois. Never
use strong solvents.
Protect your Components from
Overheating
• Do not block ventilation holes in any component.
Arrange the components so that air can circulate freely.
• Do not stack components directly on top of each other.
• Allow adequate ventilation when placing your components in a stand.
• Place the receiver near the top shelf of the stand so
heated air rising from it will not affect other components.
EN
3
About CDR, CDRW, Audio MP3, Compact
Disk Audio (CDA), DVD Video, DVD Audio
This model DPL915VD is compatible to play CDR,
CDRW, Audio MP3, Compact Disk Audio (CDA),
Video Compact Disk (VCD) and DVD Audio.
DTS:
DTS sound format is availabe for DVD, SAT/CAB and
CD playback.
When playback a DVD-Audio disk, this model is
able to play any Dolby Digital 5.1 (AC3) Surround
mix content only, but not the DVD-Audio
Advanced Resolution Surround sound (6 channels)
or Stereo sound (2 channels) content.
Please watch the format of your disk and read the
disk information for further contents information.
NOTES ON CD-R/RW DISC
This unit is compatible with CD-RW/ CD-R discs for
playback.
• Do not affix any type of labels to either side
(recordable or labeled side) of a CD-R/RW disc as
this may result in the unit malfunctioning.
• To avoid damages to the CD-R/RW disc, do not
open the disc compartment door while the disc is
being read.
• Do not load an unrecorded CD-R/RW disc into the
unit. This may take a longer time to read the disc.
• Playback capability for CD-RW discs may
vary due to variations in the quality of the
CD-RW disc and the recorder used to create
the disc.
10 cm/
4"
10 cm/4"
mp3
SOURCE SURROUND
POWER
- PRESET +
PRESET
PHONES
BAND/APP
RPT/PGM
TUNE - TUNE +
BASS/TREBLE
VOLUME
10 cm/
4"
10 cm/4"
5 cm/
2"
Page 8

Getting Started
Connecting to Audio-Visual Components
4
ANALOG INPUT
Alternatively, if you have no VCR or SAT, you can
connect any other compatible components like
TAPE player, TV to your DVD receiver via the
VCR/SAT input.
VCR
VCR
TV SCART INPUT
Connect the TV to the DVD receiver
with a SCART cable. Audio from
any components which are
connected to the TV (e.g. VCR) as
well as the TV itself will be
broadcasted through the system.
When the DPL915VD is turned on
in DVD/CD mode, the TV will
automatically switch to the correct
input (e.g. AV1).
TV
to AUDIO OUT (VCR)
VCR SAT
IN OUT IN
L
R
AUDIO
to VIDEO OUT (VCR)
to VIDEO IN (VCR)
to AUDIO IN (VCR)
AUDIO OUT (SAT)
SAT
COAXIALINOPTICAL
IN
DIGITAL AUDIO
DIGITAL INPUT
Connect components
capable of outputing
Dolby Digital (e.g. SAT)
or standard PCM (CD)
format digital signals.
Read section on "Input
Signal Setting" under
"Advanced Sound
Control" carefully to
adjust the matching
input settings.
DIGITAL AUDIO
VCR IN
VCR OUT
SAT
IN
MON
OPTICAL
OUT
OPTICAL OUT (SAT)
to VIDEO OUT (SAT)
to S-VIDEO OUT (if available)
OUT
to VIDEO IN (TV)
to S-VIDEO IN (if available)
VIDEO
DIGITAL OUTPUT
Connect components
capable of recording
digital signals (e.g. MD,
CD recorder player)
equiped with a optical
input.
SAT
S-VIDEO
S-video provides the best connection for the video portion of the signal.
When connecting S-video cable, a Composite video cable (yellow RCA
connector) must also be used. If you use a S-video cable to connect
any audio-visual components to your DVD receiver, you must also use
a S-video cable between your TV and receiver.
¥ VCR audio/video out will have output signal in SAT, DVD/CD and
TUNER modes. When VCR (source) is selected, there will be no
audio/video signal from VCR audio/video out.
to SCART AUDIO / VIDEO IN (TV)
TV
Page 9

Getting Started
EN
5
Digital Connections
If you have a SAT receiver DVD player or CD player with a
digital output, you can make use of an optical digital connecting cord (not supplied) or coaxial digital connecting
cord (not supplied) to carry the audio portion of the signal
and enjoy Dolby Digital or digital stereo sound quality. One
optical or coaxial cable is needed for each SAT receiver,
DVD player or CD player. When optical or coaxial cable is
used, the analog audio cables are still needed if recording
through a tape or VCR is desired. This receiver provides one
optical and one coaxial digital input for the connection of
your components. Please connect your components (e.g.
DVD, SAT or CD) to the appropriate digital inputs and
select the appropriate source (see below).
Read instructions carefully when connecting components to
the receiver.
Digital In Jacks can accept Dolby Digital (AC-3), or PCM signals when compatible components are connected.
Connecting the Antennas
The AM and FM antennas connect to the AM and FM terminals on the system’s back panel.
They must be hooked up in order to receive clear reception.
AM Loop Antenna and FM Indoor Antenna
1. Uncoil the AM Antenna wire.
2. Press down on the Antenna tab to open the terminal
(Refer to the illustration on the bottom of page 6)
HINT
• For FM reception, extend antenna to its full
length and arrange the Antenna at different parts
of the room until the reception is optimized.
• For AM reception, rotate the antenna
horizontally to get better reception.
NOTE
Optical and coaxial cables carry only the audio portion of the signal. A video connection must also be
established by connecting a video cable to the
(SAT) video input.
NOTE
Make sure the white wire on the AM loop antenna
is inserted into the top terminal.
Manufactured under licence from Dolby Laboratories.
"Dolby", "Pro Logic 2" and the double-D symbol are
POWER SOURCE: 230V 50Hz
trademarks of Dolby Laboratories. Confidential
RATED INPUT POWER: 300W
Unpublished Works. © 1992-1997 Dolby Laboratories,
SECTEUR 230V 50Hz
CENTER SUB
FRONT
REAR
SPEAKERS
AM LOOP
GND
LR
FM 75
LR
Inc. All rights reserved.
CONSOMMATION NOMINALE: 300VA
Shock hazard - do not open! Keep dry!
Attention:
Before opening disconnect power plug!
VCR
SAT
Risque de choc électrique ne pas ouvrir!
Attention:
Vor Öffnen Netzstecker ziehen!
Achtung:
Vor Feuchtigkeit schützen!
IN
IN OUT
Przed otwarciem obudowy wyjąć wtyczkę z
UWAGA:
AUDIO
gniazda sieciowego
SAT
COAXIALINOPTICAL
OPTICAL
DIGITAL AUDIO
TV
L
R
ME67
VCR IN
VCR OUT
SAT
IN
MON
OUT
OUT
IN
VIDEO
230V 50Hz
SAT
CENTER SUB
FRONT
REAR
SPEAKERS
White
OPTICAL DIGITAL IN (AUDIO)
Optical Fiber Cable
Connect to optical digital output of DVD, CD,
SAT or other compatible devices.
SAT / DVD / CD Player
COAXIAL DIGITAL IN (AUDIO)
Connect to coaxial digital output
of DVD, CD, SAT or other
compatible devices.
SAT / DVD / CD
SAT
COAXIALINOPTICAL
DIGITAL AUDIO
OPTICAL DIGITAL OUT
Connect to recording
device like CD, CDRW
player, DVD recorder,
mini disc etc.
IN
OPTICAL
OUT
AM LOOP
GND
FM 75
Ω
Manufactured under licence from Dolby Laboratories.
"Dolby", "Pro Logic 2" and the double-D symbol are
POWER SOURCE: 230V 50Hz
trademarks of Dolby Laboratories. Confidential
RATED INPUT POWER: 300W
Unpublished Works. ' 1992-1997 Dolby Laboratories,
SECTEUR 230V 50Hz
AM LOOP
GND
LR
FM 75‰
LR
Inc. All rights reserved.
CONSOMMATION NOMINALE: 300VA
Shock hazard - do not open! Keep dry!
Attention:
Before opening disconnect power plug!
VCR
SAT
Risque de choc lectrique ne pas ouvrir!
Attention:
Vor ffnen Netzstecker ziehen!
Achtung:
Vor Feuchtigkeit schtzen!
IN
IN OUT
Przed otwarciem obudowy wyjąć wtyczkę z
UWAGA:
AUDIO
gniazda sieciowego
SAT
COAXIALINOPTICAL
OPTICAL
DIGITAL AUDIO
TV
L
R
ME67
VCR IN
VCR OUT
SAT
IN
MON
OUT
OUT
IN
VIDEO
230V 50Hz
Page 10

Getting Started
Connecting the Speakers
Speakers
There are 6 speakers equipped with the unit (2 front,
1 center, 2 rear, 1 subwoofer). In order to enjoy good
surround effects all six speakers need to be connected to
the receiver
For better sound quality, Center speaker, rear speakers and
Subwoofer should also be connected. Adding center and
rear speakers will enhance surround effects. Adding a
Subwoofer will increase bass response.
If you want to enjoy full range of sound effects, it is a must
to use the subwoofer with the speakers to maintain a
dequate bass signal.
Center Speaker Setup
Speaker cords
1 for each speaker, is
needed for connection. Twist
the stripped ends of speaker
cord about 2/3 inch (15 mm).
Press down on the tab to
open the terminal and insert
the wire. Snap the tab closed.
To ease speaker connections,
the speaker cords and the
terminals are color-coded.
• Red/Black (Front Speakers),
• Blue/Black (Center Speaker)
• Grey/Black (Rear Speakers).
• Brown/Black (Subwoofer)
Connect the speaker wire
(red/black wire) to the back
of L, R front speakers (red /
black terminals) and to the
corresponding color terminals
on the rear of the receiver. Do the same for center speaker
(with blue/black terminal), rear speakers (with grey/black
terminals) and the subwoofer (with brown/black terminal).
Speaker Polarity
When connecting the speakers, make sure the polarities
(“+” speaker wire to “+” on the receiver) of speaker wires
and terminals are matched. If the cords are reversed, the
sound will be distorted and will lack bass (“out of phase”
effect).
Connecting the Subwoofer
Connect the subwoofer with the speaker wire (brown/
black) provided.
6
Antenna and Speaker
Wire Connection
Push Speaker terminal tab
down to insert wire.
Release tab to lock wire in
the terminal.
NOTE: Make sure the insulation
is completely removed from the
ends of the Antenna and
speaker wires at all connection
points.
SUBWOOFER
CENTER SPEAKER
BLUE / BLACK
BROWN / BLACK
FRONT SPEAKER
RED / BLACK RED / BLACK
R
GREY / BLACK
REAR SPEAKER
L
CENTER SUB
FRONT
REAR
SPEAKERS
LR
GREY / BLACK
FRONT SPEAKER
REAR SPEAKER
Page 11

Getting Started
Positioning your speaker
1 Left, Right (Front Speakers)
They carry primarily music and sound effects
2 Center
In surround mode, the center speaker carries much of the
dialogue as well as music and effects. It should be set
between the left and right speakers.
3 Surround (Rear Speakers)
Their overall sound balance should be as close as possible
to the front speakers. Proper placement is vital to establish
an evenly distributed sound field.
Subwoofer
A subwoofer is designed to reproduce powerful low bass
effects (explosions, the rumble of spaceships, etc.) which
dramatically heightens involvement with the action on the
screen. It is therefore recommended to connect subwoofers when small speakers are used.
Magnetic shielding
Speakers placed less than two feet from the TV set must be
magnetically shielded in order to prevent picture distortion. Front and center speakers provided with DPL915VD
are magnetically shielded to protect your TV set.
It is not recommended to place the rear speakers near the
TV set.
Front Speaker Placement
Even if you can't duplicate this ideal home theater setup
exactly, the suggestions for speaker placement that follow
will help you get good results.
Alignment
Align the center speaker evenly with (A), or slightly behind
(B), the left and right speakers, but not ahead of them.
Advanced Setting
Angle
Placing the left and right speakers to form a 45-degree
angle with your favorite viewing position will duplicate the
soundtrack mixer's perspective.
Height
The mid- and high-frequency drivers of the three front
speakers should be as close as possible to the same height.
This often requires placing the center speaker directly atop
(A) or beneath (B) the TV set.
EN
7
1
1
2
3
3
A
B
Courtesy Dolby Laboratories
Courtesy Dolby Laboratories
Courtesy Dolby Laboratories
Courtesy Dolby Laboratories
Page 12

Getting Started
Preferred surround placement
Location
If possible, place surround speakers to either side of the listening area, not behind it.
Height
If space permits, install surrounds 2-3 feet (60 - 90 cm)
above viewers. This helps to minimize localization effects.
Aiming
Aiming surrounds straight across the room, not down at
viewers, helps create a more open, spacious surround sound
field.
Advanced Setting
Alternative Surround Placement
Rear wall
If rear wall mounting is the only choice, aim the speakers at
each other (A), towards the front (B) or even towards the
sidewalls (C, D). Experiment with placement until surround
sounds seem to envelop you, rather than coming from
behind you.
No adjacent walls
Surrounds can go on stands facing each other to approximate the preferred sidewall mounting (A), or to the sides
or rear of the viewing area aimed upwards. In the latter
case, they can go right on the floor, or preferably, a few
feet off the floor such as on end tables (B).
8
Courtesy Dolby Laboratories
Courtesy Dolby Laboratories
Courtesy Dolby Laboratories
Courtesy Dolby Laboratories
Courtesy Dolby Laboratories
(60 - 90 cm)
Page 13

Getting Started
EN
9
Test Tone / Channel balance
Channel balance
Your receiver is equipped with a test signal generator for
balancing the channels. As the signal "travels" from channel to channel, adjust the level controls until each channel
plays at the same loudness level. (details see operation of
test/setup)
Level adjustment & surround channel level expectation
Even though you adjust the surround channel to be as loud
as the others on the test signal, you'll find that on actual
program material the surround channel is usually much
lower than the front. Don't be tempted to readjust the surround level; program producers use surround mostly for
subtle atmosphereics and ambience, and only rarely for
special effects. A good surround mix doesn't call attention
to itself; if it did, it would soon become distracting.
Using Headphones
To listen privately through your
audio system, use the PHONES jack
on the receiver. However, make sure
you turn down the volume before
you put on the headphones. Increase
the volume to the desired level after
headphones are in place.
Once headphones are connected, “HEADPHONE DOWNMIX
2 CHANNEL” will scroll on display. This feature automatically converts multi-channel outputs to 2 channel stereo for
your listening pleasure.
Hearing Comfort & Well-Being
• Do not play your headset at a high volume. Hearing
experts advise against continuous extended play.
• If you experience a ringing in your ears, reduce volume
or discontinue use.
Factory Setting
The DPL915VD is preset to the following setting when you
first turn on the power
Source = DVD/CD
Volume setting = 45 dB
Treble = 0 dB
Restore to Factory Settings
You can always restore all settings back to its original state.
When the receiver is in STANDBY mode, press accordingly
on the main unit to restore all settings back to factory
default :
PRESET - PRESET + TREBLE
NOTE
The system is equipped with Dolby Digital, and
manufactured under License from Dolby
Laboratories.
Dolby Digital Manufactured
under license from Dolby
Laboratories. “Dolby”, “Pro
Logic”, “Pro Logic II” and the
double-D symbol are trademarks of Dolby
Laboratories. Copyright 1992-1997 Dolby Laboratories,
Inc. All Rights Reserved.
NOTE
All preset radio stations and surround sound setting will be lost after factory setting is restored.
Courtesy Dolby Laboratories
Manufactured under License from
Digital Theater Systems, Inc. US Pat. No.
5,451,942 and other world wide patents
issued and pending. “DTS Digital
Surround”, are trademarks of Digital Theater Systems,
Inc. copyright 1996 Digital Theater Systems, Inc. All
Rights Teserved.
Page 14

Operating Your Receiver
Receiver Controls
1. POWER / ECO
• To turn the unit on/ off. When the system is turned on, the
unit will go to Standby mode, then press the SOURCE button
on the unit to power the unit up in the last mode used.
• When the unit is in standby mode, press the Source button to
power on the unit.
2. Source Buttons
• To select input source. For example, DVD/CD, VCR1 etc.
• Press and hold for delay settings (In surround / multichannel
mode only).
3. SURROUND
• Press repeatedly to select the surround sound setting or
Digital Sound Processor (DSP) mode you want. Refer to
“Advanced Sound Control” on page 16.)
• Press and hold to activate speaker Test Tone, use the
Adjustment buttons on the remote to adjust the settings.
4. PRESET - / SKIP REVERSE
• To move back to the beginning/previous preset memory
location in tuner mode.
• To skip to the beginning/previous track in CD mode and the
beginning/previous chapter in DVD mode (only while playing).
5. PRESET + / SKIP FORWARD
• To go to the next preset memory location in tuner mode.
• To skip to the next track in CD mode and the next chapter in
DVD mode (only while playing).
6. BAND /APP / RPT / PGM
• In Tuner mode, press to select between radio BANDS or press
and hold to enter AUTOMATIC PRESET PROGRAMMING mode.
• In DVD/CD mode, press to select among REPEAT options (only
while playing) or press and hold to enter PROGRAM mode
(only in stop mode).
7. TREBLE
• To adjust TREBLE, press this button and turn the volume knob
to adjust level.
• To increase bass level, increase the subwoofer volume.
• Press and hold for Random function in CD/MP3 playback.
8. TUNE - / FAST REVERSE
• In tuner mode, press to tune down on the radio frequency or
press and hold to to search down .
• In CD and DVD mode, press to fast reverse.
Press repeatedly to vary the speed of fast reverse.
• In pause mode, press for slow reverse.
9. TUNE + / FAST FORWARD
• In tuner mode, press to tune up the radio frequency or press
and hold to search down.
• In CD and DVD mode, press to fast forward.
Press repeatedly to vary the speed of fast forward.
• In pause mode, press for slow forward.
10. VOLUME
Turn the knob to adjust volume level.
11. PLAY/PAUSE
To play and pause DVD/CD playback.
12. STOP/ EJECT
To stop DVD/CD playback. Press to eject disc tray.
13. Display
To display current status of the receiver.
14. PHONES
Plug your headphones (not supplied) into it for your private
enjoyment. Speakers will be off when phones are inserted.
1 2 34
7
6
8
9 1011
12
5
10
13
14
POWER / ECO
SOURCE SURROUND
PRESET
- PRESET +
mp3
PHONES
BAND/APP
RPT/PGM
TUNE - TUNE +
TREBLE
VOLUME
Page 15

Operating Your Receiver
EN
Your Remote Control
Please be sure you have inserted the batteries into the remote
control (see relevant section on page 3.)
1. ON/OFF
To turn on or off the receiver and other auxiliary components (see
page 14 “Using the Remote to Control Additional Components”).
2. Digital
Select the way your SAT external audio/video devices are connected to the receiver (Analog, Optical or Coaxial) through the SAT
audio input.
3. Source Buttons
To turn on and select various audio/ video sources and enable
related functions.
4. Source Selector
To select which unit/mode you want to control with your remote.
5. DVD/CD Modes / Speaker Settings
To select menu items in DVD/CD mode.
To select speaker settings in AV receiver mode.
• center - In HiFi mode, press to select 3 STEREO surround mode.
Audio Language - In DVD mode, press to access language
selection menu.
During VCD playback, press for Audio Channel selection (Stereo /
Left only / Right only)
• stereo - Selects stereo mode.
Subtitle - Press to turn subtitles on/off. Press and hold to
access subtitle selection menu.
• theater modes - Selects among theater modes (DOLBY PL II
MOVIE, DOLBY PL II MUSIC, DOLBY PRO LOGIC, 3 STEREO,
ARENA, JAZZ, THEATER, STADIUM, DISCO, STEREO)
info - shows on-screen banner.
• delay - In HiFi mode, press to select speaker delay settings
(between speakers and your favorite listening position).
title - In DVD mode, goes to Title on screen menu.
During VCD playback, press to toggle between PBC on / off.
• level - Adjusts volume of individual speakers. Press repeatedly
and the display will toggle among different channels (Left front
speaker, Right front speaker, Center speaker, Left rear speaker,
Right rear speaker and Subwoofer). Press the left and right
arrow buttons beside OK button for adjustment
angle - selects different screen display angles if available.
6. Adjustment Buttons
Use arrows to move around on menus, press OK to enter/confirm
selection.
Press OK to show Sleep, Dimmer or Night mode
• SLEEP Mode
• DIM Mode
• EQ Mode (Stereo)
• NIGHT Mode (Dolby Digital Only).
When the display shows the setup you want to change, press the
left and right arrow buttons beside OK button to make changes,
then press OK to finalize your choice.
7. RDS / menu
• In Tuner mode, press to show Radio Data System information if
available. (Frequency station, Station name, program type, clock
and radio text)
• In DVD mode, press for menu setup for DVD title.
8. pty
• In Tuner mode, press to activate search by program type.
9. Volume + / Volume -
To adjust the volume.
10. pr + / pr -
To select programmed stations in TUNER mode.
To skip to the next or previous chapter or track in DVD, CD & MP3
mode.
11. MUTE
To mute all audio outputs.
12. Number Buttons
• In Tuner mode, to select a preset station.
• In DVD/CD mode, to select a track to be played (Audio CD only).
13. memo / clear
• In Tuner mode:
- Press AM/FM
- Press memo / clear to enter preset program function to store
desired frequency in memory. The flashing word PROG. in red will
appear in display. Input your desired channel number while the
word is still flashing and the frequency will be stored. (For details,
refer to "Storing Radio Stations” under “Manual Preset” on page
38)
• In DVD/CD mode, press to clear program settings.
14. Operation Buttons
• TUNER, press AM/FM on the remote to enter tuner mode.
Press REVERSE and FORWARD keys to tune down or up the radio
frequency.
• DVD/CD, press DVD to enable PLAY, RECORD, STOP and PAUSE
keys. The remote control currently operates most Thomson, RCA
and GE products, but it can be programmed to operate devices
from other manufacturers
1
3
5
6
4
14
10
12
9
7
11
8
11
13
2
TV
SAT/
CAB
VIDEO/
VCR
Page 16

Operating Your Receiver
CD / DVD / VCD / MP3
• Unit in DVD, VCD, CD or MP3 mode.
DIGITAL
• Audio output is in Dolby Digital mode. (For DVD and
SAT coaxial/optical inputs only)
Pro Logic II
• Audio output is in Dolby PL II Movie, Dolby PL II Music
or Dolby Prologic mode.
DTS
• Audio output is in dts mode (for DVD, SAT/CAB and CD
playback)
RANDOM
• Random playback mode activated.
• Currently in playback mode.
• Currently in pause mode.
PARENTAL LOCK
• Parental lock is on and a password is required to view
DVDs above a specific rating level.
TITLE
• Title number for DVD playback.
TRACK
• Track number being played.
CHAP
• Chapter location at which DVD is currently at.
SLEEP
• Sleep mode is activated
PROG.
• Program mode is activated.
ST
• Tuner stereo signal detected.
TUNED
• Tuner station detected.
RDS
• Radio data system is activated.
REPEAT / REPEAT 1 / REPEAT ALL /
REPEAT FOLDER (MP3 ONLY)
• CD, MP3 and DVD in repeat mode.
KHz / MHz
• Tuner frequency unit.
• Speaker Icons.
12
Display
CD
DVD
VCD
MP3
DIGITAL
ProLogic II
DTS RANDOM
pro
SLEEP
ST RDS
FOLDER
LCR
LS
LFE
RS
C
Page 17

Operating Your Receiver
EN
13
Switching on /off
• To switch on the receiver, press POWER/STANDBY
button on the receiver once to enter standby mode. Press
SOURCE button on the receiver or one of the source
buttons on the remote control to power on the receiver.
(See illustration below)
• Standby: when the receiver is on, press ON/OFF on the
remote twice (except in Tuner mode) to return to standby
mode.
• To switch off the unit completely, press the POWER/ ECO
button on the receiver.
Selection of Audio/Video source
When one of the audio/video source is selected, the audio
and video input corresponding to the name will be
activated.
The receiver acts as a switching device between all the
sources that are plugged into it.
Example 1:
If you connect a VCR player to the VCR input (audio +
video) on the receiver and press the SOURCE button
until VCR1/ANL shows on the display. You will be able to
have the sound and image transmitted by the VCR.
Example 2:
Based on example 1, the VCR input is selected. If SAT is
selected, image and sound from the SAT source will
replace the VCR.
NOTE
Your receiver has a back up memory to keep your
settings like preset radio station for about 2 weeks
in case electricity cut occurs. If the receiver is
unplugged for more than 2 weeks, all the settings
will be lost and re-setting will be necessary.
SO
R
NOTE
Remote control selector must be on hifi.
NOTE
Remote control selector must be on vcr/sat
to operate VCR features.
NOTE
Remote control selector must be on vcr/sat
to operate SAT features.
POWER
/ ECO
SURROUND
SOURCE
ECO
PRESET - PRESET +
P
TV
SAT/
CAB
VIDEO/
VCR
TV
SAT/
CAB
VIDEO/
VCR
ok
ok
SURROUND
SOURCE
/ ECO
PRESET - PRESET +
TV
SAT/
CAB
VIDEO/
VCR
ok
SAT/
CAB
VIDEO/
VCR
ok
/ ECO
SURROUND
SOURCE
PRESET - PRESET +
SURROUND
SOURCE
/ ECO
PRESET - PRESET +
TV
SAT/
CAB
VIDEO/
VCR
ok
Page 18

Operating your Receiver
You can connect up to 3 audio/video sources to this
amplifier:
Source button Corresponding connector
(remote control) (receiver back panel)
- DVD/CD built-in
- FM/AM built-in
- SAT SAT IN (audio / video)
- VCR VCR IN (audio / video)
- TV TV SCART (audio / video)
When a source is selected, the source name will be shown
on the display.
Example: Press VCR to select VCR as the source to the
amplifier.
14
D
V
M
NOTE
1. Your receiver has a built in tuner. Just connect
the appropriate antenna on the back of the
receiver and you will be able to listen to radio
stations. (See details in Tuner section)
2. The receiver is also equipped with DVD/CD
player. Press the SOURCE button on the main unit
or DVD button on the remote to activate the
feature.
3. Other sources can be connected to this unit
(VCR, SAT etc).
4. Refer to the "Connecting To Audio-Visual
Components" section for details on connection.
DIGITAL
VD
PRO.LOGIC
CD
INTRORANDOM
CD
P3
LCR
LS
LFE
RS
Page 19

EN
15
Advanced Sound Control
Sound Enhancement Systems
This receiver is equipped with several built-in sound
enhancement systems.
Dolby Pro Logic II and Dolby 3 Stereo
The Pro Logic II mode uses the built-in circuit to steer the
Left, Center, Right and Surround left and right channel
audio signals and uses all five speakers to play both stereo
and Dolby Pro Logic program source, such as TV and VCR.
Dolby Pro Logic II includes Dolby Pro Logic II Movie, Dolby
Pro Logic II Music and Dolby Pro Logic.
Use this mode to suit the type of program (such as VCR).
This surround system reproduces theater-like surround
sound from Dolby-encoded software.
The 3 Stereo mode will redirect the Surround signals to the
front left and right speakers when only the front and
center speakers are used.
Dolby Digital
The Dolby Digital mode lets you enjoy full digital
surround from software processed in the Dolby Digital
format. Dolby Digital provides better sound quality and
more powerful presence than conventional Dolby
Surround.
This unit is equipped with Dolby Digital 5.1-channel so
that you can enjoy enhanced full digital surround sound.
Being different from Dolby Pro Logic in which only four
channels ( Front Left, Front Right, Centre and Rear ) are
used, the new system provides stereo separation of the rear
speakers (Rear-Right, Rear-Left ). These 5 channels,
together with the subwoofer channel for bass sounds
(counted as 0.1 channel ), constitute as 5.1-Channel ( or 6
Channels ) Input for Dolby Digital that brings you the most
sophisticated sound enjoyment.
Digital Theater Systems (DTS)
DTS is a digital surround system which delivers six channels
of master-quality, 20-bit audio. It offers five full-range
channels plus a special low frequency effect (LFE) channel
for subwoofer, resulting commonly know 5.1 channels. It
can be applied with existing 5.1 speaker configurations.
DTS is available in DVD, SAT/CAB and CD mode.
Listening
Zone
Listening
Zone
[
Listening
Zone
Front Left Speaker
Center Speaker
Front Right Speaker
Subwoofer
Rear Left Speaker
Front Left Speaker
Center Speaker
Rear Right Speaker
Front Right Speaker
Front Left Speaker
Rear Left Speaker
Center Speaker
Front Right Speaker
Rear Right Speaker
Subwoofer
Page 20

16
Advanced Sound Control
Stereo
The Stereo mode uses the two main channel outputs from
the front speakers.
DSP (Digital Sound Processor)
These digital sound effects resemble sounds in a real
environment such as Arena, Jazz, Theater, Stadium and
Disco. DSP automatically converts analog audio signals to
digital ones which enables you to adjust the sound without
degrading the sound quality. Different modes will give you
different feel of size and type of listening environment.
(Not available in Dolby Digital (DVD))
Night Mode
By using Dynamic Range Compression technology (pressing
OK), you can enjoy enhanced Dolby Digital sound quality at
night without interrupting your roommates or neighbors.
Night Mode will compress the difference in volume
between normal voices and sound like explosions, while still
enjoying a Dolby Digital enable component (DVD, SAT).
Night Mode can be activated by pressing the OK
button repeatedly until NORMAL appears on the display.
While Normal is still on the display, press the LEFT or RIGHT
Adjustment buttons on the remote control,around the OK
button, on the remote control until you select the desired
mode. There are three modes (NORMAL, SOFT, SOFTER) for
you to choose the extents of compression.
Fine Setting of the Components
The receiver has pre-selected the best surround mode for
you once you turn on the unit by pressing the SOURCE
Buttons (like DVD/CD, SAT) directly. The default surround
modes for different components are as tabled below.
If you decide to change the surround mode, you can press
the SURROUND repeatedly to toggle among the different
surround mode choices and select the one you want.
For Digital Signal (2ch PCM), or analog signal , VCR1,
Tuner:
Dolby PL II Movie Dolby PL II Music Dolby PL
Dolby 3 Stereo Arena Jazz Theater
Stadium Disco Stereo
For Digital Signal (Dolby Digital for DPL900VD and
DPL910VD / DTS for DPL910VD only)
Dolby Digital Dolby 3 Stereo Stereo DTS
Default Settings
The receiver will keep the last selection in memory as long
as it doesn’t enter standby mode.
Input Signal Setting
The receiver defaults to the most convenient settings for
your easiest use (see table).
By default, SAT (satellite) is set to analog input. If you wish
to change the input formats, follow the steps below:
1. Press SOURCE on the main unit until SAT appears on the
display or press the SAT/CAB source buttons on the remote
control.
2. Press DIGITAL on the remote control to toggle among
optical/ coaxial/ analog to match your connection. Your
selection will be stored automatically.
Every time you press the source button, the input setting
(e.g. SAT/ ANL) will be shown on display for a few seconds.
Digital Input: Coaxial (COAX) / Optical (OPT)
Select this setting to play digital signals from a DVD, CD, LD
player, or SAT. (SAT mode only)
CAUTION!
DO NOT CONNECT A LD PLAYER WITH RF
COAXIAL OUTPUT TO YOUR COAXIAL INPUT.
Analog Input
Select this setting to play analog signals from a cassette
deck, VCR or SAT.
Source/ If Digital Input
Source/ (optical or coaxial) If PCM If Analog Input
Input is selected bitstream selected
DVD/CD Dolby Digital PRO-LOGIC II PRO-LOGIC II MOVIE
MOVIE
SAT Dolby Digital/ PRO-LOGIC II PRO-LOGIC II MOVIE
MOVIE
VCR N/A N/A PRO-LOGIC II MOVIE
TUNER N/A N/A PRO-LOGIC II MOVIE
TV N/A N/A PRO-LOGIC II MOVIE
DEFAULT INPUT (as seen on display)
Analog (SAT/ ANL)
Analog (VCR1/ ANL)
Built-in Tuner
Analog (TV / ANL)
SOURCE
SAT
VCR1
FM/AM
TV
NOTE
Only SAT input setting can be changed to coaxial or
optical.
AVAILABLE INPUT
ANL/Optical/Coaxial
Built-in
ANL only
ANL only
SOURCE
SAT
DVD/CD
VCR1
TV
NOTE
SAT and VCR are just generic names. You can connect
other compatible audio/video components to these
inputs like TV, TAPE, MINI DISC, CD-RW player, etc.
Page 21

EN
17
Advanced Sound Control
Auto Switching
If the TV is connected to the system via a SCART cable, the
TV will automatically switch to the right input when the
receiver is powered on.
For example:
The cable is connected to AV1 on the TV and the TV is
currently on AV2. When you turn on the receiver in
DVD/CD mode, the TV will automatically switch to AV1
input.
Fine Setting of the Speakers
If you use all the speakers provided, all the basic settings
have been set.
However, to make the surround sound more effective and
suit the acoustic conditions in your listening room, you
need to delay the signal from some of the speakers. Such
channel delay compensates for center or surround speakers that are closer to listening position than the front
speakers. You can make use of the SOURCE button to
adjust the speakers’ relative loudness.
The TEST button
Recommend to set the surround to one of the Dolby
setting so that all speakers will be selected. To activate the
Test Tone, press and hold the SURROUND button. A short
noise will be heard in each speaker one by one. The
speaker producing the noise at that moment will flash on
the Speaker icon and be displayed on the VFD. The speaker
being displayed can then be adjusted by using the LEFT or
RIGHT arrows on the remote to desired level. To get out
of Test Tone, just press SURROUND button and the setting
will be saved.
Advanced Setting
Factory Default Setting
The receiver speaker distance default settings are the
following:
Front speakers
(Lch/Rch) 4.5m
Center speaker
(Cch) 4.5m
Rear speaker
(L/S / R/S) 3.0m
Speaker Configurations
You can also change the delay of the speakers by pressing
and holding the SOURCE button on the main unit or the
delay button on the remote control.
Available Selections:
Pressing SOURCE repeatedly while the display is still
showing speaker distance setup. Set speaker selections or
speakers’ distance by pressing PRESET +/ PRESET - on the
main unit or the LEFT / RIGHT arrows on the remote
control.
Front Speaker distance 0.9 - 12m
Center Speaker distance 0 - 12m
Rear Speaker distance 0 - 12m
NOTE
Always use the subwoofer for optimum sound
quality.
3
TV Setting
A/V mode
TV mode
TV mode
TV mode
TV mode
SOURCE
DVD/CD
SAT
VCR
TV input
TUNER
NOTE
You must set the unit to multichannel mode (Dolby
Pro Logic II or Dolby Digital) by pressing the
SURROUND button before entering Speaker delay
mode.
Front
Left
Center
Front
Right
Cch
Lch
Rch
L/S
Rear
Left
R/S
Rear
Right
SURROUND
SOURCE
/ ECO
PRESET - PRESET +
TV
SAT/
CAB
VIDEO/
VCR
ok
SOURCE
SURROUND
PRESET - PRESET +
mp
TV
SAT/
CAB
VIDEO/
VCR
ok
Page 22

18
Advance Sound Control
• Speaker distance: For optimum surround experience
measure the distance between the speaker and your
favorite listening position.
1. Press and hold SOURCE for 3 seconds
2. While the Display is showing FRNT 4.5m, press PRESET +
or PRESET - on the main unit or LEFT or RIGHT arrow on
the remote control to adjust the delay setting.
3. Press SOURCE once to move to the next delay setting.
4. Repeat step 2 to set up the next speaker
5. When set up is done, wait for 5 seconds to automatically
save your settings or press any source key to save your
selection and set up mode.
Speaker Icons
The receiver shows you the speakers’ settings on the display
with the following icons:
Displaying Program Formats
When a digital source is playing, the receiver will automatically switch to the proper surround mode and indicates on
the speaker icons on the right-hand side of the display. (See
diagram)
It is important to note, however, that not all Dolby Digital
sources are encoded with the full complement of five channels plus LFE*. Speaker icons show how many and which
speaker you have enabled (See “Fine Setting of the
Speakers”) and the letters inside the speaker icons show
which channel is present in the source information. For
example, the diagram shown means you have all the five
speakers and subwoofer enabled and the digital sources
you played have five channels plus LFE complemented.
(Dolby Digital 5.1 Channels)
* LFE stands for Low Frequency Effect. The indication “LFE”
appears if the digital source contains LFE information. In
this case, the bass signal will be delivered to the subwoofer,
offering more dynamic deep bass sound effects. If the letter
is flashing, the signal is either too weak or just gone.
m
SURROUND
SOURCE
/ ECO
PRESET - PRESET +
SURROUND
SOURCE
PRESET - PRESET +
TV
SAT/
CAB
VIDEO/
VCR
ok
Front Speakers
C
Center Speaker
Rear Speakers
LFE
Subwoofer Present
C
SURROUND
SOURCE
/ ECO
PRESET - PRESET +
 Loading...