

Page 1
Handset
Belt
clip
Handset
battery pack
Battery
compartment
cover
Charge
Cradle
R
E
G
N
RI
P
R
O
G
ABC
DEF
GHI
JKL
MNO
PQRS
TUV WXYZ
EXIT
OPER
PAUSE
introduction
CAUTION: When using telephone equipment, there are basic safety
instructions that should always be followed. Refer to the IMPORTANT
SAFETY INSTRUCTIONS provided with this product and save them for
future reference.
IMPORTANT: Because cordless phones operate on electricity, you should have
at least one phone in your home that isn’t cordless, in case the power in your
home goes out.
If you have purchased an extra handset apart from your original purchased
unit you may find a detailed description of its functions in the User’s Guide
provided with your original purchased unit.
If you have purchased an extra handset that is not of the same type as your
original handset you may still use the original User’s Guide to help explain the
new handsets basic functions and options.
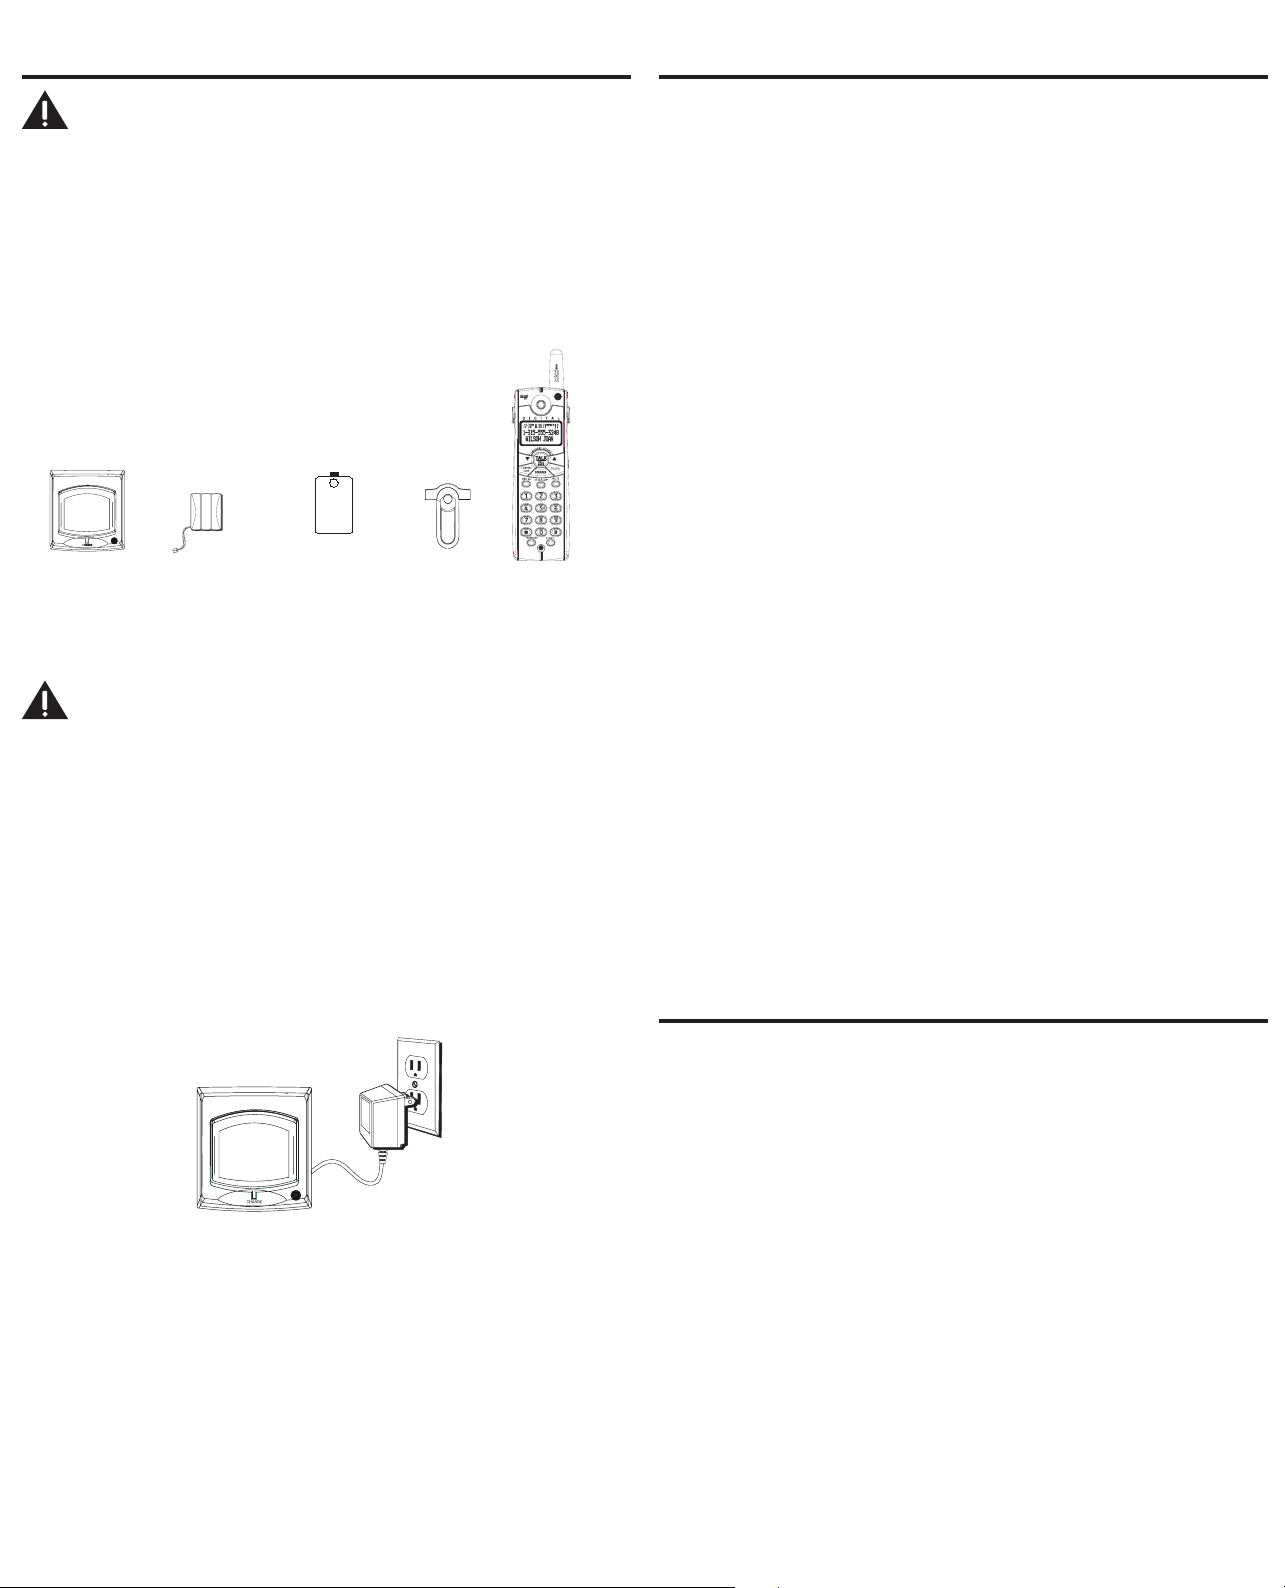
partS cHeckliSt
Make sure your package includes the items shown here.
inStallinG tHe HandSet battery
NOTE: You must connect the handset battery before use.
CAUTION: To reduce the risk of fire or personal injury, use only the ATLINKS
USA, Inc. Nickel-metal Hydride battery model 5-2660, which is compatible
with this unit.
1. Locate battery and battery door which are packaged together inside a plastic bag and
are separate from the handset.
2. Locate the battery compartment on the back of the handset .
3. Plug the battery pack cord into the jack inside the compartment .
NOTE: To ensure proper battery installation, the connector is keyed and can be
inserted only one way.
4. Insert the battery pack.
5. Close the battery compartment by pushing the door up until it snaps into place.
6. Place the handset in the base to charge.
extra cHarGinG cradle
1. Plug the AC power converter of the extra charging cradle into the electrical outlet.
naMinG tHe HandSet
1. Use the touch-tone pad to enter a name (up to 15 characters)..
NOTE: If you make a mistake, use the DELETE button to backspace and delete
one character at a time.
2. Press the MUTE/PROG button to save your name. You will hear a conrmation tone and
the handset name shows in the display.
De-Registration
De-registration cancels registration. During the de-registration process, keep the
handset near the base.
From the Handset Setup Menu:
1. Press the CALLER ID-VOLUME ( 6 or 5) button to scroll to the DEREGISTRATION submenu.
2. Press the MUTE/PROG button to enter the menu. REGISTRATION 1YES 42NO - - -
shows in the display The default setting is "2NO".
3. Use the touch-tone pad to select 1 for YES or 2 for NO. Or use the CALLER ID-VOLUME
( 6 or 5) button to scroll to 1YES or 2NO.
WARNING: It is not recommended that a handset be de-registered unless
absolutely necessary because once a handset is de-registered, that handset’s
telephone features cannot be used until the handset is re-registered.
4. Select NO, if you do not want to de-register.
5. If you select 1YES, press the MUTE/PROG button and MOVE NEAR TO BASE displays for
2 seconds, then CONFIRM? 1YES 2NO appears in the display.
6. Press the touch-tone pad to select 1YES or 2NO, or use the CALLER ID-VOLUME ( 6 or
5) button to scroll to 1YES or 2NO.
7. If you select YES, press the MUTE/PROG button to conrm. You will hear a conrmation
tone. Then HANDSET X DEREGISTERED shows in the display to conrm the handset is
deregistered.
NOTE: When you complete the de-registration process, HANDSET
NEEDS REGISTRATION shows in the display. To use the handset,
you MUST re-register the handset using the Registration process.
Global De-registration (applicable only with additional handsets)
If one or more handsets becomes lost, you should de-register all handsets to ensure
proper system operation. Follow the steps below to de-register all handsets at the same
time.
WARNING: It is not recommended that a handset be de-registered unless
absolutely necessary because once a handset is de-registered, that handset’s
telephone features cannot be used until the handset is re-registered.
1. Press and hold the page button on the base until the CHARGE/IN USE indicator on the
base ashes.
2. Press and hold the page button on the base again until the CHARGE/IN USE indicator
on the base ashes rapidly.
3. Press and release the page button on the base once. All handsets are de-registered
and HANDSET NEEDS REGISTRATION shows in the display.
Intercom Operation
(applicable only with additional handsets)
The intercom feature allows you to have a conversation with another registered handset
without tying up the telephone line, allowing you to still receive incoming calls.
MakinG an intercoM call
1. Make sure the handset is OFF (not in talk mode).
2. Press the INTERCOM button on the handset.
3. Use the touch-tone pad to select the handset you want to page.
NOTE: To cancel page, press the INTERCOM button again or the *EXIT button
on the sending handset.
4. Wait for the person at the receiving handset to press the INTERCOM button.
NOTE: If the receiving handset does not answer within two minutes, the
intercom call is automatically canceled. The originating handset displays NO
ANSWER.
5. When nished, press the *EXIT button or INTERCOM button on either handset to
deactivate the intercom.
NOTE: The system is expandable up to 4 handsets (by purchase of optional
Model 28001 handset with recharge cradle). When 4 handsets are registered,
the system can handle 2 separate intercom operations at once, for example,
1st handset intercoms with 2nd handset while 3rd handset intercoms with 4th
handset.
receivinG an intercoM call
When you receive an intercom call, your handset beeps. To answer the call press the
INTERCOM button or TALK/CALL BACK button.
2. Place the handset in the extra charging cradle. The charge indicator turns on, verifying
the battery is charging.
3. Allow the phone to charge for 16 hours prior to rst use.
reGiStration
YOU MUST REGISTER THE HANDSET TO THE MAIN BASE BEFORE USE!
After the optional handset has charged for 16 hours on the extra charger,
HANDSET NEEDS
REGISTRATION shows in the display.
1. Press the MUTE/PROG button. HOLD BASE PAGE WAIT FOR BEEP shows in the display.
(Your handset should be held near the base during registration process.)
2. Press and hold the page button on the base unit until you hear a tone at the handset.
HANDSET X REGISTERED shows in the handset display, where X is the handset
number. You may now rename your handset
 Loading...