

Page 1
1.
y
IMPORTANT SAFETY INSTRUCTIONS
Electrical energy can perform many useful functions, but it can also cause personal injuries and property damage if
improperly handled. This product has been engineered and manufactured with the highest priority on safety. But
IMPROPER USE CAN RESULT IN POTENTIAL ELECTRICAL SHOCK OR FIRE HAZARD. In order to prevent
potential danger, please observe the following instructions when install ing, operating and cleaning the product. To
ensure your safety and prolong the service life of your LCD TV product, please read the following precautions
carefully before using the product.
1.Read instructions—All operating instructions must be read and understood before the product is operated.
2.Retain instructions—These safety and operating instructions must be kept in a safe place for future reference.
3.Obse rve w arnings—All warnings on the product and in the instructions must be observed closely.
4.Follow instructions—All operating instructions must be followed.
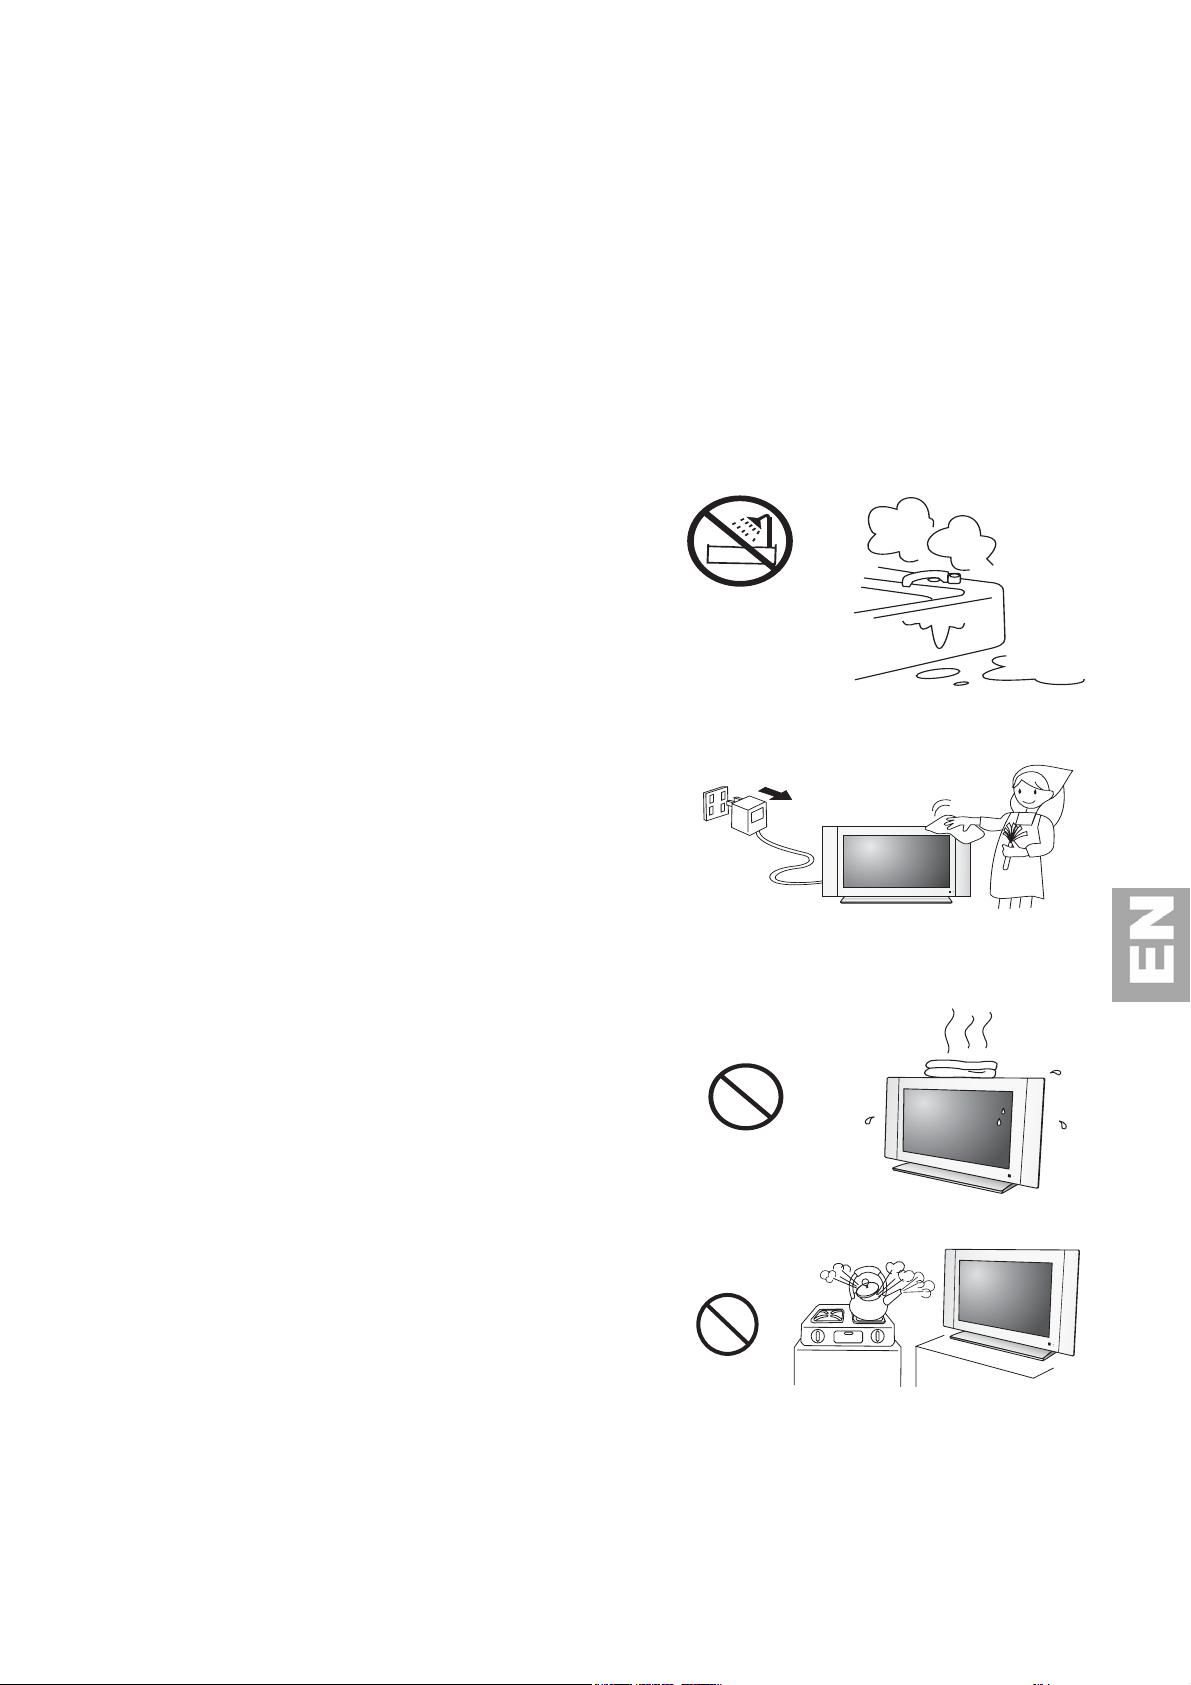
5.Water and moisture—Do not use this product near water -
for example, near a bathtub, washbowl, kitchen sink, or laundr
tub, in a wet basement, or near a swimming pool, and the like.
Do not use immediately after moving from a low temperature to
high temperature environment, as this causes condensation,
which may result in f ire, electric shock, or o ther hazards.
Moisture in rooms where the set is installed sho uld not exceed
85% humidity
Leave the condensation to evaporate before turning the TV on
again.
6.Cleaning— Unplug this product from the wall outlet before
cleaning. Do not use liquid cleaners or aerosol cleaners. Use a
damp cloth for cleaning.
Clean the screen with a glass care cleaner and the rest of the set
with a soft cloth and neutral detergent. Regularl y dust the vents
at the back and sides. Using so lvents, abrasive or alcohol based
products risk damaging the TV.
Caution : the screen of your LCD TV may be damaged if it is
cleaned with strong detergents, alcohol or abrasive products.
7.Ventilation—The vents and other openings in the cabinet are
designed fo r ventilation. D o not cover or block these vents and
openings since insufficient ventilation can cause overheating
and/or shorten the lif e of the pro duct. Do not place the product
on a bed, sofa, rug or other similar surface, since they can block
ventilation openings. This product is not designed for built-in
installation; do not place the product in an enclosed place such
as a bookcase or rack, unless proper ventilation is provided or
the manufacturer’s instructions are followed.
8.Heat sources—Keep the product away from heat sources
such as radiators, heaters, stoves and other heat-generating
products (including amplifiers).
The TV components are sensitive to heat. The maximum
ambient temperature should not exceed 350 celsius.
9.Power cord protection—The power cords must be routed properly to prevent people from stepping on them
or objects from resting on them. Check the cords at the plugs and product.
Power-supply cords should be routed so that they are not likely to be walked on or snagged by items placed upon or
against them. Pay parti cular attentio n to cords at doors, plugs, receptacles, and the point where they exit from the
product.
1
Page 2

10.Attachments—Do not use attachments not recommended by the manufacturer. Use of improper attachments
can result in accidents.
11.Accessories—When the product is used on a trolley, care should be taken to avoid quick stops, excessive force,
and uneven surfaces that may cause the product and trolley to overturn, damaging equipment or causing possible
injury to the operator. Do not place this product on an unstable trolley, stand, pedestal, bracket, or table. The
product may fall, causing serious injury to a child or adult and serious damage to the product. The product should be
mounted according to the manufacturer’s instructions, and use only with a trolley, stand, pedestal, bracket, or table
recommended by the manufacturer.
12.Servicing—Do not attempt to service the product yourself. Removing covers can expose you to high voltage and
other dangerous conditions. Request a qualified service person to perform servicing.
13.Replacement parts—In case the product needs replacement parts, make sure that the service person uses
replacement parts specified by the manufacturer, or those with the same characteristics and performance as the
original parts. Use of unauthorized parts can result in fire, electric shock and/or other danger.
14.Power source—This product is intended to be supplied by a listed power supply, output rated :
~100 - 240 V, 50 – 60Hz, 1.8A maximum, indicated on the marking label. If you are not sure of the type of power
supply to your home, consult your product dealer or local power company. For added protection for this product
during a lightning storm, or when it is left unattended and unused for long periods of time, unplug it from the wall
outlet and disconnect the cable system. This will prevent damage to the product due to lightning and power line
surges. When the unit has to be used with another power supply voltage, the power cable must be changed. Consult
your product dealer. The socket outlet should be installed near the equipment and eas ily accessible. The power cord
attached conforms to the following power supply voltage. Use only the power cord designated by our dealer to
ensure safety and EMC. When connecting other products such as VCRs and personal computers, you should turn off
the power of the unit for protection against electri c shock.
15.Overloading—Do not overload wall outlets, extension cords, or convenience receptacles on other equipment
as this can result in a risk of fire or electric shock.
16.Entering of objects and liquids—Never insert an object into the product through vents or openings. High
voltage flows in the product, and inserting an object can cause electric shock and/or short internal parts. Fo r the
same reason, do not spill water or liquid on the product.
17.Damage requiring service—If any of the following conditions occurs, unplug the power cord from the AC
outlet, and request a qualified service person to perform repairs.
a. When the power cord or plug is damaged.
b. When a liquid is spilled on the product or when objects have fallen into the product.
c. When the product has been exposed to rain or water.
d. When the product does not operate properly as described in the operating instructions.
Do not touch the controls other than those described in the operating instructions. Improper adjustment of controls
not described in the instructions can cause damage, which often requires extensive adjustment work by a qualified
technician.
e. If the product has been dropped or the cabinet has been damaged in any way.
f. When the product displays an abnormal condition or exhibits a distinct change in performance. Any noticeable
abnormality in the product indicates that the product needs servicing .
18.Safety checks—Upon completion of service or repair work, request the service technician to perform safety
checks to ensure that the product is in proper operating condition.
19.Wall or ceiling mounting—When mounting the product on a wall or ceiling, be sure to install the product
according to the method recommended by the manufacturer.
This is a safety feature.
2
Page 3
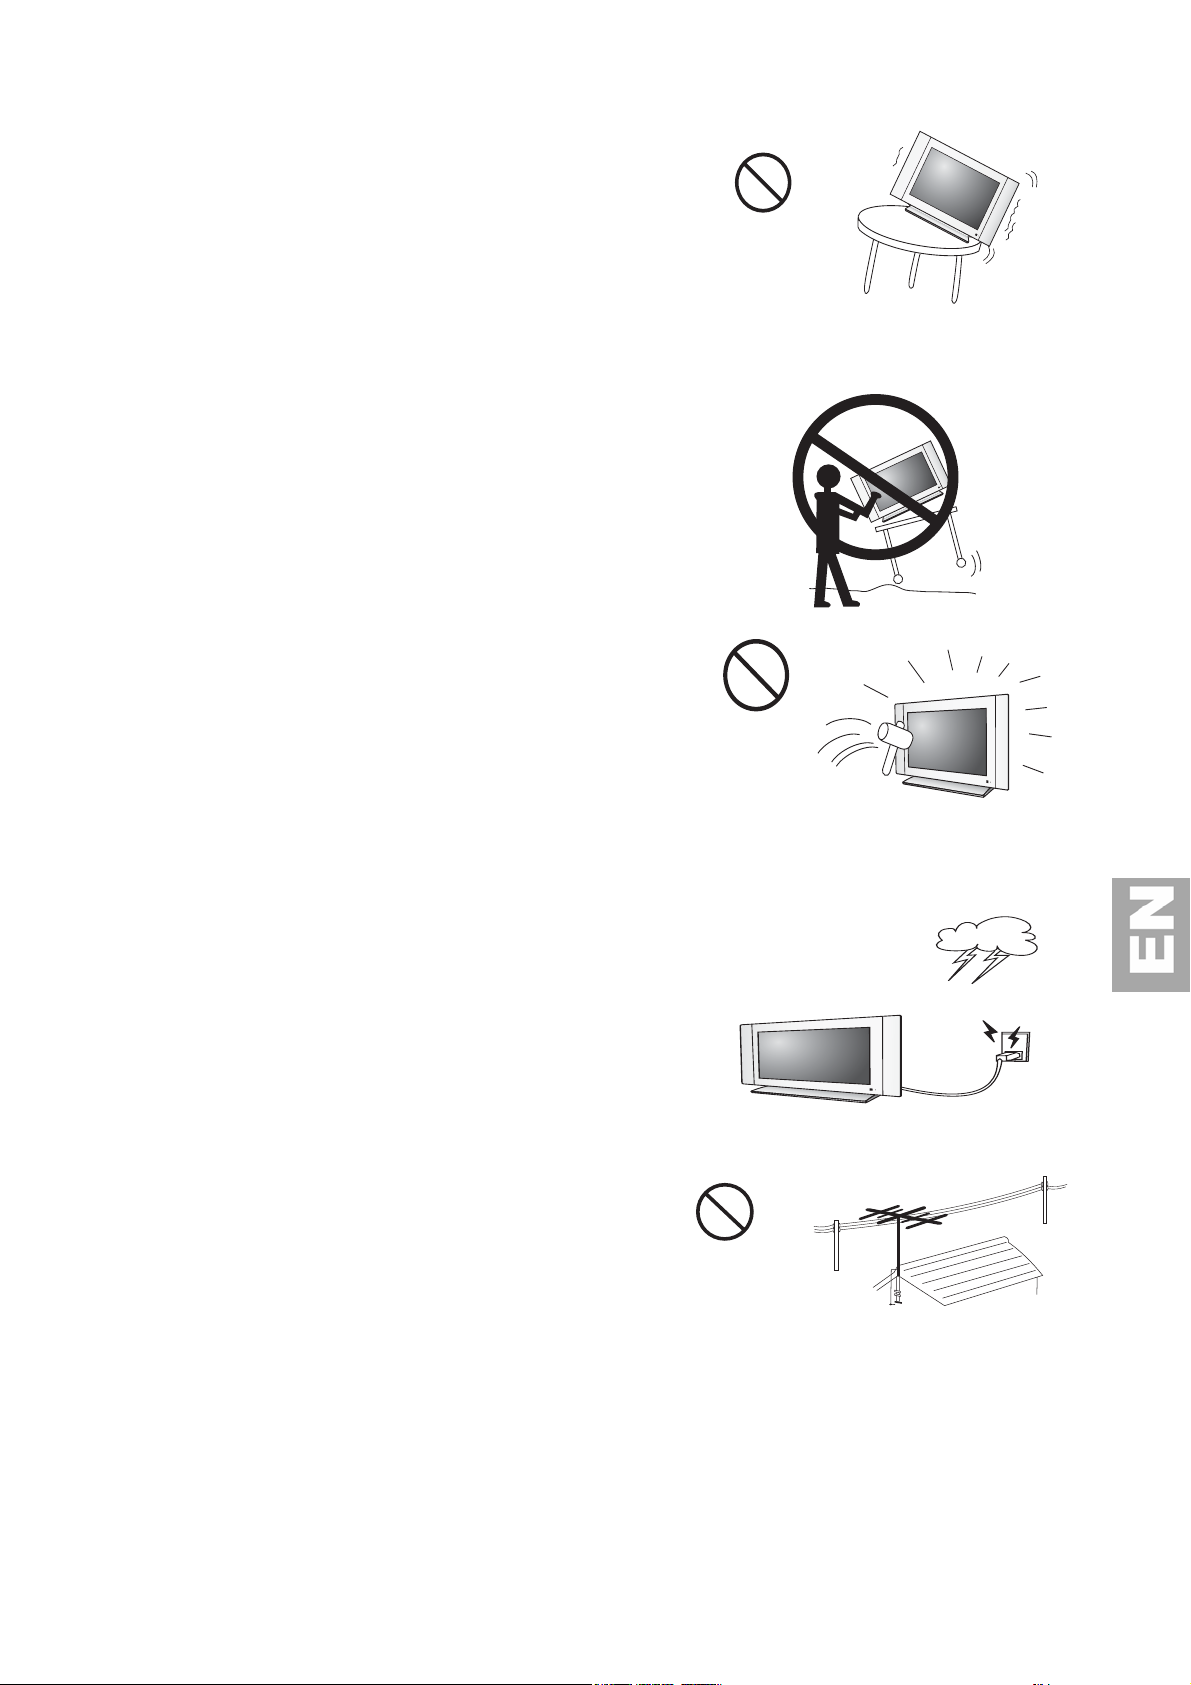
20.Stand—Do not place the product on an unstable trolley,
g
stand, tripod or table. Placing the product on an unstable base
can cause the product to f all, resulting in serious personal
injuries as well as damage to the product. Use only a trolley,
stand, tripod, and bracket or table recommended by the
manufacturer or sold with the product. When mounting the
product on a wall, be sure to follow the manufacturer’s
instructions.
Use only the mounting hardware recommended by the
manufacturer.
21.Careful move— When relocating the product placed on a
trolley, it must be moved with the utmost care. Sudden stops,
excessive force and uneven floor surfaces can cause the product
to fall from the trolley.
22.Panel protection—The LCD panel used in this product is
made of glass.
Therefore, it can break when the product is dropped or
impacted upon by other objects. Be careful not to be injured by
broken glass pieces in case the LCD panel breaks.
23.Pixel defect—The LCD panel is a very high technology product, giving you finely detailed pictures.
Occasionally, a few non-active pixels may appear on the screen as a fixed point of blue, green or red.
Please note that this does not affect the performance of your product.
Fo r added protection for this television equipment during a
lightning storm, or when it is left unattended and unused for lon
periods of time, unplug it from the wall outlet and disconnect
the antenna. This will prevent dama ge to the equipment due to
lightning and power-line surges.
An outside antenna system should not be located in the vicini ty
of overhead power lines or other electric light or power circuits,
or where it can collide with such po wer lines or circuits. When
installing an outside antenna system, extreme care should be
taken to keep from touching such power lines or circuits, as
contact wi th them might be fatal.
3
Page 4
I
e
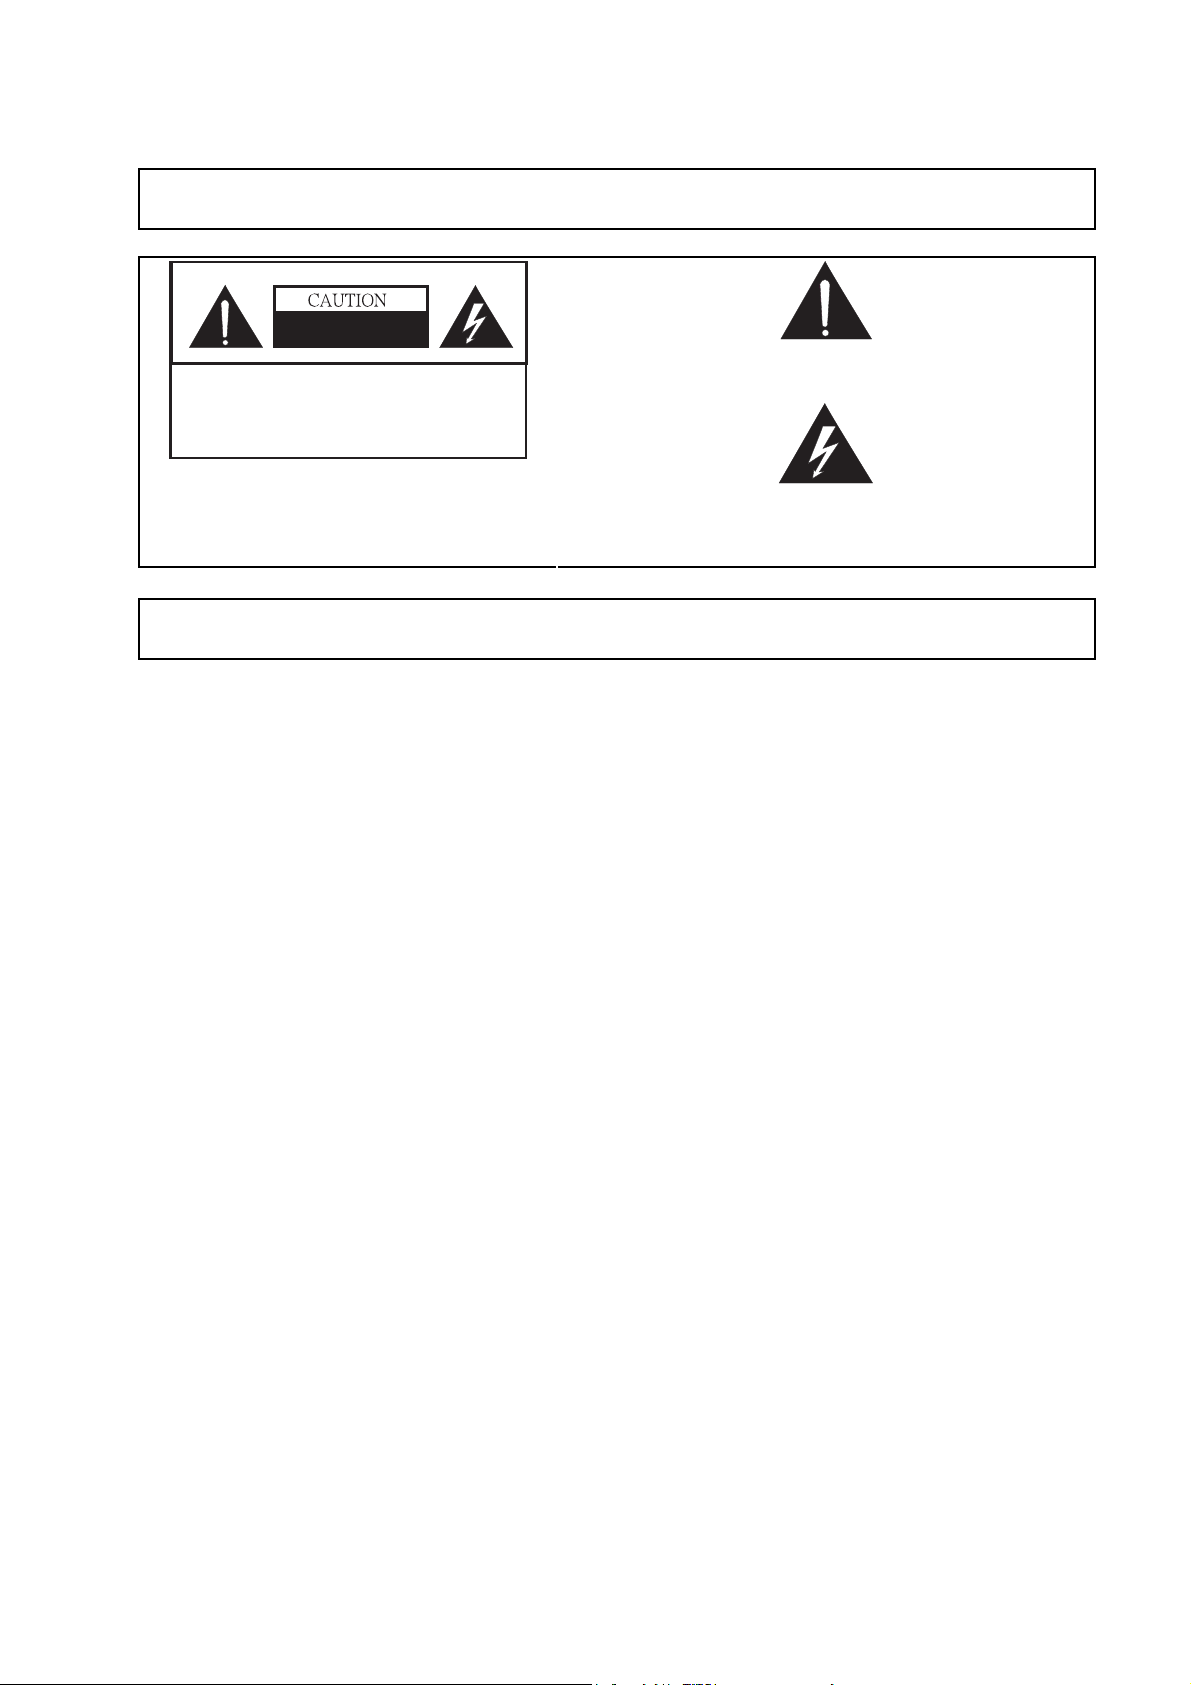
RISK OF ELECTRIC SHOCK
DO
NOT OPEN
s
s
e
IMPORTANT INFORMATION
WARNING: TO REDUCE THE RISK OF FIRE O R ELECTRIC SHOCK, DO
NOT EXPO SE THI S PRODUCT TO RAIN OR MOISTURE.
RISK OF ELECTRIC SHOCK
DO NOT OPEN
CAUTION: TO REDUCE THE RISK OF ELECTRIC SHOCK,
DO NOT REMOVE COVER (OR BACK).
NO USER-SERVICEABLE PARTS INSIDE.
REFER SERVICING TO QUALIFIED SERVICE
PERSONNEL.
The exclamation point within a triangle is intended to alert the user to th
p r esen c e of impor tan t op era tin g and mainte na nce (se r vic ing) instructions in
the literatu re accompan yin g th e product.
The lightning flash with arrowhead symbol, within an equilateral triangle, i
i n t en d ed to a l er t th e u ser to t h e p r e sen c e o f un in su l a t ed “d anger o u
v o l t ag e ” wi th in t h e p r o d uc t ’ s en c lo sur e th a t ma y b e o f su f f i c i en t magnitud
to constitute a risk of electric shock to persons.
CAUTION: TO PREVENT ELECTRIC SHOCK, MATCH WIDE BLADE OF PLUG TO WIDE
SLOT, FULLY INSERT.
II
SAFETY TIPS
Please read and follo w the safety tips listed below to ensure the equipment is free
from da mage, and to ensure that n o injury will occur as a result of improper use.
z
Do not insert any object, especially metal or liquids, into the TV.
z
Do not place any objects containing water or any other liquid on top of the TV.
z
Do not place the unit in direct sunlight, near heaters or in extremely dusty or humid locations.
z
Do not install this system outdoors or otherwise expose it to the elements.
z
Do not place heavy objects on top of the TV.
z
If the power cord is damaged or frayed in any way, electr ical shock and/or fire may result.
z
Please do not place objects on the power cord, and keep the cord away from heat-emitting devices. Should
the power cord become damaged in any way, please contact yo ur dealer for a replacement cord.
z
Do not remove the cover of the TV f or any reaso n. If any problems arise with the unit, please contac t your
dealer for service. Remo ving the covers will void the warranty.
III
WARNING
Before Setting Up
Do not place the TV on sloped or unstable surfaces.
z
The TV may fall or tip over.
Do not place any objects on top of the TV.
z
If water spills o nto the LCD TV or foreign objects get inside it, a short-circuit may occur which could result
in fire or electric shock. If any foreign objects get inside the LCD TV, please consult an Authorized Dealer.
Do not cover the ventilation holes.
Doing so may cause the LCD TV to overheat, which can cause fire or damage to the set.
AC Power Supply Cord
The LCD TV is designed to operate on 100~240 V AC, 50/60 Hz.
Securely insert the power cord plug as far as it will go.
z
If the plug is not fully inserted; heat may be generated which could cause fire. If the plug is damaged or the
wall socket plate is loose, they should not be used.
Do not handle the power cord plug with wet hands.
z
Doing so may cause electric shocks.
4
Page 5

Do not do anything that might damage the power cable. When disconnecting the power cable, hold
the plug, not the cable.
z
Do not make any modifications, place heavy objects on, place near hot objects, heat, bend, twist or forcefully
pull the power cable. Doing so may cause damage to the power cable, which can cause fire or electric shock.
If damage to the cable is suspected, have it repaired at an Authorized Service Center
If the LCD TV is not in use for a long period of time, unplug the power cord from the wall outlet.
If problems occur during use
If a problem occurs (such as no picture or no sound), or if smoke or an abnormal odor is detected
from the LCD TV, unplug the power cord immediately.
z
Continuous use of the Display under these conditions might cause fire or permanent damage to the unit.
Have the Display evaluated at an Authorized Service Center. Services to the Display by any unauthorized
personnel are strongly discouraged due to its dangerous high voltage nature.
If water or foreign objects get inside the TV, if the TV is dropped, or if the cabinet becomes
damaged, disconnect the power cord plug immediately.
z
A short-circuit may occur, which could cause fire. Contact an Authorized Service Center for any repairs that
need to be made.
IV
CAUTION
When using the LCD TV
To turn o ff the main power, be sure to remove the plug from power o utlet. The power outlet socket should be
installed as near to the equipment as possible, and should be easily accessible.
Be sure to disconnect all cables before moving the LCD TV.
z
Moving the Display with its cables attached might damage the cables, which, in turn, can cause fire or electric
shock.
z
Disconnect the power plug from the wall outlet as a safety precaution before carrying out any
cleaning.
Electric shocks can result if this is no t done.
Clean the power cable regularly to prevent it from becoming dusty.
z
Built-up dust on the power cord plug can increase humidity, which might dama ge the insulation and cause
fire.
Unplug the cord from the wall outlet and clean it with a dry cloth.
z
Do not insert any objects or liquids into the unit.
z
Do not expose the unit to water o r moisture, or otherwise to the elements
z
Do not open the unit for any reaso n. Doing so will void the warranty!
z
Unplug the unit if it will not be used for an extended period of time
z
Avoid placing the unit near sources of heat
z
Avoid placing the unit in direct sunlight
z
In any event, if any problems arise, contact your dealer immediately!
0871 712 1312
0.10 £ / mn)
5
Page 6

2. INTRODUCTION
Congratulations on your purchase of a THOMSON LCD TV. Your LCD TV will provide you with many years
of enjoyment no other LCD TV can match. It is com patible with to day’s current NTSC, PAL and S ECAM systems,
as well as tomorrow’s DTV standards. This TV is extremely easy to use and features high performance picture
quality. The LCD TV is extremely versatile; it can be mounted on a wall or table stand, and it can be used in any
ambient light environment.
This manual will explain how to use your LCD TV, as well as its features, benefits and o ther impo rtant information.
Please be sure to read this manual before installing or operating your LCD TV, especially the safety precautions!
I SUPPLIED ACCESSORIES
Make sure the following accessories are provided with the product.
User Manual(IB) (x1)
Power Cord for European Type (x1)
Remote Control (x1)
Power Cord for UK Type (x1)
RF Coaxial Cable
Size AAA Dry Battery (x2)
.
D-Sub to Component Cable
Note: The AC Power cord type is different in
di ffe re nt terri tories
6
Page 7
II PREPARATION
Using the Remote Control
Use the remote contro l by pointing it towards the remo te
sensor window of the set. Objects between the remote contro l
and sensor window may prevent proper operation
Cautions regarding use of remote control
z
Do not expose the remote control to shock. In addition,
do not expose the remote control to liquids, and do not
place in an area with high humidi ty.
z
Do not install or place the remote control under direct
sunlight. The heat may cause deformation of the unit.
z
The remote control may not work properly if the remote
sensor window of the main unit is under direct sunlight or
stro ng lighting. In such a case, chan ge the angle of the
lighting or LCD TV set, or operate the remote control
closer to the remo te senso r windo w.
Batte ri es for the Remote Control
If the remote contro l f ails to operate the LCD TV functio ns, replace the batteries in the remote co ntrol.
Open the battery cover. Insert batteries (size-AAA batteries,
supplied with product).
Replace the cover and slide in reverse
until the lock snaps.
(Slide the cover while pressing
down.)
(Place the bat teries with their
terminals correspo nding to the (+)
and (–) indications in the battery
compartment.
Precaution on battery use
Improper use of batteries can result in a leakage of chemicals and/or explosion. Be sure to follow the instructions below.
z
Place batteries with their terminals corresponding to the (+) and (–) indications.
z
Only use the battery types specified.
z
Do not use rechargeable batteries.
z
Different types of batteries have different characteristics. Do not mix batteries of different types.
z
Do not mix old and new batteries. Mixing old and new batteries can shorten the life of new batteries and/or cause old
batteries to leak chemicals.
z
Do not expose batteries to excessive heat, throw them in a fire, recharge them or try to open them, as this could cause
them to leak or explode.
z
Remove the batteries from th e r emote contr ol if you are n ot u sin g it for a long period of time (several weeks).
z
Remove batteries as soon as they are non-operable. Chemicals that leak from batteries can cause a rash. If chemical
leakage is found, wipe with a cloth.
z
The batteries supplied with the product may have a shorter life expectancy due to storage conditions.
z
If the remote control is not used for an extended period of time, remove the batteries from the remote control.
7
Page 8

3. GETTING STARTED
Switching on
Follow the instructions on this page on how to switch on your TV set and the remote control before going on to following
pages describing how to use the remote control and the channel set-up procedure.
1.
Connect the female plug to AC power input of the set.
2.
Connect the male plug to the wall outlet as
illustrated.
Equipment for the UK is supplied with a mains cable fitted with a
moulded plug.
This plug contains safety components and must not be replaced
by one sold by general retailers. It is fitted with a fuse that
protects your television.
If your set has stopped working, the fuse may have blown. If it
has, replace it with an identical AS TA or BSI certified (BS1362)
5-amp fuse.
3. Connect the outside aeri
al
or cable network to the
socket at the back of the TV set.
The aerial socket (75 Ohms - VHF / UHF / cable) can be used
for connecting an external aerial or other equipment fitted with a
modulator (video recorder, satellite receiver, etc.).
We recommend that you do not connect other equipment (video
recorder, satellite receiver, etc.) to your TV set to begin with, so
as not to complicate the set-up procedure with the additional
steps involved. Connect them when you have finished setting up
the channels by referring to page 21 of this manual.
4. Switch the TV on by pressing the on/off button on the
right side.
You will find a description of how to use the remote control on
page 9. Then go to page 11 for information on the initial set-up,
or to page13 for information on manual set-up (if the channels
have already been set up on your TV).
8
Page 9

Getting started
Remote control TV functions
Most of your television’s functions are available via the menus that appear on the screen .The remote control
supplied with your set can be used to navigate through the menus and to configure all the general settings.
This page contains the description of the remote control.
DVD To access DVD mode.
VCR To access VCR mode.
TV To access TV mode.
Press this button to control the television.
Light To provide information:
This function is also available in VCR and DVD modes.
Standby / quit standby.
- it lights up when you press a button
- it indicates the status when the remote control is
being programmed (see page 10)
- if the batteries are run down, it flashes when you
press a button.
To control the volume.
To switch the sound off and back on again.
RETURN To return to the previous menu or the previous program
PR+/PR- To change channels
EXIT To exit a menu
MENU To access the OVERVIEW menu
To select menu options
To set functions, change values, enable and disable
functions, and to select the picture format (In TV, AV and
PC mode)
OK
To confirm a selection.
Coloured buttons:
PRESETS (red button) picture preset settings
Zzz/LIST (green button) sleep timer setting
INFO (yellow button) status information
GUIDE (blue button) disabled in TV mode
TEXT (purple button) Teletext
The coloured buttons can also be used for operating Teletext.
0-9 To select a channel by its number.
Single digit entry is the default so in the case of channel numbers with two
digits, press 0 to display “--”, then enter the channel number.
AV To select an appliance connected to an AV socket.
9
Page 10

Using the remote control for other equipment
The remote control supplied with your set can be used for other equipment, such as video recorders, PC or DVD
players. This page provides information concerning the remote control’s use with these types of equipment.
VCR
DVD
MENU
OK
EXIT
0-9
PR+/PRAV
REV
PLAY
FWD
STOP
PAUSE
REC
Programming the remote control
Automatic code search
This method can be used to automatically find the most appropriate code protocol for your appliance.
1.
Switch on the appliance you wish to use the remote control with.
2.
Press the relevant button f or this appliance on the remote control, and while holding this button down, press
VCR
Press the VCR button
On/Standby
To display the main menu
Vertical scrolling in menus
Horizontal scrolling in menus
To confirm an action
To close a menu
To directly access channels or enter
numeric values
To change channels
To select AV input
Rewind
Play
Fast forward
Stop
Pause picture
Record
DVD
Press the DVD button
On/Standby
To display the main menu
Vertical scrolling in menus
Horizontal scrolling in menus
To confirm an action
To close a menu
To enter numeric values or select options
in menus
To select
Rewind
Play
Fast forward
Stop
Pause picture
the standby button until the remote control light comes on. Release the two buttons.
3.
Point the remote control at the appliance and press PLAY. Wait until the light stops flashing. If the appliance has
not gone into standby mode after five seconds, press the PLAY button again to continue the search for the next
set of codes.Repeat this operation until the appliance goes into standby mode. There are 20 sets of codes.
4.
When the appliance goes into standby mode, press the standby button on the right up side to switch it on
again. Then press the REV button to put it back in standby mode, and if necessary, keep pressing until the
appliance goes into standby.
5.
Press the STOP button and hold it down until the remote control light goes off.
Note: you can cancel the programming operation at any time by pressing the EXIT button.
Manual programming
This metho d involves carrying out a manual search fo r the code to be used for controlling your other appliances.
1.
Switch on the appliance you wish to use the remote control with.
2.
Press the relevant button f or this appliance on the remote control, and while holding this button down, enter
one of the codes relevant to your make of appliance (there is a list of codes at the end of this manual). If the
remote control light flashes you have entered the wrong code or it is not possible to program the remote control.
3.
Point the remote control at the appliance and press the relevant button (VCR or DVD). Press the standby
button. If the appliance does not go into standby mode, try ano ther co de.
Depending on the year of manufacture and the type of appliance, some functions may not be available.
Certain codes may cover more functions than others. Test the functions you can control and, if appropriate, try
other codes.
Note here the code(s) which work best.
VCR
DVD
When you change the remote control’s batteries, remember to re program it.
10
Page 11

4. CHANNELS SET-UP
Note :If you use the device as LCD Monitor function not a TV, you may skip the chapter.
Initial set-up
# AUTOMATIC INSTALLATION
Return
Standard EURO…
Start Running…
Frequency 150.75MHz
Programmes found 02
1. When you first switch the TV set on, the language selection menu appears.
Choose which language you want the menus to appear by using the ¿ / À buttons.
When you select a language, it is applied to the menus immediately.
2. Confirm with OK. Countries menu will come out and a list of co untries will appear.
3. Select the relevant country by using the ¿ / À buttons.
This is the country you are in, or the country whose channels you want to receive if living near its borders
4. Confirm with OK. The AUTOMATIC INSTALLATION menu will display.
5. The Standard option is selected.
Select a suitable standard using the
Note: the following standards are available to choose from: UK for the UK and Ireland, FR for France and Luxembourg,
DK for Eastern Europe, the Middle East and Asia, EURO for Western Europe, Australia and New Zealand.
6. Then select the Start option by using the À button and press OK to start the search.
During this time the message “Running” appears next to the Start option and the Frequency and PR
found
(Programme found)
If you press the EXIT button before the end of channel searching, the channels already found are stored.
Once the search has ended the ORGANISER menu appears (see following page).
Note : You may subsequently return to AUTOMATIC INSTALLATION menu by selecting the Automatic
installation lin e in the INSTALLATION menu.
½ / ¾
buttons.
options appear, info rming you of the process of installation procedure.
Initial set-up involves selecting all the settings required
to be able to search for and store all the channels you
can receive.
Make sure that the television is switched on and follo w
all the steps in turn specified on this page.
.
11
Page 12

Organiser
# ORGANISER
Return
Select programme 01
Swap with programme -Change pr. name BBC1
Delete programme 01
Arranging channels in order
The Select programme line is selected.
Display the channel number to be changed using the PR+/PR- buttons or the 0-9 keys.
Select the option Swap with programme. Enter the new programme number using the 0-9 keys.
Press OK to confirm. When you successfully finish the swap, the bottom help line will show
“ The programmes have been swapped“ message. Follow the same procedure for the other channels.
Deleting channels
The Select programme line is selected.
Display the channel number to be deleted using the PR+/PR- buttons or the 0-9 keys.
Select the Delete programme option and press the OK button to delete the channel.
Once this channel has been deleted the bottom help line will show “ The programme has been
deleted“ message.
Note : you can use AUTOMATIC UPDATE menu (from Installation menu) to restore the deleted programme
Naming or renaming channels
The Select programme line is selected.
Display the number of the channel whose name you want to change using the PR+/PR- buttons.
The relevant channel appears. Select the Change pr. name option and press the ¾ button to place the cursor
on the first character.
Using the ¿ / À buttons, select a character from the list, which includes letters from the alphabet, numbers
between 0 and 9, the characters +,. and space. Go on to the next character or back to the previous character
using the ½ / ¾ buttons and start the procedure again.
Press OK to confirm. Names can have a maximum of six characters.
Press EXIT to close the menu.
Note : You may subsequently return to ORGANISER menu by selecting the Organiser line in the
INSTALLATIO N menu.
By using this menu you can change the channels order
arranged during automatic set-up, name and rename
channels, delete duplicate channels or tho se with poor
reception quality.
Fo llow the help messages at the bo ttom of the screen
and ref er to a TV programme guide to help identify the
channels.
12
Page 13

Manual channel set-up
Follow the procedure given on this page if you find that some channels have not been stored during the initial setup. This can happen if you are setting up cable network channels. Setting up channels manually requires every
setting for a particular channel to be entered, one at a time.
# MANUAL INSTALLATION
Return
Standard EURO…
Frequency 150.75MHz
Programme name BBC2
Fine-tuning ------|-- ---- ---Store on programme 02
Decoder
Teletext char. set 1…
1. Select the Standard option and then the relevant standard for your country using the ½ / ¾ buttons.
Note: the following standards are available to choose from: UK for the UK and Ireland, FR for France and Luxembourg,
DK for Eastern Europe ,the Middle East and Asia, EURO for Western Europe, Australia and New Zealand.
2. Select the Frequency option. Use the ½ or ¾ button to start the search in descending or ascending o rder.
When a channel is found, pictures appear.
Note : If the channel name is found,it is displayed next to Programme name opt ion.
3. If the picture is not clear you can adjust the setting. You do this by selecting the Fine tuning option and
adjusting it w ith the ½ / ¾ buttons.
4. If the channel is encrypted and you want to connect a decoder, select the Decoder option and check the box
by pressing the OK button.
5. Then select the Teletext char. set option and choose the character set that will be used for Teletext on this
channel using the ½ / ¾ buttons. The following character sets are available:
1 : Western Europe
2 : Eastern Europe
3 : Turkish and Greek
4 : Russian and Bulgarian
5 : Arabic
6 : Farsi
The character set selected determi nes how characters are displayed on Teletext screens.
6. Select the Store on programme option to assign a number to the channel. Enter the number using the
numeric buttons. Press the OK button to confirm.
Important: As soon as you change a setting in the MANUAL INSTALLATION menu, the channel number starts
flashing under the Store on programme option .To confirm your change you must select the Store on programme
option and press OK. If you do not confirm the chang, it will be cancelled when you change channel or put the television
into standby mode.
Repeat this procedure (2 to 6) to find other channels.
Display the OVER VIEW menu by pressing the
MEN U button.
Select the Installation option and press OK to
confirm .
Select the relevant country and press OK.
Select the Manual Installation option from the
INSTALLATIO N menu and press OK to conf irm.
Automatic update:
Auto update allows you to set up channels just l aunched or any channels that are missing or wrongly set up.
You can access Automatic update menu by selecting the line inside the INSTALLATION menu.
Return: return to the INSTALLATION menu
Standard: Select the relevant standard for your country using the ½ / ¾ buttons.
Note: the following standards are available to choose from: UK for the UK and Ireland, FR for France and Luxembourg,
DK for Eastern Europe ,the Middle East and Asia, EURO for Western Europe, Australia and New Zealand.
Start: Press OK to start the auto update function
The Frequency is incrementing during the progress of the searching. “New pr. found” is incremented each time
when a PR, which is not already installed, is found. When the highest frequency is reached, the auto update fuction
will stop. Or if you press EXIT button, you will also stop the auto update fuction.
.
13
Page 14

5. OPERATION
General operation
Switching the TV set on and off
To switch the TV set on, press the button located o n the right side of the set.
When the set is on, the indicator on the front is green.
Standby mode
Press the button on the screen right side of TV or on the remote co ntrol.
The TV set remains powered up, but with low energy consumption.
When the TV set is in standby mode, the indicator on the front is red.
Quitting standby mode
- Press the or any numeric button on the remote control,
- press the PR+/PR- buttons to switch on the television at the last channel or AV programme you were watching,
- press the AV button to switch the television on at the last AV programme you were watching.
Volume
Volume contro l: use the VOL + / - butto ns on the right side of the TV set o r press the same buttons on the
remo te contro l to increase or decrease the volume.
Sound mute: press the button to temporarily mute the sound. Press this button again or the
restore it.
Displaying status information
In TV mode, press the yellow button (INFO) on the remote control to display the number and name of the
channel you are watching, the type of sound, the zoom or format type, sound mute status and the sleep
time r status (if active ).
TV lock message is displayed if the function is activated under the PREFER ENCES menu.
When you switch on the television or change channels, the number and name of the channel are displayed if you
entered its name under the ORGA NISER menu.
In PC and PIC(see page 21) modes, press the yellow button (INFO) on the remote control to display the
Resolution ,Vertical and Horizontal frequency.
Accessing channels
Using the numeric buttons:
- for channels 1 to 9, press the corresponding button.
- for channels 10 to 99, press the 0 button to display “--“, then enter the two digits.
Using the PR+/PR- buttons: scroll through the channels.
AV programmes are not included in the cycle unles s you use the buttons on the righ t sid e of the TV set.
Accessing AV programmes
Press the
programmes.
AV selections loop: AV1, AV1RGB, AV2, AV2-S, YCrCb, YPrPb, DVI, PC
AV
button to display the last selected audio-visual programmes and scan through the other audio-visual
VOL
+
butto n to
14
Page 15

Zoom
In TV mode, you have the o ptio n of changing the display format and using the zoo m function via the ½ / ¾
buttons. Here is selections of Zoom:
4/3 Format - picture in 4/3 format
Zoom 14/9 - picture in 14/9 letterbox format
Zoom 16/9 - picture in 16/9 letterbox format
Zoom 16/9 up - picture in 16/9 letterbox format moved up for subtitles
Cinerama - Cinerama
16/9 Format - picture in 16/9 format
Note : The Zoom type can’t be change when menu appears on the screen. In Teletext mode, the screen alway 4/3 format
but if exiting the Teletext mode, the screen will return the former Zoom level.
When user changes the zoom format, the zoom status will appear temporarily at the bottom of the screen.
Panning function for Zoom
In 14/9 Zoom, 16/9 Zoom, or 16/9 Zoom up, user can shift the picture up and down temporarily by using
button and the panning icon will displ ay.
When the picture reach the upperest positon for the zoom level, the panning icon will show :
When the picture reach the lo west positon for the zoom level, the panning icon will show :
Last programme
Press the RETURN button to return to last watched programm e.
Freeze
Press OK button in TV mode to freeze the picture. Press again OK button to unfreeze the picture.
15
Page 16

Adjusting the sound
; SO UND
Return
Preset Standard…
Balance ------|-- ---- ---- Sound type Stereo…
Auto. volume leveling
Internal speakers
Advanced settings …
Return
Preset
Personal) for the programme you are watching.
Personal option contains the values you have defined for Equalizer settings.
:
go back to OVERVIEW menu
:
use the ½ or ¾ button to select the appropriate setting (Standard, Film, Voice, Music and
Balance: use the ½ or ¾ button to balance the sound between the right and left speakers.
Sound type: this option is used to select the appropriate sound type(Automatic, Stereo, Sound 1, Sound 2,
Sound 3, Nicam, Mono).
The available options depend on the programme you are watching.
The table at the bottom of this page indicates the sound types available for each type of broadcast.
Auto. volume leveling:. Tick the box using OK button if you want to keep the same sound level on all the
channels.
Internal Speakers: the TV set’s speakers are enabled by default - the box is checked.
You can connect amplified speakers or an amplifier to the TV LCD (see the “Othe r inform ation” chapter).You
can then get the most out of the sound using all the speakers or you can disable the internal speakers.
Uncheck the box to do this, by pressing OK to confirm.
Advanced Settings: Press OK to access following options.
Treble ,Mid Treble, Medium, Mid Bass, Bass (Equalizer): select each band in turn and make the necessary
adjustments by using the ½ / ¾ buttons.
These settings are automatically stored under Pe rsonal in the Preset opt ion.
Dolby Virtual : Check the box by pressing OK to enable Dolby Virtual effect setting.
Surround effect: adjust the surround effect as required using the ½ / ¾ buttons.
Press EXIT to close the menu or select the option Return and press OK to return to the SO UND menu.
Broadcast Options
Mo no Auto matic, Mo no
Nicam mono Nicam, Mono
Nicam / IRT stereo Stereo, Mono
Bilingual Nicam So und 1, Sound 2, Sound 3
Bilingual IRT So und 1, Sound 2
AV Stereo, Sound 1, Sound 2
;
Display the OVER VIEW menu by pressing the
MEN U button.
Select the Sound option and press OK to confirm.
The SOUND menu appears with the following
options:
Manufactured under license from
Dolby Laboratories.
“Dolby”, and the double-D symbol are
trademarks of Dolby Laboratories.
16
Page 17

Adjusting the picture
The PICTURE menu can be used to adjust the current settings, to apply preset settings and define your own
preferred settings.
ÕPICTURE
Return
Preset Studio…
Brightness ------|----------Contrast ------|-- ---- ---- Colour ------|-- ---- ---- Sharpness ------|-- ---- ---- Tone Warm…
Other settings …
Return: use the butto ns to go back to the OVERVIEW menu
Preset: use the ½ / ¾ buttons to select from the preset settings o ffered (Standard, Film, Sport, Studio,
Personal) the one which suits best the programme you are watching.
The Personal option contains the values you have defined for Brightness, Contrast, Colour and Sharpness
settings.
Brightness, Contrast, Colour, Sharpness: adjust these settings as required using the ½ / ¾ buttons.
Brightness, Contrast, Colour and Sharpness settings are automatically stored under Personal in the Preset
option
Preset, Colour and Sharpness options are not displayed in PC mode.
Tone : this o ptions controls colour temperature.
Use the ½ / ¾ buttons to select between Cold, Neu tral and Warm.
Other settings: This option is not displayed in PC mode.
Press OK to access following options.
Return: use the butto ns to go back to the PICTURE menu
Noise Reduction: adjust the noise reduction strength by using the ½ / ¾ buttons.
You can choose between Off, Low, Me d i um and High.
Black Expand : adjust these settings as required using the ½ / ¾ buttons.
You can choose between Off, Low, Medium and High.
Auto format: by default, checkbox is on
The TV (16/9) adapts to the broadcast picture format if the equipment connected via a Euro-AV (scart) socket
provides a control signal.
With AV2 and Component YCrCb, Auto format is not displayed.
Tint: This option is only available for NTSC audio-visual sources.
Adjust the tint of the picture using the ½ / ¾ buttons.
If the device is in PC mode you can access f o llo wing functions in Picture Menu.
Phase, Synchronization, V-Position, H-Position
Select the desired option and adjust as required by using the ½ / ¾ buttons.
Press EXIT to close the menu.
Note : pressing PRESETS button (Red) in TV or PC mode out of the menu s opens the PICTURE menu with the
Preset line highlighted.
Display the OVER VIEW menu by pressing the MEN U
button.
Select the Picture option and press OK to confirm.
The PICTURE menu appears. It offers the following
options:
17
Page 18

Setting the Preferences
The Preferences menu can be used to set your preference including Eco mode, Permanent PR, Back light,
Sleep timer, TV Lock and Language.
PREFERENCES
Return
Eco mode
Permanent pr. number
Backlight Normal…
Sleep timer 0:00
TV lock
Language English…
Note: TV, PC and DVI mode have the same Preferences Menu
Return: use the butto ns to go back to the OVERVIEW menu.
Eco mode : When this function is on, the LCD TV will go to stand by automatically after ten minutes without
video signal. Tick the box by pressing OK to activate the function.
If in PC or DVI mode, this Eco mode selection will enable the PC po wer management function.
Permanent pr. number: tick the box by pressing OK to permanently display the number of the channel you are
watching
If the signal source is AV, the AV OSD tag will be displayed permanently.
Back light: this option allows to adjust the backlight of your LCD TV.
Using the ½ / ¾ buttons you can choose between So ft, Normal and Bright.
Sleep timer :
.
Display the OVER VIEW menu by pressing the
MEN U button.
Select the Preferences option and press OK to
confirm .
The P REFERENC ES menu appears. It offers the
following options
1. Select the Sleep timer option.
2. Set an automatic shut-off time (from 0 to 4 hours in 15-minute intervals) by using the ½ / ¾ buttons.
Set the time to 00:00 to disable this function.
TV Lock
This function allows the parents:
Either to lock the LCD TV set by putting it into to standby mode or to choose a programme their children will be
able to watch until the sleep timer expires.
Tick the box by pressing OK to activate the TV lock.
When you turn on the function, we suggest taking remote control away. In this case, children can only adjust the volume or
switch the LCD TV off.
Once in standby mode, TV LCD can then only be switched on using the remote control.
Language
Using the ½ / ¾ buttons select your preferred language for menus.
Available languages are : English, French, German, Italian, Spanish .
Press EXIT to close the menu.
Note: pressing Zzz (Green ) in TV mode out of the menu s opens th e PREFERENCES menu with the Sleep timer line
highlighted.
18
Page 19

Teletext
The Teletext service is available in many countries under a variety of names (TOP Text, Fastext, FLOF text,
Video text). It is provided as a free service by televisio n broadcasters. This service provides a real wealth of
information, available at any time, on weather, sports results, news, games, etc. The information is presented in
pages or organised in topics specified in colour on the screen and you can access this inf ormation by simply
pressing the buttons of the relevant colour on the remote control.
Accessing Teletext
Press the TEXT button o n the remote control. Teletext will display the l ast page selected, or if you have changed
channel, the index page.
To display a page, enter its 3-digit number or use the PR+/PR- buttons. The page appears after a few moments.
Navi gation bar
The navigation bar, located at the bottom of the screen, provides access to the next three pages and the previous
page by pressing the relevant colour button on the remote control.
AS the picture for example:
Press red to page 201; Press green to page 202; press yellow to page 203; press blue to page 199
Press the MENU button to display the naviga tion bar and access the following functions:
STOP: this function is used to stop pages from follo wing on in successio n. Press the re d butto n to select this
function. The word STOP (or an icon) appears in place of the page number.
Press the red button again to allow the pages to follo w on again.
??? (hidden answers): press the green button to reveal a hidden answer (for example, in games). Press the green
button again to hide the answer.
ZOOM: press the yellow button:
1st key press: page is zoomed in and displays rows 1 to 12
2nd key press: the page is zoomed and displays rows 13 to 24
3rd key press: the page returns normal size and displays full page.
MIX (mixed display): press the blue button to display Teletext against a transparent background. Press this button
again to return to normal display.
Changing the character set temporarily
You can change the character set used for Teletext, if the existing one is not suitable for the channel you are
watching.
You do this by pressing the MENU button to display the navigation bar.
Then press OK to display the number of the character set currently being used in place of ???.
Use the green button to select another character set.
The character set selected in the INSTALLATION menu will be restored when the TV set is switched off or
enters standby mode, o r when yo u change channels.
Press the EXIT button to quit the Teletext function.
Note : In teletext mode, the Vol+/Vol and Mute are still functional but on screen will not show volume bargraph and mute
symbol
Other Teletext functio ns
Newsflash
When a newsflash is detected, MIX is replaced by N in the navigation bar. Press the blue button to display the
newsflash. In the case of an update, the Teletext function is enabled and displays the new information.
This function is disabled if TV changes the programme, enters standby mode or is switched off.
Press the EXIT button to quit the Teletext function and return to TV mo de.
19
Page 20

Subtitles
Some channels provide subtitles for some of their programmes. The number of the relevant pages is specified on
the Teletext index page.
To display subtitles, enable the Teletext function, find the number of the page displaying the subtitles and enter it.
Once the relevant page is found, the subtitles appear in the TV picture. The navigation bar disappears after a
couple of seconds. To display the top bar, press the purple (TEXT) button.
Press the EXIT button to quit the Teletext function.
Direct access to subpages
So me information is spread acro ss mo re than one page (“---- “ displayed next to the page number). To access
subpages, press the ½ or ¾ button.
Enter the subpage number(4 digits) by using the numeric buttons.
To cancel subpage mode, please select a new page number by pressing PR+/PR-, press the ½ or ¾ button, or
change channels.
Fastext
If Fastext is available, direct access to previous and subsequent pages is replaced by coloured bars (red, green,
yellow and blue), which provide links to the topics you can access by pressing the relevant colour button. Other
topics accessible in the same way can also be displayed. Press the MENU button to go from these links to the
navigation bar.
20
Page 21

6.
OTHER INFORMATION
PIC (Picture in Computer Mode)
When you have connected the PC to TV set (in PC mode), you can open the function by pressing PR+/PR- and
you will watch pro gramme displayed on the top right of the screen.
The picture size is not adjustable, you may move the picture position from top left, top right, bottom left, bottom
right by pressing the ¿ / À key.
The sound will always come from the programme inside the PIC no matter whether the PC is playing video f ile;
however, inside PIC there is no overview function for it but you can change the video input type such AV1,
AV2, AV2-S etc.
PIC is 4/3 picture format and the programme number will permanently display in yellow colour.
You may choose the channel of picture by pressing numeric number (0-9).
Sockets
SCART socket AV1 (input-output)
For a ppli a n ces p roducin g an RGB s i gnal, s el ect AV 1 RGB.
These can mainly be used to connect camcorders (VHS or 8-mm format).
: at the bottom of the TV back side (Fro m right to left)
This socket can be used to connect a range of equipment, including video recorders,
camcorders (VHS or 8-mm), decoders, satellite receivers, DVD players, games
consoles or appliances producing an RGB signal.
To display images from the connected appliance, select AV1 using AV button on the remot e
control.
For some appliances (connected to the SCART socket), this selection is made automatically.
RF signal (Input) for the TV antenna or cable system using defined broadcasting
standards such as BG (Euro), LL' (FR), I (UK) and DKK’(DK).
Audio stereo jack socket (output) This can be used to connect a stereo amplifier, a
hi-fi system or amplified speakers (see below).
Audio (R/L) and video (CVBS) CINCH sockets AV2 (input)
To display images from the connected appliance, select AV2 using AV button on the remot e
control.
S-video socket AV2 and Audio (R/L) (input)
These can mainly be used to connect camcorders (S-VHS or Hi 8 format).
YCrCb component and Audio (R/L) (input)
To display images from the connected appliance, select AV2-S using AV button on the
remot e control
CVBS and S-Video share the same L/R audio input.
YCrCb is for interlacing signal and mainly be used to connect DVD player.
To display images from the connected appliance, select YCrCb using AV button on the
remot e control.
21
Page 22

YPrPb (for Video), D-Sub (for PC) and Audio (input)
LCD TV uses D-Sub (15 pin) connector for YPrPb signal source and the D-Sub also
can be used for PC input.
Note: This model only supplies D-Sub to component line
YPrPb is for progressive signal and mainly be used to connect DVD player or HDTV.
Connect the stereo sound input jack on the back of the LCD TV (near the D-sub
connector) to the audio output terminal of equipment.
To display images from the connected appliance, select YCrCb using AV button on the
remot e control.
DVI and DVI Audio input(R/L)(input)
DVI is digital video interface for PC and Video use but LCD TV DVI connector main
function is for PC input only
Connecting acti ve spe akers or an amplifier (using a jack / CINCH cable not provided).
The audio stereo jack socket located on the back of the LCD TV set can be used to connect active speakers (with
a built-in amplifier) or an amplifier.
Connect the left and the right speaker to the stereo jack socket using a jack / CINCH cable (not provided).
To connect an amplifier, you should connect the LCD TV set’s stereo jack socket to the amplifier’s L and R inputs
using a jack / CINCH cable (not provided).
Connecting headphones
Use the relevant socket on the right side of the LCD TV set to connect headphones or stereo earphones.
Connecting a video recorder
To obtain optimum picture quality, use a SCART cable. However, yo u can also connect a video recorder to the
television using the aerial socket.
If you connect a video recorder only via the aerial socket (witho ut using the SCART socket), switch it on and pla y
a tape.
Then search f or the video recorder’s relevant channel (refer to the relevant sectio n).
If you connect a video reco rder via the aerial socket, you should assign channel 99 to it in order to improve the
picture quality when tapes are being played and in pause mode. However, we recommend you connect your video
recorder via the SCART socket, as it provides better picture and sound quality.
22
Page 23

Connecting a Computer
Method A :
Note:
1.
The display na tive resolution is 1024 x 768. If the signal resolution exceeds the native resolution, it may not
be possible to show fine detail with sufficient clarity.
2.
An adapter is required to use the PC cable (D-sub 15P) to connect a Macintosh computer to the set.
3.
Some PC models cannot be connected to the set.
4.
There is no need to use an adapter for computers with DOS/V compatible D-sub 15P terminals.
5.
Do not set the horizontal and vertical scanning frequencies for PC signals, which are above or below the
specified frequency range.
Connect the D-sub signal terminal o n the back side of the LCD TV to the output of
PC equipment through min D-sub 15 pin cable.
Connect the stereo sound input jack on the back of the LCD TV to the audio output
terminal on the computer.
To display images from the connected computer, select PC using AV button on the remote
control
Method B :
Connect the DVI signal term inal on the back side of the LCD TV to the output of PC
equipment through min DVI cable.
Connect the stereo sound input jack (Audio input near DVI connector) on the back of
the LCD TV to the audio output terminal on the computer.
To display images from the connected computer, select DVI using AV button on the remote
control
For more information about external device co nnections, see the manuals of your external devices.
23
Page 24

n
n
e
n
y
t
e
n
y
t
e
g
TROUBLE SHOOTING
Before you call for service, determine the symptoms and make a few simple checks as shown below.
TV set:
SYMPTOMS
Power does not turn ON
There is no picture or sound
There are spots on the screen
Degraded colors or tints
Improper screen position or size
The image appears distorted
The image is purple
The image appears too bright, and
there is a loss of definition in th
brightest areas of the image.
The image appears too 'washed out',
or the darkest areas of the image
appear too bright.
If “xxx searching” appears, the image
or signal cannot be produced b
display.
“Out of range” appears
Remote Control do es not function
properly
There is no picture or sound, just
noise.
Picture is not clear.
No sound
z
Ensure whether the power plug is securely inserted into the
POSSIBLE CAUSES
receptacle.
z
Ensure the LCD TV power is ON (Indicated by the green LED o
the front of the unit)
z
Reception other than those of broadcasting stations can be
considered.
z
Check for connection to wrong terminal or for wrong input mode.
z
Ensure the communication cable is properly connected betwee
the Video Source and the LCD TV.
z
Check whether your AV equipments is affected by interferenc
from automobiles, trains, high-voltage transmission lines, neo
signs or other potential sources of interference.
z
Check whether all image adjustments have been properly adjusted.
z
Check whether screen position and size have been properl
adjusted.
z
Ensure the TV's aspect ratio is properly set.
z
Check the "Component" or "RGB" setting in the LCD TV and se
it for the appropriate signal type.
z
Check whether the contrast setting is too high.
z
The DVD player is set for a high-level output.
z
The video signal has not been terminated properly somewhere i
the system.
z
Check whether Brightness is set too high.
z
The DVD player may be set at too high a brightness level.
z
Check the cable for disconnection.
z
Check for connection to proper terminal or for proper inpu
mode.
z
Check whether the input signal is acceptable to the display.
z
Check for incorrect battery orientation.
z
Check for dead batteries
z
Check for distance and angle from the display.
z
Check whether remote control is properly being pointed at th
display’s receiver.
z
Check for any obstacle between the remote co ntrol and the
display.
z
Check that the remote sensor window is not under stron
fluorescent lighting.
z
Make sure the antenna cable is properly connected.
z
Consider whether TV signals are being properly received.
z
Make sure the antenna cable is properly connected.
z
Consider whether TV signals are being properly received.
z
Check whether you have selected “Mute” for Audio setting.
z
Make sure the volume is not set to minimum.
z
Make sure that headphones are not connected.
z
Check cables for disconnection.
24
Page 25

Antenna:
SYMPTOMS
The picture is not sharp or the
picture moves.
The picture is doubled or tripled.
The picture is spotted.
There are stripes on the screen or
colors fade.
POSSIBLE CAUSES
z
The reception may be weak.
z
The state of the broadcast may also be bad.
z
Make sure the outside antenna is not disconnected.
z
Make sure the antenna is facing the right direction.
z
Make sure the antenna is facing the right direction.
z
There may be reflected electric waves from mountains or buildings.
z
There may be interference from automobiles, trains, high voltage
lines, neon lights, etc.
z
There may be interference between the antenna cable and power
cable. Try positioning them further apart.
z
Is the unit receiving interference from other devices? Transmission
antennas of radio broadcasting stations and transmission antennas
of amateur radio s and cellular phones may also cause interf erence.
z
Use the unit as far apart as possible from devices that may cause
possible interference.
25
 Loading...