

Thermo Pride CLHS1-050P36N, CLHX1-050E36N, CLHS1-100P48N, CLHX1-075E42N, CLHS1-100T48N User's Information Manual
...Page 1
CONDENSING GAS FURNACE
USERS INFORMATION MANUAL
MODELS:
SINGLE STAGE TWO STAGE
CLHS1-050P36N CLHS1-050T36N CLHX1-050E36N
CLHS1-075P42N CLHS1-075T42N CLHX1-075E42N
CLHS1-100P48N CLHS1-100T48N CLHX1-100E48N
CLHS1-125P60N CLHS1-125T60N CLHX1-125E60N
PLEASE READ THESE INSTRUCTIONS PRIOR TO INITIAL FIRING, OPERATING THE FURNACE, AND
BEFORE PERFORMING ANY MAINTENANCE. THESE INSTRUCTIONS MUST BE LEFT WITH THE
HOMEOWNER AND SHOULD BE RETAINED FOR FUTURE REFERENCE BY THE HOMEOWNER/USER.
THERMO PRODUCTS, LLC.
BOX 217
NORTH JUDSON, IN 46366
PHONE: (574) 896-2133
MG-1044
ECN 5441-MA 160425
MADE IN USA
Page 2

All installations and services must be performed by qualified service personnel.
INDEX
SECTION BEGINNING PAGE
I. SAFETY INFORMATION 3
II. GENERAL INSTRUCTIONS 8
III. FURNACE OPERATION 10
A. WARNINGS BEFORE OPERATING 10
B. OPERATING INSTRUCTIONS 10
C. SHUTDOWN PROCEDURE 11
IV. HOMEOWNER/USER MAINTENANCE INSTRUCTIONS 11
(ROUTINE MAINTENANCE)
A. ANNUAL INSPECTION 12
B. FILTER MAINTENANCE PROCEDURE 12
C. VISUAL INSPECTION PROCEDURE 14
2
Page 3

All installations and services must be performed by qualified service personnel.
I. SAFETY INFORMATION
This and the following page contain reproductions of the various warning and instruction labels placed on the
Thermo Pride Condensing Gas Furnaces. Please read and comply with the contents of these labels.
THIS FURNACE MUST BE INSTALLED SO THERE
ARE PROVISIONS FOR VENTILATING AIR.
CETTE CHAUDIÈRE DOIT ÊTRE INSTALLÉE DE
MANIÈRE À ASSURER UN AIR DE VENTILATION.
3
Page 4
All installations and services must be performed by qualified service personnel.
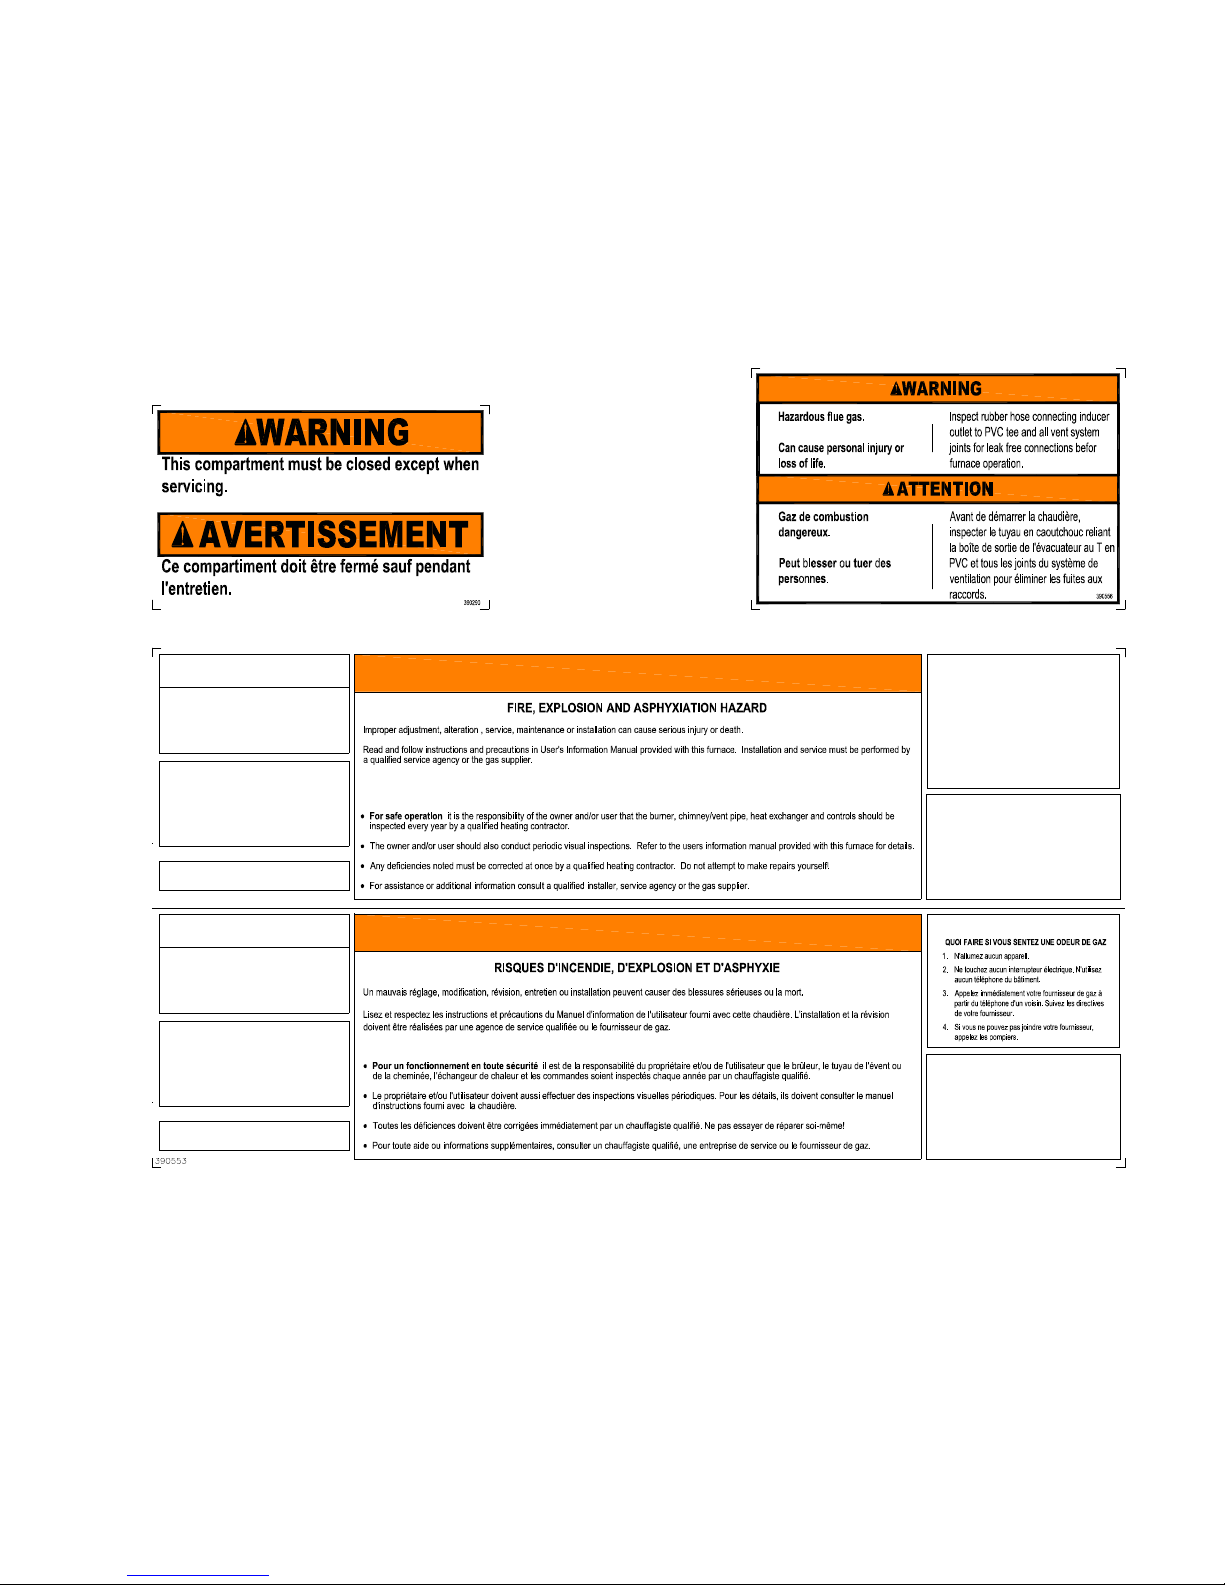
This and the previous page contain reproductions of the various warning and instruction labels placed on the Thermo
Pride Condensing Gas Furnaces. Please read and comply with the contents of these labels.
CAUTION
Moving parts.
Can cause severe personal injury.
Shut off furnace before removing this panel.
Filter maintenance: When it becomes
necessary to replace or wash filter remove
the dirty filter from the racks provided and
wash or replace with identical new filters.
Do not remove this label
AVERTISSEMENT
Les pièces mobiles peu vent blesser gravement des
personnes.
Arrêter la chaudiè re avant d'enlever ce panneau.
Maintenance des filtres : Quand il le faut,
retirer les filtres encrassés de leurs boîtiers,
les laver ou les remplacer par des filtres
neufs identiques.
Ne pas enlever cette étiquette
b
WARNING
SPECIAL HOMEOWNERS INSTRUCTIONS
b
ATTENTION
INSTRUCTIONS SPÉCIALES POUR LES PROPRIÉTAIRES
FOR YOUR SAFETY
WHAT TO DO IF YOU SMELL GAS:
1. Do not try to l ight any appliance.
2. Do not touch an y electrical switch; do not use any
phone in your bui lding.
3. Immediately call your g as supplier from a
neighbor's phone . Follow the gas supplier's
instructions.
4. If you cannot reach you r gas supplier; call the fire
department.
b
WARNING
FIRE AND EX PLOSION HAZARD
Can result in serious injur y or death.
Do not store or use g asoline or other flammable vapors
and liquids in the vicinity of this or any other appliance.
Storage of or use of gasoline or other flammable vapors
or liquids in the vicinity of this or any appliance can result
in serious injury or death.
POUR VOTRE SÉCURITÉ
b
AVERTISSEMENT
RISQUES D'INCENDIE ET D'EXP LOSION
Peuvent entraîner des blessures sérieuses ou la mort.
Ne pas stocker ou utili ser d'essence ni autres vapeurs ou
liquides inflammables à p roximité de cet appareil ou tout
autre dispositif.
Le stockage ou l'ut ilisation d'essence ou autres vapeurs
ou liquides inflammable s à proximité de cet appareil ou
tout autre dispos itif peut entraîner des blessures
sérieuses ou la mort.
4
Page 5
All installations and services must be performed by qualified service personnel.
This and the previous page contain reproductions of the various warning and instruction labels placed on the Thermo
Pride Condensing Gas Furnaces. Please read and comply with the contents of these labels.
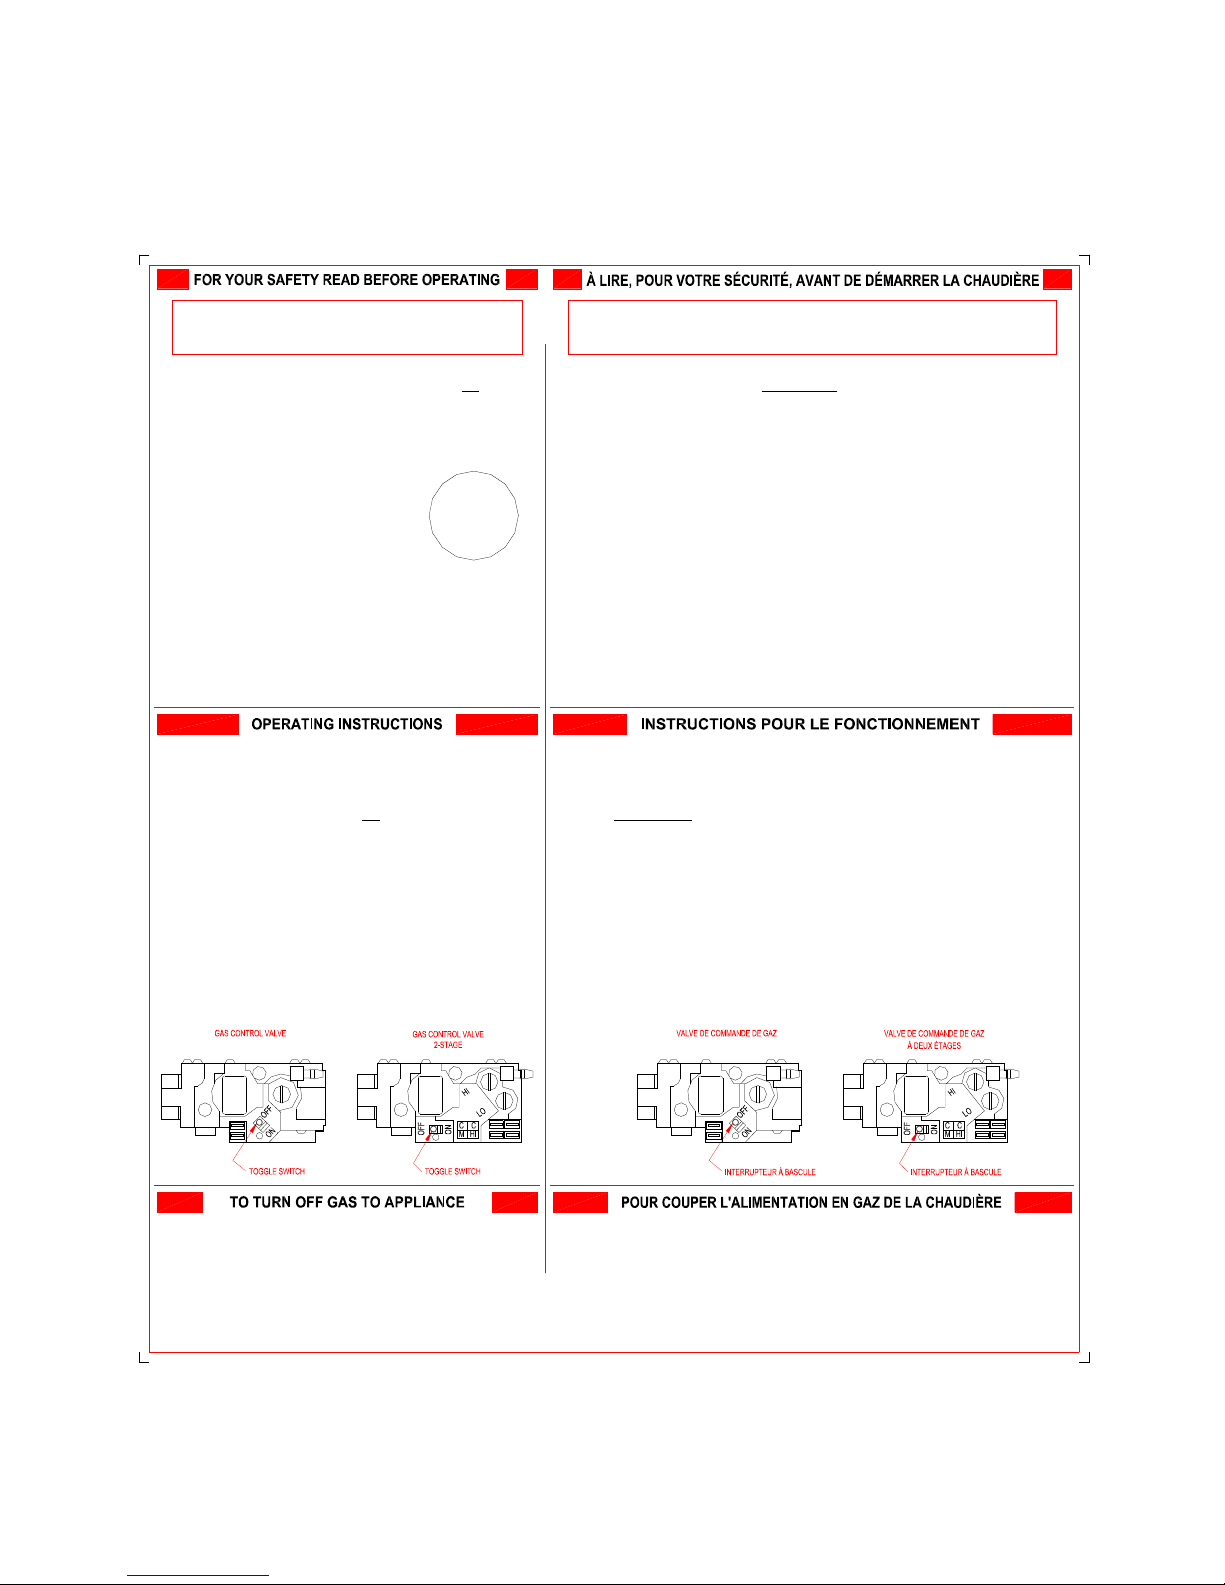
WARNING:
fire or explosion may result causing property damage,
personal injury or loss of life.
A. This appliance does not have a pilot. It is equipped with a hot
surface igniter that automatically lights the burner. Do not try to
light the burner by hand.
B. BEFORE OPERATING smell all around the appliance area for gas.
Be sure to smell next to the base of unit because some gas is
heavier than air and will settle on the floor or ground.
WHAT TO DO IF YOU SMELL GAS
?
Do not try to light any appliance.
?
Do not touch any electric switch; do not use
any phone in your building.
?
Immediately call your gas supplier from a
neighbor's phone. Follow the gas supplier's
instructions.
?
If you cannot reach your gas supplier, call the fire department.
C. Use only your hand to move the gas control switch. Never use tools.
If the switch will not move by hand, don't try to repair it, call a
qualified service technician. Force or attempted repair may result in
a fire or explosion.
D. Do not use this appliance if any part has been underwater.
Immediately call a qualified service technician to inspect the
appliance and to replace any part of the control system and any gas
control which has been underwater.
1. STOP! Read the safety information above on this label.
2. Set the thermostat to the lowest setting.
3. Turn off all electric power to the appliance.
4. This appliance is equipped with a hot surface igniter that
automatically lights the burner. Do not try to light the burner by
hand.
5. Move the gas control switch to the "OFF" position.
6. Wait five (5) minutes to clear out any gas. Then smell for gas,
including near the floor or ground. If you smell gas, STOP! Follow
"B" in the safety information above on this label. If you don't smell
gas, go to the next step.
7. Move the gas control switch to the "ON" position.
8. Turn on all electric power to the appliance.
9. Set thermostat to desired setting, and, if equipped, set the operating
mode to "HEAT".
10.If appliance will not operate, follow the instructions "To Turn Off
Gas To Appliance" and call your service technician or gas supplier.
If you do not follow these instructions exactly, a
ATTENTION ! Si vous ne respectez pas exactement les instructions ci-dessous, un
incendie ou une explosion pourraient endommager la propriété, blesser ou tuer des
personnes.
A. Cet appareil n'a pas de veilleuse. Il comporte une surface d'allumage chaude qui
allume automatiquement le brûleur. N'essayez pas d'allumer le brûleur manuellement.
B. AVANT DE DÉMARRER la chaudière, humez l'air autour de l'appareil pour détecter une
éventuelle odeur de gaz. Humez aussi l'air près de la base de la chaudière puisque le
gaz étant plus lourd que l'air, il pourrait s'accumuler près du sol ou du plancher.
QUOI FAIRE SI VOUS SENTEZ UNE ODEUR DE GAZ
?
N'allumez aucun appareil.
?
Ne touchez aucun interrupteur électrique; n'utilisez aucun téléphone dans
l'immeuble.
?
Appelez immédiatement votre fournisseur de gaz à partir du téléphone d'un voisin.
Suivez ses instructions.
?
Si vous ne pouvez pas joindre votre fournisseur de gaz, appelez les pompiers.
C. Manipulez l'interrupteur de commande de gaz seulement à la main. N'utilisez jamais
des outils pour cela. Si vous ne pouvez pas manipuler cet interrupteur manuellement,
n'essayez pas de le réparer, appelez un technicien de service qualifié. Forcer
l'interrupteur ou tenter de le réparer, pourraient provoquer un incendie ou une
explosion.
D. N'utilisez pas la chaudière si l'une de ses pièces a été sous de l'eau. Appelez
immédiatement un technicien de service qualifié pour qu'il inspecte la chaudière et
remplace toute pièce du système de commande et tout interrupteur de commande de
gaz qui ont été sous de l'eau.
1. STOP ! Lisez l'information sur la sécurité au haut de cette étiquette.
2. Réglez le thermostat à sa position la plus basse.
3. Coupez toute l'alimentation électrique la chaudière.
4. Cette chaudière est équipée d'une surface d'allumage chaude qui allume automatiquement le
brûleur. N'essayez pas d'allumer le brûleur manuellement.
5. Placez l'interrupteur de commande de gaz à la position «OFF».
6. Attendez cinq (5) minutes pour que tout le gaz soit évacué. Humez l'air pour détecter une
éventuelle odeur de gaz, sans oublier de l'humer aussi près du sol ou du plancher. Si vous
sentez une odeur de gaz, STOP ! Suivez le point «B» de l'information sur la sécurité au haut de
cette étiquette. Si vous ne sentez aucune odeur de gaz, passez à l'étape suivante.Move the gas
control switch to the "ON" position.
7. Placez l'interrupteur de commande de gaz à la position «ON».
8. Appliquez toute l'alimentation électrique à la chaudière.
9. Réglez le thermostat à la position désirée et, le cas échéant, mettez le mode de
fonctionnement à la position «HEAT».
10.Si la chaudière ne fonctionne pas, suivez les instructions de « POUR COUPER
L'ALIMENTATION EN GAZ DE LA CHAUDIÈRE» et appelez votre technicien de service ou votre
fournisseur de gaz.
1. Set thermostat to lowest setting, and, if equipped, set the operating
mode to "COOL" or "OFF".
2. If service is to be performed, turn off all electric power to the
appliance.
3. To turn off gas control valve, remove the burner compartment cover.
4. Move the gas control switch to the "OFF" position.
5. Replace the burner compartment cover.
1. Réglez le thermostat à sa position la plus basse et, le cas échéant, réglez le mode de
fonctionnement à la position «COOL» ou «OFF».
2. S'il faut accomplir une certaine tâche, coupez toute alimentation en électricité de la
chaudière.
3. Pour fermer la valve de commande de gaz, enlevez le couvercle du compartiment du brûleur.
4. Mettez l'interrupteur de commande de gaz à la position «OFF».
5. Replacez le couvercle du compartiment du brûleur.
390568
5
Page 6

All installations and services must be performed by qualified service personnel.
This page contains various warnings and cautions found throughout this manual. Please
read and comply with the statements below.
: IF YOU DO NOT FOLLOW THE SAFETY PRECAUTIONS BELOW AND IN THIS MANUAL, A
FIRE OR EXPLOSION MAY RESULT CAUSING PROPERTY DAMAGE, PERSONAL INJURY, OR LOSS OF
LIFE.
: Property damage, personal injury, or loss of life could result from repair or service of
this furnace by anyone other than a qualified heating contractor. Only the routine maintenance
described in this manual may be performed by the user.
: To avoid injury from moving parts, shut off the power to the furnace before
removing blower compartment door.
: Keep furnace free and clear of combustible materials, gasoline, and other flammable
liquids and vapors.
: Do not use this furnace if any part has been under water. Immediately call a qualified
heating contractor to inspect the furnace and to replace any part of the control system and any gas
control which has been under water.
: If you suspect there is a problem with the furnace, its venting system or any other
related problem, immediately contact a qualified service agency.
: In the event your furnace fails to operate, do not attempt to put the furnace into
operation. Contact a qualified heating contractor to service the furnace.
: A fire or explosion may result causing property damage, personal injury or loss of
life if you do not follow these instructions exactly.
: Homeowners attempting maintenance other than that covered as homeowner/user
maintenance may cause conditions which could result in personal injury or property damage.
: Shut off the power to the furnace before removing blower compartment door to avoid
injury from moving parts.
: This furnace is not to be used for temporary heating of buildings or structures under
construction.
: Call a qualified heating contractor to report suspected deficiencies (Do not attempt to
make repairs yourself!)
1. The furnace area must be kept clear and free of combustible materials, gasoline and other
flammable vapors and liquids.
6
Page 7

All installations and services must be performed by qualified service personnel.
2. The furnace must be kept free and clear of insulating material. The furnace area should be
examined when the furnace is installed or when insulation is added. Insulating materials may be
combustible.
3. For proper and safe operation the furnace needs air for combustion and ventilation. Do not
block or obstruct air openings on the furnace, air openings to the area in which the furnace is
installed, or the spacing around the furnace.
4. This furnace is equipped with a blocked vent shut off system. In the event that an obstruction
or restriction occurs in the vent pipe or termination, the furnace will shut off and the control will
flash an error code. This prevents the formation of hazardous gas products and prevents any
release of exhaust gas into the home. If the furnace fails to operate, contact a qualified service
agency.
5. Should the gas supply fail to shut off or if overheating occurs, shut off the gas valve to the
furnace before shutting off the electrical supply.
6. Do not use this furnace if any part has been under water. A flood damaged furnace is
extremely dangerous. Attempts to use the furnace can result in fire or explosion. A qualified
service agency should be contacted to inspect the furnace and to replace all gas controls, control
system parts, electrical parts that have been wet or the furnace if deemed necessary.
7. Visually examine the furnace at the start of the heating season and monthly during the heating
season.
(a.) All flue gas carrying areas external to the furnace (i.e chimney, vent connector) are
clear and free of obstructions.
(b.) The vent connector is in place, slopes upward and is physically sound without holes
or excessive corrosion.
(c.) The return air duct connection is physically sound, is sealed to the furnace casing,
and terminates outside the space containing the furnace.
(d.) The physical support of the furnace is sound without sagging cracks, gaps, etc.,
around the base so as to provide a seal between the support and the base.
(e.) There are no obvious signs of deterioration of the furnace.
(f.) The pilot and burner flames are in good adjustment (by comparison with pictorial
sketches or drawings of the main burner flame and, if applicable, the pilot burner flame).
7
Page 8
All installations and services must be performed by qualified service personnel.
II. GENERAL INSTRUCTIONS
1. : Property damage, personal injury, or loss of life could result from repair or
service of this furnace by anyone other than a qualified heating contractor. Only the
routine maintenance described in this manual may be performed by the user.
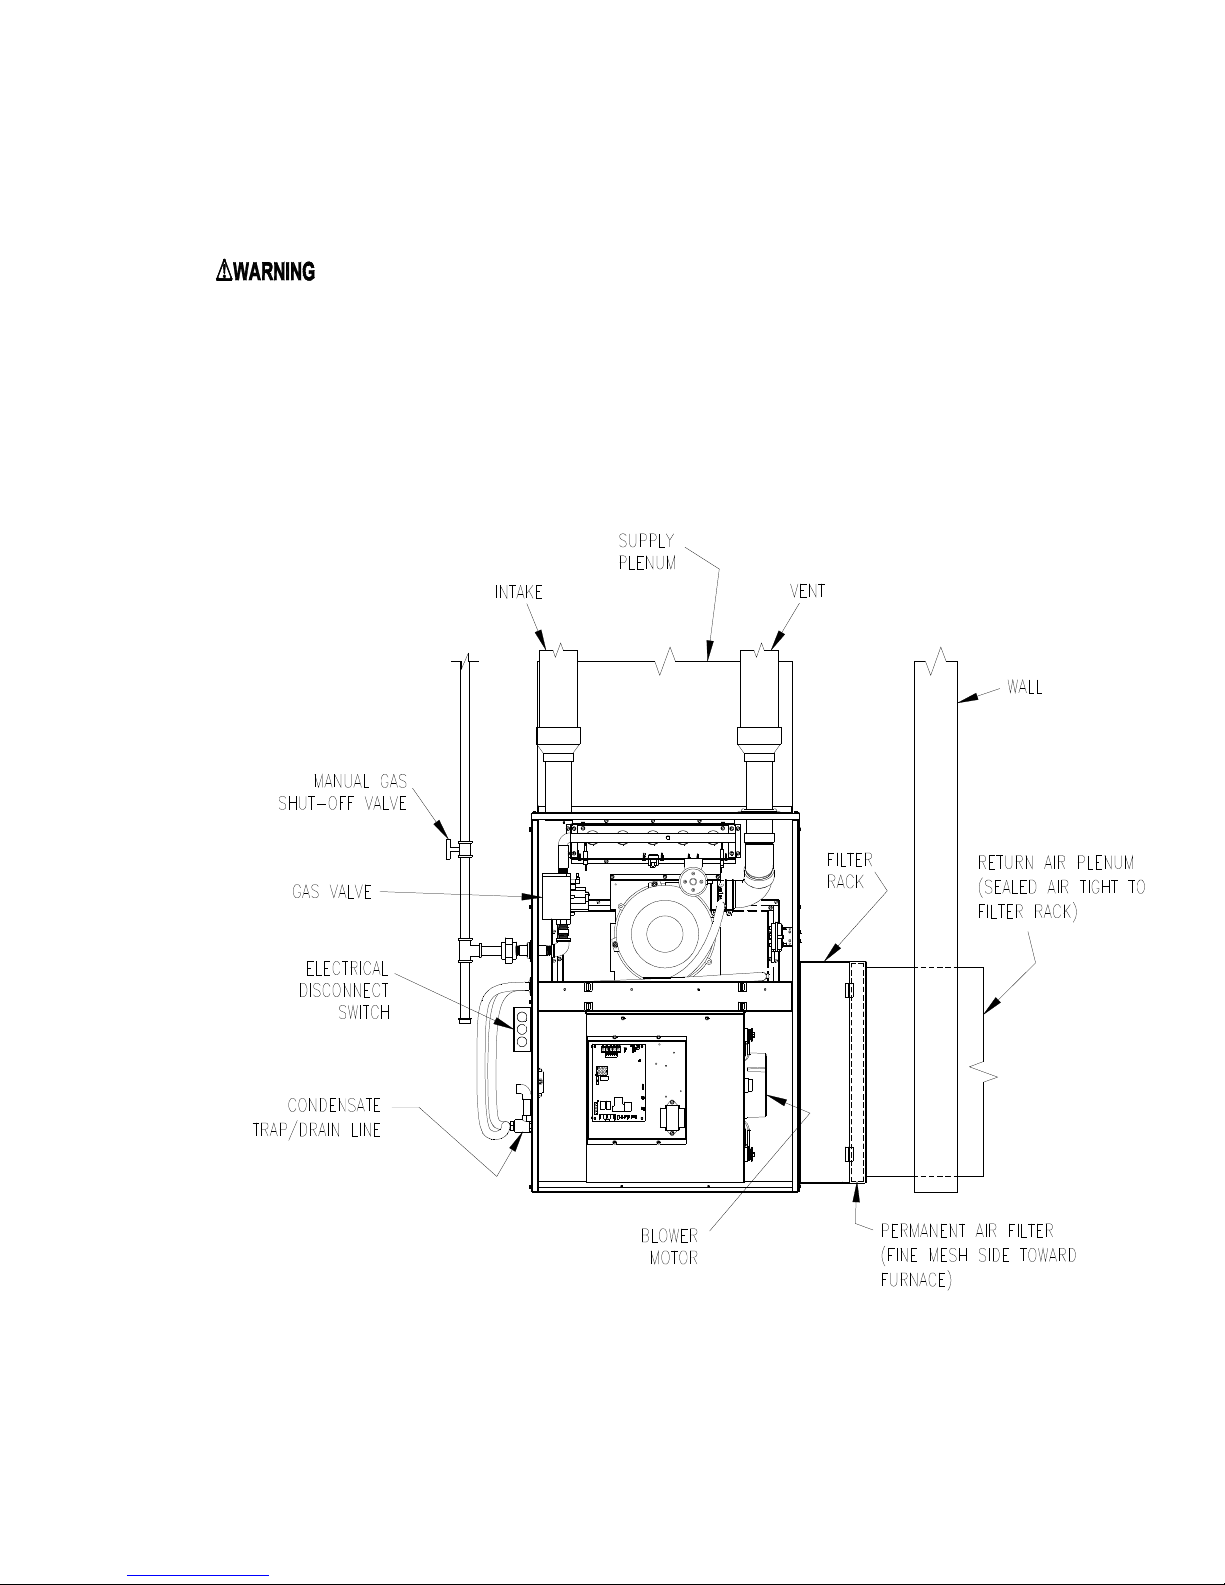
2. The following diagram shows a typical furnace installation and the typical position of the
components referenced in these instructions.
Figure 1
8
Page 9

All installations and services must be performed by qualified service personnel.
3. : To avoid injury from moving parts, shut off the power to the furnace before
removing blower compartment door.
4. The furnace uses outside air for combustion and ventilation for safe and proper operation.
5. IMPORTANT: Do not allow the outside vent terminal or air intake to be blocked or
obstructed by vegetation, ice, snow or any other materials.
6. This furnace is equipped with a safety feature which will not allow the furnace to be
operated if either the inlet or outlet vent to the appliance is blocked.
7. No attempt should be made to restart the unit in the event that gas to the main burner has
been shut off. Contact a qualified heating contractor before restarting the furnace.
8. The furnace should be inspected annually by a qualified heating contractor.
9. Should overheating occur or the gas supply fail to shut off, shut off the manual gas valve
to the furnace before shutting off the electrical supply.
10. : If you suspect there is a problem with the furnace, its venting system or any
other related problem, immediately contact a qualified service agency.
11. Your furnace should be described by the model number and serial number when
contacting a qualified heating contractor. This important information is located on the
rating plate behind the front door.
12. : In the event your furnace fails to operate, do not attempt to put the furnace
into operation. Contact a qualified heating contractor to service the furnace.
9
Page 10

All installations and services must be performed by qualified service personnel.
III. FURNACE OPERATION
A. WARNINGS BEFORE OPERATING
: A fire or explosion may result causing property damage, personal injury or loss of
life if you do not follow these instructions exactly.
A. This appliance does not have a pilot. It is equipped with an ignition device which
automatically lights the burner. Do not try to light the burner by hand.
B. BEFORE OPERATING - Smell all around the appliance area for gas. Be sure to smell next to
the floor because some gases are heavier than air and will settle on the floor.
WHAT TO DO IF YOU SMELL GAS
* Do not try to light any appliance.
* Do not touch any electric switch, do not use any phone in your building.
* Leave the building immediately.
* Immediately call your gas supplier from outside.
* Follow the gas supplier’s instructions.
* If you cannot reach your gas supplier, call the fire department.
C. Use only your hand to move the gas control switch/valve. Never use tools. If the switch will
not move by hand, don’t try to repair it, call a qualified heating contractor. Force or attempted
repair may result in a fire or explosion.
B. OPERATING INSTRUCTIONS
TO START THE FURNACE:
1. Please read the safety information in this book before operating furnace.
2. Set the thermostat to the lowest setting.
3. Turn off all electric power to the appliance.
4. Remove the combustion burner door. (This is the door which does not have a view window.)
10
Page 11

All installations and services must be performed by qualified service personnel.
Gas Control Valve
5. Move gas control switch to the “OFF” position.
6. Wait five (5) minutes to clear out any gas. If you then smell gas, STOP! Follow Step B in the
previous safety information. Go to the next step if you don’t smell gas.
7. Move gas control switch to the “ON” position.
8. Replace combustion burner door.
9. Turn on electric power to the appliance.
10. Set thermostat to desired setting.
11. Follow the instructions “To Turn Off Gas To Appliance” and call a qualified heating
contractor or gas supplier if the appliance will not operate.
C. SHUTDOWN PROCEDURE
TO TURN OFF GAS TO FURNACE:
1. Set the thermostat to lowest setting.
2. Turn off the electric power to the appliance if service is to be performed.
3. Remove combustion burner door.
4. Move gas control switch to the “OFF” position.
5. Replace combustion burner door.
IV. HOMEOWNER/USER MAINTENANCE INSTRUCTIONS
(ROUTINE MAINTENANCE)
The following maintenance procedures should be performed by the homeowner/user during the
heating season.
: Homeowners attempting maintenance other than that covered as homeowner/user
maintenance may cause conditions which could result in personal injury or property damage.
11
Page 12

All installations and services must be performed by qualified service personnel.
: Shut off the power to the furnace before removing blower compartment door to avoid
injury from moving parts.
A. ANNUAL INSPECTION
The homeowner must have this furnace professionally inspected at the beginning of each heating
season by a qualified heating contractor to ensure proper operation.
NOTICE: This furnace has been shipped from the factory with a permanently lubricated
circulating air blower motor. Any maintenance to this blower motor is to be performed only by a
qualified heating contractor.
B. FILTER MAINTENANCE PROCEDURE
1. The return air filter provided with this unit is a re-useable type filter. This filter should be
inspected monthly. When dirty, the filter must be cleaned or replaced, if necessary, to assure
proper furnace operation. Follow the cleaning, removal and replacement procedure below.
NOTICE: If the furnace is installed in a home or structure being remodeled, dust levels may be
much higher than normal. The filter must be inspected daily and cleaned as needed until dusty
conditions have been eliminated.
: This furnace is not to be used for temporary heating of buildings or structures under
construction.
2. The filter rack or drop chute will be located between the return air plenum and the return air
opening of the furnace (See Figure 3). Slide dirty filter out of the filter rack. Clean the filter
by vacuuming, rinsing with tap water, hosing or dipping in an ordinary detergent solution.
Replace the completely dry filter in the rack. The mesh side of the filter must be installed
towards the furnace after cleaning.
12
Page 13

All installations and services must be performed by qualified service personnel.
Figure 3
FILTER REPLACEMENT
See Table 1 for minimum heating filter areas required for the different types of filters available
should the filter used require replacement.
If the unit is equipped with cooling, contact your installer or a qualified service person to
determine the minimum filter area required for the different filter types and your cooling system.
MINIMUM FILTER AREA REQUIRED
FILTER TYPE MAX.
-050 -075 -100 -125
THERMO PRIDE *
SUPPLIED
PERMANENT FILTER
STANDARD
PERMANENT FILTER
DISPOSABLE TYPE
FILTER
RATED
VELOCITY
600 FT/MIN 176 IN2 264 IN2 352 IN2 440 IN2
500 FT/MIN 211 IN2 317 IN2 422 IN2 528 IN2
300 FT/MIN 352 IN2 528 IN2 704 IN2 880 IN2
FILTER AREA FOR HEATING
(LENGTH X WIDTH, SQ. IN.)
TABLE 1
* The Thermo Products supplied filter can be cut to size to fit other filter retention systems as
long as the minimum size requirement is met.
NOTICE: Any internal stiffeners used in the filter must not be removed, although they can be
cut to the length required.
13
Page 14

All installations and services must be performed by qualified service personnel.
C. VISUAL INSPECTION PROCEDURE
It is recommended that the homeowner/user conduct the following periodic visual inspection of
the furnace at the start of the heating season and monthly during the heating season.
: Call a qualified heating contractor to report suspected deficiencies (Do not attempt to
make repairs yourself!)
1. Turn off power to furnace.
2. Vent pipe, air intake pipe, and condensate system: Visually check the vent and intake pipe as
well as condensate lines both inside and outside the furnace to make sure that vent intake
joints and the condensate system are sealed. There should be no sign of water leakage at any
vent intake or condensate joints or anywhere inside the furnace. Make sure that horizontal
runs of vent pipe slope upward towards the outside. The inlet pipe should slope slightly
downward to prevent condensate build up. Any signs of damage, leakage, deterioration, or
possible blockage should be immediately reported to your dealer or the local gas company.
It is recommended that the condensate removal system be cleaned annually by a qualified service
agency to insure its proper and continued operation.
Outside vent and outside combustion air termination: the outside vent terminations should be
inspected to insure that they are clear and free of obstruction by ice, snow, debris, of vegetation.
Any obstruction of the terminal should be carefully removed without damaging the vent terminal.
If ice has formed on the outside terminals themselves, it should be removed.
3. If the furnace is equipped with a Thermo Products, LLC. condensate neutralizer kit, (See
Figure 4) it should be inspected at the start of every heating season. Remove the 2” PVC cap
from the neutralizer kit and replace dissolved filter material with #9 limestone. Keep instructions
for neutralizer kit in plastic pouch on the inside of the furnace blower door.
Figure 4
4. Return Air Duct Connection: Check to see if it is (1) physically sound; (2) sealed to the
furnace casing; and (3) terminates outside the space containing the furnace.
14
Page 15

All installations and services must be performed by qualified service personnel.
5. Examine the entire furnace, including removing the vestibule door and inspect the control
compartment and the furnace for signs of damaged or unusually worn wiring, condensation,
sooting or other damage or deterioration.
6. Restore power to the furnace. Follow the operating instructions to light furnace.
7. Make sure the gas is burning properly (See Figure 5). Burner flames should not impinge or fire
against the side of the tube opening.
NOTICE: It is not unusual to have orangish flames visible in the tube for LP gas.
: Call a qualified heating contractor to report suspected deficiencies (do not attempt to
make repairs yourself!)
Figure 5
15
 Loading...