

Page 1
QuantiGene™ Plex Gene Expression Assay
USER GUIDE
Publication Number MAN0017862
Revision C.0
For Research Use Only. Not for use in diagnostic procedures.
Page 2
Bender MedSystems GmbH | Campus Vienna Biocenter 2 | 1030 Vienna, Austria
For descriptions of symbols on product labels or product documents, go to thermofisher.com/symbols-definition.
The information in this guide is subject to change without notice.
DISCLAIMER: TO THE EXTENT ALLOWED BY LAW, THERMO FISHER SCIENTIFIC INC. AND/OR ITS AFFILIATE(S) WILL NOT BE
LIABLE FOR SPECIAL, INCIDENTAL, INDIRECT, PUNITIVE, MULTIPLE, OR CONSEQUENTIAL DAMAGES IN CONNECTION WITH OR
ARISING FROM THIS DOCUMENT, INCLUDING YOUR USE OF IT.
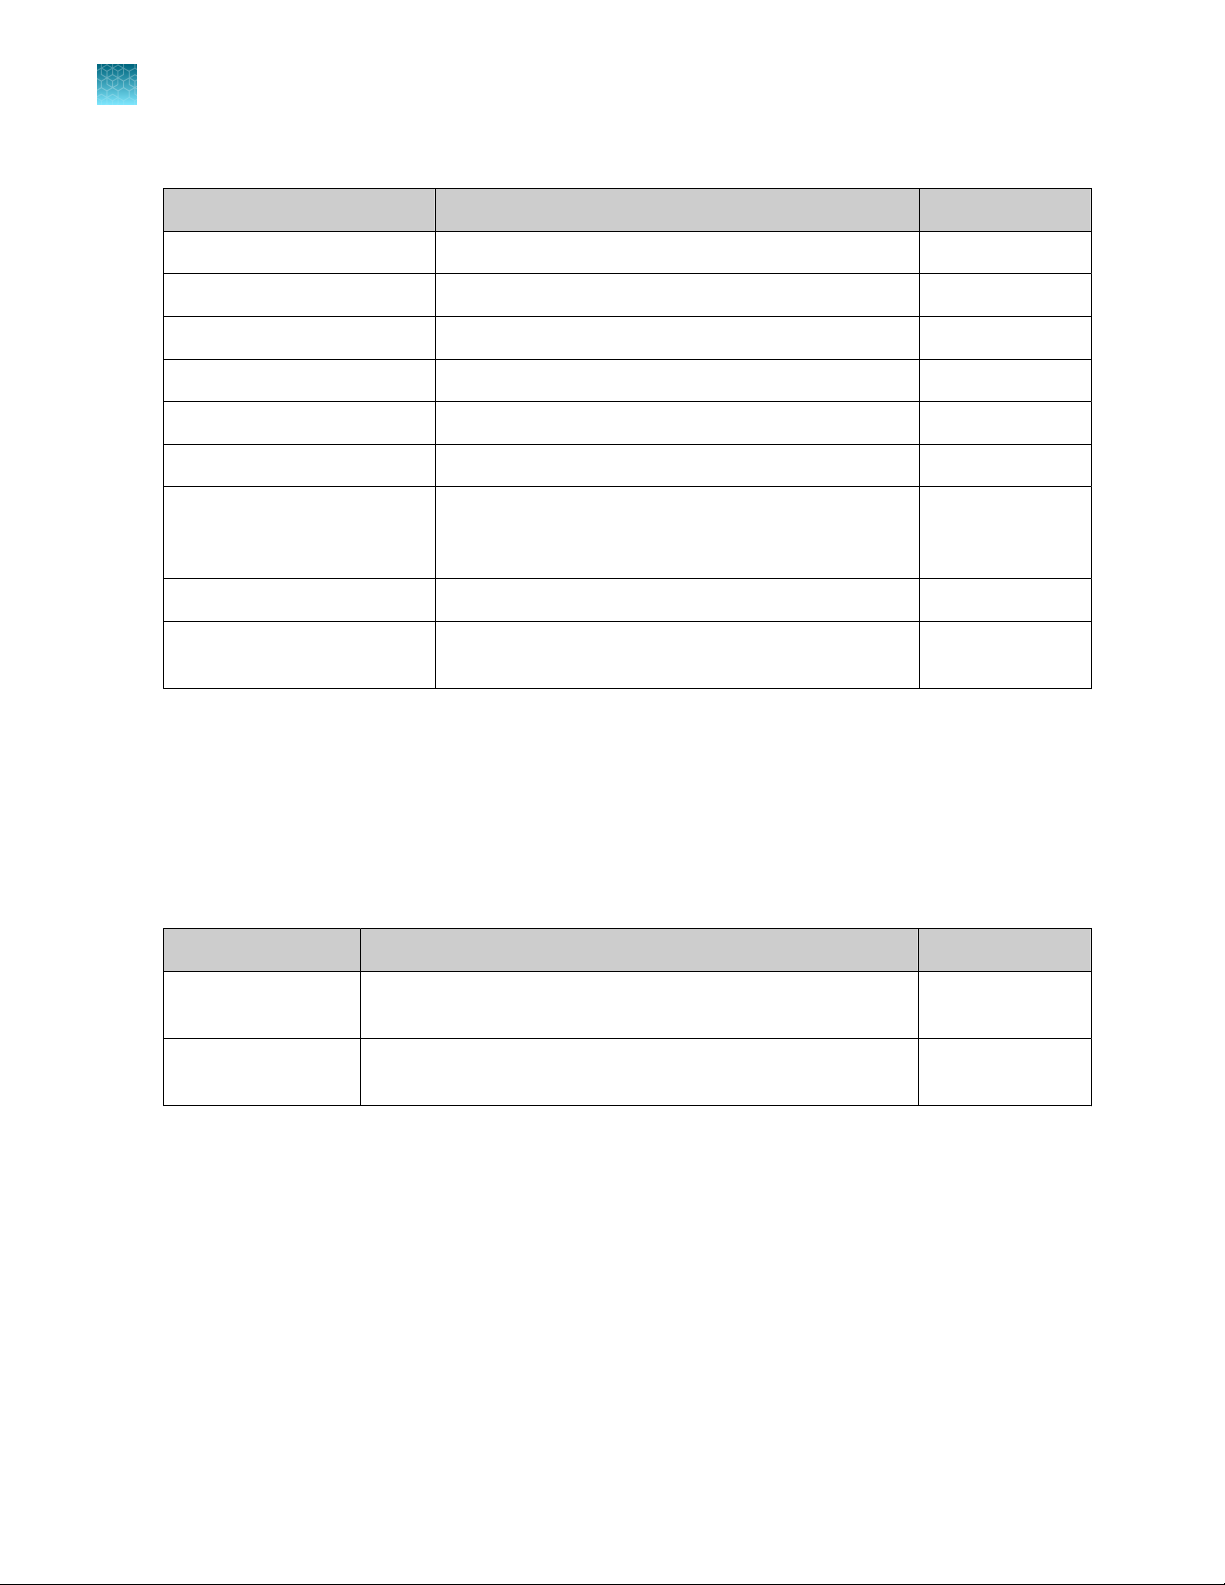
Revision Date Description
C.0 02 March 2021 Updated the reagent volumes in the tables.
B.0 20 February 2020 Updated manufacturing address
A.0 27 August 2018 New document
Important Licensing Information: These products may be covered by one or more Limited Use Label Licenses. By use of these
products, you accept the terms and conditions of all applicable Limited Use Label Licenses.
TRADEMARKS: All trademarks are the property of Thermo Fisher Scientific and its subsidiaries unless otherwise specified.
©2021 Thermo Fisher Scientific Inc. All rights reserved.
Page 3

Contents
■
Product information ................................................................... 5
Product description ............................................................. 5
How the QuantiGene™ Plex Assay works ...................................... 5
Product Description ......................................................... 5
Precautions and technical hints ............................................... 6
Required equipment and materials not provided ................................ 6
Contents and storage ............................................................ 7
QuantiGene™ Plex Assay kit .................................................. 7
QuantiGene™ Plex Panel ..................................................... 8
■
Before you begin ...................................................................... 9
Before first use ................................................................. 9
Sample preparation ............................................................. 9
■
Assay procedure: day 1 ............................................................. 10
For cell lysates or whole blood lysates ............................................ 10
For fresh, frozen, or FFPE tissue homogenates ..................................... 12
For purified RNA or in vitro transcribed RNA ....................................... 14
■
Assay procedure: day 2 ............................................................. 16
Setup of the Luminex™ protocol .................................................. 16
Process Plate .................................................................. 16
■
Analyze results ....................................................................... 20
■
APPENDIX A Troubleshooting .................................................... 22
■
APPENDIX B Magnetic plate washer validation protocol ...................... 24
Validate the handheld magnetic plate washer ...................................... 24
QuantiGene
™
Plex Gene Expression Assay User Guide
3
Page 4

Contents
■
Sample optimization protocol ...................................................... 25
Optimize sample input .......................................................... 25
Determine the optimal lysis method for a sample type .............................. 26
■
APPENDIX C Safety ............................................................... 27
Chemical safety ................................................................ 28
Biological hazard safety ......................................................... 29
■
Documentation and support ....................................................... 30
Customer and technical support ................................................. 30
Limited product warranty ........................................................ 30
Glossary .................................................................................. 31
4
QuantiGene™ Plex Gene Expression Assay User Guide
Page 5

IMPORTANT! Before using this product, read and understand the information in the “Safety” appendix
in this document.
Product description
How the QuantiGene™ Plex Assay works
The Invitrogen™ QuantiGene™ Plex Assay Kit enables the multiplexed measurement of gene expression
by combining branched DNA (bDNA) signal amplification with Luminex™xMAP™ multi-analyte profiling
technology. The bDNA assay is a probe hybridization-based method of target-specific RNA capture and
quantitation, amplifying signal rather than the target.
Color-coded fluorescent magnetic microspheres (capture beads) capture specific target RNA molecules
through hybridization of a custom oligonucleotide probe set, which consists of 3 types of probes:
capture extenders, label extenders, and blocking probes. The probe set hybridizes a contiguous
sequence of each target RNA. The capture extenders discriminate between dierent capture beads
based on the sequence of a capture probe conjugated to each bead, and the label extenders have tails
that provide the support for the branched DNA signal amplification.
Product information
Each amplification unit is constructed through sequential hybridization of bDNA oligonucleotides (preamplifier, amplifier, and label probe). The label probe is biotinylated to bind Streptavidin-conjugated
R-Phycoerythrin (SAPE). The resulting fluorescence signal is associated with individual capture beads
by the Luminex™ instrument, which combines advanced fluidics, optics, and digital signal processing.
Signal is reported as median fluorescence intensity (MFI) and is proportional to the number of target
RNA molecules present in the sample.
Product Description
The QuantiGene™ Plex Assay Kit consists of 3 modules, each sold separately:
•
QuantiGene™ Sample Processing Kit: contains reagents for release and stabilization of sample
RNA from cultured cells, blood (whole blood, PAXgene™ blood, Tempus™ blood, or dried blood
spots), or tissues (fresh, frozen or FFPE). These kits are not required if working with purified RNA
samples
•
QuantiGene™ Plex Assay Kit: contains the generic reagents, plates, and seals required for running
the assay
•
QuantiGene™ Plex Panel: contains the custom target-specific pooled probe set and associated
magnetic capture beads to capture user-defined genes of interest
QuantiGene
™
Plex Gene Expression Assay User Guide
5
Page 6
Product information
Product description
This user guide contains instructions for using the QuantiGene™ Plex Assay with the following sample
types:
•
Cell lysates from cultured cells and whole blood
•
Tissue homogenates from fresh, frozen, or formalin-fixed, paran-embedded (FFPE) tissues
•
Purified or in vitro transcribed (IVT) RNA
For instructions on preparing cell lysates or tissue homogenates, please refer to the appropriate
QuantiGene™ Sample Processing Kit package insert.
Precautions and technical hints
•
The shaking incubator must be calibrated for both 54°C & 50°C using the Temperature Validation
Kit. The Vortemp 56 requires an inverted plate lid to be placed below the assay plates. See
instructions for temperature calibration in the Temperature Validation Kit package insert.
•
When running a new sample type, optimize input by running a dilution series to ensure that all
target signals are within the dynamic range of the assay.
•
Run samples in technical replicates. We recommend a minimum of duplicates, but ideally more in
order to calculate intra-assay precision.
•
Use fresh pipette tips when loading samples into each well. Avoid creating bubbles when pipetting.
Use a multi-channel pipette whenever possible to achieve optimal assay precision.
•
Be careful not to invert the plate or allow contents from one well to mix to another well. The
Magnetic Separation Plate is to be inverted only when removing reagents and wash buer with the
Handheld Magnetic Plate Washer.
•
On day 2 of the assay, turn on and initiate startup protocol of the Luminex™ instrument according
to the manufacturer's instructions. Lasers require 30 minutes to warm-up.
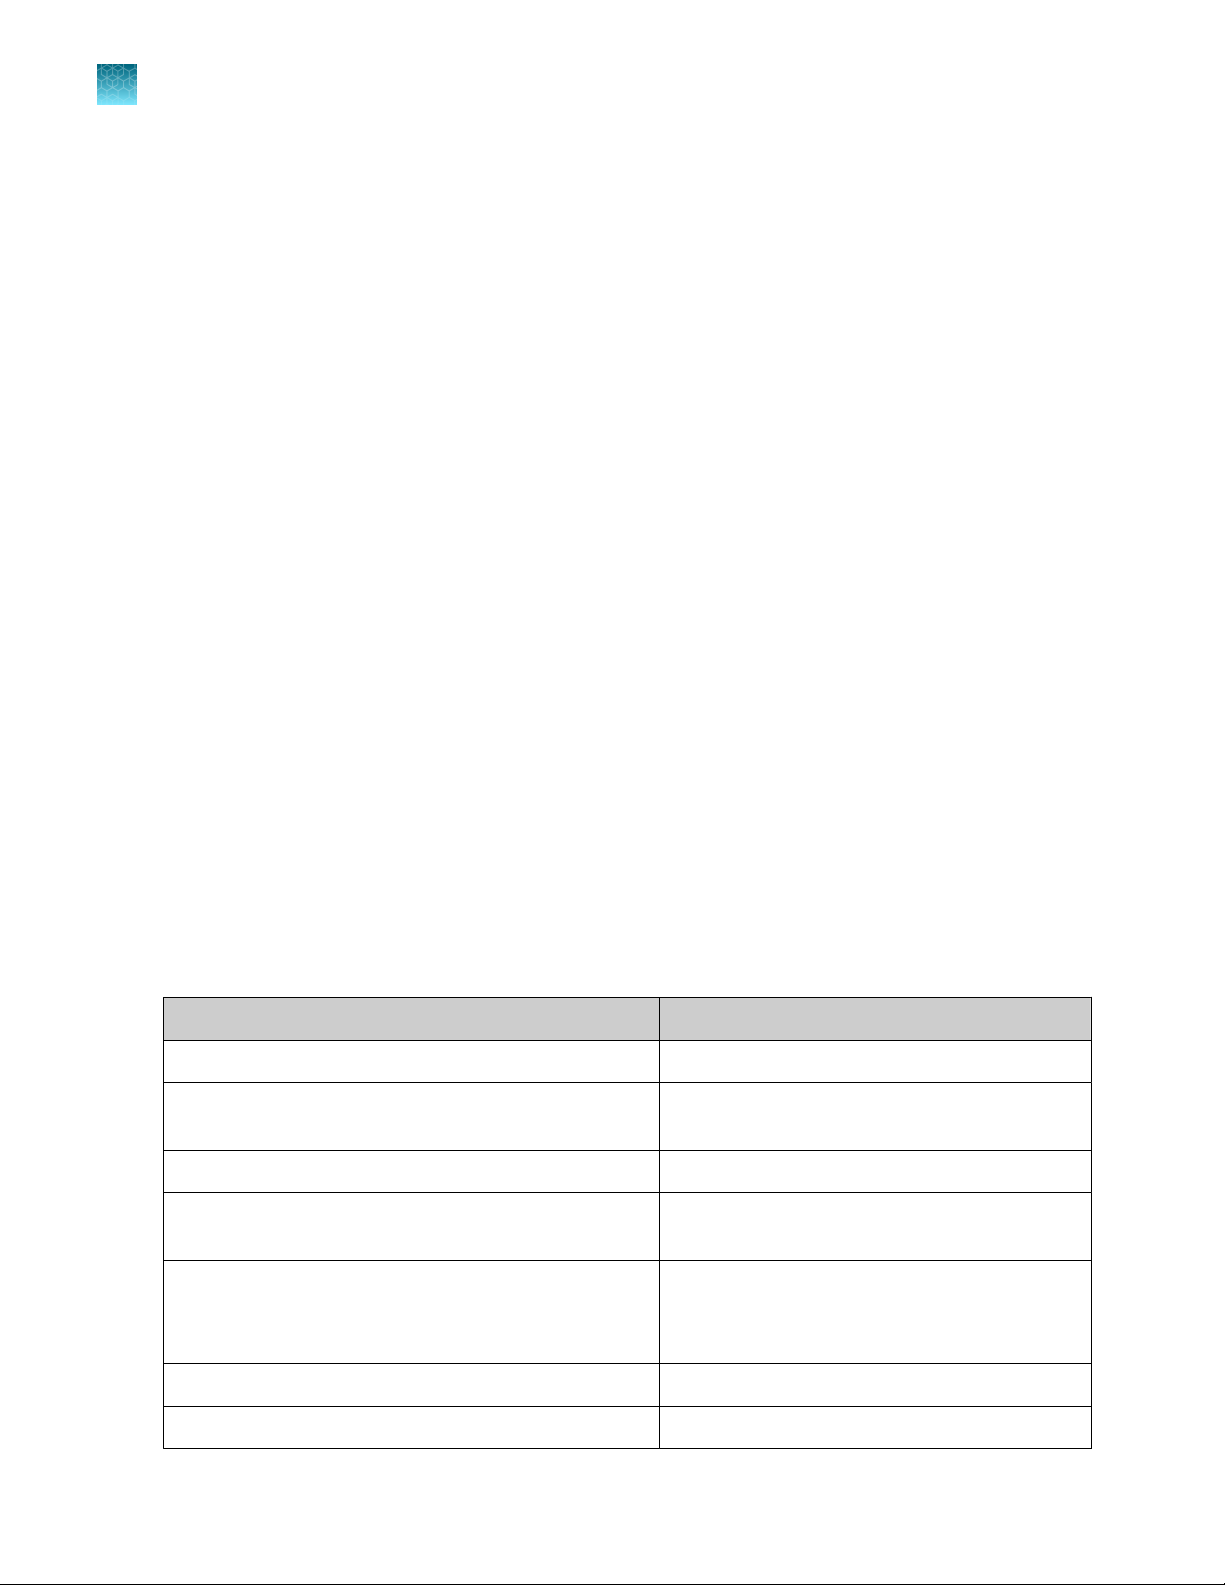
Required equipment and materials not provided
Unless otherwise indicated, all materials are available through thermofisher.com. "MLS" indicates that
the material is available from fisherscientific.com or another major laboratory supplier.
Required Equipment/Material
Handheld Magnetic Plate Washer EPX-55555-000
Microtiter plate shaker (must have 3 mm orbit at 600-800
rpm)
Vortex mixer MLS
Adjustable single and multi-channel precision pipettes
for dispensing 1-20 uL, 20-200 uL, and 200-1000uL
Reagent reservoirs (25 mL and 100 mL capacity) 3054-1002 or equivalent (VistaLab
Nuclease Free Water (H2 O) MLS
Plate centrifuge capable of 240 × g speeds MLS
88880023 or 88880024, QP0706 (IKA™MS3
CLS4873 or equivalent (Corning™Costar™)
Source
Digital)
MLS
Technologies™)
6
QuantiGene™ Plex Gene Expression Assay User Guide
Page 7
Product information
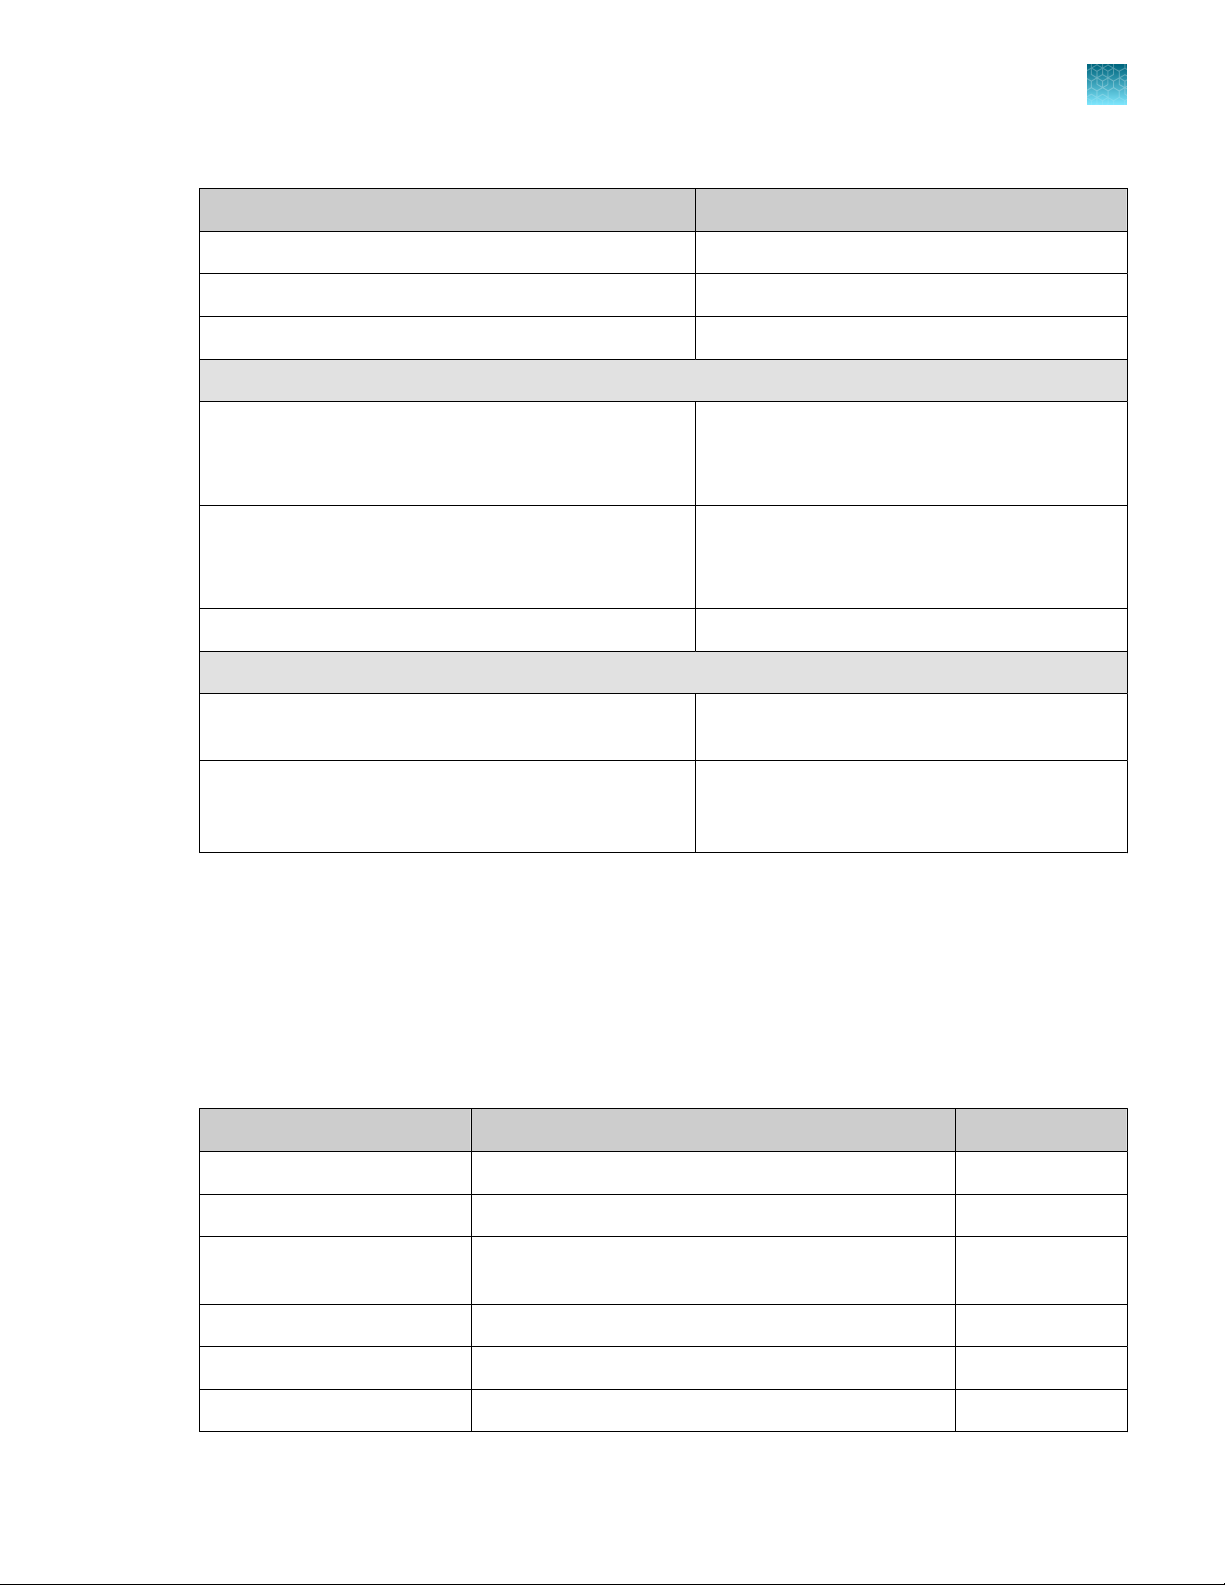
Contents and storage
(continued)
Required Equipment/Material Source
Microcentrifuge MLS
QuantiGene™ Incubator Temperature Validation Kit QS0517
4" Soft Rubber Roller QS0515
Use one of the following:
FLEXMAP 3D™instrument APX1342
Luminex Corporation (sold through Thermo
Fisher Scientific)
Luminex™ 200™ instrument APX10031
Luminex Corporation (sold through Thermo
Fisher Scientific)
MAGPIX™ instrument Luminex Corporation
Use one of the following:
Labnet VorTemp™ 56 Shaking Incubator QP0703 or QP0704 (include Temperature
MaxQ™ 4450 Benchtop Orbital Shaker SHKE4450 or SHKE4450-1CE (required in
Contents and storage
QuantiGene™ Plex Assay kit
The QuantiGene™ Plex Assay Kit is supplied in 3 separate boxes based on storage temperature.
Storage conditions are listed below. Refer to the product labels for expiration dating, and refer to the
QuantiGene™ Plex Assay Kit Package Insert for individual component volumes or quantities.
Component
Proteinase K
Blocking Reagent Aqueous buered solution containing a preservative -20°C
[1]
Validation Kit)
addition: Universal Platform Cat. No. 30100TS
and Universal Clamps for plates Cat. No. 30175)
Description Storage
Proteinase K in aqueous buered solution -20°C
Label Probe Solution Biotinylated oligonucleotide in aqueous buered
solution
Pre-Amplifier Solution DNA in aqueous buered solution 2-8°C
Amplifier Solution DNA in aqueous buered solution 2-8°C
SAPE Streptavidin-conjugated R-Phycoerythrin 2-8°C
QuantiGene™ Plex Gene Expression Assay User Guide
2-8°C
7
Page 8
Product information
Contents and storage
(continued)
Component Description Storage
SAPE Diluent Dilution Buer for SAPE reagent 2-8°C
Lysis Mixture Aqueous buered solution containing a preservative 15-30°C
Wash Buer Component 1 Aqueous solution 15-30°C
Wash Buer Component 2 Aqueous buered solution 15-30°C
SAPE Wash Buer Aqueous buered solution 15-30°C
Hybridization Plates 96-well round bottom, clear polypropylene plates 15-30°C
Pressure Seals (Day 1) Clear, pressure-activated seals for use with the
Magnetic Separation Plates 96-well flat bottom microplates 15-30°C
Plate Seals (Day 2) Clear, adhesive plate seals for use with the Magnetic
[1]
We recommend storing in an enzyme storage box, such as the NEB Cool Box (New England Biolabs P/N T0400S). NEVER store at
-80 °C.
QuantiGene™ Plex Panel
The QuantiGene™ Plex Panel includes the target-specific probe set and associated magnetic capture
beads. Each panel is supplied in 2 separate boxes based on storage temperature. Refer to the package
insert provided with the panel for the gene list and bead identifiers. Do not freeze the capture beads, as
they can be damaged if frozen.
Component
Probe set Pre-mixed probe set consisting of target-specific capture
extenders, label extenders, and blocking probes
Capture beads Pre-mixed set of magnetic Luminex™ xMAP™ capture beads
conjugated with capture probes
15-30°C
Hybridization Plate during the Day 1/overnight
hybridization.
15-30°C
Separation Plate during the Day 2 hybridizations
Description Storage
-20°C
2-8°C
8
QuantiGene™ Plex Gene Expression Assay User Guide
Page 9
Before first use
•
Validate the magnetic plate washer to ensure proper bead retention. For instructions see
Appendix B, “Magnetic plate washer validation protocol”.
•
Calibrate the shaking incubator using the Temperature Validation Kit to ensure hybridization
temperatures are 54°C and 50°C. See instructions in the Temperature Validation Kit package insert.
•
Optimize sample preparation and input by running a dilution series to ensure all targets are
within the assay's dynamic range. For sample optimization instructions see “Sample optimization
protocol” on page 25.
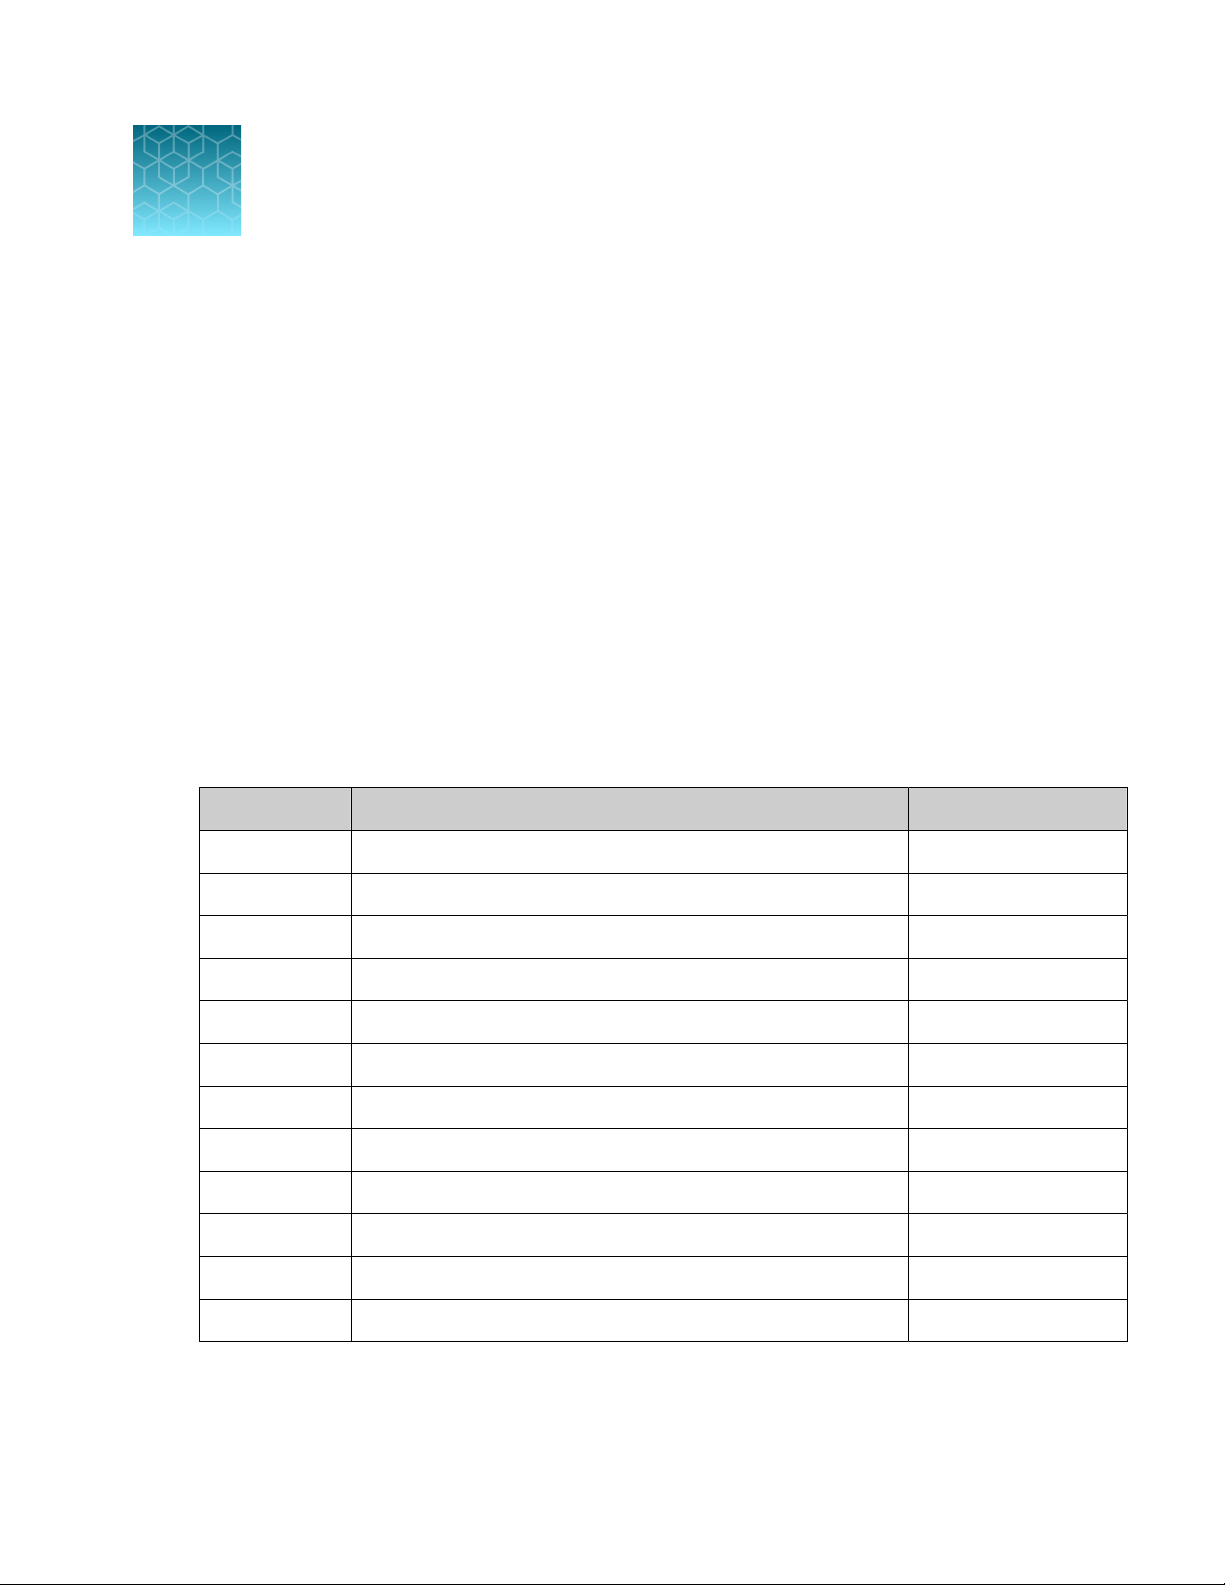
Sample preparation
Prior to running the QuantiGene™ Plex Assay, ensure you have a lysate or homogenate prepared using
one of the following sample processing kits (of note, size/plate refers to 96-well plate format):
Before you begin
Catalog No.
QS0101 Cell Lysate Sample Preparation Kit
QS0102 Cell Lysate Sample Preparation Kit 10 plate
QS0103 Cell Lysate Sample Preparation Kit 5 × 10 plate
QS0104 Fresh or Frozen Tissue Sample Processing Kit
QS0105 Fresh or Frozen Tissue Sample Processing Kit 25 samples
QS0106 Fresh or Frozen Tissue Sample Processing Kit 100 samples
QS0110 Blood Sample Processing Kit
QS0111 Blood Sample Processing Kit 5 plates
QS0112 Blood Sample Processing Kit 5 × 10 Plate
QS0107 FFPE Sample Processing Kit
QS0108 FFPE Sample Processing Kit 25 samples
QS0109 FFPE Sample Processing Kit 100 samples
[1]
Sufficient for preparing bulk lysates from 1.8 x 10⁷ cells or 2 × 96-well plates containing up to 6 × 10⁴ cells/well.
[2]
A sample is defined as 5 mg animal tissue or 15 mg plant tissue.
[3]
A 2-plate kit is sufficient for preparing bulk lysates from 1.8 × 10⁷cells or 2 × 96-well plates containing up to 6 × 10⁴cells/well.
[4]
A sample is defined as 25-100 mm2 × 50-60 microns (area × total thickness of FFPE tissue sections)
Assay specific reagents Size
[1]
[2]
[3]
[4]
2 plate
10 samples
2 plates
10 samples
QuantiGene
™
Plex Gene Expression Assay User Guide
9
Page 10

Assay procedure: day 1
IMPORTANT!
Tissue homogenates, cell lysates and whole blood lysates must be prepared using the applicable
·
QuantiGene™ Sample Processing Kit.
Purified RNA samples do not require a QuantiGene™ Sample Processing Kit.
·
The day 2 procedure is the same for all sample types.
·
For cell lysates or whole blood lysates
1.
Pre-warm Lysis Mixture at 37°C for 30 minutes followed by gentle swirling.
2.
If lysates have been frozen, remove from the freezer and thaw at room temperature followed by
incubation at 37°C for 30 min. Following incubation, vortex briefly if samples are in tubes or pipette
up and down 5 times if samples are in plates. Leave at room temperature until use.
Do not store on ice prior to use.
3.
Handle the reagents listed below as follows:
a.
Probe Set & Blocking Reagent: Thaw and vortex briefly to mix, then centrifuge Probe Set
briefly to collect contents at the bottom of the tube.
b.
Proteinase K: Keep on ice.
c.
Capture Beads: Take out of storage right before use and protect from light.
4.
If samples require dilution, dilute with Diluted Lysis Mixture (dilute 1 volume Lysis Mixture plus 2
volumes Nuclease-free Water, prepared fresh) so that the desired amount of sample is present in a
volume of 80 μL/assay well. In order to optimize sample input, please see “Optimize sample input”
on page 25.
10
QuantiGene™ Plex Gene Expression Assay User Guide
Page 11
Assay procedure: day 1
For cell lysates or whole blood lysates
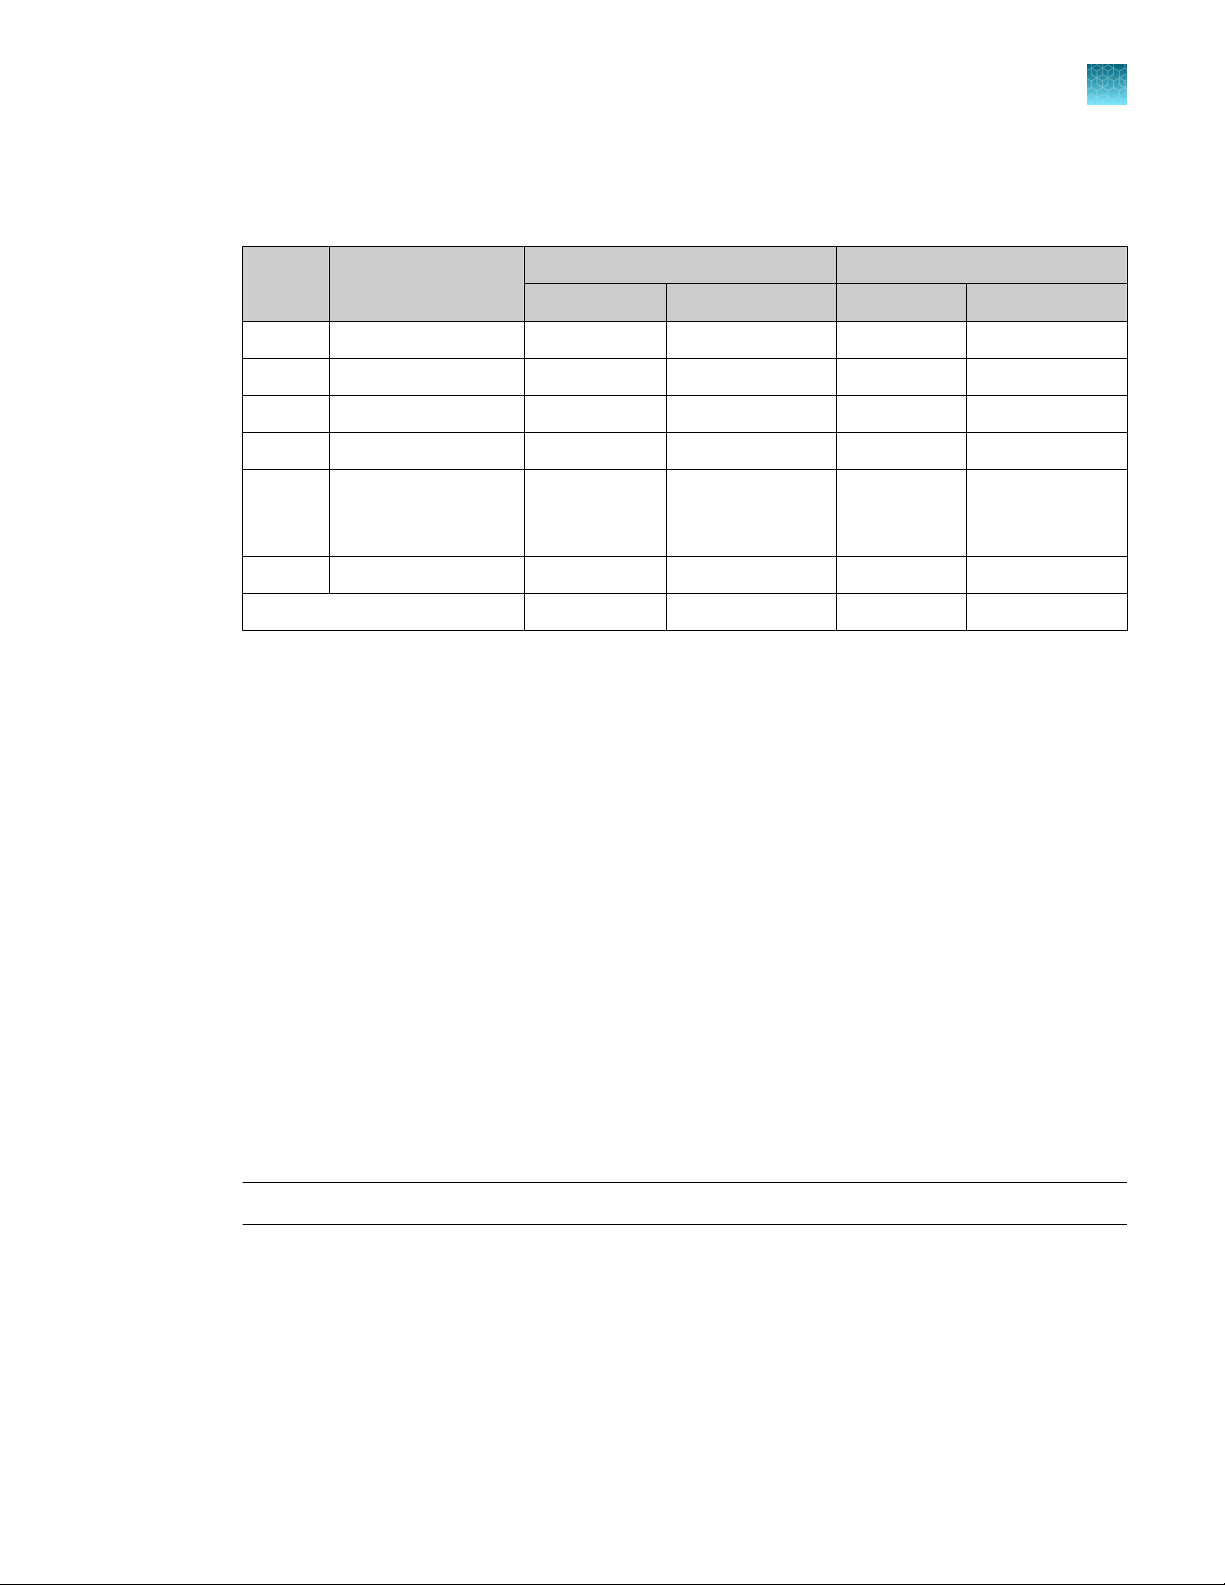
5.
Prepare an appropriate volume of Working Bead Mix by combining the following reagents in the
order listed. Scale according to the number of assays to be run, and include sucient overage.
Keep Working Bead Mix at room temperature and protected from light. Do not store on ice.
Order Reagent
1 Nuclease-free Water 5.2 624 4. 2 504
2 Lysis Mixture 6.6 792 6.6 792
3 Blocking Reagent 2 240 2 240
4 Proteinase K 0.2 24 0.2 24
5 Capture Beads
(vortex 30 seconds
before adding)
6 Probe Set 5 600 6 720
Total 20 2,400 20 2,400
[1]
Includes 25% overage to enable use of reagent reservoir and multichannel pipette.
6.
Vortex Working Bead Mix for 10 seconds, then pipette 20 μL into each well of the Hybridization
1 Well (µL) 96 Well (µL)
2 to 64-plex 65 to 80-plex
[1]
1 120 1 120
1 Well (µL) 96 Well (µL)
Plate.
•
For fewer than 48 wells: Dispense 20 μL of Working Bead Mix into each well of the
Hybridization Plate using a single channel pipette.
•
For 48 or more wells: Transfer Working Bead Mix to a 25-mL reagent reservoir using a single
channel pipette. Do not pour or reagent shortage will occur. Using a multichannel pipette
and new tips for each transfer, dispense 20 μL Working Bead Mix into each well of the
Hybridization Plate.
[1]
7.
Add 80 μL of lysate or diluted lysate to each well of the Hybridization Plate containing Working
Bead Mix. The total final volume in each well will be 100 μL. Load each sample using a new pipette
tip.
Background Controls: Add 80μL of Diluted Lysis Mixture (1 volume Lysis Mixture plus 2 volumes
Nuclease-free Water) to at least 3 wells containing Working Bead Mix.
8.
Seal the Hybridization Plate using a Pressure Seal: Remove the backing of the Pressure Seal,
center and place onto the Hybridization Plate. Using a soft- rubber roller, apply firm even pressure
across the seal. Ensure that the plate has been completely sealed.
Note: DO NOT use the Day 2 Plate Seal, otherwise evaporation may occur.
9.
Place the Hybridization Plate in the shaking incubator and incubate for 18-22 hours at 54°C ± 1°C
at 600 rpm. Ensure the incubator has been calibrated using the Temperature Validation Kit. If using
a VorTemp™ 56, ensure there is an inverted plate lid in place, as explained by the package insert.
10.
After incubation, proceed to “Assay procedure: day 2” on page 16.
QuantiGene™ Plex Gene Expression Assay User Guide
11
Page 12

Assay procedure: day 1
For fresh, frozen, or FFPE tissue homogenates
For fresh, frozen, or FFPE tissue homogenates
1.
Pre-warm Lysis Mixture at 37°C for 30 minutes followed by gentle swirling.
2.
If tissue homogenates have been frozen, remove from the freezer and thaw at room temperature
followed by incubation at 37°C for 30 min. Following incubation, vortex briefly if samples are in
tubes or pipette up and down 5 times using a multi-channel pipette if samples are in plates. Leave
at room temperature until use.
3.
Handle the reagents listed below as follows:
a.
Probe Set & Blocking Reagent: Thaw and vortex briefly to mix, then centrifuge Probe Set
briefly to collect contents at the bottom of the tube.
b.
Proteinase K: Keep on ice.
c.
Capture Beads: Take out of storage right before use and protect from light when possible.
4.
If samples require dilution, dilute with Homogenization Solution so that the desired amount of
sample is present in a volume of 40 μL/assay well. In order to optimize sample input, please see
“Optimize sample input” on page 25.
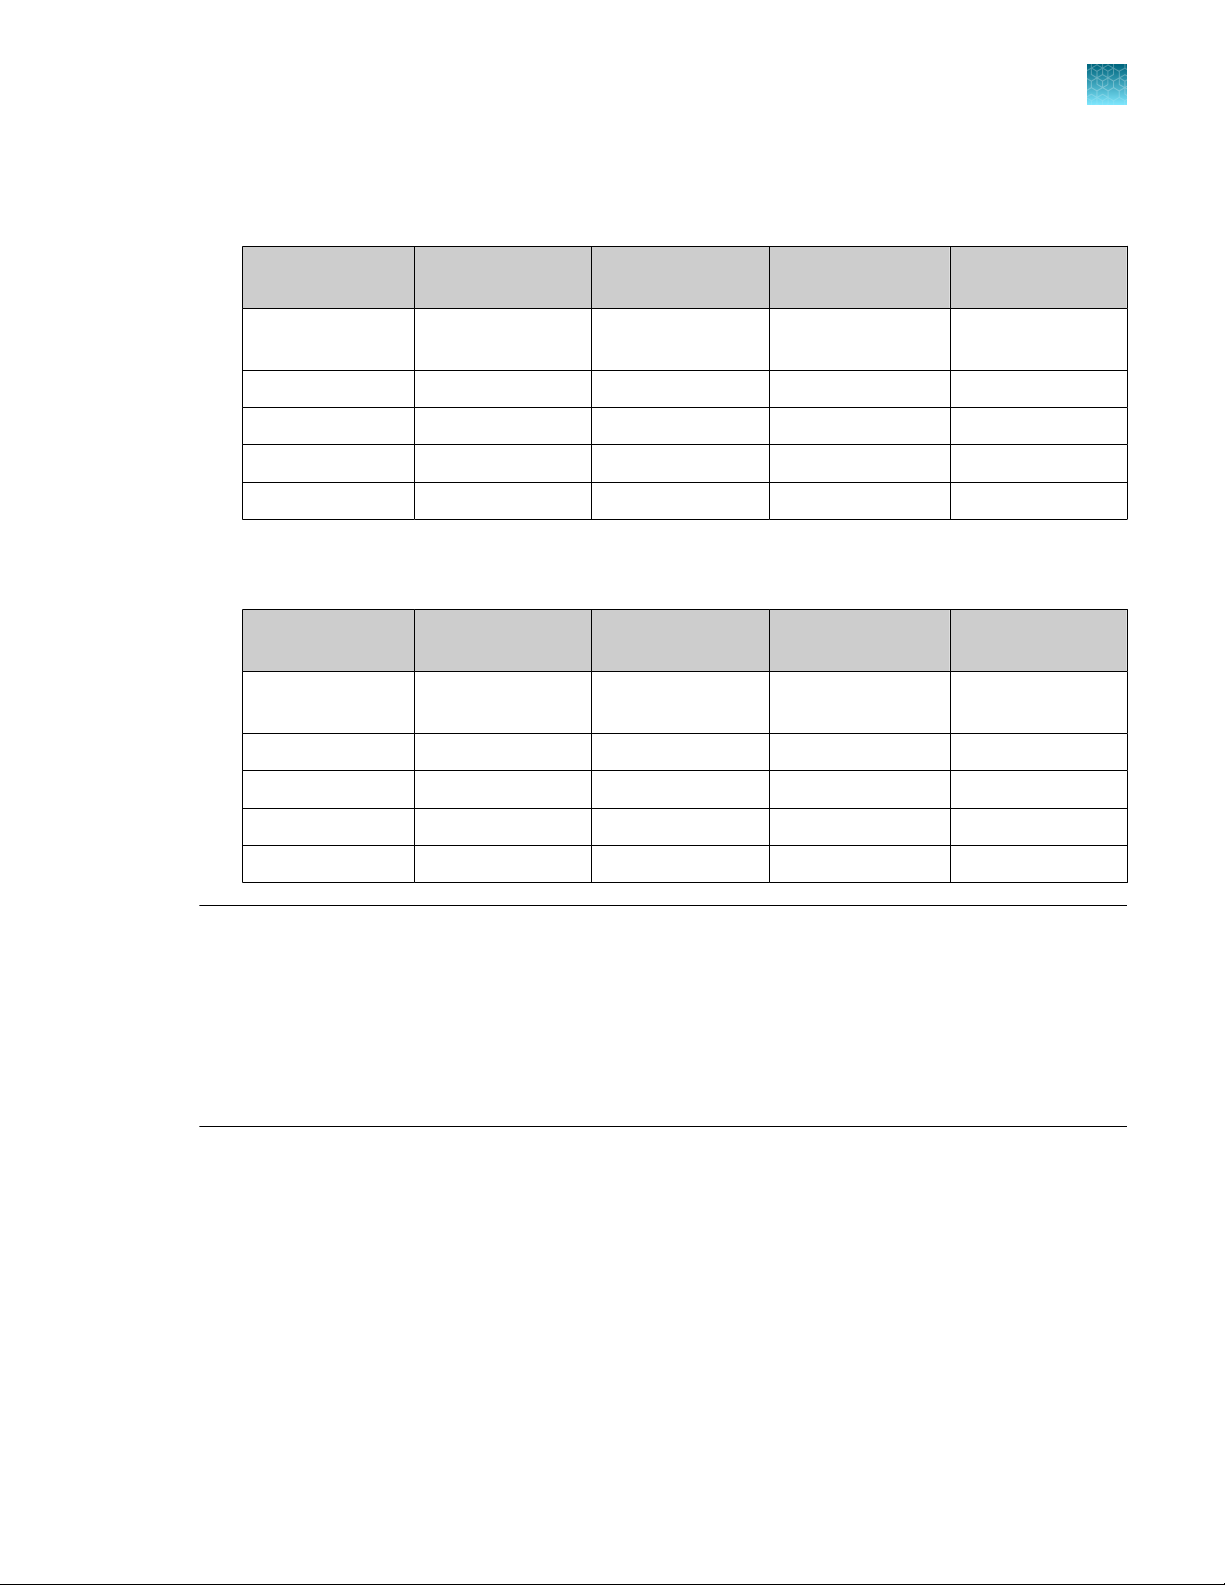
5.
Prepare an appropriate volume of Working Bead Mix by combining the following reagents in the
order listed. Scale according to the number of assays to be run, and include sucient overage.
Keep Working Bead Mix at room temperature and protected from light when possible. Do not store
on ice.
Order Reagent
1 Nuclease-free Water 18.5 2,220 17.5 2,100
2 Lysis Mixture 33.3 3,996 33.3 3,996
3 Blocking Reagent 2 240 2 240
4 Proteinase K 0.2 24 0.2 24
5 Capture Beads
(vortex 30 seconds
before adding)
6 Probe Set 5 600 6 720
Total 60 7,200 60 7,200
[1]
Includes 25% overage to enable use of reagent reservoir and multichannel pipette.
1 Well (µL) 96 Well (µL)
2 to 64-plex 65 to 80-plex
[1]
1 120 1 120
1 Well (µL) 96 Well (µL)
[1]
12
QuantiGene™ Plex Gene Expression Assay User Guide
Page 13

Assay procedure: day 1
For fresh, frozen, or FFPE tissue homogenates
6.
Vortex Working Bead Mix for 10 seconds, then pipette 60 μL into each well of the Hybridization
Plate.
•
For fewer than 48 wells: Dispense 60 μL of Working Bead Mix into each well of the
Hybridization Plate using a single channel pipette.
•
For 48 or more wells: Transfer Working Bead Mix to a 25mL reagent reservoir using a single
channel pipette. Do not pour or reagent shortage will occur. Using a multichannel pipette
and new tips for each transfer, dispense 60μL Working Bead Mix into each well of the
Hybridization Plate.
7.
Add 40 μL of tissue homogenate or diluted tissue homogenate to each well of the Hybridization
Plate containing Working Bead Mix . The total final volume in each well will be 100 μL. Load each
sample using a new pipette tip. Background Controls: add 40 μL of Homogenizing Solution to at
least 3 wells containing Working Bead Mix.
8.
Seal the Hybridization Plate using a Pressure Seal: Remove the backing of the Pressure Seal,
center and place onto the Hybridization Plate. Using a soft- rubber roller, apply firm even pressure
across the seal. Ensure that the plate has been completely sealed.
Note: DO NOT use the Day 2 Plate Seal, otherwise evaporation may occur.
9.
Place the Hybridization Plate in the shaking incubator and incubate for 18-22 hours at 54°C ± 1°C
at 600 rpm. Ensure the incubator has been calibrated using the Temperature Validation Kit. If using
a VorTemp™ 56, ensure there is an inverted plate lid in place, as explained by the package insert.
10.
After incubation, proceed to “Assay procedure: day 2” on page 16.
QuantiGene™ Plex Gene Expression Assay User Guide
13
Page 14

Assay procedure: day 1
For purified RNA or in vitro transcribed RNA
For purified RNA or in vitro transcribed RNA
1.
Pre-warm Lysis Mixture at 37°C for 30 minutes followed by gentle swirling.
2.
Remove RNA from freezer and thaw on ice. Vortex briefly before use. If appropriate, dilute RNA
using nuclease-free water so that the desired amount of RNA is present in 20 μL. See “Optimize
sample input” on page 25 for guidelines. The typical sample input range is 50-500 ng/well.
3.
Handle the reagents listed below as follows:
a.
Probe Set & Blocking Reagent: Thaw and vortex briefly to mix, then centrifuge Probe Set
briefly to collect contents at the bottom of the tube.
b.
Capture Beads: Take out of storage right before use and protect from light when possible.
4.
Prepare an appropriate volume of Working Bead Mix by combining the following reagents in the
order listed. Scale according to the number of assays to be run, and include sucient overage.
Keep Working Bead Mix at room temperature and protected from light when possible. Do not store
on ice.
Order Reagent
Nuclease-free
1
Water
2 Lysis Mixture 33.3 3,996 33.3 3,996
Blocking
3
Reagent
Capture Beads
(vortex 30
4
seconds before
adding)
5 Probe Set 5 600 6 720
Total 80 9,600 80 9,600
[1]
Includes 25% overage to enable use of reagent reservoir and multichannel pipette.
5.
Vortex Working Bead Mix for 10 seconds, then pipette 80 μL into each well of the Hybridization
1 Well (µL) 96 Well (µL)
2 to 64-plex 65 to 80-plex
[1]
38.7 4,644 37.7 4,524
2 240 2 240
1 120 1 120
1 Well (µL) 96 Well (µL)
Plate.
•
For fewer than 48 wells: Dispense 80 μL of Working Bead Mix into each well of the
Hybridization Plate using a single channel pipette.
•
For 48 or more wells: Transfer Working Bead Mix to a 25mL reagent reservoir using a single
channel pipette. Do not pour or reagent shortage will occur. Using a multichannel pipette
and new tips for each transfer, dispense 80 μL Working Bead Mix into each well of the
Hybridization Plate.
[1]
14
QuantiGene™ Plex Gene Expression Assay User Guide
Page 15

Assay procedure: day 1
For purified RNA or in vitro transcribed RNA
6.
Add 20 μL of RNA sample to each well of the Hybridization Plate containing Working Bead Mix .
The total final volume in each well will be 100 μL. Load samples using a multichannel pipette, if
possible. There is no need for mixing - try to avoid introducing bubbles.
Background Controls: Add 20 μL of Nuclease Free Water to at least 3 wells containing Working
Bead Mix. For IVT RNA background controls, add 20 μL of nuclease-free water containing 200
ng/μL yeast tRNA.
7.
Seal the Hybridization Plate using a Pressure Seal: Remove the backing of the Pressure Seal,
center and place onto the Hybridization Plate. Using a soft- rubber roller, apply firm even pressure
across the seal. Ensure that the plate has been completely sealed to prevent evaporation.
Note: DO NOT use the Day 2 Plate Seal, otherwise evaporation may occur.
8.
Place the Hybridization Plate in the shaking incubator and incubate for 18-22 hours at 54°C ± 1°C
at 600 rpm. Ensure the incubator has been calibrated using the Temperature Validation Kit. If using
a VorTemp™ 56, ensure there is an inverted plate lid in place, as explained by the package insert.
9.
After incubation, proceed to“Assay procedure: day 2” on page 16.
QuantiGene™ Plex Gene Expression Assay User Guide
15
Page 16

Assay procedure: day 2
Setup of the Luminex
Please refer to the QuantiGene™ Plex panel package insert for specific bead regions when setting up
your protocol in the Luminex™ xPONENT™ software. If given the option between calibrating with Low or
High RP1 target values, we recommend RP1 Low target value settings for the QuantiGene™ Plex Assay.
Use the following parameters to complete protocol definition :
Sample size
100 µL 5 ,000 - 25,000 45 sec 100
If there is a malfunction of the instrument or software during the run, the plate can be reprocessed
on the Luminex™ instrument. Remove the plate from the instrument, insert into the Handheld Magnetic
Plate Washer, wait 1 min, then remove the solution in the wells by quickly inverting the assembly over a
sink. Tap the assembly onto several layers of paper towels to remove any residual solution. Resuspend
the beads in 130μL of SAPE Wash Buer, remove from the Hand-Held Magnetic Plate Washer, seal the
plate, wrap in foil and shake at 800 rpm for 3 min at room temperature. The assayed samples may take
longer to read since there will be fewer beads in each previously read well due consumption from the
initial run.
Process Plate
™
protocol
DD Gate Timeout Bead event / bead region
16
These instructions are for processing one 96-well plate using a multi-channel pipettes and reagent
reservoirs. Scale reagents accordingly to process a dierent number of wells. Prior to completing the
QuantiGene™ Plex Assay on Day 2, allow plenty of time to warm up and calibrate the Luminex™.
The lasers require 30 minutes to warm up. Additionally, ensure your protocol is set up correctly in
xPONENT™. See Setup of Luminex™ Protocol for more details and settings.
1.
Warm Pre-Amplifier Solution, Amplifier Solution, and Label Probe Solution at 37°C for 30 minutes
to dissolve any precipitates, and mix well by inversion before use. Leave at room temperature until
ready to use (solutions are viscous). Bring SAPE Diluent to room temperature.
2.
Prepare 1X Wash Buer: add 0.6 mL Wash Buer Component 1 and 10 mL Wash Buer
Component 2 to 189 mL Nuclease Free Water. This volume is sucient for 1 plate. Scale wash
buer volumes according to the number of wells or plates to be processed.
3.
Remove the Hybridization Plate from the shaking incubator and adjust temperature to 50°C ± 1°C.
4.
Centrifuge Hybridization Plate at 240 × g for one minute at room temperature. Remove the
pressure seal and pipette up and down 5 times, then completely transfer from the Hybridization
Plate to the Magnetic Separation Plate. Use a multichannel pipette, one column at a time and
change tips after each transfer.
QuantiGene™ Plex Gene Expression Assay User Guide
Page 17

5.
Wash the plate:
a.
Insert the Magnetic Separation Plate into the Handheld Magnetic Plate Washer so that the A1
location of the 96-Well Plate matches up with the A1 Position noted on the washer.
b.
Ensure the Magnetic Separation Plate is securely locked onto the Handheld Magnetic Plate
Washer. The 2 securing tabs on each end of the washer should overlap the skirt of the plate
such that you can lift the entire plate/washer assembly by gently lifting the plate.
c.
Wait 1 minute to allow the Magnetic Beads to accumulate on the bottom of each well.
d.
Remove the solution in the wells by quickly inverting the assembly over a sink or waste
container and gently blot onto several layers of paper towels to remove any residual solution.
Do not remove the Magnetic Separation Plate from the Handheld Magnetic Plate Washer.
e.
Add 100 μL of 1X Wash Buer into each well.
f.
Wait 15 seconds to allow the Magnetic Beads to accumulate on the bottom of each well.
g.
Remove the Wash Buer in the wells by quickly inverting the assembly over a sink or waste
container. Repeat Actions E-G two more times for a total of three washes. After the last wash,
blot the Magnetic Separation Plate onto several layers of paper towels to remove any residual
solution.
Assay procedure: day 2
Process Plate
6.
Pre-Amplifier Hybridization:
a.
Transfer Pre-Amplifier Solution to a 25mL reagent reservoir and pipette 100μL using a multichannel pipette into each well.
b.
Seal the Magnetic Separation Plate with a Day 2 Plate Seal. Remove the Magnetic Separation
Plate from the Handheld Magnetic Plate Washer. Shake at 800 rpm for 1 minute at room
temperature to resuspend beads.
c.
Place the Magnetic Separation Plate into the shaking incubator, and incubate for 1 hour at
50°C±1°C with shaking at 600 rpm.
7.
After the 1 hour Pre-Amplifier incubation, remove the Magnetic Separation Plate from the shaking
incubator, remove the seal, insert the plate into the Handheld Magnetic Plate Washer and repeat
the washing procedure from Step 5.
8.
Amplifier Hybridization:
a.
Transfer Amplifier Solution to a 25mL reagent reservoir and pipette 100μL using a multichannel pipette into each well.
b.
Seal the Magnetic Separation Plate with a Day 2 Plate Seal. Remove the Magnetic Separation
Plate from the Handheld Magnetic Plate Washer. Shake at 800 rpm for 1 minute at room
temperature to resuspend beads.
c.
Place the Magnetic Separation Plate into the shaking incubator, and incubate for 1 hour at
50°C±1°C with shaking at 600 rpm.
QuantiGene™ Plex Gene Expression Assay User Guide
17
Page 18

Assay procedure: day 2
Process Plate
9.
After the 1 hour Amplifier incubation, remove the Magnetic Separation Plate from the shaking
incubator, remove the seal, insert the plate into the Handheld Magnetic Plate Washer and repeat
the washing procedure from Step 5.
10.
Label Probe Hybridization:
a.
Transfer Label Probe Solution to a 25mL reagent reservoir and pipette 100μL using a multichannel pipette into each well.
b.
Seal the Magnetic Separation Plate with a Day 2 Plate Seal. Remove the Magnetic Separation
Plate from the Handheld Magnetic Plate Washer. Shake at 800 rpm for 1 minute at room
temperature to resuspend beads.
c.
Place the Magnetic Separation Plate into the shaking incubator, and incubate for 1 hour at
50°C±1°C with shaking at 600 rpm.
11.
Prepare SAPE Working Reagent: briefly vortex SAPE to mix, then briefly centrifuge to collect the
contents at the bottom of the tube. In a 15mL tube, add 36μL of SAPE to 12mL of SAPE Diluent to
make the SAPE Working Reagent. Vortex for 15 seconds to mix, and protect from light.
12.
After the 1 hour Label Probe incubation, remove the Magnetic Separation Plate from the shaking
incubator, remove the seal, insert the plate into the Handheld Magnetic Plate Washer and repeat
the washing procedure from Step 5.
13.
Bind SAPE:
a.
Transfer the SAPE Working Reagent to a 25mL reagent reservoir and pipette 100μL into each
assay well using a multi-channel pipette.
b.
Seal the Magnetic Separation Plate with a Day 2 Plate Seal. Remove the Magnetic Separation
Plate from the Handheld Magnetic Plate Washer. Cover or wrap in foil to protect from light.
Place on a shaking platform at room temperature and shake at 800 rpm for 1 minute followed
by 600 rpm for 30 minutes.
14.
After the 30 minute SAPE incubation, remove the Magnetic Separation Plate from the plate shaker,
remove the seal, insert the plate into the Handheld Magnetic Plate Washer and repeat the washing
procedure from Step 5 using SAPE Wash Buer instead of the QuantiGene™ Plex Wash Buer.
15.
Prepare the plate for analysis
a.
Add 130μL of SAPE Wash Buer to each assay well using a multichannel pipette.
b.
Seal the Magnetic Separation Plate with a Day 2 Plate Seal. Remove the Magnetic Separation
Plate from the Hand Held Magnetic Plate Washer and wrap or cover the plate with aluminum
foil to protect from light.
c.
Place the Magnetic Separation Plate on the Microtiter Plate Shaker and shake at 800 rpm for
3 minutes at room temperature. Read plate immediately on Luminex™ instrument.
18
Note: If running more than 1 plate at a time, leave the 2nd plate at room temperature (without shaking).
Once the 1st plate has been read and the instrument wash protocol has been completed, place the
2nd plate on a shaker platform at room temperature shaking at 800 rpm for 3 minutes, then read
QuantiGene™ Plex Gene Expression Assay User Guide
Page 19

Assay procedure: day 2
Process Plate
immediately. The plate can be stored at room temperature for up to 2 hours or at 4 °C for 24 hours
(without shaking).
QuantiGene™ Plex Gene Expression Assay User Guide
19
Page 20

Analyze results
An example is provided for calculating gene expression fold changes. Target signals must be in the
linear range of the assay. Signals over 20,000 MFI on the Luminex™ 200™ or MAGPIX™ may be
saturating. Signals over 45,000 MFI on the Luminex™ FLEXMAP 3D™ may be saturating.
1.
For each sample, determine the average signal (MFI) for all genes.
Sample type
Background (no
sample)
Untreated sample 2727 21315 117.5 20710.5
Treated sample 1 2551.5 4449.5 169.3 9260.5
Treated sample 4 2741.5 11986 133.3 5547
Treated sample 3 3020.5 10141.3 115.5 20959.8
2.
For each sample, subtract the average background signal for each gene.
Sample type
Background (no
sample
Untreated sample 2720.7 21307 110.7 20704.5
Treated sample 1 2545.2 4441.5 162.5 9254.5
Treated sample 4 2735.2 11978 126.5 5541
Treated sample 3 3014.2 10133.3 108.7 20953.8
Normalization
gene
6.3 8 6.8 6
Normalization
gene
0 0 0 0
Test gene 1 Test gene 2 Test gene 3
Test gene 1 Test gene 2 Test gene 3
20
QuantiGene™ Plex Gene Expression Assay User Guide
Page 21
Analyze results
Process Plate
3.
For each sample, divide each test gene signal (background subtracted) by the reference gene
signal (background subtracted). This will correct for sample preparation, sample input and
deviations between wells, plates, and experiments.
Sample type
Background (no
sample
Untreated sample 1 7.83 0.04 7.61
Treated sample 1 1 1.75 0.06 3.64
Treated sample 4 1 4.37 0.05 2.03
Treated sample 3 1 3.36 0.04 6.95
4.
For each test gene, calculate Fold Change by dividing the normalized value for the treated samples
Normalization
gene
— — — —
Test gene 1 Test gene 2 Test gene 3
by the normalized value for the untreated sample
Sample type
Background (no
sample
Untreated sample 1 1 1 1
Treated sample 1 1 0.22 1.57 0.48
Treated sample 4 1 0.56 1.14 0.27
Normalization
gene
— — — —
Test gene 1 Test gene 2 Test gene 3
Treated sample 3 1 0.43 0.89 0.91
Note: A cloud-based software tool is available at apps.thermofisher.com/apps/quantigene.
In addition, the data can be exported from the software tool to the Applied Biosystems
™
Transcriptome Analysis Console (TAC) software for advanced analysis and visualization. When
combined with TAC, the analysis allows for better visualization and interpretation using
tools like scatter and volcano plots, hierarchical clustering, and link outs to publicly
available annotations. Download a free copy of TAC at www.thermofisher.com/us/en/home/
life-science/microarray-analysis/microarray-analysis-instruments-software-services/microarrayanalysis-software/aymetrix-transcriptome-analysis-console-software.html .
QuantiGene™ Plex Gene Expression Assay User Guide
21
Page 22
A
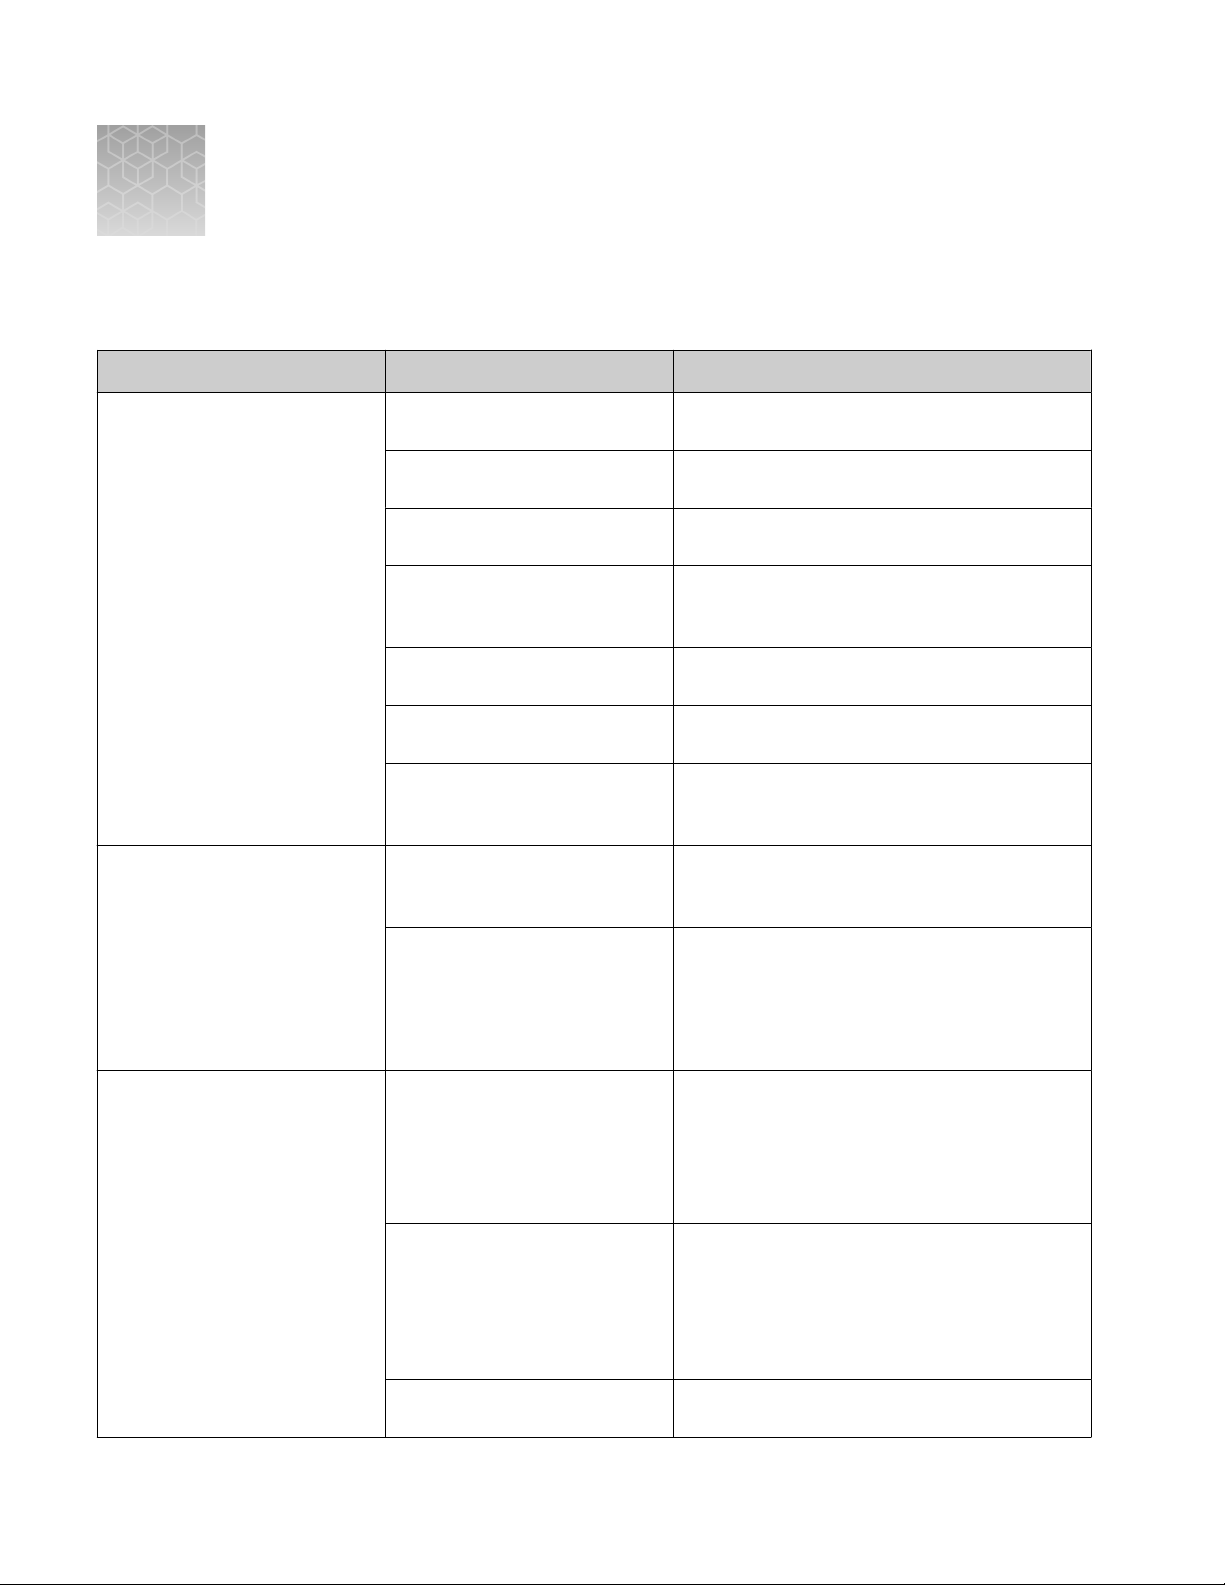
Troubleshooting
Observation Possible cause Recommended action
Low assay signal or poor
sensitivity
High background signal
Number of RNA transcripts
below limit of detection
Incomplete cell lysis Refer to the appropriate sample processing kit
Expired reagents were used Reagents are good for 6 months from date of
Sub-optimal assay conditions Follow the recommended incubation times and
Photobleaching of SAPE Protect SAPE from light throughout the
Incorrect wash buer was used Use SAPE Wash Buer to wash away unbound
Significant RNA degradation Refer to the appropriate sample processing kit
Sub-optimal assay conditions Follow the recommended incubation times and
Poor washing Refer to the appropriate sample processing kit
Increase the sample input.
product inserts for detailed procedures.
receipt.
temperature. Shake the Magnetic Separation
Plate during all incubations.
procedure.
SAPE.
package inserts for detailed procedures and
troubleshooting.
temperature. Shake the Magnetic Separation
Plate during all incubations.
product inserts for detailed procedures.
Low assay precision (high CV)
22
Set up the magnetic washer with 5–10 μL
of residual volume for each wash step. Verify
washing program on the magnetic washer.
Inaccurate pipetting
Non-homogeneous samples Warm samples to 37 °C to dissolve any
Incomplete cell lysis Refer to the appropriate sample processing kit
•
Use only calibrated, precision pipettes.
•
Ax tips securely.
•
Use a new tip for each transfer.
•
Pipette slowly and carefully, avoiding
bubbles voiding bubbles.
precipitate, and vortex briefly before use. If
samples contain particulates, centrifuge at
high speed for 15 minutes, then transfer
supernatants to a new tube and repeat
centrifugation and transfer step before use.
product inserts for detailed procedures.
QuantiGene™ Plex Gene Expression Assay User Guide
Page 23
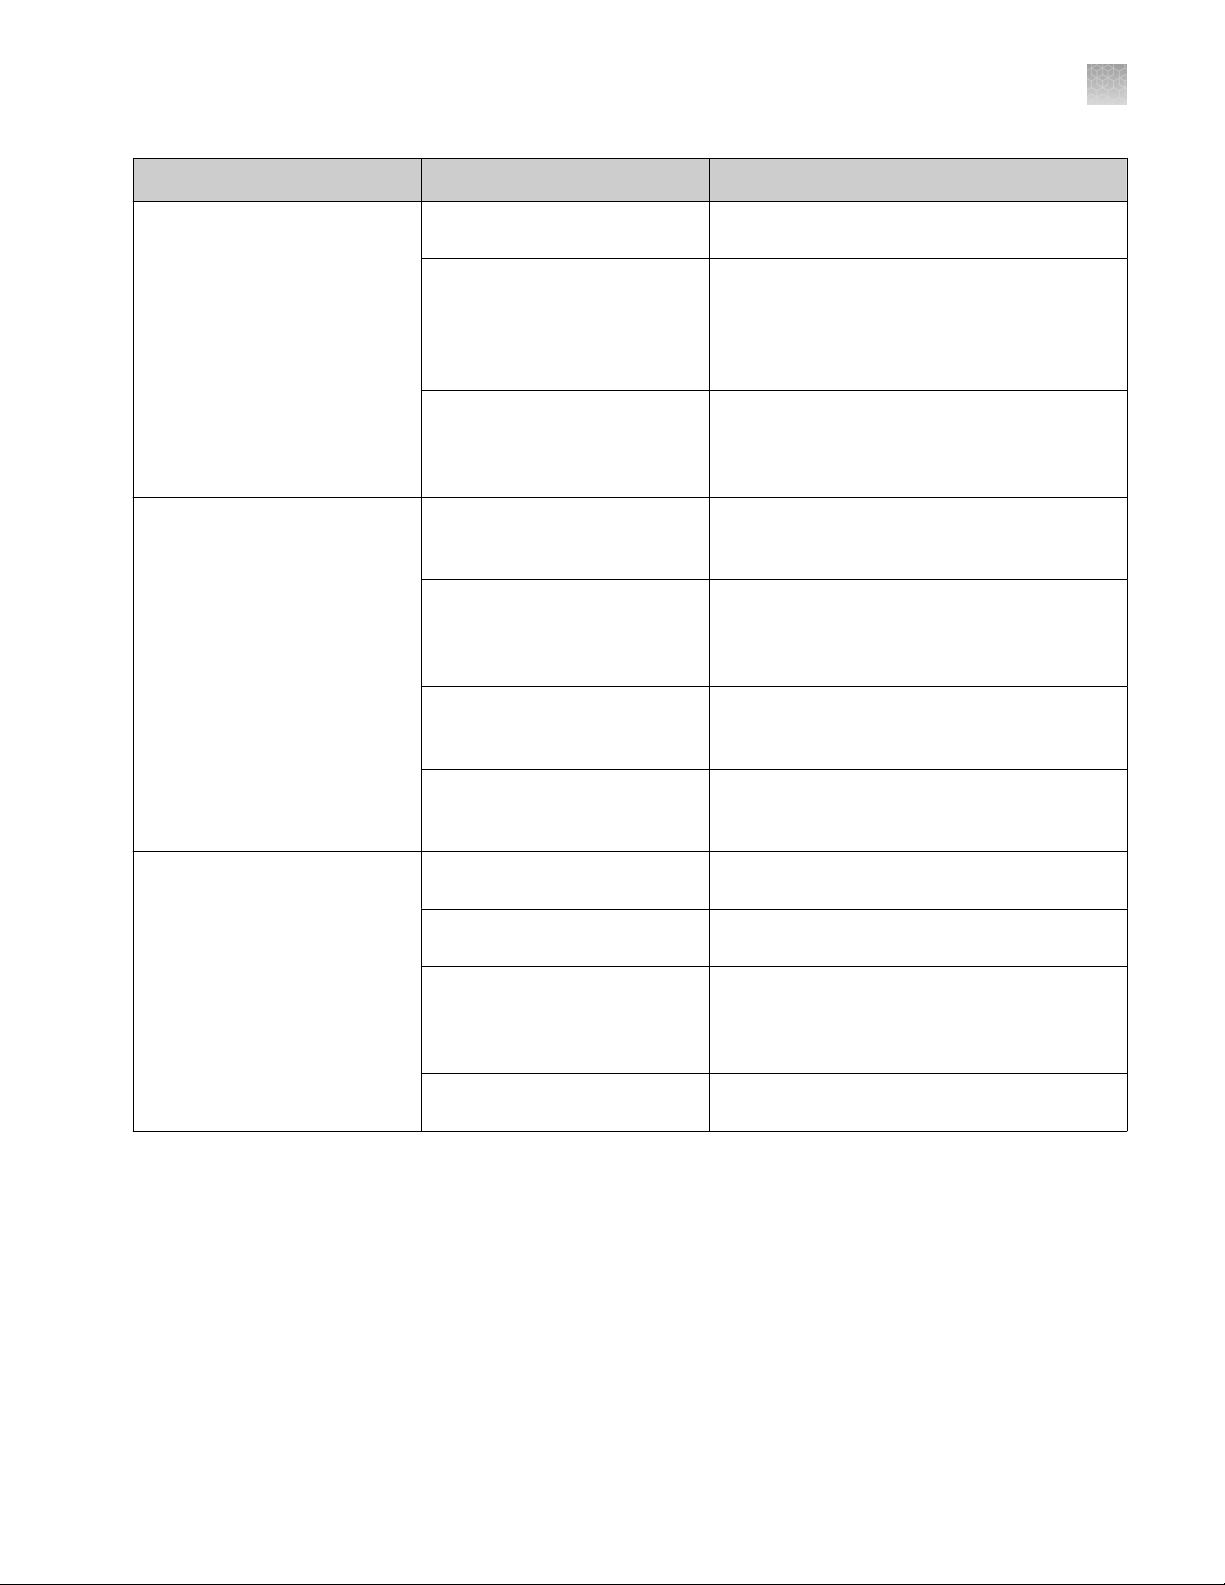
Appendix A Troubleshooting
Process Plate
Observation Possible cause Recommended action
A
Low assay precision (high CV)
(continued)
Low bead count
Poor assay linearity
Instrument needle is partially
clogged
Bubble introduction into
Luminex™ fluidics
Replace or clean the needle according to the
manufacturer's recommendations.
Check Luminex™ probe for proper height, then
run instrument debubbling protocol. Make sure
every well contains 130 μL of SAPE Wash Buer
and verify the Luminex™ sample size is set to
100 μL.
Using buers containing
precipitates
Eliminate precipitates by warming to 37 °C
for 30 minutes followed by gentle swirling.
If precipitate remains, continue with the
incubation.
Capture Beads settled or
clumped in stock tube
Vortex Capture Beads for 30 seconds
immediately prior to adding to Working Bead
Mix.
Capture Beads were not
resuspended prior to transfer to
the Magnetic Separation Plate
Pipette up and down to resuspend the Capture
Beads in the Hybridization Plate prior to transfer
of the hybridization mixture to the Magnetic
Separation Plate.
Magnetic Separation Plate not
shaken enough prior to reading
Shake the Magnetic Separation Plate at 800
rpm for at least two minutes to resuspend the
beads before reading the plate.
Incorrect Luminex™ probe height Adjust the height of the probe following
the procedures supplied with your Luminex
™
system.
Incomplete cell lysis Refer to the appropriate sample processing kit
product inserts for detailed procedures.
Inadequate sample preparation Refer to the appropriate sample processing kit
product inserts for detailed procedures.
Instrument saturation Signals >20,000 MFI on a Luminex™ 100™/200
instrument may be saturated. The FLEXMAP
™
and MagMAX™ have a higher range prior to
saturation.
Assay saturation Perform serial dilution of sample to ensure
appropriate fold change is observed.
™
QuantiGene™ Plex Gene Expression Assay User Guide
23
Page 24

Magnetic plate washer validation
B
Validate the handheld magnetic plate washer
The Handheld Magnetic Plate Washer is designed for use with the QuantiGene™ Plex Assay configured
for the Magnetic Separation Plate. This device uses magnetic separation to enable wash steps after
each incubation. This section describes how to validate the handheld washer prior to running an
experiment and how to operate the device when performing washes.
Do not substitute another plate type for the Magnetic Separation Plate included in the QuantiGene
Plex Kit. This plate is specifically for use with the Handheld Magnetic Plate Washer (EPX-55555-000).
Other plate types can result in assay failure. After reading all instructions in this document, we
recommend that you perform a series of practice washes using the Handheld Magnetic Plate Washer.
Note: Failure to completely read and follow the instructions for validating and using the Handheld
Magnetic Plate Washer could result in assay failure.
protocol
™
1.
Set up the Luminex™ instrument according to the guidelines provided. Define a protocol with the
appropriate bead regions and set to read 2 wells. Refer to the product insert for the target-bead
population of the panel.
2.
Vortex Capture Beads at maximum speed for 30 seconds. Add 2.5μL of Capture Beads to 250 μL
of SAPE Wash Buer. Vortex to mix. Add 100μL of the Capture Bead mixture into each of 2 wells
on the Magnetic Separation Plate.
3.
Perform wash steps:
a.
Perform a series of wash steps using the Wash Buer to simulate the multiple wash steps in
the assay. No incubation needed.
b.
After the final wash step, add 130μL SAPE Wash Buer to each well. Cover the Magnetic
Separation Plate with a plate seal, place on a shaking platform at room temperature and shake
for 2 to 5 min to completely resuspend the Magnetic Beads.
4.
Read Magnetic Separation Plate
a.
Insert the Magnetic Separation Plate into the instrument and read the 2 wells. Make sure the
probe height is set properly for the Magnetic Separation Plate.
b.
View the window with the bead regions and Doublet Discriminator (DD) gate. The expected
results are:
•
Signals for the expected beads should show up on the bead map.
•
Average bead count should be greater than 50/region.
•
The main single peak in the DD gate window should be within the set DD gates.
24
QuantiGene™ Plex Gene Expression Assay User Guide
Page 25

Sample optimization protocol
Optimize sample input
Optimal QuantiGene™ Plex assay performance depends on the complete release and stabilization of the
RNA from the cells and protein complexes. Incomplete cell lysis may result in poor assay precision, high
CV values, or non-linear results. If any of these conditions occur, your samples may not be completely
lysed. Complete cell lysis depends on the correct ratio of cells to lysis solution (Working Lysis Mixture or
Working Homogenization Solution) and the method used to lyse the cells or homogenize the tissue.
1.
Follow the recommended amount of cell number or tissue amount per volume of lysis mixture
solution or homogenization solution listed in the Sample Processing Kit package insert for the
specific sample types. Example recommendations are summarized below for cultured cells and
animal tissues. To ensure optimal lysis, in the initial experiment, run a test range of sample
preparations as indicated in the table.
Sample type
Cultured cells 400 cells/μL Working Lysis
Tissue 5 mg
[1]
Wet tissue.
2.
For each lysate or homogenate, prepare a 4-fold, 4-point serial dilution in Diluted Lysis Mixture or
Recommended Test Range
200, 400, 800 cells/μL Working
Mixture
[1]
/300 μL Working Tissue
Homogenization Solution
2.5
Working Tissue Homogenization
Lysis Mixture
[1]
, 5.0
[1]
, 10 mg
Solution
[1]
/300 μL
Tissue Homogenization Solution, respectively, to determine the assay performance. Make sure to
account for sucient sample input volume (technical replicates). Assay performance is determined
by calculating the following:
•
LOD (Assay limit of detection)
•
LOQ (Limit of Quantification)
•
Assay linearity
•
%CV (Coecient of Variation)
Please refer to the Glossary on page 31 for detailed calculation instructions.
3.
Calculate the assay performance for each sample (input) to determine which one had the best
performance and use that amount of cells or tissue for future experiments.
QuantiGene
™
Plex Gene Expression Assay User Guide
25
Page 26

Sample optimization protocol
Determine the optimal lysis method for a sample type
Determine the optimal lysis method for a sample type
Following the procedure for determining optimal lysis, test dierent lysis methods. For example, tissue
lyser vs. liquid nitrogen. Procedures for these lysis methods can be found in the Sample Processing Kit
Package Insert.
After you have determined the optimal lysis conditions for sample preparation, use the following
guidelines to determine the optimal sample amount to use for the QuantiGene™ Plex assay.
•
Resulting signal from the sample is above the LOQ. The LOQ is between 2,000 and 4,000 RNA
transcripts per well.
•
Amount of sample is high enough to compensate for sample loading error. For example, if the
amount of loaded sample can deviate more than 4 times, then increase the sample input by 4 to
ensure detection.
•
If the amount of sample is not limiting, use an input that has a signal/background ratio of at least
10-fold. Background is defined as signal from a sample well that contains no sample.
•
Ensure signal from samples are within the assay and instrument linear range. Luminex™ 200
instruments exhibit saturation starting around 20,000 MFI. Assay linear working ranges are
approximately 1,500 to 1,500,000 RNA transcripts.
™
26
QuantiGene™ Plex Gene Expression Assay User Guide
Page 27

C
WARNING! GENERAL SAFETY. Using this product in a manner not specified in the user
documentation may result in personal injury or damage to the instrument or device. Ensure that
anyone using this product has received instructions in general safety practices for laboratories and
the safety information provided in this document.
Before using an instrument or device, read and understand the safety information provided in the
·
user documentation provided by the manufacturer of the instrument or device.
Before handling chemicals, read and understand all applicable Safety Data Sheets (SDSs) and use
·
appropriate personal protective equipment (gloves, gowns, eye protection, and so on). To obtain
SDSs, see the “Documentation and Support” section in this document.
Safety
QuantiGene™ Plex Gene Expression Assay User Guide
27
Page 28

Appendix C Safety
C
Chemical safety
Chemical safety
WARNING! GENERAL CHEMICAL HANDLING. To minimize hazards, ensure laboratory personnel
read and practice the general safety guidelines for chemical usage, storage, and waste provided
below. Consult the relevant SDS for specific precautions and instructions:
Read and understand the Safety Data Sheets (SDSs) provided by the chemical manufacturer
·
before you store, handle, or work with any chemicals or hazardous materials. To obtain SDSs, see
the "Documentation and Support" section in this document.
Minimize contact with chemicals. Wear appropriate personal protective equipment when handling
·
chemicals (for example, safety glasses, gloves, or protective clothing).
Minimize the inhalation of chemicals. Do not leave chemical containers open. Use only with
·
sucient ventilation (for example, fume hood).
Check regularly for chemical leaks or spills. If a leak or spill occurs, follow the manufacturer
·
cleanup procedures as recommended in the SDS.
Handle chemical wastes in a fume hood.
·
Ensure use of primary and secondary waste containers. (A primary waste container holds the
·
immediate waste. A secondary container contains spills or leaks from the primary container.
Both containers must be compatible with the waste material and meet federal, state, and local
requirements for container storage.)
After emptying a waste container, seal it with the cap provided.
·
Characterize (by analysis if needed) the waste generated by the particular applications, reagents,
·
and substrates used in your laboratory.
Ensure that the waste is stored, transferred, transported, and disposed of according to all local,
·
state/provincial, and/or national regulations.
IMPORTANT! Radioactive or biohazardous materials may require special handling, and disposal
·
limitations may apply.
28
WARNING! HAZARDOUS WASTE (from instruments). Waste produced by the instrument is
potentially hazardous. Follow the guidelines noted in the preceding General Chemical Handling
warning.
WARNING! 4L Reagent and Waste Bottle Safety. Four-liter reagent and waste bottles can crack
and leak. Each 4-liter bottle should be secured in a low-density polyethylene safety container with the
cover fastened and the handles locked in the upright position.
QuantiGene™ Plex Gene Expression Assay User Guide
Page 29

Biological hazard safety
WARNING! Potential Biohazard. Depending on the samples used on this instrument, the surface
may be considered a biohazard. Use appropriate decontamination methods when working with
biohazards.
WARNING! BIOHAZARD. Biological samples such as tissues, body fluids, infectious agents,
and blood of humans and other animals have the potential to transmit infectious diseases.
Conduct all work in properly equipped facilities with the appropriate safety equipment (for example,
physical containment devices). Safety equipment can also include items for personal protection,
such as gloves, coats, gowns, shoe covers, boots, respirators, face shields, safety glasses, or
goggles. Individuals should be trained according to applicable regulatory and company/ institution
requirements before working with potentially biohazardous materials. Follow all applicable local,
state/provincial, and/or national regulations. The following references provide general guidelines when
handling biological samples in laboratory environment.
U.S. Department of Health and Human Services, Biosafety in Microbiological and Biomedical
·
Laboratories (BMBL), 5th Edition, HHS Publication No. (CDC) 21-1112, Revised December 2009;
found at:
https://www.cdc.gov/labs/pdf/CDC-BiosafetymicrobiologicalBiomedicalLaboratories-2009P.pdf
World Health Organization, Laboratory Biosafety Manual, 3rd Edition,
·
WHO/CDS/CSR/LYO/2004.11; found at:
www.who.int/csr/resources/publications/biosafety/Biosafety7.pdf
Appendix C Safety
Biological hazard safety
C
QuantiGene™ Plex Gene Expression Assay User Guide
29
Page 30

Documentation and support
Customer and technical support
Visit thermofisher.com/support for the latest service and support information.
•
Worldwide contact telephone numbers
•
Product support information
–
Product FAQs
–
Software, patches, and updates
–
Training for many applications and instruments
•
Order and web support
•
Product documentation
–
User guides, manuals, and protocols
–
Certificates of Analysis
–
Safety Data Sheets (SDSs; also known as MSDSs)
Note: For SDSs for reagents and chemicals from other manufacturers, contact the
manufacturer.
Limited product warranty
Life Technologies Corporation and/or its aliate(s) warrant their products as set forth in the
Life Technologies' General Terms and Conditions of Sale at www.thermofisher.com/us/en/home/
global/terms-and-conditions.html. If you have any questions, please contact Life Technologies at
www.thermofisher.com/support.
30
QuantiGene™ Plex Gene Expression Assay User Guide
Page 31

Assay precision
The Coecient of Variation (CV) is a measure of assay precision. QuantiGene™ Plex Assay CVs are
typically less than 15% for technical replicates
To determine the assay CV:
1.
Run technical replicates of each sample.
2.
Calculate the avereage background-subtracted signal (AVG) of technical replicates for each target
RNA.
3.
Calculate the standard deviation (SD) of signals from technical replicates for each target RNA.
4.
Calculate the %CV = (SD/AVG) × 100.
Assay limit of detection (LOD)
Glossary
The LOD is the signal above the background plus 3 standard deviations of the background. To calculate
assay limit of detection for each target RNA:
LOD = AVG MFI of assay background control wells + 3 SD of assay background signals.
Assay signals below LOD should not be used to draw quantitative conclusions about gene expression
Limit of Quantification (LOQ)
LOQ is the lowest MFI that exhibits acceptable accuracy of fold change. Quantifiable signals are those
signals within the assay's linear range.
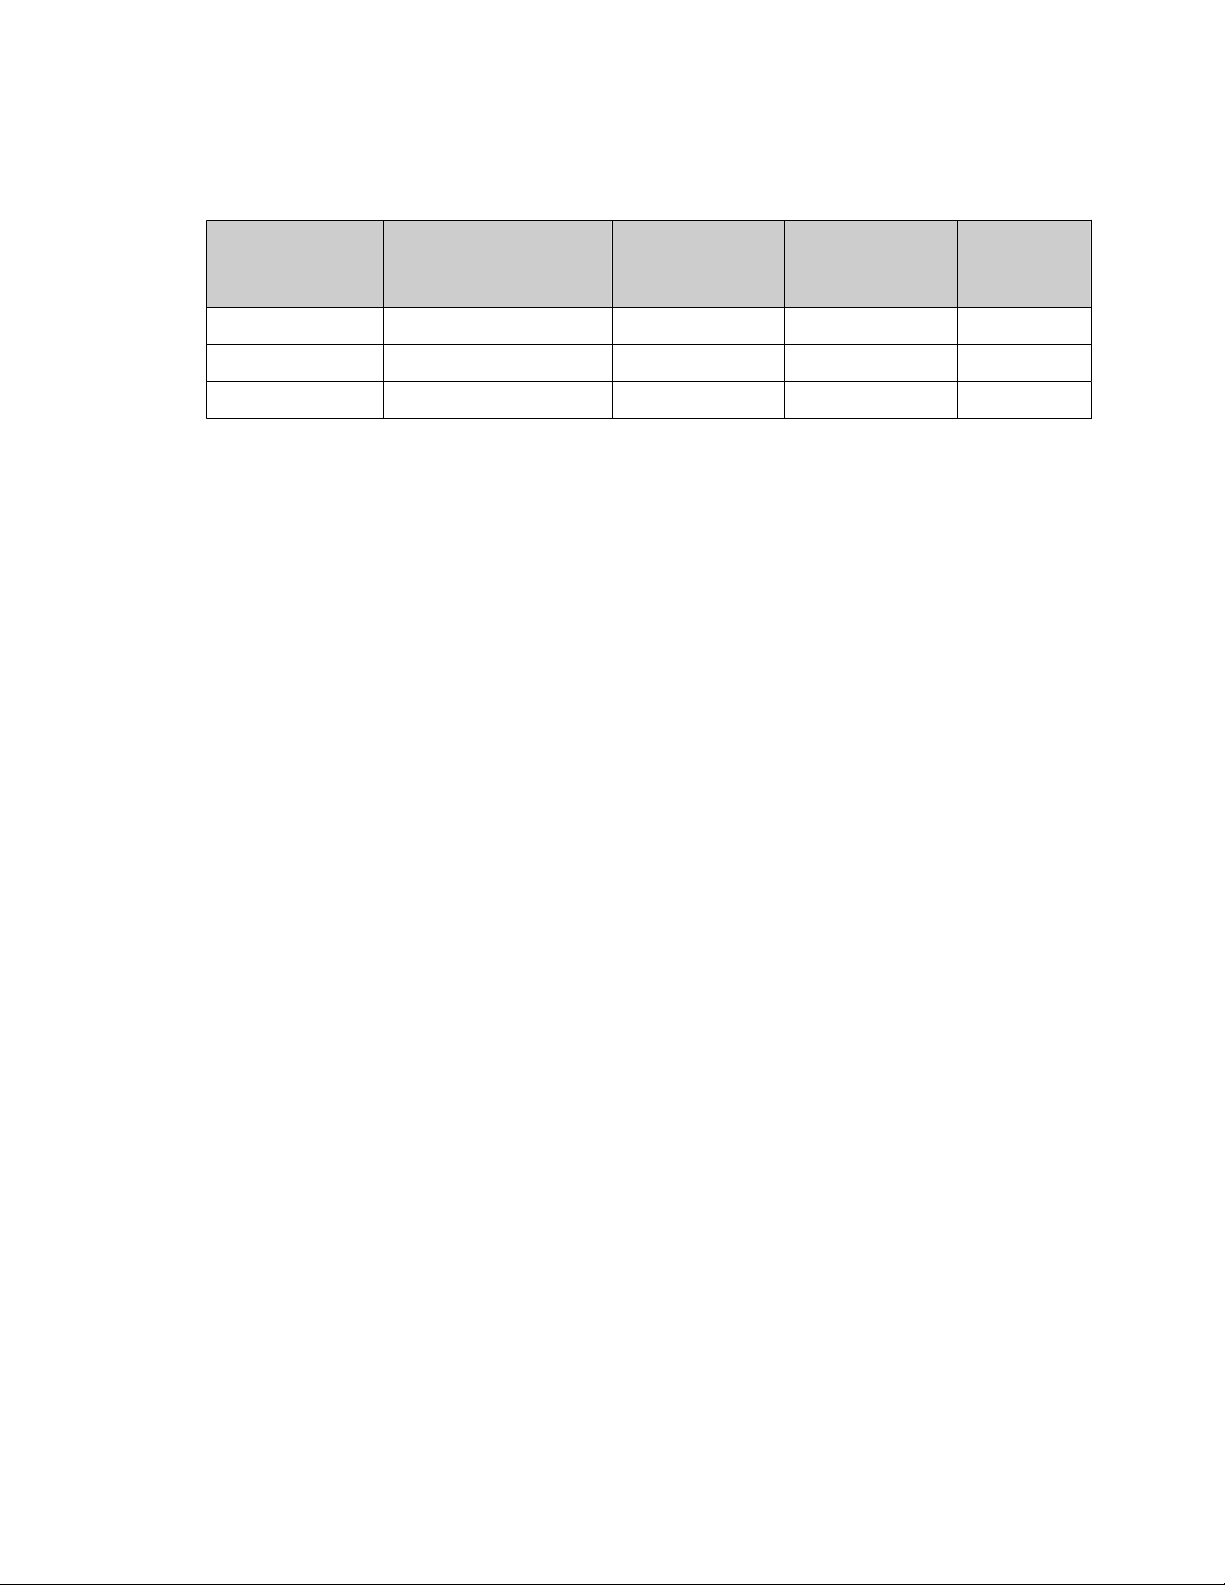
Assay linearity/accuracy of fold change
Assay linearity is defined as all dilutions that exhibit an accuracy of fold change between 80 and 120%.
To determine assay linearity:
1.
Run a dilution series of your sample.
2.
Subtract the AVG assay background signal from the AVG signal of technical replicates for each
target RNA.
QuantiGene
™
Plex Gene Expression Assay User Guide
31
Page 32
Limited product warranty
3.
Calculate the ratio of background-subtracted AVG MFI from sequential sample dilutions for each
target RNA. Observed values should be within 20% of the expected ratio of 100% (80%-120%).
Replicates
Technical replicates are replicate assays from a single sample. For example, a cell lysate that is divided
into several portions and each portion run in the same QuantiGene™ Plex assay. Biological replicates
are replicate assays from biologically-equivalent samples. For example, cells grown in dierent wells
that are subjected to the same treatment, lysed independently, then run as distinct samples in the
QuantiGene™ Plex assay
3-fold serial
dilution of the cell
lysate (μL)
60 3100 3.10 3 103
20 1000 2.70 3 90
6.6 370 — — —
Signal (background
subtracted) (MFI)
Observed fold
change
Expected fold
change
% Obs/Exp
32
QuantiGene™ Plex Gene Expression Assay User Guide
Page 33

Page 34

Quantigene Plx Gene Expression Assay_UG_MAN0017862-v6-GUID-B6E8B7A5-5B9E-4190BB55-6F28549CA2AD-2021/02/17 06:01:21 en
05:53:39.842Z
thermofisher.com/support | thermofisher.com/askaquestion
thermofisher.com
2 March 2021
 Loading...