

QUICK REFERENCE
Respiratory Tract Microbiota P
rofiling Experiments v2 using
OpenArray™ plates
Pub. No. MAN0019509 Rev. A.0
Note: For safety and biohazard guidelines, see the “Safety”
appendix in the Respiratory Tract Microbiota Profiling Experiments
v2 using OpenArray™ Application Guide (Pub. No. MAN0019506).
Read the Safety Data Sheets (SDSs) and follow the handling
instructions. Wear appropriate protective eyewear, clothing, and
gloves.
This document is intended as a benchtop reference for
experienced users. See “Related documentation” on page 5 for
resources that contain detailed instructions and troubleshooting.
Perform preamplification and dilute samples
Perform preamplification
Note: Preamplification of the TrueMark™ Respiratory Panel 2.0
Amplification Control is not recommended.
1. Prepare PreAmp Reaction Mix: Combine the following
components for the number of required reactions plus 10%
overage, then mix thoroughly by pipetting up and down.
4. Gently vor
tex the plate for 10 seconds to mix, then briefly
centrifuge to bring contents to the bottom of the wells.
5. Place the plate in a thermal cycler that is programmed with
the following thermal cycling conditions, then start the run.
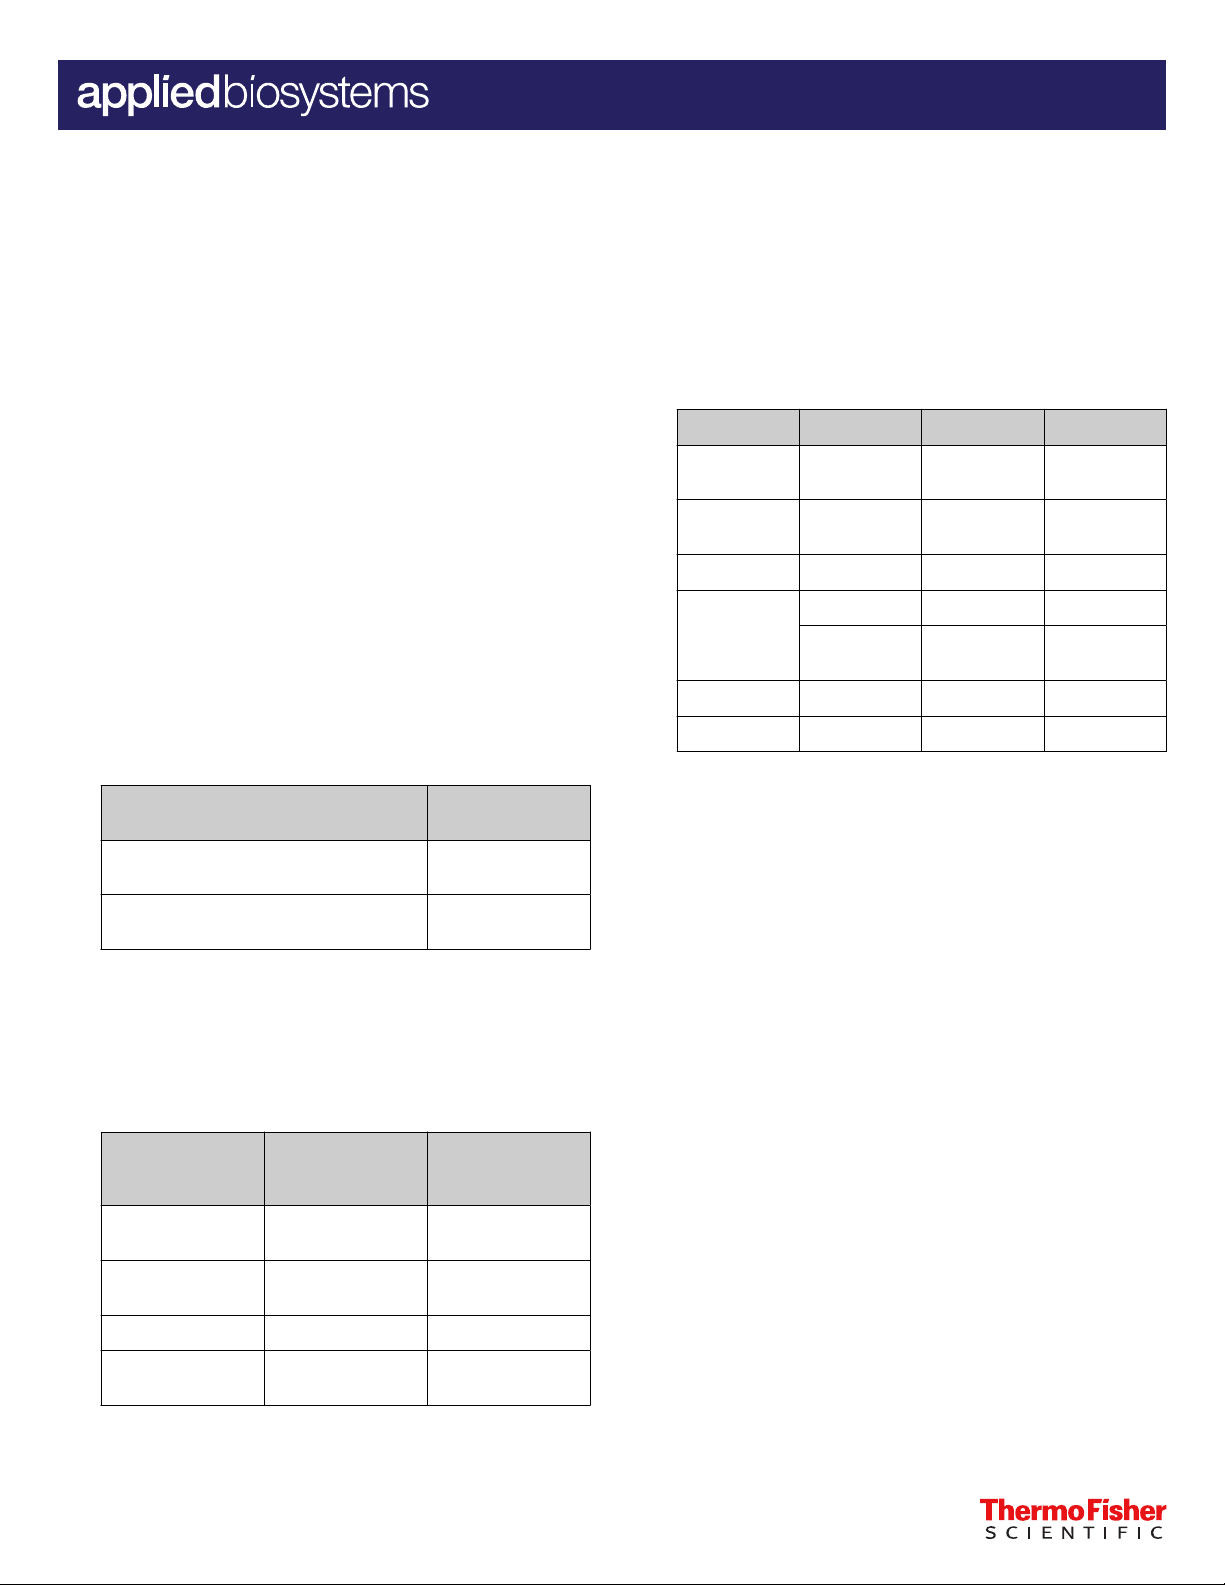
Stage Step Temperature Time
Hold
Hold
Hold Activation 95°C 2 minutes
Cycling (14
cycles)
Hold Inactivation 99.9°C 10 minutes
Hold — 4°C Hold
[1]
eat-labile UNG is completely inactivated during the initial ramp to 95°C.
H
UNG
incubation
Reverse
anscription
tr
Denaturation 95°C 15 seconds
Annealing/
Extension
[1]
25°C 2 minutes
50°C 30 minutes
60°C 2 minutes
Component
TaqPath™ 1-Step RT-qPCR Master Mix,
CG
TrueMark™ Respiratory Panel 2.0 PreAmp
[1]
Primers
[1]
T
he TrueMark™ Respiratory Panel 2.0 PreAmp Primers contains primers
for all respiratory tract microbiota assays plus the TaqMan™ Universal RNA
Spike In/Reverse Transcription (Xeno) Control and the RNase P RPPH1
gene, but does not contain primers for the TaqMan™ Universal Extraction
Control Organism (B. atrophaeus).
Volume per
r
eaction
2.5 µL
2.5 µL
2. Distribute PreAmp Reaction Mix, then Nuclease-free Water
or sample nucleic acid to the appropriate wells of a 96-well
plate.
No-template
Component Sample reaction
PreAmp Reaction
Mix
Sample DNA or
NEC
Nuclease-free Water — 5 µL
Total volume per
reaction
5 µL 5 µL
5 µL —
10 µL 10 µL
contr
reaction
ol (NTC)
6. Store the plate on ice until dilution for PCR (see “Dilute the
preamplified sample” on page 1).
Dilute the preamplified sample
To determine dilution volumes, first determine the total volume
of diluted preamplified sample that is required for PCR (see
“Prepare and run respiratory tract microbiota profiling experiments
with OpenArray™ plates” on page 2). We recommend that you
prepare only the volume of diluted preamplified sample that is
required for your experiment. The undiluted preamplified sample
can be stored at –20°C long term.
1. Vortex, then briefly centrifuge the plate that contains the
completed preamplification sample reactions.
2. Remove the adhesive film from the plate.
3. Prepare a 1:10 dilution of the preamplified samples in a new
96-well plate.
a. Transfer the desired volume of the preamplified
samples to a new 96-well plate (for example, 2 µL).
b. Add the appropriate volume of Nuclease-free Water to
each sample and control well (for example, 18 µL).
4. Seal the plate with new adhesive film.
3. Seal the plat
e with adhesive film.
For Research Use Only. Not for use in diagnostic procedures.

5. Vortex the plate for 10 seconds, then briefly centrifuge.
b. Select the folders indicat
ed in this table:
6. Proceed directly to PCR (see “Prepare and run respiratory
tract microbiota profiling experiments with OpenArray
™
plates” on page 2 ).
Seal the plate that contains the unused portion of the undiluted
preamplified samples, then store at –20°C.
Prepare and run respiratory tract microbiota
profiling experiments with OpenArray™ plates
One-time procedures
Set up default folders and software preferences
Set up the default file locations and preferences before using
the OpenArray™ AccuFill™ system for the first time. You must be
logged in as an administrator.
1. Create the following four folders in a convenient location on
the same computer drive as the AccuFill™ software:
• TPF Files
• Sample Tracker 96-well Input
• Sample Tracker 384-well CSV Files
• Loaded TPF Files
2. (Optional) Copy a template file into the OpenArray™ Sample
Tracker Software folder.
• Navigate to this folder on your
computer: <drive>:\Program Files
(x86)\Applied Biosystems\OpenArray Sample
Tracker\examples.
• Copy the 96‑Well Sample Plate 1.csv template
file, which is provided with the OpenArray™ Sample
Tracker Software.
• Paste the template file into the Sample Tracker 96‑well
Input folder.
AccuFill
OpenArray
Plate File Input
Folder
Sample Plate
File Folder
Loaded
OpenArray
Plate File
Folder
5. In the QuantS
™
folder
™
™
Default folder Folder contents
TPF Files TPF files for the
Sample Tracker
384-well CSV Files
Loaded TPF Files Integrated TPF files
OpenArray™ plates,
with assay name
and location
CSV 384-well
sample plate layout
files
generated during
processing with the
AccuFill™ software.
tudio™ 12K Flex Software, select Tools4
Preferences4OpenArray, then select the Loaded TPF
Files folder for the software Setup Folder.
Note: If the QuantStudio™ 12K Flex Software is not on
the same computer as the AccuFill™ software, transfer the
loaded TPF files to the computer running the QuantStudio
™
12K Flex Software.
Obtain TPF files
Go to thermofisher.com/OA-platefiles to obtain the TPF files for
the TrueMark™ Respiratory Panel 2.0, OpenArray™ Plate.
Set up the optimized folder locations and software preferences
before downloading TPF files to your computer.
3. In the OpenArray™ Sample Tracker Software, select View4
Preferences, then enter the following preferences:
Field Selection
Experiment Type Gene Expression
OpenArray™ Plat
Pipettor Fixed or Adjustable tip spacing
Import Data Directory Sample Tracker 96-well Input
Export Data Directory Sample Tracker 384-well CSV Files
4. In the AccuFill™ softwar
e Select the OpenArray™ format that
will be run most often, such as
Gene Expression – 112.
e, select Instrument4Edit
Preferences, then:
a. Select Require Sample Integration.
2 Respir
atory Tract Microbiota Profiling Experiments v2 using OpenArray™ Quick Reference

Generate 384‑well sample plate layouts in the
OpenArray™ Sample Tracker Software
Before generating 384‑well sample plate layouts, see “One-time
procedures” on page 2.
1. Using a spreadsheet program, create a 96‑well sample CSV
file.
CSV template files can be found at <drive>:\Program
Files (x86)\Applied Biosystems\OpenArray
Sample Tracker\examples
2. Open the OpenArray™ Sample Tracker Software.
3. In the Properties screen, select Gene Expression for
Experiment Type, then select the appropriate settings for
OpenArray™ Plate and Pipettor.
4. In the Samples screen, click
t your 96‑well sample CSV file that you created in
impor
step 1.
5. In the Sample Mapping screen, confirm that the samples for
a single OpenArray™ plate are assigned to one color.
Note: If necessary, correct the OpenArray™ Plate and
Pipettor settings in the Properties screen.
Import, then select and
3. F
ollowing the plate layout designated in the OpenArray
Sample Tracker Software, add master mix, then DNA
samples, to the wells of an OpenArray™ 384-well Sample
Plate.
(Optional) Use the TrueMark™ Respiratory Panel 2.0
Amplification Control in place of diluted preamplified sample,
as a positive amplification control sample.
Component
TaqMan™ OpenArray™ RealTime PCR Master Mix
Diluted preamplified sample 2.5 µL 5.5 µL
Total reaction volume 5.0 µL 11.0 µL
[1]
Volume includes 10% overage.
Volume
per well
2.5 µL 5.5 µL
Volume
per sample
4. Thoroughly mix each PCR reaction by pipetting up and
down or by using the "mix" function on a multi-channel
pipette.
5. Seal the OpenArray™ 384-well Sample Plate with an
aluminum foil seal, remove the foil flap, then mark the edges
of the filled 4 × 12 area with a pen.
6. Centrifuge the plate at 1,200 × g for 1 minute.
™
[1]
6. In the Sample Mapping screen, click the 384-Well Plate
tab, then click Export4Export *.csv.
7. Select 384-Well Plate (for AccuFill), enter a file name, then
save the exported file.
Plate layouts for the 384-well sample plates are saved to
individual CSV files in the Sample Tracker 384-well CSV Files
folder.
Set up the PCR reactions in an OpenArray™ 384-well Sample Plate
IMPORTANT! The 4 × 12 ar
Sample Plate being filled must match the area(s) designated in the
OpenArray™ Sample Tracker Software for that set of samples.
1. Remove an OpenArr
aside. Allow it to come to room temperature in its unopened
sleeve (~15 minutes).
The OpenArray™ plate must be completely thawed before
transferring reactions to it from the OpenArray™ 384-well
Sample Plate created in this section.
2. Gently swirl the contents of the TaqMan™ OpenArray™ Real-
Time PCR Master Mix to thoroughly mix. Do not invert the
bottle.
ea(s) of the OpenArray™ 384-well
ay™ plate from the freezer and set it
7. Score the foil along the lines that were marked before
centrifuging.
Do not remove the foil from the scored area at this time.
Set up the AccuFill™ instrument and software
IMPORTANT! Do not use OpenArr
that exceed the expiration date (shown on the outer box that
contains the tip trays).
1. In the OpenArr
ay™ AccuFill™ software, click Setup and Load.
The Setup Load Information window appears.
2. Configure the Loading Information pane for sample
integration using the 384-well sample plate CSV file and TPF
files.
a. In the Loading Information pane (top section of the
window), ensure that the Use Sample Integration
checkbox is selected.
b. Click Browse to the right of the Sample Plate field,
then select the 384-well sample plate CSV file that
you generated with the OpenArray™ Sample Tracker
Software in the Sample Tracker 384-well CSV Files
folder.
c. Click Browse to the right of the Plate Holder Position
of the OpenArray™ plate, then select the TPF file for the
OpenArray™ plate in the TPF Files folder.
ay™ AccuFill™ System Tips
Respiratory Tract Microbiota P
3. In the Select Samples to Load pane (bottom section of the
window), click the corresponding 4 × 12 area of the 384-well
sample plate image, then click Next.
The Setup Deck window is displayed.
rofiling Experiments v2 using OpenArray™ Quick Reference 3

4. In the AccuFill™ instrument, ensure that:
• Tip boxes and tips are loaded as shown in the Setup
Deck window.
• The lids are removed from the tip boxes.
• The waste bin in the instrument is emptied.
5. In the Setup Deck window, confirm that the deck is ready:
• Select The tips are configured as shown above.
• Select The Waste Bin is empty.
Transfer reactions to the OpenArray™ plate using the AccuFill™ instrument
1. Prepare the items needed to seal the loaded OpenArray
plate .
Note: The OpenArray™ plate must be sealed promptly after
being loaded with the reactions, as described here.
• Ensure that the QuantStudio™ 12K Flex OpenArray
Plate Press 2.0 is ready.
• Gather and remove from their packaging the following:
an OpenArray™ Lid, plug, syringe with OpenArray
Immersion Fluid, and syringe tip.
• Attach the syringe tip to the syringe, carefully push
some of the fluid through the tip to remove air bubbles,
then lay the syringe aside.
2. Load the OpenArray™ plate and the OpenArray™ 384-well
Sample Plate into the AccuFill™ instrument.
• OpenArray™ plate—Remove the plate from its sleeve,
then place the plate in the appropriate plate holder
position in the instrument.
Ensure that the barcode on the OpenArray™ plate is
facing left and the serial number is facing right.
• OpenArray™ 384-well Sample Plate—Place the 384well sample plate onto the deck of the instrument, then
use forceps to peel the foil from the filled area of the
plate.
Seal the OpenArray™ plat
e
IMPORTANT! Throughout this procedure, handle the
OpenArray™ plate and the OpenArray™ Case only by the edges.
Note: The OpenArray™ Case consists of the sealed OpenArray
™
plate and the OpenArray™ Lid.
1. Place the newly loaded OpenArray™ plate in the
QuantStudio™ 12K Flex OpenArray™ Plate Press 2.0.
Ensure that the barcode is facing left and the serial number
is facing right.
™
2. From the OpenArray™ Lid, remove the clear protective film
from the inside of the lid and the red adhesive-protective
strip from around the edge of the lid.
3. Seat the lid on the OpenArray™ plate with the lid adhesive
™
against the plate.
4. Engage the press mechanism until the green flashing light
™
changes to a steady green light (approximately 20 seconds).
5. Disengage the press and remove the OpenArray™ Case.
6. While holding the case by its edges, insert the prepared
syringe tip into the port in the case, then carefully inject
OpenArray™ Immersion Fluid until the case is filled.
Note:
Minimize creation of air bubbles when you dispense the
·
fluid.
Leave a small bubble at the fill point to prevent fluid leaks
·
during the instrument run.
3. Close the door of the AccuFill™ instrument.
4. In the AccuFill™ software Setup Deck window, select the
following confirmations:
• The OpenArray Plate is in the Plate Holder
• Remove foil from the highlighted section of the
Sample Plate
5. Click Load.
6. As soon as the Remove OpenArray Plate window
appears, open the instrument door and remove the loaded
OpenArray™ plate.
7. Proceed immediately to seal the OpenArray™ plate .
Note: For best results, seal the OpenArray™ plate within
90 seconds of completion of loading to prevent evaporation.
4 Respir
The syringe tip must be in front of the array when filling the case
with immersion fluid.
7. While holding the case ver
tically, remove the syringe tip,
insert the screw end of the OpenArray™ plug into the port of
the case, then rotate clockwise until the black handle breaks
o.
IMPORTANT! T
o avoid leaking of immersion fluid, hold the
case vertically and rotate the plug slowly.
If the plug handle breaks o pr
ematurely, use a Phillips #0
screwdriver to complete this step.
8. If needed, clean the case with a laboratory wipe that has
been thoroughly sprayed with ethanol, then dry the case
with a clean laboratory wipe.
atory Tract Microbiota Profiling Experiments v2 using OpenArray™ Quick Reference

Run the OpenArray™ plate on the QuantStudio™ 12K Flex Instrument
1. On the QuantStudio™ 12K Flex Instrument touchscreen,
touch to extend the instrument tray arm.
2. Remove the clear protective film from the outside of the
OpenArray™ case (sealed plate + lid).
3. Place the OpenArray™ case on the tray arm plate adapter.
• Support the case from underneath the tray arm to
prevent the case from slipping through the adapter.
• Ensure that the plate barcode and serial number are
facing the front of the instrument.
3. V
iew the following ROX™ image to check for loading quality
issues:
• POST-READ_CHANNEL_4.ti
4. Check the following spotfinding images for leaks or other
displaced sample issues.
• s02_c001_t03_p0001_m1_x2_e1_cp#_spotfind.ti
• s02_c040_t03_p0001_m1_x2_e1_cp#_spotfind.ti
Note: The “cp#” in the image file name refers to array
positions 1 through 4 within the instrument.
5. If a problem is found, view the following pre-run spotfinding
image to determine whether the issue existed before cycling:
• s00_c001_t01_p0001_m2_x3_e1_cp#_spotfind.ti
4. Touch
5. In the Home scr
to retract the instrument tray arm.
een of the QuantStudio™ 12K Flex
Software, in the Run pane, click OpenArray.
6. In the Select Instrument pane, select your instrument.
7. Click Get Plate IDs to import the barcode of the OpenArray
plate.
Once the OpenArray™ serial number appears, the loaded
TPF file corresponding to the plate should appear in the
Setup File field.
If the TPF file does not appear, click Browse, then select the
correct loaded TPF file from the Loaded TPF folder.
8. (Optional) Click Browse to change the Experiment File
Location.
9. (Optional) Change the software-determined Experiment File
Name.
10. Click Start Run.
Note: The instrument pauses at 41 or 42 seconds prior to
the end of the run. Wait for the system to complete the run
before opening the EDS file.
11. Transfer the EDS file from the instrument to an accessible
location for analysis.
6. View the following FAM™ images to check for fluorescent
abnormalities and to confirm any problem seen in the
spotfinding images:
• STAGE2_CYCLE1_CHANNEL_1.ti
• STAGE2_CYCLE40_CHANNEL_1.ti
™
7. Note any abnormalities found, as well as all other potentially
relevant information related to the setup of the run.
Related documentation
Respiratory Tract Microbiota P
using OpenArray™ Application Guide
TrueMark™ Respiratory Panel 2.0, OpenArray™ Plate
Product Information Sheet
TrueMark™ Respiratory Panel 2.0 Amplification
Control Product Information Sheet
QuantStudio™ 12K Flex Real–Time PCR System:
OpenArray™ Experiments User Guide
OpenArray™ Sample Tracker Software Quick
Reference
OpenArray™ AccuFill™ System User Guide 4456986
Document
rofiling Experiments v2
Publication Nu
mber
MAN0019506
MAN0019510
MAN0019505
4470935
4460657
12. Check the QC images for loading issues or leaks.
Check the quality–control images
Check the quality–control (QC) images before analysis. Images
can be viewed using ImageJ, an open–source software available
from the NIH at imagej.nih.gov/ig.
Expor
1. In the QuantStudio™ 12K Flex Software
click Browse, then create a uniquely–named folder for the
QC images export.
IMPORTANT! Cr
eate a new folder for images each time.
Exporting a second run to the same folder overwrites the
images.
2. Click Expor
Respiratory Tract Microbiota P
t QC Images at the bottom of the screen.
rofiling Experiments v2 using OpenArray™ Quick Reference 5
t screen,
Customer and technical support
V
isit thermofisher.com/support for the latest service and
support information.
• Worldwide contact telephone numbers
• Product support information
– Product FAQs
– Software, patches, and updates
– Training for many applications and instruments
• Order and web support
• Product documentation
– User guides, manuals, and protocols
– Certificates of Analysis
– Safety Data Sheets (SDSs; also known as MSDSs)
Note: For SDSs for reagents and chemicals from other
manufacturers, contact the manufacturer.

Limited product warranty
Life Technologies Corporation and/or its aliate(s) warrant their products as set forth in the Life Technologies' General Terms and
Conditions of Sale at www.thermofisher.com/us/en/home/global/terms-and-conditions.html. If you have any questions, please
contact Life Technologies at www.thermofisher.com/support.
Life Technologies Corporation | 6055 Sunol Blvd | Pleasanton, CA 94566 USA
For descriptions of symbols on product labels or product documents, go to thermofisher.com/symbols-definition.
The information in this guide is subject to change without notice.
DISCLAIMER: T
PUNITIVE, MULTIPLE, OR CONSEQUENTIAL DAMAGES IN CONNECTION WITH OR ARISING FROM THIS DOCUMENT, INCLUDING YOUR USE OF IT.
Revision history: Pub. No. MAN0019509
Important Licensing Information: These pr
applicable Limited Use Label Licenses.
©2021 Thermo Fisher Scientific Inc. All rights reserved. All trademarks are the property of Thermo Fisher Scientific and its subsidiaries unless otherwise specified. TaqMan is a
registered trademark of Roche Molecular Systems, Inc., used under permission and license.
O THE EXTENT ALLOWED BY LAW, THERMO FISHER SCIENTIFIC INC. AND/OR ITS AFFILIATE(S) WILL NOT BE LIABLE FOR SPECIAL, INCIDENTAL, INDIRECT,
Revision Date Description
A.0 5 January 2021 New document.
oducts may be covered by one or more Limited Use Label Licenses. By use of these products, you accept the terms and conditions of all
thermofisher.com/support | thermofisher.com/askaquestion
thermofisher.com
5 January 2021
 Loading...